
Windows 10 uses the built-in Windows Installer to install, maintain, and remove software on your PC. When the Installer is faulty, you’ll run into several issues when you either try to install or remove software programs. This will pop up the InstallShield Error Code 1722. The error may also pop up due to other various system issues.
Read on to find out all the potential causes and fixes for the InstallShield 1722 error.
What causes the Error 1722 (Windows Installer Package Error)?
Some potential causes for this error are as follows:
- The Windows Installer is disabled in the system settings.
- There are some missing or corrupt system files on your PC.
- Invalid or corrupted Registry entries are conflicting with the Windows Installer.
- Some software programs are corrupted.
1. Quick Fixes
Before you continue with the detailed solutions, here are some quick fixes you can try.
- Restart your PC immediately when you encounter the error.
- Update your apps. Besides adding new features, updating apps helps fix or remove system bugs.
- Run the Windows Troubleshooter. Navigate to Windows Start Menu > PC Settings > Update & Security > Troubleshoot. Run both the Program Compatibility Troubleshooter and the Windows Store Apps Troubleshooter.
- Clean your PC. A simple disk clean-up helps free up disk space and allows apps to run efficiently. This can help resolve issues with the Windows Installer and other programs.
2. Enable the Windows Installer
If the Windows Installer is disabled, you’ll struggle to install or remove software programs. To enable the Installer, here’s what you need to do.
- Press the Windows key + R to open the Run command dialog box.
- Type services.msc and click Enter.
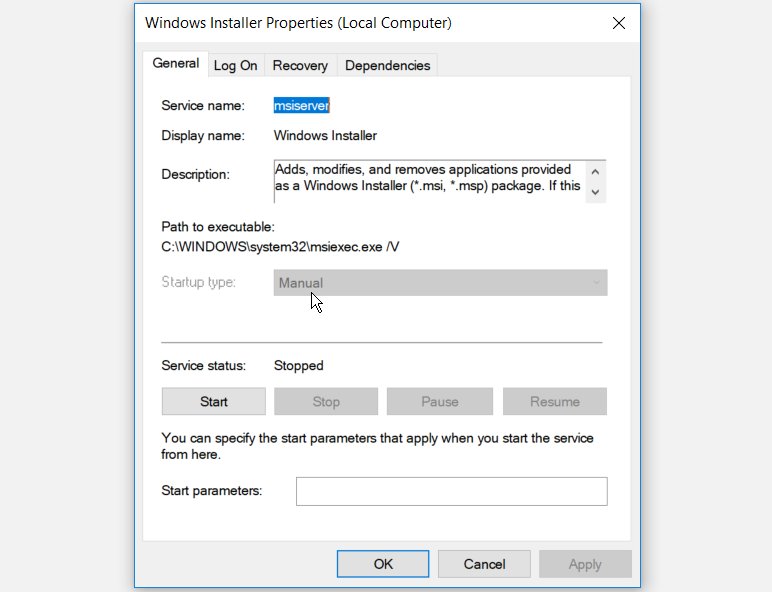
- On the next screen, scroll down and double-click the Windows Installer option.
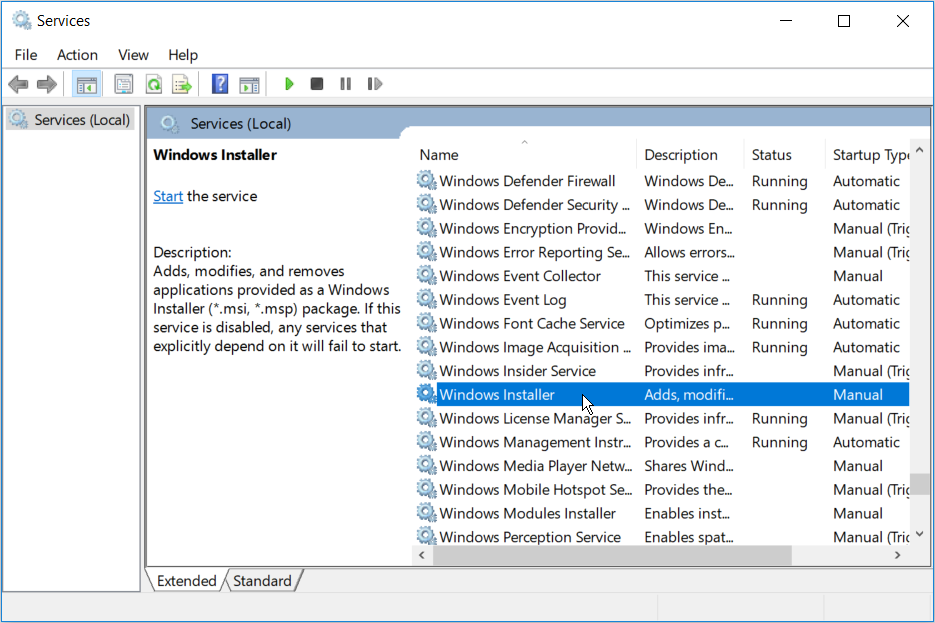
On the next screen, set the Windows Installer Startup type to Manual. Hit the Start button to enable the service. Select Apply and then OK to save these changes.
3. Run the Microsoft Program Install and Uninstall Troubleshooter
If you suspect that the issue is caused by corrupted Registry keys, Microsoft’s Program Install and Uninstall troubleshooter can help.
When it comes to fixing corrupted Registry keys, you shouldn’t use a Registry Cleaner. Running these programs could harm your PC. If you delete, move, or damage Registry keys, critical system functions could fail. This could cause issues with installing, running, or removing apps.
The Program Install and Uninstall troubleshooter will not only help scan and fix corrupted registry keys, but it will also fix other system files.
- To get started, download the Program Install and Uninstall troubleshooter.
- Run the troubleshooter by double-clicking on it.
- Click Next to start the troubleshooting process.
- From the options that appear, click either the Installing or Uninstalling option.
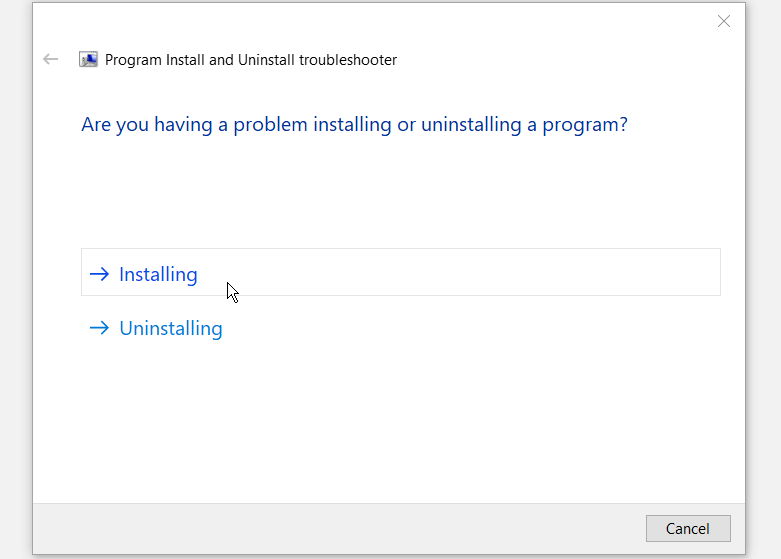
On the next window, select the program you’re facing issues with and then click Next. In case you can’t find the program from the list, select the Not listed option and search for the program. From here, follow the on-screen options to finalize the troubleshooting process.
4. Unregister and Re-Register the Windows Installer
- Press the Windows key + R to open the Run command dialog box.
- Type CMD and then press Ctrl + Shift + Enter to open an elevated Command Prompt.
- To temporarily unregister the Windows Installer, type the following command and click Enter:
msiexec /unreg
When this process is complete, you can now re-register the Windows Installer. To do this, type the following command and click Enter:
msiexec /regserver
Restart your PC to save these changes.
Since this error could occur due to corrupt system files, you can troubleshoot it using the SFC and DISM tools. SFC will scan your PC for missing or corrupt system files, while DISM will scan the system image used to make these corrections. In this case, you should run DISM first to confirm that SFC is working correctly.
- To get started, press the Windows Key + R and type CMD.
- Press Ctrl + Shift + Enter to open an elevated Command Prompt.
- Type the following command and press Enter:
DISM /Online /Cleanup-Image /ScanHealth
When the scan is complete, type the following command and press Enter:
DISM /Online /Cleanup-Image /RestoreHealth
Wait for the scan to complete, and then restart your PC.
Open the Command Prompt as per the previous steps. Type the following command and click Enter:
sfc /scannow
Wait for the scan to complete. From here, close the Command Prompt and restart your PC.
6. Install Programs in Safe Mode
You can resolve this issue by installing software programs in safe mode. This will help you determine whether the issue is caused by installed software or damaged hardware components of your PC.
If you no longer run into the error as soon as you boot into safe mode, it’s safe to say that a driver or a software program is causing the issue.
- To get started, navigate to Windows Start Menu > PC Settings > Update and Security.
- Select the Recovery option.
- Under the Advanced Startup option, click the Restart Now button.
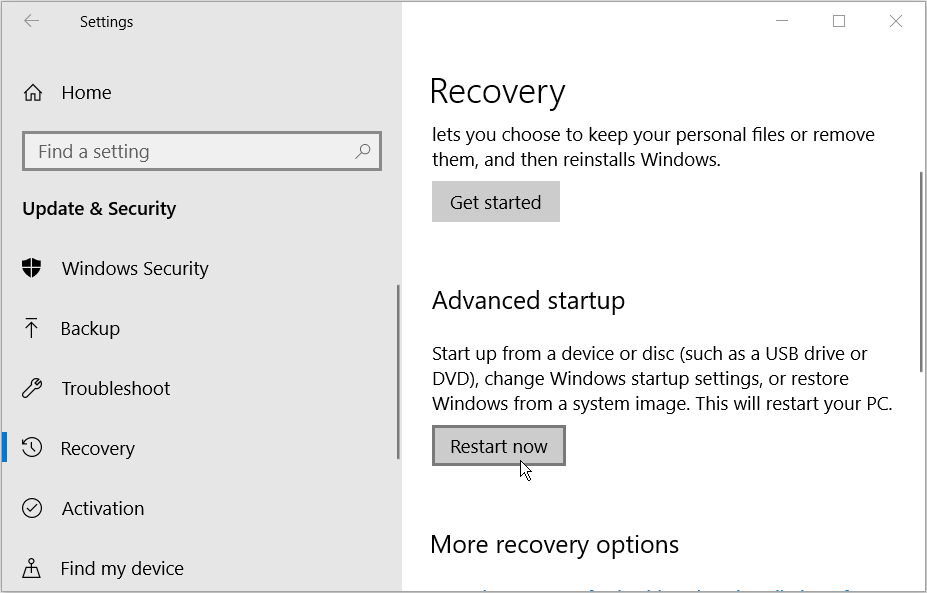
This will restart your PC in the Recovery Environment.
On the screen that appears, select Advanced options > Startup Settings and then press the Restart button. Finally, click the F4 key to allow your PC to boot into Safe Mode.
7. Perform a Clean Boot and Use a Third-Party Uninstaller
You can perform a clean boot to isolate other programs that may be causing this error. This process simply boots up your PC with all third-party applications disabled. It also starts your PC with minimum required drivers and programs. This helps remove any conflicts that occur when you install or uninstall software programs.
Once you’ve identified the problematic software program, you can remove it using a third-party uninstaller. This will help ensure no residual files are left behind to cause further issues on your PC.
If all else fails, then you should consider updating Windows. This should help resolve this issue and other critical system issues.
Easily Install and Remove Software Programs in Windows 10
The Windows Installer Package Error 1722 can be quite irritating, but you should now be able to resolve it easily. This error message, or any other similar one, shouldn’t stop you from installing or removing your apps with ease.
Sometimes, you can encounter the “There is a problem with this Windows Installer package” error while trying to install an application through an MSI installer. This error occurs if your system can’t run a script, program, or DLL file necessary for such operations. You will also encounter corresponding error messages in each case:
- Error 1720: There is a problem with this Windows Installer package. A script required for this install to complete could not be run.
- Error 1721: There is a problem with this Windows Installer package. A program required for this install to complete could not be run.
- Error 1722: There is a problem with this Windows Installer package. A program run as part of the setup did not finish as expected.
- Error 1723: There is a problem with this Windows Installer package. A DLL required for this install to complete could not be run.
Even if they are different errors, you need similar solutions to resolve all of them. First, make sure to log in with an admin account and run the program as an administrator. Some installers require admin privileges to run properly. Also, make sure that there is enough space to install the application.
Re-register Windows Installer
Windows uses the MSIExec engine to run the MSI installer. If the registration of this engine becomes corrupt, you can’t run such installers. To resolve this issue, you need to unregister and then re-register the engine.
- Open Run.
- Type
cmdand press Ctrl + Shift + Enter to open the Elevated Command Prompt. - Enter the following commands:
MSIExec /unregisterMSIExec /regserver

Restart Windows Installer Service
You will also get this error if the Windows Installer service is not running properly or another instance of the installer engine is already running. We recommend checking for both issues at the same time.
- Open Run by pressing Win + R.
- Type
msconfigand press Enter to launch the System Configuration. - Go to the Services tab and search for Windows Installer.
- Make sure the box next to it is checked and press OK.

- Now, press Ctrl + Shift + Esc to open the Task Manager.
- Go to the Details tab.
- Look for
msiexec.exe. If it’s there, select it and click End Task.
- Then, open Run again.
- Type
services.mscand press Enter to open Window Services. - Look for Windows Installer and check its Startup Type.

- If it shows Disabled, double-click on it and set the Startup type drop-down list to Manual.
- Click on Start if the Service status indicates Stopped. Otherwise, click Stop and then Start to restart the service.


Restart your computer and check if the issue persists.
Re-register Some DLL Files
Like with the MSIExec engine, your system uses many DLL files while running the MSI installers. You can similarly re-register them to resolve any potential registration issues.
- Open the Elevated Command Prompt.
- Enter the following commands:
regsvr32 Actxprxy.dllregsvr32 Browseui.dllregsvr32 Mshtml.dllregsvr32 ole32.dllregsvr32 Oleaut32.dllregsvr32 Scrrun.dllregsvr32 Shdocvw.dllregsvr32 Shell32.dllregsvr32 urlmon.dll
- Don’t worry if you get a “The module was loaded but the entry point DllRegisterServer was not found” error, simply move on to the next command.

Troubleshoot Compatibility
If the error has the code 1721, it might be because the installer is for a previous version of Windows and therefore is not compatible with your current system. In such cases, you need to troubleshoot for program compatibility.
- Right-click on the installer and select Troubleshoot Compatibility or Show more options > Troubleshoot Compatibility.

- Select Try Recommended Settings.
- Then, click on Test the program.

- If the error doesn’t occur this time, go back to the Troubleshooter and select Next > Yes, save these settings for this program.


Install Necessary Windows Features and Updates
The installation of several programs on your system requires certain supporting software components and features. We recommend installing all such programs to prevent suffering from different installation errors. Even if you already have these components, they might have become corrupt, so it’s worth reinstalling them.
- All available Microsoft Visual C++ Runtime Packages
- Windows Management Framework
- Latest .NET Framework
You should also make sure to have the latest version of your Operating System. The newer applications require the most updated OS versions to be able to provide better features.
- Open Run.
- Type
ms-settings:windowsupdateand press Enter to open Windows Update Settings. - Click on Check for Updates to scan for and download available updates or Install now if your computer has already downloaded them.


Re-download the Installer
It is also possible that the installer you downloaded or transferred is not complete. You can check for such issues by checking its properties.
Select the installer and press Alt + Enter to open its Properties and compare the Size and Size on the disk from the General tab. If the Size on disk is much lower than the Size, the file is not complete.
In such cases, you need to download it again. Also, we recommend you ensure that the installer you download matches the system architecture of your computer while doing so.
Take Ownership of the Temp Folder
Many programs including installers make use of the Temp folder inside AppData to store temporary files. By default, each user accounts have the ownership and permissions of the Temp folder for that account. However, if this setting gets changed somehow, you will encounter many issues, including the above.
In such a scenario, you should see the error code 1723 in the error message, so it’s easier to recognize. You need to take ownership and provide permissions to this folder to resolve the issue.
- Open the Elevated Command Prompt.
- Enter the following commands:
takeown /F %Temp%icacls %Temp% /Grant %userdomain%\%username%:F

Uninstall Application Before Reinstalling
Sometimes the previous software of an application can also interfere with the new installation. In such cases, you need to uninstall the previous application first.
- Open Run.
- Type
appwiz.cpland press Enter to open Programs and Features. - Look for and select your application.
- Click on Uninstall or Uninstall/Change > Uninstall.

- Confirm with Yes and follow the on-screen instructions.

Then, update/reinstall the app again by launching a complete installer. If you can’t uninstall the applications, there may be some app-specific reasons causing such errors. You need to check official websites for what to do in such scenarios.
Remove Pending Installations Using Registry Editor
You will also get this error if you try running an installer when another one is already running on your system. Windows will usually warn you if something like this happens, but it can’t do so if the previous instance of installers is stuck. In such a case, you need to remove all pending installations first.
- Open Run.
- Type
regeditand press Enter to open the Registry Editor. - Navigate to
Computer\HKEY_LOCAL_MACHINE\Software\Microsoft\Windows\CurrentVersion\Installer
- If the InProgress key is present, delete all the entries inside it.
- Then go to Computer
HKEY_LOCAL_MACHINE\System\CurrentControlSet\Control\Session Manager - If PendingFileRenameOperations is there, delete all of its entries as well.

Install a Different Version of Application
Sometimes, the latest version of the application or its installer may have some bugs that are responsible for such issues. In such cases, you will only encounter the above error while trying to install one application but can successfully install other programs through MSI installers. You need to try installing a previous or different version of the app instead to resolve the issue.
When you use Windows 11, the built-in Windows Installer handles the installation, maintenance, and removal of software on your PC.
If your Installer is faulty, you might encounter errors while trying to install or remove a software program. A typical one is Error Code 1722. An error may also appear due to issues with your computer system in the following format:
Error 1722. There is a problem with this Windows Installer package. A program run as part of the setup did not finish as expected. Contact your support personnel or package vendor.
It is worth noting that you are likely to experience the error when you are trying to install:
- Java
- Security software
- Drivers
- Games
- Microsoft products
What causes the Windows Installer 1722 Error in Windows 11?
When installing new software on your computer, errors do occur. Sometimes, this is due to the fact that the program needs a component that is no longer available on your PC or because there is a conflict with another software that’s already installed.
This can also be caused by an incorrect installation of another application because they leave traces behind and sometimes make changes in the registry.
The registry holds all settings for them on your computer. When making changes here, they can cause errors in other programs.
When you use different kinds of software that make changes in the same area of the registry it can lead to conflicts between them. These conflicts can prevent your software from working correctly.
What can I do about the Windows Installer 177 Error in Cisco VPN client?
Error 1722 Windows Installer is one of the common errors you might come across while installing Cisco VPN Client in Windows 11.
There may be different reasons for this error but the most common one could be the incompatibility of the files with the OS version, bad sectors on the disk, or damaged registry entries. That’s why our below fixes will do the trick in no time.

What causes the Error 1722 with Windows Installer Package of Acrobat DC?
Error 1722 is a common error message in Windows operating system. It usually occurs when we try to install a software program or driver using the .exe file.
Do note that it also occurs when we try to open some programs, for example, Adobe Acrobat DC. The error message appears as:

It is not a critical error and it only means that the application failed to start correctly, due to some corrupt files or missing files. You can usually correct that by reinstalling the application or the program with which you are trying to open it.
Are there multiple Windows Installer 1722 Error variations?
Windows Installer 1722 Errors in Windows 11 often occur when trying to install, reinstall, or update one of Microsoft’s programs.
These complications are usually caused by minor issues that can be fixed in a few minutes. Here are some of the main variations that you may encounter:
- Error in Application: Windows Installer Error 1722
- Windows Installer Error 1722 is not a valid Win32 application
- Windows Installer Error 1722 has encountered a problem and needs to close. We are sorry for the inconvenience.
- Windows Installer Error 1722 can’t be located
- Windows Installer Error 1722 can’t be found
- Error starting program: Windows Installer Error 1722
- Windows Installer Error 1722 is not running
- Windows Installer Error 1722 quit
- Faulty Program Path: Windows Installer Error 1722
It’s important to know how to troubleshoot Error 1722 in order to get things back to normal. In this particular guide, we will help you learn how to bypass this issue. Do not fret!
How can I fix the Error 1722 Windows Installer in Windows 11?
1. Run a PC repairing software
In order to specifically detect the potential errors in your PC, a practical answer that can really solve the error is specialized repair software.
These Windows repairing tools behave as restoring software that will deep scan your PC in order to find issues regarding privacy, crashing applications, broken registry files, or junk files.
2. Restart your device
In an attempt to quickly resolve this issue, you need to restart your PC. The simplest way to do this is by pressing the power button for a few seconds until the computer turns off.
When the PC is turned on again, the error should be gone. If it doesn’t work, repeat the process until the error disappears.
3. Use Safe Mode to remove unnecessary programs
- Click on the Windows Start Menu, then select Settings.

- Then, select the Recovery option on the left side of the window.
- Scroll down to the Advanced Startup option, and click on the Restart Now button.
- Your device will restart in the Recovery Environment.


To fix Error 1722, you’ll need to open your system in Safe Mode and then remove any unnecessary applications and services from your computer.
If you’re still receiving this error even after performing these steps, try uninstalling the software that is causing the conflict and then reinstall the program again.
Rest assured that you can certainly find the best uninstaller software that fits your budget and specific needs. Although the guide talks about Windows 10, the software can also be used in Windows 11.
Therefore, if you continue to receive Error 1722 after uninstalling the software, make sure that your antivirus software isn’t blocking the installation, and then try installing the program again.
In that regard, make sure you use one of the best antivirus solutions perfectly compatible with Windows 11 to protect your computer.
-
1. Press the Windows Key + R key, then type cmd in the Run dialog box.
-
2. Press Ctrl + Shift + Enter to open the Command Prompt.
-
3. Type the following command and then press Enter:
DISM /Online /Cleanup-Image /ScanHealth
-
4. Then, type this command and press Enter:
DISM /Online /Cleanup-Image /RestoreHealth
-
5. Wait for the scan to complete, and then restart your device.
-
6. Finally, input the following command and hit Enter:
sfc /scannow
4. How to fix Error 1722 using cmd
Windows Installer Error 1722 can occur due to issues with the registry entries or broken files in your Windows 11 PC. Therefore, running the SFC and DISM scans in Command Prompt can help solve the error.


5. Turn on the Windows Installer
- Press the Windows key + R key to open the Run command dialog box.
- Key in the following command, then press Enter:
services.msc
- On the window, scroll down and double-click the Windows Installer option.
- Then, set the Windows Installer Startup type to Manual. Click the Start button to enable the service.
- Finally, select Apply and then OK to save these changes.


6. Unregister and re-register the Windows Installer
- Press the Windows key + R key to open the Run command dialog box.
- Type cmd and then press Ctrl + Shift + Enter to open the Command Prompt.
- To temporarily unregister the Windows Installer, type the following command and press Enter:
msiexec /unreg
- When this process is complete, you can now re-register the Windows Installer. To do this, type the following command and hit Enter:
msiexec /regserver
- Finally, restart your device to save these changes.


7. Enable Windows Script Host
- Type cmd in the Search bar, right-click Command Prompt, and choose Run as administrator.

- Key in the following commands and press Enter after each one:

REG DELETE /“HKCUSOFTWAREMicrosoftWindows Script HostSettings” /v Enabled /f
REG DELETE /“HKLMSOFTWAREMicrosoftWindows Script HostSettings” /v Enabled /f

8. Perform a system restore
- Click on the Start Menu and click on the Control Panel.

- Type in Recovery in the search box of the Control Panel and then tap into it.

- Select Open System Restore.
- Then, click on Next.
- On the list shown, choose the most recent driver or update and then click Scan for affected programs.
- You’ll be shown a list of items that will be deleted. If you’re OK with that, click Next and then Finish otherwise select another update from the list.


Can resetting an application resolve the Windows Installer 1722 Error?
When you’re trying to install an application on Microsoft Windows, you might receive an error message that reads:
Error 1722. There is a problem with this Windows Installer package. A program required for this install to complete could not be run.
This error message is usually caused by a corrupted file in the installer program, but there are also instances where the problem lies elsewhere. If you’re receiving Error 1722, try resetting your application, then installing it again.
Flight Simulator X installation Error 1722 is one that can occasionally occur as well. Take a look at our detailed guide on Flight Simulator X Error 1722 to resolve the issue and forget all about this error message:
Error 1722 Windows Installer Package FSX. A program run as part of the setup did not finish as expected. Contact your support personnel or package vendor.
Were you able to fix this error using our detailed procedures? Do not hesitate to let us know in the comments section below.
Radu Tyrsina
Radu Tyrsina has been a Windows fan ever since he got his first PC, a Pentium III (a monster at that time).
For most of the kids of his age, the Internet was an amazing way to play and communicate with others, but he was deeply impressed by the flow of information and how easily you can find anything on the web.
Prior to founding Windows Report, this particular curiosity about digital content enabled him to grow a number of sites that helped hundreds of millions reach faster the answer they’re looking for.
Windows Installer is a built-in component of Windows that is used to install, remove and maintaining software on a computer system. When your Windows Installer is faulty, you will not be able to install software which gets really frustrating. A system is no good if one is not able to install new things on the software for his own benefit.
Windows Installer Error 1722 is an error that revokes your software installation. Not only that, you won’t be able to remove any software from your system. This error has the potential of appearing during Windows boot up, shut down. It can cause your system to freeze for a couple of seconds, your mouse or keyboard response time will be affected etc. To save you from such a series of events, we’ve mentioned a few solutions that are going to help you resolve the matter.

What causes the Windows Installer Error 1722?
- Invalid/corrupted registry entries. If your registry is corrupted from a recent software change i.e install or uninstall that is related to Windows installer.
- Incomplete Installation. The error can be caused if you had an incomplete software installation relating Windows Installer.
Below mentioned are the possible solutions for fixing Error 1722.
Solution 1: Scan Windows Registry
Like we mentioned, the error can be caused by corrupt or invalid entries in Windows registry. Hence, your first action is to scan your Windows registry for any errors in the registry. To scan your registry, do the following:
- Open Start Menu and enter cmd.
- Click on cmd to open it up.
- In cmd, type in the following command:

Registry Scan

scanreg/autorun
This scans your registry for any errors and uses a backup to restore any registries that are corrupted or invalid. This is going to take a while, make sure to wait for it.
- After that’s done, enter the following command:
scanreg/fix
This will fix your corrupted registries in case there is no backup.
Solution 2: Use System File Checker
System File Checker is a built-in utility in Windows that lets the users scan their system for any corrupted files and repair them. Your error could very well be due to corrupted Windows Installer files that were affected by another program during installation. To scan your device, here’s what to do:
- Open Start Menu and type in cmd.
- Right click on it and select ‘Run as an Administrator’.
- When command prompt loads, enter the following command:

DISM Cleanup
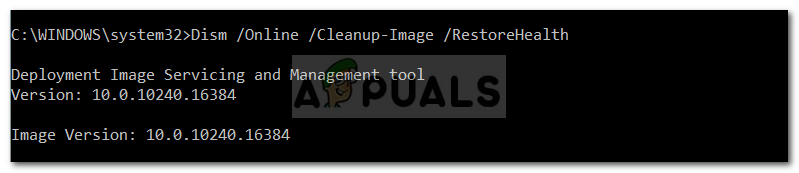
DISM.exe /Online /Cleanup-image /Restorehealth
- Wait for it to complete and then enter this:

SFC Scan
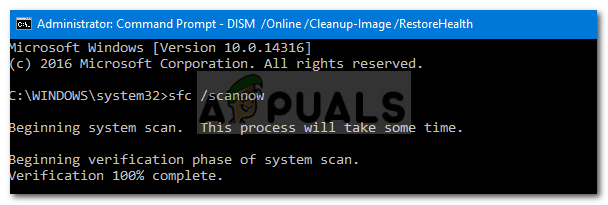
sfc /scannow
Make sure not to interrupt it while it is checking your system for corrupted files or repairing them.
Solution 3: Do a Clean Boot
Doing a Clean Boot can remove any conflicts that occur during your software installation. This means starting your system with minimum required drivers and programs. Here’s how to perform a clean boot:
- Make sure you are logged in as an administrator.
- Click Start Menu and type msconfig.
- Open up System configuration from the results.

Open System Configuration - In the System configuration window, switch to Services tab.
- There, make sure to uncheck the ‘Hide all Microsoft Services’ box and then click ‘Disable all’.

Uncheck the dialogue box - Now, switch to the Startup tab and click on ‘Open Task Manager’.

Click on Open Task Manager - A Startup window in Task Manager will be opened. There make sure to select every item and then choose Disable.

Select every item and click disable - Close the Task Manager window.
- Now on the Startup tab in System configuration, just click OK.
- Restart your device.


Note: It is important to note that if your computer is connected to a network and you make amendments in the System configuration, the network policy settings will try to prevent you.
Solution 4: System Restore
You can fix the issue by restoring your device to an earlier point before the appearance of the error. To do a system restore, do the following:
- Click on the Start Menu and click on Control Panel.
- Type in Recovery in the search box of Control Panel and then tap into it.
- Select ‘Open System Restore’ and then click Next.
- On the list shown, choose the most recent driver or update and then click ‘Scan for affected programs’.

Choose an update - You’ll be shown a list of items that will be deleted, if you’re okay with that, click Next and then Finish otherwise select another update from the list.

Click Next


Solution 5: Reregister Windows Installer
If you reregister your Windows Installer, it might fix the files that are causing the error to pop up. To reregister your Windows Installer, do the following:
- Exit all the Windows programs.
- Press Winkey + X and choose ‘Command Prompt (Admin)’.
Choose Command Prompt (Admin) - Type in the following:
msiexec /unregister

msiexec /regserver

Kevin Arrows
Kevin Arrows is a highly experienced and knowledgeable technology specialist with over a decade of industry experience. He holds a Microsoft Certified Technology Specialist (MCTS) certification and has a deep passion for staying up-to-date on the latest tech developments. Kevin has written extensively on a wide range of tech-related topics, showcasing his expertise and knowledge in areas such as software development, cybersecurity, and cloud computing. His contributions to the tech field have been widely recognized and respected by his peers, and he is highly regarded for his ability to explain complex technical concepts in a clear and concise manner.
Table of contents
- Why Does the InstallShield Error 1722 Occur?
- How to Fix the InstallShield Error Code 1722 While Installing the MSI Program
- Method 1: Use the Program Install and Uninstall Troubleshooter
- Method 2: Use a Third-Party Uninstaller
- Method 3: Check If the Windows Installer Service Is Enabled
- Method 4: Reregister the Windows Installer Service
- Method 5: Scan Your PC for Malware
- Conclusion
The InstallShield error code 1722 has become a nuisance to many Windows users today. The Windows Installer (MSI) throws up this error when installing programs on your Windows 10 computer. Most people say that after clicking OK on the error message, the installation process fails, forcing them to retry. Have you been experiencing the same issue on your PC? Worry no more because this article will give you the answers you need. In today’s tutorial, we will show you the complete steps to fix the error 1722 in Windows 10.
Why Does the InstallShield Error 1722 Occur?
The error 1727 displays the following message on your computer screen:
“Error 1722. There is a problem with this Windows Installer package. A program run as part of the setup did not finish as expected. Contact your support personnel or package vendor.”
However, you may also face other variations of this error, such as:
- Error 1722 – Windows Installer Service couldn’t be started.
- Error 1722: There is a problem with this Windows Installer package. A program run as part of this package did not finish as expected.
- MSI Error 1722: There is a problem with the Windows Installer Package during installation/uninstallation.
- Error 1722 – Could not start the Windows Installer service on Local Computer.
- Error 5: Access is denied.
- Error 1722 – The Windows Installer Service could not be accessed.
The InstallShield error code 1722 may occur due to any of these reasons:
- Your antivirus caused some damage during a recent malware removal operation.
- An incomplete program installation has occurred.
- There are invalid entries in your registry.
- Crucial system files, such as .sys files, .ocx files, and .dll files, are missing or corrupt.
- The Windows Installer service is disabled.
Listed above are the primary causes of the error 1727, but it might also appear if a corrupted MSI package you recently removed has left behind some problematic files.
How to Fix the InstallShield Error Code 1722 While Installing the MSI Program
Here are some great workarounds that are highly recommended by most Windows users who managed to fix the InstallShield error 1722 on their PCs. Apply these tactics in no particular order until the error disappears.
Method 1: Use the Program Install and Uninstall Troubleshooter
The Program Install and Uninstall troubleshooter allows you to detect sensitive software-related issues, including corrupted registry keys, that may be causing the error and automatically fix them. Therefore, if you can’t uninstall an app through the Control Panel, this tool could help remove it. Download the troubleshooter from the Microsoft website and then follow the instructions below to use it:
- Open the downloaded file and then click on the Advanced link.
- Select “Apply repairs automatically”.
- Choose Next when the Program Install and Uninstall troubleshooter window appears.
- Select Installing.
- Click on the affected program. Choose Not Listed if it’s not on the list.
- The troubleshooter will indicate the cause of your issue and present some possible fixes. If you see the “Troubleshooting couldn’t identify the problem” message, click on “Close the troubleshooter” and then proceed to the next solution below.
Method 2: Use a Third-Party Uninstaller
If you want to uninstall a program without leaving any leftover files, you should consider using a third-party software uninstaller. Although uninstalling programs via the Settings application is much easier, it might not get rid of all the files. Auslogics BoostSpeed is an effective PC optimizing program that can help you clean up your system, and it has a good uninstaller in its arsenal, among many other tools. You can use it to get rid of stubborn apps that cannot be uninstalled using the normal method.
Method 3: Check If the Windows Installer Service Is Enabled
The Windows Installer service is responsible for removing or modifying applications, storing installation information, and many more functions. If this service is disabled or faulty, you are likely to face the InstallShield error code 1722.
Use this procedure to check if the Windows Installer service is enabled on your device:
- Press the Windows logo key + R shortcut to launch the Run dialog box.
- Type in “msc” (no quotes) and hit the Enter key.
- When the Services window appears, scroll down the list to find Windows Installer and double-click on it.
- Click on the Startup type drop-down arrow and choose Automatic.
- Beside Service status, check if the service is running or stopped. If it’s stopped, then click the Start button to enable it.
- Click Apply and then click OK.
- Close the Services window.
- Restart the PC and then check if your issue has been resolved.
Method 4: Reregister the Windows Installer Service
Some users report that reregistering the Windows Installer service enabled them to remove the InstallShield error code 1722 from their devices. You could also try this fix and see if it’ll work for you by following these steps:
- Press the Windows logo key + S keyboard combination to open the Windows search bar.
- Type in “cmd” (without quotes) and then select Run as administrator on the right menu pane.
- Choose Yes in the User Account Control (UAC) window.
- When the Command Prompt opens, type in “msiexec /unreg” (no quotes) and then hit Enter. This will temporarily unregister the Windows Installer service.
- Wait for the command to be processed. Then type “msiexec /regserver” (without quotes) and press Enter to re-register the service.
- Once the process completes, restart your computer and then check if the InstallShield error 1722 will appear.
If the problem reoccurs, then move down to the next fix.
Method 5: Scan Your PC for Malware
Since virus infections can be the primary cause of the InstallShield error 1722 in Windows 10, you should also consider scanning your PC for malware. We recommend using a high-quality malware removal tool such as Auslogics Anti-Malware. This program is easy to use, thoroughly scans your PC for evasive viruses and removes them, and does not conflict with other antivirus applications.
Conclusion
We hope this post has helped you understand how to resolve the error 1722 in Windows 10. If the InstallShield error 1722 is still appearing on your device even after applying the above solutions, then comment down below, and we will be happy to help.