
Windows Operating System is equipped with many addons and components which may extend the functionality of Windows without using any third party software. Some of these components are enabled or installed by default. But all features need not to be enabled because it will slow down the performance of your computer. Moreover all users do not require all that features to be enabled. Some components are also required by third party software to function correctly e.g., .NET Framework 3.5.
Table of Contents
We will discuss how to turn on/off those features using command prompt and manually. Moreover we will also describe how to find and open optional features using a command line. Further, we will briefly elaborate on how to install Windows features from the installation source using command prompt and PowerShell.
Explore Windows Features Using Command Prompt
To get a list of Windows Features using Command prompt, follow the steps below:
- Open command prompt in administrative mode.
- Type the following command
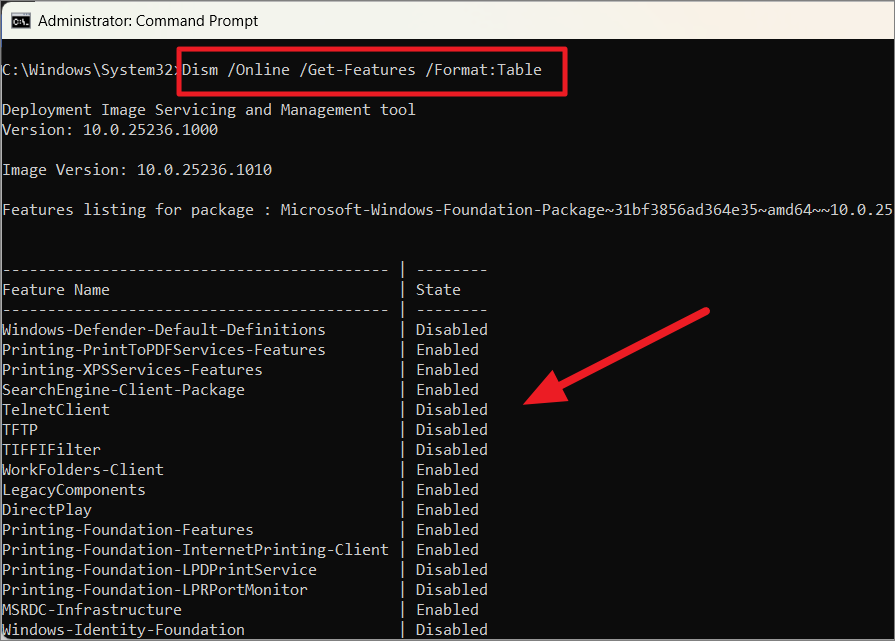
DISM /online /get-features /format:table | more
It will display all the list of features enabled or disabled on your computer. Here format:table and more are optional and are used to improve the readability of the features.

Keep on pressing Enter until you get the full list. You can remove more options if you don’t want to get the full list.
If you do not open it in administrative mode you will encounter the following error.
1- How to turn Windows features on or off?
You can enable any Windows feature or you can disable them. Some features are disabled by default.
- To open the Windows Features screen, go to Run –> optionalfeatures (This can also be accessed by opening Start Menu –> Control Panel –> Programs and Features –> Turn Windows features on or off)
- To enable a feature, check the checkbox beside the component.
- To disable a feature, un-check the checkbox beside the component.

2- How to turn Windows features on or off using command line?
Windows Features can be enabled or disabled using command line. For checking the status of the features type the command mentioned above. In order to enable any feature, follow the steps below:
- Open command prompt in administrative mode and run the following command:
DISM /online /get-features /format:table | more - Copy the name of feature you want to enable.
- Now run the following command in command prompt:
DISM /online /enable-feature /featurename:[paste the feature name here] - For example, if you want to enable Hyper-V which provides services and tools for running and creating virtual machine type the following command
DISM /online /enable-feature /featurename:Microsoft-Hyper-V -All
This will install and enable all the components of Hyper-V - You may need to restart the computer to install some components.
Disabling Windows features is very similar to enabling them. Follow the steps below to disable any feature.
- Open command prompt in administrative mode and run the following command:
DISM /online /get-features /format:table | find “Enabled” | more
This command will list down all the enabled features in Windows. (You can also make use of Findstr command.) - Copy the name of the feature you want to disable.
- Now run the following command in command prompt:
DISM /online /disable-feature /featurename:[paste the feature name here] - For example, if you want to disable Hyper-V, type the following command
DISM /online /disable-feature /featurename:Microsoft-Hyper-V -All
To get detailed information about a specific component, run the following command:
DISM /online /get-featureinfo/featurename:[featurname]
You will get detailed information about the feature name, description, properties, status and whether it requires restart or not.
3- Enable or Disable Windows features using PowerShell
The benefit of PowerShell over using a command prompt is that PowerShell commands check if the feature is already enabled. If it is already enabled, the installation action is not performed saving computing time.
To get information about windows features through Powershell, open PowerShell in administrative mode and then type
Get-WindowsOptionalFeature -Online

If you want to get information regarding specific features, type
Get-WindowsOptionalFeature -Online -FeatureName *Type feature name*
In order to enable/disable any feature use the following commands.
Enable-WindowsOptionalFeature -Online -FeatureName “Type feature name” -all
Disable-WindowsOptionalFeature -Online -FeatureName “Type feature name”
4- Adding Windows features from a Windows installation source
If a feature is not available for installation in installed Windows, we will need to give external source address to install the feature. The external source can be Windows installation ISO or any drive. Make sure that the path should be given correctly and installation media should be correctly installed. Moreover, you need to know exactly the feature name you wan to add.
Using Command Prompt
To add any Windows feature, open the command prompt in administrator mode and run the following command:
Dism.exe /online /enable-feature /featurename:Type Feature name /All /Source:C:\Sources\sxs /LimitAccess
Here is the installation media is C drive. You should change the installation media according to the requirement you want to install the feature. Once successfully installed remove the installation media.
Using PowerShell
The window feature can be installed by PowerShell using the following command
Install-WindowsFeature Feature Name –Source “C:\Sources\sxs”
Enabling/Disabling features in Windows XP
All the above mentioned methods work in Windows Vista, Windows 7, Windows 8.1 and Windows 10. But if you want to use a command prompt for adding/removing features in Windows XP, you’ll need to follow the instructions below:
pkgmgr d/n
What are your favorite Windows features and which ones do you enable as essentials when you Install Windows?
Provide feedback
Saved searches
Use saved searches to filter your results more quickly
Sign up
Appearance settings
Windows 10 included many optional features, which you can enable or disable based on your requirements. These features are known as optional features. Most of these features are intended for business networks and servers, Enabling all the features will take up more space on your hard drive. And most of the windows features are disabled by default. For example, Hyper V is a windows optional feature which is disabled by default. And based on your requirement you can enable this feature. Enabling all the features will slower your system performance.
To Turn on or off any windows features you can navigate to Programs and Features and from the left-hand side choose Turn on or off Windows Features. This will take you to the Windows Optional features page. This method is very easy and Straight forward, if you want to write a PowerShell script to enable or disable the windows feature then you can use the following method. This article will guide you to Turn on or off Windows Features Using PowerShell.
Turn on or off Windows Features Using PowerShell:
Open PowerShell in elevated mode.
Now first before proceeding you need to know the list of Windows Features Names, to know that type the following command.
Get-WindowsOptionalFeature –Online
This command will list all the available Windows Features name and their state.

If you want to get information about any specific windows features, then type the following command.
Get-WindowsOptionalFeature -Online -FeatureName *Type feature name*
If you know the feature name then replace it in the command while executing.
To Enable:
Type the following command to enable any Windows Optional Feature.
Enable-WindowsOptionalFeature -Online -FeatureName “Feature name” –all
Replace the actual feature name in the command.
Example: Enable-WindowsOptionalFeature -Online -FeatureName “TelnetClient” –all

To Disable:
Type the following command to Disable any Windows Optional Feature.
Disable-WindowsOptionalFeature -Online -FeatureName “Feature name”
Replace the actual feature name in the command.
Read Also: How to Add or Remove Optional Features using Windows PowerShell?
You can read this article to learn the ways to enable or disable Windows features effortlessly.
Windows is an operating system rich in features. It offers a plethora of features that you may or may not need. However, only some of these optional tools are necessary for all users. You can turn these Windows features on or off depending on your requirements.
Turning off the unneeded features helps save resources and improve the computer’s performance. However, deactivating a Windows feature does not uninstall it, you can reactivate it whenever you want.
However, many users need clarification about how to activate or deactivate Windows features. You may find this article helpful if you are also one of those users.
This article guides you through quick and simple ways to turn Windows features on/off. Let us begin with them without wasting your precious time.
Easy Methods to Turn Windows Features On or Off
You can follow any of these approaches to turn Windows features on/off according to your needs.
Method 1: Use the Control Panel to turn Windows features on or off
The Control Panel in Windows allows you to change various settings on your computer, including adding or removing the optional features. Hence, here are the steps you can follow to turn the Windows on/off using the Control Panel.
Also Read: How to Get Help in Windows 10
Method 2: Use Powershell to turn on/off Windows features
Powershell is an extremely useful tool in Windows to perform various tasks, such as enabling a Windows feature if it is not installed already or disabling it. Here are the steps you can follow to get the required information about a Windows feature to activate or deactivate it.
- Firstly, right-click the Windows icon and select Windows PowerShell (Admin) from the on-screen options.
- Now, input the command Get-WindowsOptionalFeature -Online in the on-screen window and press the Enter key to get information about various features.
- If you wish to know about a particular feature, enter the command Get-WindowsOptionalFeature -Online -FeatureName *Type feature name*.
- To enable a Windows feature, input the command Enable-WindowsOptionalFeature -Online -FeatureName “Type feature name” -all.
- To disable a Windows feature, enter the command Disable-WindowsOptionalFeature -Online -FeatureName “Type feature name”.
Method 3: Turn Windows features on or off using Command Prompt
Command Prompt is another command line utility that lets you perform tasks like adding or removing Windows features. The difference between Command Prompt and Windows Powershell is that the latter does not perform feature installation if the feature is already active on your computer, saving system resources. Hence, Powershell is preferred over the Command Prompt. Still, here is how you can turn a feature on/off through the Windows Command Prompt.
Note: Above are the steps to enable a Windows feature through Command Prompt. The steps to disable Windows features slightly differ from the steps to enable a feature. We share them below.
- After opening the Command Prompt as an administrator, input the command DISM /online /get-features /format:table | find “Enabled” | more to get a list of enabled features.
- Now, copy the name of the feature you want to disable.
- Input the command DISM /online /disable-feature /featurename:[Enter the name of the feature here] -All and press the Enter key.
Also Read: Windows 11 22h2 Update: New 10 Features You Should Use
Method 4: Use Windows settings to enable/disable Windows features
You can manage your computer’s features through settings. Here is how to turn Windows features on or off through settings on Windows 10 and 11.
Enabling/disabling Windows features via settings on Windows 10
Adding/removing Windows features via settings on Windows 11
- Firstly, launch the settings app using the Windows+I shortcut.
- Now, choose Apps from the left pane and Optional features from the right section of the on-screen window.

- Now, you can remove the feature you do not want by clicking on the arrow next to it and selecting the Uninstall option.
- If you want to enable an optional feature, you can follow the path Apps>Optional features>View features>Select the feature you need to enable>Next>Install.

Summing Up
This article discussed various methods you can follow to turn Windows features on or off. You can try any of these approaches depending on your convenience. If you have any confusion, questions, or suggestions about this article, please leave us a comment.
Also Read: Windows 10 ‘News and Interests’ Taskbar Feature Rolling Out
We hope you found this article helpful. If you did find it useful, please share it with your peers who may be interested in turning Windows features on/off. We will see you in some time with another interesting article. Meanwhile, you can go through our other posts to gain more technology knowledge.
Windows 11 offers a wide range of features and components, but many of them are not enabled by default. These are known as ‘Optional features’ and are primarily designed for developers and system administrators. While they aren’t essential for everyday use, enabling these features can extend your PC’s capabilities and provide greater control over your system. They can introduce new functionalities, support legacy applications, or be necessary for specific tasks (such as enabling the Windows Subsystem for Linux to run Linux distributions on Windows).
You can add or remove optional features like Hyper-V, Windows Subsystem for Linux, .NET Framework, Microsoft Defender Application Guard, and more, depending on your needs. Some features can be toggled on or off directly from the Windows Features dialog, while others need to be downloaded and installed through the Settings app. This guide will walk you through various methods to install and remove optional features in Windows 11.
Install Optional Features Using the Windows Features Dialog
The Windows Features dialog grants access to critical components such as the Hyper-V virtualization tool, Internet Information Services (IIS), Virtual Machine Platform, Windows Subsystem for Linux, and more. Here’s how to install optional features using this method:
- Press
Win+Rto open the Run dialog, typeoptionalfeatures, and pressEnter.
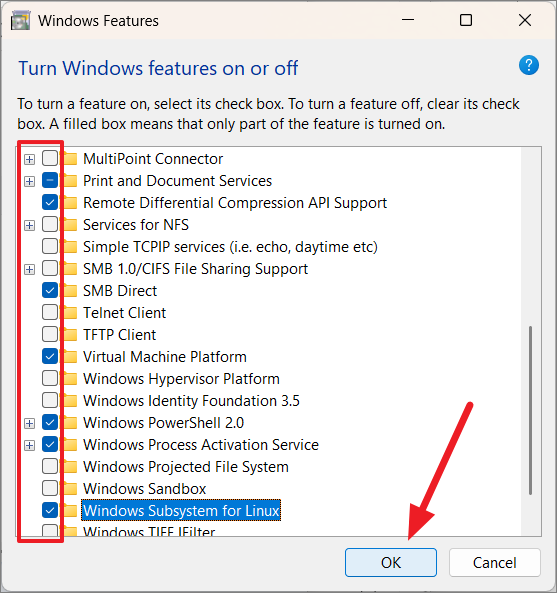
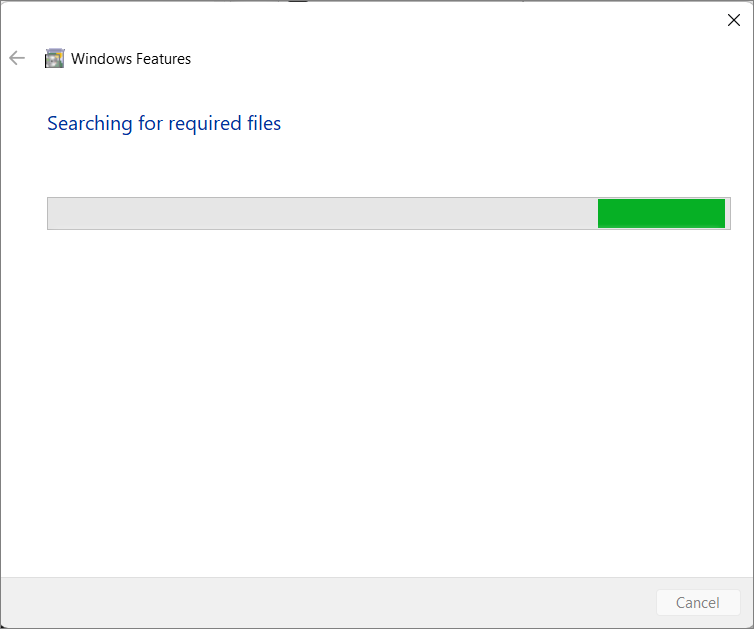
- In the Windows Features dialog box, you’ll see a list of available optional features. Check the box next to the feature(s) you want to install and click ‘OK’.
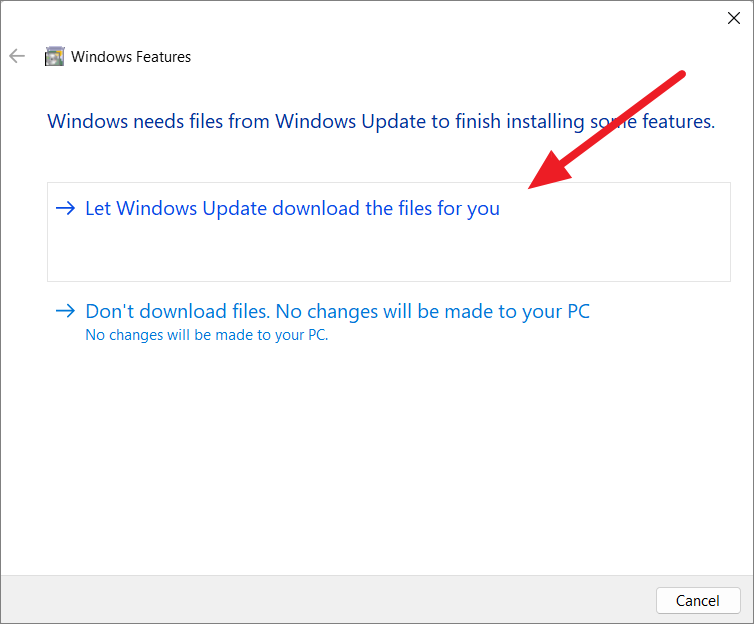
- Some features may require downloading additional files from Windows Update. If prompted, select ‘Let Windows Update download the files for you’.
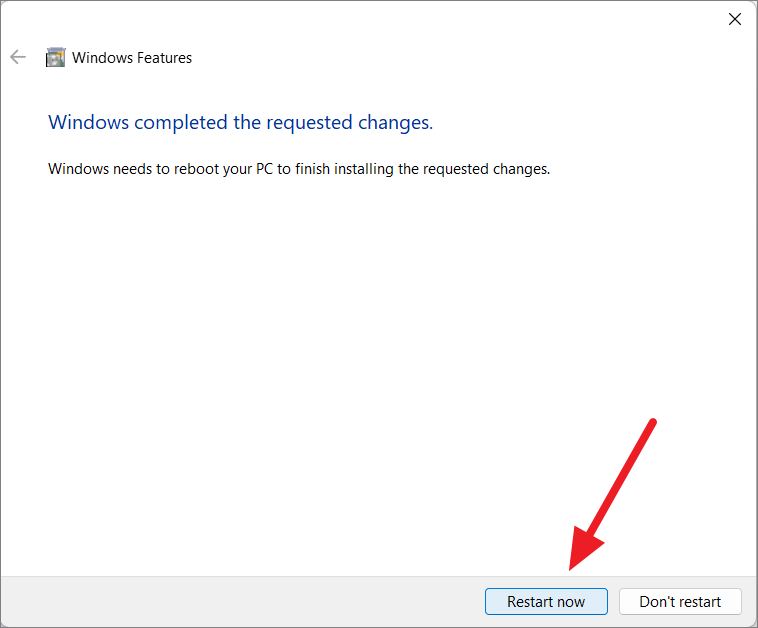
Windows will search for the necessary files and install the selected features. You may need to restart your computer to apply the changes.
Install Optional Features Using the Settings App
The Settings app allows you to download and install several optional features, though it doesn’t include all of them. An active internet connection is required to install features through this method. Follow these steps:
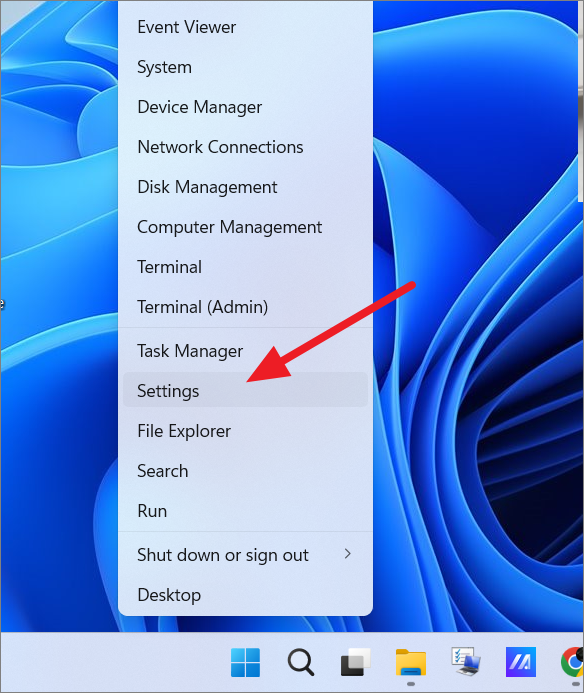
- Open the Settings app by pressing
Win+Ior by right-clicking the Start menu and selecting ‘Settings’.
- In the Settings window, click on ‘Apps’ in the left sidebar, then select ‘Optional features’ on the right.
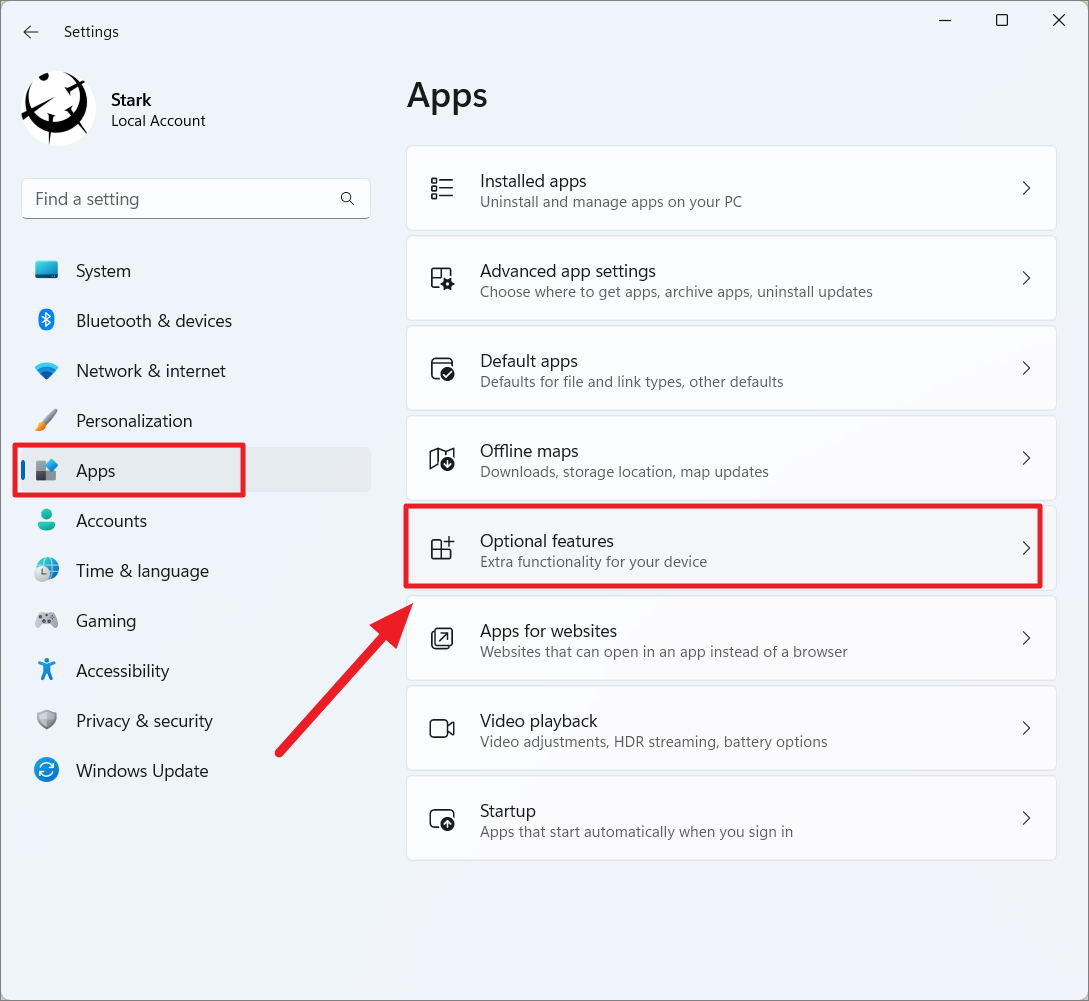
- At the top of the ‘Optional features’ page, click the ‘View features’ button next to ‘Add an optional feature’.

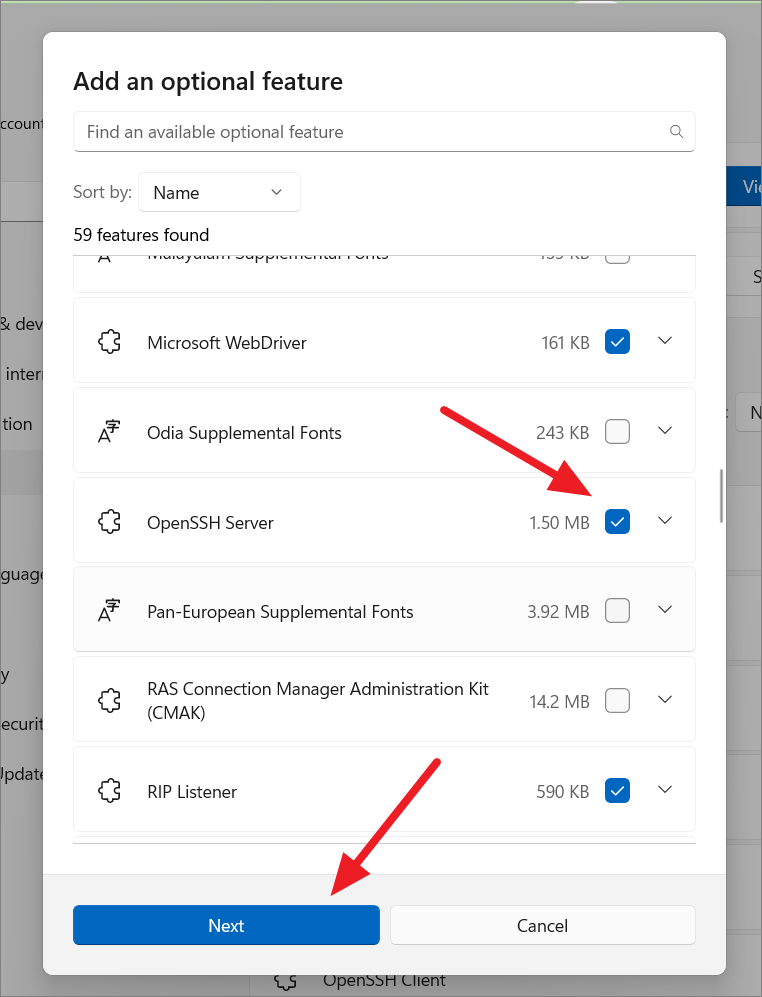
- In the pop-up window, you’ll see a list of available features. Use the search bar or scroll through the list to find the feature you want to install. Check the box next to the desired feature and click ‘Next’.
- Review your selections and click ‘Install’ to begin the installation process.
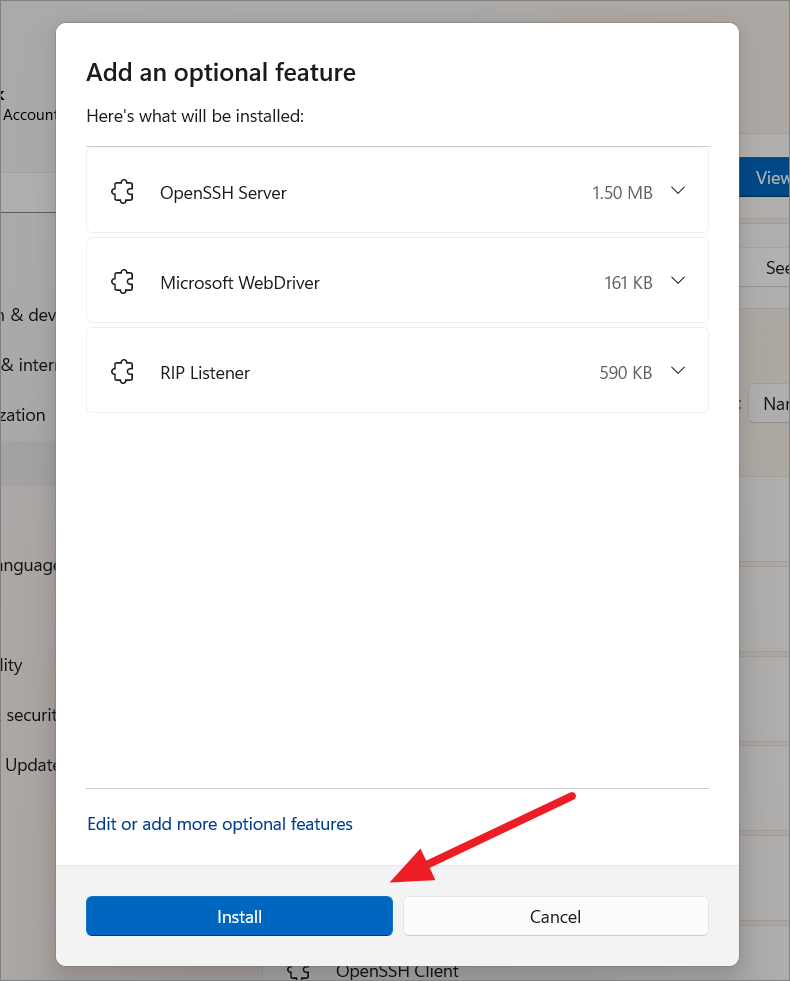
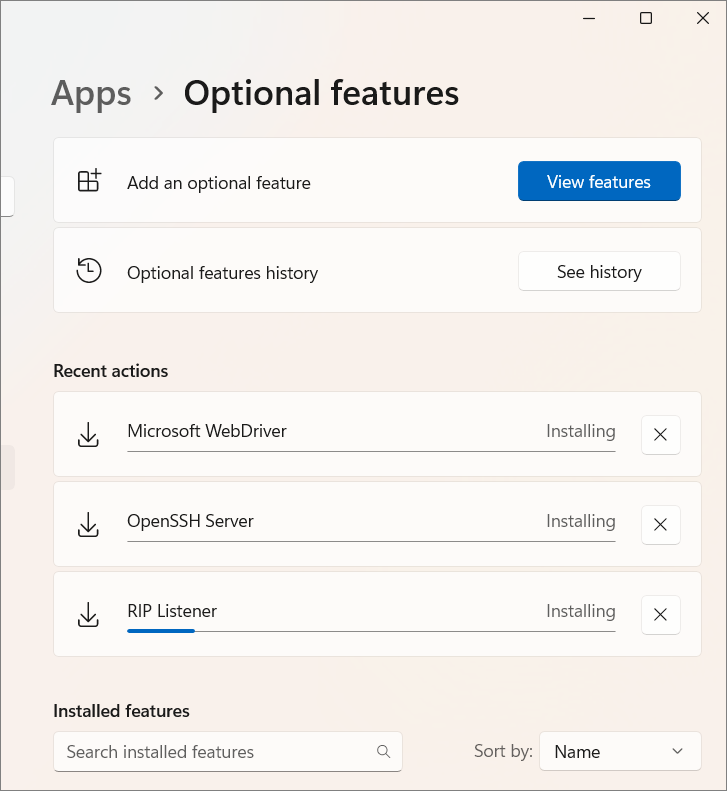
The selected features will be downloaded and installed on your system.
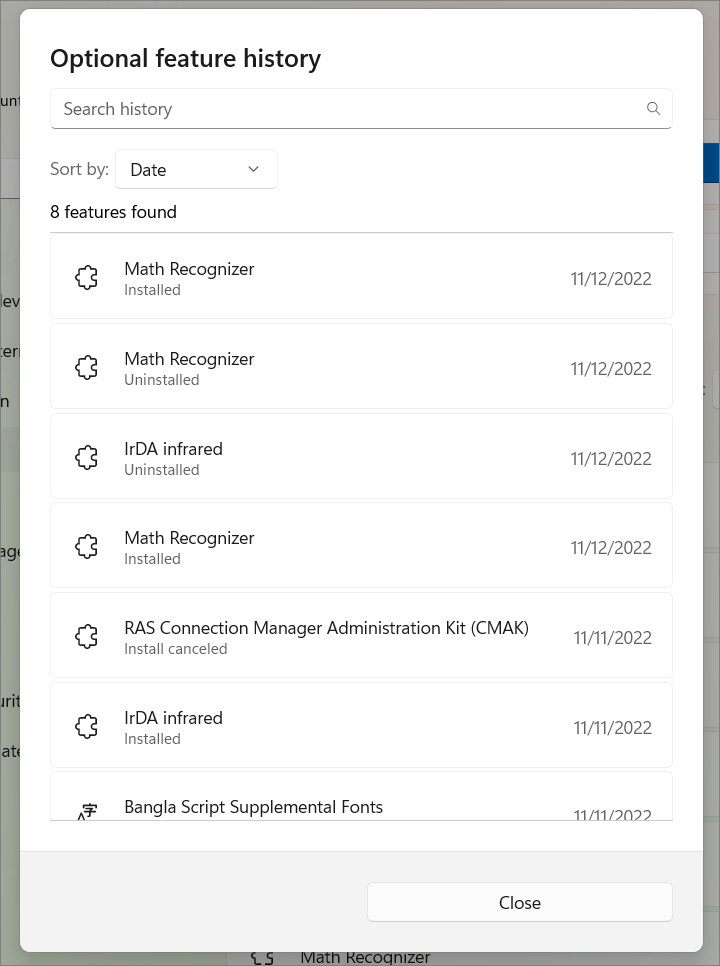
Check Optional Features History
You can view the history of optional features you’ve installed or removed:
- In the ‘Optional features’ settings page, click on the ‘See history’ button.
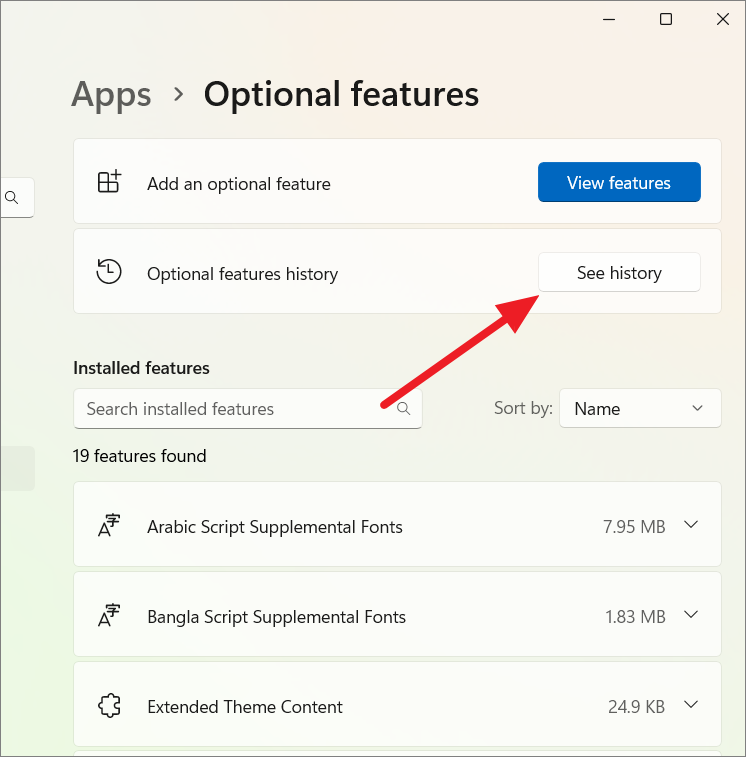
- A list will display all the features you’ve added or removed since you installed Windows 11.
Enable Windows Optional Features Using DISM Command
The Deployment Image Servicing and Management (DISM) tool allows you to install optional features via the command line. This method provides access to all optional features, including those not available through the Settings app or Control Panel. Here’s how to use DISM:
- Open Command Prompt as an administrator. Type ‘Command Prompt’ in the Start menu, right-click the app, and select ‘Run as administrator’.
- List all available optional features by executing the command:
Dism /Online /Get-Capabilities
This will display a list of features along with their ‘Capability Identity’ and installation status.

- Identify the ‘Capability Identity’ of the feature you want to install. For example, ‘MathRecognizer~~~~0.0.1.0’ for Math Recognizer.
- Install the feature by running:
Dism /Online /Add-Capability /CapabilityName:Feature_Name
ReplaceFeature_Namewith the appropriate capability identity.
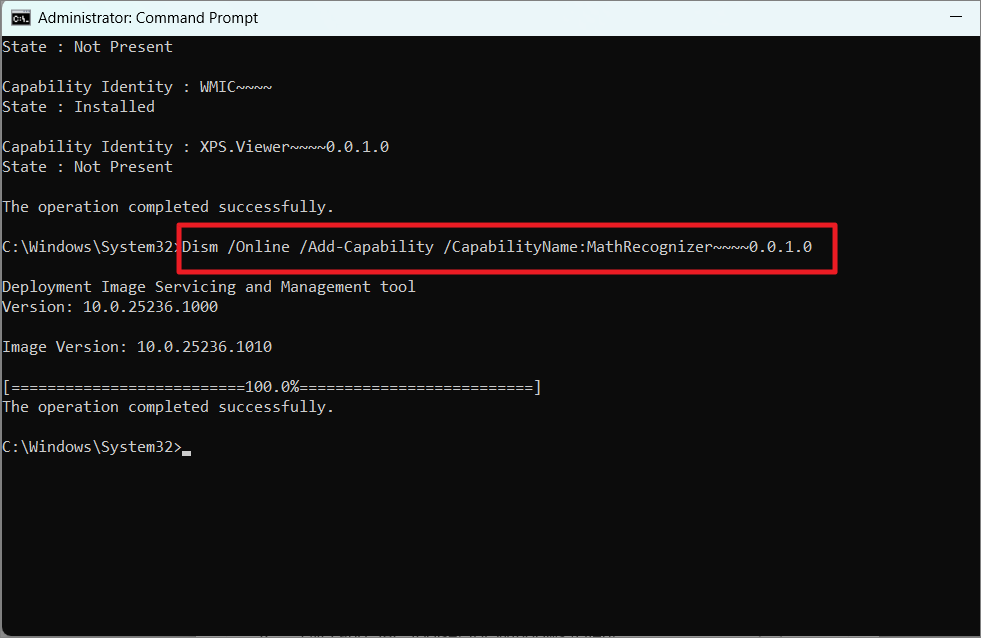
- Once the installation is complete, restart your computer to apply the changes.
Install Optional Features Using PowerShell
PowerShell provides another way to manage optional features via the command line. Here’s how:
- Open PowerShell as administrator. Right-click the Start menu and select ‘Windows PowerShell (Admin)’.
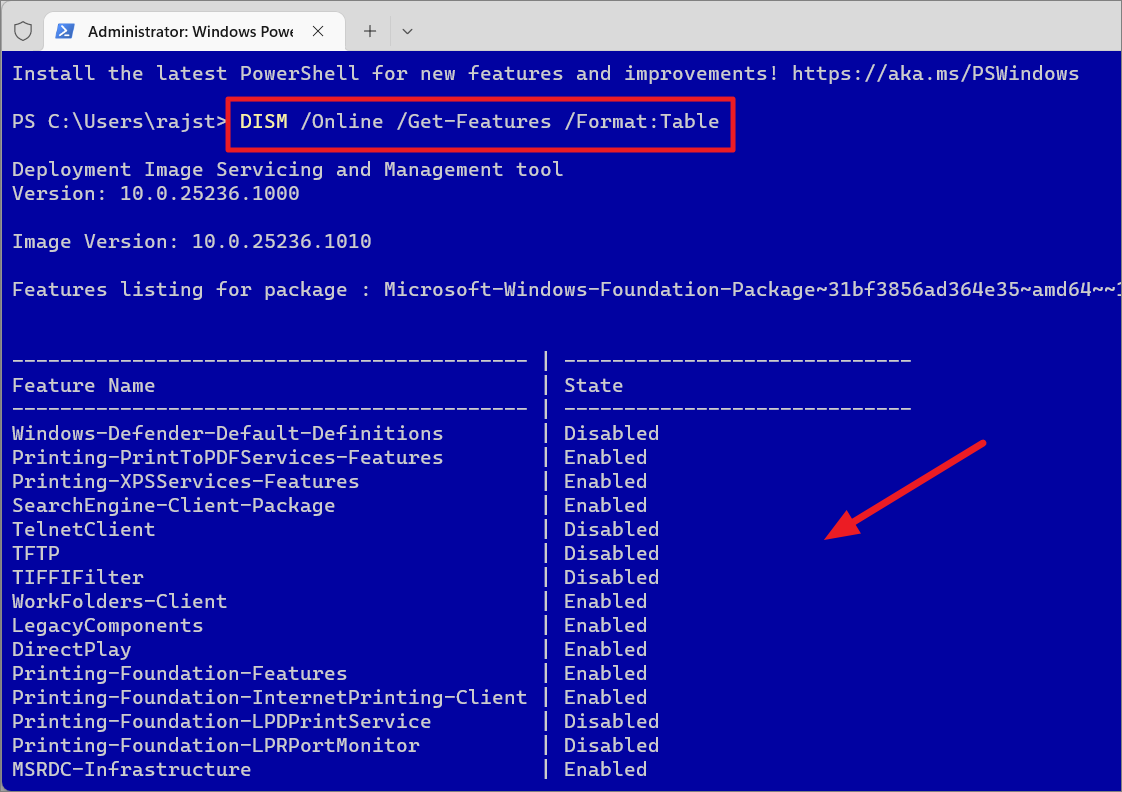
- List all optional features by executing:
Get-WindowsOptionalFeature -Online
This command will display a list of features along with their statuses.
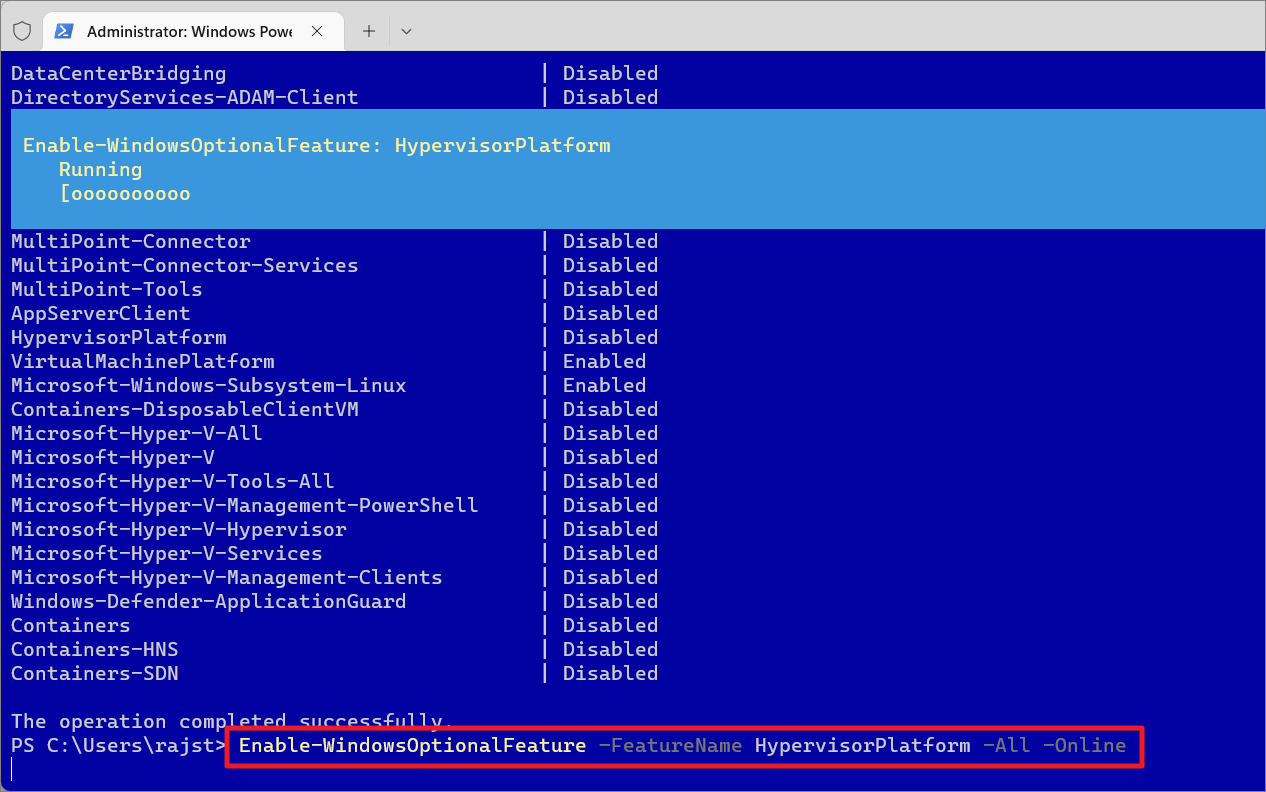
- Install a feature by running:
Enable-WindowsOptionalFeature –FeatureName Feature_Name -All -Online
ReplaceFeature_Namewith the name of the feature you wish to install.
- If prompted to restart your computer, type ‘Y’ and press
Enterto initiate the restart.
Remove Optional Features in Windows 11
If you no longer need a particular optional feature, you can disable or uninstall it using any of the methods below.
Uninstall an Optional Feature Using the Settings App
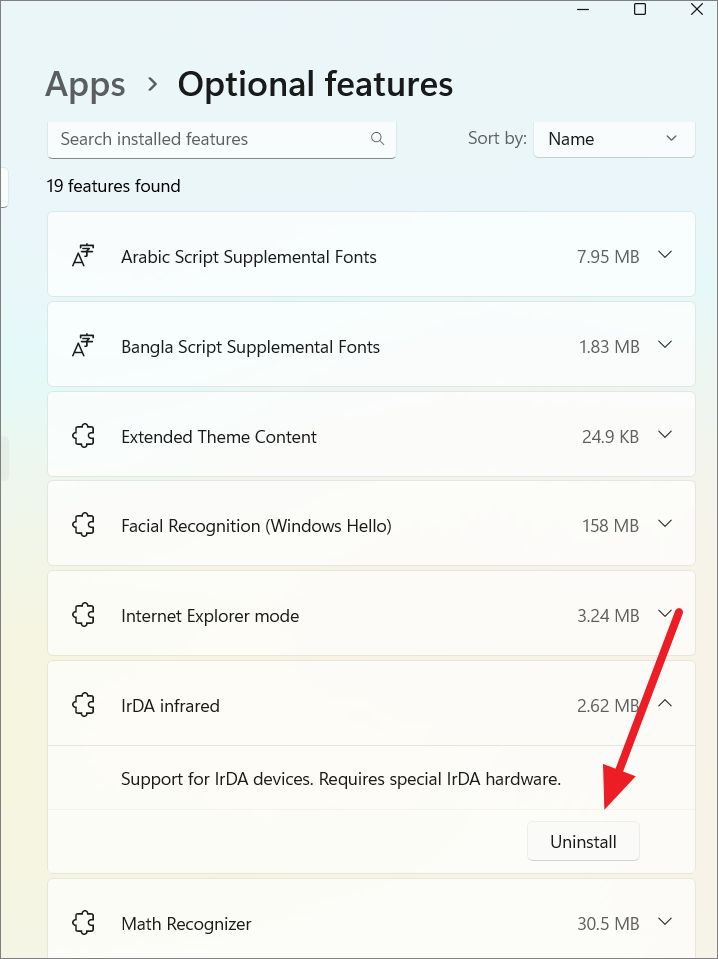
- Press
Win+Ito open Settings, then navigate to ‘Apps’ > ‘Optional features’.

- Scroll through the list to find the feature you want to remove, click on it, and select ‘Uninstall’.
- After the feature is uninstalled, restart your computer if prompted.
Uninstall Optional Features Using Windows Features Applet
- Press
Win+R, typeoptionalfeatures, and pressEnterto open the Windows Features dialog. - Uncheck the box next to the feature(s) you wish to disable and click ‘OK’.
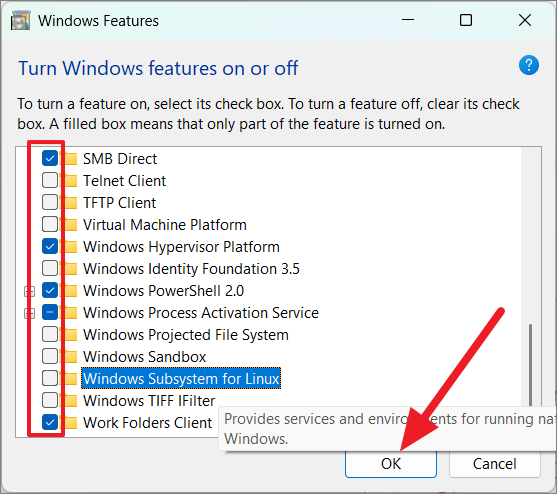
Wait for Windows to apply the changes. You may need to restart your computer.
Uninstall Optional Features Using DISM
- Open Command Prompt as an administrator.
- Execute the command:
Dism /Online /Remove-Capability /CapabilityName:Feature_Name
ReplaceFeature_Namewith the capability identity of the feature you want to remove.
For example, to remove ‘Math Recognizer’, you would run:
Dism /Online /Remove-Capability /CapabilityName:MathRecognizer~~~~0.0.1.0
Uninstall Optional Features Through PowerShell
- Launch PowerShell as an administrator.
- Run the command:
Disable-WindowsOptionalFeature –FeatureName Feature_Name -Online
ReplaceFeature_Namewith the name of the feature.
For example:
Disable-WindowsOptionalFeature –FeatureName HypervisorPlatform -Online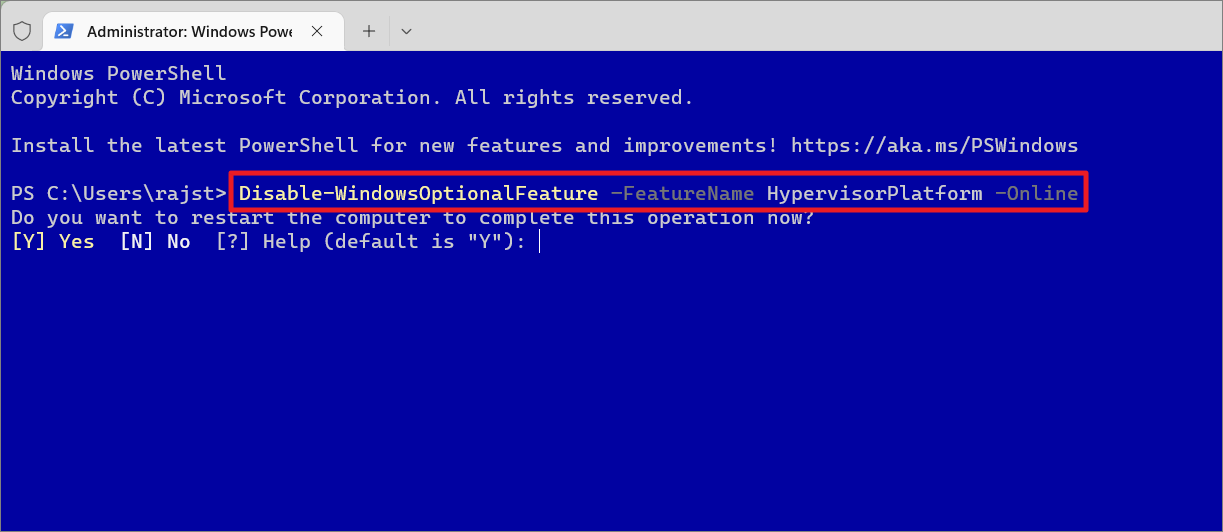
- If prompted, type ‘Y’ and press
Enterto restart your computer and complete the uninstallation.
Install Windows Optional Features Offline
In scenarios where you don’t have an internet connection, you can still install optional features using the source files from the Windows installation media. These files are located in the ‘sxs’ folder within the ‘Sources’ directory.
Enable Windows Optional Features Offline Using Command Prompt
- Insert the Windows installation media (USB or DVD) into your computer and note its drive letter (e.g.,
J:\). - Open Command Prompt as an administrator.
- List the technical names of optional features by running:
Dism /Online /Get-Features /Format:Table
- Install the desired feature using the command:
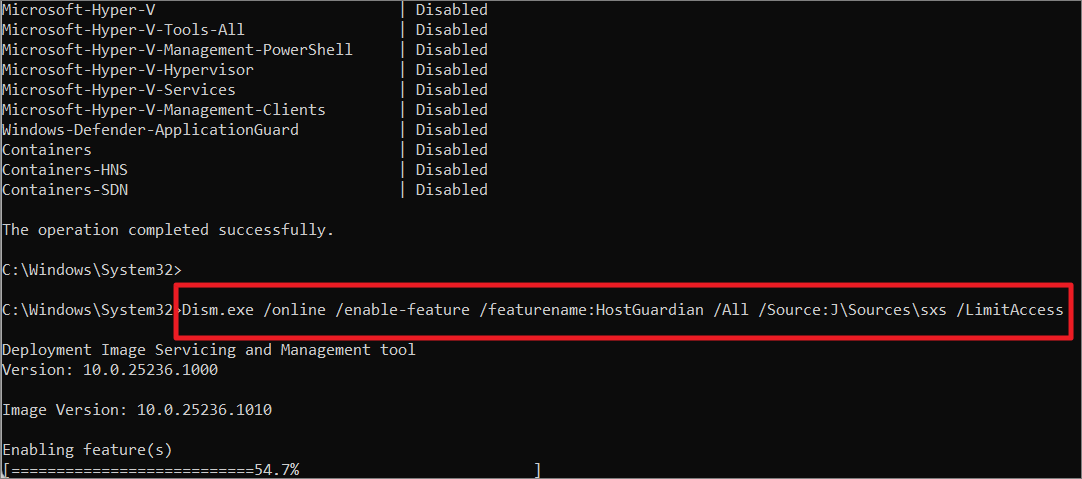
Dism.exe /online /enable-feature /featurename:Feature_Name /All /Source:J:\Sources\sxs /LimitAccess
ReplaceFeature_Namewith the technical name andJ:with your drive letter.
Enable Windows Optional Features Offline Using PowerShell
- Mount the Windows installation media and note the drive letter.
- Open PowerShell as an administrator.
- List available features by running:
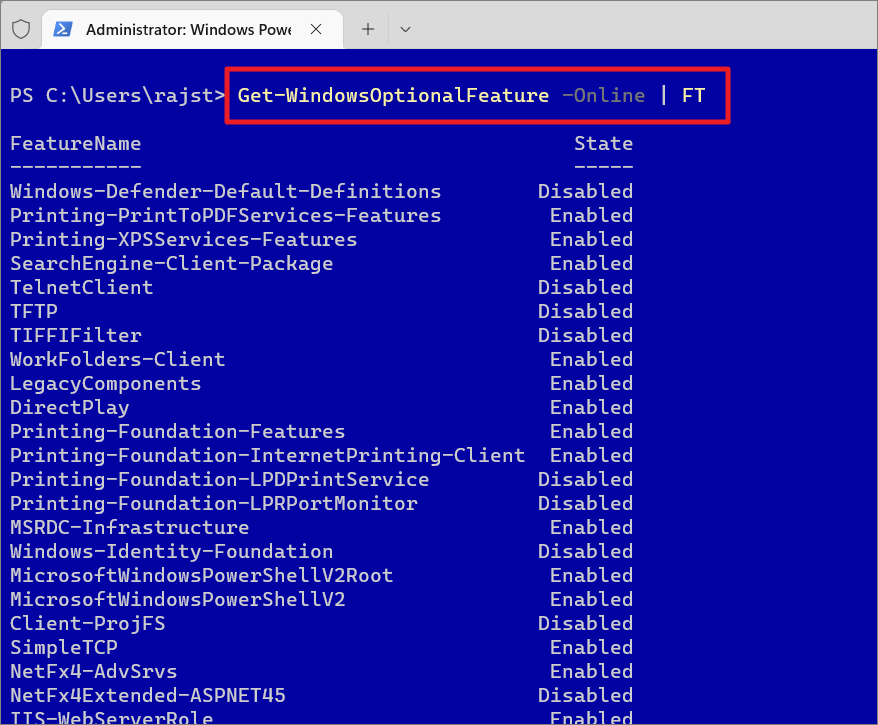
Get-WindowsOptionalFeature -Online | FT
- Install the feature using:
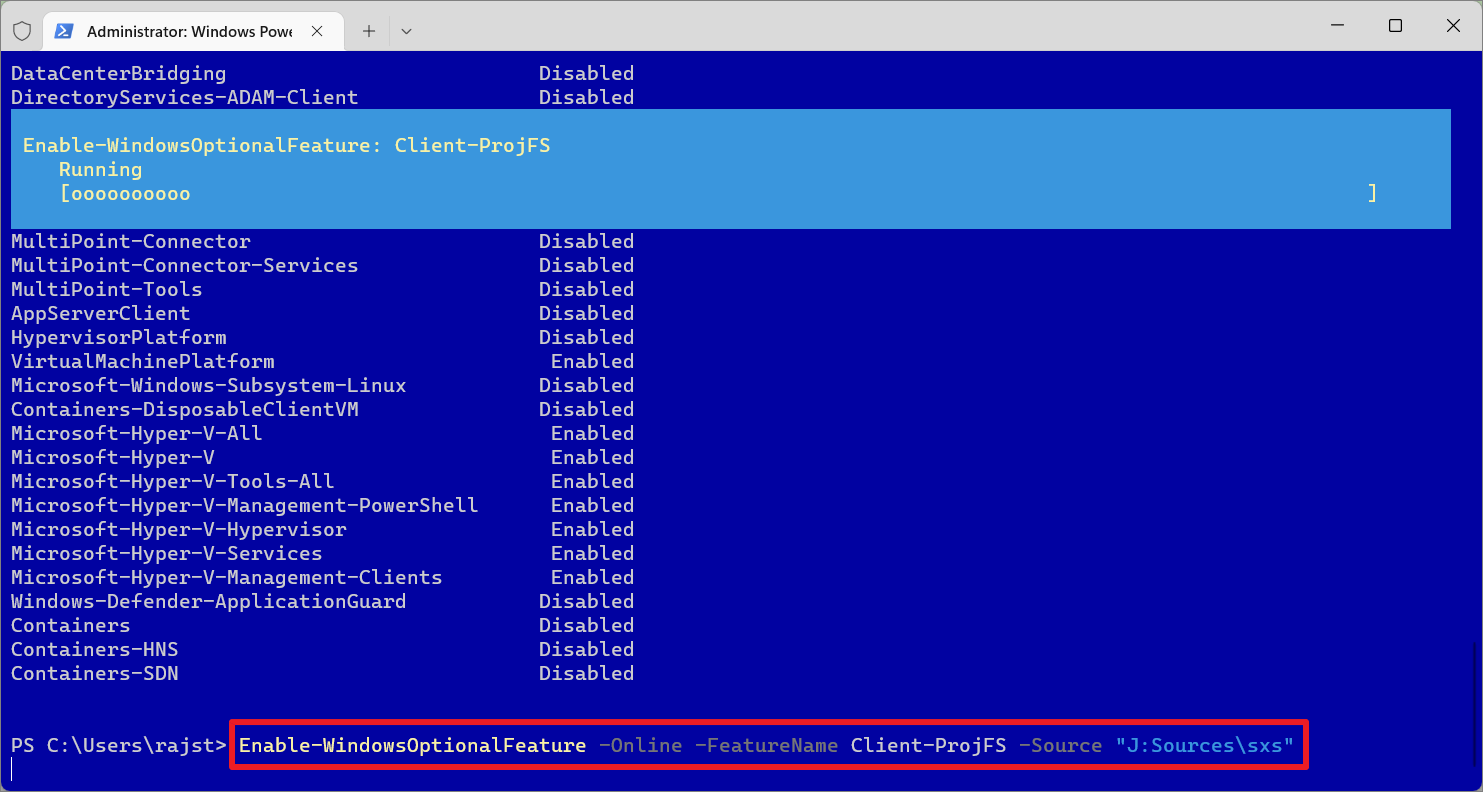
Enable-WindowsOptionalFeature -Online -FeatureName Feature_Name -Source "J:\Sources\sxs"
Replace Feature_Name with the technical name and J: with your drive letter.
- If prompted, type ‘Y’ and press
Enterto restart your computer.
Install Optional Features Offline Through Group Policy Editor
- Copy the ‘sxs’ folder from the ‘Sources’ directory of the installation media to a local directory (e.g.,
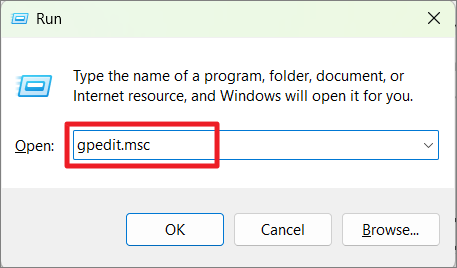
C:\Sources\sxs). - Press
Win+R, typegpedit.msc, and pressEnterto open the Group Policy Editor.
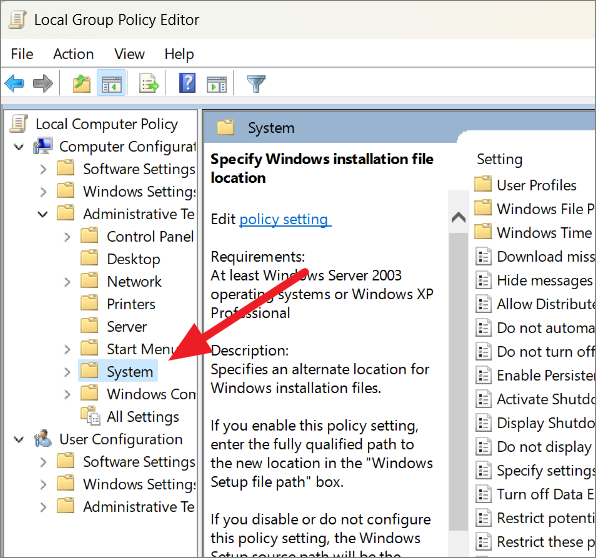
- Navigate to
Computer Configuration > Administrative Templates > System.
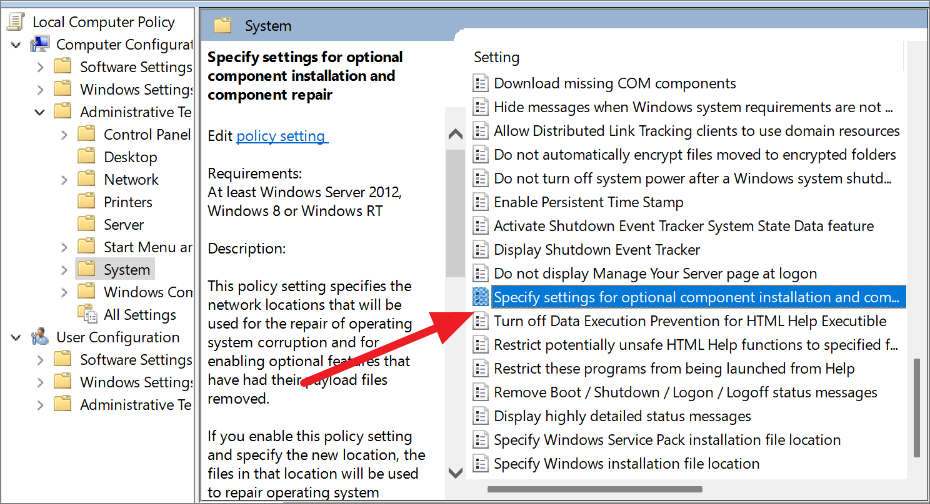
- Double-click on ‘Specify settings for optional component installation and component repair’.
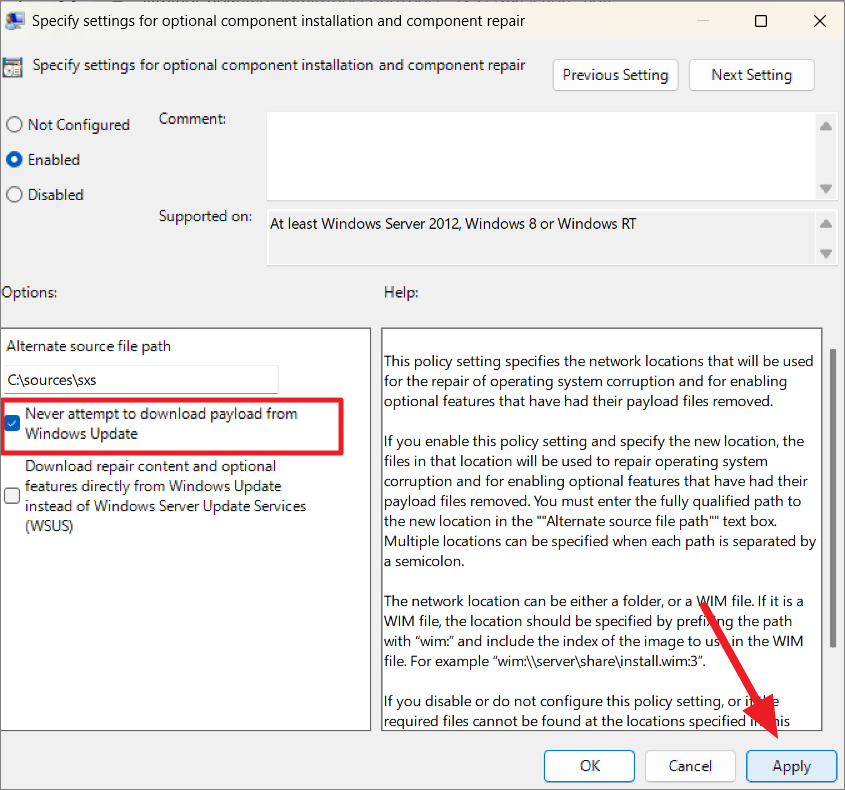
- Select ‘Enabled’, enter the path to the ‘sxs’ folder in the ‘Alternate source file path’ field, and check the ‘Never attempt to download payload from Windows Update’ option. Click ‘Apply’ and then ‘OK’.
- Open Command Prompt as an administrator and run the command:
gpupdate /force
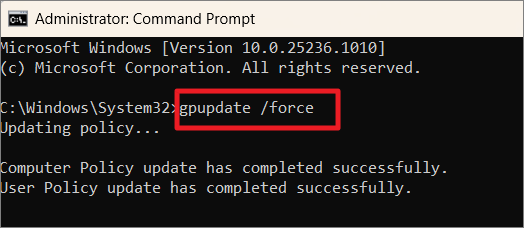
- Now, open the Windows Features dialog, select the features you want to install, and click ‘OK’. The system will use the local source files to install the features offline.
Fix Windows Features Dialog Box Is Blank or Empty
If the Windows Features dialog box appears blank or empty, it’s usually because the ‘Windows Modules Installer’ service is disabled. This service is responsible for installing, modifying, and removing Windows updates and optional components. To fix this issue:
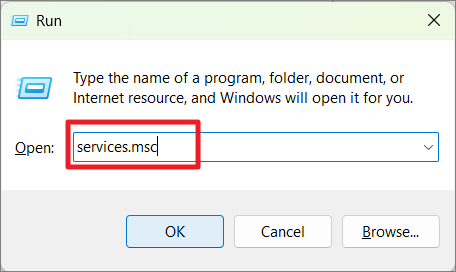
- Press
Win+R, typeservices.msc, and pressEnterto open the Services console.
- Scroll down and double-click on ‘Windows Modules Installer’.
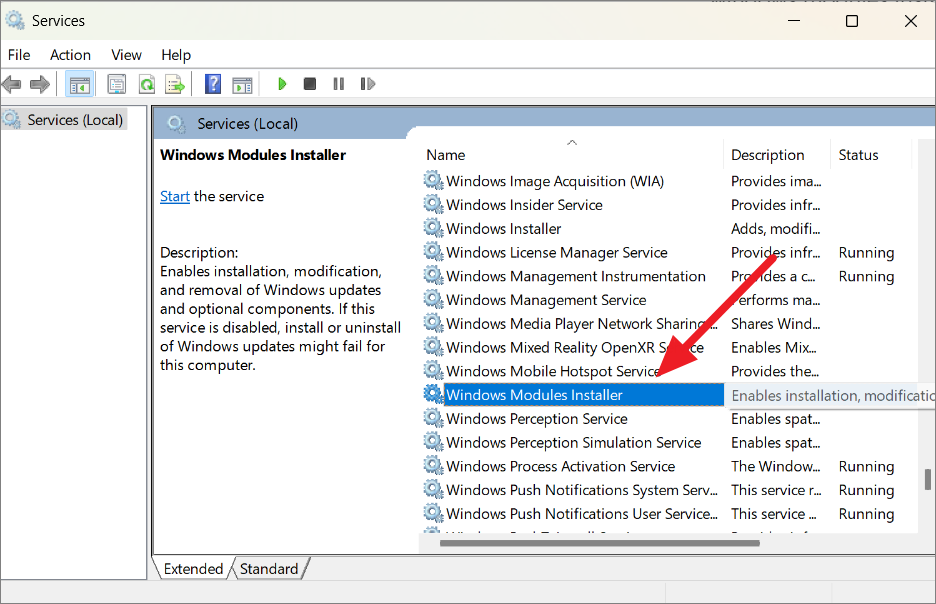
- Set the ‘Startup type’ to ‘Automatic’, click ‘Apply’, and then ‘OK’.
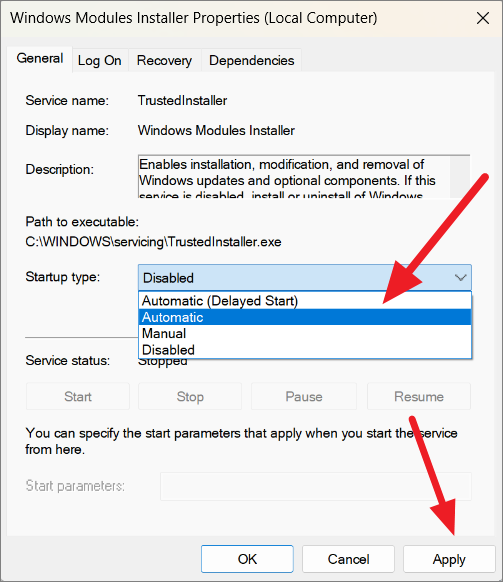
- Restart your computer to ensure the changes take effect. The Windows Features dialog should now display the available features.
If it still not working, try running SFC and DISM scan, create a new admin account, or restore your PC using the restore point.