
Если вам необходимо использовать Windows XP, а на компьютере установлена Windows 10 home, нет необходимости устанавливать устаревшую систему рядом с новой. Достаточно использовать XP mode в Windows 10 — и все получится.
Для того, чтобы вы могли установить Windows XP mode на Windows 10, нужно немного подготовиться, поскольку Microsoft предлагает такой режим по умолчанию только для Windows 7.
Для начала загрузите бесплатное приложение Windows XP-Mode на сайте Microsoft. То, на каком языке будет работать это приложение, не играет решающей роли.
Если на вашем компьютере не установлена программа-архиватор, загрузите и установите бесплатную версию WinRAR, поскольку вам понадобится инструмент для распаковки модуля XP.
После загрузки откройте загруженный Windows XP-Mode с помощью WinRAR. В архиваторе перейдите в каталог, куда вы загрузили модуль XP. Дважды щелкните соответствующий EXE-файл (например: «WindowsXPMode_en-us.exe»), чтобы отобразить его содержимое.
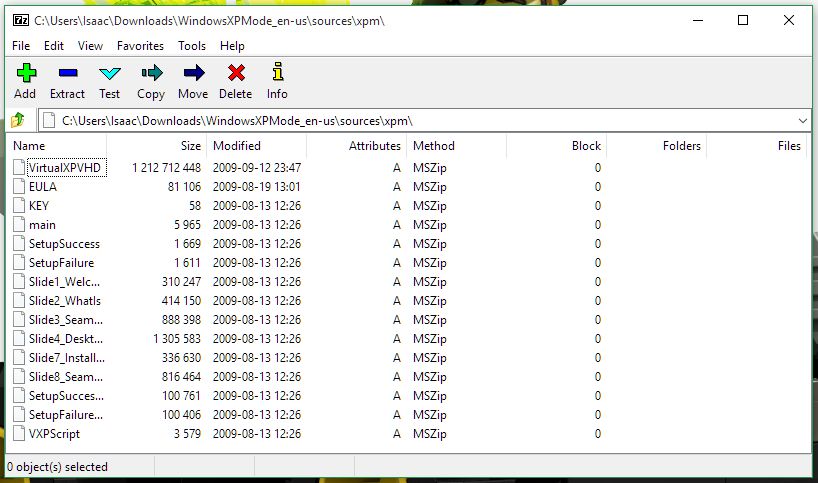
Кроме WinRAR можно использовать любой другой архиватор, например, 7Zip
- Откройте папку «sources» и извлеките файл «xpm». Вы можете просто перетащить его в любую папку.
- Через архиватор WinRAR зайдите в каталог, куда вы перенесли файл «xpm» и дважды кликните по нему. Теперь вы увидите целый ряд файлов, среди которых важен только VirtualXPVHD. Извлеките его так же, как описано выше, с помощью перетаскивания.
- Переименуйте файл в VirtualXPVHD.vhd.
- Наконец, загрузите и установите бесплатную программу VirtualBox.
Создание виртуальной машины
После подготовки нужно создать виртуальную машину и запустить Windows XP mode со своего рабочего стола.
- Переместите вновь созданный файл «VirtualXPVHD.vhd» в папку на рабочем столе, которую вы больше не будете изменять. В будущем VirtualBox всегда будет искать и использовать именно этот файл по этому адресу.
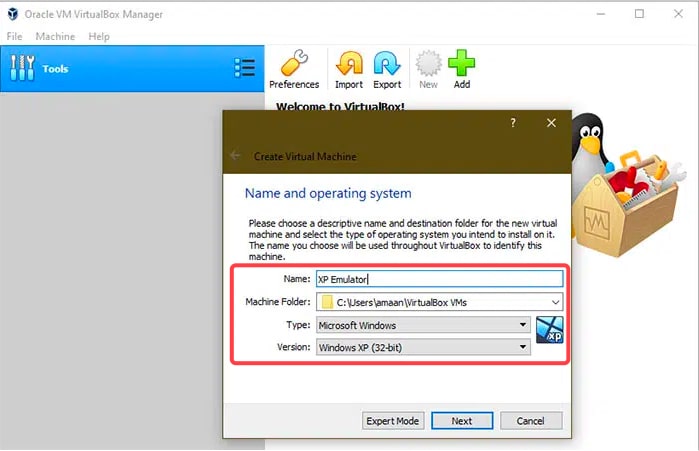
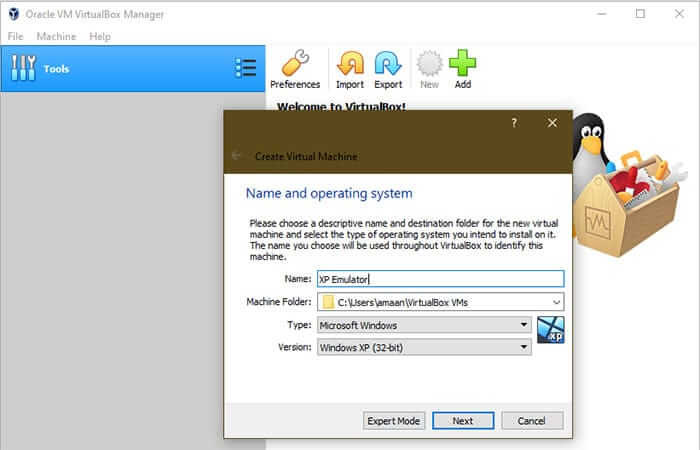
- Запустите VirtualBox и создайте новую виртуальную машину в поле «Новое». В следующем поле введите имя виртуальной машины по вашему выбору, выберите «Microsoft Windows» в качестве типа, а «Windows XP (32-разрядная версия)» — в качестве версии.
- В разделе «Диск» выберите «Использовать существующий диск», щелкните значок папки и выберите файл «VirtualbXPVHD.vhd» в директории, которую вы используете.
- Теперь нажмите на кнопку «Создать».
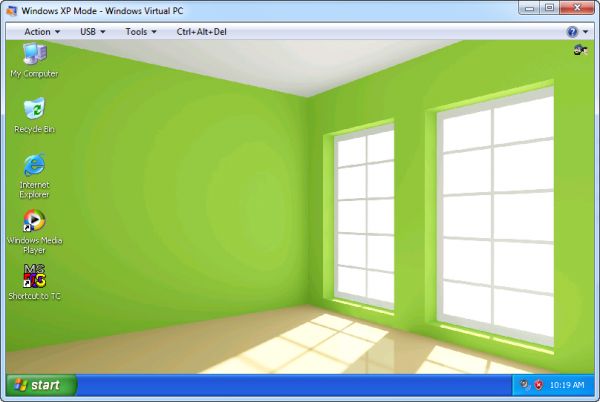
Windows 10: установка XP mode — запуск Windows XP
Теперь вы можете запустить Windows XP из VirtualBox:
- Выберите только что созданную виртуальную машину из списка в VirtualBox;
- Нажмите на зеленую стрелку «Старт» в верхней панели.
Возможно, VirtualBox не будет корректно распознавать мышь, поэтому вам придется выполнить начальную настройку с помощью клавиатуры.
Как только вы переключились на рабочий стол Windows XP, для начала лучше установить гостевые дополнения (VirtualBox Guest Additions) на старую ОС. Это позволит лучше эмулировать видеокарту, использовать общие папки и т.д.
Дополнения VirtualBox — это один файл образа CD-ROM, который называется VBoxGuestAdditions.iso. Этот файл образа находится в каталоге установки VirtualBox. Чтобы установить гостевые дополнения для конкретной виртуальной машины, нужно смонтировать этот файл ISO в старой ОС в виде виртуального компакт-диска и установить оттуда.
Если вы хотите использовать старое программное обеспечение в режиме XP, вы должны установить и запустить эти программы в VirtualBox.
Читайте также:
- Как отменить синхронизацию данных с OneDrive в Windows 10
- Лучшие сборки Windows 10: сравниваем, тестируем
Фото: CHIP, компания-производитель, pixabay.com
Microsoft
Windows XP Mode
for Windows 7, 8.x, and 10
100% WORKING /
FULL VERSION
!!!
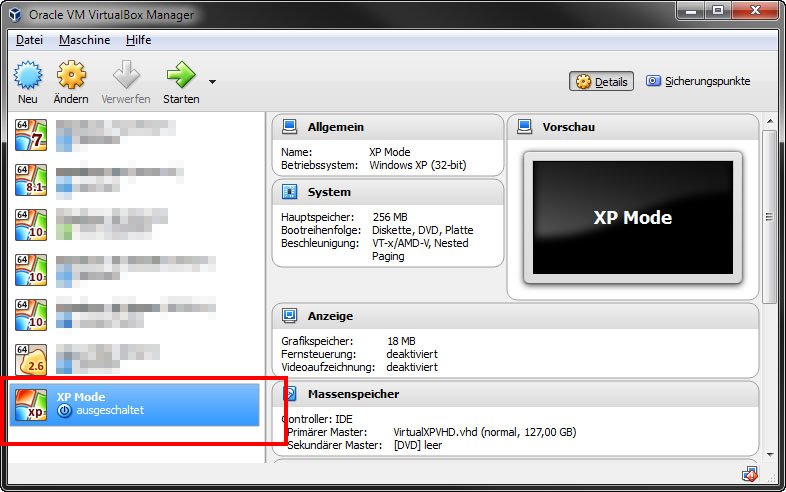
VM settings
— Name: Windows XP Mode
— Processors / Cores: 1 CPU / 1 Core
— VT-x/AMD-V: Disabled
— Memory: 256 MB (minimum) ~ 4096 MB (maximum)
— Hard Disk(s): VirtualXPVHD.vhd/vmdk (127 GB)
— Optical(s): Auto detect x1
— Floppy(ies): Auto detect x1
— Network Adapter(s): NAT x1
— USB Controller: USB 2.0 present
— Sound Card: Auto detect
— Display: Auto detect with 3D
— Graphics Memory: 32 MB (minimum) ~ 8 GB (maximum)
— Shared Folders:
1: Name= Host OS C, Path= C:\, Mode: R / W
— Other Devices: No present
OS objectives
— Supported Host Operating Systems:
Windows 7 and higher (any editions)
— Supported Virtual Machines:
Windows Virtual PC
VMware Workstation Player 6.x and later
VMware Workstation Pro 10.x and later
Oracle VM VirtualBox 5.2 and later
Microsoft Hyper-V (experimental)
— User name: Administrator
— Password: XPMUsers
— Account type: Administrator
— 32-bit (IA-32 / x86)
— Professional edition
— English language
— All updates are installed
— Disk cleanup already
— Includes extra features
— Includes extra languages support
— Includes extra updates
— Cracked version (use AntiWPA v3.4.6)
— Modified version the Windows XP Mode
See details: Please read to «
Readme.txt
«
Are you trying to use an old program that just won’t work on your Windows 10 computer? You’re not alone. Many people still need to run software designed for Windows XP, but they’re not sure how to do it on a modern system.
Maybe you’ve got a favorite game from years ago that you’re itching to play again. Or perhaps there’s a specialized work application that your company still relies on. Whatever the reason, it can be frustrating when these programs refuse to run on your up-to-date machine.
But here’s the good news: you can set up something called an emulator on your Windows 10 computer. Think of it as creating a virtual Windows XP machine inside your current system. It’s like having two computers in one, allowing you to run old XP programs without giving up your modern Windows 10 setup.
In this guide, we’ll walk you through the process step by step. Don’t worry if you’re not tech-savvy – we’ll explain everything in plain language.
By the time you’re done reading, you’ll know exactly how to get those old programs running again. Ready to bring a bit of the past into the present?
What you’ll need to get started:
Before we begin, make sure you have:
- A Windows 10 computer.
- A Windows XP installation disc or digital copy (ISO file).
- Enough free space on your hard drive (at least 15GB).
Step 1: Get VirtualBox
First, you need to download a free program called VirtualBox. Here’s how:
- Open your web browser and go to the VirtualBox website.
- Click the “Download” button.

- Choose the version for Windows hosts.

- Once it’s downloaded, open the file and follow the installation instructions.
VirtualBox is the tool that will let you create and run your virtual Windows XP.
Step 2: Set up your virtual machine
Now that you have VirtualBox installed, let’s create your virtual Windows XP:
- Open VirtualBox.
- Click “New” at the top of the window.

- Give your virtual machine a name, like “My Windows XP“.

- For “Type,” choose “Microsoft Windows“.

- For “Version,” select “Windows XP“.
- Click “Next“.

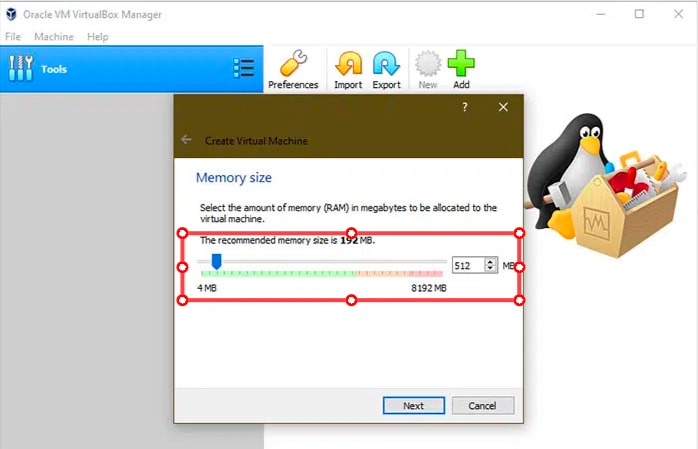
Step 3: Allocate memory and create a virtual hard drive
Now you’ll decide how much of your computer’s resources to give to your virtual XP:
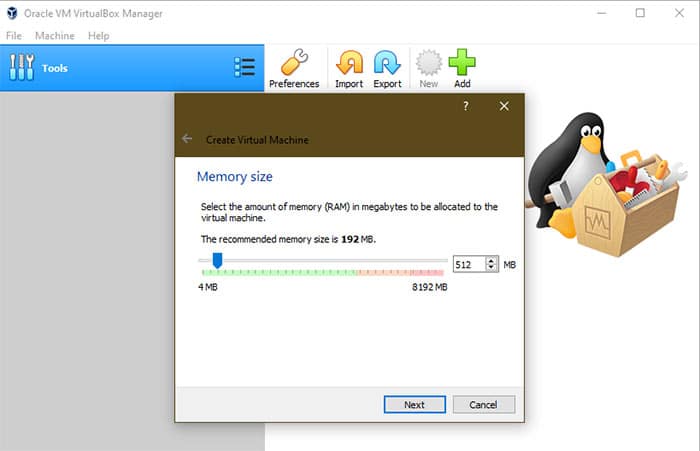
- Choose how much memory (RAM) to allocate. 512MB is the minimum, but 1024MB (1GB) is better if you can spare it.
- Click “Next“.

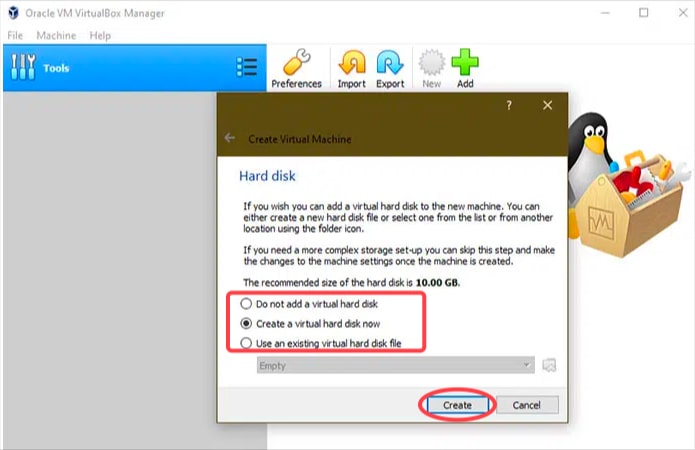
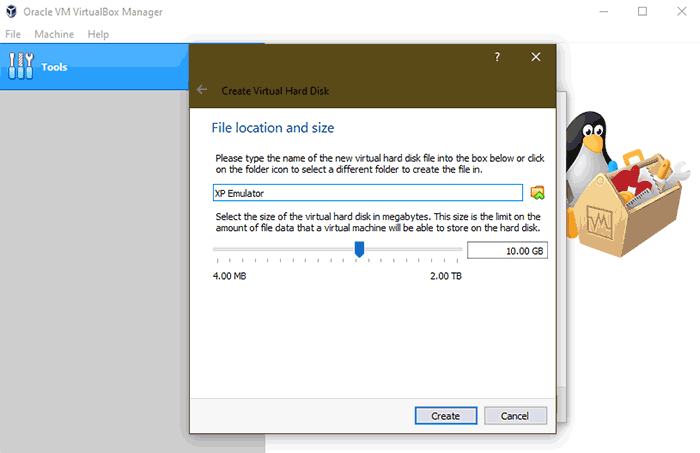
- Select “Create a virtual hard disk now“.
- Set the size to about 10GB and click “Next“.

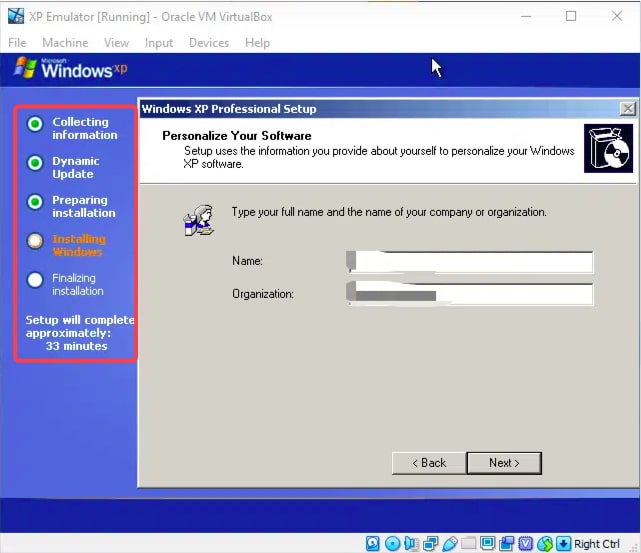
Step 4: Install Windows XP
You’re now ready to install Windows XP on your virtual machine:
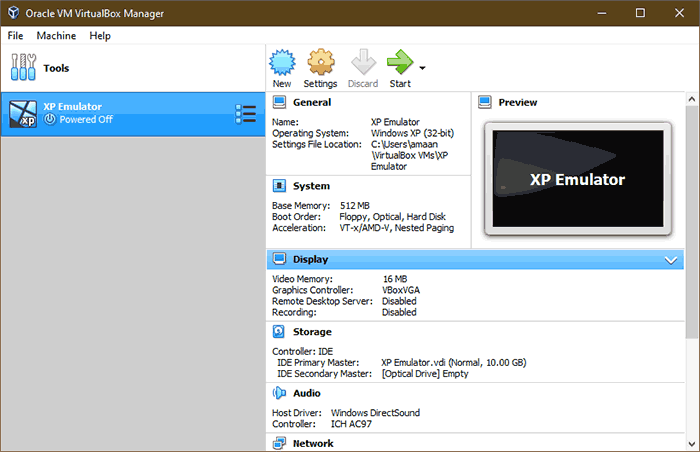
- In VirtualBox, select your new virtual machine and click “Start“.

- When prompted, select your Windows XP installation disc or ISO file.

- Follow the on-screen instructions to install Windows XP, just like you would on a real computer.
- Once installation is complete, your virtual Windows XP will restart.
Step 5: Using your virtual Windows XP
Congratulations! You now have a virtual Windows XP on your Windows 10 computer. Here’s how to use it:
- Open VirtualBox.
- Select your Windows XP virtual machine.
- Click “Start“.
Your virtual Windows XP will boot up in a window on your desktop. You can use it just like a regular computer. When you’re done:
- Click the Start menu in your virtual XP.
- Choose “Shut Down“.
Remember, any programs you install on your virtual XP won’t affect your main Windows 10 system. This keeps things safe and separate.
Why might you need to use old Windows XP programs?
Even though Microsoft no longer supports Windows XP, there are good reasons why you might want to use programs designed for it. Let’s explore why and how you can do this safely:
1. Old programs that don’t work on new systems
Some older software just doesn’t run on modern Windows versions. Maybe you have:
- A favorite game from years ago.
- A work program your company still uses.
- Specialized software for a hobby or interest.
These programs might be important to you, but they’re not compatible with Windows 10.
2. Security concerns with old systems
Running Windows XP directly on your computer isn’t safe because:
- It doesn’t get security updates anymore.
- It can’t handle new software or hardware well.
- It’s more likely to get viruses or other malware.
3. A safer way to use old programs
This is where a virtual Windows XP comes in. It’s like having a separate XP computer inside your Windows 10 system. Here’s why it’s better:
- It keeps your old programs separate from your main system.
- If something goes wrong, it won’t affect your Windows 10.
- You can easily start over if you need to.
By using a virtual Windows XP, you get to enjoy your old programs without putting your computer at risk. It’s the best of both worlds – you keep the security of Windows 10 while still being able to use software from the XP era.
The takeaway
Setting up a virtual Windows XP on your Windows 10 computer isn’t just a trip down memory lane – it’s a practical solution for many of you. Whether you need to run an old work program or revisit a favorite game, this method keeps things safe and separate.
You don’t need to be a tech whiz to make this happen. With some patience and the steps we’ve shared, you can create your own virtual XP environment. It’s like having an old computer inside your new one, without the security risks.
Remember, keep your virtual XP offline when possible, and don’t store important files there. This way, you get the best of both worlds – access to old programs and the safety of your modern system.
So, why not give it a try? You might be surprised at how useful this little blast from the past can be in your digital present. Have you ever needed to use an old program on a new computer? We’d love to hear about your experiences!
Frequently Asked Questions
What is a Windows XP emulator?
A Windows XP emulator allows you to run Windows XP within a virtual machine on your Windows 10 system. This setup creates a separate, virtualized environment where you can operate XP without affecting your main operating system.
Why should I use a Windows XP emulator instead of directly installing Windows XP?
Using an emulator provides a safer alternative to installing Windows XP directly on your hardware. Since XP is no longer supported with security updates, running it in a virtual environment isolates potential security threats, such as malware, from your main system.
What software do I need to set up a Windows XP emulator on Windows 10?
Oracle VM’s VirtualBox is recommended for emulating Windows XP on Windows 10. It’s a free and robust virtual machine software that allows for the easy setup and management of virtual operating systems.
How do I get a Windows XP installation media for the emulator?
You will need a Windows XP CD/DVD or an ISO disk image to use with the emulator. These can often be found in old software collections, purchased from legal sources, or downloaded from a trusted online repository if available.
Can I use Windows XP emulator to run old games or software?
Yes, one of the main reasons to use a Windows XP emulator is to run old games and software that are incompatible with newer versions of Windows. The emulator provides the necessary old OS environment for these programs to function correctly.
What should I do if my emulated Windows XP gets infected with malware?
If your virtual Windows XP environment becomes infected, you can easily reset or reinstall it without affecting your Windows 10 system. This involves wiping the virtual hard drive or rolling back to a previous state using VirtualBox’s snapshot feature.
Windows XP is seeing its end days but the operating system itself is not yet redundant and can still be benefitted from. What if you can use the best of both Windows 10 and Windows XP both? What if you wanted to use old apps that would not run on Windows 10?
Wondering how this could be possible. Well, the Windows XP emulator can make this possible for you. For this purpose, you would need to use a virtual machine. Creating a virtual environment for Windows XP inside Windows 10 would facilitate this. Thus if you want to learn how to set up a Windows XP emulator for Windows 10, you need to go through the below segment.
The below segment offers a step-by-step guide to run Windows XP emulator for Windows 10. Let’s get started without further ado.
1. You need to choose an ideal virtual machine app like Virtualbox by Oracle and install it on your Windows 10 computer.
2. After this, launch the Virtual Machine app and hit the “New” button.
3. This will open a dialog box where you have to name your virtual machine and choose a location for storing the virtual machine.
4. In the “Type” section you have to choose “Microsoft Windows” and in the version box you have to choose “Windows XP 32-bit.”
5. Further, click the “Next” button.
6. Followed by this, you have to choose the RAM amount which should be at least 512MB of RAM.
7. Again, click “Next” to continue further.
8. Here you have to choose the size of the virtual hard disk which will act as the storage point.
9. You will have the option to either “Create a virtual hard disk” or “Use an existing hard disk.”
10. In the new popup dialogue, you can leave the settings as they are regarding the “hard disk file type.”
11. After finalizing the size of the hard disk, you will have to choose the “Dynamically Allocated” option to allow the virtual machine to use the available space of the hard disk automatically. Alternatively, choosing the “Fixed Size” option will utilize only a fixed size on the hard disk but it will be faster to use.
12. Once the size and location of the virtual hard disk are chosen, you can wait for about 10-30 seconds for its creation.
13. After this, you will get a message that will read as you have successfully created your “Windows XP VirtualBox.”
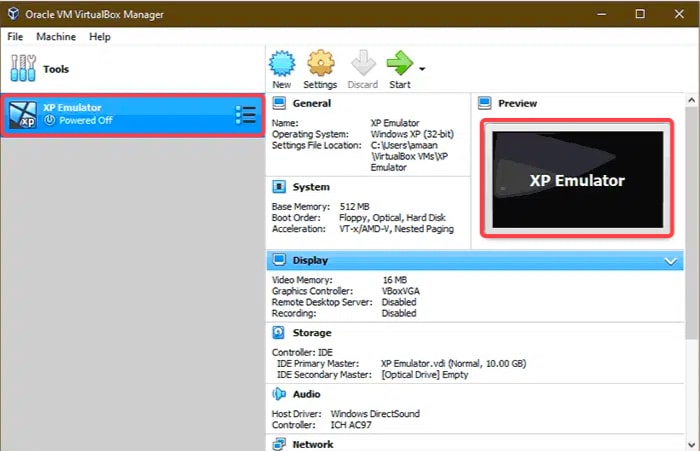
14. Now, click on the “Start” icon to initiate your Windows XP virtual machine.
15. Next, a pop-up will appear to insert the image into the optical drive for which you have to enter the location of your Windows XP ISO image.
16. Finally, you can reboot the emulator and begin using Windows XP like before.
Signing Off
So, this was all about how you can run a Windows XP emulator for Windows 10. Switching to Windows 10 is the need of the hour. However, if Windows XP users still wish to continue using the old operating system, it is advisable to emulate it as this way they can avoid malware and security breaches.
This is because Windows XP has not been updated with security patches for a long time now. Do like, share, and subscribe to our blog.
Also Read
- 5 Best PSP Emulators for PC & Android
- 4 Best PlayStation 5 Emulators For PC
- 10 Best Nintendo DS Emulator For Windows 11/10 PC
- 10 Best Xbox 360 Emulators for Windows 11 / 10 PC
- 5 Best PS4 Emulators For Windows PC
- 7 Best PS3 Emulators For PC
- 9 Best PS1 Emulators For Windows 11/10 PC
- 7 Best Terminal Emulator for Windows 11/10 PC
- 11 Best NES Emulator for Windows 11 / 10 PC
You have arrived at the correct location. Are you trying to find the most effective Windows XP simulator? Continue reading to find out more.
Operating a computer with Windows XP offers several benefits, provided that the decision is made for the right reasons. These benefits are available regardless of whether the decision is motivated by sentimental nostalgia or the need to run older software.
Windows XP is an antiquated operating system that is no longer supported by Microsoft and contains several vulnerabilities; therefore, it is not recommended that you use Windows XP as your sole operating system.
To one’s relief, upgrading a Windows XP virtual machine does not incur additional costs and may be accomplished relatively easily. Windows 10 and other operating systems can be used, even though the official methods require a computer running Windows 7. However, using Windows 10 or any other operating system does require a bit of a workaround.
You will need to follow specific rules very carefully if you want to be able to run Windows XP inside of a virtual machine.
However, using specific emulators can turn the experience of executing programs on Windows XP into a somewhat pleasant one.
Also Read- Best PS2 Emulators for PC
Before you begin setting up a Windows XP emulator on Windows 10, you must have a few prerequisites.
- Install a Virtual Machine to run the Windows XP emulator. We’ve tested Free VirtualBox from Oracle. You can also test the VMWare Workstation player.
- A minimum of 4GB of installed RAM on your PC. The virtual machine needs at least 512 MB of RAM to function flawlessly. The OS you run utilizes about 30% to 40% of your RAM. Thus, calculate if you have 500 MB of RAM for using the virtual system.
- An image(ISO) or duplicate from your Windows XP DVD/CD to boot into your virtual computer. We suggest using Service Pack 3 of Windows XP because it is more stable than Windows XP.
After everything is set, Let’s create a Windows XP emulator for Windows 10 with the virtual machine.
- Launch with your Virtual Machine application. Click the New button and the dialog box will pop up.
Give a name to your virtual machine. Select the type to be Microsoft Windows and the version as Windows XP 32-bit. Select the location where the virtual machine will be kept. Next, click to continue.
- The next step is to choose what amount of RAM you’d like to allocate for your Windows XP virtual machine. We recommend at least 500 MB of RAM to ensure the software can work properly within your virtual device. Go to the next choice.

- Choose what size you want for the virtual hard disk for the virtual machine that runs the Windows XP emulator. It serves as the storage to install software and for storing the data.You may also choose an existing virtual disk in the third selection. If not, click Create to proceed.
A pop-up dialogue will appear regarding what is the hard disk format. It is possible to leave the settings in place if you have no plans to switch to a different virtual machine application.
- Choose what size your disk is. You have two options to choose from Fixed Size and Dynamically Allocated. If you select the dynamically allocated size, your virtual computer will utilize all the space available on the hard disk until it gets full.In contrast, the Fixed-size program will consume only a specific amount of hard disk space. It is time-consuming to create occasionally but is generally more efficient to utilize.
- Choose the size and the location of the Virtual Hard Disk. It is important to select the location within the partition with enough space to hold your VM. The creation process will take 10-30 minutes, depending on your speed and the hard drive’s capacity.You have successfully created Windows XP VirtualBox now.


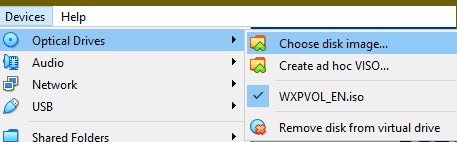
- Select the location of your Windows XP ISO image that you’ve created. Select the Start button on the right side of the window. It will launch the virtual computer. A small window will pop up asking you to upload an image to an optical drive. If you do not receive the notification, you can go to the Device menu, Select the Disk Image and choose your ISO images from Windows XP. Restart the emulator to start using the Windows XP setup.


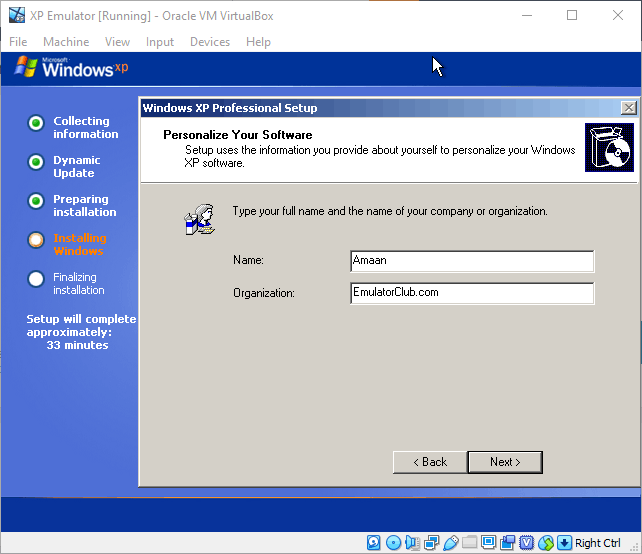
- Start installing Windows XP like you usually would. Initially, it will ask you to create an account on your virtual hard disk.Everything should function perfectly if you ensure that the Windows XP image is adequately created and doesn’t contain any bugs.


Conclusion
This was the best way for installing Windows XP emulator for Windows 10, and it could be installed on a computer within half an hour, including the time it took to prepare the computer and install the emulator. Please let us know if you are aware of any further Windows XP emulators that are compatible with Windows 10.