
Компонент WSL (Windows Subsystem for Linux или Подсистема Windows для Linux) появился в Windows 10 и с тех пор постоянно развивается. Одна из новых возможностей, которую кто-то из пользователей мог пропустить — возможность простого и удобного запуска программ Linux с GUI прямо в ОС Windows.
В этом материале — пример быстрой установки всего необходимого и запуска приложений с графическим интерфейсом в Windows 11 и 10 и дополнительная информация, которая может оказаться полезной.
Установка WSL, дистрибутива Linux и приложений
Установить WSL и нужный дистрибутив можно разными способами:
- Включив необходимые компоненты в дополнительных компонентах Windows и загрузив дистрибутив в Microsoft Store (подробнее).
- Почти автоматически в командной строке.
Далее будет рассмотрен второй вариант, как более быстрый в контексте рассматриваемой темы.
Для установки WSL и конкретного дистрибутива Linux достаточно выполнить следующие шаги:
- Запустите командную строку от имени администратора, введите команду
wsl --install
и нажмите Enter, дождитесь завершения выполнения команды.

- Перезагрузите компьютер и снова зайдите в командную строку. Если на первом шаге была также произведена установка Ubuntu (в некоторых версиях Windows устанавливается автоматически), завершите установку с помощью
wsl --install Ubuntu
В процессе потребуется задать имя пользователя и пароль.
- Если требуется другой дистрибутив или автоматическая установка не выполнялась, по порядку введите команды (первая покажет список доступных дистрибутивов, во второй укажите имя дистрибутива из левого столбца):
wsl --list --online
wsl --install NAME


Готово, дистрибутив установлен, а поддержка графического интерфейса приложений в WSL текущих версий включается автоматически (ранее этого можно было добиться лишь обходными путями, по умолчанию приложения работали только в режиме терминала), переходим к установке приложений:
- Введите команду
sudo apt-get update
также можно использовать apt вместо apt-get. Дождитесь обновления репозиториев.
- Для установки приложения по его имени введите команду
sudo apt-get install ИМЯ_ПРИЛОЖЕНИЯ -y
- Приложение будет установлено и появится в меню «Пуск» Windows (в папке соответствующего дистрибутива), откуда его можно будет запустить:

- Тем же способом можно установить и другие необходимые приложения, а для их удаления используйте команду
sudo apt-get remove ИМЯ_ПРИЛОЖЕНИЯ


Результат: приложения Linux с графическим интерфейсом исправно работают прямо в Windows:
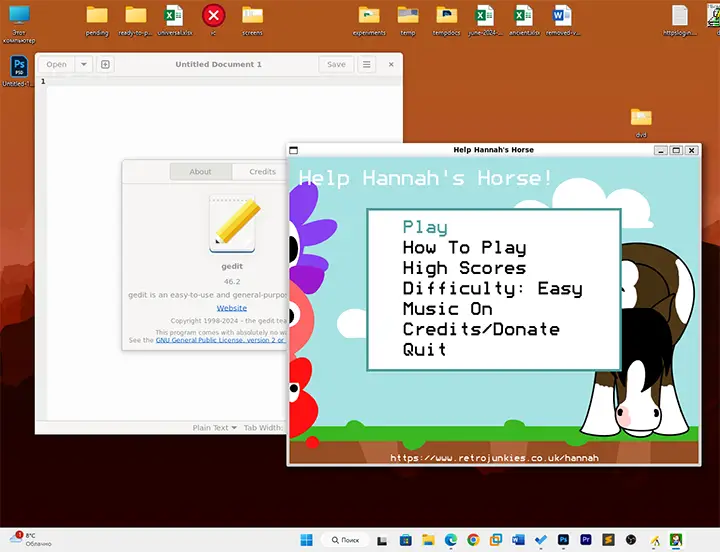
Делают это со звуком, ускорением графики OpenGl, пробросом локальных дисков.
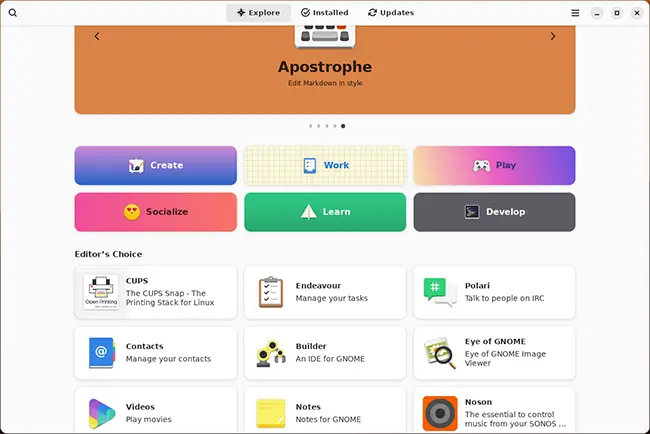
При желании вы даже можете установить менеджер пакетов с графическим интерфейсом (своего рода «магазин приложений»). Например, мне удалось добиться вполне исправной работы Gnome Software:
- Устанавливаем с помощью команды в WSL
sudo apt install gnome-software -y
- Изменяем свойства ярлыка, добавленного в меню «Пуск» (правый клик по ярлыку в меню Пуск — перейти к расположению файла — открыть свойства ярлыка), заменив поле объект на (пример для Ubuntu)
"C:\Program Files\WSL\wslg.exe" -d Ubuntu -u root sudo gnome-software
Подобным же способом можно «заставить» запускаться от имени суперпользователя с ярлыков Windows и другие программы.

- Пользуемся для установки, обновления и удаления приложений Linux прямо в Windows, в графическом интерфейсе:


Подробная техническая информация о том, как именно работают Linux-приложения с GUI доступна на GitHub проекта WSLg, с помощью которого реализована соответствующая функциональность.

Если вы только начали свой путь разработчика и до сих используете операционную систему семейства Microsoft Windows, то уже наверняка столкнулись с ситуацией, когда ваш инструментарий отличается от того, что установлено у большинства людей из этой профессии. Чаще всего проблемы начинаются при работе в командной строке. Дело в том, что Windows не является POSIX-совместимой операционной системой, поэтому в ней отсутствует базовый набор прикладных программ, который необходим для разработки.
- Ubuntu из Microsoft Store
- Другие способы
Несмотря на все написанное дальше, наша основная рекомендация — ставить полноценный Linux-дистрибутив, например, Ubuntu и полностью погружаться в него. Подавляющее большинство веб-проектов работает под управлением Linux-систем. А постоянное использование такой системы на домашнем и рабочем компьютере равносильно погружению в языковую среду при изучении иностранных языков.
Для новичков есть способ проще и быстрее — технологии виртуализации. Об этом и поговорим.
Ubuntu из Microsoft Store
Если вы работаете на Windows версии не ниже 10 с архитектурой x64, то можно воспользоваться встроенным решением и установить слой совместимости (Windows Subsystem for Linux), а затем дистрибутив на основе Ubuntu Linux через магазин приложений Microsoft Store.
Подсистема WSL поставляется вместе с Windows, но не включена по-умолчанию. Чтобы её активировать, необходимо открыть PowerShell и ввести команду:
wsl --install
Также эта команда скачивает и устанавливает дистрибутив Ubuntu Linux. Скорее всего после завершения установки потребуется перезагрузить компьютер.
После перезагрузки найдите в меню Пуск приложение Ubuntu и запустите его.
Первый запуск может вызвать ошибку Error: 0x8007007e и предложение прочитать инструкцию по её решению https://aka.ms/wslinstall. Если хотите сэкономить время, то просто запустите PowerShell (не путать с cmd) от имени администратора и выполните следующую команду:
Enable-WindowsOptionalFeature -Online -FeatureName Microsoft-Windows-Subsystem-Linux
После этого компьютер попросит перегрузиться, а потом нужно снова запустить приложение Ubuntu. В случае удачной установки откроется интерпретатор командной строки с предложением ввести имя пользователя и пароль. Выглядеть это будет вот так:
Installing, this may take a few minutes...
Installation successful!
Please create a default UNIX user account. The username does not need to match your Windows username.
For more information visit: https://aka.ms/wslusers
Enter new UNIX username:
Данные логин и пароль никак не связаны с вашим пользователем в Windows, придумайте новые и не забывайте их. Чтобы изменить пароль Ubuntu в будущем, вам пригодится команда passwd
Обратите внимание на данные официальные инструкции от Microsoft, где рассмотрены не только установка и настройка WSL и Ubuntu, но так же рассказано о настройке окружения для разработки (VSCode, Git)
- Настройка среды разработки WSL
- WSL + VSCode
Другие способы
Если у вас нет возможности установить WSL, то можно использовать другие способы виртуализации для установки Linux. Смотрите другие наши гайды:
- VirtualBox
- Vagrant
Best Ubuntu (Linux) Emulator for Windows [10/8.1/8/7]
In the world of software development and programming, Linux has become an essential tool for developers. Among the various distributions available, Ubuntu stands out due to its user-friendliness and extensive support community. For Windows users, using a full Ubuntu installation can be an inconvenience, particularly when it comes to resource allocation, boot processes, and compatibility issues. Fortunately, there are several emulators and virtual machines available that allow Windows users to experience Ubuntu on their systems without hassle.
This article aims to provide you with a comprehensive guide to the best Ubuntu emulators for Windows (10/8.1/8/7). We will cover their features, benefits, drawbacks, and how to set them up, allowing you to choose the best solution for your needs.
1. What is an Emulator or Virtual Machine?
An emulator is software that allows one system to behave like another. In the context of running Ubuntu on Windows, an emulator makes it possible for applications designed for the Linux environment to run seamlessly within a Windows environment. A virtual machine, on the other hand, creates a virtualized environment that emulates hardware, enabling users to install and run an operating system like Ubuntu alongside Windows.
There are various advantages to using emulators and virtual machines to run Ubuntu on a Windows system:
- Convenience: You can run Linux applications alongside your Windows apps without needing to dual-boot.
- Resource Management: You can allocate specific amounts of RAM and CPU to your virtual machine as needed.
- Testing Environments: Ideal for testing software in a Linux environment without leaving Windows.
- Sandboxing: Keeps your main system safe from potential issues by isolating Ubuntu in a virtual environment.
2. Windows Subsystem for Linux (WSL)
Overview
The Windows Subsystem for Linux (WSL) is a compatibility layer developed by Microsoft that enables users to run a Linux environment directly on Windows. It provides a full-fledged Ubuntu distribution without the overhead of a virtual machine.
Features
- Native support for Linux command-line tools and applications.
- Fast performance by directly integrating with the Windows kernel.
- File system integration, allowing access to Windows files from Linux and vice versa.
Setup Instructions
- Open PowerShell as an administrator.
- Run the command:
wsl --install - Select Ubuntu from the available distributions in the Microsoft Store.
- Launch Ubuntu from your Start menu, and follow the prompts to set up your user account.
Advantages
- Lightweight and efficient.
- Seamless integration with Windows applications.
- Regularly updated and supported by Microsoft.
Drawbacks
- Limited to command-line applications; GUI apps may face issues.
- Some advanced Linux features may not be fully supported.
3. VirtualBox
Overview
Oracle VirtualBox is a popular open-source virtualization software that allows users to run a complete Ubuntu OS inside a virtual machine on their Windows PC.
Features
- Support for multiple operating systems: run several Linux distributions as well as Windows within virtual machines.
- Snapshot feature allows users to save and restore states.
- Shared folders let you easily transfer files between the host and the guest OS.
Setup Instructions
- Download and install VirtualBox from the official website.
- Download the Ubuntu ISO file from the official Ubuntu website.
- Open VirtualBox, click «New,» and follow the prompts to set up a new virtual machine.
- Allocate RAM and create a virtual hard disk.
- Point to the Ubuntu ISO file during the setup process and complete the installation.
Advantages
- User-friendly interface with extensive customization options.
- Fully functional desktop environment allows for complete Ubuntu usage.
- Suitable for developers and advanced users alike.
Drawbacks
- Resource-intensive, consuming significant amounts of RAM and CPU.
- Requires more complex setup compared to WSL.
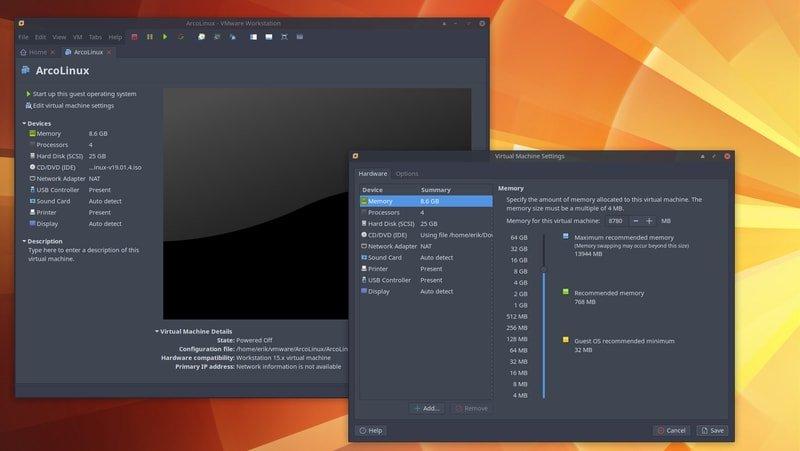
4. VMware Workstation Player
Overview
VMware Workstation Player is another popular virtualization platform that allows users to create and run virtual machines on Windows. It is well-regarded for its performance and reliability.
Features
- Supports a vast array of guest operating systems, including various distributions of Linux.
- Easy drag-and-drop file transfers between the host and guest OS.
- Unity View allows seamless integration of applications with the Windows desktop.
Setup Instructions
- Download VMware Workstation Player from the official website.
- Install the software by following the on-screen instructions.
- Download the Ubuntu ISO file.
- Open VMware Player, create a new virtual machine, and follow the prompts using the ISO file to install Ubuntu.
Advantages
- Optimized for performance and stability.
- Good support for advanced graphics and 3D applications.
- Features that accommodate both novice and expert users.
Drawbacks
- Free version limited to non-commercial use, with fewer features than the paid Pro version.
- Requires activation for full benefits.
5. MobaXterm
Overview
MobaXterm is a terminal software that provides a range of network tools and the ability to run Linux command-line tools on Windows. It is particularly useful for those looking to execute commands rather than run a full desktop environment.
Features
- Fully equipped with Unix commands and tools.
- SSH client for secure connections to remote servers.
- X11 server support for running graphical Linux applications.
Setup Instructions
- Download MobaXterm from the official website.
- Install it on your Windows machine.
- Use the built-in terminal to access Ubuntu through SSH or use Cygwin for a similar command line interface.
Advantages
- Particularly lightweight and fast.
- Great for remote server access and application management.
- All-in-one tool for Unix commands, FTP, and SSH.
Drawbacks
- Limited mainly to command-line usage; graphics and GUI applications are not heavily supported.
- Might not provide the same seamless experience as full virtualization.
6. Cygwin
Overview
Cygwin is a large collection of GNU and Open Source tools that provide functionality similar to a Linux distribution on Windows. It enables users to utilize Linux applications while using the Windows file system and commands.
Features
- Extensive collection of Linux commands that run natively on Windows.
- Allows the installation of additional packages via a user-friendly installer.
- Creates a Unix-like experience on Windows.
Setup Instructions
- Download Cygwin from the official website.
- Run the installer and select the packages you want to install during the setup process.
- Once installed, open Cygwin and start using Linux commands on your Windows machine.
Advantages
- Offers a familiar command-line experience for Linux users.
- Works well with the Windows ecosystem and file system.
Drawbacks
- No complete version of Ubuntu or GUI; it mimics the command-line environment.
- Requires significant configuration and package management.
7. Hyper-V
Overview
Hyper-V is a built-in virtualization solution in Windows Pro and Enterprise editions, allowing users to run virtual machines directly from their Windows system. It is particularly suited for enterprise users who need robust virtualization.
Features
- Kernel-based virtualization, providing good performance.
- Live migration and snapshots for easier management.
- Supports running multiple operating systems including Ubuntu.
Setup Instructions
- Enable Hyper-V from the Control Panel under «Turn Windows features on or off.»
- Download Ubuntu ISO from the official website.
- Open Hyper-V Manager and create a new virtual machine, making sure to allocate necessary resources and configure your network.
- Set the installation media to the downloaded Ubuntu ISO and follow the installation prompts.
Advantages
- Integrated directly into Windows, offering performance benefits.
- Highly configurable and designed for enterprise usage.
Drawbacks
- Limited to Windows Pro and Enterprise users.
- Can be confusing to setup for beginners.
8. Remote Desktop to an Ubuntu Server
If you have access to an Ubuntu server, using remote desktop tools can be an effective way to run a Linux environment without a full installation on your Windows machine. You can set up an Ubuntu server on a different machine and use clients such as Remote Desktop Protocol (RDP) or VNC to connect from your Windows machine.
Advantages
- No need for powerful hardware, as the server does all the processing.
- Access to a full Ubuntu desktop environment from anywhere.
Drawbacks
- Requires a robust network setup and potentially more complex configurations.
- Less suitable for local development.
Conclusion
There are numerous options available for Windows users wanting to run Ubuntu. Each method has its own advantages and disadvantages, ranging from lightweight command-line tools like WSL and Cygwin to full-featured virtualization platforms such as VirtualBox and VMware Workstation Player.
Choosing the right Ubuntu emulator depends largely on your specific needs, whether you require complete GUI support, only need command-line access, or want to test out Linux applications without committing to a full installation. The resources you have available, the kind of tasks you will be performing, and your level of comfort with virtualization software will ultimately guide your decision.
Linux increasingly plays a pivotal role in software development, data analytics, and IT management. Therefore, having the ability to use Ubuntu while primarily working within a Windows environment not only enhances productivity but allows users to take advantage of the best tools from both operating systems.
Время на прочтение9 мин
Количество просмотров271K
К написанию данной статьи меня побудил вопрос на Тостере, связанный с WSL. Я, после нескольких лет использования систем на ядре Linux, около полугода назад перешел к использованию Windows 10 на домашнем ПК. Зависимость от терминала и Linux окружения в моей работе практически сразу привели меня к вопросу: или ставить виртуалку или попробовать WSL. Я выбрал второе, и остался вполне доволен.
Под катом я расскажу как установить и настроить WSL, на какие я наткнулся проблемы и ограничения, как запускать Linux приложения из Windows и наоборот, а так же как интегрировать элементы окружения Xfce в окружение рабочего стола Windows.

Никогда не думал, что однажды вернусь на Windows, но повод попробовать мне дали стечения обстоятельств: жена, далекая от IT, дергала почти каждый раз, когда у нее возникала необходимость воспользоваться компом; проснулась ностальгия по одной игре, но она никак не хотела адекватно работать под wine; а тут еще мне подарили коробочную Windows 10 Pro. WSL я поставил чуть ли не сразу после установки системы, поигрался несколько вечеров, понял, что продукт для моих задач годный, но хочется более привычный терминал и вообще некоторых удобств.
Установка WSL и дистрибутива
Сразу оговорюсь, в интернете можно найти описание установки с помощью выполнения команды lxrun /install в командной строке или консоли PowerShell. Данный способ больше не работает (после выхода WSL в стабильный релиз). Насколько мне известно, сейчас WSL можно установить только из Microsoft Store вместе с предпочитаемым дистрибутивом.
Так же отмечу, что когда установку производил я, на выбор были доступны дистрибутивы OpenSUSE, SUSE Linux Enterprise и Ubuntu 16.04 — последний я и установил. Сейчас также доступны Ubuntu 18.04, Debian 9 и Kali Linux, возможно появятся и другие дистрибутивы. Действия по установке могут отличаться. Так же, часть проблем описанных в статье может быть уже исправлена.
Находим в магазине желаемый дистрибутив и устанавливаем. Установка пройдет быстро, так как скачает только эмулятор ядра Linux и утилиту для запуска подсистемы, которая окажется в системной папке в трех экземплярах: wsl.exe, bash.exe и ubuntu.exe (вместо ubuntu будет имя Вашего дистрибутива). Все они равнозначны и делают одно и то же — запускают собственный эмулятор терминала, в нем linux’овый bash работающий под эмулятором ядра. При первом же запуске нас попросят придумать логин и пароль для пользователя по умолчанию, а после произойдет непосредственно установка дистрибутива. В качестве пользователя по умолчанию указываем root без пароля — это потребуется для дальнейших шагов. Безопасность не пострадает, кроме того при подготовке материалов к статье, в англоязычном туториале, я наткнулся на информацию, что новые версии WSL теперь делают пользователем по умолчанию root без пароля без лишних вопросов.
Дожидаемся установки. Далее первым делом стоит обновить зеркала apt на ближайшие. Для этого понадобится CLI текстовый редактор. В комплекте только vi, я же больше предпочитаю nano, поэтому ставлю его:
apt install nanosudo вводить не требуется, так как мы уже под root’ом. Отредактируем файл /etc/apt/sources.list:
nano /etc/apt/sources.listУ меня лучше всего работают зеркала Яндекса, поэтому мой файл выглядит так:
deb http://mirror.yandex.ru/ubuntu/ xenial main universe restricted
deb-src http://mirror.yandex.ru/ubuntu/ xenial main universe  restricted

deb http://mirror.yandex.ru/ubuntu/ xenial-security main universe restricted
deb-src http://mirror.yandex.ru/ubuntu/ xenial-security main universe restricted

deb http://mirror.yandex.ru/ubuntu/ xenial-updates main universe restricted
deb-src http://mirror.yandex.ru/ubuntu/ xenial-updates main universe restricted
Нажимаем Ctrl+O для сохранения и Ctrl+X для выхода. Теперь можно обновить систему до актуального состояния:
apt update && apt upgradeПосле обновления можно создать нашего основного пользователя. В данной статье я назову его user1, Вы же можете задать привычное имя:
addgroup --gid 1000 user1
adduser --home /home/user1 --shell /bin/bash --uid 1000 -G user1,sudo user1
Далее переходим в папку юзера, зайдем под ним, установим пароль и отредактируем файл ~/.bashrc:
cd /home/user1
su user1
passwd
nano .bashrc
Мой базовый .bashrc выглядит так
# If not running interactively, don't do anything
case $- in
    *i*) ;;
      *) return;;
esac

# don't put duplicate lines or lines starting with space in the history.
# See bash(1) for more options
HISTCONTROL=ignoreboth

# append to the history file, don't overwrite it
shopt -s histappend

# for setting history length see HISTSIZE and HISTFILESIZE in bash(1)
HISTSIZE=1000
HISTFILESIZE=2000

# check the window size after each command and, if necessary,
# update the values of LINES and COLUMNS.
shopt -s checkwinsize

# If set, the pattern "**" used in a pathname expansion context will
# match all files and zero or more directories and subdirectories.
#shopt -s globstar

# make less more friendly for non-text input files, see lesspipe(1)
[ -x /usr/bin/lesspipe ] && eval "$(SHELL=/bin/sh lesspipe)"

# set variable identifying the chroot you work in (used in the prompt below)
if [ -z "${debian_chroot:-}" ] && [ -r /etc/debian_chroot ]; then
    debian_chroot=$(cat /etc/debian_chroot)
fi

# set a fancy prompt (non-color, unless we know we "want" color)
case "$TERM" in
    xterm|xterm-color|*-256color) color_prompt=yes;;
esac

# uncomment for a colored prompt, if the terminal has the capability; turned
# off by default to not distract the user: the focus in a terminal window
# should be on the output of commands, not on the prompt
#force_color_prompt=yes

if [ -n "$force_color_prompt" ]; then
    if [ -x /usr/bin/tput ] && tput setaf 1 >&/dev/null; then
    # We have color support; assume it's compliant with Ecma-48
    # (ISO/IEC-6429). (Lack of such support is extremely rare, and such
    # a case would tend to support setf rather than setaf.)
    color_prompt=yes
    else
    color_prompt=
    fi
fi

if [ "$color_prompt" = yes ]; then
    if [[ ${EUID} == 0 ]] ; then
        PS1='${debian_chroot:+($debian_chroot)}\[\033[01;31m\]\h\[\033[01;34m\] \W \$\[\033[00m\] '
    else
        PS1='${debian_chroot:+($debian_chroot)}\[\033[01;32m\]\u@\h\[\033[00m\] \[\033[01;34m\]\w \$\[\033[00m\] '
    fi
else
    PS1='${debian_chroot:+($debian_chroot)}\u@\h \w \$ '
fi
unset color_prompt force_color_prompt

# If this is an xterm set the title to user@host:dir
case "$TERM" in
xterm*|rxvt*)
    PS1="\[\e]0;${debian_chroot:+($debian_chroot)}\u@\h \w\a\]$PS1"
    ;;
*)
    ;;
esac

# enable color support of ls and also add handy aliases
if [ -x /usr/bin/dircolors ]; then
    test -r ~/.dircolors && eval "$(dircolors -b ~/.dircolors)" || eval "$(dircolors -b)"
    alias ls='ls --color=auto'
    #alias dir='dir --color=auto'
    #alias vdir='vdir --color=auto'

    alias grep='grep --color=auto'
    alias fgrep='fgrep --color=auto'
    alias egrep='egrep --color=auto'
fi

# colored GCC warnings and errors
#export GCC_COLORS='error=01;31:warning=01;35:note=01;36:caret=01;32:locus=01:quote=01'

# some more ls aliases
alias ll='ls -alF'
alias la='ls -A'
alias l='ls -CF'

# Add an "alert" alias for long running commands.  Use like so:
#   sleep 10; alert
alias alert='notify-send --urgency=low -i "$([ $? = 0 ] && echo terminal || echo error)" "$(history|tail -n1|sed -e '\''s/^\s*[0-9]\+\s*//;s/[;&|]\s*alert$//'\'')"'

# Alias definitions.
# You may want to put all your additions into a separate file like
# ~/.bash_aliases, instead of adding them here directly.
# See /usr/share/doc/bash-doc/examples in the bash-doc package.

if [ -f ~/.bash_aliases ]; then
    . ~/.bash_aliases
fi

# enable programmable completion features (you don't need to enable
# this, if it's already enabled in /etc/bash.bashrc and /etc/profile
# sources /etc/bash.bashrc).
if ! shopt -oq posix; then
  if [ -f /usr/share/bash-completion/bash_completion ]; then
    . /usr/share/bash-completion/bash_completion
  elif [ -f /etc/bash_completion ]; then
    . /etc/bash_completion
  fi
fi
Все, подсистема готова к использованию… почти…
Установка X-сервера, Xfce и прочих GUI’шных приложений
Первая же проблема, на которую я натолкнулся — bash-completion в предлагаемом эмуляторе терминала работал, мягко говоря, некорректно. Кроме того, данный эмулятор не умеет вкладки, а каждый его экземпляр запускает все в новом пространстве процессов, с отдельным init’ом (который кстати не заменить). Мне захотелось нормальный эмулятор терминала, некоторых других GUI приложений, а так же панельку, чтоб это все быстро запускать.
Когда я гуглил этот вопрос, я наткнулся на множество проблем, вроде необходимости перевода dbus на tcp протокол. На данный момент всех этих проблем нет. В подсистеме нормально работают unix-domain-socket’ы и все спокойно общается через них.
Первым делом нам понадобится X-сервер, притом установленный в основную систему (в Windows). Лично я использую для этих целей VcXsrv — порт X11 на Windows. Официальный сайт указанный в about самой утилиты его сейчас не предоставляет, поэтому гуглим установщик и устанавливаем все по умолчанию.
Пока идет установка возвращаемся в терминал WSL, командой exit выходим обратно в root’а. Первым делом настроим русские локали:
locale-gen ru_RU
locale-gen ru_RU.UTF-8
update-locale
Далее установим некоторые компоненты Xfce. Можно конечно установить его целиком из мета-пакета, но большинство компонентов нам не понадобится, а модульная архитектура Xfce позволяет нам поставить только необходимое:
apt install -y xfce4-session xfce4-notifyd xfce4-appfinder xfce4-panel xfce4-quicklauncher-plugin xfce4-whiskermenu-plugin xfce4-xkb-plugin xfce4-settings xfce4-terminal xfce4-taskmanager mousepadЗапускать каждый раз окружение руками не очень удобно, поэтому я автоматизировал данный процесс. Для этого в основной системе создадим в удобном для нас месте папку, а в ней 3 файла для запуска:
- config.xlaunch — файл настроек для VcXsrv
<?xml version="1.0" encoding="UTF-8"?> <XLaunch WindowMode="MultiWindow" ClientMode="NoClient" LocalClient="False" Display="0" LocalProgram="xcalc" RemoteProgram="xterm" RemotePassword="" PrivateKey="" RemoteHost="" RemoteUser="" XDMCPHost="" XDMCPBroadcast="False" XDMCPIndirect="False" Clipboard="True" ClipboardPrimary="True" ExtraParams="" Wgl="True" DisableAC="False" XDMCPTerminate="False" /> -
x-run.vbs — WSL всегда запускается со своим эмулятором терминала, если его закрыть — завершатся все его дочерние процессы. Чтоб данное окно не мозолило глаза, неплохо его запускать скрытым. К счастью в Windows встроен интерпретатор VBScript, который позволяет это сделать в одну строчку:
WScript.CreateObject("Shell.Application").ShellExecute "wsl", "cd /home/user1; DISPLAY=:0 LANG=ru_RU.UTF-8 su user1 -c xfce4-session", "", "open", 0Поясню, что здесь происходит. Мы говорим VBscript выполнить приложение wsl с параметром
cd /home/user1; DISPLAY=:0 LANG=ru_RU.UTF-8 su user1 -c xfce4-session, папка запуска нам не важна, поэтому пустая строка, действие open — запуск, 0 — скрытый режим. Самому wsl мы отдаем команду на выполнение: переход в папку пользователя, затем с установкой переменных окружения DISPLAY (дисплей X-сервера) и LANG (используемая локаль) мы запускаем xfce4-session от имени нашего пользователя user1 (благодаря команде su) - start.bat — batch файл для запуска, по желанию его можно засунуть в автозагрузку
start config.xlaunch
wscript x-run.vbs
Далее можем запустить наш start.bat и настроить панель Xfce под себя. Замечу, что здесь я наткнулся на еще одну проблему — панель прекрасно отображается поверх всех окон, но вот выделить себе место, как панель на рабочем столе Windows она не может. Если кто знает решение данной проблемы, поделитесь в комментариях.
Ну и под конец данной части, скриншот моего рабочего стола:

Взаимодействие окружения Windows и окружения подсистемы Linux
Запускать Linux приложения напрямую из Windows можно через те же 3 команды — bash, wsl или ubuntu. Не забываем, что по умолчанию запуск идет от root, поэтому стоит понижать привилегии через su, так же нужно не забывать передавать переменную окружения DISPLAY=:0 если приложению требуется X-сервер. Так же нужно менять папку, из которой должно работать приложение, через cd внутри WSL. Пример, посчитаем md5 для file.txt на диске D средствами Linux’овой md5sum:
wsl md5sum < d:\file.txtДоступ к файловой системе Linux так же имеется, лежит она в %localappdata%\Packages\CanonicalGroupLimited.UbuntuonWindows_79rhkp1fndgsc\LocalState\rootfs. Читать таким образом файлы можно, а вот писать — не желательно, можно поломать файловую систему. Думаю проблема в том, что Windows не умеет работать с правами и владельцами файловой системы Linux.
Из Linux так же можно запускать Windows приложения. Просто запускаем exe-шник и он выполнится в основной системе.
Диски Windows монтируются в /mnt в соответствии со своими буквами в нижнем регистре. Например диск D будет смонтирован в /mnt/d. Из Linux можно свободно читать и писать файлы Windows. Можно делать на них симлинки. Права у таких файлов всегда будут 0777, а владельцем будет root.
Сетевой стек у подсистемы общий с Windows. Сервер поднятый в Linux будет доступен на localhost в Windows и наоборот. Однако unix-domain-socket для Windows будет просто пустым файлом, работать с этим можно только внутри Linux. Выход во внешнюю сеть у Linux так же есть, в том числе можно слушать порты, если этого не запрещает фаервол.
ifconfig в Linux и ipconfig в Windows выдают одинаковую информацию о сетевых интерфейсах.
Из диспетчера задач Windows можно спокойно прибить процесс внутри подсистемы Linux. Однако Linux увидит только свои процессы.
Особенности, ограничения и подводные камни
Ядро Linux в WSL не настоящее. Это всего лишь прослойка-эмулятор, которая часть Linux-специфичных задач выполняет сама, а часть проксирует напрямую в ядро winNT. Большая часть api в нем реализована, но не все. Свое ядро собрать не получится, как и не получится подключить модули ядра (.ko, Kernel Object).
Init процесс у WSL тоже свой и заменить его, например, на system.d не выйдет. У меня давно есть желание написать менеджер демонов на go, который бы работал с файлами юнитов system.d и предоставлял бы схожий интерфейс, да все руки не доходят.
Нет поддержки openFUSE, соответственно примонтировать виртуальную или удаленную файловую систему не получится. Так же нельзя сделать mount из файла, mount вообще ничего кроме bind здесь, похоже, не умеет.
Так же нет никакой возможности разбить файловую систему Linux на несколько разделов/дисков.
Прямой доступ к железу практически отсутствует. Все таки мы находимся в песочнице Windows, а не в полноценном Linux. /dev и /sys заметно пустуют, в них лишь проц да виртуальные устройства. Доступ к GPU — только через X-сервер, напрямую — никак, так что нейросети обучать придется в Windows.
В JS разработке столкнулся с тем, что electron.js отказался запускаться в WSL, пришлось дублировать окружение node.js в Windows.
Итоги
Статья получилась довольно длинной, надеюсь, что она окажется еще и полезной.
WSL для меня лично оказался инструментом вполне юзабельным, решающим мои задачи fullstack backend разработчика. Виртуалка с Linux за полгода так и не понадобилась. По общим ощущениям Windows+WSL намного функциональнее, чем Linux+Wine.
Пока писал статью, обнаружил, что в Microsoft Store появилась сборка WSL с Debian 9.3, данный дистрибутив мне более симпатичен, чем Ubuntu, поэтому буду пробовать ставить.
Best Linux Emulators for Windows 10/8.1/8/7 PC. Run Ubuntu OS on your PC with this best Emulation system which we tested.
Windows is the most used and popular operating system for the computer that people are using nowadays. However, three are many tasks that you can only do on a Linux operating system. If you wanna experience some cryptography, password cracking of if you just wanna learn how to use a Linux distro, you can download an emulator on windows to run the Linux distro. Ubuntu is one of the easiest Linux to operate. It has an easy learning curve i.e., you will learn to operate Ubuntu in a month. Even more, it is not a hassle to run a Linux emulator on Windows. You just need to have at least 4GB of RAM and dual-core processor.
For Developers, using these Ubuntu Linux Emulators is a great tool where they can test their Linux app or command in different environments. If you’re also excited about Ubuntu Linux Emulators as I am, then let’s get to explore some of the best Linux Emulators out there for windows PC. Emulators can help you to run Ubuntu or other Linux distros easily on your Windows PC. To know which emulator you should use, read the following list of emulators, and select your desired one.
Best Ubuntu Emulator for Windows
Here are the Best Ubuntu Emulators for Windows 10, 8.1, 8, 7 to perform Ubintuo OS Functions on your Windows PC.
1. Virtual box

Virtualbox is a free hypervisor hosted by Oracle. It allows users to create multiple virtual machines to run a different operating system on your system. The UI is very simple and understandable, and you can achieve Linux emulation on Windows without any hassle, it’s that easy. Virtualbox allows you to install Linux distributions inside an already running OS, and it is the perfect option if you want to install a fully functional Linux OS on your system.
The Performance of the virtual box is great due to x86 assembly code and optimization of C, C++. Bugs are fixed very often, and new features are added in almost every update by oracle. Even more, You can power resource-concentrated servers and test various Linux software. VM also allows third-party applications to optimize the Virtual box.
Download Virtual Box
2. VMware workstation
VMware Workstation is very much similar to Oracle Virtual box. Its hypervisor allows you to run Linux systems locally on your 64-bit Windows. It is professional software. If you purchase the application, you can have access to some top-notch features for gaming and different purposes. In the free version, there are some limitations. However, the free version is enough to run a Linux distro on your system without any hassle. The UI is also pretty clean and simple.
The Emulator comes with ready-made set up Virtual Machines for Linux distros. It supports OpenGL and 3GB of shared video memory in the free version. However, you can go beyond these limits in the premium version. Even more, VMware Workstation has built-in support for DirectX 10.1, 4K resolution, Wayland, SSH, and Virtual networks.
Download VMware Workstation
3. QEMU
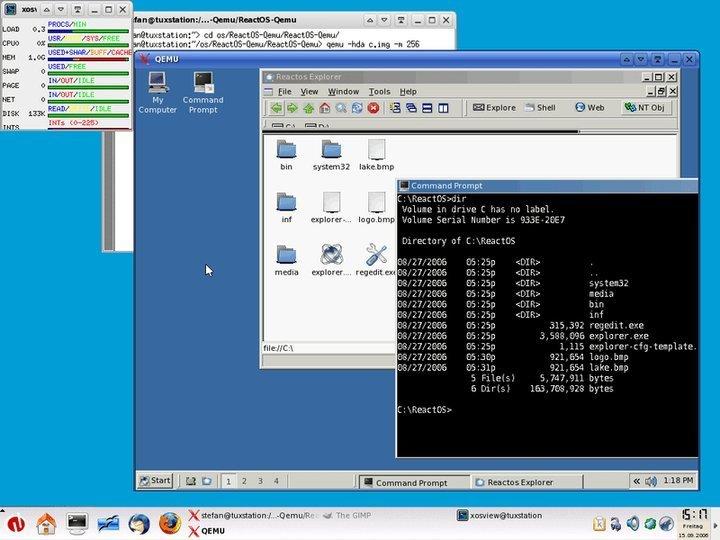
The QEMU emulator is unique among all the emulators because it can emulate architecture, and it supports an extensive range of hardware. QEMU is a very stable application. It is written in C and supports GNU GPL. If you have sufficient RAM and CPU power, then you won’t face any problem using QEMU. The virtual machine QEMU emulator has native-level Performance, and the application is updated frequently.
The features QEMU provide are pretty wholesome. You can save the current state of the Linux system as snapshots and can use that snapshot to run later. Even more, you can also utilize the peripherals, including hard drives, CD, network data cards, audio drives, thumb drives and USB devices directly in QEMU.
Download QEMU
4. Hyper-V
Windows Server virtualization is also known as Hyper-v, developed by Microsoft. It is a powerful and robust emulator. It can run and emulate almost any operating system like POSIX operating systems, including Linux and BSD, etc. The application makes better use of hardware like QEMU. However, the application tends to consume too much RAM, which could make your experience slow.
Hyper-V creates a virtual partition for the OS to run, which remains isolated. Thus provides more security. You can test malware etc. The resource protection mechanism doesn’t let the VM clog up your system resources. Even more, it supports persistent memory, encrypted network virtualization, d.VMMQ, cloud backup, and innovative administration tools. Moreover, you can manage multiple guest OS using PowerShell.
Download Hyper-V
5. Cygwin
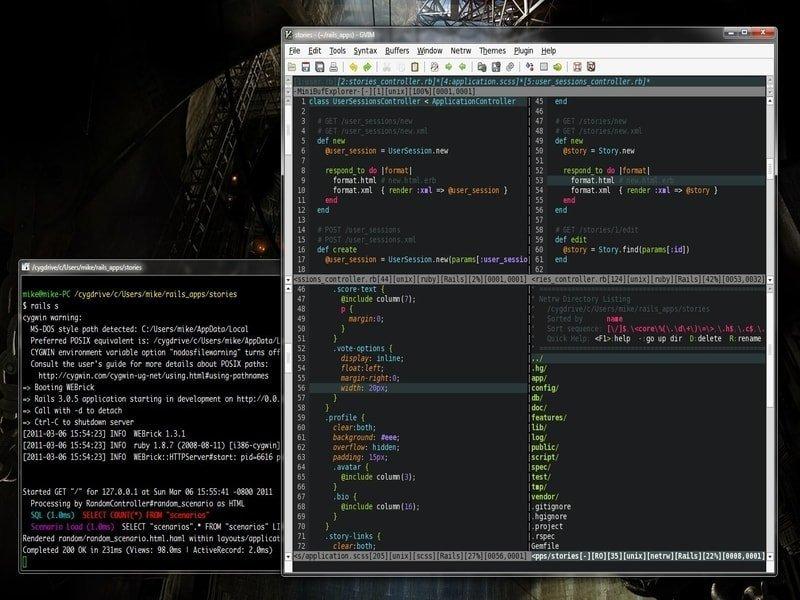
Cygwin is nor exactly an emulator. It runs the Linux apps on Windows by recompiling them for windows. Therefore it is a simulator. However, if you are low on RAM and power and you wanna experience some Linux apps. This is the best option. Cygwin has POSIX-compatible provisions and has a collection of GNU and Open Source tools for Linux distros. It works on most of the x86 32 bit and 64-bit versions of Windows and has regular updates.
The application comes with pre-packed runtime POSIX API inside the Windows and has a large tool collection for Linux and BSD including X Window System, K Desktop Environment, Apache, GNOME, and TeX. Moreover, the application also allows you to run the Linux shell, file, and system utilities like terminals, remote login, etc.
Download Cygwin
6. AndLinux
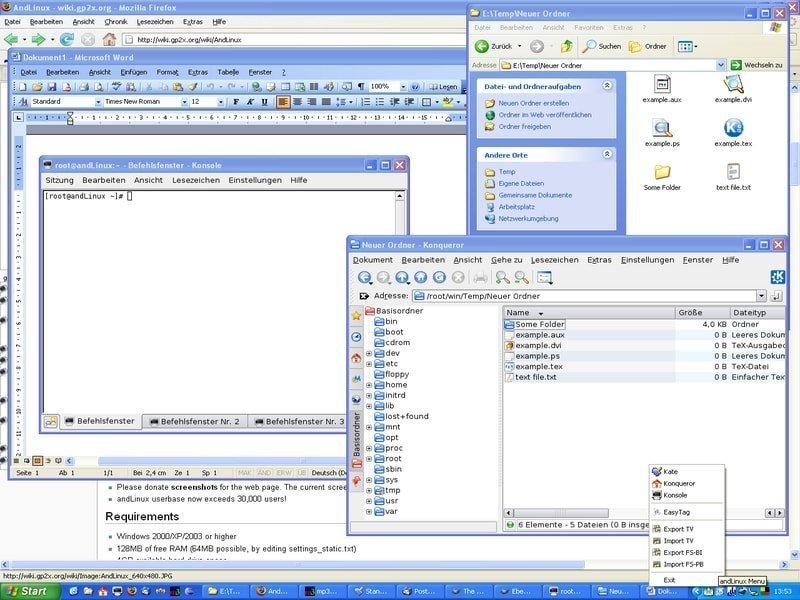
The AndLinux application is designed to run the Linux environment in the Windows system. It has Ubuntu pre-installed using coLinuxkernel for the Standard X server. Thus we can tell that the application is pretty powerful and robust. Since it requires no virtual machine to emulate, its Performance is outstanding. The application implements OS-level virtualization to emulate Linux, which results in a smooth experience.
Along with the Synaptic package manager and Nautilus file manager AndLinux utilizes KDE and XFCE Linux desktop environment. Thus, enabling Windows users to run Linux scripts from Windows scripts using command prompt. Even more, AndLinux is completely open-source and comes under the GNU GPL license.
Download andLinux
7. Multi Emulator Super System
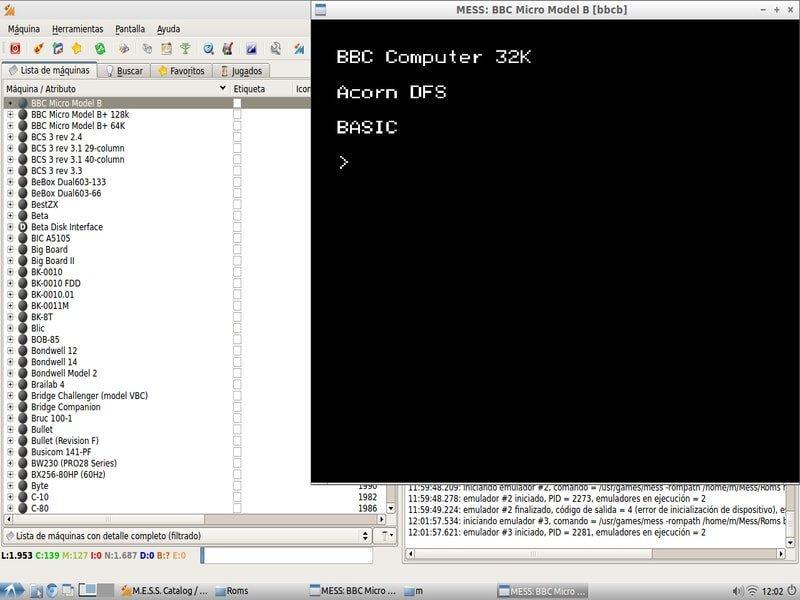
The Multi Emulator Super System is very popular among gamers and popularly known as MESS. It is the oldest and the most versatile Linux emulators application for Windows, which can emulate over a thousand different guest systems, from game consoles to Linux and Mac. The software is maintained by the developers of MAME; Although there are many emulators, MESS is unique among all the other emulators because of its accuracy.
The application is a universal solution for emulation. MESS is open-source. Thus, you will need no permission if you want to tweak the Emulator. Moreover, MESS identifies portability as one of its gem features. Evermore, it can run on a vast range of host systems.
Download Multi Emulator Super System
8. TopologiLinux
TopologiLinux is not a traditional Linux emulator. It is open-source software that empowers Windows users for a robust Linux experience. The Linux runs under Windows 2000, XP, and Vista editions using coLinux. However, it is sad that tolologiLinux lacks support for recent editions of Windows.
The application utilizes coLinux to run, coLinux is an application that allows parallel executions of both the Linux kernel and the Windows NT kernel. Thus, there is no need for a partition of the host Windows system. Moreover, it has a free GNU GPL license, hence allows modifications. Even more, it supports GNOME, KDE, and XFE.
Download TopologiLinux
9. Wubi

Wubi is a system utility application that allows you to install Ubuntu on your system without a repartition. It installs Ubuntu within the Windows, and on boot, it will give you the option to choose the operating system that you wanna run. Though the developers have discontinued Wubi, it is the most popular app amount the Linux enthusiasts due to its simplicity and potential.
The application is incredibly lightweight on;y 2.4MB in size and comes with a GNU GPL license, which allows users to modify the application. Even more, users are allowed to select their own desired desktop environment. Moreover, If you want to uninstall Ubuntu. You can uninstall Ubuntu via Wubi app.
Download Wubi
10. Parallels Workstations
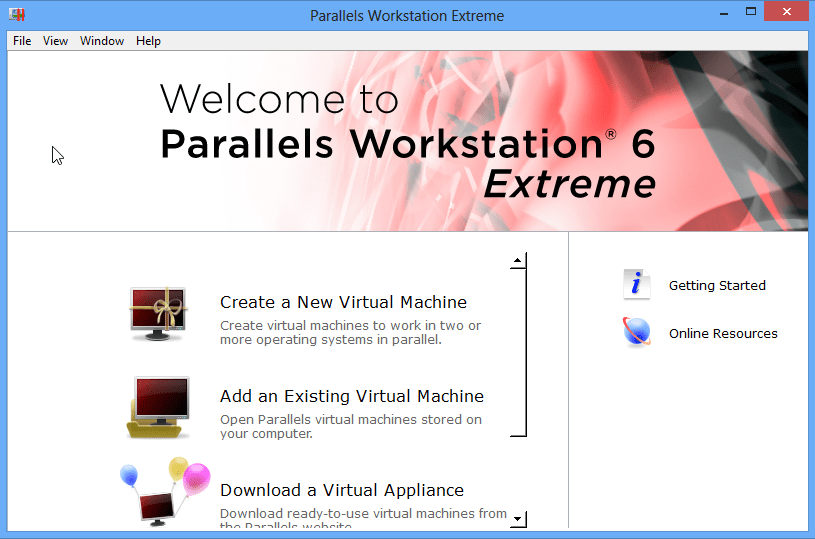
Parallel Workstation allows users to create Linux Virtual machines inside Windows and offers robust features like full system emulation. It is a full-fledged hypervisor that can emulate everything, including video and network adapters, along with hard drive adapters. Even more, it can virtualize 64-bit processors with NX and AES-NI very easily. Recently the product has been disabled for Windows and Linux operating systems, but you can still get the older versions that work just fine.
The application comes with pre-built drivers for parallel ports and USB devices. It also supports VGA and SVGA graphics with VESA VBE 3.0 and a maximum 256 MB video ram, which is enough to run most of the application. However, if you buy the premium version, then you can remove these limitations. It can support up to 16 SATA devices and four IDE devices.
Download Parallel Workstation
11. Bhyve
The Bhyve is a BSD based Hypervisor capable of x86 emulation and can also emulate Linux distros. The application is robust and offers various options for the hypervisor to run Linux on a Windows system. It is a lightweight application, perfect if you don’t want to install a resource-heavy application. However, you can use Bhyve to run windows in the windows also.
The Linux distros Bhyve supports are RHEL, CentOS, Debian, Fedora, OpenSUSE, and Ubuntu, without any trouble. The application is also capable of manipulating AHCI devices and out of box experience, though it supports UEFI, Hyper-V, and OmniOS. However, the application is still in development mode, so there are frequent updates with different features.
Download Bhyve
12. coLinux
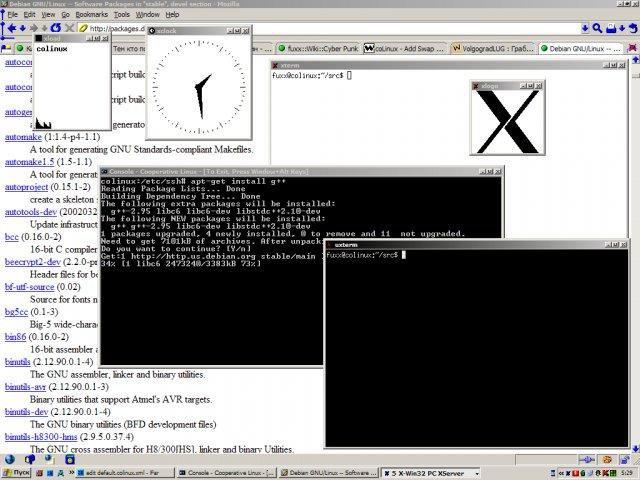
The coLinux is a virtualization software allowing you to run both window and Linux simultaneously. The application is innovative and robust because it utilizes the distributed kernel technology and provides a sophisticated mechanism that allows you to run both Windows and Linux on your system. This makes the coLinux different from other emulators that are out there. It gives you full control over the host system resources.
The application comes with pre-built support for every popular Linux distros like Debian, Ubuntu, Fedora, and Gentoo. However, you have to install X-Windows servers in order to run graphical Softwares. Moreover, coLinux also allows you to emulate network adapters using TAP, PCAP, NDIS, and SLiRP. coLinux has some compatibility with 64-bit systems.
Download coLinux
13. Bochs
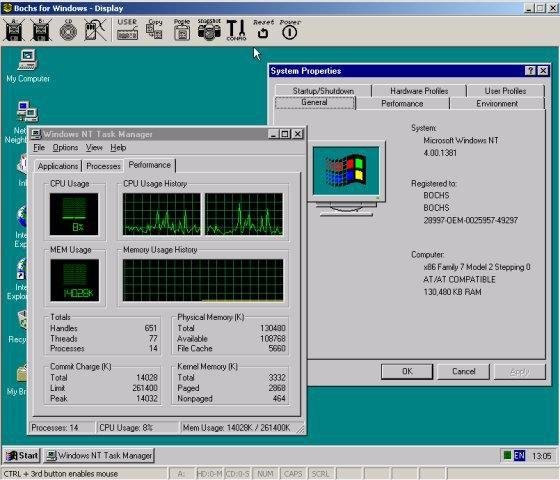
Bochs is a hypervisor that is capable of emulating a full-fledged Linux environment inside Windows. The application is written in C++. Thus it is lightweight, accurate and can emulate a wide range of system architectures, including x86-64 Intel and AMD processors. However, there are a few bugs causing the app to crash sometimes when the guest system runs resource-heavy applications.
Bochs is designed to emulate all the DOS, Linux, and Windows operating systems. Though it is programmed in C++, it is also capable of compiling early 386 CPUs. The application comes with GNU GPL licensed, which is a freeware, you will only need to give a little credit to the developers for any tweaking.
Download Bochs
14. JPC
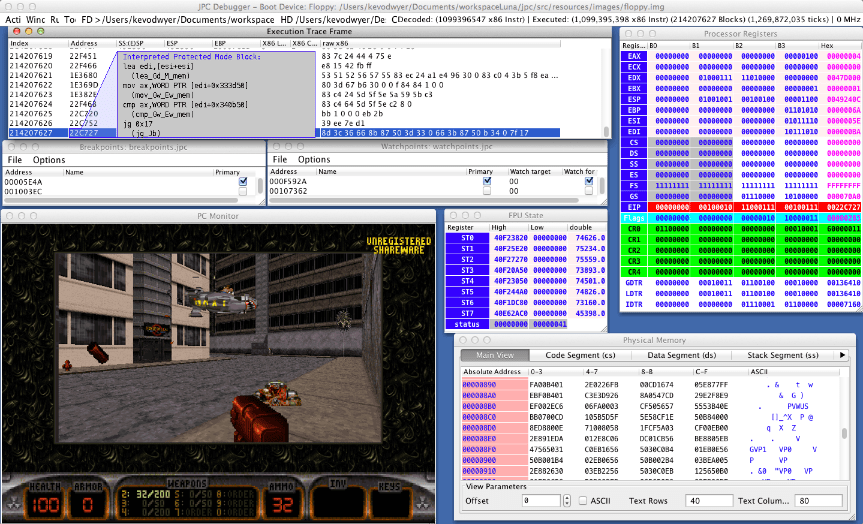
The JPC is a Java-based emulator capable of emulating various Linux Distros and Windows. It uses a Java Virtual Machine that is x86 Emulator to emulate operating systems. The application is very portable and runs on almost any platform. JPC runs very smoothly on older hardware, but if you are running some heavy-resource application that it might cause trouble.
It has an inbuilt debugger that you can use to find bugs during Linux emulation, and it also supports snapshots. You can save a snapshot of the guest Linux operating system and can access the system in the same condition at any time. Though it has pre-built network cards and audio cards thus it can emulate network adapters and audio cards.
Download JPC
15. JSLinux

The JSLinux is a web application that allows you to use a remote Linux system in your browser. The software is totally written in javascript, and it is opensource. Thus it gives you reliable access to access Linux anywhere from the Internet. The only thing you will need is a fast Internet connection.
The application can be used for testing JS applications for benchmarks though it is developed via JavaScript stack. However, it offers six different Linux distros with both console and X-Windows based interfaces. You can connect worldwide networks using Linux environments. Moreover, it doesn’t require any installation, and you just need an updated version of your browser.
Download JSLinux
The Editor’s Desk
So these are some of the best Linux emulators you can install today. Some of them are free, and some come with a shareware license. But all of them have great performance and distinctive features. You can easily run any form of Linux OS, including Ubuntu, Mint OS, Kali, etc. They also serve as a great tool to learn the Linux Operating system from deep inside. So install one today and explore the features
If you’ve any thoughts on Best Ubuntu (Linux) Emulator for Windows [10/8.1/8/7], then feel free to drop in below comment box. Also, please subscribe to our DigitBin YouTube channel for videos tutorials. Cheers!