
Table of Contents
1
In the past decade, we could not live without computer. But now, smartphones are dominating the world! Some of the apps and games are exclusive to mobile devices. However, the display of smartphones are quite limited when comparing to computers. So, it could be a little difficult or tired to work or play games on smartphones.
To fix this issue, Android Emulator comes in. It is a dedicated solution to let you run mobile apps and games on a PC or Mac. Though this is a quite old topic and you could find plenty of Android emulator on market, it is still hard to pick up the right Android emulator for Windows 11 PC or laptop. This is the main topic we will cover for Windows 11 users.
What is the Android Emulator?
Android Emulator is a software program that allows users to run Android applications on a computer or laptop. It is a virtual machine that runs on the same hardware as a physical Android device, allowing users to test and debug their applications without having to use a physical device.
It is an amazing tool for developers and testers who want to test their applications on multiple devices without having to buy multiple physical devices. It also allows developers to test their applications on different versions of the Android operating system, which can be useful for ensuring compatibility across different versions of the OS.
Benefits of Using Android Emulator on a PC
Android Emulator is a powerful tool that can be used to run Android apps and games on a PC. This can be a great way to test out apps and games before committing to buying a device, or to simply enjoy the experience of playing Android games on a larger screen. Here are some of the benefits of using an Android Emulator on a PC.
1. Increased Performance
One of the biggest benefits of using an Android Emulator on a PC is the increased performance. PCs generally have more powerful hardware than mobile devices, so running an Android Emulator on a PC can result in smoother and faster performance. This can be especially useful for playing games, as the increased performance can make the experience much more enjoyable.
2. Easy Access to Apps and Games
Another great benefit of using an Android Emulator on a PC is the easy access to apps and games. With an Android Emulator, users can easily download and install apps and games from the Google Play Store, as well as from third-party sources. This makes it much easier to find and install the apps and games that you want to use.
3. Improved Compatibility
Using an Android Emulator on a PC can also improve compatibility with certain apps and games. Some apps and games are designed specifically for Android devices, and may not work properly on other platforms. By using an Android Emulator, users can ensure that the apps and games they want to use will work properly on their PC.
4. Cost-Effective
Using an Android Emulator on a PC can also be a cost-effective way to enjoy Android apps and games. Instead of buying an Android device, users can simply download and install an Android Emulator on their PC. This can save a lot of money, as users can enjoy the same apps and games without having to purchase a device.
5. Easy to Use
Finally, using an Android Emulator on a PC is also very easy to use. Most Android Emulators are designed to be user-friendly, so users can quickly and easily get up and running. This makes it easy for anyone to enjoy Android apps and games on their PC, regardless of their technical knowledge.
How to Choose an Android Emulator for Windows 11 PC in 2023
Honestly, it is really a a daunting task to choosing a proper Android emulator as there are so many candidates available. It can be very difficult to know which one is right for you. Fortunately, there are some key factors to consider when selecting an Android emulator that can help you make the best decision.
1. Compatibility: The first thing to consider when choosing an Android emulator is compatibility. Make sure the emulator you choose is compatible with your device and operating system. Some emulators may only work with certain versions of Android or certain devices, so it’s important to check this before downloading.
2. Performance: Performance is another important factor to consider when choosing an Android emulator. You want an emulator that can run smoothly and quickly, so make sure to read reviews and test out the emulator before making your final decision.
3. Features: Different Android emulators offer different features. Some may offer more advanced features than others, so it’s important to consider which features are most important to you when selecting an emulator.
4. Price: Some Android emulators are free, while others may require a subscription or one-time purchase. Make sure to factor in the cost when making your decision.
Android emulator is a quite competitive niche. There are tons of free Android emulator available on the market and it is not an easy job to find the right one for you as each one has its own needs and the computer specs are different.
We now pick up the 7 best free Android emulator you can choose from so you can run Android apps and play mobile games on a Windows 11 PC.
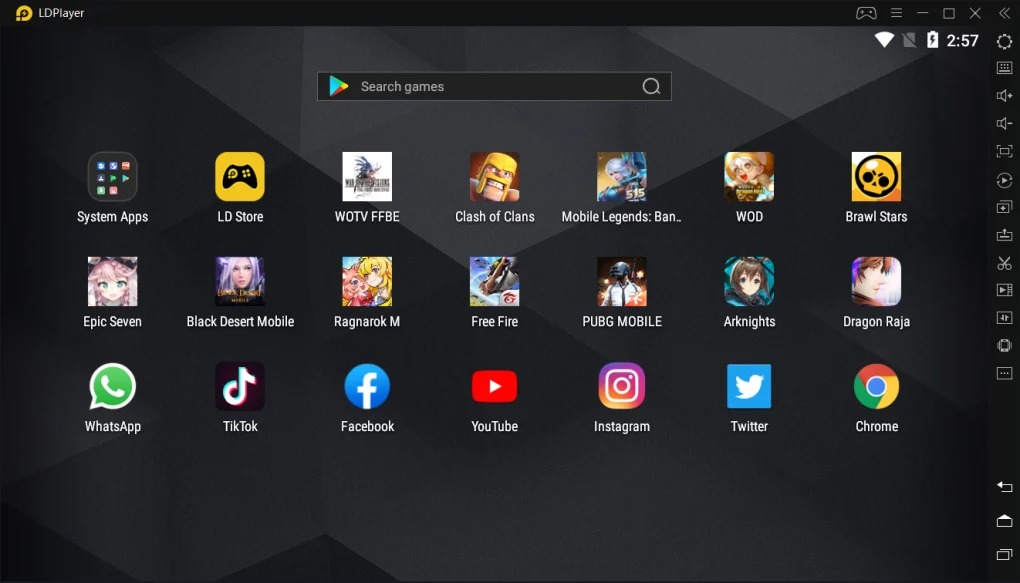
LDPlayer – The Fastest Android Emulator for PC
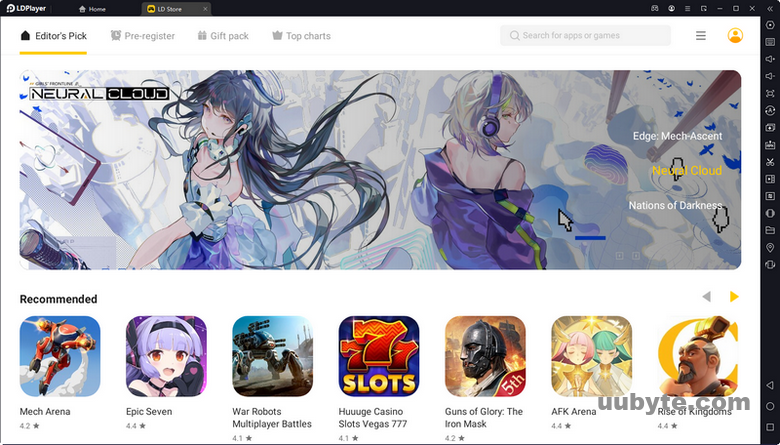
LDPlayer is an Android emulator for PC that allows users to play Android games on their computers. It is designed to provide a smooth gaming experience, with features such as key mapping, multi-instance, and gamepad support. It also has a built-in Google Play Store, so users can easily download and install their favorite apps and games.
LDPlayer is a great tool for gamers who want to play Android games on their PCs. It offers a variety of features that make it easy to customize and optimize the gaming experience. Here are some of the benefits of using LDPlayer:
1. Key Mapping: LDPlayer allows users to customize the controls of their games, so they can play with the most comfortable settings. This feature is especially useful for gamers who are used to playing on consoles or other devices.
2. Multi-Instance: LDPlayer allows users to run multiple instances of the same game, so they can play with multiple accounts or characters at the same time. This is great for gamers who want to level up their characters or try different strategies.
3. Gamepad Support: LDPlayer supports gamepads, so users can enjoy a more immersive gaming experience. This is great for gamers who want to play their favorite games with a controller.
4. Google Play Store: LDPlayer has a built-in Google Play Store, so users can easily download and install their favorite apps and games. This is great for gamers who want to access the latest games and apps.
Pros:
1. Easy to Use: LDPlayer is very easy to use and set up, allowing users to quickly get started with playing their favorite Android games on their PCs. The user interface is intuitive and straightforward, making it easy to navigate and customize settings.
2. High Performance: LDPlayer offers high performance, allowing users to enjoy smooth and lag-free gaming experiences. It also supports a wide range of hardware configurations, allowing users to customize their gaming experience to their needs.
3. Customization Options: LDPlayer offers a wide range of customization options, allowing users to customize the emulator to their needs. This includes options such as changing the resolution, setting up key bindings, and more.
4. Support for Multiple Platforms: LDPlayer supports a wide range of platforms, including Windows, Mac, and Linux. This allows users to enjoy their favorite Android games on any platform.
Cons:
1. Limited Compatibility: LDPlayer is not compatible with all Android games and apps, so some games may not run properly on the emulator.
2. Limited Support: LDPlayer does not offer much in the way of customer support, so users may have difficulty getting help with any issues they encounter.
3. Ads: LDPlayer displays ads, which can be annoying for some users.
Download LDPlayer for Windows 11: https://www.ldplayer.net/
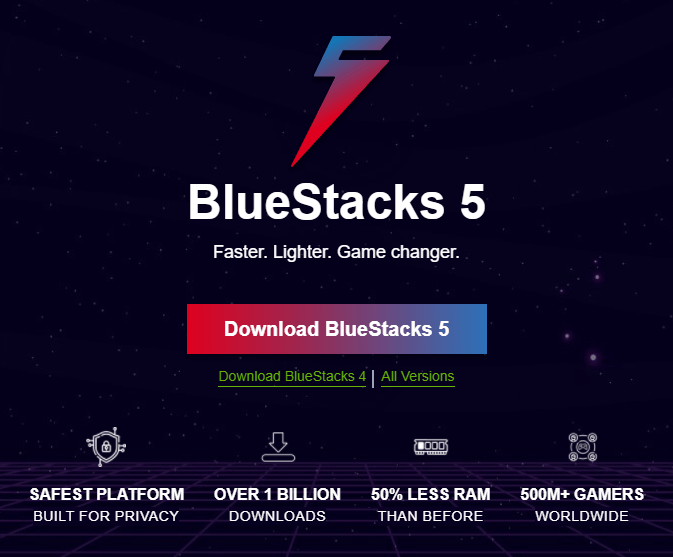
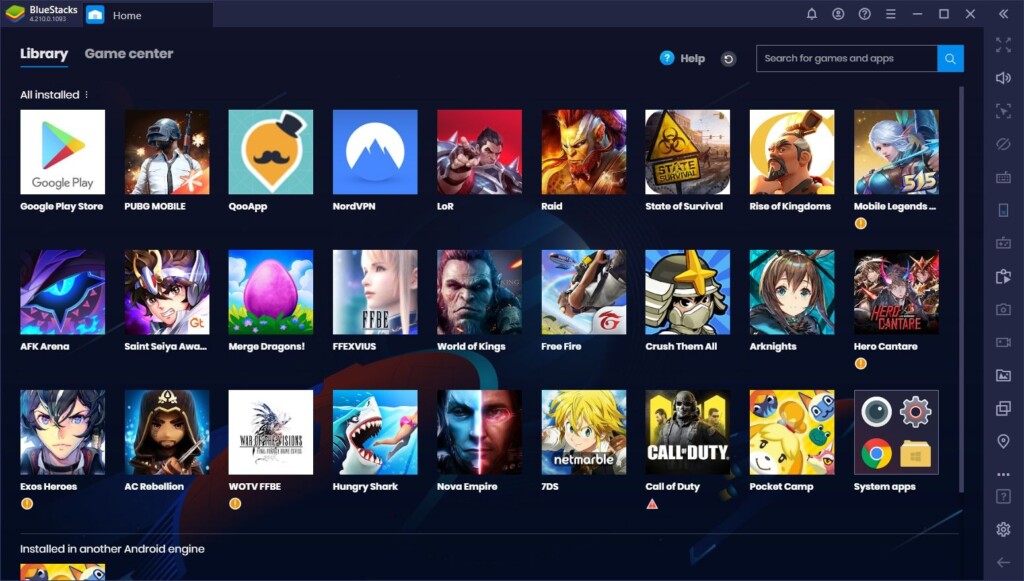
BlueStacks – The Most Popular Android Emulator for PC
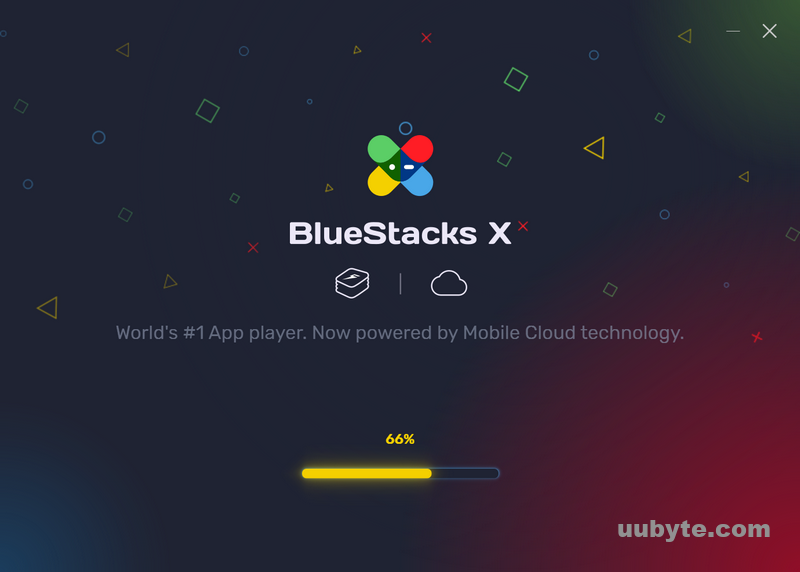
BlueStacks is an Android emulator that allows users to run Android apps and games on their Windows or Mac computer. It is a popular choice for gamers who want to play Android games on their PC, as it provides a seamless experience with no lag or stuttering. It also allows users to access their favorite Android apps on their computer, such as social media, streaming services, and more.
BlueStacks is a great choice for those who want to experience Android apps and games on their computer. It is easy to install and use, and provides a smooth, lag-free experience. It also allows users to customize their experience with various settings, such as resolution and graphics quality.
Pros:
1. Easy to install and use: BlueStacks is easy to install and use, allowing users to quickly get up and running with their favorite Android apps and games.
2. Seamless experience: BlueStacks provides a seamless experience with no lag or stuttering, making it ideal for gamers who want to play Android games on their PC.
3. Customizable experience: BlueStacks allows users to customize their experience with various settings, such as resolution and graphics quality.
4. Access to Android apps: BlueStacks allows users to access their favorite Android apps on their computer, such as social media, streaming services, and more.
Cons:
1. Compatibility issues: Some apps and games may not be compatible with BlueStacks, which can be a problem for users who want to access certain apps or games.
2. Limited features: BlueStacks is limited in terms of features, and does not offer the same level of customization as other Android emulators.
3. Security concerns: Some users may be concerned about the security of their data when using BlueStacks, as it is not as secure as other Android emulators.
Download BlueStacks Android Emulator: https://www.bluestacks.com/
NoxPlayer – Best Free Android Emulator for Beginners
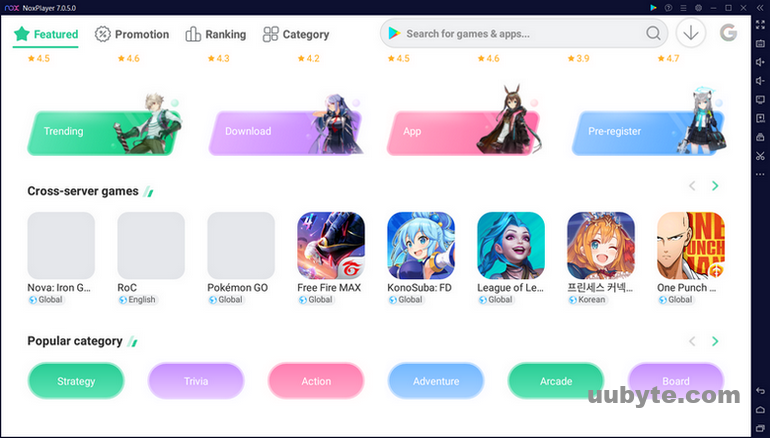
NoxPlayer is a free Android emulator that allows users to play Android games and apps on their Windows and Mac computers. It is developed by BigNox, a Chinese company that specializes in Android emulators. The emulator provides a virtual Android environment on your computer, allowing you to run Android apps and games without having to purchase a physical device.
NoxPlayer is a great choice for those who want to play Android games on their computer. It is easy to install and use, and it provides a smooth gaming experience. The emulator also supports multiple accounts, allowing you to play multiple games at the same time. Additionally, NoxPlayer is compatible with most popular Android games and apps, making it a great choice for those who want to experience the latest Android games and apps on their computer.
Pros:
1. Easy to install and use: NoxPlayer is easy to install and use, making it a great choice for those who want to play Android games on their computer.
2. Smooth gaming experience: NoxPlayer provides a smooth gaming experience, allowing users to enjoy their favorite Android games without any lag or stuttering.
3. Multiple accounts: The emulator supports multiple accounts, allowing users to play multiple games at the same time.
4. Compatible with most popular Android games and apps: NoxPlayer is compatible with most popular Android games and apps, making it a great choice for those who want to experience the latest Android games and apps on their computer.
Cons:
1. Limited customization options: NoxPlayer does not offer many customization options, making it difficult to customize the emulator to suit your needs.
2. Limited support: NoxPlayer’s support is limited, making it difficult to get help if you encounter any issues.
3. Ads: NoxPlayer displays ads, which can be distracting and annoying.
Windows Subsystem for Android – The Native Android Emulator by Microsoft
Windows Subsystem for Android (WSL) is a feature of the Windows 10 operating system that allows users to access and run Android applications on their Windows 10 devices. This feature was first introduced in the Windows 10 Anniversary Update and has since been improved and expanded upon. WSL provides an environment for running Android applications on Windows 10 devices, allowing users to experience the same Android experience as they would on an Android device.
The main benefit of WSL is that it allows users to access and run Android applications on their Windows 10 devices. This provides a great way for users to access the same apps and services they would on an Android device, without having to purchase a separate device. Additionally, WSL allows users to access the same Android features they would on an Android device, such as notifications, widgets, and more.
Using WSL is fairly straightforward. First, users must enable the Windows Subsystem for Android in the Windows 10 Settings app. Once enabled, users can then install and launch Android applications from the Microsoft Store. Additionally, users can also sideload Android applications from other sources.
Pros:
1. Access to the same Android applications and services as on an Android device.
2. Ability to access the same Android features as on an Android device, such as notifications, widgets, and more.
3. Easy to set up and use.
4. Cost-effective solution for accessing Android applications on Windows 10 devices.
Cons:
1. Not all Android applications are available on the Microsoft Store.
2. Performance may not be as good as on an Android device.
3. Some features may not be available on WSL, such as Google Play Services.
4. Security risks associated with side loading Android applications.
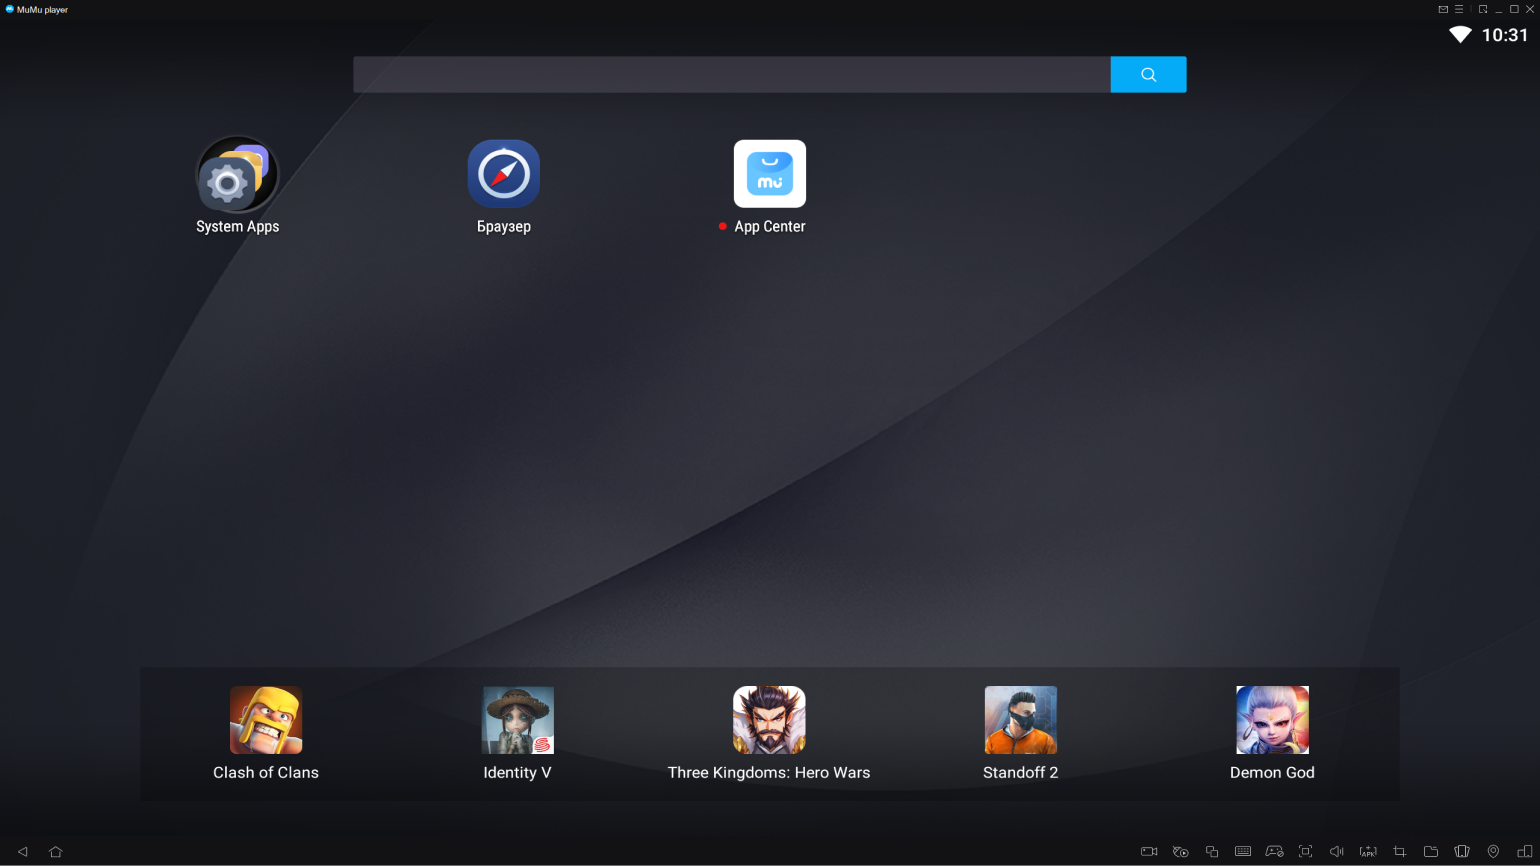
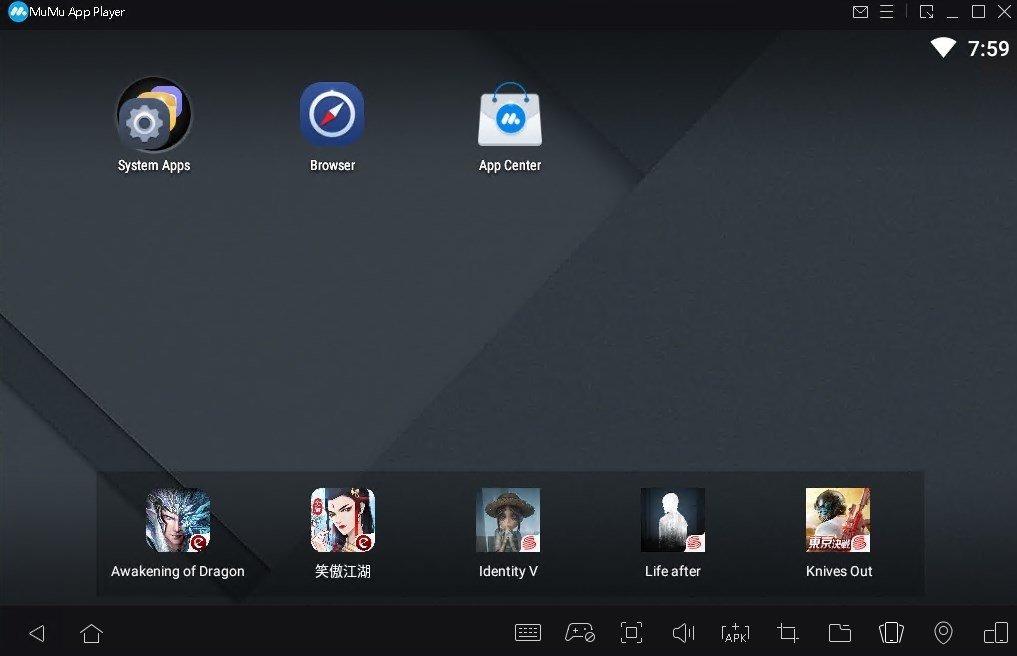
MuMuPlayer – Best Free Android Emulator for Budget PC
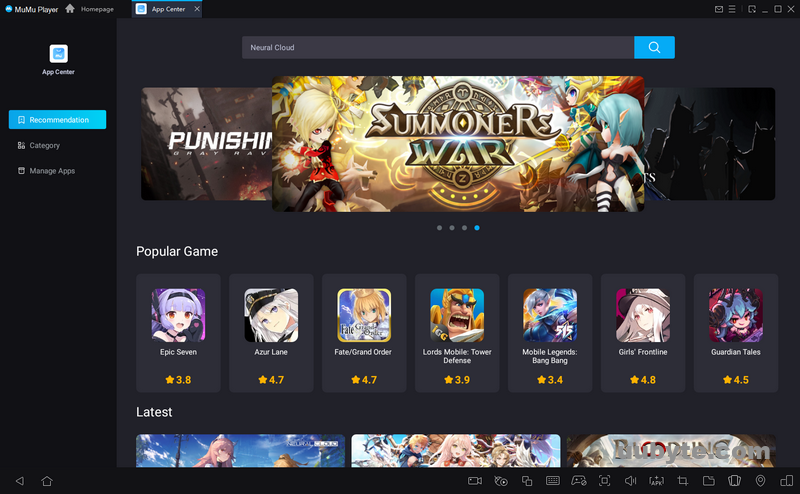
MuMu Player is a powerful Android emulator developed by Netease, a Chinese internet technology company. It is designed to provide a fast and reliable Android experience on Windows PCs. The emulator is based on Android 5.1 and supports a wide range of hardware configurations, including Intel and AMD processors, as well as Nvidia and AMD graphics cards.
MuMu Player is easy to install and use. It requires no additional setup and can be launched directly from the Windows Start menu. Once installed, users can access the Google Play store and download their favorite apps and games. The emulator also supports a wide range of Android versions, from Android 4.4 KitKat to the latest Android 12.
In addition, MuMu Player is known for its fast performance and low resource consumption. It is also highly customizable, allowing users to change the resolution, RAM, and CPU cores to best suit their needs. The emulator also supports a wide range of peripherals, such as gamepads, keyboards, and mice.
MuMu Android Emulator is a great choice for those looking for a reliable and fast Android experience on their Windows 11 PC. It is easy to install and use, and provides a wide range of features and customization options. The emulator is also highly compatible with a wide range of hardware configurations and peripherals. However, it is not compatible with Mac OS or Linux, so users of those operating systems will need to look elsewhere for an Android emulator.
Download MuMU Player: https://www.mumuglobal.com/
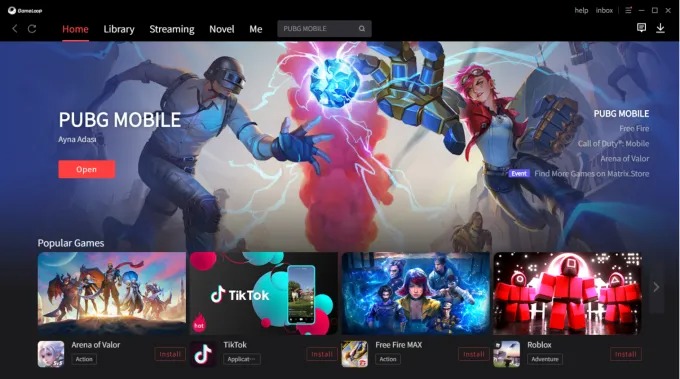
Gameloop – Dedicated Android Emulator for Playing Mobile Games
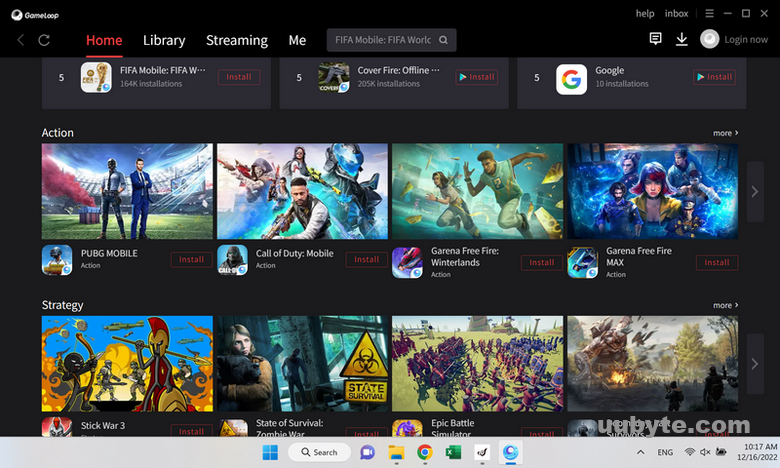
Gameloop is a free Android emulator developed by Tencent that allows users to play mobile games on their PCs. It is designed to provide gamers with an optimized gaming experience, allowing them to play their favorite mobile games with the same controls as a console or PC game. Gameloop also supports the use of a mouse and keyboard, making it easier to control the game.
Gameloop is a great tool for gamers who want to play mobile games on their PC. It is easy to set up and use, and it offers a smooth gaming experience. The emulator is also optimized for gaming, meaning that it will run games at a higher frame rate than a typical Android device. Additionally, Gameloop supports the use of a mouse and keyboard, making it easier to control the game.
One of the biggest advantages of using Gameloop is that it allows gamers to play their favorite mobile games on a larger screen. This makes it easier to see the game and all of its details, and it also makes it easier to control the game. Additionally, Gameloop supports the use of a mouse and keyboard, allowing gamers to use the same controls as they would on a console or PC game.
Another great feature of Gameloop is that it is free to download and use. This makes it a great option for gamers who want to play their favorite mobile games without having to spend any money. Additionally, Gameloop is regularly updated, ensuring that gamers can always access the latest version of their favorite games.
Overall, Gameloop is a great tool for gamers who want to play their favorite mobile games on their PC. It is easy to set up and use, and it offers a smooth gaming experience. Additionally, it supports the use of a mouse and keyboard, making it easier to control the game. Finally, Gameloop is free to download and use, making it a great option for gamers who want to play their favorite mobile games without having to spend any money.
Download Gameloop Android Emulator: https://www.gameloop.com/
Video Review: Best Android Emulator For Windows 11
Summary
No matter which Android emulator you choose, it is important to make sure that it is compatible with Windows 11 PC and that it meets your needs. Be sure to read reviews and do your research before making a decision. With the right emulator, you can get the most out of your Android device and enjoy a great gaming experience.
In the tech world, there are few things as exciting as watching Microsoft unveil their new versions of Windows, the most popular operating system in the world. And while some of their updates are a bit controversial, especially regarding the privacy and advertising aspects of the OS, these new releases often give the team somewhat of a blank slate; an opportunity to dazzle the crowds with new features, visual designs, and innovations in user experience and accessibility.
Got questions about guilds, gaming, or our product? Join our Discord for discussions and support!

However, one of the top concerns when it comes to new versions of Windows is compatibility. Will the same apps be compatible? What will the new features mean in relation to the performance of apps and games? Well, while only time will tell what the extent of changes that Windows 11 will bring in terms of compatibility, we can already say for sure that BlueStacks 5 will, without a doubt, work on the new OS. And when it comes to installing BlueStacks 5 on Windows 11, the process will be as simple as always, and you’ll still be able to enjoy your favorite Android games on PC, even in the new upcoming version.
In this article, we’ll talk about all you need to know about Windows 11, as well as how to install BlueStacks 5 on the newest version of Microsoft’s operating system.
Installing Windows 11 Through the Insider Program
As of right now, Windows 11 still hasn’t launched yet. However, it’s possible to access a preview of the operating system through Microsoft’s Windows Insider Program. This program is meant to choose users with eligible systems so that they can access a trial version, and report any bugs or flaws in the system, in anticipation of its launch later this year.
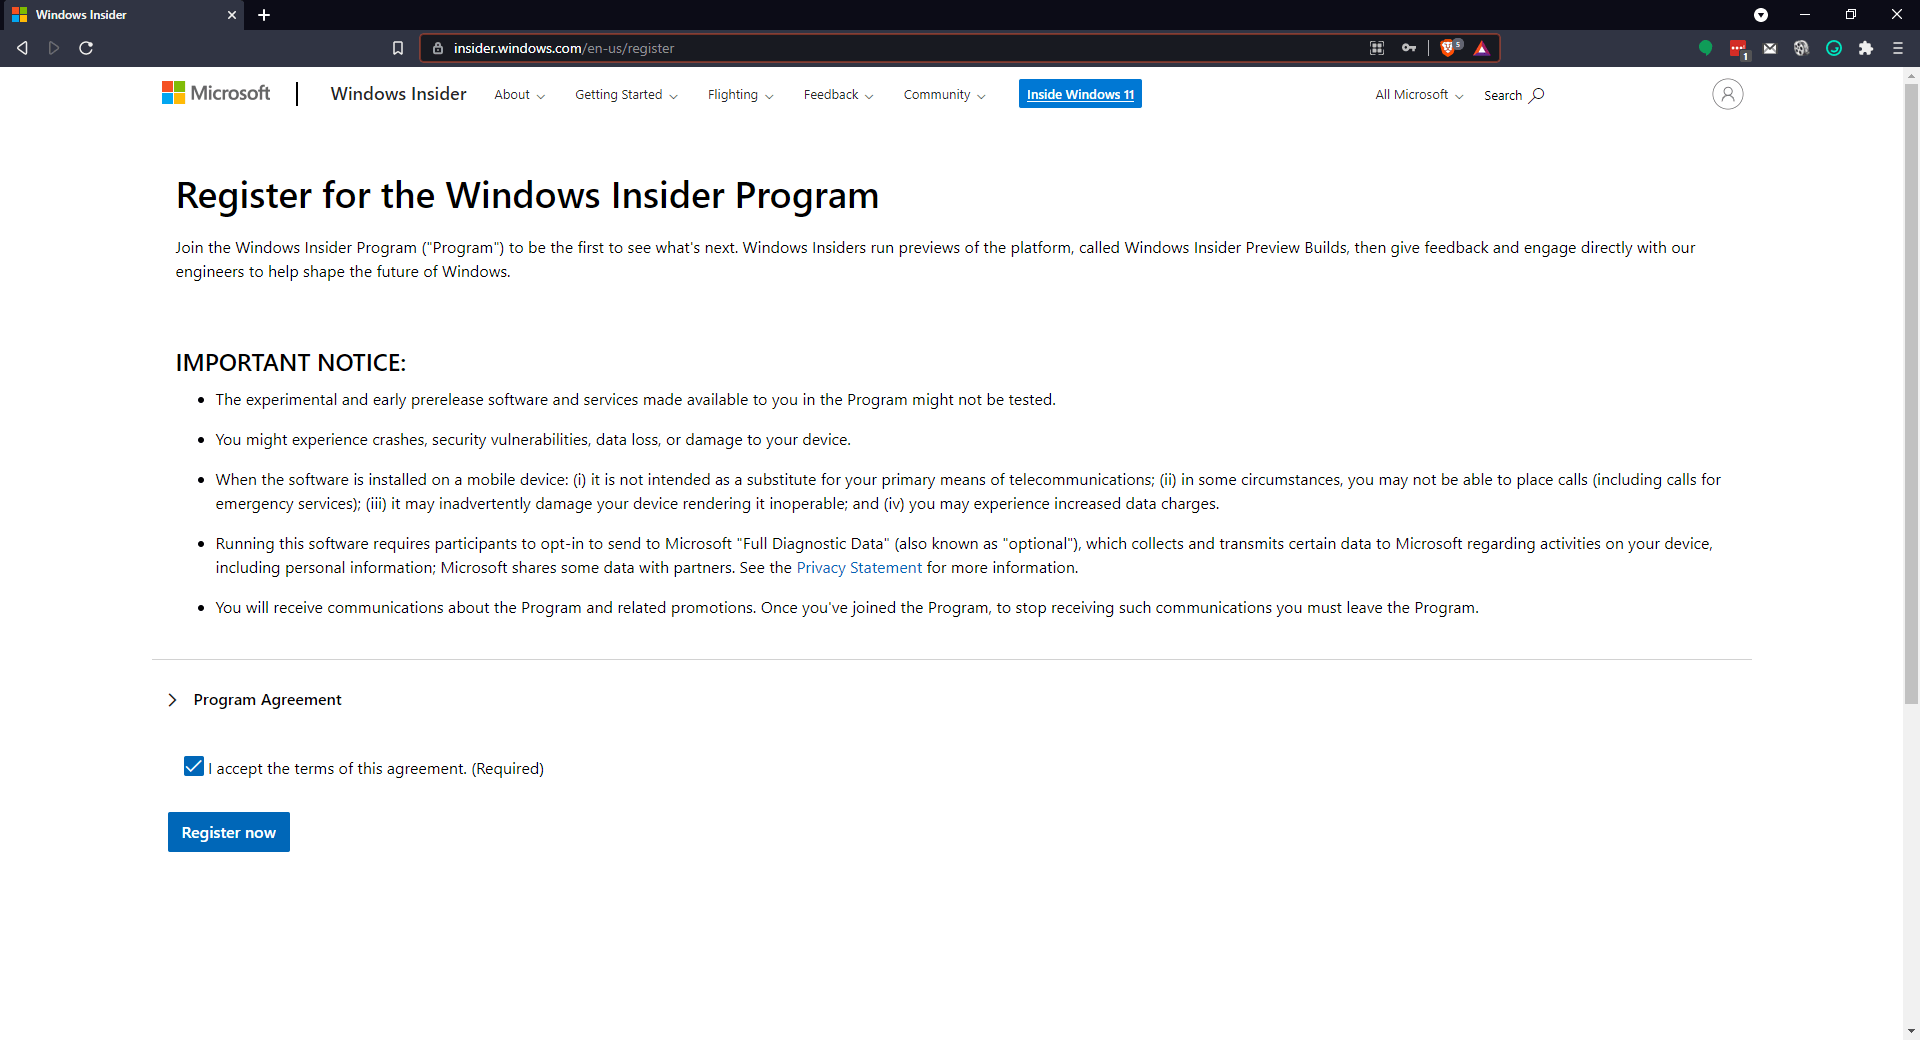
Before we install BlueStacks 5 on Windows 11, we’ll need to access the operating system through the Windows Insider Program, and you can do this by following the steps in this section.
Windows 11 System Requirements
According to Microsoft’s website, users will need to fulfill the following hardware requirements to upgrade to Windows 11:
CPU: 64-bit processor with at least 1 GHz on 2 or more cores.
RAM: 4 GB.
Storage: At least 64 GB of storage space on any storage device.
Firmware Requirements: Secure boot capable, UEFI.
GPU: Integrated or dedicated graphics chip with Directx 12 compatibility.
Display: 9” or larger screen with at least 720p resolution.
Internet: An internet connection and Microsoft account are required to install Windows 11 Home.
Feel free to check out Microsoft’s page on Windows 11 to get a more detailed list of the system requirements.
Before Beginning
Before we proceed with the installation steps, we first need to check that your PC is eligible for the free upgrade to Windows 11. You see, even though your machine might fulfill the necessary hardware requirements, it might still require some settings to be enabled before upgrading. A quick way to check is by using the PC Health Check program that you can find on Microsoft’s website, through the link mentioned in the section above. While this tool is unavailable for now, Microsoft has said that they will bring it back well before launching this Fall.

If by any chance that link was working for you, simply download the program and run it, and you’ll learn whether or not your PC is eligible. And even if it’s not, you can read the details to learn if it’s a hardware issue, or simply if you need to configure a setting in your BIOS. Regardless, as long as you meet the hardware requirements, there’s a good chance that you’ll be able to upgrade to Windows 11 for free this Fall if you wish.
Windows 11 Installation Steps
Now that we know your PC is eligible to upgrade to Windows 11, you can obtain early access to a preview of the new OS through the Windows Insider Program. For simplicity’s sake, let’s break down the process into easy steps:
- Head on over to the Windows Insider Program portal and register to become a tester. Make sure to login with the Microsoft account linked to the PC in which you intend to upgrade.
- On your PC, go to Settings > Update & Security > Windows Insider Program.
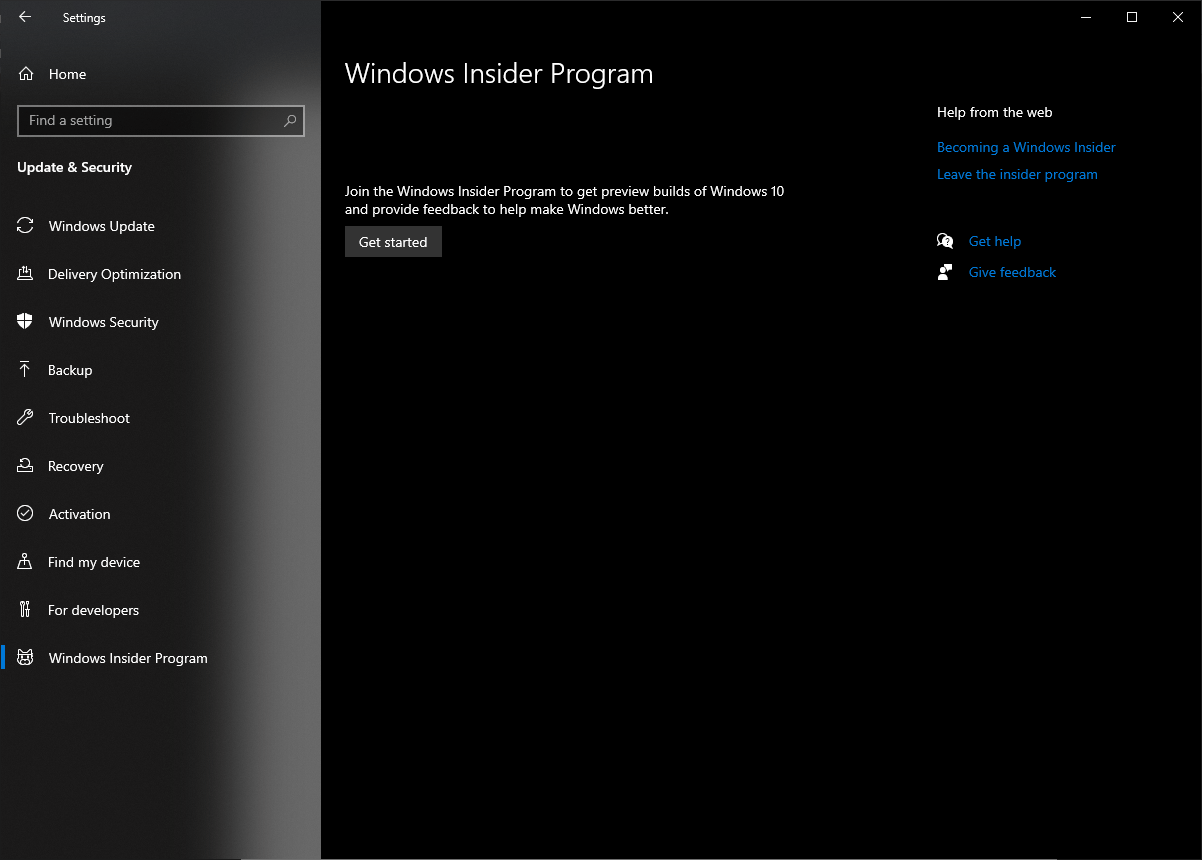
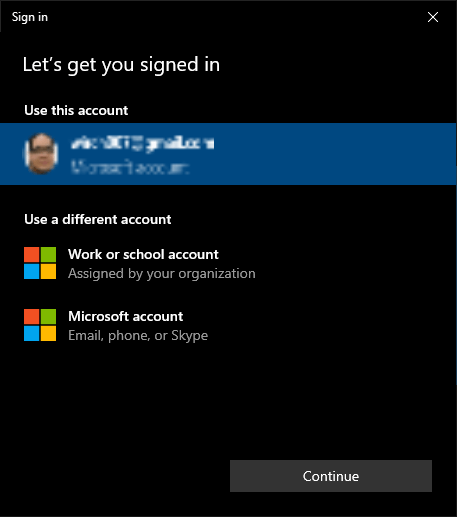
- Click on “Get Started,” and choose the Microsoft Account with which you signed up.
- Follow all the steps, and then click on “Restart Now” or “Restart Later.” The version of Windows 11 you chose can only be installed after restarting your PC.
- Once restarted, head to Settings > Update & Security > Windows Update, and click on “Check for updates” to download the latest version of Windows 11, as per your selection when you registered.
This Windows Insider Program tab can also tell you whether or not your PC meets the minimum system requirements, and can give more information if it doesn’t. Nevertheless, if you were able to follow these steps, you should now be on Windows 11, and ready to install BlueStacks 5.
How to Install BlueStacks 5 on Windows 11
If you’re a veteran user of BlueStacks, you’ll notice that the process for installing BlueStacks 5 on Windows 11 is quite the same as ever. Regardless, if you’re just getting started with gaming on our Android app player, then you’ll find everything you need to know about installing BlueStacks on PC in this section.
Let’s begin.
BlueStacks 5 System Requirements
BlueStacks 5 is the fastest and lightest our Android emulator has ever been, being able to run on more systems, and with much better performance than the previous version. However, to have the best experience with playing Android games on PC, we recommend meeting these requirements before running BlueStacks:
Minimum System Requirements
- OS: Microsoft Windows 7 and above.
- Processor: Intel or AMD Processor.
- RAM: Your PC must have at least 4GB of RAM. (Note that having 4GB or more disk space is not a substitute for RAM)
- Storage: 5GB Free Disk Space.
- You must be an Administrator on your PC.
- Up to date graphics drivers from Microsoft or the chipset vendor.
Recommended System Requirements
- OS: Microsoft Windows 10
- Processor: Intel or AMD Multi-Core Processor with Single Thread benchmark score > 1000.
- Graphics: Intel/Nvidia/ATI, Onboard or Discrete controller with benchmark score >= 750. To find the scores of your CPU and GPU, we recommend reading the brief guide we wrote on the topic.
- Please ensure Virtualization is enabled on your PC/Laptop.
- RAM: 8GB or higher
- Storage: SSD (or Fusion/Hybrid Drives)
- Internet: Broadband connection to access games, accounts, and related content.
- Up to date graphics drivers from Microsoft or the chipset vendor.
- You can install BlueStacks 5 even if you have a virtual machine such as Microsoft Virtual PC, VMWare Workstation, or Oracle Virtualbox, installed on the same PC. However, please note that you may run into some performance issues.
Downloading and Installing BlueStacks 5
Once you’ve checked that your PC meets the system requirements to run BlueStacks 5, we can go ahead with the installation.
First off, head over to our official website and click on the big download button front and center. This will download the latest version of our Android app player, which includes the latest features, tools, and the best stability and compatibility with the largest variety of games. Keep in mind that we can only respond to the BlueStacks clients downloaded through our official website, and can’t guarantee the proper functioning of clients acquired from third party sources.
Once downloaded follow these simple steps:
-
Before Installing
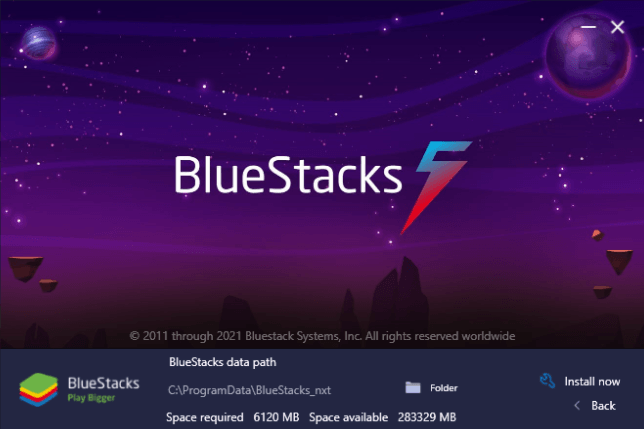
Run the installer to begin the process. By default, BlueStacks will install in the C:/ drive, but you can click on “Customize installation” on the bottom right to change the install directory. This is important as well because all the games and apps you download and install on BlueStacks 5 will be stored in this drive, which in some cases can increase the size of the BlueStacks directory. Make sure you have enough space leftover to avoid potential issues in the future.

-
Download and Installing BlueStacks Files
Once you’ve selected the desired install directory, click on “Install now”. During this process, the installer will download and install all necessary files. No user input is required here; you just need to sit tight for a few seconds until the installer finishes. It’s worth noting that the install time here will vary according to your connection speed.
-
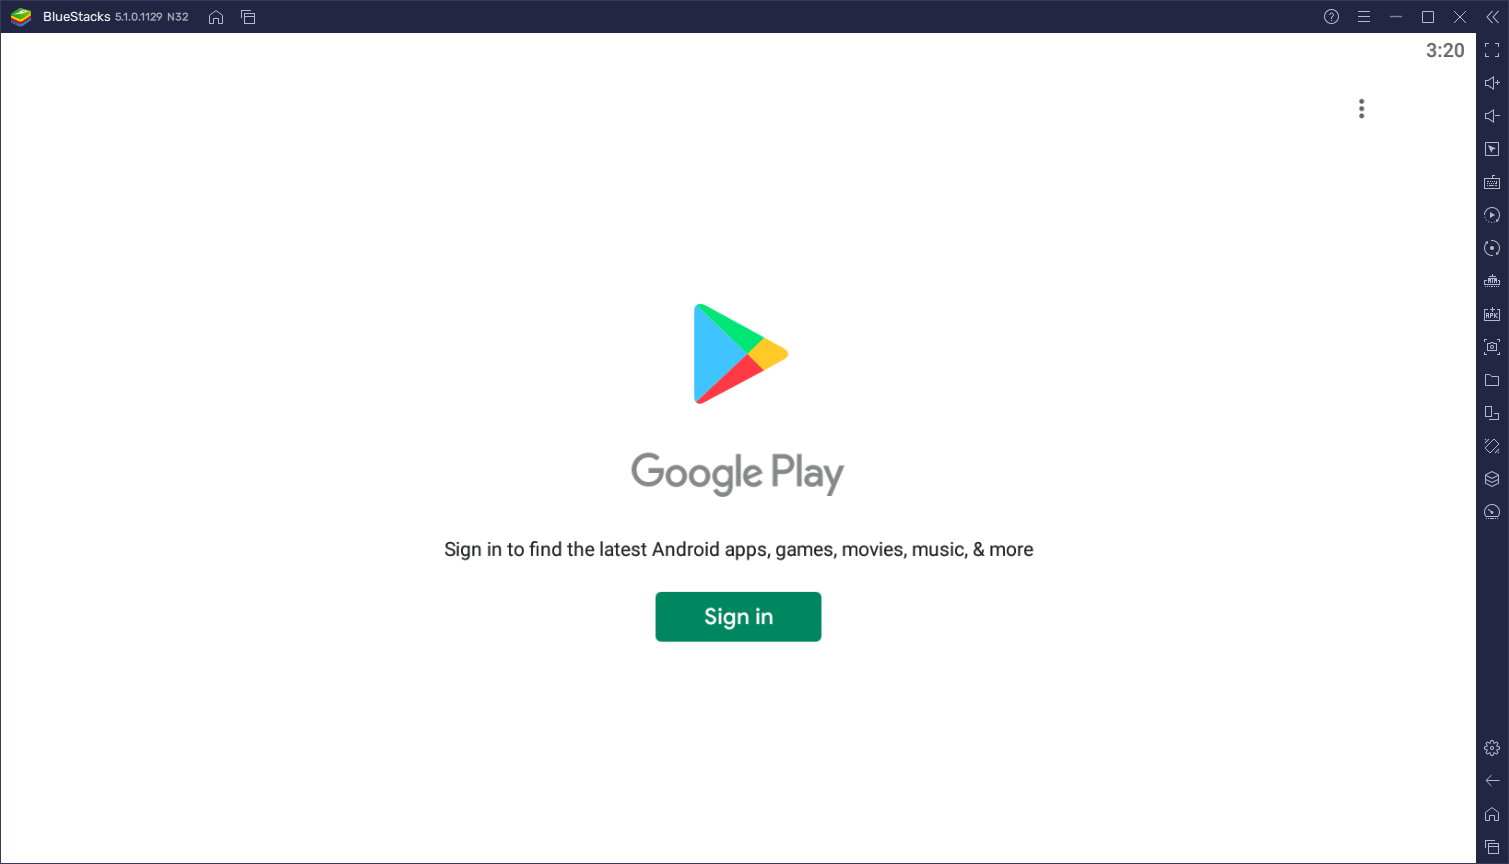
Setting Up Your Google Account
Just like with your smartphone, you’ll need to link a Google account to BlueStacks in order to download games from the Play Store. While BlueStacks 5 doesn’t automatically prompt you to link an account on its first launch, you can do so manually either through Settings > Account > Add Account, or by launching the Play Store app from the home screen, upon which you’ll be taken to a screen where you can add an account before being able to browse the store.
Upgrading From a Previous BlueStacks Version
If you’re using BlueStacks 4 currently, there’s no way to upgrade from it to BlueStacks 5, since this new version is a complete rewrite of our emulator from scratch. Consequently, you must follow the steps above to install BlueStacks 5 if you wish to upgrade. The good thing about this is that, if you still want to continue using BlueStacks 4 for some games, it’s possible to have both versions of our emulator installed on one PC and even running at the same time.
If you’re already on BlueStacks 5 and wish to update to a more recent release, you might get prompted upon launching the emulator to do so if a new version is available. However, you can also update manually by downloading the installer from our website and running it. If you have an older version of BlueStacks 5 installed when running the installer, you’ll be prompted to update instead of installing. All you have to do in this case is wait until the installer finishes updating, after which you’ll be on the latest version of BlueStacks 5.
As we mentioned above, BlueStacks 5 is the lightest and fastest that our Android emulator has ever been. Installing it on a system with the recommended hardware and a good connection speed takes only seconds, after which you’ll be playing your favorite Android games on PC, even on the new Windows 11.
Let us know if you have any questions or comments related to installing BlueStacks 5 on Windows 11 in the section below, and we’ll try to answer them as soon as we can.
#статьи
-
0
Проверенные эмуляторы для тестирования программ и игр на Windows и других ОС.
Иллюстрация: MEmu / LDPlayer / rawpixel / freepik / Colowgee для Skillbox Media
Филолог и технарь, пишет об IT так, что поймут даже новички. Коммерческий редактор, автор технических статей для vc.ru и «Хабра».
Эмулятор Android — программное средство, позволяющее запускать программную оболочку мобильной операционной системы на любой настольной ОС — например, Windows. Это полезно для разработчиков и геймеров — можно протестировать приложение или запустить любую мобильную игру на быстром ПК с большим экраном и геймпадом.
Начнём с того, зачем вообще нужны эмуляторы и как их установить. Затем расскажем про быстрые и стабильные эмуляторы Android, доступные в России.
- Tencent GameLoop — для интересующихся киберспортом
- LDPlayer — высокая совместимость
- MEmu — самый быстрый
- BlueStacks App Player — для настоящих геймеров
- Android Studio AVD — для разработчиков приложений
- Andy — с готовыми игровыми пресетами
- Nox — единственный игровой эмулятор с Android 12
- MuMu — с заботой обо всех
- Google Play Games — игры, готовые к работе на ПК
Эмуляторы — это программы, создающие образ планшета или смартфона для Windows или macOS. При этом мобильные приложения думают, что работают на Android в своей родной среде, так как эмулятор преобразует команды и данные в подходящий формат. Используют их преимущественно разработчики и геймеры.
Разработчики применяют эмуляторы мобильной ОС для тестирования приложений и игр. Эмулятор позволяет проверить, как программы отображаются на экранах разных моделей смартфонов и планшетов и как продукт работает с разными версиями операционной системы. Это упрощает разработку и тестирование, позволяет отладить работу приложения или игры почти на всех вариантах устройств c Android на одном компьютере.
Геймеры устанавливают эмуляторы на ПК, чтобы спокойно играть на них в мобильные игры. Что может быть лучше большого экрана, удобного геймпада и независимости от зарядки?
Внимание! Этот раздел статьи актуален только для эмуляторов, в описании которых указано «Windows Hyper-V: требуется». Если вы планируете использовать эмулятор без такой пометки, то пропустите раздел.
Чтобы имитировать реальное устройство, эмуляторы или используют собственную реализацию виртуализации, или работают с готовыми вариантами — VMware или VirtualBox. Но есть тенденция перехода их на функционирование через виртуализацию, встроенную в ОС, которую необходимо предварительно активировать.
Для активации виртуализации в Windows:
- Запустите «Диспетчер задач», нажав сочетание клавиш Ctrl + Shift + Esc, перейдите во вкладку «Производительность», выберите там пункт «ЦП». Убедитесь, что виртуализация включена.
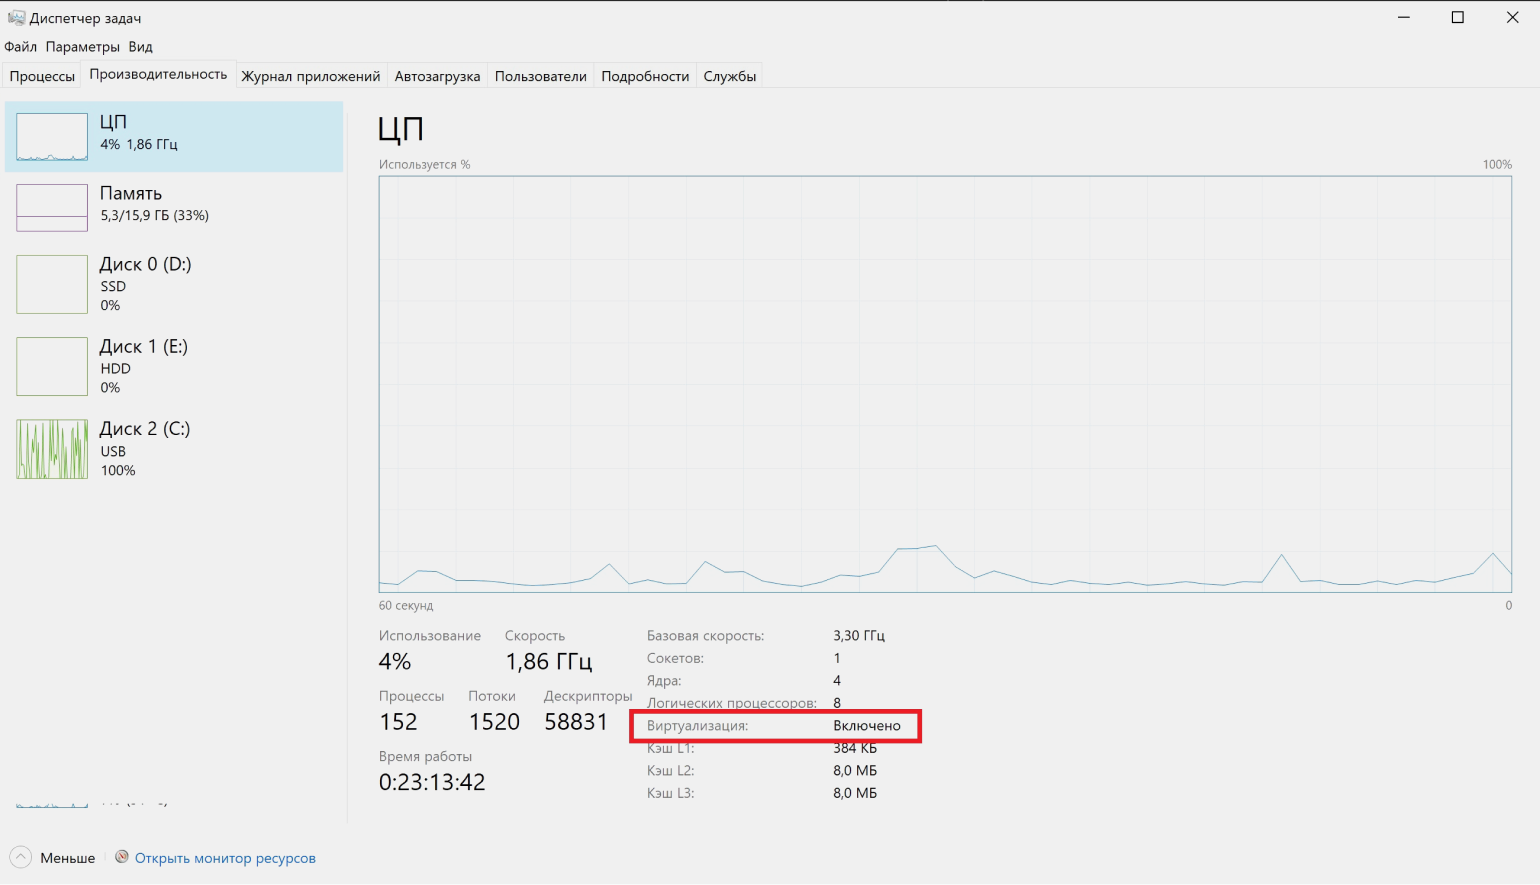
Скриншот: Skillbox Media
На большинстве ПК виртуализация будет активной. Если нет, то её активация возможна только в настройках BIOS. Конкретные шаги зависят от модели материнской платы, поэтому потребуется изучить инструкцию к ней или обратиться в техподдержку производителя.
- В Windows нажмите сочетание клавиш Win + R. В появившемся окне «Выполнить» впишите optionalfeatures и нажмите Enter. В открывшемся окне «Компоненты Windows» отметьте галочками следующие пункты.
Если у вас Windows «Домашняя» или «Домашняя для одного языка» — «Платформа виртуальной машины» и «Платформа гипервизора Windows». Последнего пункта может вовсе не быть, что нормально.
Если у вас «Профессиональная» версия, отметьте «Hyper-V».
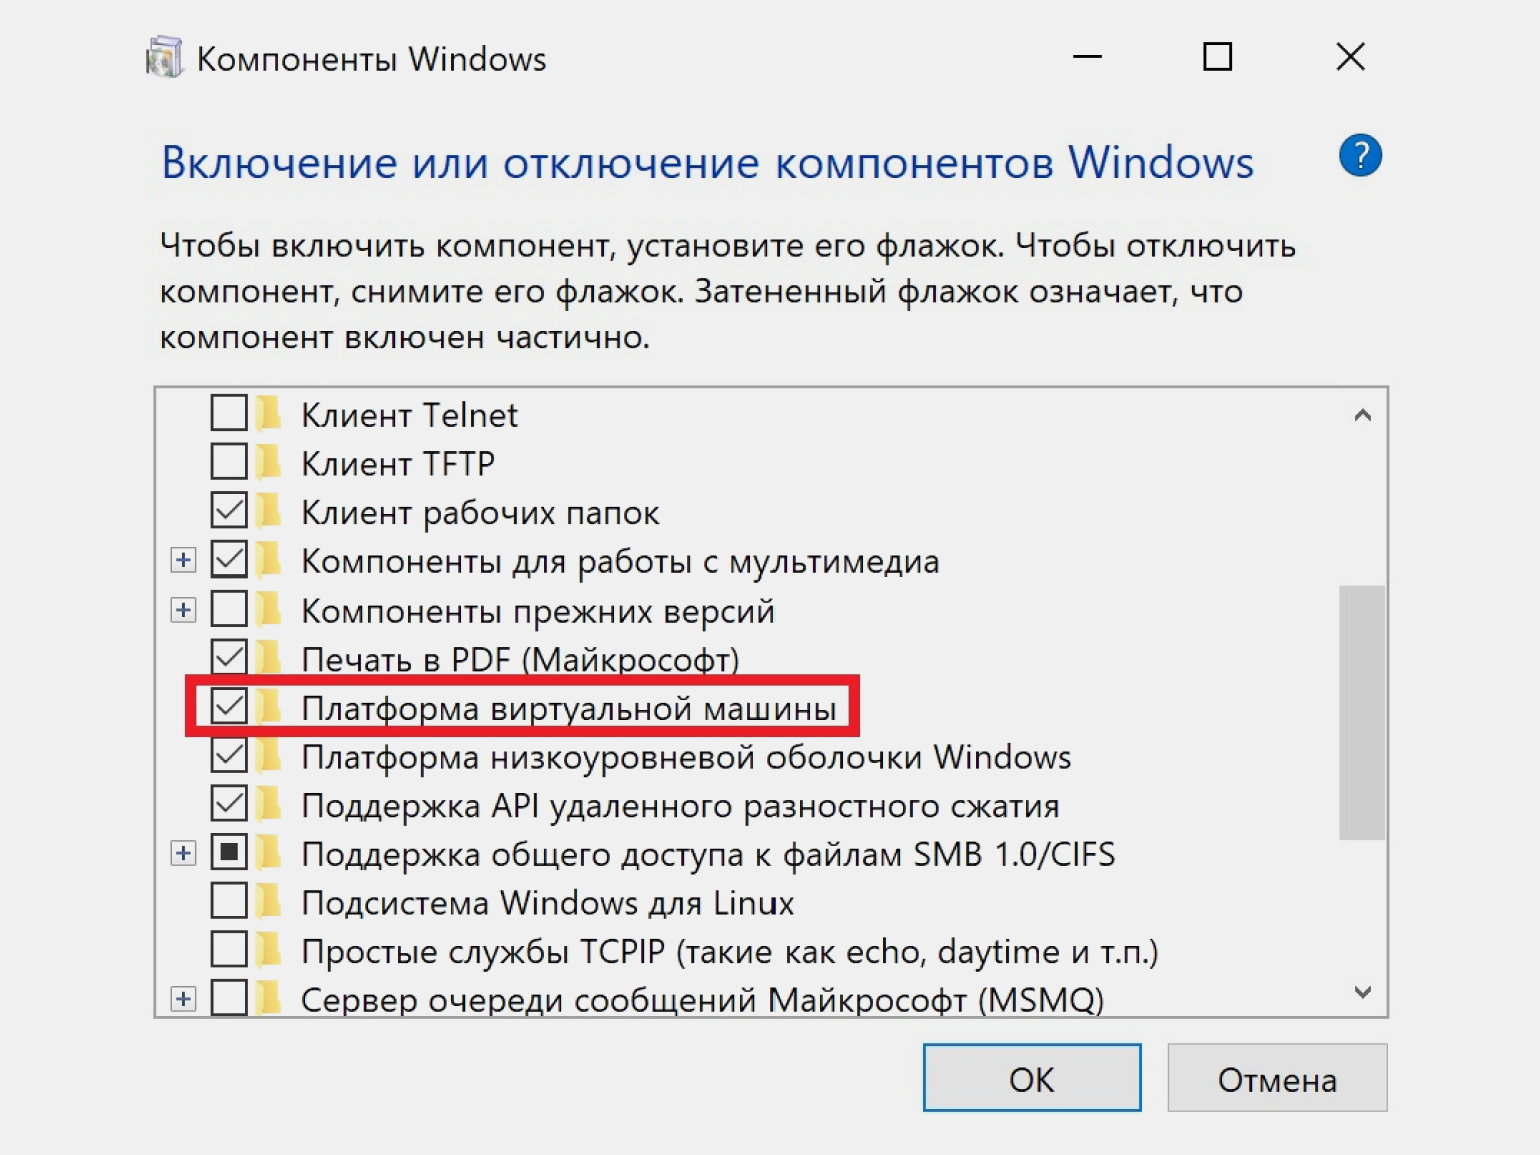
Скриншот: Skillbox Media
- Нажмите ОК, дождитесь установки и перезагрузите компьютер.
Китайский медиагигант Tencent, под крылом которого развиваются такие игровые проекты, как League of Legends и Path of Exile, выпустил эмулятор Android, который изначально умел запускать только PUBG Mobile. Сейчас же это игровой комбайн для множества проектов, таких как, например, Garena Freefire и Honkai: Star Rail. Игры и приложения, включая выпущенные сторонними компаниями, можно загрузить из главного меню программы или из Google Play.
Помимо этого, в GameLoop можно смотреть прямые трансляции соревнований по мобильным играм и покупать внутриигровую валюту, причём даже из России. Присутствует настройка устройств ввода, а виртуальные кнопки, размещаемые на экране, можно биндить на мышь с клавиатурой или на геймпад.
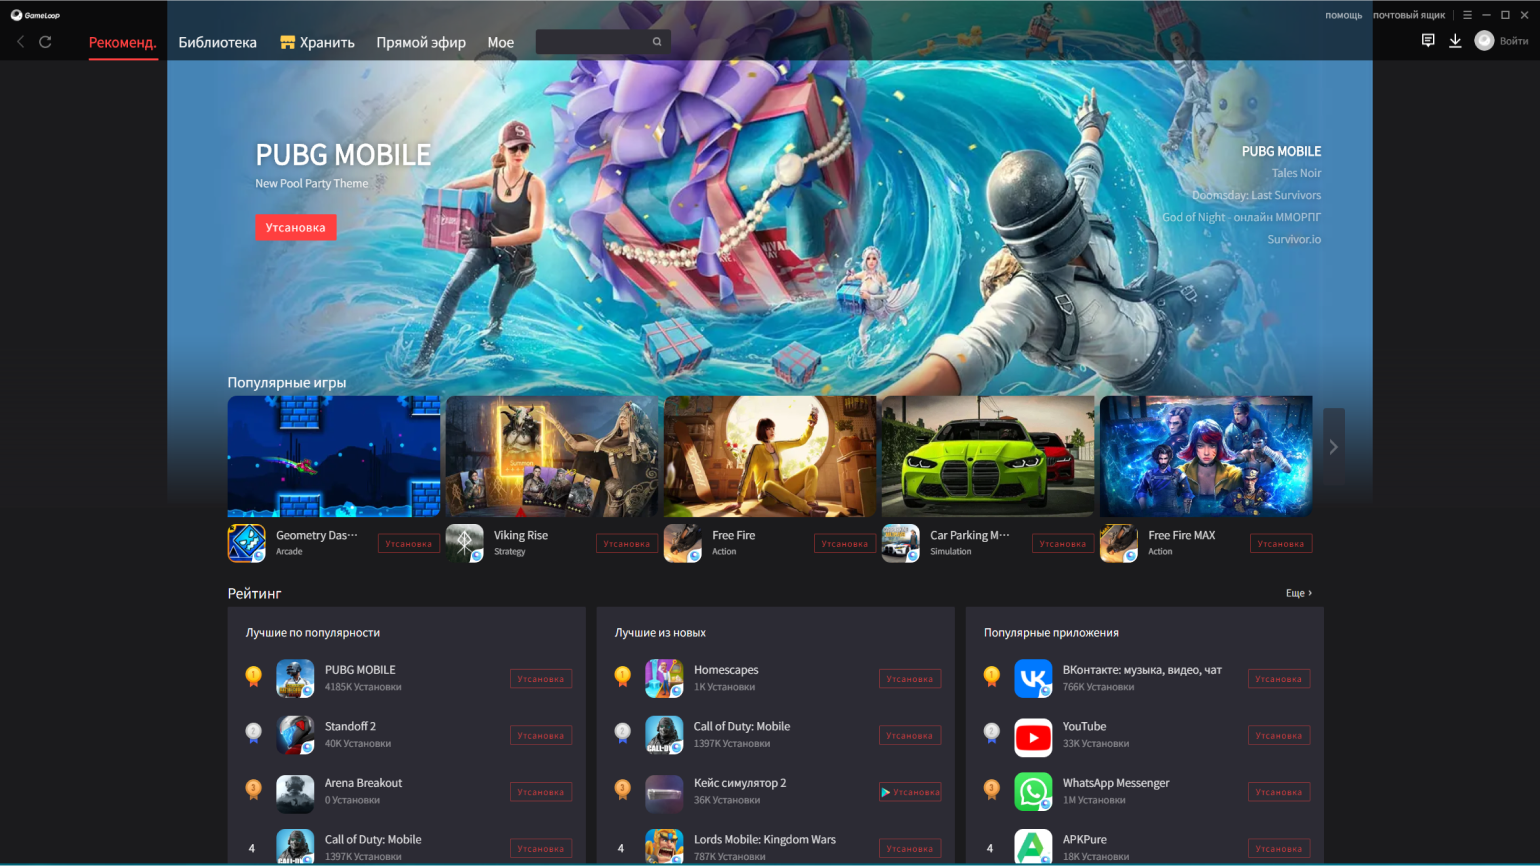
Версия Android: 7.1.2.
Доступен для 64-разрядной Windows 7, 8.1, 10 и 11.
Windows Hyper-V: не требуется.
Распространение: бесплатно.
Скачать эмулятор GameLoop
LDPlayer — бесплатный эмулятор Android, обеспечивающий максимальную совместимость с игровыми приложениями. По заверению самих разработчиков, 99% игр и программ запускается удачно. В их числе старые продукты, уже не поддерживаемые издателями.
Это достигается благодаря использованию нескольких версий Android с разной разрядностью, переключаться между которыми можно в менеджере LDMultiPlayer. В виртуальных машинах доступна активация Root-прав, установка приложений из APK- и XAPK-файлов, а не только из Google Play, настройка управления с клавиатуры, мыши или геймпада с поддержкой макросов, создание скриншотов и запись видео.

Версия Android: 5.1 (32-бит), 7.1 (32 и 64-бит), 9.0 (64-бит).
Доступен для Windows 7, 8.1, 10 и 11. 64-бит — для всех версий, а 32-бит — для 32-разрядных версий эмулятора.
Windows Hyper-V: требуется.
Распространение: бесплатно. Есть реклама в виде блока рекомендуемых приложений в нижней части главного экрана.
Скачать эмулятор LDPlayer
Эмулятор MEmu отличается от аналогов из этой подборки быстрым запуском и скоростью работы. Установить приложения можно, скачав их из Google Play или запустив файлы APK и XAPK.
В коробке: настройка общего доступа к папкам на ПК, включение Root-привилегий, гибкая настройки параметров виртуального железа и управления в играх с клавиатурой и мышью. Также в менеджере «Мульти-MEmu» можно создать несколько виртуальных машин с разными аппаратными конфигурациями и версиями Android.
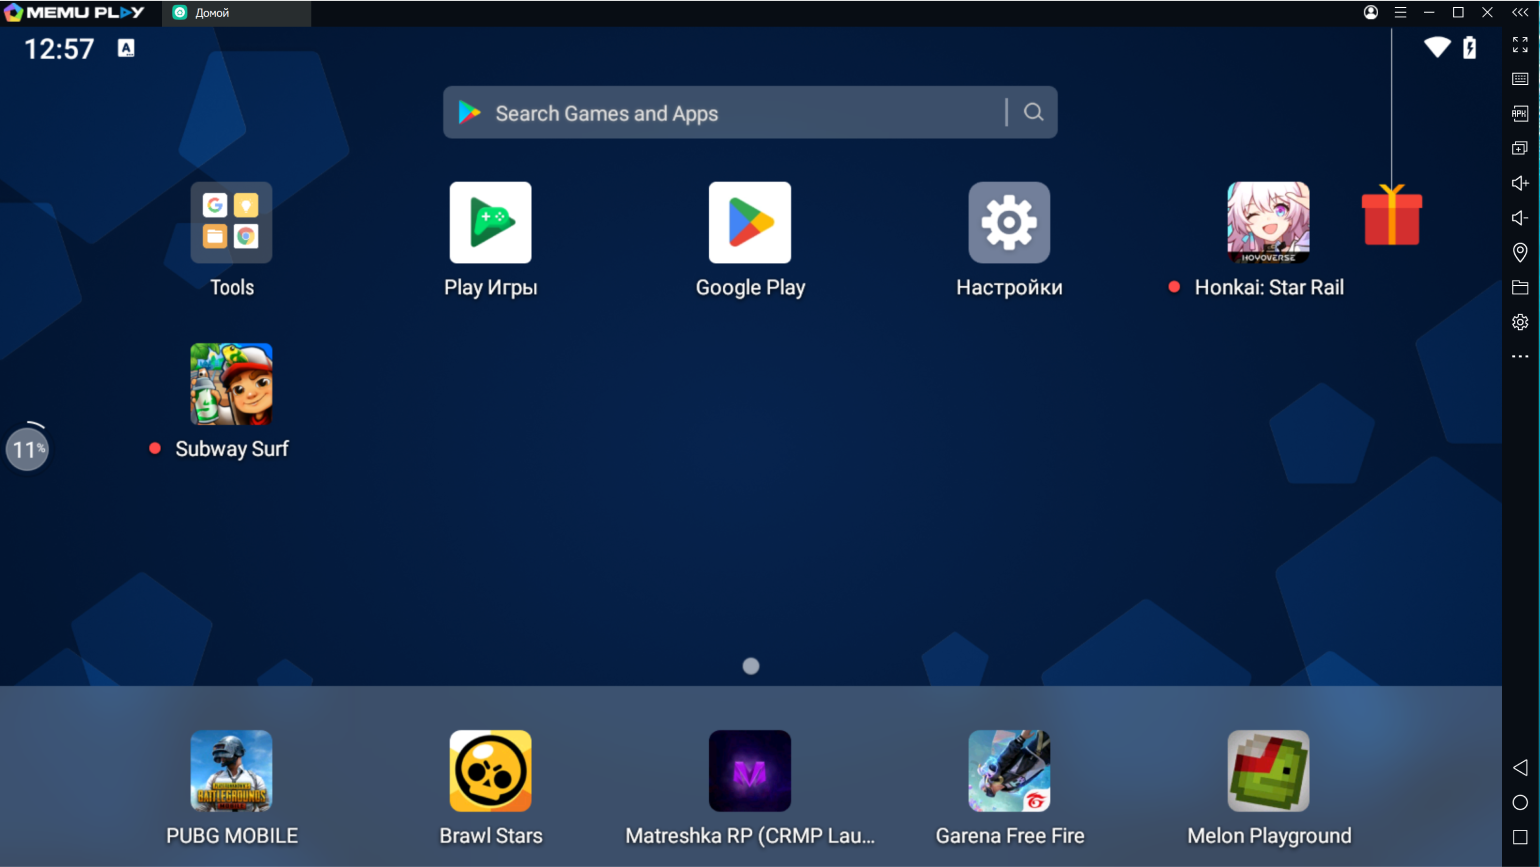
Версия Android: 5.1 (32-бит), 7.1 (32 и 64-бит), 9.0 (64-бит).
Доступен для Windows 7, 8.1, 10 и 11. 64-бит — для всех версий, а 32-бит — для 32-разрядных версий эмулятора.
Windows Hyper-V: требуется.
Распространение: бесплатно. Рекламный ролик после запуска приложения и блок рекомендуемых приложений на главном экране.
Премиум: отключает рекламу, открывает доступ к кастомизации внешнего вида.
Оплата из России: нет.
Цена: 2,99 доллара в месяц.
Оплата только через PayPal.
Скачать эмулятор MEmu
BlueStacks — один из самых распространённых эмуляторов Android. Главной особенностью является наличие системы «Играй и выигрывай», позволяющей получать призы за выполнение игровых заданий. Например, можно выиграть подписку Xbox Game Pass Ultimate на 1 месяц или даже игровой компьютер.
В настройках эмулятора можно включить Root-права, активировать высокую частоту кадров, вертикальную синхронизацию для получения чётких кадров без разрывов картинки, настроить управление с геймпада, клавиатуры или мыши и синхронизировать эмулятор с Discord. Устанавливать игры можно c помощью Google Play и установочных пакетов APK или XAPK.
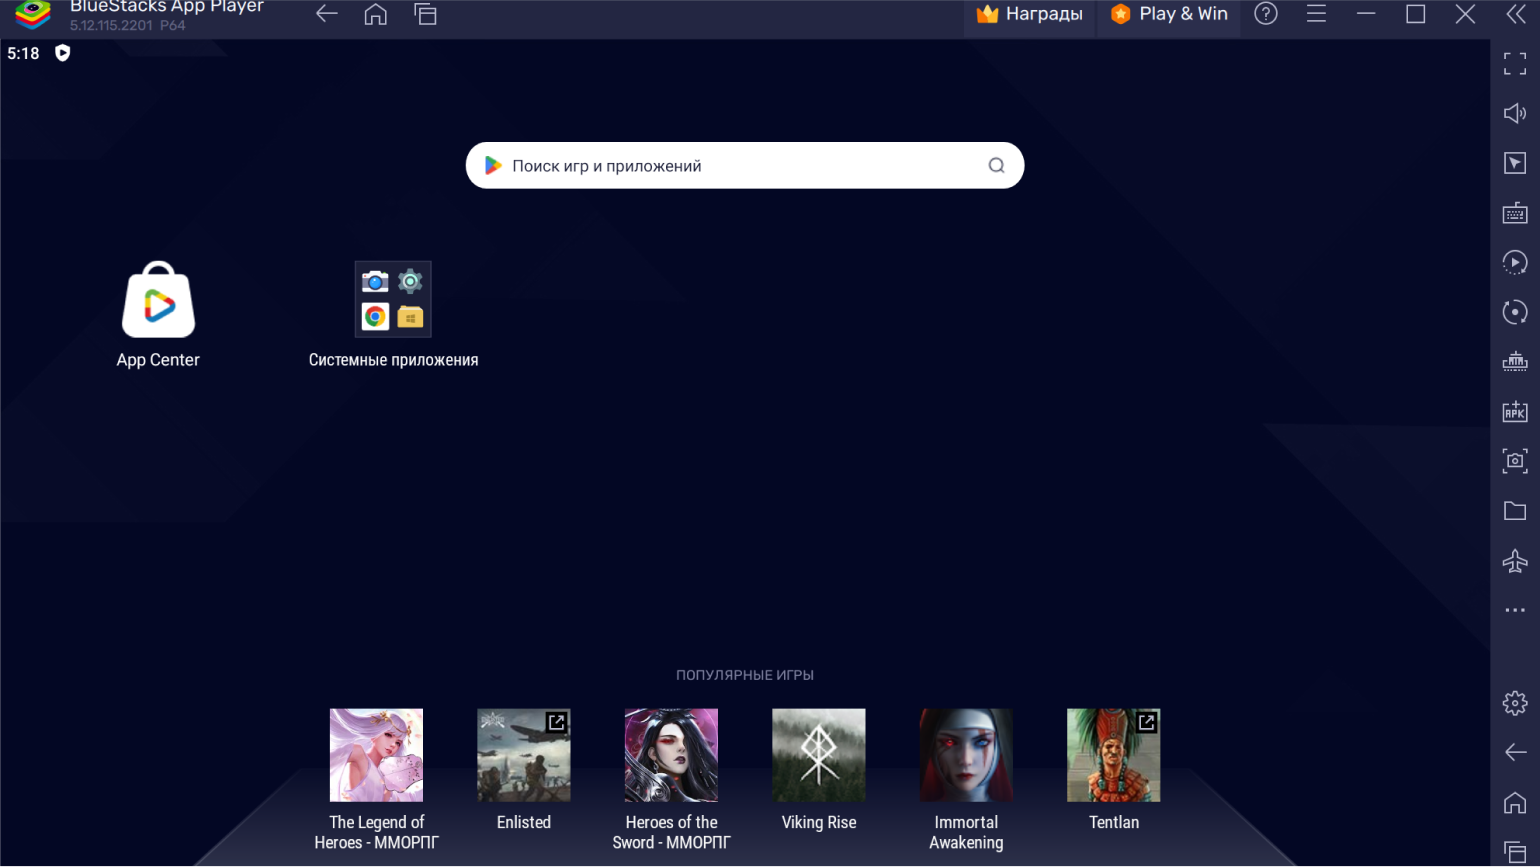
Версия Android
BlueStacks 4: 64- или 32-битная 1.2 и отдельная 64-битная для Hyper-V, работающая на Windows 10 Pro.
BlueStacks 5:
- 1.2 — 64- или 32-бит;
- 9 — для 64-бит. Возможно ускорение через Hyper-V на Windows 10 Pro;
- 11 — для 64-бит.
Доступен:
- Для Windows 7, 8.1, 10, 11. 64-бит — для всех версий, а 32-бит — для 32-разрядных версий эмулятора.
- Для macOS 10.12 Sierra и выше, но только BlueStacks 4.
Windows Hyper-V: требуется в 64-разрядных версиях.
Распространение: бесплатно. Реклама в виде блока рекомендуемых приложений в нижней части главного экрана.
Скачать эмулятор BlueStacks
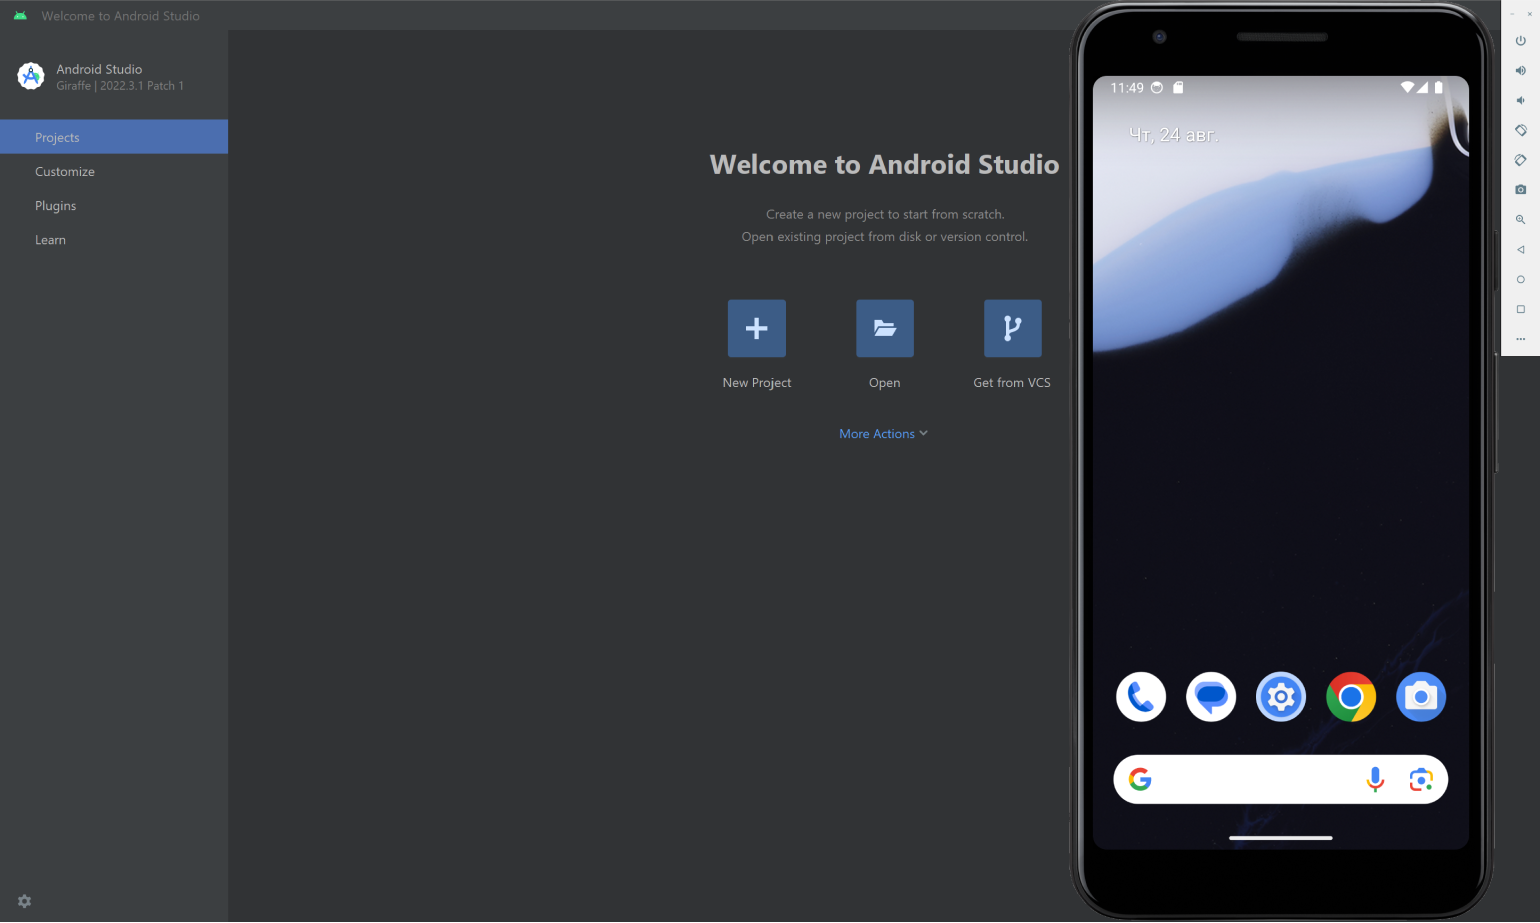
Если вы разработчик мобильных приложений, вам наверняка знакомо название среды разработки Android Studio. Это огромный комбайн, включающий в себя все необходимые инструменты для написания и тестирования программ под «зелёного робота», в их числе эмулятор Android.
В эмуляторе нельзя настроить управление с геймпада, а он сам отличается низкой производительностью в играх. Но AVD нет равных, когда дело касается проверки совместимости новой программы с разными версиями Android, так как они тут есть все — от старичка 1.5 Cupcake до 13-го Tiramisu и бета-версии 14-го, а также версий ОС для TV и смарт-часов. Кроме самописных программ, можно устанавливать приложения из Google Play.
Версия Android: все версии, включая тестовые.
Доступен для 32- и 64-битной Windows 10, 11, Linux и macOS.
Windows Hyper-V: не требуется.
Распространение: бесплатно.
Скачать эмулятор Android Studio AVD
Andy — эмулятор с минимальным набором функций, часто используемый на маломощных устройствах. Главная его фича — центр загрузки готовых пресетов управления с клавиатуры для большого количества популярных игр, что актуально для новичков в мобильных играх с ПК. Имеется поддержка геймпада. Установка игр только через клиент Google Play.
Версия Android: 7.1.2.
Доступен для 32- и 64-битной Windows 7, 8.1, 10, 11, Ubuntu 14.04 и выше, macOS 10.8 и выше.
Windows Hyper-V: не требуется.
Распространение: бесплатно для личного пользования.
Премиум: лицензия для компаний с поддержкой разработчиков и маппером для клавиатуры.
Оплата из России: нет.
Цена: 12 долларов за одно рабочее место в месяц или 99 долларов в год.
Оплата только через PayPal.
Скачать эмулятор Andy
Что будет, если взять за основу скорость работы Andy и навесить на неё геймерские фичи? Правильно. Получится Nox.
Установка игр из Google Play и пакетов APK и XAPK, биндинг виртуальных кнопок на клавиатуру, мышь и геймпад, высокая совместимость и производительность, а также выбор версии Android и настройка виртуального железа — всё на своих местах. На данный момент это единственный стабильный эмулятор Android 12 с возможностью настройки управления.

Версия Android: 5.1 (32-бит), 7.1.2 (32 и 64-бит), 9 (64-бит), 12 (64-бит).
Доступен для 32- и 64-битной Windows 7, 8.1, 10, 11; macOS 10.12 Sierra и выше.
Windows Hyper-V: не требуется.
Распространение: бесплатно, но с рекламой на главном экране.
Скачать эмулятор Nox
MuMu — эмулятор, запускающий Android 6.0.1 и использующий технологию ускоренного рендеринга, которая повышает производительность в играх. Среди особенностей — наличие макросов, настройка управления с геймпада, клавиатуры и мыши, общие папки с Windows, создание скриншотов и запись экрана. Установка приложений возможна с помощью Google Play и файлов APK или XAPK.
Стоит упомянуть, что у MuMu Player есть облегчённый вариант эмулятора — Nebula. Он подойдёт для компьютеров, процессоры которых не поддерживают аппаратную виртуализацию или на которых её невозможно включить из-за ограничений BIOS. Разработчики отмечают, что Nebula ещё находится на стадии тестирования, поэтому может работать нестабильно.
Версия Android: MuMu Player — 6.0.1 (64-бит), MuMu Nebula 7.1.2 (32-бит).
Доступен для 32- и 64-битной Windows 7, 8.1 и 10, 11.
Windows Hyper-V: не требуется.
Распространение: бесплатно, но с рекламой на главном экране.
Официальный продукт компании Google — эмулятор Play Games — пока ещё находится в стадии бета-тестирования. Официально недоступен для загрузки на территории России.
Важно! Загрузить можно не все игры из библиотеки Google Play, а определённые тайтлы, которые уже готовы к работе на ПК и управлению с помощью клавиатуры, мыши или геймпада.
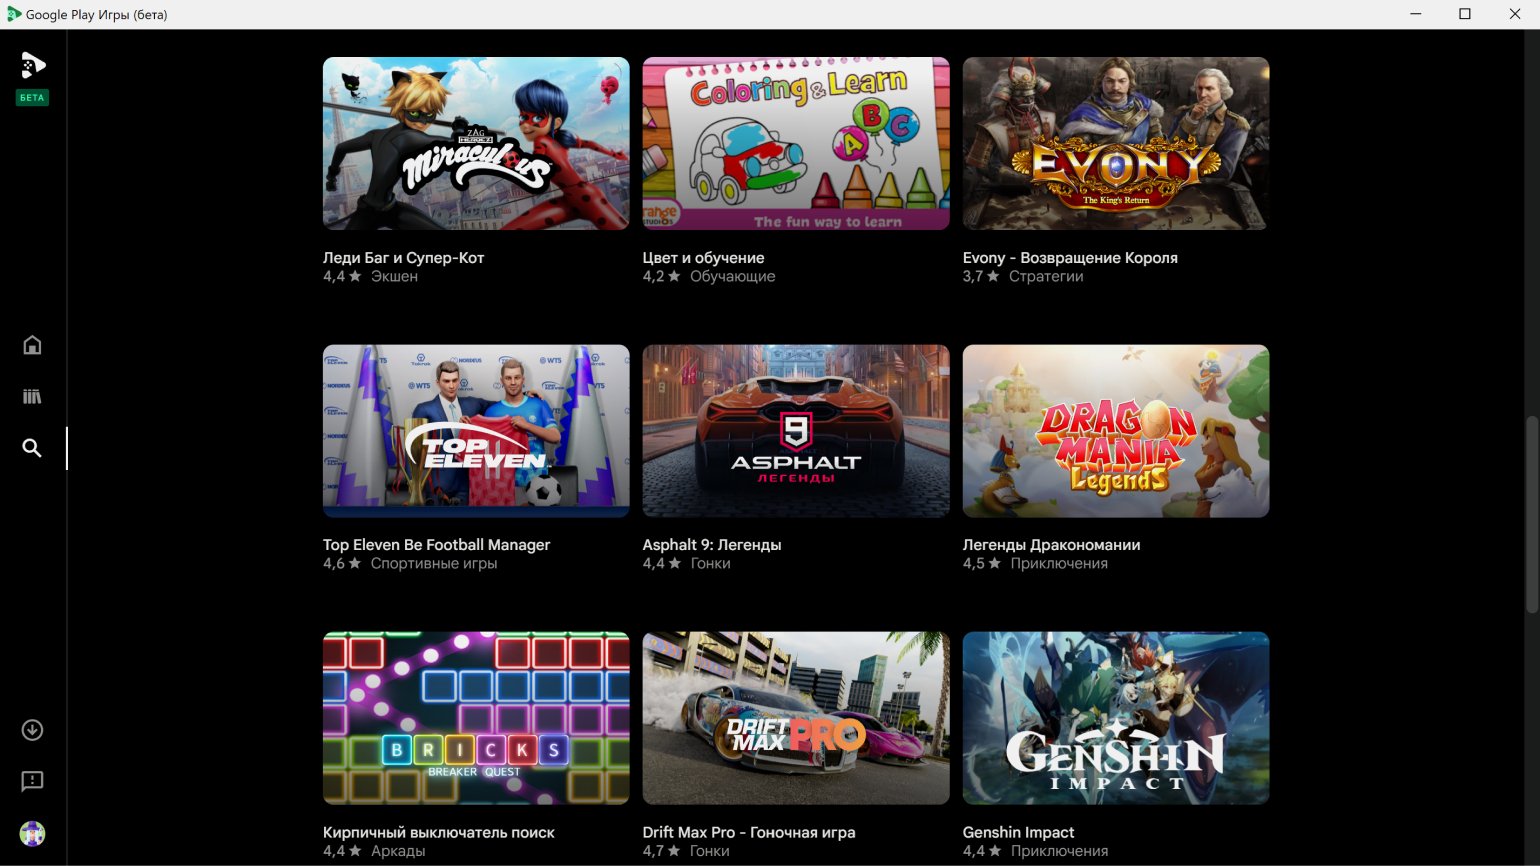
Версия Android: 13, обновляется с каждым релизом новой версии.
Доступен для 64-битной Windows 10, 11.
Windows Hyper-V: требуется.
Распространение: бесплатно.
Скачать эмулятор Google Play Games
С чего начать путь в IT?
Получите подробный гайд в нашем телеграм-канале бесплатно! Кликайте по баннеру и заходите в канал — вы найдёте путеводитель в закрепе.
Забрать гайд>
As a professional gamer, I often need to have multiple game accounts running simultaneously. However, owning multiple Android devices is not always feasible or economical. The emergence of Android emulator has solved this problem. In this article, I will discuss the top 9 Android emulators for Windows 10/11 in 2023.
What are Android Emulators?
Android emulators are software that simulates an Android device on a computer. They allow users to run Android applications and games on their Windows PC or laptop. Android emulators come with various features, such as multi-instance support, gamepad mapping, and key mapping, making them an attractive option for developers, gamers, and casual users.
Benefits of using Android Emulators on Windows
Using Android online emulators on Windows has numerous benefits. Firstly, it allows developers to test their applications on different Android versions and device configurations without needing to own multiple Android devices. Secondly, gamers can play Android games on a larger screen and with better graphics than on their mobile devices. Finally, casual users can access Android applications on their Windows PC, such as social media, messaging apps, and entertainment apps.
Criteria for selecting the best Android Emulators
When selecting the best Android emulator for Windows, there are various factors to consider. These include performance, compatibility, features, user interface, and ease of use. A good Android emulator should be easy to install, configure, and use. It should also offer good performance and support a wide range of Android applications and games.
The top 9 Android Emulators for Windows 10/11
If you’re searching for Android emulators that can be installed on Windows 10/11, you’re in luck as there are many options available. In this article, we’ll be focusing on introducing nine of the most commonly used emulators that are popular among users. These emulators provide a wide range of features and functionalities that cater to different users’ needs. Whether you’re a gamer or an app developer, you’re sure to find an emulator that suits your requirements.
1.Redfinger
Redfinger is a cloud-based Android emulator that allows users to access a virtual Android device on their Windows PC. It offers excellent performance, multi-instance support, and gamepad mapping. Redfinger also supports a wide range of Android applications and games, making it an attractive option for developers and gamers.
2.NoxPlayer
NoxPlayer is a well-known Android emulator that provides exceptional functionality and performance. It allows for multi-instance and gamepad mapping, making it an ideal choice for gamers. NoxPlayer also offers excellent compatibility with several Android apps and games, making it an attractive option for users seeking a seamless experience.
3.LDPlayer
LDPlayer is a highly sought-after Android emulator that boasts impressive performance and features. It provides support for multi-instance and gamepad mapping, making it an appealing option for gamers.
4.MEmu Play
MEmu Play is an exceptional Android emulator with a wealth of features that deliver excellent performance and compatibility. It supports multi-instance, gamepad mapping, and key mapping, making it an excellent choice for developers and gamers. Additionally, MEmu Play offers an intuitive user interface and straightforward configuration, ensuring a hassle-free experience.
5.Genymotion
Genymotion is a popular Android emulator that offers good performance and features. It supports multi-instance and gamepad mapping, making it an attractive option for gamers. Genymotion also offers good compatibility with various Android applications and games.
6.Remix OS Player
Remix OS Player is a lightweight Android emulator that offers good performance and compatibility. It supports multi-instance and gamepad mapping, making it an attractive option for gamers. Remix OS Player also offers a user-friendly interface and easy configuration. Unlike some other emulators, Remix OS Player does not support multi-instance, which means that users cannot run multiple instances of the emulator at the same time.

7.Andy
Andy is a feature-rich Android emulator that offers good performance and compatibility. It supports multi-instance, gamepad mapping, and key mapping, making it an attractive option for developers and gamers. But installing Andy Simulator can sometimes be challenging, and the process may be time-consuming. This can cause frustration for users who are not tech-savvy.
8.KoPlayer
KoPlayer is a sleek and efficient Android emulator that delivers great performance and features. With support for multi-instance and gamepad mapping, it’s a desirable choice for gamers. But KoPlayer may not be compatible with some older or less common PC hardware configurations. This can lead to performance issues or even prevent the emulator from running altogether.
Conclusion
The above are the best Android emulators for Windows 10/11. While other emulators are available, they may not match up to the standards of the ones highlighted in this article. We hope that this guide has provided you with the information needed to select an Android online emulator that meets your requirements.
Playing mobile games on a computer gives a different level of joy and adrenaline rush. You don’t need to hold your phone for several hours, especially while playing FPS games. Most importantly, no one can hamper your gaming experience by constantly calling. Although the new Windows 11 now comes with Amazon App Store integration, which lets us download and run Android apps and games on our Windows 11 PC. But it isn’t available in all regions yet.
Due to this, the only best option that remains with us is Android emulators. If you’re also in search of the best android emulator for your Windows 11 PC, then we’ve got your back. In this article, we’ve talked about some of the best Android emulators for Windows 11 in detail to help you choose the best one.
Best Android Emulators For Windows 11
So, here are some of the best Android emulators that work smoothly on Windows 11 without any interruption. Let’s learn about the first Android emulator featured on our best android emulators for Windows 11 list.
1. BlueStacks
BlueStacks is indeed one of the most popular Android emulators. The best part about this emulator is that you don’t need a high-specs graphic card to run it. You can easily run it on your system, even if it doesn’t come with high-end hardware specifications.
Moving ahead, BlueStacks runs on Android 9 (Pie), which is quite interesting to see, as most Android emulators run on either Android 7 or below. Interestingly, it also comes with three performance modes: Balanced, High, and Low Memory. Notably, all three modes are designed to work differently and provide different performances.
Coming over to its primary use case. BlueStacks is the perfect Android emulator to play all kinds of games, from racing to First Person Shooters (FPS) to action games. It also focuses a lot on offering the best gaming experience to the users. You can customize your game controls to play your favorite game on your own terms. You also can change your mouse’s sensitivity as per your preferences to play FPS better.
BlueStacks also lets you use your keyboard to play mobile games, which is obvious. But one thing that makes it great is that it lets you customize the keyboard controls according to your preferences. One thing that drew our eyes the most is Multi-Instance. This feature lets you play multiple games at the same time.
What we liked the most about BlueStacks is that it has an integrated Screenshot tool to take screenshots with ease. It also has a built-in Screen Recorder tool that lets you record your emulator’s screen. To sum up, it’s an excellent Android emulator but uses a lot of the system’s resources, which sometimes causes so many issues with the Windows system.
Pros:
- Great Compatibility
- Built-in Screenshot & Screen Recording Tool
- Best To Play All Kinds Of Games
- Integrated Google Play Store
- Comes With Different Game Modes
Cons:
- Consumes A Lot Of the System’s Resources
- Installs Bloatware
2. LDPlayer
LDPlayer is an Android emulator known for offering excellent gaming performance without consuming many system resources. However, it doesn’t come with the same number and kind of features as BlueStacks. But its high-end gaming performance ensures that you won’t feel left out because of this.
To check its gaming performance, we played several heavy games, and we must say that it handled all of them properly. We didn’t face any lag or freeze issues while playing those games.
One thing that’s worth mentioning about LDPlayer is that it features a similar user interface as BlueStacks. For example, it also incorporates all essential options in the right sidebar, like BlueStacks. But LDPlayer’s user interface is more vibrant and modern than the BlueStacks emulator.
Similar to BlueStacks, LDPlayer also runs on Android 9 (Pie) and comes with Google Play Store and Google Play Games preinstalled. Moving further, it also comes with other necessary apps installed, like File Manager, Contacts, Downloads, etc., preinstalled. The best thing about LDPlayer is that it lets you use your smartphone as a joystick to play video games.
Other than that, it also comes with a built-in Screenshot and Screen Recording tool that works perfectly. Another thing we really liked about this Android emulator is that it allows you to import Android apps. Simply put, you can install a third-party app on your system using the system’s browser and import it to the emulator.
Lastly, it also has a Synchronizer feature that syncs all your open instances in real-time. In short, all the actions made in the main instance automatically auto-repeat in other instances in real time. Overall, it’s a great Android emulator for Windows 11.
Pros:
- Easy to Use and Runs Smoothly
- Modern & Simple UI
- Run on Android 9
- Compatible With Both Intel and AMD PCs
- Less Bloated
- Supports Remote Joystick
- Built-in Virtual GPS Tool
Cons:
- Not As Feature-Rich As BlueStacks
3. MuMu Player
Another Android emulator that’s worth talking about is MuMu Player. According to our experience, it’s one of the fastest Android emulators, and other Android emulators aren’t even close to it. Coming over to its user interface. It features an intuitive and clean user interface that is smooth and quick.
Surprisingly, it doesn’t run on Android 9 or 7. But it still works seamlessly and provides an excellent user experience. Like other emulators, it also comes with Google Play Store preinstalled, which lets you install apps and games on your device.
Notably, it also comes with Google Play Games already installed. You can use Google Play Games to play games where you left them off. This gives this Android emulator an additional point.
One thing we would like to mention is that it consumes a considerable amount of the system resources while running. So if you’ve a PC with basic hardware specs, then you can experience performance issues while playing heavy games.
In that case, you can try MuMu Nebula instead of MuMu Player, as it’s specifically made for low-end systems. Like MeMu Play, it also supports device rooting, which could be great for app developers.
Moving ahead, it also lets you choose from two performance modes: High FPS and Extra High FPS. The High FPS mode is best for medium or high-end PCs with GTX660 or better.
At the same time, the Extra High FPS is best for high-end PCs with 120Hz refresh rate support. You can switch to any mode anytime. Besides this, it also comes with an Operation recorder tool that lets you record steps and execute them to any app you want.
Pros:
- Completely Safe & Secure
- Better Than MeMu
- Built-in Google Play Store
- Easy to Use User Interface
- Ability to Change the Mobile Brand & Model
- Supports Mobile Rooting
- Integrated Screen Recorder & Screenshot Tool
- Very Less Bloatware
- Runs Smoothly
Cons:
- Runs on Android 6
4. MEmu Play
MEmu Play is a popular Android emulator that lets you install and run heavy mobile games, like Free Fire, PUBG Mobile, Call Of Duty Mobile, etc., smoothly. You won’t face any lag issues while playing games on MEmu Play. One of the best parts about this Android emulator is that it also runs on low-end PCs, such as PCs with basic Intel and AMD processors.
So, if your system comes with a basic graphics card, you can still use this Android emulator on it to easily play high-end mobile games. Like other Android emulators, MEmu Play also runs on Android Nougat (7.1.2). But it’s quite different from other emulators because you can switch the Android version to Kit Kat (4.4) or Lollipop (5.0).
Besides this, it also features an intuitive user interface similar to other Android emulators’ user interfaces. The best part about this Android emulator is that it offers options to customize the user interface. For example, you can change the navigation bar’s position.
You can even change your cursor’s design. To be specific, it lets you choose from four different cursor styles. In addition, you also get other essential yet useful options, like screen rotation, shake, etc., in the right sidebar. However, the given options don’t work all the time.
Besides an interesting UI, it also comes with other essential apps preinstalled. These essential apps are file manager, telephony, calendar, and downloads. Other than that, it also comes with Google Play Store and Play Games preinstalled. One thing that caught our eye is the integrated Fake GPS tool. You can use this tool to spoof your current location.
Moving further, it also lets you import apk/xapk files from your system, which can help in many cases. Like NoxPlayer, it also enables you to root your device and unlock more advanced options to test more apps. To sum up, it’s an excellent Android emulator that comes with all essential features.
Pros:
- Can Change the Android Version
- Built-in Fake GPS Tool
- Works Fast
- Supports Rooting
- Good for Gaming
- Custom Key Mapping
Cons:
- Comes With Bloatware
5. GameLoop
Another Android emulator that’s worth trying is GameLoop. This Android emulator is created by Tencent, the actual publisher of Players Unknown Battle Ground (PUBG). It’s a simple yet powerful Android emulator that comes with all essential features.
Like other Android emulators, it also lets you use apps and games on your Windows 11 system, which is its primary function. Notably, it doesn’t come with Google Play Store preinstalled. You have to install it manually.
We also checked GameLoop’s Android version, and it slightly disappointed us. It’s based on Android 7.1.2 (Nougat). This could be a drawback for some users, as it can cause performance and compatibility issues.
GameLoop also comes with some useful built-in tools, such as Key Mapping, Video Recorder, Screenshot, Multi Window, etc. Like other emulators, it also lets you play games using the mouse and keyboard.
You can also change the keyboard controls and mouse’s sensitivity according to your own preferences. Additionally, it also comes with an integrated Screenshot and Video Recorder tool. One thing that disappointed us a lot was its performance. Undoubtedly, it lets you install apps and games properly.
But what’s the point of installing them if you can’t play or use them? Other than that, it’s a great Android emulator, and there’s nothing much to highlight about.
Pros:
- Doesn’t Consume Many Resources
- Easy to Use
- Best for Playing Android Games Like PUBG
- Hosts Lots of High-end Android Games Available
Cons:
- Sometimes Lags & Become Unresponsive
- Limited to Gaming
6. NoxPlayer

NoxPlayer is another fantastic Android emulator that lets you install and use Android apps and games on your PC. Interestingly, this emulator differs from other Android emulators on this best Android emulators list.
This is because it’s not only designed for gamers. It is also made for developers, as it comes with some developer-centric features that can help them easily test their new apps and games.
Moving ahead, it features a simple user interface, again similar to other Android emulators. But we would like to mention that it’s quite laggy and slow. But an update can fix it easily, so that’s not an issue. Coming over its primary features.
NoxPlayer is based on Android 7.1.2 (Nougat). This could be a disadvantage for some users, as it can prevent them from installing all mobile apps and games. But according to its creators, it supports 90% of apps and games that are present on the Play Store.
Like other Android emulators, it also comes with all essential apps, such as File Manager, Contacts, Photos, Downloads, etc. Though, NoxPlayer works most of the time properly. But if you encounter any performance issues, you can modify the graphics settings as per your system’s specs to enjoy games seamlessly.
You can also choose from three different screen resolutions: Tablet, Mobile Phone, and Widescreen. Not only this, but you can also set a custom screen resolution at your convenience.
One of the most highlighting parts about NoxPlayer is that it lets you root your emulator and do more things you couldn’t do earlier. It also has a Streaming Mode feature that automatically hides the sidebars so you can stream on YouTube, Twitch, etc.
Also, like other Android emulators, it comes with a Sync option that lets you operate multiple instances at the same time. It can be useful while playing games like Clash of Clans, Hay Day, etc.
One thing we didn’t like about this tool is that it comes with a lot of bloatware. It also keeps showing ads on the different sides of the emulator.
Pros:
- Easy to Use and Runs Smoothly
- Build-In Keyboard Control
- Supports Rooting
- Compatible With Both Intel and AMD PCs
- Tons of Customization Options
- Supports Multiple Android Versions
Cons:
- Sometimes Crashes and Freezes While Running
- Bloatware
- Runs on Android 7.1.2
- Security Issues
- Sometimes Lags
FAQs
Is There an Android Emulator for Windows 11?
Yes, there are several Android emulators for Windows 11. You can try emulators like Bluestacks, LDPlayer, NoxPlayer, etc.
Which Is the Fastest Android Emulator for PC?
LDPlayer is the fastest Android emulator for PC, as it installs seamlessly on your PC and lets you play heavy games, like PUBGM, CODM, etc., without any performance issues. In addition, it also comes with all essential features and an intuitive interface, which makes it easy to use, especially for new users. One of the highlights of LDPlayer is that you can use your phone as a joystick to play games on this emulator.
Is Windows 11 Good for Emulators?
Yes, Windows 11 is good for emulators. You can efficiently run any Android emulator on Windows 11, even if it’s equipped with basic hardware specifications. For instance, most Android emulators run systems with AMD and Intel processors.
What’s Better Than BlueStacks?
There are many better Android emulators than BlueStacks, one of which is LDPlayer. LDPlayer is much better than BlueStacks, as it provides excellent gaming performance without consuming much of your system resources. It also lets you install and run heavy multiplayer games, like PUBG Mobile, COD Mobile, Genshin Impact, etc. Besides this, NoxPlayer is also a great emulator and comes with all essential features.
Can Windows 11 Run All Android Apps?
Yes, Windows 11 can run Android apps. But not all apps. This is because Windows has recently started supporting mobile apps. You can quickly download them from the integrated Amazon App Store. But the Amazon App Store doesn’t host all available and popular mobile apps and games, as the Google Play Store does.
Are Android Emulators Safe for PC?
Many people always ask themselves an important question before downloading an Android emulator on their PC: “Are Android Emulators Safe for PC?.” And sadly, they never find a straight answer to this question. If you’re still finding an answer to this question, then let us share it with you.
Android emulators are completely safe and secure if you only download them from a trusted source. This is why we always suggest users download programs from their official website. This same suggestion applies to you. You can also use online virus scanner tools to scan files before downloading them to your system.
Which Is Your Favorite Android Emulator?
One of the best ways to run mobile apps and games on a Windows computer is using Android emulators. But, there are a large number of Android emulators for Windows 11, which makes things quite complicated. Due to the many available options, it becomes challenging to learn about all Android emulators and choose the best one.
To help you pick the best Android emulators for your Windows 11 PC, we’ve thoroughly discussed some of the best ones in this guide. We hope our handpicked choices helped you pick the best one for the system. If yes, then make sure to share which Android emulator you picked for your Windows 11 PC.