
Export Users, Groups and OU’s from one Windows 2003/2008 Active Directory Domain to other Windows 2003/2008 Active Directory Domain
One of our engagement with client, client wants to upgrade of Windows 2003 Domain Controller to Windows 2008 R2 Domain Controller and to assure that once upgrade, application integrated with Active Directory will have no impact, we want it to test with Windows 2008 R2 Active Directory Domain. We deploy one fresh Windows 2008 R2 Domain from scratch. The next is to create users, groups OU structure similar to the production environment. So we thought to use LDAP export and import to do that. We have to first import OU, then Users and last Groups. Here are steps we followed to achieve the same.
1. Export OU structure from Windows 2003 DC and import it in Windows 2008 R2 Domain Controller
a. To export users, login with Domain Admin credential to Windows 2003 DC and run below command
ldifde -f ExportOu.ldf -s DCservername -d “dc=domain,dc=com” -p subtree -r “(objectCategory=organizationalUnit)” -l “cn,objectclass,ou” -c fromDN ToDN
Where ExportOU.ldf: file name
DCservername: Domain Controller Name
fromDN: Source Domain Name
ToDN: Destination Domain Name
b. Copy File ExportOu.ldf to Windows 2008 R2 Domain Controller
c. Login to Windows 2008 R2 DC with Domain Admin credential
d. To import OU structure, run below command
ldifde -i -f ExportOu.ldf -k -s DCservername
Where ExportOU.ldf: file name
DCservername: Domain Controller Name
e. Confirm OU structure is similar to Windows 2003 Active Directory Domain
2. Export Users from Windows 2003 DC and import it in Windows 2008 R2 Domain Controller
a. To export users login to Windows 2003 DC and run below command
ldifde -f ExportUser.ldf -s DCservername -d “dc=domain,dc=com” -c “dc=domain,dc=com” “DC=destination,DC=com” -p subtree -r “(&(objectCategory=person)(objectClass=User)(givenname=*))” -l “cn,givenName,objectclass,samAccountName,memberof” –c fromDN ToDN
Where ExportUser.ldf: file name
DCservername: Domain Controller Name
fromDN: Source Domain Name
ToDN: Destination Domain Name
b. Copy File ExportUser.ldf to Windows 2008 R2 Domain Controller
c. Login to Windows 2008 R2 DC with Domain Admin credential
d. To import Users, run below command
ldifde -i –f ExportUser.ldf -k –s DCservername
Where ExportUser.ldf: file name
DCservername: Domain Controller Name
e. Confirm users are imported successfully
3. Export Groups from Windows 2003 DC and import it in Windows 2008 R2 Domain Controller
a. To export Groups login to Windows 2003 DC and run below command
ldifde -f ExportGroup.ldf -s DCservername -d “dc=domain,dc=com” -c “dc=domain,dc=com” “DC=destination,DC=com” -p subtree -r “(&(objectCategory=group)(objectClass=group))” -l “cn,givenName,objectclass,member,memberof,managedby” –c fromDN ToDN
Where ExportGroup.ldf: file name
DCservername: Domain Controller Name
fromDN: Source Domain Name
ToDN: Destination Domain Name
b. Copy ExportGroup.ldf File to Windows 2008 R2 Domain Controller
c. Login to Windows 2008 R2 DC with Domain Admin credential
d. To import groups, run below command
ldifde -i –f ExportGroup.ldf -k –s DCservername
Where ExportOU.ldf: file name
DCservername: Domain Controller Name
e. Confirm users are imported successfully
4. Enable all users and reset the password
a. When you import users, it will be in disabled state. To enable it, right click saved queries and define new query. Give query name and click on define query. Click users and select ‘Disabled Accounts’. Click OK
b. Select all users and click on Enable Account
c. Select all users and click on Properties, Select Account and select check box for Users must change password at next logon, and click OK
d. To reset password for users, use below command
dsquery user -samid | dsmod user -pwd
Now you can ask users to login and test application J
(Как скопировать учетные записи пользователей из одного домена в другой на Windows 2008)
Абсолютно не травильная задача особенно если хочется перенести пользователей с паролями.
Есть несколько способов от примитивных до самых изощрённых. Отличия в трудоемкости переноса и в конечном результате. (Для своей задачи рассмотрел всего лишь несколько первых попавшихся из-за ограниченности времени).
Итак, способы (обзор):
1) Командная строка и Excel.
2) Утилита CSVDE.
3) Утилиты из Resource Kit 2008 Server.
4) Active Directory Migration Tool.
5) Программа POINTDEV IDEAL Migration.
——————————————————————————————-
1. Командная строка и Excel
Для создания пользователей используется команда net user (Использование команды «net user»), например так
net user bob 123 /add /comment:»My user» /fullname:»Иванов Иван» /domain
Чтобы получить набор строк net user, нужно получить список пользователей, который можно обработать в Excel. Пример, вот такой список

В столбце D – формула:
=СЦЕПИТЬ(«net user «;A2;» 123 /add /comment:»;СИМВОЛ(34);»My user»;СИМВОЛ(34);» /fullname:»;СИМВОЛ(34);C2;» «;B2;СИМВОЛ(34);» /domain»)
Как получить список пользователей: Список может существовать в виде файла (админы иногда сохраняют списки пользователей в файлы). Можно с помощью программы POINTDEV IDEAL Migration, она даже в триальном варианте позволяет выгрузить пользователей в файл cvs. Можно прямо с экрана снять снимок и распознать в ABBYY FineReader, если снимок снимать SnagIt то он сам умеет распознавать.
— Пользователи создаются в примитивном варианте, большая часть полей и опций не переноситься
— Пароль не переноситься
+ Всё очень просто и может быть быстро
——————————————————————————————-
2. Утилита CSVDE
Позволяет импортировать\экспортировать данные из каталога LDAP в файл cvs (в том числе и учетные записи пользователей).
Есть целый сайт посвященный описанию CSVDE Home
— Желательно знать устройство LDAP Active Directory (какие поля чего означают)
+ Бесплатно и не нужно устанавливать
——————————————————————————————-
3. Утилиты из Resource Kit 2008 Server
Утилиты addusers, moveuser. Addusers – аналог net user, но более функциональный, например позволяет создавать сразу кучу пользователи из файла-списка. Moveuser – позволяет перенести учетную запись прямо с одного компьютера на другой.
Описание есть здесь:
ADDUSERS.exe
MOVEUSER.exe
Сам набор утилит Resource Kit 2008 Server официально он продается в виде набора классных книг (сам не читал – сужу по отзывам) и CDROM диска к ним. Не официально есть на торренте.
— Нужно искать, скачивать или покупать
— Платно
+ Более функционально чем net user
——————————————————————————————-
4. Active Directory Migration Tool
Дистрибутив v.3.2 — Active Directory Migration Tool version 3.2
Документация — Active Directory Migration Tool (ADMT) Guide: Migrating and Restructuring Active Directory Domains
Набор средств (утилит) для миграции Active Directory. Изучить – не просто.
— Сложно освоить (документация 263 страницы)
+ Бесплатно
+ Перенести можно наверное что угодно (например, пароли переносятся, но при установке еще каких-то дополнительных компонентов)
——————————————————————————————-
5. Программа POINTDEV IDEAL Migration
POINTDEV IDEAL Migration
Позволяет переносить полные сведения домена. Программа платная. Можно получить триальный ключ за просто так, но только на 15 дней и мигрировать можно только 5 пользователей. Программа в триальном варианте позволяет просто выгрузить список пользователей в файл cvs.
При переписке с ними, прислали письмо с ключом, но сам ключ приложить забыли 🙂 поэтому даже попробовать не удалось, хотя список пользователей в Excel я выгрузить сумел.
— Программа платная
+ Переносить ВСЁ
——————————————————————————————-
Introduction
I was working on a little project for a company that was running TS Gateway on 32bit Windows 2008. The reason they did not go for x64 at the time was that they used Virtual Server as their virtualization platform for some years and not Hyper-V. One of the drawbacks was that they could not use x64 guest VMs. Since then they have move to Hyper-V and now also run Window Server 2012. So after more than 5 years of service and to make sure they did not keep relying on aging technology it is time to move to Windows Server 2012 RD Gateway and reap the benefits of the latest OS.
All in all the Microsoft documentation is not too bad, all be it that the information is a bit distributed as you need to use various tools to complete the process. Basically, depending on the original setup of the source server you’ll need to use the TS/RD Gateway Export & Import functionality, Web Deploy (we’re at version 3.0 at the time of writing) and the Windows Server Migration Tools that were introduced with Windows 2008 R2 and are also available in Windows Server 2012.
In a number of posts I’ll be discussing some of the steps we took. You are reading the second post.
- x86 Windows Server 2008 TS Gateway Migration To x64 Windows Server 2012 RD Gateway
- Installing & using the Windows Server Migration Tools To Migrate Local Users & Groups
- TS/RD Gateway Export & Import (Fixing Event ID 2002 “The policy and configuration settings could not be imported to the RD Gateway server «%1″» because they are associated with local computer groups on another RD Gateway server”)
As discussed in the first part we need to migrate some local users & groups on the TS Gateway (source) server as they are also being used for some special cases of remote access, next to Active Directory users & groups for the Remote Access Policies (RAPs) & Connection Authorization Policies (CAPs). The tool the use is the Windows Server Migration Tools. These were introduced with Windows 2008 R2 and are also available in Windows Server 2012.
Some people seem to get confused a bit about the installation of the Server Migration Tools but it’s not that hard. I have used these tools several times before in the past and they work very well. You just need to read up a bit on the the deployment part and once you have it figured out they work very well.
Installing the Windows Server Migration Tools on the DESTINATION Server
First we have to install the on the DESTINATION host (W2K12 in our case, the server to which you are migrating)). For this we launch Server Manager and on the dashboard select Manage and choose Add Roles & Feature.

Navigate through the wizard until you get to Features. Find and select Windows Server Migration Tools. Click Next.
![clip_image001[4]](https://blog.workinghardinit.work/wp-content/uploads/2013/05/clip_image0014_thumb.png "clip_image001[4]")
Click Install to kick of the installation.
![clip_image001[9]](https://blog.workinghardinit.work/wp-content/uploads/2013/05/clip_image0019_thumb.png "clip_image001[9]")
After a while your patience will be rewarded.
![clip_image001[11]](https://blog.workinghardinit.work/wp-content/uploads/2013/05/clip_image00111_thumb.png "clip_image001[11]")
Installing the Windows Server Migration Tools on the SOURCE Server
To install the Windows Server Migration Tools on the SOURCE server, you need to run the appropriate PowerShell command on the DESTINATION server. This is what trips people up a lot of the time. You deploy the correct version of the tools from the destination server to the source server, where you will than register them for use. Do this with an admin account that has admin privileges on both the DESTINATION & SOURCE Computer.
Start up the Windows Server Migration Tools from Server Manager, Tools.

This launches the Windows Server Migration Tools PowerShell window.

Our SOURCE server here is the32 bit (X86) Windows 2008 TS Gateway Server. The documentation tells us the correct values to use for the parameters /architecture and /OS to use.
SmigDeploy.exe /package /architecture X86 /os WS08 /path \SourcerServerc$sysadmin
Now before you run this command be sure to go to the ServerMigrationTools folder as the UI fails to do that for you.
Also this is PowerShell so use . in front of the command otherwise you’ll get the error below.

While you want this:

Now you have also deployed the correct tools to the SOURCE server, our old legacy TS Gateway Server. Next we need to register these tools on the SOURCE Server to be able to use them. You might have gotten the message already you need PowerShell deployed on the SOURCE Server as documented.
If you have PowerShell, launch the console with elevated permissions (Runs As Administrator) and run the following command: .SmigDeploy.exe

Congratulations you are now ready to use the Windows Server Migration Tools! That wasn’t so hard was it?
Using the Windows Server Migration Tools To Migrate Local Users & Groups
To export the local users and groups from the source TS/RD Gateway server you start up the Windows Server Migration Tools on the SOURCE server (see the documentation for all ways to achieve this) and run the following PowerShell command:
Export-SmigServerSetting -User All -Group –Path C:SysAdminExportMigUsersGroups –Verbose

As you can see I elected to migrate all user accounts not just the enabled or disabled ones. We’ll sort those out later. Also note the command will create the folder for you.
To import the local users and groups to the target RD Gateway server you start up the Windows Server Migration Tools on the Destination server (see the documentation) , i.e. our new Windows Server 2012 RD Gateway VM.
and run the following PowerShell command:
Import-SmigServerSetting -User Enabled -Group -Path C:SysAdminExportMigUsersGroups -Verbose
Do note that the migrated user accounts will be disabled and have their properties set to «Next Logon». This means you will have to deal with this accordingly depending on the scenarios and communicate new passwords & action to take to the users.


Do note that the local groups have had the local or domain groups/users added by the import command. Pretty neat.

You’re now ready for the next step. But that’s for another blog post.
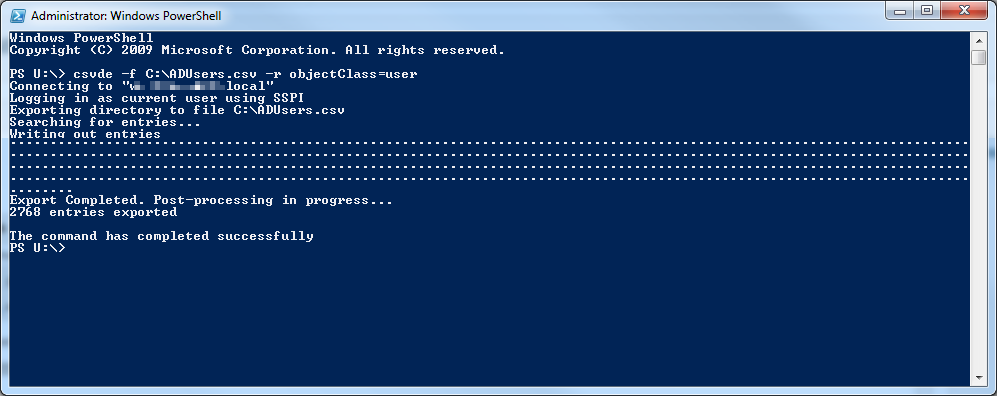
The following command can be used to extract a complete list of users objects in your Active Directory environment.
csvde -f C:\ADUsers.csv -r objectClass=user
- To run open the PowerShell console (or command prompt)
-

- Then enter the command listed above
-

- The list will be saved to C:\ADUsers.csv
*** All the below commands are use in
command prompt.
Viewing LDIFDE general parameters
Click
Start, point to Programs, point to Accessories, and then click 1. Command
Prompt.
Using LDIFDE to import and export
directory objects to Active Directory
To Export All OU:-
C:\>ldifde -f
orissa.ldf -s WIN-MB9FF6Z1KLE -d «dc=testbed,dc=com» -p subtree -r
«(objectCategory=organizationalUnit)» -l
«cn,objectclass,ou»
Connecting
to «WIN-MB9FF6Z1KLE»
Logging in
as current user using SSPI
Exporting
directory to file orissa.ldf
Searching
for entries…
Writing out
entries……
6 entries
exported
The command
has completed successfully
To Import All OU Expect Default OU:-
Edit the orissa.ldf and delete all default OUs.
And use the command.
C:\>ldifde -i -f
orissa.ldf
Connecting
to «WIN-MB9FF6Z1KLE.testbed.com»
Logging in
as current user using SSPI
Importing
directory from file «orissa.ldf»
Loading
entries…..
4 entries
modified successfully.
The command
has completed successfully
To Export all users of a OU:-
C:\>ldifde -f
orissa-bbsr.ldf -s WIN-MB9FF6Z1KLE -d
«ou=bbsr,ou=orissa,dc=testbed,dc=com» -p subtree -r
«(&(objectCategory=person)(objectClass=User)(givenname=*))» -l
«cn,givenName,objectclass,samAccountName»
Connecting
to «WIN-MB9FF6Z1KLE»
Logging in
as current user using SSPI
Exporting
directory to file orissa-bbsr.ldf
Searching
for entries…
Writing out
entries….
4 entries
exported
The command
has completed successfully
Imp users to OU:-
C:\>ldifde -i -f
orissa-bbsr.ldf
Connecting
to «WIN-MB9FF6Z1KLE.testbed.com»
Logging in
as current user using SSPI
Importing
directory from file «orissa-bbsr.ldf»
Loading
entries…
4 entries
modified successfully.
The command
has completed successfully
To Delete a user:-
1-create a
file like c:\deluser.ldf
2-edit the
filr c:\deluser.ldf
3- add the
following
dn:
CN=bbsr1,OU=bbsr,OU=orissa,DC=testbed,DC=com
changetype:
delete
4- run the
command below in cmd prompt
C:\>ldifde -i -f
deluser.ldf -s WIN-MB9FF6Z1KLE
or
C:\>ldifde -i -f
deluser.ldf
Connecting
to «WIN-MB9FF6Z1KLE.testbed.com»
Logging in
as current user using SSPI
Importing
directory from file «deluser.ldf»
Loading
entries..
1 entry
modified successfully.
The command
has completed successfully
export all groups of DC:-
C:\>ldifde -f
ExportGroup.ldf -s WIN-MB9FF6Z1KLE -d «dc=testbed,dc=com» -p subtree
-r
«(&(objectCategory=group)(objectClass=group))»
-l «cn,givenName,objectclass,member,memberof,managedby»
Connecting
to «WIN-MB9FF6Z1KLE»
Logging in
as current user using SSPI
Exporting
directory to file ExportGroup.ldf
Searching
for entries…
Writing out
entries………………………………..
38 entries
exported
The command
has completed successfully
But these groups can not be imported.
Because it contains all default groups with custom groups. To use this delete
all default groups and use the ldf file.
Export groups from a particular OU :-
C:\>ldifde -f
ExportGroupHwh.ldf -s WIN-MB9FF6Z1KLE -d «OU=salt,OU=hwh,dc=testbed,
dc=com» -p subtree -r
«(&(objectCategory=group)(objectClass=group))» -l
«cn,givenName,objectclass,member,memberof,managedby»
Connecting
to «WIN-MB9FF6Z1KLE»
Logging in
as current user using SSPI
Exporting
directory to file ExportGroupHwh.ldf
Searching
for entries…
Writing out
entries.
1 entries
exported
The command
has completed successfully
Imp groups from a particular OU :-
C:\>ldifde -i -f
ExportGroupHwh.ldf
Connecting
to «WIN-MB9FF6Z1KLE.testbed.com»
Logging in
as current user using SSPI
Importing
directory from file «ExportGroupHwh.ldf»
Loading
entries..
1 entry
modified successfully.
The command
has completed successfully