
Те, кто часто играет в игры, с большой долей вероятности могут столкнуться с синим экраном смерти, который указывает на файл dxgmms2.sys. Ошибка может сопровождаться фразами: SYSTEM SERVICE EXCEPTION, KMODE EXCEPTION NOT HANDLED, PAGE_FAULT_IN_NONPAGED_AREA, IRQL_NOT_LESS_OR_EQUAL и другими. Их вы можете посмотреть на скриншоте. В любом случае Windows 10 пытается нам сообщить, что ей не удалось найти, загрузить файл или dxgmms2.sys поврежден. Дальше мы рассмотрим, почему так получилось и как это можно исправить.
Что вызвало проблему dxgmms2.sys?
Проблему может спровоцировать:
- повреждение драйверов;
- неправильная работа второго монитора или невозможность их использования в паре;
- сбой в аппаратном ускорении.
Как исправить ошибку BSOD dxgmms2.sys?
Не считая откат Windows 10, который тоже может помочь, есть несколько рабочих способов исправления проблемы:
- Чистая установка драйверов. Важно не просто обновить видеодрайвер или запустить установщик поверх старого, но предварительно удалить его. Это можно сделать через интерфейс «Диспетчера устройств» в разделе «Видеоадаптеры». Необходимый параметр расположен в меню драйвера, которое можно открыть двойным кликом по устройству и переходом на одноименную вкладку.
- Выключить второй монитор. Если драйвер работает некорректно, он может не обрабатывать сразу пару мониторов. Самый простой способ это сделать – нажать Win + P и выбрать вариант «Только экран компьютера» или «Только второй экран».
- Отключить аппаратное ускорение. Оно активно практически у всех пользователей, так как используется для прироста производительности операционной системы. Сложность в том, что Windows 10 не предоставляет доступ к данному параметру через интерфейс, поэтому нужно редактировать реестр. В него попадем, если нажать Win + R, ввести regedit и нажать Ок. Далее нужно перейти по пути HKEY_CURRENT_USER > Software > Microsoft > Avalon.Graphics. Осталось только нажать дважды на параметр DisableHWAcceleration и установить ему значение 1. Если его нет, нужно просто создать этот элемент.
Еще можно попробовать откатить систему, сбросить настройки BIOS, обновить Windows 10. Плюс некоторые пользователи говорят, что Microsoft Office Access 2010 тоже может стать причиной сбоя. Можно попробовать его временно удалить. Все остальное – чересчур фантастические варианты, которые вряд ли смогут помочь при ошибке dxgmms2.sys.
Are you viewing a dxgmms2.sys or SYSTEM_THREAD_EXCEPTION_NOT_HANDLED error on the blue screen on your computer? BSOD errors seem to be a nightmare for Windows users. And, dxgmms2.sys stop code is one of the most common annoying errors, usually accompanied by Blue Screen Error Codes: SYSTEM THREAD EXCEPTION NOT HANDLED & SYSTEM SERVICE EXCEPTION.
But what exactly causes the dxgmms2.sys Blue Screen Error to appear? Well, if your system has an old, corrupted, and faulty graphics card driver, there’s a high probability that you may witness this issue while playing games or watching movies. Apart from graphics card driver issues, you may encounter the dxgmms2.sys, stop code when you are dealing with incompatible firmware.
How To Fix dxgmms2.sys Blue Screen Error on Windows 10?
For most of the Windows users, updating the graphics card driver has turned out to be an effective way to fix dxgmms2.sys stop code on Windows 10. If you are not sure how to manually update the drivers, we suggest you try an automatic driver updater tool for the process.
STEP 1- Download, install & launch Smart Driver Care on your PC.
STEP 2- On the main dashboard, click on Start Scan Now button.
STEP 3- Once the driver updater utility completes the scanning process, it will show a complete list of device drivers that are damaged, missing, outdated, or incompatible.

STEP 4- Go through the list & look for faulty graphics drivers, and you can click on the Update button to replace it with the latest and compatible versions.


If you have a registered version of the product, you can update all the faulty drivers at once, by clicking the Update All button to fix all the driver-related issues.
Resolved: dxgmms2.sys Blue Screen Error on Windows 10
Still struggling with the BSOD Error? Well, fret not! If updating the graphics drivers didn’t help you to resolve the issue, you can try below-mentioned workarounds:
| Top 4 Solutions | Workarounds To Fix The Stop Code: dxgmms2.sys |
|---|---|
| Run DirectX Diagnostic Tool | Executing the DirectX Diagnostic Tool will help you fix the bugs related to DirectX Graphics API. |
| Disable Hardware Acceleration | The feature is dedicatedly used for maximizing the performance. But certain times, it may cause the errors too & dxgmms2.sys is one of them. So, try resolving the error code by deactivating the feature. |
| Update the BIOS | You can simply update the BIOS configuration to resolve the stop code dxgmms2.sys on Windows 10. |
| Use CMD To Delete Problematic Windows System Files | Use Command prompt to delete problematic files that might cause this Windows 10 BSOD error. |
METHOD 1- Run DirectX Diagnostic Tool
Follow the instructions to run the DirectX Diagnostic Tool & resolve Windows 10 BSOD error:
STEP 1- Open the Run Window.
STEP 2- Just type “dxdiag” (without semicolons) and hit the Enter button.
STEP 3- Your DirectX Diagnostic Tool will open instantly.
STEP 4- If a pop-up appears on your screen asking to check if the drivers are digitally signed. Just click the Yes button to proceed.

Once the Diagnostic tool finishes the scanning, make sure you check the details related to a video card, game controllers & unsigned drivers.
METHOD 2- Disable Hardware Acceleration
Follow the instructions to deactivate Hardware Acceleration:
STEP 1- Open the Run window.
STEP 2- Type regedit & hit the OK button to open Registry Editor.
STEP 3- Follow the path: HKEY_CURRENT_USER > Software > Microsoft > Avalon.Graphics
STEP 4- Locate DisableHWAcceleration.
STEP 5- Just right-click on the blank area & click on the New option. Select the DWORD (32-bit) Value option and simply name it as DisableHWAcceleration.

STEP 6- Now double-click on the entry and set the value to 1. This will disable the Hardware Acceleration feature on your PC. Hit OK button to implement and save the changes.
Now restart the Windows 10 PC to see whether the Stop Code: dxgmms2.sys appears again.
METHOD 3- Update the BIOS
Implement the steps mentioned below the update the BIOS configuration:
STEP 1- Open the Run window.
STEP 2- Just type “msinfo32” (without semicolons to open System Information Window) & hit the Enter button.
STEP 3- At this point, you need to search for the BIOS version your computer is running.
STEP 4- Once you find the developer & version of the BIOS installed on your Windows PC, Google the manufacturer’s website to install the latest version.

There are plenty of BIOS Update Software as well, that can ease the entire process. You can try them and save your time and effort.
METHOD 4- Use CMD TO Delete Problematic Windows System Files
Implement the steps mentioned below to delete certain fault files responsible for causing the stop code dxgmms2.sys on Windows 10.
Note: Make sure you take a backup of all the necessary files before deleting any Windows 10 file.
STEP 1- Launch the Troubleshoot menu. To do so, go the Start menu & click on the Power button while holding the Shift key & click on the Restart button carefully.
STEP 2- Select the Troubleshoot menu, followed by clicking on the Advanced options.
STEP 3- Hit the Command Prompt option to open the CMD window.
STEP 4- Execute the following set of command lines:
C:
cd windows
attrib -s -r -h DXGMMS1.sys /s
del DXGMMS1.sys /s /q
You must press Enter after typing every command.
Now close CMD & restart PC. Executing the command above lines will help you detect and remove problematic Windows 10 files, if any.
Video Tutorial: Quick Solutions To Fix dxgmms2.sys BSOD Error on Windows 10
If you are short on time, you can check out this quick video tutorial and implement the steps one by one to resolve the stop code dxgmms2.sys on Windows 10.
Did this article help you? Let us know your opinion in the comments section below!
Follow us on social media – Facebook, Instagram and YouTube.
Encountering the frustrating dxgmms2.sys blue screen error can be a gamer’s nightmare as it disrupts immersive gaming experiences. The issue commonly appears with System Service Exception, Video_Scheduler_Internal_Error, System Thread Exception Not Handled, or DRIVER_IRQL_NOT_LESS_OR_EQUAL. This BSOD problem may occur with a system crash, and the PC may freeze, hang, and become unresponsive.
This glitch often occurs from obsolete or faulty graphics card drivers pushing your DirectX Graphics MMS system file beyond its limits. But fear not, as we’ve got this blog, to rescue your system from this digital quagmire. Whether it’s a driver hiccups or a hardware misstep, our solutions promise respite. Therefore, say goodbye to the relentless restarts and hello to uninterrupted gaming bliss.
dxgmms2.sys blue screen Error
Here is how to fix dxgmms2.sys blue screen Error in Windows 11/10:
Update the Graphic Drivers
To tackle the pesky BSOD you should begin with updating your graphic drivers. This quick fix is done through Device Manager, an effective Windows tool that helps to update, uninstall, and roll back drivers and ensures a seamless gaming journey.
- Press Win + R, type devmgmt.msc, and hit Enter.
- In Device Manager, expand Display adapters.
- Right-click on your graphics adapter (AMD, NVIDIA, or Intel), and choose Update driver.
- Select “Search automatically for drivers”.
- Let Windows install the latest driver and reboot your computer.
Roll Back to the Previous Driver Version
In certain scenarios, updating the drivers has been identified as the real reason for this error, so, reverting them to the previous version where they worked can be a viable option.
- Right-click on Start and select Device Manager.
- Double-click on Display adapters.
- Right-click the graphics card, and select Properties.
- Navigate to the Driver tab.
- Select “Roll Back Driver”.
- Wait for the previous driver version to be installed.
- Click OK and restart your PC.
Launch the DirectX Diagnostic Tool to see note
The dxgmms2.sys error in Windows is closely tied to DirectX, a crucial component. Essentially, the filename is a shortcut for DirectX Graphics MMS. Therefore, understanding the error notes on the tool becomes a pivotal key in troubleshooting and resolving the issue effectively:
- Press Win + R, type dxdiag, and hit Enter.
- Let the DirectX Diagnostic Tool load.
- Click the Display tab.
- Check Notes for errors.
- If errors, use DirectX Web Installer to reinstall the tool.
Turn Off Hardware Acceleration
Another reason behind the BSOD error may be the hardware acceleration feature in your Windows system. While this feature aims to boost computer performance, it can also trigger issues. Try disabling hardware acceleration to check if the issue is solved.
- Click on Search, type regedit, and press Enter.
- Navigate to
HKEY_CURRENT_USER -> Software -> Microsoft -> Avalon.Graphics. - Right-click in the right panel and select New -> DWORD (32-bit) Value.
- Name it DisableHWAcceleration.
- Double-click on this value, set its Value data to 1, and click OK.
- Exit Registry Editor and restart your computer.
- If needed, reverse the process by changing DisableHWAcceleration’s value to 0.
Run Windows Memory Test
Windows Memory Diagnostic Utility is your ally in dealing with the dxgmms2.sys problem. This Windows-integrated program serves as a diagnostic detective for memory-related issues.
When confronted with the dreadful blue screen problem, this utility becomes critical. Simply said, it scans your computer’s RAM for errors and provides suggestions for resolving the problem.
- Search for MdSched in the Start menu and press Enter.
- Click Restart now and check for problems.
- Alternatively, select Check for problems next time I start my computer for unsaved work.
- Windows scans for memory issues upon reboot.
Upgrade the BIOS
Still struggling with the dxgmms2.sys issue? You might want to try updating or upgrading your BIOS. It is the Basic Input/Output System which is nothing but the core of your computer’s startup process.
Therefore, updating it can be the key to addressing the aforementioned error. Moreover, BIOS updates often include enhancements and bug fixes, offering a potential solution to this glitch.
- Download the latest BIOS from your motherboard manufacturer’s website.
- Extract if it’s a ZIP/RAR to an empty USB drive.
- Click Start > Power > Restart (hold down Shift).
- Navigate to Troubleshoot -> Advanced options -> UEFI Firmware Settings -> Restart.
- In BIOS, find the Update option.
- Flash BIOS using the USB drive.
- Ensure smooth updates for your motherboard.
Switch HDMI/VGA Ports
Another quick fix for this error is to change the HDMI port on your computer by moving the cable from the Graphics Card port to the HDMI/VGA port on the motherboard. This simple switch might effectively solve the problem.
Install available Windows updates
You might want to try updating Windows to a stable version to bid farewell to dxgmms2.sys blue screen error. Whether on Windows 10 or 11, stability is key.
For Windows 10
- Click on Start and select Settings.
- Go to Update & security.
- Choose Windows Update.
- Click on Check for updates.
- Install the available updates.
For Windows 11
- Press Win + I and navigate to Windows Update.
- Click on “Check for updates”.
- Allow the system to scan and download pending updates.
- Finally, click on Restart now.
Methods:
Update the Graphic Drivers
Roll Back to the Previous Driver Version
Launch the DirectX Diagnostic Tool to see note
Turn Off Hardware Acceleration
Run Windows Memory Test
Upgrade the BIOS
Switch HDMI/VGA Ports
Install available Windows updates
That’s all!!
The “dxgmms2.sys” blue screen of death (BSOD) error occurs when the DirectX Graphics MMS system file in Windows 10 crashes due to outdated, buggy, or broken graphics card drivers. But rarely, general file corruption and memory-related faults can also contribute to the issue.
If you keep experiencing the “dxgmms2.sys” BSOD error repeatedly while playing games or streaming video on your Windows 10 PC, the list of troubleshooting methods below should help you fix that.

Update Graphics Card Drivers
In most cases, the “dxgmms2.sys” BSOD stems from outdated video drivers, so it’s a good idea to kick things off by updating them. You can obtain an up-to-date copy of the drivers with a brief search on graphics card manufacturer websites such as NVIDIA, AMD, and Intel.
Suppose you don’t know the specific make and model of your graphics card. In that case, you can rely on auto-detect tools such as NVIDIA Smart Scan, AMD Driver Auto-detect, and Intel Driver & Support Assistant to download drivers automatically. You can also use a dedicated driver updater tool to help you with that.
Update Windows 10
Outdated versions of Windows 10 can also result in the “dxgmms2.sys” BSOD. If you’ve repeatedly put off installing operating system updates on your computer, you must apply them immediately. That should eliminate any known bugs and issues while simultaneously updating obsolete DirectX components.
1. Open the Start menu and select Settings.
2. Select Update & Security.
3. Select Check for updates.

Suppose Windows Update detects any pending updates, select Download and install to install them.
Roll Back Graphics Card Drivers
If you started encountering the “dxgmms2.sys” error right after updating your graphics drivers in Windows 10, you must roll them back.
1. Press Windows+X and select the option labeled Device Manager.
2. Expand Display adapters.
3. Right-click your display adapter and select Properties.

4. Switch to the Driver tab.
5. Select Roll Back Driver.

6. Restart your computer.
Reinstall Graphics Card Drivers
If the “dxgmms2.sys” BSOD error persists, you must reinstall the graphics card drivers on your computer.
1. Open Device Manager.
2. Expand Display Adapters.
3. Right-click your display adapter and select Uninstall device.
4. Check the box next to Delete the driver software for this device and select Uninstall.
5. Press Windows+X and select Apps and Features.
6. Remove any listed video card driver support software.
7. Restart your computer.
Windows 10 will automatically install a set of generic video drivers at startup. But you must obtain the latest drivers from your graphics card manufacturer and apply them as soon as possible.
Update Game, Browser, or Streaming Client
Is there a specific video game, web browser, or streaming client that triggers the “dxgmms2.sys” error on your computer? Update the application to its latest version and check if that helps.
Repair Corrupted Files and Drive Errors
Windows 10 features several command-line tools that you can run off an elevated Windows PowerShell console to check for and resolve issues with corrupted files and drive errors. You should run them in the order that they appear below. However, they may take a significant amount of time (around an hour or more) to complete.
Run System File Checker (SFC)
1. Press Windows+X and select Windows PowerShell (Admin).
2. Type sfc /scannow.

3. Press Enter.
Run Deployment Image Servicing and Management (DISM) Tool
1. Open an elevated Windows PowerShell console.
2. Enter the following command and press Enter:
DISM /Online /Cleanup-Image /CheckHealth

3. If the DISM command detects issues with your computer, execute the two commands that follow:
DISM /Online /Cleanup-Image /ScanHealth
DISM /Online /Cleanup-Image /RestoreHealth
Run Check Disk Utility (CHKDSK)
1. Open an elevated Windows PowerShell console.
2. Type chkdsk c: /r.

3. Press Enter.
4. Type Y to confirm that you want the Check Disk Utility to run the next time you reboot your computer.
5. Press Enter again and restart your computer.
6. Wait for the Check Disk Utility to finish scanning and repairing drive errors. Windows 10 will load soon after that.
Perform System Restore
Have you taken the time to set up System Restore in Windows 10? If so, you probably have a restore point from a time when your PC was working correctly. Try using it to restore the operating system to an earlier state.
1. Press Windows+R to open the Run box. Then, type sysdm.cpl and select OK.
2. Switch to the System Protection tab.
3. Select System Restore.

4. Select Next.

5. Pick a restore point and follow all on-screen instructions to apply it.
Uninstall Windows Update
New Windows 10 updates improve the stability of the operating system, but some can also end up breaking things. If a recent Windows update caused the “dxgmms2.sys” BSOD error to show up, you should remove it. You must not uninstall any security updates, however.
1. Open the Run box. Then, type appwiz.cpl and select OK.
2. Select View installed updates to the top-left of the Programs and Features window.
3. Select the most recent optional or feature update and select Uninstall.

Run Memory Diagnostics
Faulty memory is another cause of the “dxgmms2.sys” BSOD. You can check for memory-related issues using Windows 10’s built-in Windows Memory Diagnostics tool.
1. Press Windows+S, type windows memory diagnostics, and select Open.
2. Select Restart now and check for problems. That should prompt your computer to boot into Windows Memory Diagnostics.

3. Wait until Windows Memory Diagnostics finishes checking for any errors. Once it does, your computer will reboot and notify you of memory-related issues.
Additionally, you should run the third-party MemTest86 tool to check for even more errors. Here’s how to use MemTest86 to diagnose bad memory.
If both tools confirm that there are memory errors on your computer, you may have to replace the RAM modules. Contact a local PC repair service for assistance.
Reset Windows 10
If none of the fixes above worked (or if there’s nothing wrong with the memory on your computer), then you must reset Windows 10 to factory defaults. That should get rid of any underlying issues behind the “dxgmms2.sys” BSOD error. You can choose to keep or remove personal files during the reset procedure.
1. Open the Start menu and select Settings.
2. Select Update & Security.
3. Select Recovery.
4. Select Get started.

5. Depending on what you want to do with your files, select Keep my files or Remove everything. Then, follow the rest of the on-screen instructions.

For a comprehensive step-by-step guide, check out this post about resetting Windows 10 to factory settings.
You likely ended up fixing the “dxgmms2.sys” BSOD straight off the bat by updating the graphics card drivers on your computer. If not, the rest of the pointers above should’ve helped you resolve it. But here’s what you must do if you continue to run into the error.
The “dxgmms2.sys” BSOD typically shows up alongside the “System Thread Exception Not Handled,” “Kmode Exception Not Handled,” and “System Service Exception” stop codes. We’ve covered them separately, so dig into those posts and carry out any additional suggestions and fixes that you find.
Related Posts
- How to Fix a “This file does not have an app associated with it” Error on Windows
- How to Fix an Update Error 0x800705b4 on Windows
- How to Resolve “A JavaScript error occured in the main process” Error on Windows
- How to Fix the Network Discovery Is Turned Off Error on Windows
- How to Change Folder Icons in Windows
Dxgmms2.sys is a system file or driver associated with the Windows operating system. Microsoft developed it for DirectX. Hence, DXGMMS is apparently an abbreviation for DirectX Graphics MMS, and MMS probably stands for Microsoft Media Server.
Many users reported seeing dxgmms2.sys errors after upgrading their system from an older version of Windows (Windows 8.1, Windows 8, Windows 7, and so on) to Windows 10. Others stated that the error messages started to appear after Windows downloaded and installed updates.
In recent times, we can authoritatively say we noticed that the group of people receiving the Dxgmms2.sys BSOD messages consisted of a unique set of users. The affected individuals were almost all people who were
- Using an NVIDIA graphics card
- Using a PC running Windows 10
- Playing games. The game involved was not necessarily a graphics-intensive or demanding application, but the one which just used the dedicated graphics driver of the PC.
Running specific games or programs causes the execution of the process that triggers the dxgmms2.sys blue screen of death. The affected games include Heroes of the Storm, The Division, Ark Survival Evolved, and Black Desert Online among others.
Blue screen of death errors earned their reputation overtime for being some of the worse errors a user can experience. Regardless of a PC’s processing power or graphics adapter, it would restart every time a blue screen of death error occurs.
A stop code, symbolic name, or both usually accompany a blue screen of death error. This extra information is beneficial, as it can be used to identify and troubleshoot the specific blue screen of death. Dxgmms2.sys SYSTEM_THREAD_EXCEPTION_NOT_HANDLED, Dxgmms2.sys SYSTEM_SERVICE_EXCEPTION are examples of a blue screen of death error messages. There are other dxgmms2.sys BSOD error messages. Now, we outline some of those error messages.
Some Dxgmms2.sys error messages
- Error message description: IRQL_NOT_LESS_EQUAL – dxgmms2.sys
- Error code: STOP 0x0000000A dxgmms2.sys
- Error message description: KMODE_EXCEPTION_NOT_HANDLED
- Error code: STOP 0x0000001E dxgmms2.sys
- Error message description: PAGE_FAULT_IN_NONPAGED_AREA
- Error code: STOP 0×00000050 dxgmms2.sys
- Error message description: A problem has been detected, and your system has been shut down…. the problem seems to be caused by the following file Dxgmms2.sys
- Error message description: Your PC ran into a problem and needs to restart… search online later for this error Dxgmms2.sys
- Why do dxgmms2.sys errors occur?
In the majority of events that occurred recently, the dxgmms2.sys errors have everything to do with NVIDIA graphics, Windows 10, or both. The exact cause of the error is unknown, but it is fair to say that most external factors are blameless. To that end, it is a bit strange that neither Microsoft nor NVIDIA provided information on resolving the issue.
As we know, exceptions to such happenings are normality. The causes of dxgmms2.sys that we explore below focus on the eventuality of all kind of scenarios.
Dxgmms2.sys errors may occur due to one of the following reasons or due to a combination of events below:
- Driver issues: Wrongly configured, outdated or corrupted drivers
- Windows registry-related problems: Corrupted, missing or invalid entries in the registry
- Virus or malware infestation: Malicious programs wreak havoc on a PC
- Damaged or faulty hardware: The hard drive and temporary memory (RAM) are usually the main culprits to look out for
How to fix dxgmms2.sys blue screen errors
We recommend that you follow the instructions contained in this guide consecutively to ensure that you are successful in getting rid of your problems involving dxgmms2.sys errors. If a particular fix does not apply to you or you are unable to use a specific method, skip it and move on to the next solution.
Is your computer running slow or suffering system glitches? If so, it may need maintenance. Try running a dedicated PC optimization tool to check the health of your PC and apply the necessary fixes.
1.Use Windows Update:
It is widely known that Microsoft designed Windows 10 to search for, download, and install updates automatically. Then again, some users who hated this setup were able to disable automatic updates by taking advantage of loopholes and employing some advanced techniques. If you are one of those users or if for some reason you have not updated your Windows OS in a long while, then this fix might just work for you. After all, not all Windows 10 iterations are prone to experiencing the dxgmms2.sys error messages.
To check for updates on Windows 10, follow these instructions:
Press the Windows button on your keyboard or click on the Windows start icon
2.Check your dedicated graphics driver cards:
The dedicated graphics card associated with dxgmms2.sys BSOD errors is NVIDIA. Some users experienced the errors after Windows updates installed the newest NVIDIA drivers. It is no surprise that the solution to their issues involved returning the older drivers.
First, you need to stop Windows from updating the drivers for you by following these steps:
Right-click on the Windows icon to see a list of programs. Select Control Panel to launch it
Under Devices, select the Devices and Printer option
Identify the PC icon with the name of your PC. Right-click on it and select Device installation settings. You will now be prompted with a message requesting confirmation for your action on whether Windows should download apps automatically
Click on No (your device might not work as expected). Click on Never install driver software from Windows Update
If you have successfully prevented Windows from downloading and installing graphics card drivers automatically, we can move on to our task of reverting to the old drivers by using these instructions:
Press the Windows button and the R key together to launch the Run app. Input devmgmt.msc into the available box present. After typing the code correctly, press the Enter key to launch the Device Manager app
Locate Display Adapters from the list. Expand it. Right-click on the NVIDIA graphic card that you have there. Click on Properties
After the Properties window opens, navigate to the Driver tab. Click on Roll Back Driver. A pop-up window (requesting confirmation for your action of reverting to old drivers) should show up now. Click on Yes to proceed. Windows should restore your old driver software now.
Reboot your PC for the changes to take effect. After your computer restarts, check if the process described here solved your issues. Otherwise, proceed to instructions on installing the later drivers or attempt other completely different methods to solve your problem
If the procedure above failed to work for you, then a different approach might be necessary. Uninstalling your graphics card driver and installing the latest recommended versions is probably the solution that will suit you.
To uninstall your dedicated graphics card software, follow these steps:
Launch Device Manager , using the instructions above. This process is an alternative way of doing the same thing: press the Windows button and the letter X together. This action asks your system to present a list of useful programs to you. Select the Device Manager program from this list
Expand Display adapters. Right-click on your NVIDIA graphics card and select Uninstall device
Click on Yes when you are asked for confirmation
Now it is time to download and install the newest recommended driver software. This process is a lot trickier though , as it requires you to search for the graphics card driver yourself. You can search for it online and download the necessary software from trusted sources. Be careful to download the right version for your PC and one that is entirely compatible with your iteration of Windows 10. This request is a big ask for most people.
You can make light work of this procedure by using special software (Auslogics Driver Updater) to download and install the latest recommended driver software. The process involved here is extremely efficient and far more comfortable to carry out.
Auslogics Driver Updater is an excellent program that will scan your computer for driver issues, and it will present a report on outdated or missing drivers on your PC. With the use of a single click, you can quickly update the problematic drivers to the required versions.
3.Completely disable your graphics card:
If for some reason the dxgmms2.sys BSOD error messages persisted even after you have performed the driver-related fixes, then disabling the dedicated graphics card is the next logical move. This action is needed because the NVIDIA cards are usually the culprit involved.
Although you might experience lower graphics performance when playing graphics-intensive games, this fix is the solution that will let you play games without BSOD interrupting you every time. Its use is probably worth it. For users who were experiencing the errors while playing casual or less graphics-intensive games, then this solution is a lifesaver.
Launch Device Manager, using any of the procedures above. You should have no problem doing this by now
Go to Display adapters. Right-click on your NVIDIA graphics card driver and select Disable
Exit the Device Manager and check if this action solved your problem
Otherwise, you can disable the integrated graphics drivers to eliminate conflicts between the available graphic cards that might be the cause of the error messages. Some users reported that they had been able to get rid of the error by doing this.
Open Device Manager again and expand Display adapters. Right-click on your integrated graphics card driver and select Disable
Right-click on your NVIDIA graphics card driver, but this time select Enable
Close the Device Manager program and check if this action solved your problems.
4.Disable hardware acceleration:
Some reports confirmed that the operations of applications using hardware acceleration caused the dxgmms2.sys blue screen of death error messages to appear. Several programs employ hardware acceleration to achieve maximum performance.
You can disable hardware acceleration for frequently used programs like browsers.
The instructions below would guide you in doing this for the most popular browser app (Google Chrome):
Launch your browser app (Chrome). Click on the Menu icon located in the top right corner. This icon is the one that consists of 3 dots forming a vertical line
Select Settings from the presented list. Scroll down and click on Show advanced settings
Move down and locate the System section. Here, untick the checkbox for Use hardware acceleration when available
Restart your browser to let the new settings take effect
If you use a different browser, the instructions for disabling hardware acceleration is a bit similar to the one above. Check for it in the settings menu of that browser.
There is an alternative way of disabling hardware acceleration. This method involves editing of the registry, so follow these steps very carefully:
Press the Windows button and the R key together to launch Run. Type regedit into the box present and hit the Enter key to start the Registry Editor program
After the required program opens, navigate through the following folders: HKEY_CURRENT_USER > Software > Microsoft > Avalon.Graphics
Locate the DisableHWAcceleration entry in the right pane. If you cannot find this entry, follow the instructions below to create one:
Right-click on the blank space in the pane and select New
Click on DWORD (32-bit) Value. The name of this newly created value should be DisableHWAcceleration
Double-click on DisableHWAcceleration to edit it. Input 1 as the Value data. Click on OK to save what you have just edited
Exit Registry Editor and restart your computer to see if this process resolved your issues.
5.Alter the TdrDelay value in your registry:
For some users, this action was successful in stopping the BSOD error messages. Many GPUs possess a setup that enforces a restart if their drivers fail to respond within a given time limit. When your driver encounters an issue and fails to respond within this timeframe, you might get dxgmms.sys errors with Windows also crashing.
The solution involved here works by giving your PC more time to recover or respond after it experiences any problem. Here are the steps for performing the required procedure:
Press the Windows button and the R key together to launch Run. Type regedit into the available box present. Click on OK to start the Registry Editor program
After it opens, navigate through the following folders: HKEY_LOCAL_MACHINE\SYSTEM\CurrentControlSet\Control\GraphicsDrivers
Find the TdrDelay value. If you cannot find it, you will need to create a new one by following the instructions below:
Right-click on the blank space in the pane and select New
Click on DWORD (32-bit) Value. The name of this newly created value should be TdrDelay
Double-click on TdrDelay to edit it. Input 10 as the Value data. Set the base to Decimal. Click on OK to save what you have just edited
Exit the Registry Editor program. Restart your system and see if this tweak has helped you. If nothing changed, perform this process again, but this time increase the value data: input 20 or 30. Some users had to use 60 as value data to make this fix work for them. Restart your system once more and do the needful.
6.Disable external monitors:
If you tend to connect other monitors or display devices to your system, then the reason you are experiencing dxgmms2.sys error messages is easy to figure out. A unique set of individuals got rid of these external devices to solve their problems. The guide below contains instructions on how to go about it:
Right-click on any blank space on your desktop screen. Select Graphics options or Display settings depending on which option is available to you
Here, disable the monitor or other external devices
If you could not arrive at the settings for display, using the procedure above, try to use this method instead:
Press the Windows button and R key together to open the Run app
Once the Run window opens, input the following code and hit the Enter key to arrive at the required location: control.exe desk.cpl,Settings,@Settings
7.Remove the problematic dxgmms2.sys file:
Dxgmms2.sys is a system file, and we rarely recommend removing system files that are necessary for maintaining the stability of the Windows operating system. However, if you are still experiencing the error messages after attempting several solutions, then it is fair to throw away a bit of caution.
Regardless, we advise that you back up all your files or create a system restore point. This way, you can always recover your data and setup if things go wrong. Once you are ready to delete the problematic system file, follow these instructions:
Click on the Windows start icon. Click on the icon for Power. Holding the SHIFT key on your keyboard, click on Restart to reboot your PC in Advanced Startup mode
After your computer restarts in the required mode, you should see a list of options. Click on Troubleshoot
Select Advanced options. Select Command Prompt. You might be prompted with a message requesting that you enter your account password. Do the needful and move on
After the Command Prompt window opens, carefully enter the following command: C:
cd windows
attrib -s -r -h DXGMMS1.sys /s
del DXGMMS1.sys /s /q
Hit the Enter key to initiate the execution of the code you have just entered
After its completion, exit Command Prompt. Reboot your computer
Windows, in theory, should download the removed file and your problems might end up disappearing.
8.Remove certain device drivers:
The operations we are going to carry out here are not exactly ideal, but they have been effective for some users in solving BSOD errors involving dxgmms2.sys. For this reason, we could not leave them out.
These are instructions on how to remove the HID mouse driver:
Launch Device Manager as usual
Once this program opens, click on View located at the top of the app’s window
Select Show hidden devices
Now from the list of driver devices, locate Mice and other pointing devices. You should see a list which comprises of various HID-compliant mouse devices.
Right-click on each of these devices and select Uninstall every time. Click on OK when a message box (requiring confirmation for your action) pops up
If you have a mouse connected, it is time you unplugged it because this process has rendered it useless for the time being
Restart your PC. Connect your mouse as usual. Do not worry about what you did earlier: Windows should automatically find and install necessary drivers for your mouse
For some users, removing all connected USB devices did the trick. These are instructions on how to disable your USB devices:
Open Device Manager
Once this program opens, click on View located at the top of the app’s window
Ensure that the Show hidden devices option remains checked. Return to the list of driver devices
From this list, find Universal Serial Bus controllers
Right-click on every driver device contained here. Select Uninstall. If the dialog box requesting confirmation comes up, click on OK and move on
Unplug every device connected to your PC via USB cables
Restart your system. Connect the devices you unplugged earlier. Windows should automatically find and install the missing drivers for some of those devices, if not all of them. If for some reason this fails to happen, you should check online yourself for the driver software needed. Your PC’s manufacturer homepage is an excellent place to start your search. Download and install the correct drivers.
9.Check for conflicts between programs and incompatibility:
If your problems only manifested after you installed a new game or application, then uninstallation of that particular program might be critical to fixing your error. Try to recall every event or action you took in the buildup to the occurrence of the dxgmms2.sys errors. Only you have access to the knowledge which might somehow explain how the errors came to be.
In some online reports, a good number of users identified Bluestacks as a culprit and stated that it was the reason they were receiving error messages. They noticed that their issues only occurred when Bluestacks was running. Due to this, some uninstalled it to solve their problem. Others did a similar thing but also downloaded a newer or different version of Bluestacks.
For you, it might not be Bluestacks. You might not even have the Bluestacks app on your system. It could be an entirely different application. It is up to you to find out what exact program is associated with the blue screen of death error messages. After identifying the program, you will need to uninstall it by following the steps below on how to uninstall an application in Windows 10:
Click on the Windows start icon. Click on Settings
Select Apps. Locate the program you intend to uninstall. Click on it and Select Uninstall. Follow the presented instructions as appropriate to complete the uninstallation process
Some apps might not show up in the list of programs under settings, so you will need to explore an alternative means of removing them. The alternative method involves the use of Control Panel and is probably more familiar to users who have used older versions of Windows. Do this:
Click on the Windows start icon once again. Into the available search box, input Control Panel. Select the required program from the list of results
Click on Programs and Features
Locate the program that you want to remove from the returned list. Select that program. Click on Repair/change depending on what is available
Follow the instructions on the screen where applicable to remove the program or its components
10.Check for faulty hardware:
If by now, you have exhausted all available means of resolving dxgmms2.sys error messages, then it is time to consider the possibility that damaged hardware is to blame for your problems.
In fact, many blue screen of death errors are due to hardware issues. Your hard disk drive (HDD) and temporary memory (RAM) are the two main hardware components you must check.
To check your hard disk drive for corruption and other issues, follow these steps on using CHKDSK through the Command Prompt program:
Right-click on the Windows icon to see a list of useful programs. Select Command Prompt (admin) to launch a Command Prompt window with administrative privileges
After the required window opens, input the following code and hit the Enter key to execute it: chkdsk /f
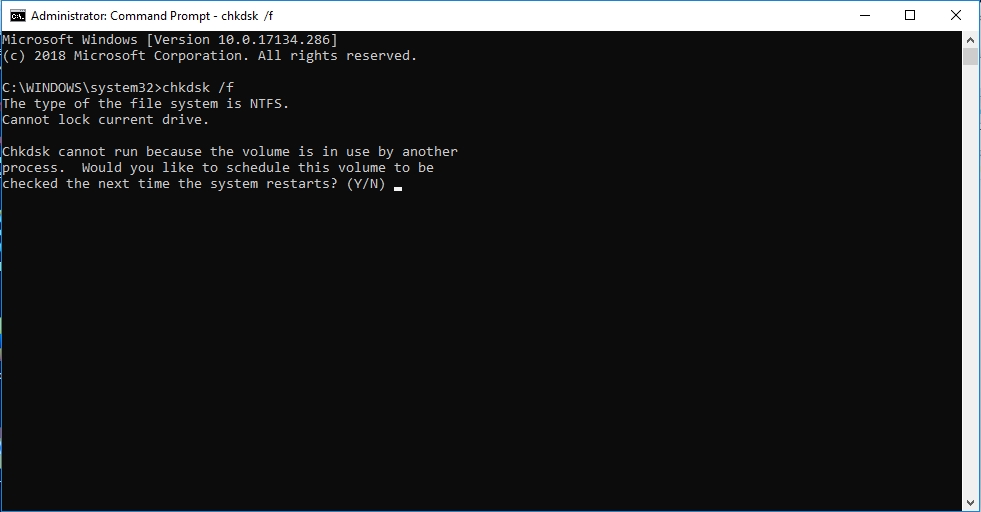
Windows should scan your hard disk drive for corruption. It would also attempt to repair the errors where possible. Note that this scanning process might take a while, so be patient. Follow the presented instructions where applicable
If the results of the test indicate a problem with your hard disk drive, then you will need to replace your drive if these problems cannot be repaired by any known software process
To check your temporary memory for issues, do this:
Press the Windows button and the letter R key together to open the Run app. Once it opens, type mdsched.exe into the available box and press the Enter key
A message should pop up stating that you will need to restart your PC to carry out this test. Save any ongoing work first and or otherwise, allow your PC to reboot by clicking on Restart now and check for problems
As expected, your PC will switch off and come on again. The diagnostic test screen should be visible now. You will need to be patient and wait for the completion of this test, as it may require significant time
When Windows completes the test, your PC should start up as usual. The desktop screen should be your destination , and there you will see the results of the analysis you just carried out. If this does not happen, follow these instructions on using the Event Viewer to look at the results of your RAM check:
Right-click on the Windows icon and select Event Viewer
Click on Windows Logs. Click on System. Now a list of events that have occurred on your PC should be presented to you
On the left pane, click on Find
Type MemoryDiagnostic into the box present
Select Find Next. This action should bring the result of your test to you
Note that this test is not powerful enough as a standout process to confirm that your temporary memory is faulty. If the test stated that your RAM is defective, consider performing an extended test to verify the results. If the extended analysis reports the same thing, then surely your RAM is defective or at least one of its modules is. Identify the damaged module or replace the entire RAM stick if possible.
11.Use System Restore or Install a fresh copy of Windows:
If you have verified beyond every reasonable doubt that no hardware device deserves blame for your problems, then these fixes are for you. They are the last resort for serious issues that cannot be resolved using ordinary methods. Check the Microsoft webpage for instructions on performing these operations safely.