
Quick Tips
- Go to Alarms & Clock > Clock > click the + icon, search for your desired location, and pin it to the Start Menu.
- Go to Control Panel > Clock and Region > Date and Time > Additional Clocks > Show this clock > Select the time zone for each additional clock > click Apply and then OK.
Note: I’ll add a new clock for an entirely different timezone/region (Baltimore – a city in Maryland, USA).
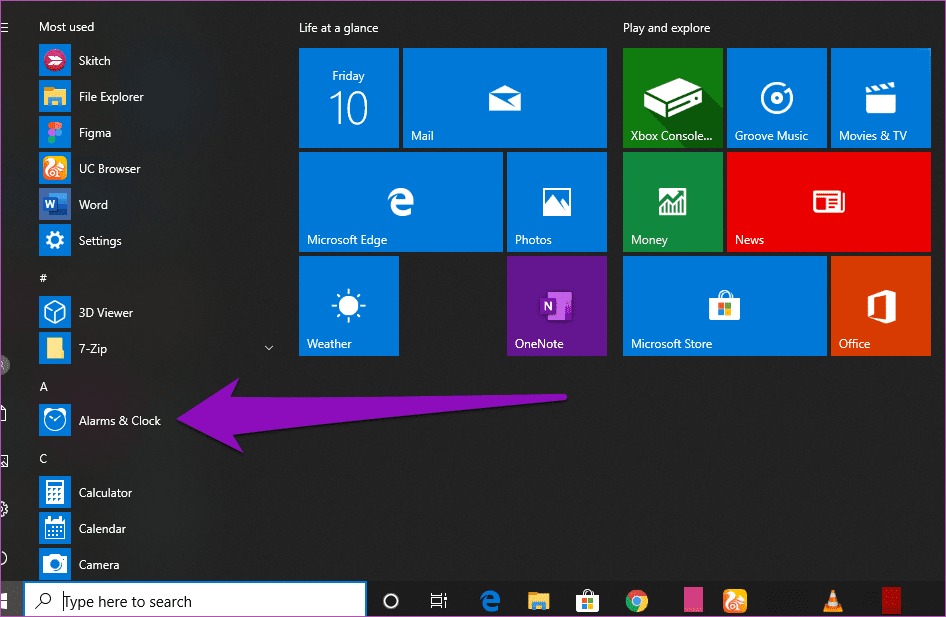
Step 1: Tap the Windows key and select Alarms & Clock from the app list.
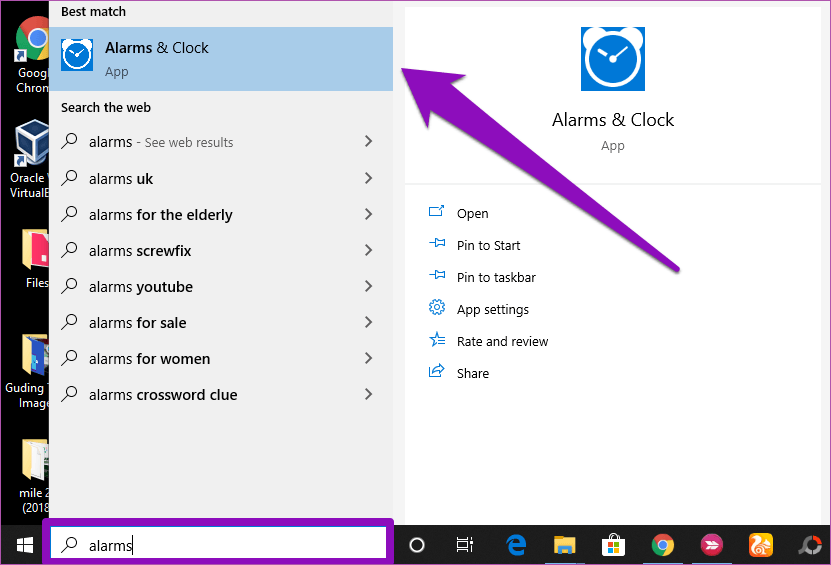
Alternatively, you can type Alarms into the search box and click on the corresponding result — Alarms & Clock.
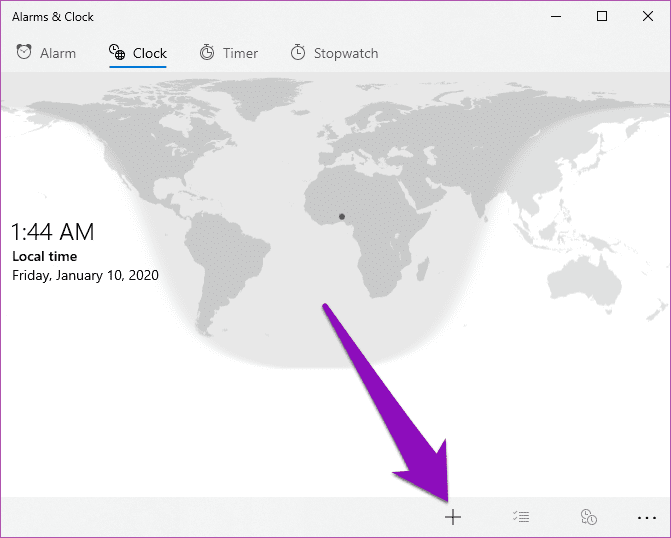
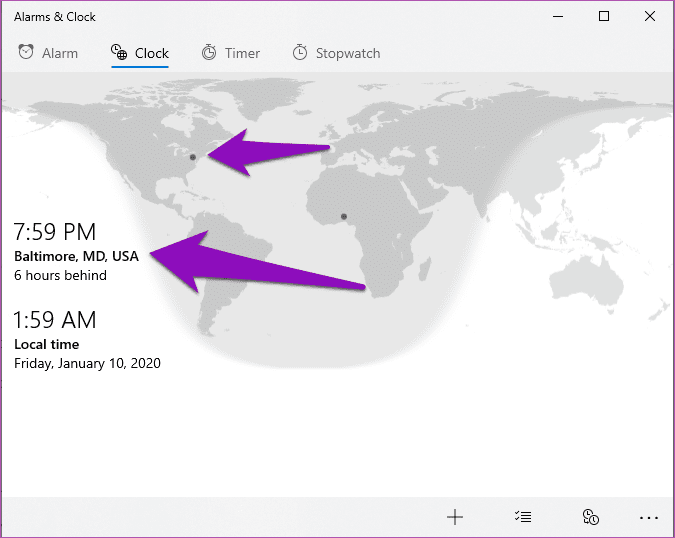
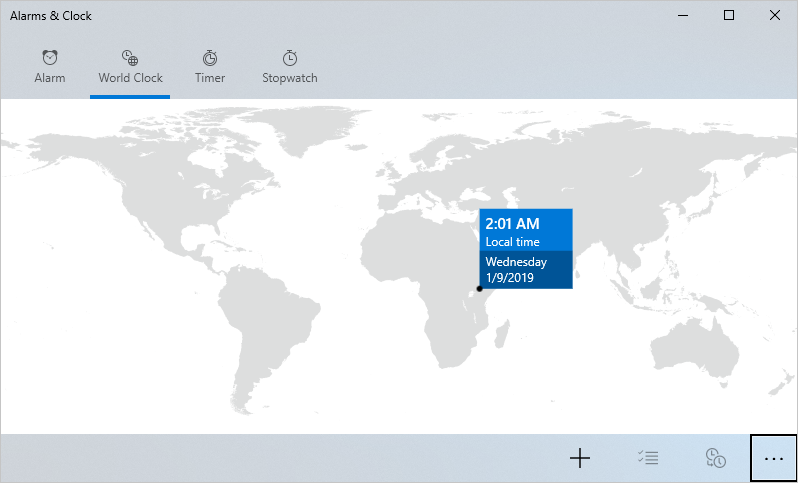
Step 2: Navigate to the Clock section.

It will display your local time and date, as well as a map with a geo-pin showing your current location.
Step 3: Click the plus (+) icon at the bottom-right corner of the display.
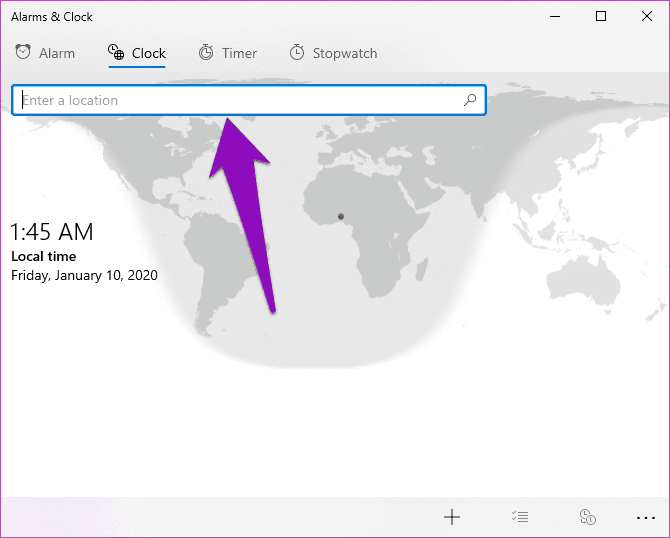
That will bring up a new search bar at the top of the map.
Step 4: In the search box, enter a location. It could be the name of a country, a state, or a city.
As you type in the box, the Windows system will show some suggestions.
Step 5: Tap a region of choice from the drop-down suggestions, and its corresponding clock will be added to the dashboard.

Windows will display the time difference between your default timezone and the newly added timezone. A new pin showing the location of the new clock will also be added to the map.
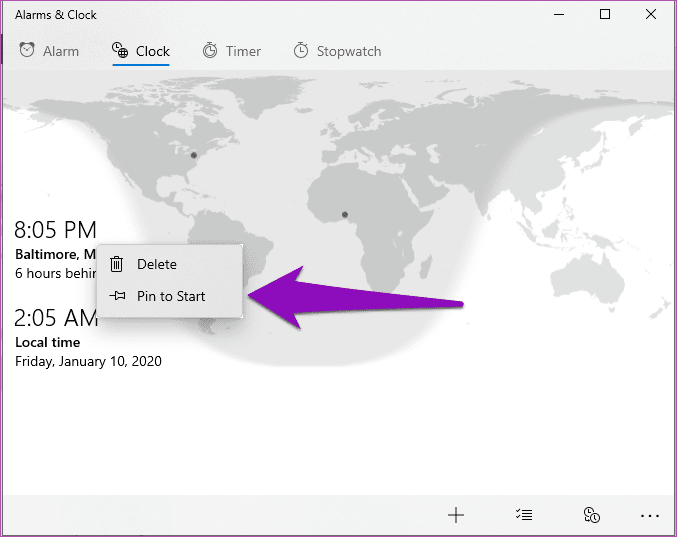
Step 6: To add the new clock to your computer’s Start Menu, right-click the clock and select the Pin to Start option.
Step 7: In the prompt, click Yes to proceed.

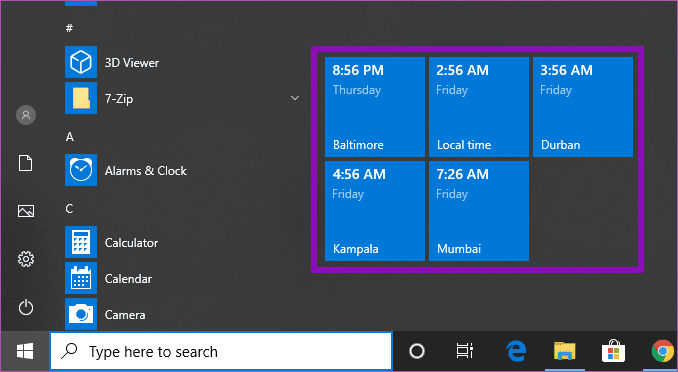
And that’s it. When you click the Windows icon on the screen or your keyboard, you should see a tile displaying the newly added clock.

If you added a clock in an entirely different timezone, we recommend that you also pin your primary (read: local) clock to the Start Menu. This eliminates the possibility of mistaking the newly added clock for your local clock.
Step 8: To add your primary clock to the Start Menu, return to the Clock dashboard, right-click the Local time clock, and select the Pin to Start option.

Step 9: Click Yes to confirm the action.

Now, you should see multiple clocks in your PC’s Start Menu. Each clock should have a proper label with its respective location and time. To add more clocks, simply repeat Steps 1 to 7.
Adding Multiple Clocks to the Taskbar
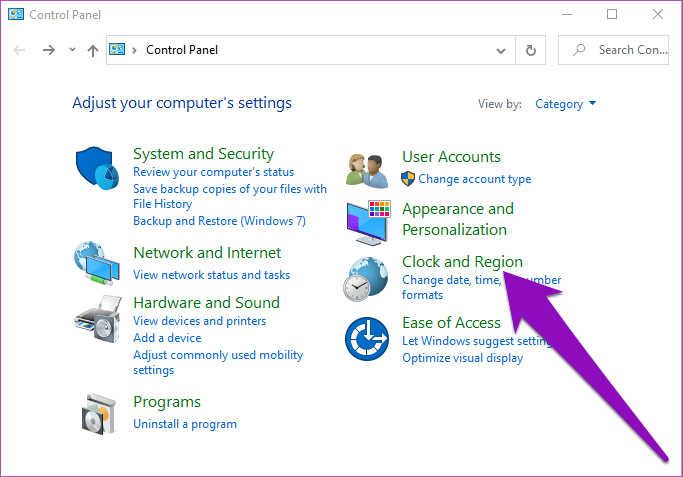
Step 1: Type Control Panel into the Windows search bar and tap the corresponding result.
Step 2: Click the Clock and Region option.
Step 3: Click Add clocks for different time zones.

That opens a new window to set up multiple clocks for different time zones on your PC.
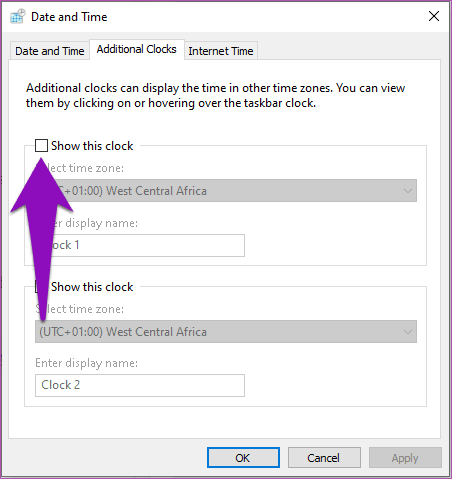
Step 4: To add the first clock, check the Show this clock box.
Step 5: Click the Select time zone drop-down and select your preferred timezone.

Step 6: Give the clock a name or use the default display name (Clock 1).

We recommend that you rename the clock, preferably to match the name of the region or timezone, so it can be easily distinguished from your primary timezone.
Step 7: To add another clock, check the second Show this clock box, select a timezone, change the clock’s display name—or use the default name like Clock 2.

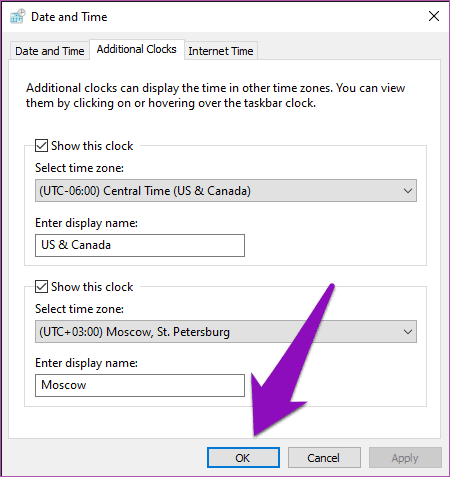
Step 8: Tap the Apply button.
Step 9: Click OK to save the new clocks.
When you hover your mouse over the Date & Time section of the taskbar, the time and date of the local and new time zones are displayed on the tooltip.

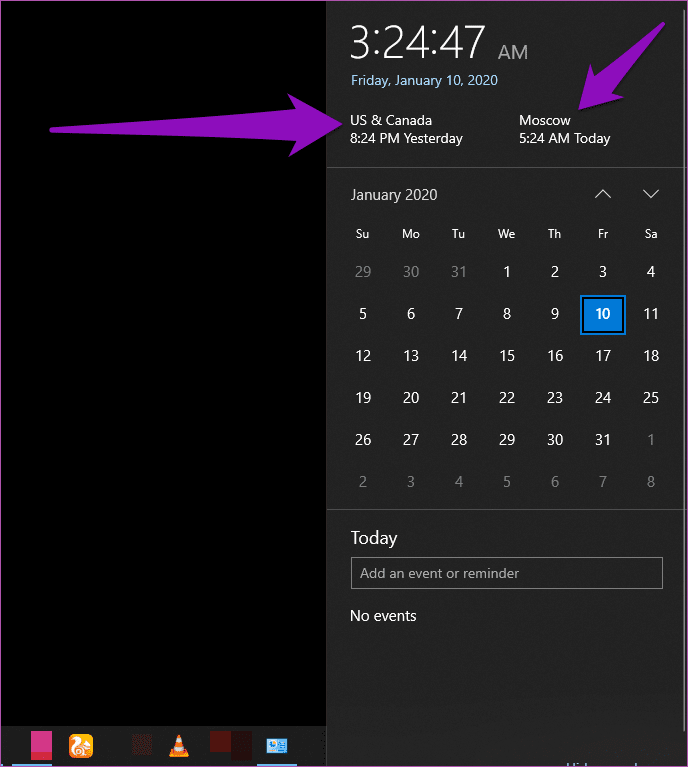
When you click the taskbar clock, the newly added clocks will be displayed directly above the calendar.
If you have trouble keeping up with the time differences of multiple regions, you should use either of the methods above to add their respective clocks to your Windows computer.
Was this helpful?
Thanks for your feedback!
The article above may contain affiliate links which help support Guiding Tech. The content remains unbiased and authentic and will never affect our editorial integrity.

В Anniversary Update системные часы в области уведомлений потерпели изменения в функциональности и интерфейсе, а поэтому немного изменился способ отображения и добавления дополнительных часовых поясов. В этой небольшой инструкции вы узнаете, как добавить дополнительные часы в Windows 10. Полезно, если вы хотите посмотреть какую-то зарубежную презентацию или просто надо следить за другими часовыми поясами. Всего Windows 10 позволяет вам одновременно отображать до трех часов.
- Откройте Настройки – Дата и Время и выберите самый нижний пункт «Часы для различных часовых поясов«. Отсюда вам уже откроется классический интерфейс от старой панели управления.
- Отметьте галочкой отображение часов, а затем выберите нужный часовой пояс. При необходимости можно задать имя для того, чтобы легко ориентироваться.
Если вам надо еще больше, можно попробовать другой сценарий.
- Откройте приложение Часы и будильники, перейдите на вкладку мирового времени.
- Нажмите на кнопку с плюсом и введите нужное местоположение, после чего правой кнопкой мыши по добавленному городу прикрепите часы на домашний экран. Теперь в меню Пуск будет отображаться плитка с выбранными вами часами. Их количество ничем не ограничено.
Была ли вам эта инструкция интересной или полезной? Об этом расскажите нам в комментариях.
For some reasons, there are moments when you need to keep tabs with time in different time zones. It could be your employer, relatives or friends live abroad or maybe you are tracking a sports event or a happening abroad. If that is the case, nothing can be more helpful than having multiple clocks for different time zones. Having to adjust your watch or convert the time manually can be quite hectic. This post will take you through the steps of adding clocks with different time zones in Windows 10 PC.
Adding Multiple Time Zones Clock in Windows 10
Windows 10 allows you to simply add and display up to three clocks with three different time zones. If that is not sufficient, you can go for Alarms & Clock app or try any other third-party apps to have additional clocks.
1. Add Multiple Clocks Using Settings
You can find the date/time is shown in the taskbar which is in your local time zone. If you want to have two additional clocks with simple date/time format showing on top of the taskbar clock, then follow the below steps.
1.1. Accessing Windows 10 Time Zone Settings
- Right-click the Windows Start button and select “Settings” option or press “Window + I” shortcut keys.
- Or type “Settings” in Windows search box and click “Settings” from the results to open the Settings app.

- Pick “Time & Language” option by clicking on it. This will open the “Date and time” settings.
- On the right side of the window, click the link “Add clocks for different time zones”. It is under “Related settings” heading.

- You can also reach the date and time settings from the taskbar. Right-click the clock on your Windows taskbar and click “Adjust date/time” to open the time settings panel.
- Go down the page and select “Add clocks for different time zones” link below the “Related settings” section.
1.2. Adding Additional Clocks
- A pop-up window will appear. On the “Additional Clocks” tab, tick the “Show this clock” checkbox to activate “Clock 1”.
- Pick your preferred time zone by clicking to expand the drop-down list below “Select time zone:” and enter the display name for the clock.

- Repeat the above 2 steps to add the second clock and when done click “Apply” and then “Ok” button at the bottom of the pop-up window to execute the changes.
1.3. Viewing Multiple Clocks
- Hover the mouse over the clock on the Windows taskbar (this displays your local time zone) located at the right edge of the taskbar. You will see the all three clocks shows the date and time as shown below.
- Click the clock on the taskbar. This will slide up a panel on the right side of your display with the two additionally added clocks at the top of the panel along with the calendar.
2. Adding Clocks with Alarms & Clock App
Unfortunately, Windows 10 limits you to adding only three clocks – one is your local time showing by default on taskbar and you can add additional two with different time zones. Also, the display text is smaller and difficult to read the time visually. You can add more time zone clocks using Alarms & Clock app with larger visual display. This is also a default app that comes as part of Windows 10 operating system.
- Click the Windows Start menu on the taskbar or press the Windows Start key on your keyboard to expand the Start menu. Select “Alarms and Clock” from the menu to open the app. Alternatively type “Alarms” in the Windows Search and click on “Alarms & Clock” from the result.
- Go to the “World Clock” tab and click the “+” (plus sign) located on the lower right side of the window.
- A search box will appear at the top, prompting you to enter a location. Enter the location for which time zone you want to add. For instance, the name of a city, say London and then click the location from in the list to add the clock.

- Repeat the same (step above) to add more clocks. The clocks will be pinned to the map.

2.1. Pin Clocks for Quick Access
The challenge with the above option is that you need to open the application to view various clocks, but there is a solution for that. You can pin the clocks to Start for quick access.
- To do so, right-click the clock on the map and select “Pin to Start” and then confirm you want to pin the tile to Start by clicking “Yes” when prompted.
- To view the multiple clocks, click the Windows Start Menu button or press the “Win” key from the keyboard.

3. Using Third-Party Apps
The last option is to use any third-party app to show multiple world clocks in Windows 10. There are many free and paid apps available in Microsoft Store for different purposes. For example, you can try Analog Clock Tile app to add tiles of different time zone clocks in Start menu.

There are also apps for adding clock widgets with different time zones on the desktop screen or in the widgets area.
Conclusion
If you want to track activities on different time zones, you can easily add multiple world clocks each showing your preferred time zone. Windows 10 allows users to add and display three clocks, but you can always add more using the “Alarms & Clock” app. If both options are not sufficient, then try for a third-party app from Microsoft Store.
If you are an online freelancer and you’re working with many clients in different countries, it is important that you know their time zones. Instead of searching on Google every time you need to know your client’s time, it’s better that you have multiple clocks installed on your own computer that you can easily take a look at.
How to install multiple clocks on Windows 10?
This tutorial is specifically tried and tested on Windows 10. I’m not sure if it will work on Windows 7 or 8 because all our computers here run n Windows 10.
First, download Desktop Gadgets Installer. Remember the Desktop Gadgets on the older version of Windows? This is the same as that one but unfortunately, it’s not readily available on the newer versions of Windows. That’s why we have to install it manually.
Extract the downloaded file and run the installer.
Once successfully installed, go to Control Panel and find Desktop Gadgets. Or, you can just simply right click on your desktop and choose Gadgets.

Voila! Aside from the clock, there are many gadgets that you can put on your computer. Just drag and drop it on your desktop.

What I loved about this is that you can have as many clock as you can and set them up on different time zones.
Here’s how my desktop looks like now. I have 5 different clocks running.

What we have here is a typical clock. Now, what if you’re still confused whether the time is AM or PM? Don’t worry, I have a solution for you! Download the Digital Clock Installer.
Extract the downloaded file and run the installer. You will then see the Digital Clock added on the Desktop Gadgets. Just drag and drop it to your desktop.

Just set the digital clock to 24-hr time format. Now, here’s how the digital clock looks like on my desktop.

Actually, you can customize the appearance of the digital clock. You can change it to the color that you like.
That’s it! You can have many clocks now on your computer.
If you need to keep in touch with people from different time zones, you can add two additional clocks to the Windows taskbar to quickly check the time in their part of the world. Having multiple clocks available also comes in handy if you are traveling, as it allows you to schedule calls, meetings, and tasks without having to remember or search for the corresponding time zone. This guide illustrates the necessary steps to view the time for other parts of the world straight from the taskbar’s notification area in Windows 10 and Windows 11:
How to access the Additional Clocks in the Date and Time window
Regardless of the operating system used, adding multiple clocks requires you to first open the Additional Clocks tab of the Date and Time window. The steps for reaching this location are different in Windows 10 and Windows 11, so follow the instructions relevant to you.
How to access the Additional Clocks in Windows 10
First, right-click or press-and-hold on the time and date button from the Windows 10 system tray, and then click or tap on Adjust date/time from the contextual menu.
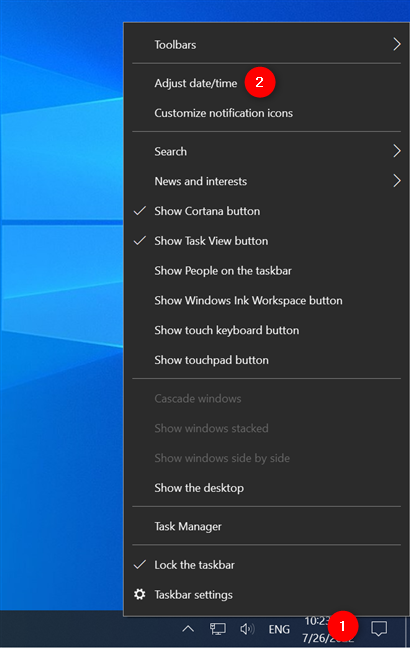
Press Adjust date/time from the right-click menu
This opens the Settings app and takes you to the Date & time tab from the Time & Language settings. In the right panel, find the Related settings section (scroll down if you have to) and click or tap on “Add clocks for different time zones.”
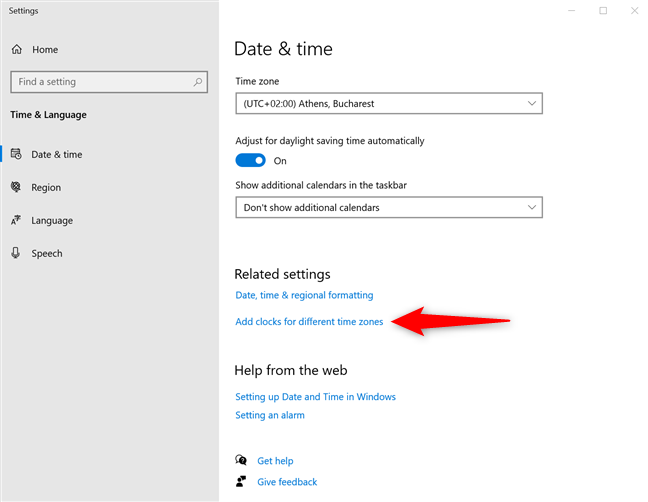
Access Add clocks for different time zones
This opens the Additional Clocks tab in the Date and Time window, where you can add more time zones to your taskbar.
TIP: If you want fast access to more time zones, you can also pin multiple clocks to the Windows 10 Start Menu.
How to access the Additional Clocks in Windows 11
If you’re using Windows 11, right-click or press-and-hold on the time and date button from the notification area. From the subsequent contextual menu, click or tap on “Adjust date and time.”
Access Adjust date and time from the right-click menu
The Settings app opens, showing the Date & time section from the Time & language tab. In the panel on the right, scroll down to the Related links and click or tap on Additional clocks.
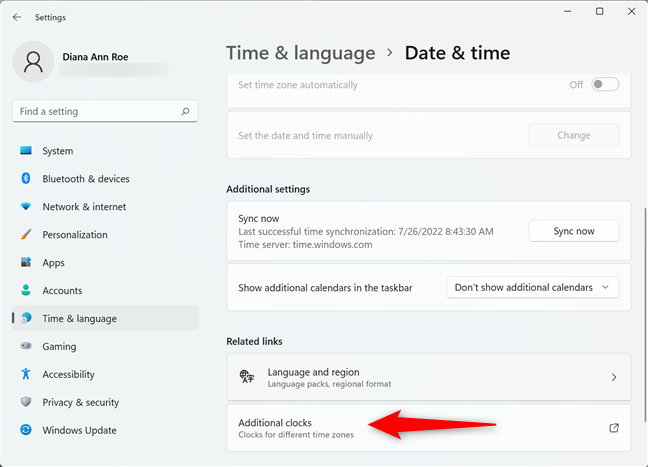
Access Additional clocks in Windows 11
This takes you to the Additional Clocks tab in the Date and Time window. Next, follow the steps described below.
How to add a clock to the taskbar in Windows 10 and Windows 11
Regardless of the operating system used, the Additional Clocks tab of the Date and Time window looks and works the same. You can use it to add up to two additional clocks to the taskbar. To enable an extra clock, check the “Show this clock” box by clicking or tapping on it.
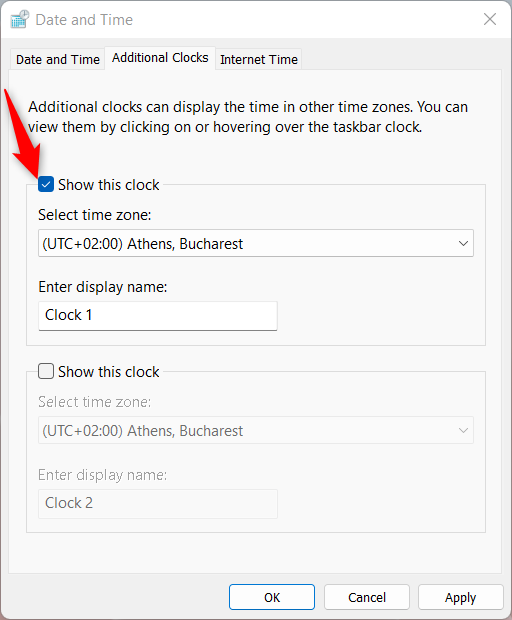
Check the box to start adding a clock
You can now edit the other options for this clock. Click or tap on the “Select time zone” field to open a dropdown menu. Scroll through the available options and select your desired time zone. We chose Pacific Time (US & Canada).
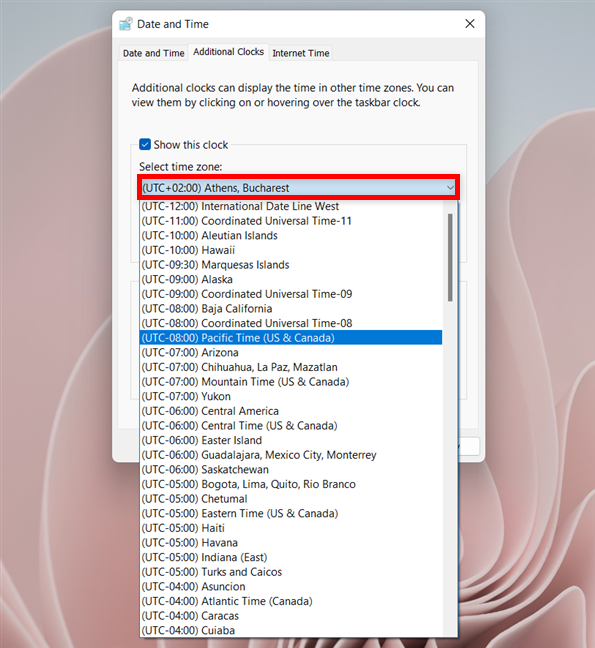
Scroll and then click or tap on the desired time zone
In the “Enter display name” field, you have the option to rename your extra clock to something less generic than the default Clock 1. Type in a suggestive name, like the name of the time zone or country or the city you are interested in — we wrote Pacific.
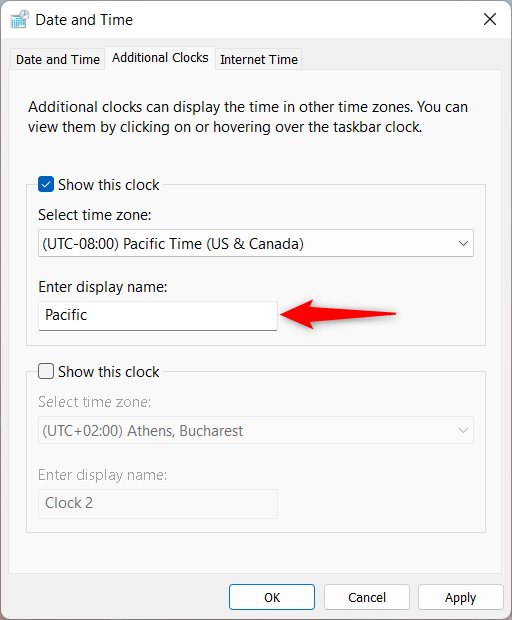
Enter another name for your clock
If you want to add a second additional clock to your taskbar, check the second “Show this clock” box as well. Then, select the time zone — in our case, (UTC + 05:30) Chennai, Kolkata, Mumbai, New Delhi — and type in a name for that clock — we entered India. If you uncheck the box for one of the extra clocks, the time zone is no longer displayed, but Windows remembers your settings. This lets you enable each clock when you need it, without having to redo the settings every time. When you are done, click or tap on either OK or Apply to add your clock(s) to the notification area/system tray.
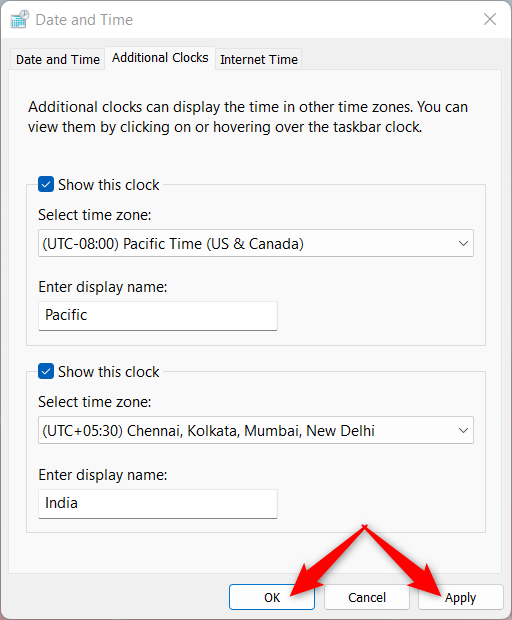
Press OK or Apply to add a clock to the taskbar
TIP: In Windows 11, you can use the Clock app to keep track of even more time zones. Here are 5 things you can do with the Windows 11 Clock app.
How to check the additional clocks in the Windows notification area
To quickly check the extra clock(s) you added, hover the mouse cursor over the time and date displayed in the system tray, on the right side of your Windows 10 or Windows 11 taskbar. A tooltip shows the additional time zone(s) you are interested in, alongside the Local time, as shown below.
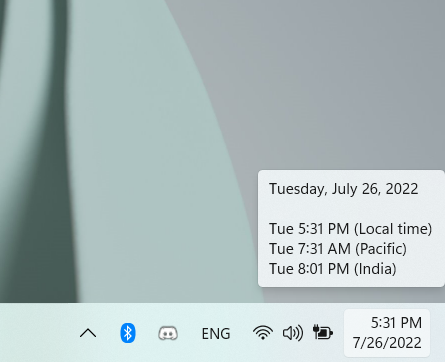
A tooltip displays the local time and additional clocks
Clicking or tapping on the time and date displayed in your taskbar’s notification area opens a calendar pane, which looks slightly different in the two operating systems.
In Windows 10, the two extra clock(s) you want to keep an eye on are shown next to each other, under the local time at the top of the pane.
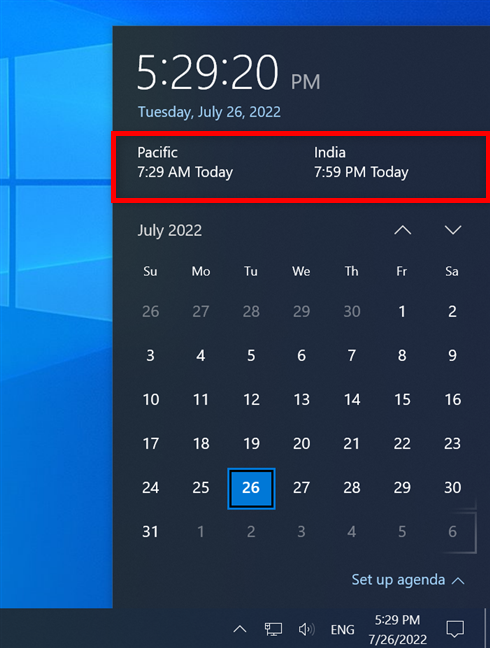
The additional clocks, as displayed in Windows 10
In the more subtle Windows 11 pane, the two new time zones are listed at the top, under the current date, as shown in the image below.
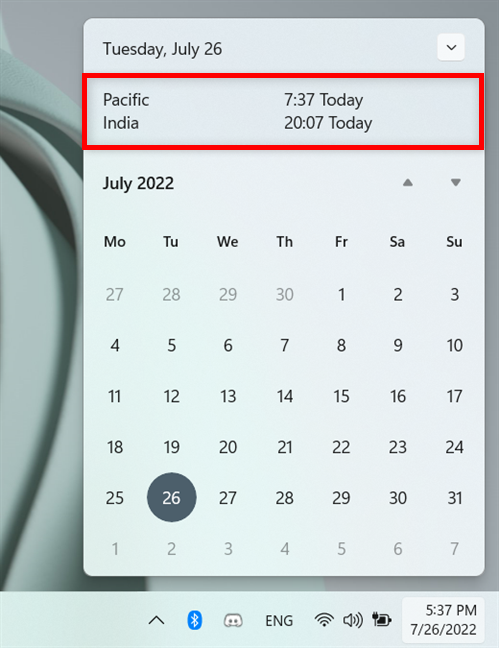
The additional clocks, as displayed in Windows 11
TIP: You can also use the Windows Clock app to list the times in multiple countries.
Why do you need additional clocks in Windows?
Now you know how to add a clock to the taskbar in Windows. We use additional clocks whenever we’re traveling or if we’re collaborating on projects with people from different time zones. This spares us the effort of having to convert time manually whenever we want to make a call or schedule a meeting. What about you? Why do you need extra clocks on the taskbar’s notification area in Windows 10 or Windows 11? Let us know in the comments below.