
Windows 10, 8.1 и Windows 7 позволяют отключить обязательную проверку цифровой подписи драйверов и установить неподписанный драйвер, однако если в последних версиях ОС это нужно сделать на постоянной основе, изменение опций с помощью bcdedit не помогает. Однако, может помочь самостоятельная подпись драйвера и его последующая установка, о чем и поговорим.
В этой инструкции подробно о том, как самостоятельно подписать драйвер для Windows 10, 8.1 или Windows 7 x64 или 32-бит (x86) для последующей установки в системе на постоянной основе без отключения проверки цифровой подписи драйверов, избежав при этом ошибок наподобие «INF стороннего производителя не содержит информации о подписи».
Что потребуется для подписи драйвера
Для того, чтобы выполнить все описанные далее шаги, скачайте и установите следующие инструменты с сайта Майкрософт:
- Microsoft Windows SDK for Windows 7 https://www.microsoft.com/en-us/download/details.aspx?id=8279
- Windows Driver Kit 7.1.0 https://www.microsoft.com/en-us/download/details.aspx?id=11800
Из первого набора достаточно будет установить Tools, из второго (представляет собой ISO-образ с установщиком, с которого нужно запустить KitSetup.exe) — выбрать Build Environments и Tools.
Обратите внимание: это не последние версии наборов инструментов, но они в равной степени подойдут для самостоятельной подписи драйверов для последующей установки во всех ОС от Windows 10 до Windows 7, при этом в инструкции не потребуется вдаваться в некоторые дополнительные нюансы.
Процесс самостоятельной подписи драйвера
В процессе для того, чтобы подписать драйвер самостоятельно, нам потребуется: создать сертификат, подписать драйвер этим сертификатом, установить сертификат в системе и установить драйвер. Начнем.
- Создайте в корне диска C какую-либо папку (так к ней проще будет обращаться в дальнейшем), например, C:\cert, где мы будем работать с сертификатами и драйверами.
- Запустите командную строку от имени администратора (нужны для 18-го шага). Далее используем следующие команды по порядку. Файлы драйвера пока не потребуются. Во время выполнения второй команды вас попросят ввести пароль, я использую password в окне запроса и далее в командах, вы можете использовать свой.
-
cd "C:\Program Files\Microsoft SDKs\Windows\v7.1\bin"
-
makecert -r -sv C:\cert\driver.pvk -n CN="remontka" C:\cert\driver.cer
-
cert2spc C:\cert\driver.cer C:\cert\driver.spc
-
pvk2pfx -pvk C:\cert\driver.pvk -pi password -spc C:\cert\driver.spc -pfx C:\cert\driver.pfx -po password
- До этого этапа всё должно пройти как на скриншоте ниже, командную строку не закрываем.

- В папке C:\cert создайте вложенную папку, например, drv и поместите туда свои файлы драйвера. Но: если вам требуется драйвер только для x64, не копируйте .inf файл для x86 систем в эту папку и наоборот.

В командной строке используем следующие команды:
-
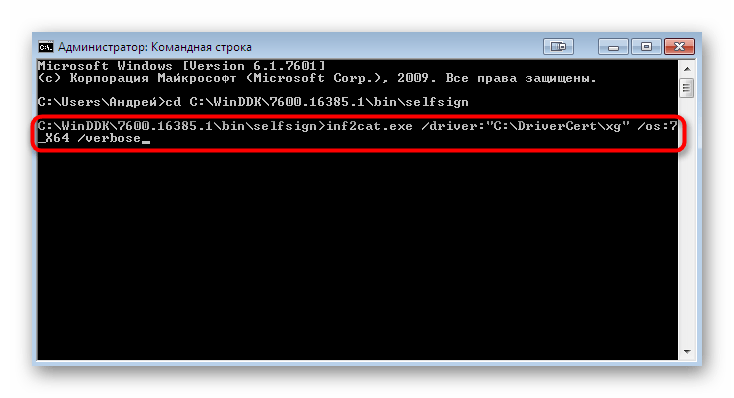
cd C:\WinDDK\7600.16385.1\bin\selfsign\
-
inf2cat.exe /driver:"C:\cert\drv" /os:7_X64 /verbose
- В предыдущей команде для драйвера 32-бит укажите X86 вместо X64. Если будет предложено скачать .NET Framework, согласитесь, установите, а затем заново выполните команду. В идеале вы должны будете получить сообщение об успешном создании .cat файла для подписи. Однако, возможны ошибки, о наиболее частых — следующие два пункта. После исправления ошибок повторите команду из пункта 10.
- DriverVer set to incorrect date — возникает при дате в файле драйвера до 21 апреля 2009 года. Решение: откройте файл .inf из папки drv в текстовом редакторе (можно в блокноте) и в строке DriverVer установите другую дату (формат: месяц/день/год).
- Missing AMD64 CatalogFile entry (для 64-бит) или Missing 32-bit CatalogFile entry. Решение: откройте файл .inf из папки drv в текстовом редакторе и в разделе [Version] добавьте строку CatalogFile=catalog.cat
- В итоге вы должны получить сообщение: Catalog generation complete с указанием пути к файлу каталога, в моем случае – C:\cert\drv\catalog.cat. Далее используем следующие команды (требуется подключение к Интернету).
-
cd "C:\Program Files\Microsoft SDKs\Windows\v7.1\bin"
-
signtool sign /f C:\cert\driver.pfx /p password /t http://timestamp.verisign.com/scripts/timestamp.dll /v C:\cert\drv\catalog.cat
- Результат подписи файла драйвера без ошибок на скриншоте ниже. Следующий шаг — добавить самоподписанный сертификат в список доверенных в системе, сделать это можно следующими двумя командами по порядку
-
certmgr.exe -add C:\cert\driver.cer -s -r localMachine ROOT
certmgr.exe -add C:\cert\driver.cer -s -r localMachine TRUSTEDPUBLISHER
- В результате вы должны получить сообщение «CertMgr Succeeded». Если Failed или certmgr.exe не является внутренней или внешней командой — убедитесь, что командная строка запущена от имени администратора, а вы находитесь в нужной папке (см. 15 шаг).


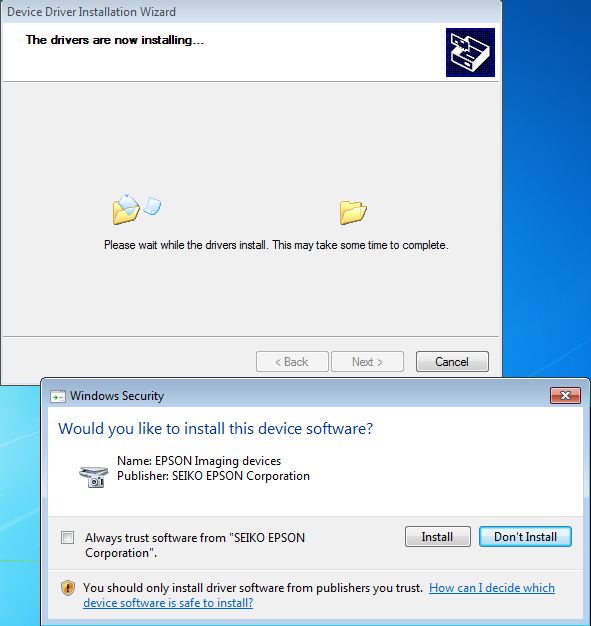
И вот теперь можно закрыть командную строку и установить драйвер из папки C:\cert\drv с помощью диспетчера устройств, или нажав правой кнопкой по .inf файлу и выбрав пункт «Установить». Потребуется подтвердить установку драйвера в окне «Не удалось проверить издателя этих драйверов» — нажать «Все равно установить этот драйвер».

Обратите внимание, что возможные ошибки в диспетчере устройств, отображаемые для устройства с самостоятельно подписанным драйвером обычно не имеют отношения непосредственно к процессу подписи (та же ошибка для них будет появляться и без подписи, при простом отключении проверки цифровой подписи драйверов в особых вариантах загрузки). Т.е. искать причину в этом случае нужно в чем-то ещё и читать подробную инструкцию по использованию драйвера (например, в случае драйверов для FlashTool).
Все способы:
- Способ 1: Импорт цифровой подписи
- Способ 2: Ручное создание подписи
- Шаг 1: Предварительные действия
- Шаг 2: Генерация ключа и сертификата
- Шаг 3: Создание конфигурационного файла
- Шаг 4: Создание подписи для драйвера
- Вопросы и ответы: 2
Перед началом инструкций отметим, что иногда бывает проще отключить проверку цифровых подписей в операционной системе, нежели вручную подписывать драйвер. К тому же есть и альтернативные варианты инсталляции неподписанного ПО, о чем более детально читайте в других руководствах на нашем сайте, воспользовавшись ссылками ниже.
Подробнее:
Отключение проверки цифровой подписи драйверов в Windows 7
Установка драйвера без проверки цифровой подписи в Windows
Способ 1: Импорт цифровой подписи
Первый вариант подходит тем пользователям, кто собирается устанавливать его в операционную систему только один раз и не заинтересован в дальнейшем распространении. Этот способ лучше всего использовать в тех ситуациях, когда вы скачали драйвер, но оказалось, что он не подписан и инсталлировать его не получается. Тогда от вас требуется перенести его конфигурацию в Windows 7, что осуществляется так:
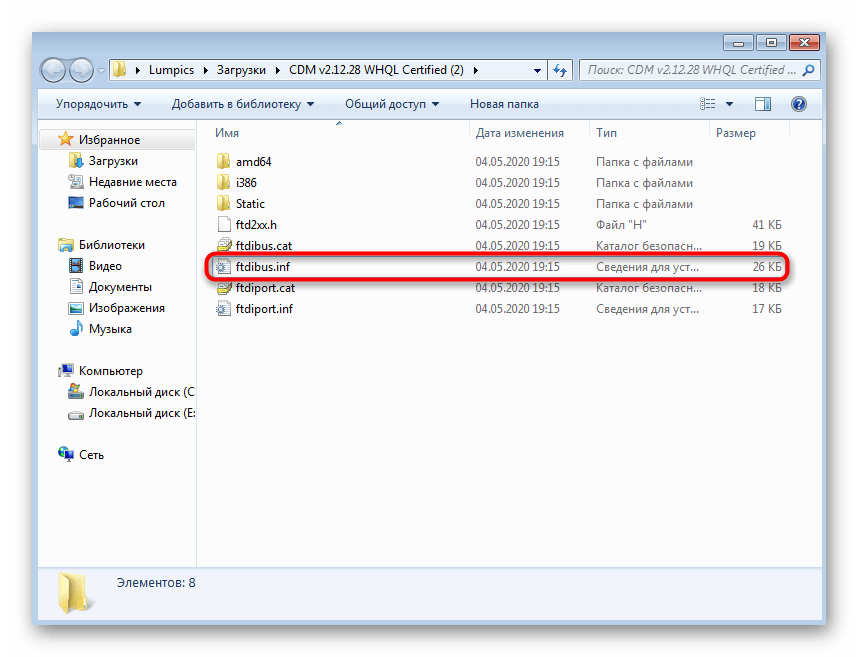
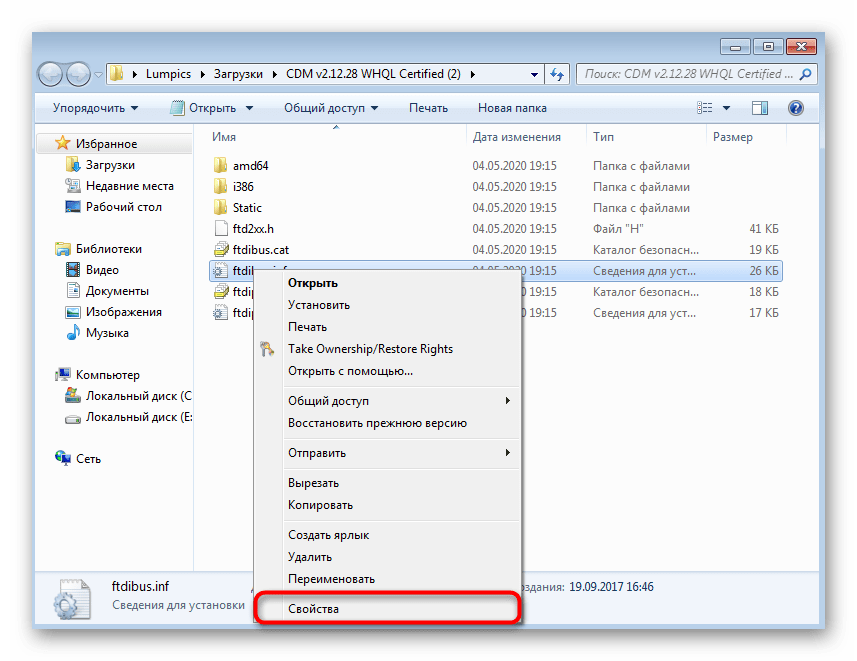
- Перейдите в папку с драйвером и отыщите там файл формата INF, который и должен быть установлен в ОС. Щелкните по нему ПКМ, чтобы вызвать контекстное меню.
- Внизу списка выберите пункт «Свойства».
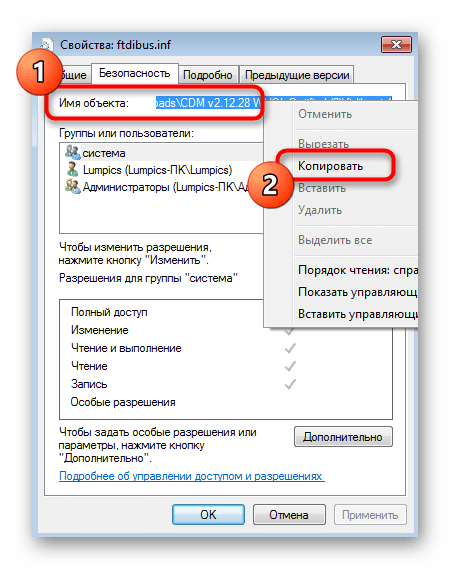
- Переместитесь на вкладку «Безопасность».
- Полностью выделите имя файла и скопируйте его клавишами Ctrl + C или вызвав контекстное меню нажатием ПКМ.
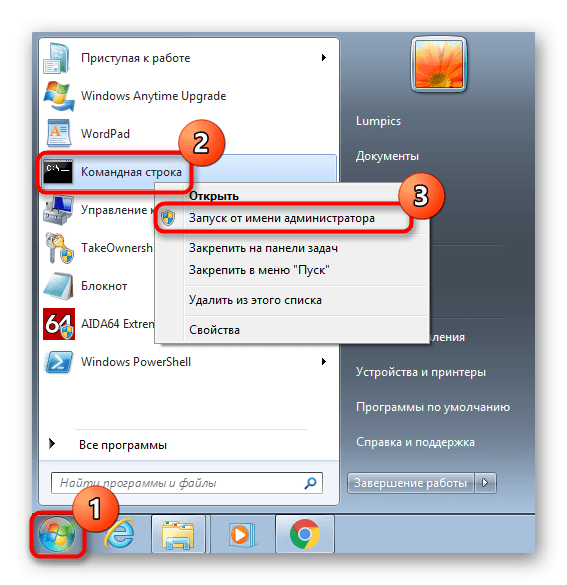
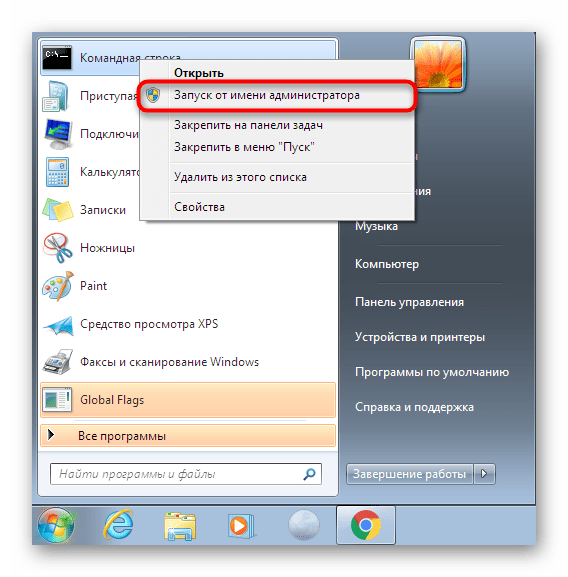
- Запустите «Командную строку» от имени администратора любым удобным методом, например, отыскав приложение через меню «Пуск».
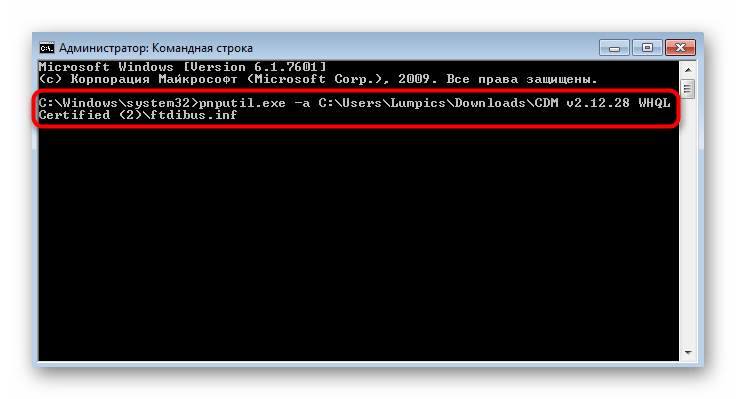
- Введите там команду
pnputil.exe –aи через пробел вставьте скопированное ранее имя. Можно поступить и по-другому, используяcd. Тогда через нее нужно переместиться к каталогу с драйвером и вписатьpnputil.exe –a + название файла. - Ожидайте окончания обработки компонента, что займет буквально несколько секунд. После на экране отобразится уведомление о том, что импорт настроек произошел успешно.

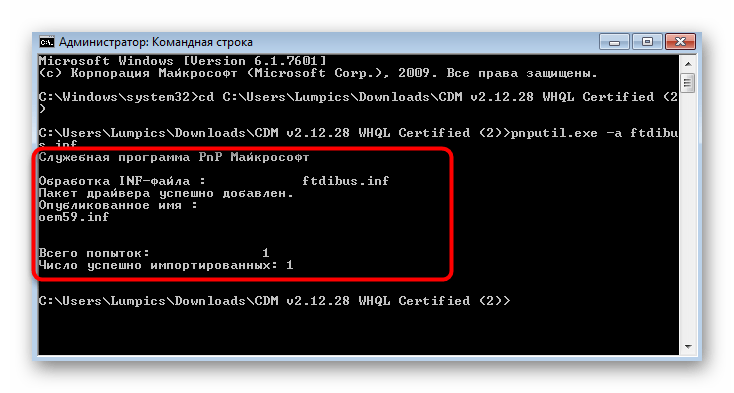
Теперь драйвер считается зарегистрированным. Если инсталляция остальных компонентов должна происходить при помощи исполняемого файла, перейдите в каталог с программным обеспечением и запустите его, чтобы завершить установку.
Способ 2: Ручное создание подписи
Этот способ более сложный, поэтому пришлось даже разделить его на этапы во избежание проблем с пониманием. Его суть заключается в использовании фирменных средств разработчика от Microsoft, чтобы создать подпись для пользовательского драйвера. Особое внимание этому методу стоит уделить тем, кто заинтересован в ручной разработке драйверов.
Шаг 1: Предварительные действия
Компания Майкрософт распространяет все необходимые утилиты в свободном доступе, однако по умолчанию они отсутствуют в Windows 7, поэтому сначала придется заняться их загрузкой и инсталляцией.
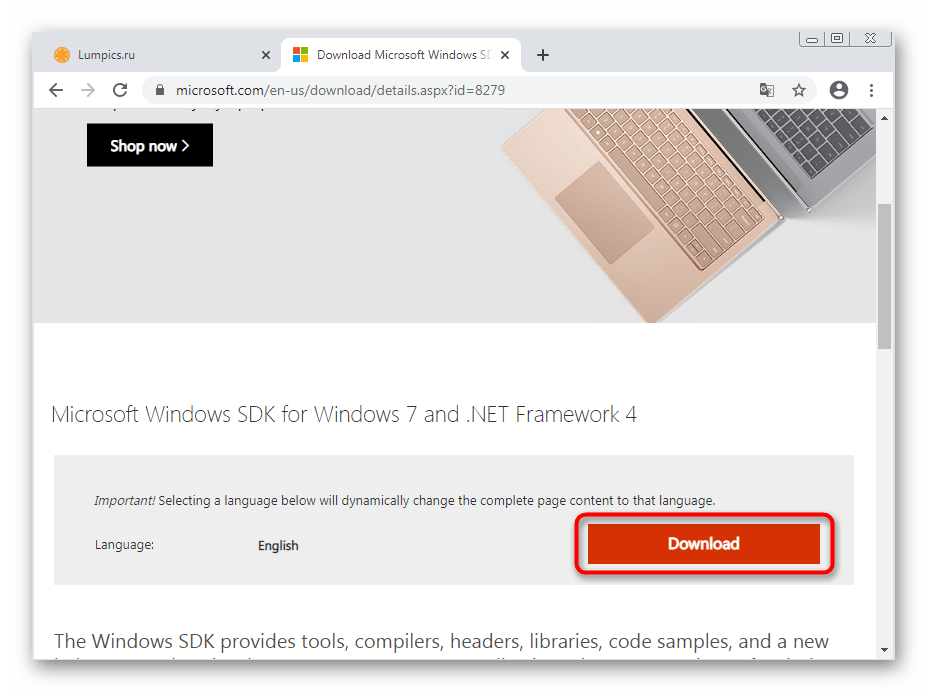
Перейти на скачивание Windows SDK for Windows 7
- Откройте ссылку выше, чтобы открыть страницу скачивания Microsoft Windows SDK, где нажмите по кнопке «Download».
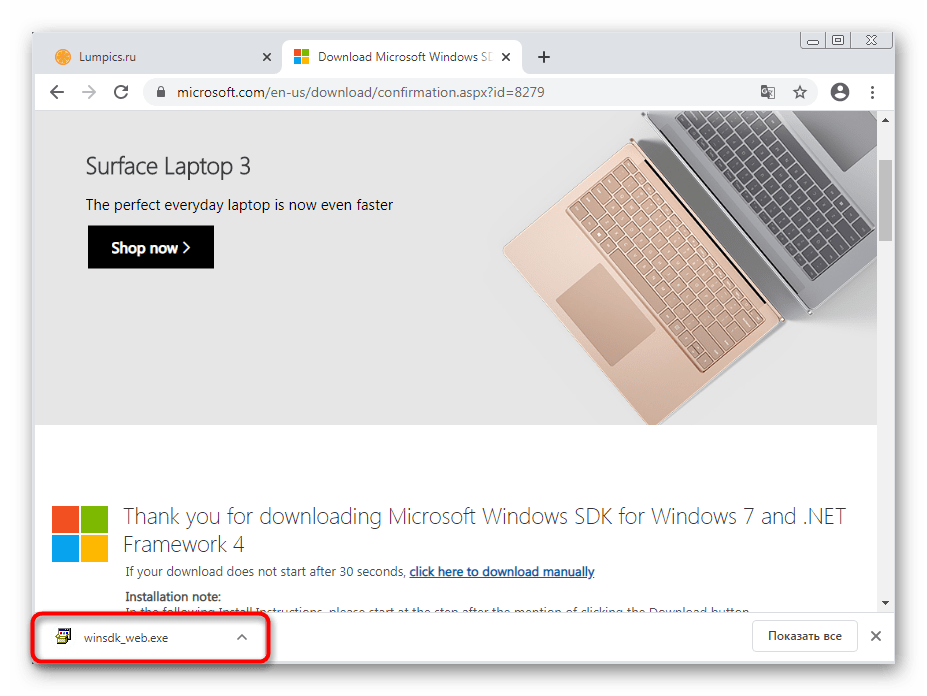
- Загрузка инсталлятора начнется в автоматическом режиме: ожидайте ее окончания, а затем запустите исполняемый файл.
- При появлении окна контроля учетных записей разрешите внесение изменений.
- Следуйте отобразившейся на экране инструкции и переходите далее.
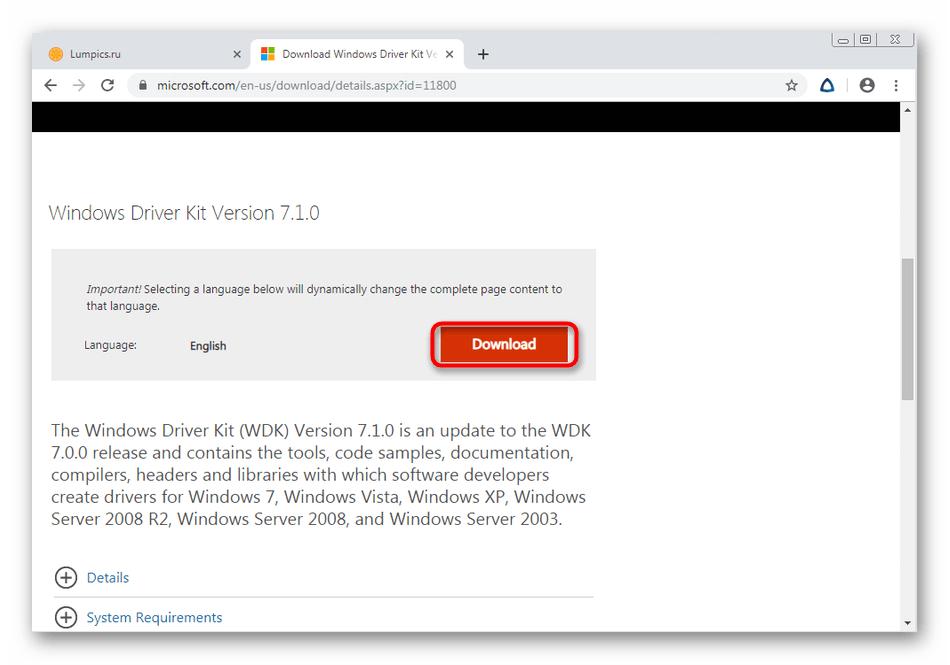
- По ссылке, ведущей на страницу приложения, загрузите Windows Driver Kit.
Перейти на скачивание Windows Driver Kit 7.1.0
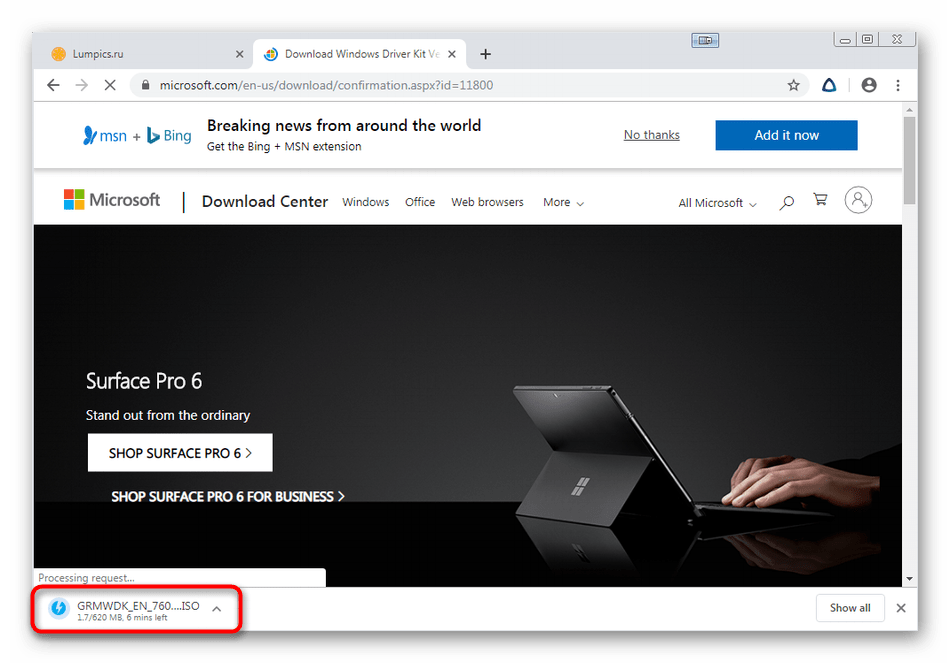
- Это целый пакет разных утилит и дополнительных компонентов, распространяющийся в виде ISO-образа. По завершении загрузки вам необходимо смонтировать его через любую удобную программу, о чем читайте по ссылке далее.
Подробнее: Как смонтировать образ в программе DAEMON Tools
- После запуска диска через виртуальный привод откройте EXE-файл для начала инсталляции.
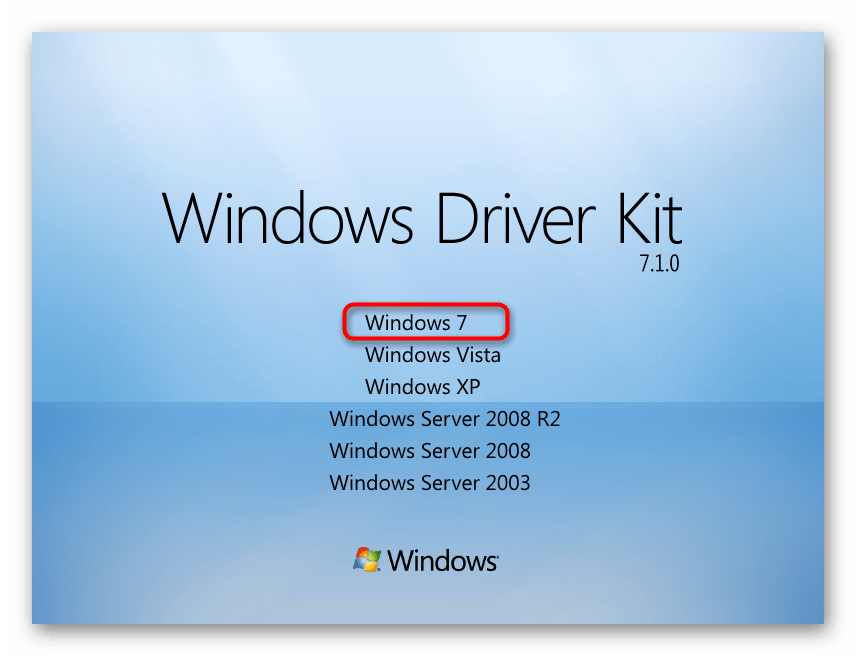
- Укажите версию операционной системы.
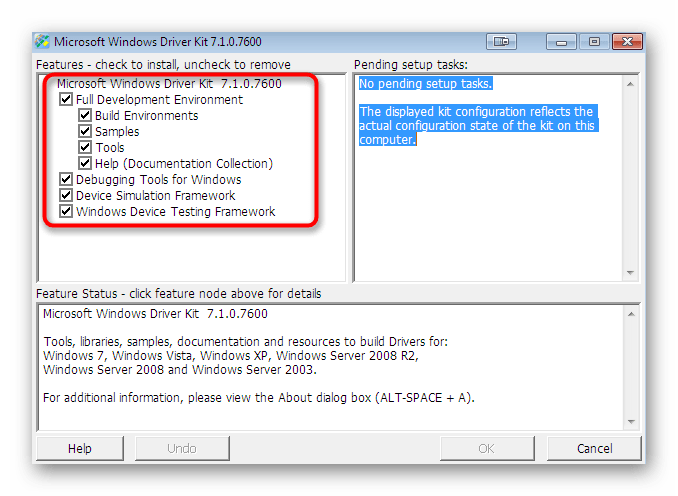
- Выберите для установки все присутствующие инструменты, отметив их галочками, и завершите операцию.
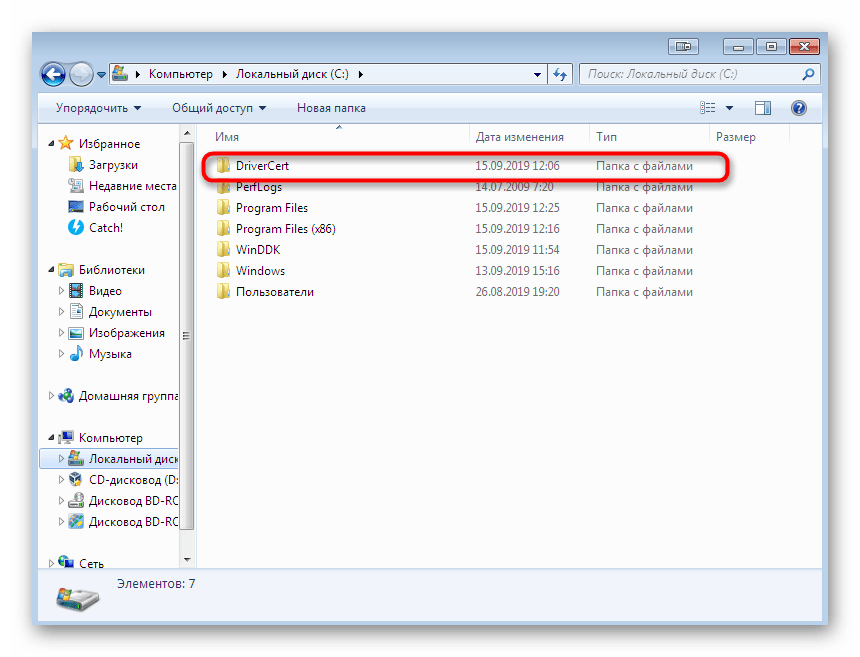
- Затем откройте корень системного логического тома жесткого диска, где создайте папку с названием «DriverCert». В нее будут помещены все зависящие от драйвера объекты для удобства взаимодействия с ними.
- Переходите по стандартным расположениям установленных компонентов, чтобы запомнить путь ко всем каталогам. Вы можете скопировать их или записать, чтобы не запутаться при выполнении следующих действий.
Сейчас уже существуют новые версии рассмотренных инструментов, но вам нужно загружать только те сборки, на которые мы оставили ссылки. Связано это с тем, что разработчики в новых версиях прекратили поддержку используемых далее утилит, что не позволит вручную подписать драйвер. Убедитесь в том, что все компоненты установлены, перезагрузите компьютер и переходите далее.
Шаг 2: Генерация ключа и сертификата
Сертификат необходим драйверу для того, чтобы определить его подлинность, а сгенерированные ключи обезопасят сам файл от несанкционированного изменения. Создание таких компонентов — обязательное условие от Microsoft, поэтому каждому пользователю придется выполнить следующие действия:
- Запустите «Командную строку» от имени администратора.
- Введите команду
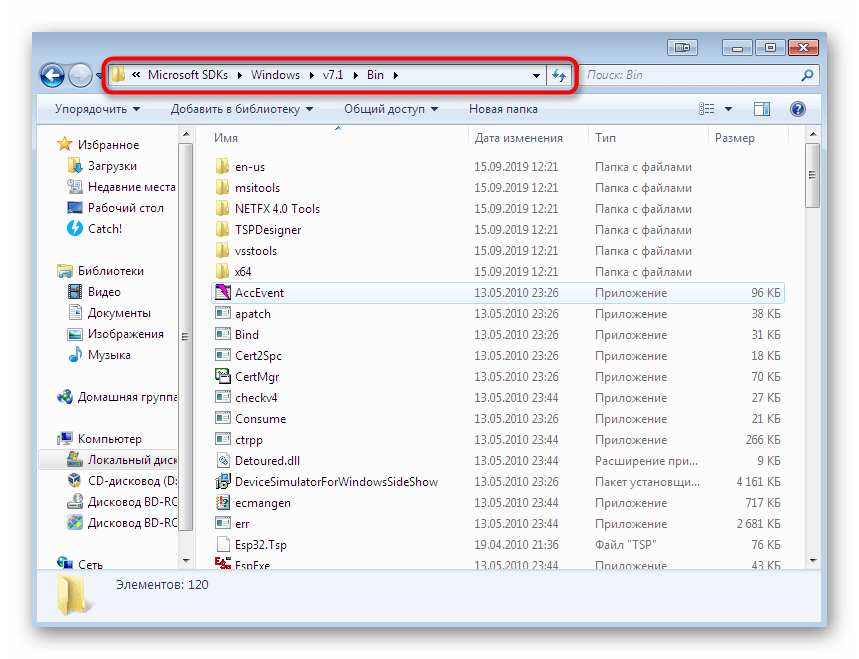
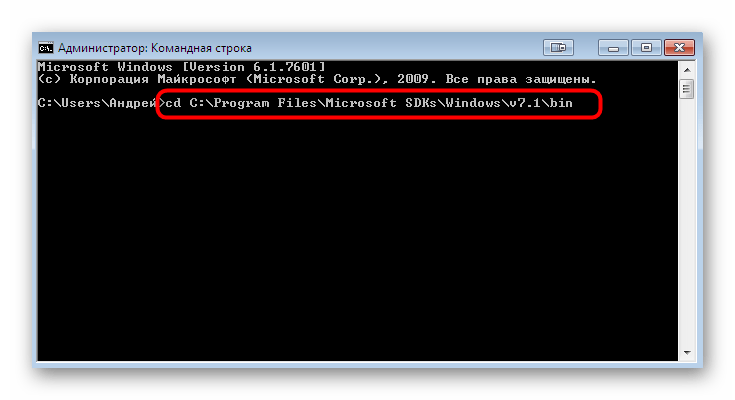
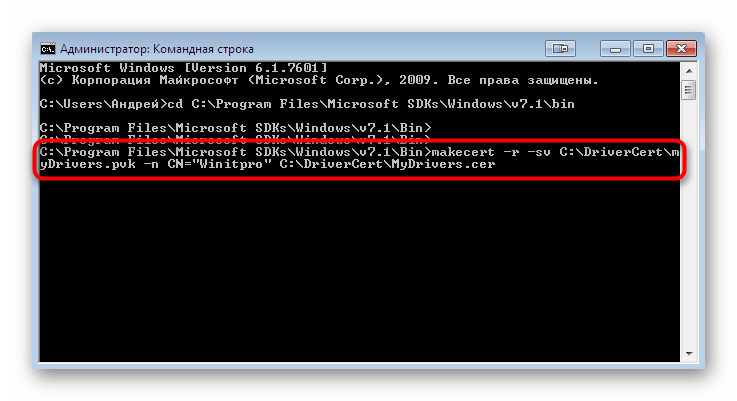
cd C:\Program Files (x86)\Microsoft SDKs\Windows\v7.1\bin, чтобы перейти к папке с объектами SDK. Если вы изменяли директорию при установке, замените путь на актуальный. Активируйте команду нажатием по клавише Enter. - Задействуйте утилиту, входящую в состав SDK, чтобы сгенерировать сертификат, вписав в консоль команду
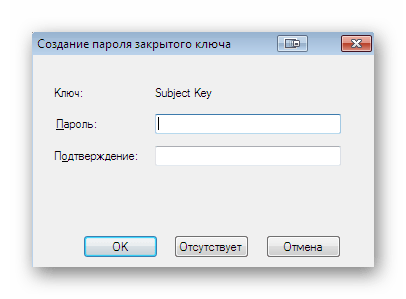
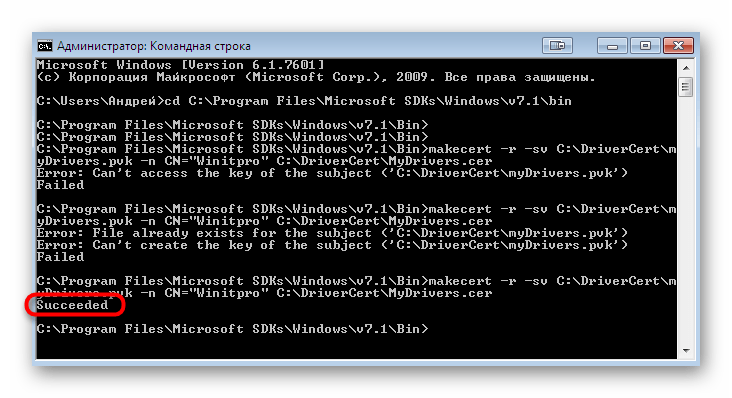
makecert -r -sv C:\DriverCert\myDrivers.pvk -n CN="NameCompany" C:\DriverCert\MyDrivers.cer. Замените NameCompany на название изготовителя драйвера или впишите произвольное. - На экране отобразится форма для создания пароля к закрытому ключу, а от вас требуется ввести его в соответствующем поле и подтвердить.
- Для продолжения работы в новом окне введите уже присвоенный пароль.
- После автоматического закрытия окна ознакомьтесь с содержимым консоли: если в конце вы видите уведомление «Succeeded», значит, генерация прошла удачно и можно двигаться далее.
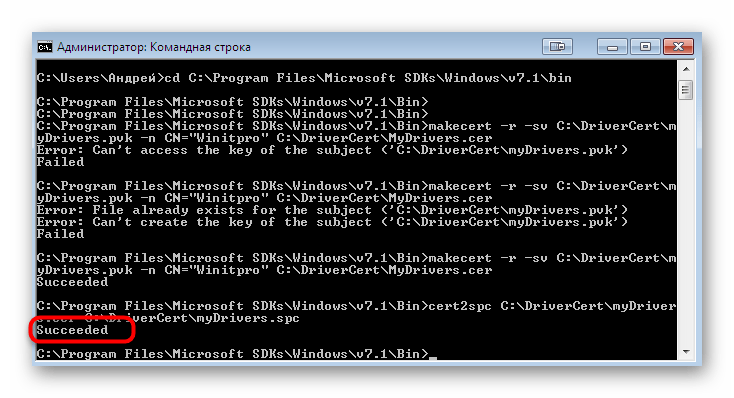
- Следующий обязательный этап заключается в создании публичного ключа, и он будет доступен всем желающим внедрить драйвер в программное обеспечение. Для этого вставьте команду
cert2spc C:\DriverCert\myDrivers.cer C:\DriverCert\myDrivers.spc. - Сообщение в консоли должно свидетельствовать об успешном создании публичного ключа.
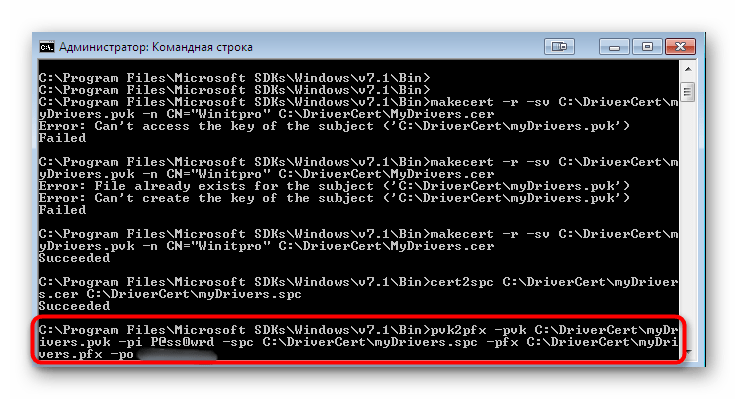
- Закрытый и публичный ключ должны быть объединены в один компонент, а для этого используется команда
pvk2pfx -pvk C:\DriverCert\myDrivers.pvk -pi P@ss0wrd -spc C:\DriverCert\myDrivers.spc -pfx C:\DriverCert\myDrivers.pfx -po PASSWORD. Замените PASSWORD на ранее созданный пароль закрытого ключа.

Это был самый простой этап создания цифровой подписи для драйвера, в ходе которого практически никогда не возникает никаких ошибок. Однако если на экране отобразились какие-то предупреждающие уведомления, не игнорируйте их, читайте содержимое и исправляйте ситуацию в соответствии с находящимися там рекомендациями.
Шаг 3: Создание конфигурационного файла
Конфигурационный файл необходим каждому драйверу, ведь именно в нем и будут храниться основные сведения. В дальнейшем он может пригодиться, если, например, понадобится изменить дату последнего изменения или внести коррективы в название версии драйвера. Сначала понадобится обратиться в заранее созданную папку «DriverCert», куда перенесите файлы драйвера, для которого и создается подпись, выделив для них отдельный подкаталог. После запустите консоль и выполните такие действия:
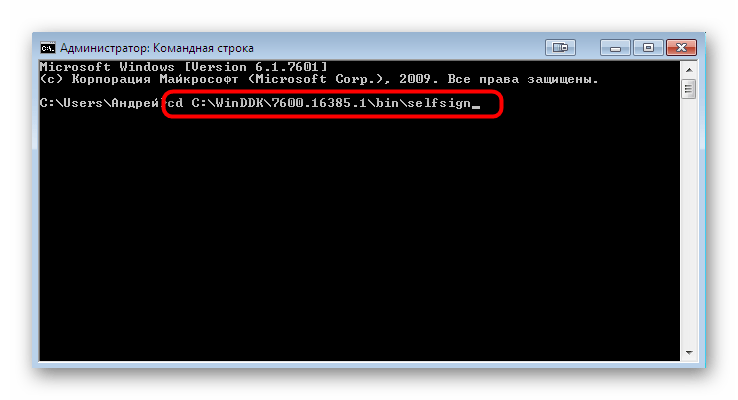
- Для использования следующей утилиты снова придется переместиться в папку с набором инструментов от Майкрософт, а для этого задействуйте команду
cd C:\WinDDK\7600.16385.1\bin\selfsign. - Предварительно откройте каталог с драйвером и убедитесь, что там есть два файла с расширениями INF и SYS, ведь они будут задействованы для следующего формирования конфигурационного файла. После введите
inf2cat.exe /driver:"C:\DriverCert\DRIVER" /os:7_X64 /verbose, заменив DRIVER на название ранее созданной папки с файлами. Подтвердите выполнение команды нажатием на Enter.
Следите за состоянием «Командной строки» и ожидайте появления на экране уведомлений «Signability test complete» и «Catalog generation complete». Во время процедуры создания файла настоятельно не рекомендуется выполнять других действий на компьютере, поскольку это может вызвать сбои в функционировании утилиты.
Отдельно отметим самую частую ошибку, которая появляется при создании конфигурационного файла. Ее текст выглядит примерно так: «22.9.7: DriverVer set to incorrect date (must be postdated to 4/21/2009 for newest OS) in \XXXXX.inf», а вызывает ее некорректно установленная дата создания объекта. Если такая проблема возникла, откройте целевой файл, имя которого и указано в ошибке, через стандартный «Блокнот», где отыщите строку «DriverVer=» и поменяйте ее значение на 05/01/2009,9.9.9.9. Сохраните изменения и повторно выполните создание конфигурационного файла.
Шаг 4: Создание подписи для драйвера
Когда все предыдущие этапы завершены, остается только подписать сам драйвер, что выполняется при помощи добавленных ранее средств разработчика через уже привычную Командную строку.
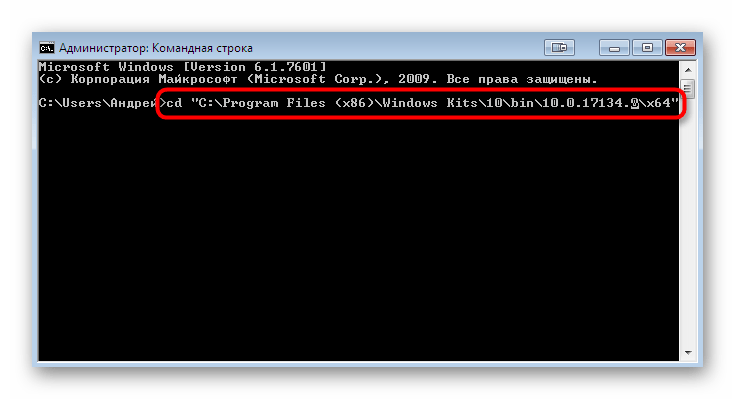
- Откройте консоль от имени администратора и напишите команду
cd "C:\Program Files (x86)\Windows Kits\10\bin\10.0.17134.0\x64". - Далее вставьте содержимое
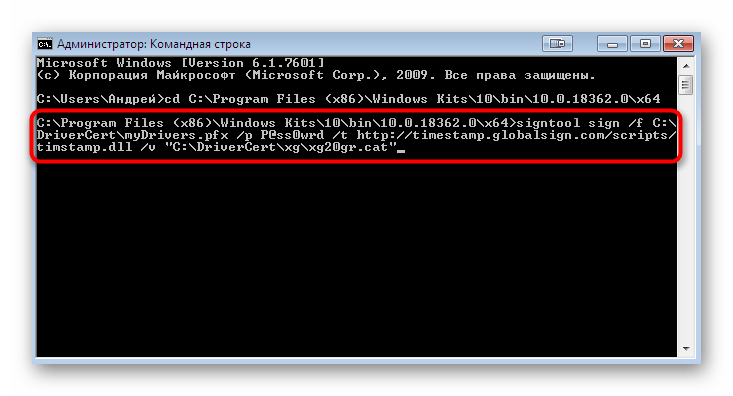
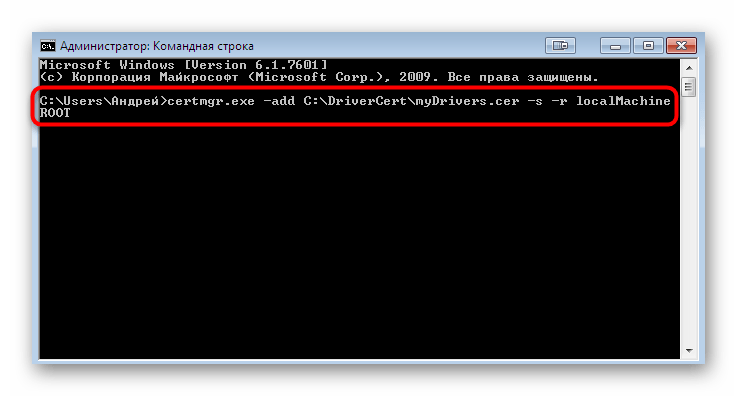
signtool sign /f C:\DriverCert\myDrivers.pfx /p PASSWORD /t http://timestamp.globalsign.com/scripts/timstamp.dll /v "C:\DriverCert\xg\xg20gr.cat", заменив PASSWORD на пароль закрытого ключа, который создавался ранее. Во время данной операции будет задействован онлайн-сервис Globalsign, отвечающий за установку штампа времени, поэтому убедитесь в наличии подключения к интернету. Появившаяся в консоли строка Successfully signed: C:\DriverCert\xg\xg20gr.cat Number of files successfully Signed: 1 уведомит об успешном завершении процесса. - По очереди вставьте две команды ниже, устанавливающие сертификат.
certmgr.exe -add C:\DriverCert\myDrivers.cer -s -r localMachine ROOT

certmgr.exe -add C:\DriverCert\myDrivers.cer -s -r localMachine TRUSTEDPUBLISHER
Следуйте отобразившимся в графическом меню инструкциям, чтобы завершить подпись. На этом процесс считается оконченным, а подписанный драйвер остается только вручную установить, если это требуется.
Подробнее: Ручная установка драйверов в Windows 7
Наша группа в TelegramПолезные советы и помощь
Contents
- 1 Missing or incorrect Trusted Publishers/Certificates
- 2 Extract certificate from .cat file
- 3 Install certificate into cert store
- 4 Remove certificate after install
- 5 Installing Remotely
- 6 Updates
- 6.1 Epson 4490
- 6.2 ARM mbed Windows serial port driver
- 7 Comments
Missing or incorrect Trusted Publishers/Certificates
In this example — installing drivers for an Epson 3170 scanner that has a broken certificate chain. This will stop you being able to install from command line without fixing.
The error will manifest itself like this if installing directly
devcon Windows Security — «Would you like to install this device software» — tick box «Always trust software from»
or with the dpinst error in c:\WINDOWS\DPINST.log if doing command line with dpinst.exe
dpinst RETURN: DriverPackagePreinstallW (0xE0000242)
e.g.
INFO:   Found driver package: 'E:\epson 3170\LIB\0c0a\Es32n.inf'.
INFO:   Found driver package: 'E:\epson 3170\LIB\0c0a\Es52.inf'.
INFO:   Preinstalling 'e:\epson 3170\es32.inf' ...
INFO:   ENTER:  DriverPackagePreinstallW
INFO:   RETURN: DriverPackagePreinstallW  (0xE0000242)
INFO:   Preinstalling 'e:\epson 3170\es43.inf' ...
INFO:   ENTER:  DriverPackagePreinstallW
INFO:   RETURN: DriverPackagePreinstallW  (0xE0000242)
To test what’s actually broken, you can use «signtool.exe /verify»,
First one fails (as in this example) and second one is correct from an Epson V300 scanner driver.
E:\>"E:\7600.DDK\signtool.exe" verify /a "e:\Epson 3170\es43.cat"
SignTool Error: A certificate chain processed, but terminated in a root
        certificate which is not trusted by the trust provider.

Number of errors: 1

E:\>"E:\7600.DDK\signtool.exe" verify /a "e:\epson v300\es8b.cat"
Successfully verified: e:\epson v300\es8b.cat
(yes, Epson can’t sign their drivers properly!)
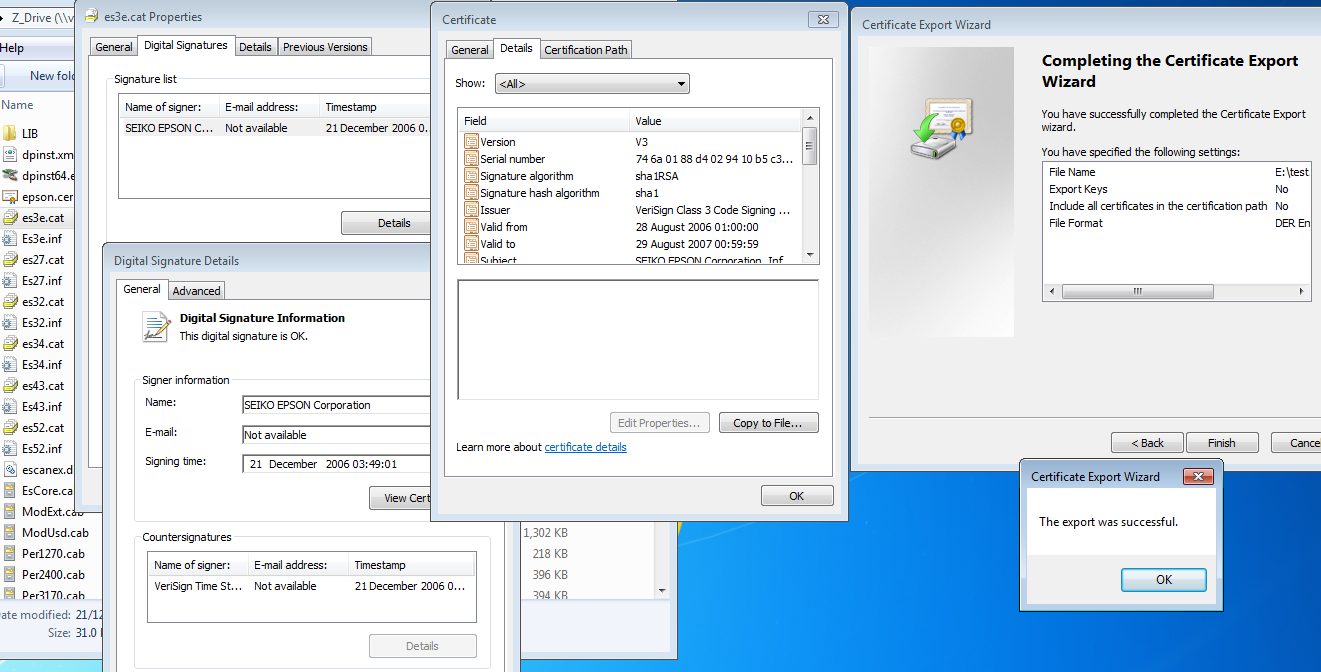
Right click on the(any) .cat file in the driver package, in this case es3e.cat > Digital Signatures > Highlight the name in ‘Name of Signer’ on the ‘Signatures List’ > Details.
A new window ‘Digital Signature Details’ should open. > View certificate > ‘Details’ tab > ‘Copy to File’ > Next > (leave default X.509 DER encoded .CER) Next > File name, choose one, e.g «epson.cer» > Next > Finish.
(If anyone knows how to do this via command line please let me know as I couldn’t find a way)
Install certificate into cert store
Import the DER encoded .CER certificate file «epson.cer» you just extracted to BOTH the ROOT(Trusted Root Certification Authority) and Trusted Publishers stores using certmgr.exe of the machine you wish to install the driver on.
C:\WinDDK\7600.16385.1\bin\amd64\CertMgr.exe -add "E:\epson 3170\epson.cer" -c -s -r localMachine TrustedPublisher
C:\WinDDK\7600.16385.1\bin\amd64\CertMgr.exe -add "E:\epson 3170\epson.cer" -c -s -r localMachine ROOT
If you then rerun dpinst.exe you should now see it correctly installs in c:\WINDOWS\DPINST.log, here is a sample.
INFO:   Found driver package: 'e:\epson 3170\Es43.inf'.
INFO:   Found driver package: 'e:\epson 3170\Es52.inf'.
INFO:   Preinstalling 'e:\epson 3170\es27.inf' ...
INFO:   ENTER:  DriverPackagePreinstallW
SUCCESS:e:\epson 3170\es27.inf is preinstalled.
INFO:   RETURN: DriverPackagePreinstallW  (0x0)
INFO:   ENTER:  DriverPackageGetPathW
INFO:   RETURN: DriverPackageGetPathW  (0x0)
INFO:   Preinstalling 'e:\epson 3170\es32.inf' ...
INFO:   ENTER:  DriverPackagePreinstallW
SUCCESS:e:\epson 3170\es32.inf is preinstalled.
Remove certificate after install
If you wish to tidy the PC up back to its initial state certificate wise you can remove them like this after the driver is (pre)installed.
- Note, MUST change the name option (-n) to match the ‘Name of Signer’
CertMgr.exe -del -n "SEIKO EPSON Corporation" -c -s -r localMachine TrustedPublisher
CertMgr.exe -del -n "SEIKO EPSON Corporation" -c -s -r localMachine ROOT
Installing Remotely
This call all be done automatically and remotely using psexec once the certificate (.cer) is extracted from the .cat.
You WILL need to change ALL occurances of two things (the name of the certificate file and ‘Name on Certificate’) in the .bat file with the link above example.
- richud.com.cer to epson.cer (or whatever you called your cert when saved it out)
- -n richud.com to -n «SEIKO EPSON Corporation» (or whatever the ‘Name on Certificate’ is for the cert)
Updates
Epson 4490
The Epson 4490 scanner driver (epson13552.exe) suffers a similar issue (Win7 64bit only tried) and is fixed in the same way. Note you will need to extract the cert from the cat file again.
- Note , the certificates aren’t interchangable between driver packages and you will need to extract from the specific driver bundles specific cat file(s).
ARM mbed Windows serial port driver
mbedWinSerial_16466.exe Driver here
To be able to silently install the ARM mbed driver, follow the same procedure as with the Epson top.
blog comments powered by
(6 votes, average: 5.00 out of 5)
Explore our complete guide to Windows driver signature enforcement. This built-in Windows feature increases the security of your operating system by detecting and blocking the installation of unsigned (and potentially dangerous) drivers.
Have you ever wondered how an operating system takes long streams of binary code and transforms them into graphic images, videos, or sounds? Drivers are the key software ingredient that makes the “magic” happen.
They’re the ones that, behind the scenes, guarantee that the operating system, software applications, and the hardware attached to your device work properly. As such, they’ve become an appealing target for cybercriminals who want to introduce malicious code into a system.
Having Windows driver signature enforcement enabled reduces infection risks by preventing the installation and execution of potentially dangerous unsigned drivers. Keeping the Windows driver signature enablement feature active is a quality that shouldn’t be overlooked, given that the number of newly detected malware families increased by a walloping 135% over the past five years. In this guide, we’ll look under the hood at what driver signature enforcement is, how it operates, how to manage it, and how it can help you prevent cybersecurity attacks.
What We Mean by “Driver Signature Enforcement”
Driver signature enforcement is a security feature enabled by default in all Windows versions, starting from Windows Vista. Every time a new driver installs/runs, this security mechanism checks several key factors:
- Whether the driver has been signed with a valid code signing certificate,
- If it’s been verified and signed by the Windows Hardware Developer Center, and
- Whether it has been signed by Microsoft.
The installation is blocked if any of these security requirements are unmet. Basically, driver signature enforcement shields users, organizations, and devices against installing malicious software.
It’s a considerable step forward in the security of Windows devices. Before its advent, the operating system had no way to automatically validate, authenticate, and block suspicious software installations. It just displayed a pop-up warning “Do you want to run this file?” leaving the final choice to the end users who often had no idea about the risk involved. Leaving this choice up to a potentially unassuming employee isn’t the best solution when you consider that the human element remains the root cause of 74% of data breaches.
Simply put, Windows driver signature enforcement was the breakthrough. Built on top of the groundwork done by code signing certificates, it taps into their capabilities. This takes the security of computers to the next level — no user actions required.
Sign Windows Drivers (and Save Up to 21% While Doing So)
Digitally sign your Windows drivers using an extended validation (EV) code signing certificate for as little as $277.71/year for a 3-year certificate.
Get Started
How Does Driver Signature Enforcement Work?
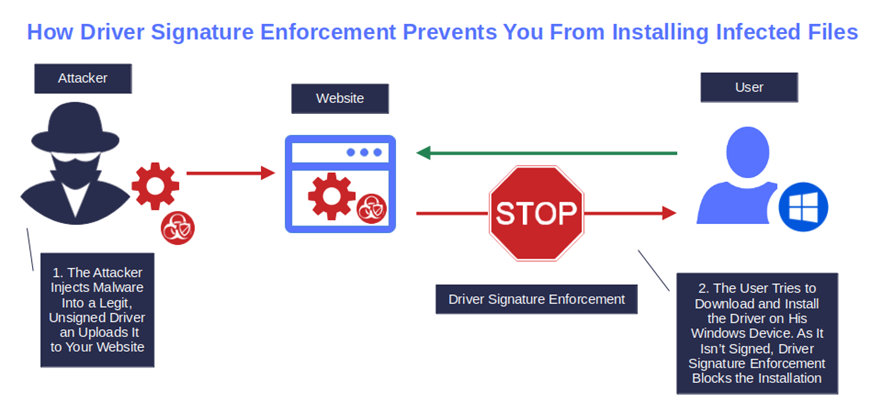
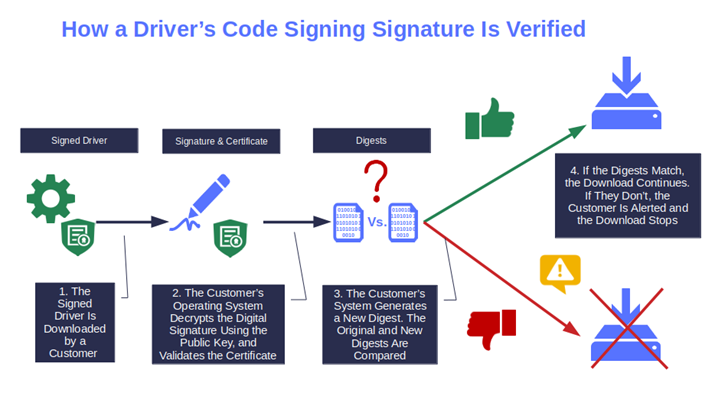
In layman’s terms, driver signature enforcement acts much like a border officer checking passports. If everything is fine, you can go on your merry way, but if something is wrong with your papers (e.g., the photo doesn’t match your face or your passport is expired), you won’t be allowed to continue your journey.
Likewise, when a user attempts to install/run an infected, unsigned driver or a driver with an expired digital signature, driver signature enforcement steps in. This security mechanism:
- Checks the driver’s certificate and the digital signature to identify the issue,
- Stops the installation, and
- Warns the user of the security risks.
No more risks of making the wrong decision, and no more installation of infected, suspicious, or incompatible drivers.
So, if code signing certificates alone aren’t the Holy Grail of drivers and device protection, why should you, as a software provider, invest time and money into signing them? There are a few jolly good reasons why you should, and we’re going to explore them now.
Why You as a Software Publisher Should Always Sign Your Drivers
Since the 2016 release of Windows 10 version 1607, before you can publish a new Windows 10 or 11 driver, you first have to:
- Sign it with an extended validation (EV) code signing certificate issued by a trusted certificate authority (CA),
- Successfully complete the Windows Hardware Developer Center verification process, and
- Get it signed by Microsoft.
Yet, code signing certificates are more than just a way to ensure customers can smoothly install your software without being blocked by their operating system’s driver signature enforcement. They also serve several other important functions:
Prevent Users and Customers From Installing Malicious Drivers
According to Trend Micro research, in 2022 the number of kernel-based attacks increased by fivefold compared to 2015. The combination of code signing and driver signature enforcement ensures that, when a user attempts to install an unsigned driver, the installation stops, and an error message “Windows Requires a Digitally Signed Driver” is displayed.
Enhance the Security of Any Device
Kernel-mode drivers have always been among cybercriminals’ favorite entry points. This year, 2023 makes no exceptions. By compromising drivers, attackers are virtually guaranteed high-privileged access to devices’ systems and resources while enabling them to bypass detection.
With code signing verification, installing an unsigned kernel-mode driver bundled into a Windows 10 or 11 ISO isn’t possible. The warning “No signed devices were found” will display when a user tries. Frustrating as it may be from a user perspective, it’ll keep your customers and organization’s devices secure from falling prey to kernel-driver-based malware attacks.
Confirm Driver’s Authenticity and Integrity
How can your customers trust what they’re downloading from your website and the internet? Authenticity is a big deal for 51% of consumers interviewed by Edelman in 2023. Their research also shows that more than half (59%) of their consumer survey respondents are more likely to purchase products when they trust the brand.
Signing your drivers and software with a code signing certificate enables users to confirm the integrity of your codes. It’ll also guarantee them that the code hasn’t been altered during the download (e.g., man-in-the-middle attacks).

Let the Users Verify Who Signed Them and When
A digital certificate is issued only after the CA has validated your identity as a legitimate software publisher. Validation is a meticulous process that involves using official third-party documentation and government documents to verify your identity. When you sign your drivers using one of these certificates, your customers can check the certificate’s info to view your organization’s details and know exactly when the files were signed.
The same certificate proves that your drivers comply with Microsoft security and compatibility policies, giving additional peace of mind to your clients.
Ramp Up Your Sales and Customers’ Trust
The aforementioned Edelman survey shows that 73% of people consider brands more valuable that are perceived as having strong security. That’s 9% more than in 2022. So, if you’re wondering what’s in it money-wise for you, this is the answer — greater trust that can contribute to greater leads and sales.
Driver signing adds a seal of authenticity, security, and integrity to your software products and drivers. It increases customer trust and subsequently, profitability. Furthermore, as a proud owner of a code signing certificate, you’ll be able to utilize it, not just to secure your drivers but also your software, executables, apps, and scripts.
Aren’t all these very good reasons to sign your drivers?
But what if you need to install an unsigned driver? Is doing so impossible because of Windows driver signature enforcement? Hint: it isn’t. The beauty of driver signature enforcement in Windows 11, 10, and 7 is that it can be configured even to meet this specific requirement. Let’s find out how.
How to Securely Manage Driver Signature Enforcement in Windows 10, 11, and 7
While driver signature enforcement automatically checks the signature of every driver you attempt to run and/or install, and ideally you should never change it, you still have the option to tweak it.
This is a feature that may be useful for developers for example. Do you need to test some unsigned drivers you’ve just created throughout the development process? With all the due precautions, you can still do that, even on the most recent Windows releases.
But that should be it. Disabling driver signature enforcement outside of development or testing purposes merely because you can’t be bothered seeking other comparable drivers, or to save money, isn’t a smart idea.
Why? Because it’ll disable a built-in secure feature in multiple Windows operating systems and can lead to:
- Dangerous malware infections. Malware like rootkits (i.e., backdoor software that grants the attacker full access to an infected machine) execute in kernel mode, allowing bad guys to do basically anything, from stealing sensitive data to changing configurations and spying on the computer’s activity.
- Devastating ransomware attacks. Once they have access to your system, bad guys can use it to evade antivirus tools and even lock you out of your systems and data. Have you ever heard of Mallox? It’s a ransomware type that exploits Windows operating systems and MS-SQL servers. In the first half of 2023, Mallox attacks alone rose by 174% year over year. How much will a small/medium business have to fork out in recovery costs? Based on an independent survey, a minimum of $165,520.
- Costly data breaches. Once an attacker has access to your systems and data, they can hold them ransom. In 2023, a data breach cost to organizations an average of $4.45 million globally. One of the latest victims, Ceasars Entertainment, paid roughly $15 million ransom to the attackers. Yes, if you’re a medium or small business you may get away with less. However, you’ll still have to ramp up your cyber defenses. Businesses with less than 1,000 employees are easier targets thus, are more attractive to attackers than bigger companies.
NOTE: We do not recommend disabling Windows Driver Signature Enforcement because of the potential security risks that are at stake. Instead, we recommend only installing and using the Microsoft Hardware Developer Program dev portal to digitally signed drivers.
After all of this information, are you still willing to take the risk by disabling Windows driver signature enforcement to install one or more unsigned drivers? If so, keep on reading to learn how to do that in all recent Windows releases.
How to Temporarily Disable Driver Signature in Windows 11, 10, and 7 for Testing/Development
There are several techniques you can use to temporarily disable driver signature verification in Windows 7, 10, and 11. Here we’ll show you one of the more straightforward alternatives that’ll work for all releases.
Before we start, though, if you’re a Windows 8, 10, or 11 user, you’ll first have to reactivate the legacy F8 option. This should only take a couple of minutes, and it’s a feature you want to have activated anyway in case of trouble (e.g., you can’t boot your operating system normally).
Are you a Windows 7 user? You can jump to the “Launch the Advanced Boot Option Menu” section.
How to Activate the Legacy F8 Option in Windows 10 and 11
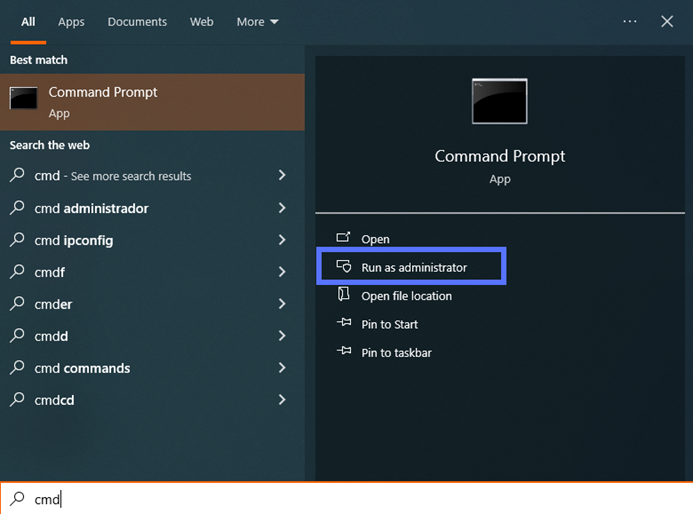
- Open the Command Prompt as administrator. On your desktop select Start, type “Cmd” in the search bar, click on Run as administrator, and enter your administrator password.
- Type“bcdedit /set {default} bootmenupolicy legacy.”Hit Enter. You can do this by writing in capitalized letters or lowercase, as some users have expressed technical issues writing it one way versus the other.
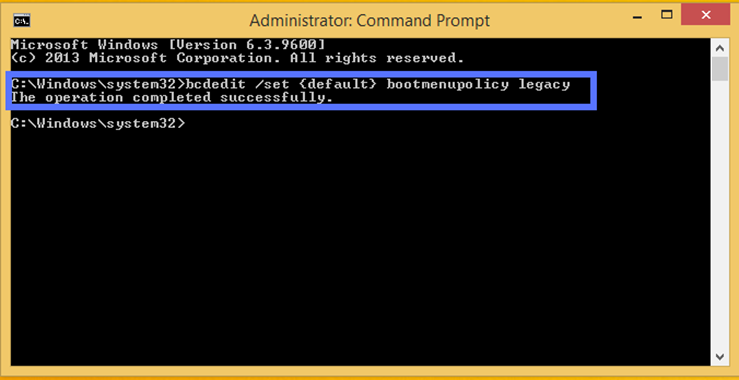
- Close the Command Prompt window. F8 is now enabled, and you can now skip ahead to the “Disable Driver Signature Enforcement” section.
How to Activate the Legacy F8 Option in Windows 8 and 8.1
- Open the Command Prompt as administrator. On your desktop, click Start, enter “Cmd” in the search bar, select Run as administrator, and type your administrator password.
- Type“bcedit /set {bootmgr} displaybootmenu yes.”Hit Enter.

And it’s done! You can now close the Command Prompt window and follow the remaining steps below.
How to Disable Driver Signature Enforcement
- Reboot your device.
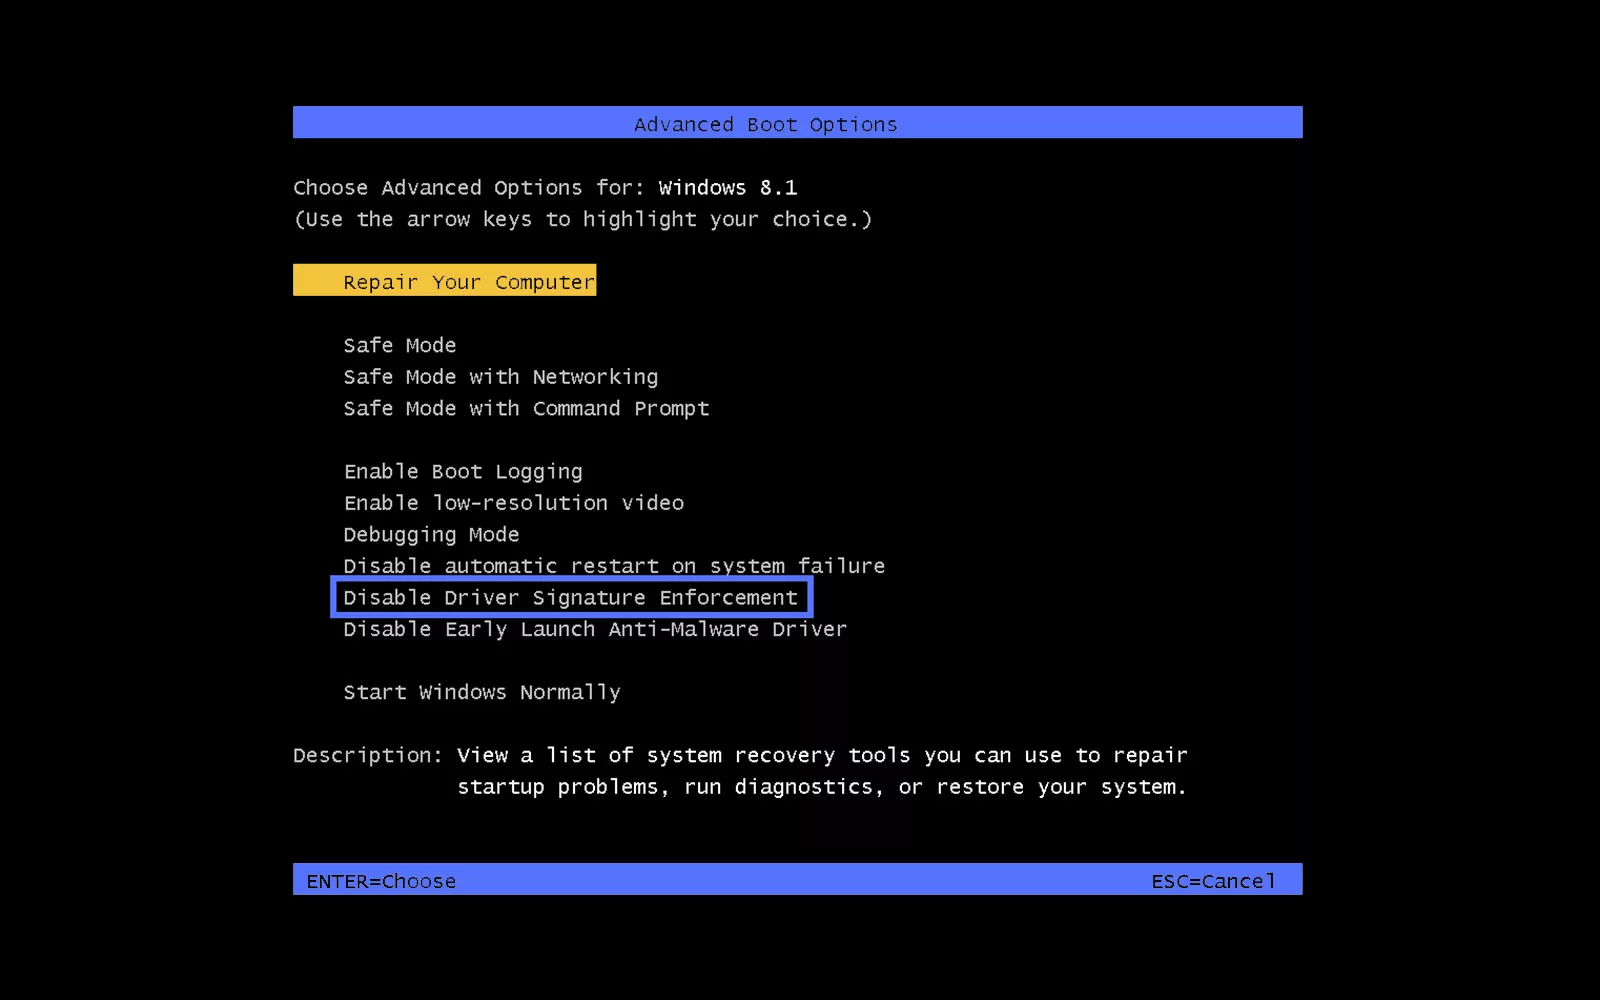
- Launch the Advanced Boot Option menu. To do so, hit the F8 button repeatedly as soon as the manufacturer logo appears. Alternatively, you can wait for the Windows Boot Manager screen to display and then press F8.
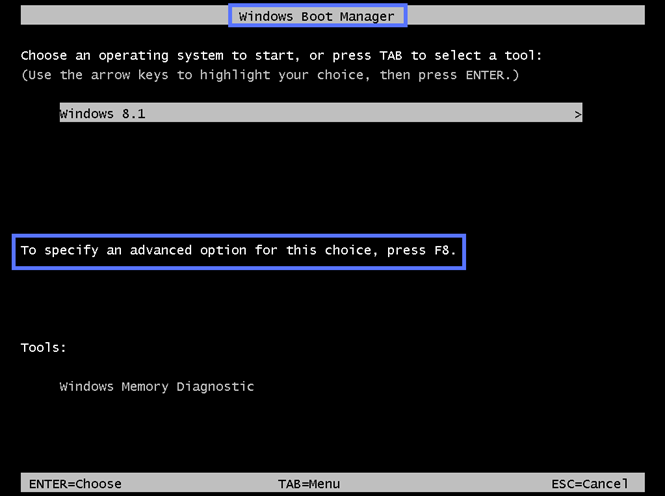
- Select the Disable Driver Signature Enforcement option using the arrow keys, and press Enter.

Done! Your computer will reboot and you’ll be able to install and run unsigned drivers. But remember, from this point on, your machine will be at a greater risk of malware infections. Therefore, disable driver signature enforcement only for testing or development purposes. NOTE: We do not recommend using this approach as a user to install unsigned drivers due to the security risks.
Immediately after installing or testing the unsigned driver, reboot the machine. The driver signature enforcement will be automatically re-enabled.
Final Thoughts on Windows Driver Signature Guide for Driver Enforcement for Windows 7, 10, and 11
Windows driver signature enforcement is a highly effective security tool. It determines whether a driver is safe and can be installed or should be blocked because of security-related concerns.
But Windows Driver Enforcement doesn’t can’t operate alone. This security feature works in tandem with code signing certificates and digital signatures to safeguard your devices, users, and organizations from the severe implications of a security incident caused by a malicious unsigned driver.
Now that you have a better understanding of how driver signature enforcement works, and how to control it, use it wisely. Don’t give the bad guys a chance. As a user, deactivate it only if you have no other options, and then scan your driver for viruses before proceeding with the installation. You’re a software publisher? Unleash the power of code signing certificates. Use them to digitally sign all of your codes and applications. You’ll protect your customers and users and demonstrate your commitment to their safety.
Provide feedback
Saved searches
Use saved searches to filter your results more quickly
Sign up
Appearance settings