
The Airpods Pro microphone might not work on your Windows PC if the PC’s Windows/drivers or firmware of the AirPods are outdated. Moreover, the corrupt or incompatible Bluetooth Windows driver may also cause the issue.
The issue arises when the user fails to use the AirPod mic on his Windows PC (sometimes after a Windows update and sometimes when trying for the first time), although the AirPods work perfectly as the sound output device.
Before proceeding with the solutions to use the AirPods Pro mic on Windows, check if disconnecting and reconnecting the AirPods and PC resolves the mic issue. Moreover, ensure the “Allow Access to Your Microphone” and “Choose Which Apps Can Access Your Microphone” settings are enabled in the Privacy Settings of your System.
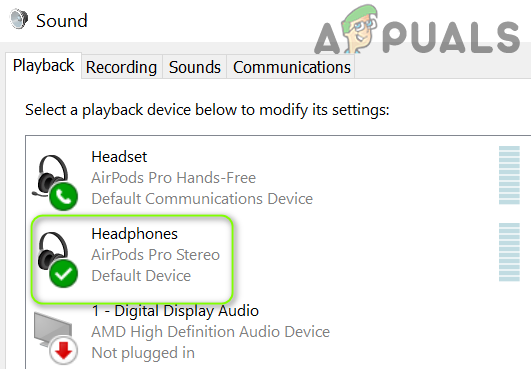
Also, check if the AirPods Pro is the Default Communication Device in the Sound Control Panel. Furthermore, ensure the Telephony service is enabled in the Services tab of the headset Properties in Settings>> Devices>> Devices and Printers.
1. Update Windows, Drivers, and Firmware of Airpods
The AirPod’s mic might not work if its firmware or Windows/device drivers are outdated as it can create incompatibility between the devices (i.e., the PC and AirPods). In this context, updating the Windows drivers and firmware of the AirPods may solve the problem.
- Update your System’s Windows and device drivers (especially Bluetooth drivers). Make sure no optional update is pending uninstall. Also, if you are using an OEM utility (like Dell Support Assistant), then use it to update the drivers.
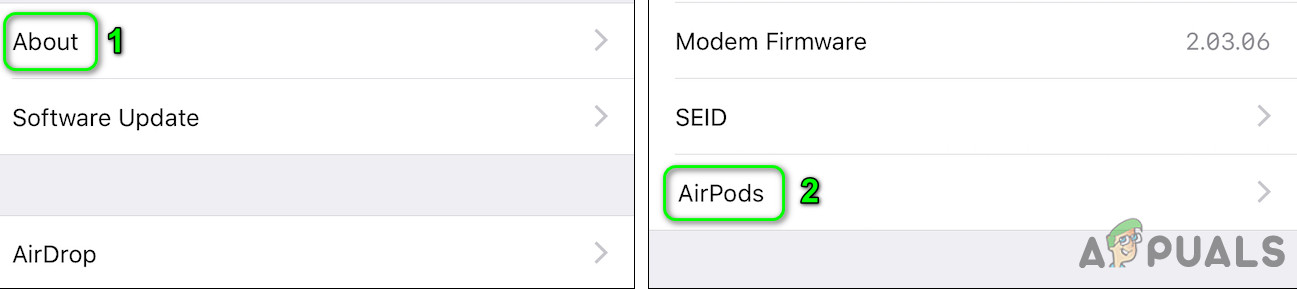
- After updating, check if the AirPod mic is working fine. If the issue persists, put the AirPods in their case, bring the case close to your iPhone, open the case’s lid, and dismiss the notification on the iPhone. Then update the firmware of the AirPods in the iPhone’s Settings>> General>> About>> AirPods>> Firmware Version.

Open AirPods in the About of Your iPhone - After updating the firmware of the AirPods, check if the AirPods mic is clear of the issue.

Check Firmware Version of AirPods

2. Re-add the AirPods Pro to the System
The AirPods Pro mic issue could be a result of a temporary glitch of the communication/Bluetooth modules of the System. In this case, re-adding the AirPods Pro to the System may solve the problem.
But before proceeding, make sure there is no Bluetooth interference from any other device (e.g., disable Bluetooth of your iPhone) and unpair both devices (i.e., your PC and the AirPods).
- Put your AirPods in their charging case and held the pairing button of the case.
- Now, without releasing the pairing button, open the AirPods case’s lid and wait until the green light blinks.
Press the Pairing Button on the AirPods’ Case - Then release the pairing button and on the Windows system, press the Windows key.
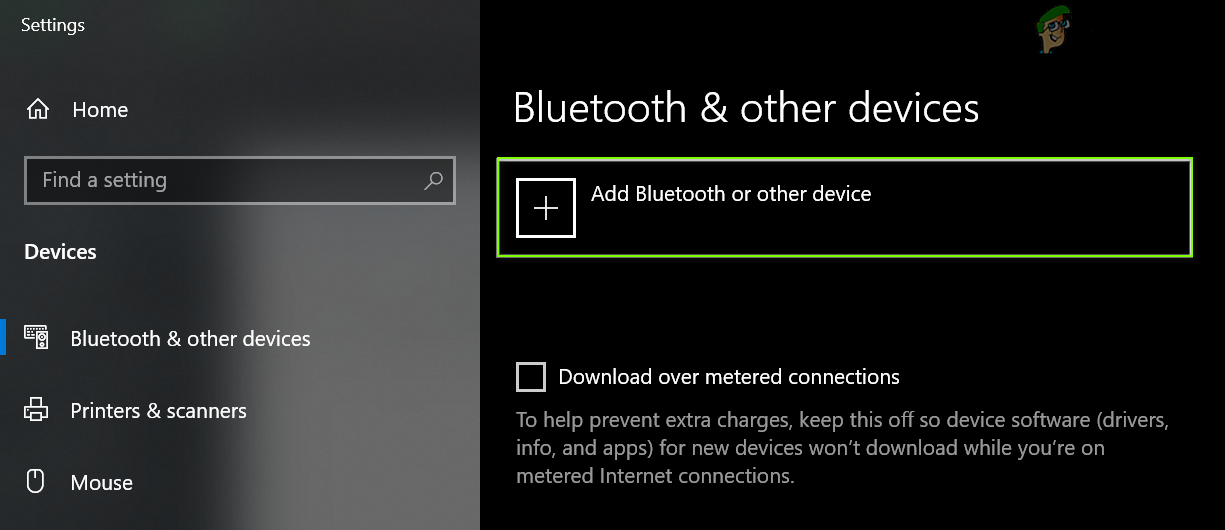
- Now type ‘Bluetooth and Other Devices Settings‘ and click on Add Bluetooth or Other Device.
Open Bluetooth and Other Devices Settings - Then click on Headset and right-click on the Speaker icon (in the System’s tray) after successfully pairing oSystem’svices.

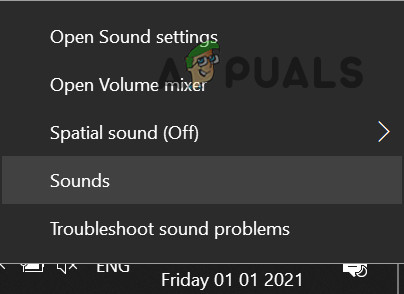
Click on Add Bluetooth or Other Device - Now choose Sounds and then head to the Recording tab.

Open Sound - Then right-click on the AirPods Pro Stereo and choose the Default Device.

Set AirPods Pro Stereo as the Default Device - Repeat the same in the Playback tab and check if the mic works fine. If not, then try the steps again after a system reboot.
3. Change the Applications’Settings
If the issue is only with some applications, then that application may not have been properly configured to use the AidPod Pro mic. In this context, making the relevant changes in the application’s settings may solve the problem. For elucidation, we will discuss the process for the Zoom application.
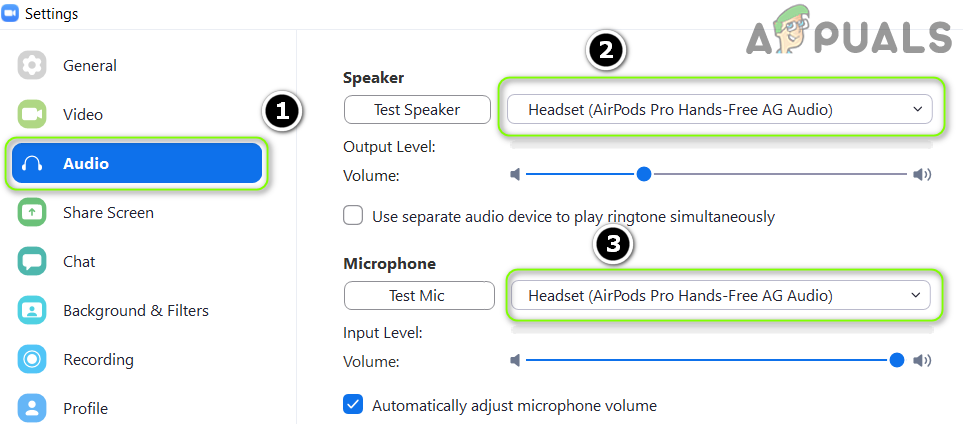
- Launch the Zoom Settings and head to the Audio tab.
- Now expand the dropdown of Speaker and choose Headset Airpod.
- Then expand the dropdown of Microphone and choose Headset Airpod.

Set Headset Airpod as the Speaker and Microphone in the ZZoom’sSettings - Now relaunch the application and check if it is working fine.
If the issue persists, check if choosing Stereo as Speaker and Microphone as ‘’Same as System’‘resolves the problem.
4. Run the Built-in Troubleshooters
The AirPod Pro mic might fail to work if essential OS modules (like Bluetooth, audio, etc.) are stuck in operation. In this scenario, running the Windows built-in troubleshooters may clear the glitch and thus solve the problem.
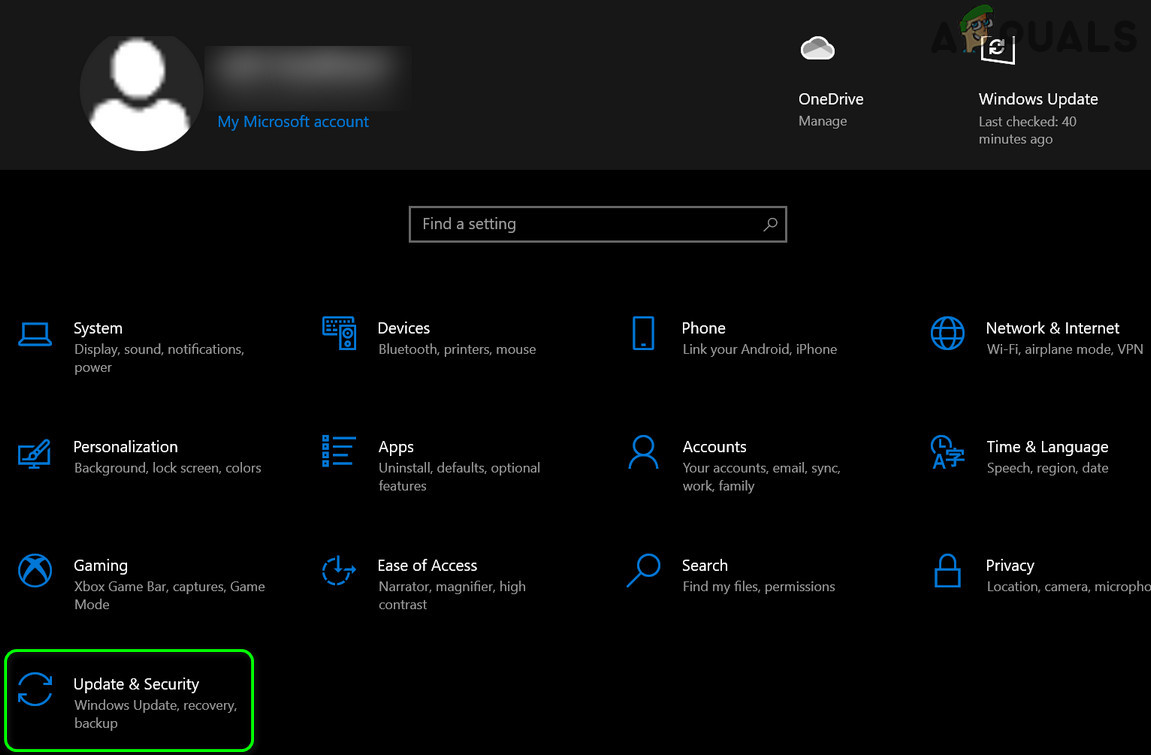
- Press the Windows key and open Settings.
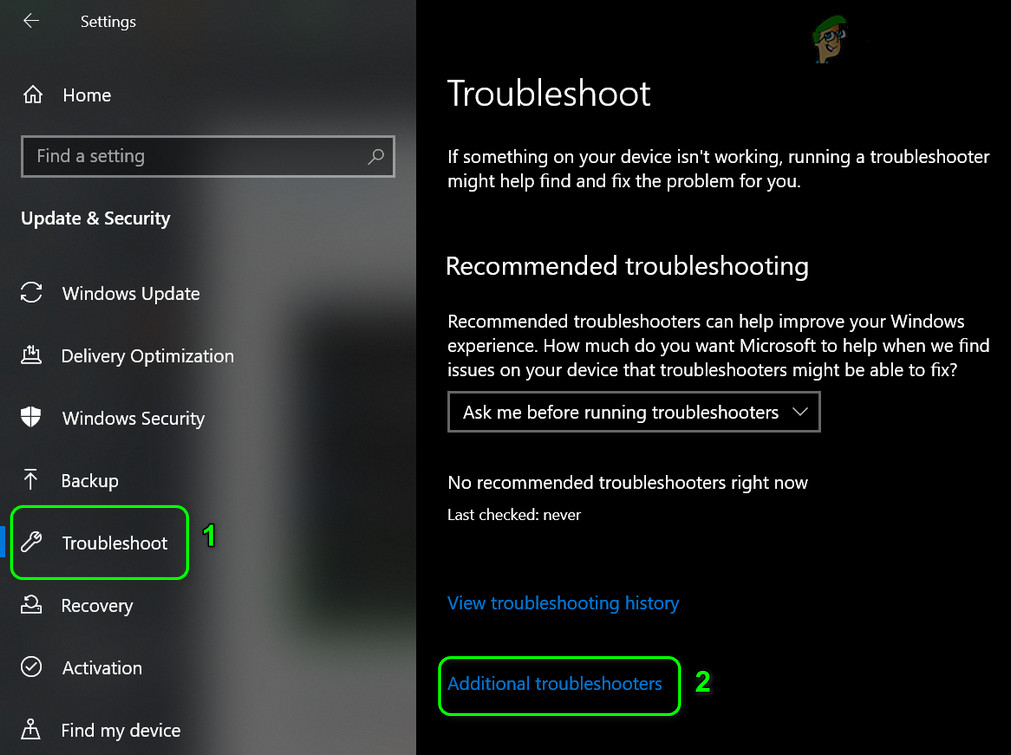
- Now select Update & Security, and in the left pane, navigate to the Troubleshoot tab.

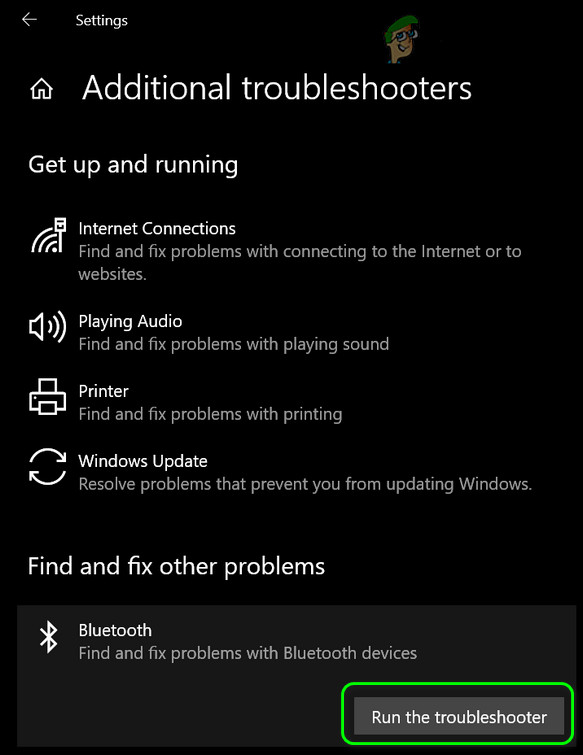
Open Update & Security - Then, in the right pane, open Additional Troubleshooters and click on Bluetooth to expand it.

Open Additional Troubleshooters - Now click on the Run the Troubleshooter button and let its process complete.

Run the Bluetooth Troubleshooter - Then apply the troubleshooter suggestions and check if the AirPod Pro mic is operating fine.
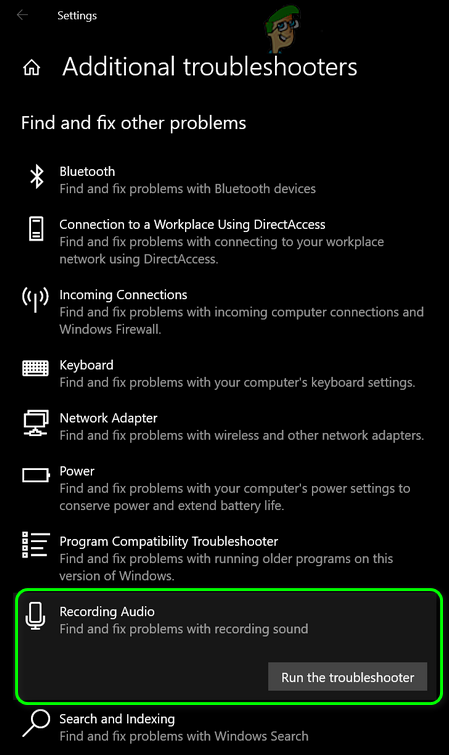
- If the issue persists, run the Recording Audio troubleshooter and check if that resolves the mic issue.

Launch the Recording Audio Troubleshooter
5. Use the Hands-Free Mode
Suppose your Bluetooth adapter (mainly internal adapters) does not support the Stereo mode operation of the AirPods Pro. In that case, switching to the Hands-Free AG Audio option may solve the problem (but the sound quality may be a bit deteriorated).
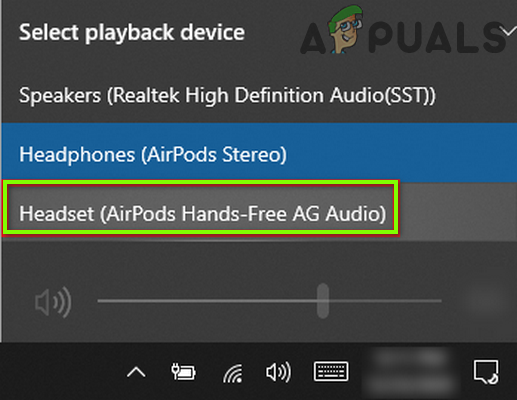
- Click on the Speaker icon in the SSystem’sTray to expand the sound devices panel.
- Select the Headset (AirPods Hands-Free AG Audio) option and check if the AirPod mic is working fine.

Select Headset (AirPods Hands-Free AG Audio) - If the issue persists, right-click Windows and select Device Manager.
- Now expand the Sound, Video, And Game Controllers option and right-click on the AirPods Stereo.
Disable AirPods Stereo in the Device Manager - Then select Disable Device and confirm to disable the AirPods Stereo device.
- Now exit the Device Manager and reboot your PC.
- Upon reboot, check if the AirPod Pro mic is working fine.
6. Reinstall the Bluetooth Driver
If your System’s Bluetooth driver is corrupt or incompatible, your AirPods mic won’t work. In this case, reinstalling the Bluetooth driver may solve the problem.
- First, launch a web browser and download the latest Bluetooth driver version from the OEM website.
- Then right-click the Windows logo button and open Device Manager.
- Now expand Bluetooth and right-click on the Bluetooth device.

Uninstall the Bluetooth Device in the Device Manager - Then, in the menu shown, choose Uninstall Device, and on the next window, checkmark the option of Delete the Driver Software for This Device.
Delete the Driver Software of This Device for the Bluetooth Driver - Now click on Uninstall and let the uninstallation complete.
- Then reboot your PC and upon reboot, let Windows install a generic driver (if it does so).
- Now check if the mic issue is resolved. If not (or the Windows did not install a generic driver), install the latest driver (downloaded at step 1) and check if the mic has started functioning.
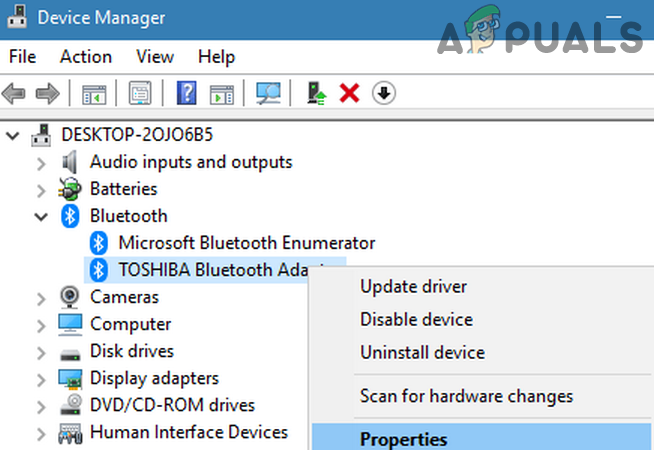
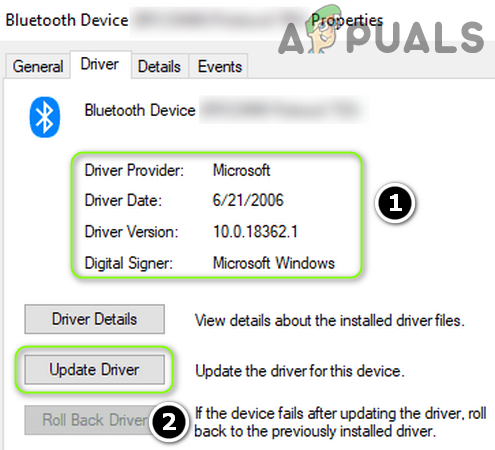
- If the issue persists, right-click on the Device MManager’sBluetooth device (repeat steps 2 to 3) and choose Properties.

Open Properties of the Bluetooth Device in the Device Manager - Now, head to the Driver tab and note the Bluetooth driver in use. After that, click on the Update Driver button.

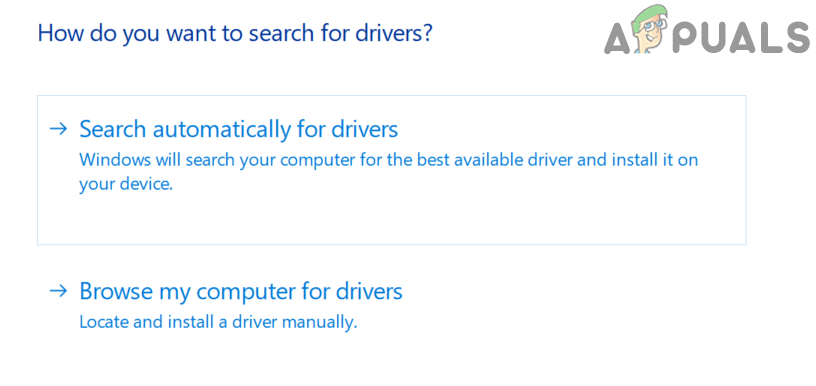
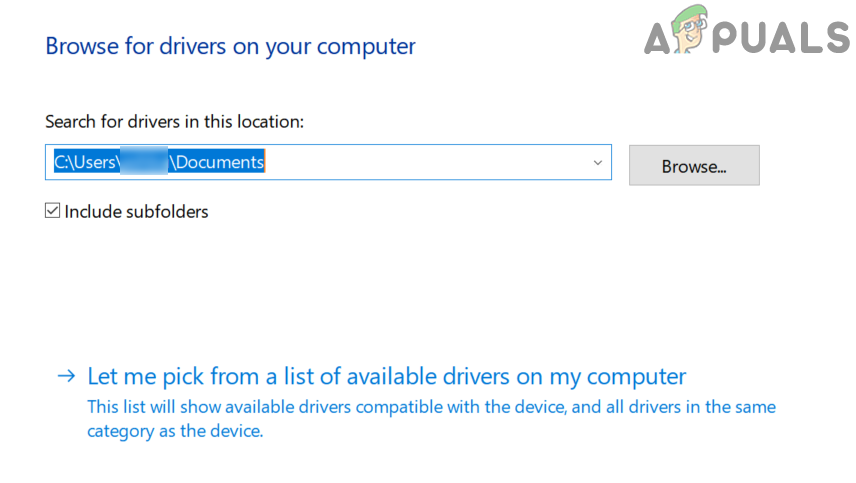
Note Down the Bluetooth Driver and Click on Update Driver - Now choose Browser My Computer for Drivers, and on the next window, select Let Me Pick from a List of Available Driver on My Computer.

Browse My Computer for Drivers - Then, in the list of drivers, select a driver (but not the one currently in use) and click on the Next button.

Let me pick from a list of available drivers on my computer - Now reboot your PC and check if the AirPod Pro mic is working fine.
- If the issue persists, you may try another driver at step 11 (you may have to uncheck Show Compatible Driver) and check if that resolves the mic issue (you may try all the drivers one by one).

If none of the drivers does the trick for you, check if using the Bluetooth Headset Helper by Broadcom resolves the mic issue. If the problem persists, you may try to use an external (or another Bluetooth adapter using Bluetooth 5.0 like Jabra Link 380) to resolve the issue.
Kamil Anwar
Kamil is a certified MCITP, CCNA (W), CCNA (S) and a former British Computer Society Member with over 9 years of experience Configuring, Deploying and Managing Switches, Firewalls and Domain Controllers also an old-school still active on FreeNode.
Можно ли использовать AirPods с компьютером Windows 10, 8.1 или Windows 7? Да, можно: достаточно, чтобы компьютер или ноутбук имел Bluetooth адаптер, и он исправно работал — после подключения AirPods их можно будет использовать как наушники с микрофоном.
В этой инструкции подробно о том, как подключить Apple AirPods или AirPods Pro к ПК или ноутбуку, а также о возможных проблемах, с которыми при этом можно столкнуться. В контексте темы может быть полезным: Как подключить любые Bluetooth-наушники к ноутбуку или компьютеру и решить возможные проблемы со звуком, Как подключить и использовать AirPods с Android.
- Процесс подключения AirPods к компьютеру
- Что делать, если Windows не находит AirPods, связь прерывается
- Видео инструкция
Подключение AirPods к компьютеру
Как было отмечено выше, для возможности подключения, ваш компьютер должен быть оборудован Bluetooth, адаптер должен исправно работать и не быть отключен, дальнейшие шаги выглядят следующим образом:
- Переведите AirPods в режим сопряжения. Для этого поместите их в футляр, откройте его, а затем нажмите и удерживайте круглую кнопку на корпусе, пока светодиодный индикатор не замигает белым цветом. Если он не начинает мигать, подождите чуть дольше, не отпуская кнопку: он будет светиться белым, мигнет несколько раз оранжевым, а затем начнет мигать белым.

- Выполните сопряжение AirPods с компьютером. Для этого в Windows 10 зайдите в Параметры (Win+I или значок шестеренки в меню «Пуск») — Устройства — Добавление Bluetooth или другого устройства — Bluetooth, дождитесь, когда в списке появятся AirPods и нажмите по ним, дождитесь завершения подключения.

- В Windows 7 и 8.1 вы можете зайти в Панель управления — Устройства и принтеры — Добавить устройство и так же подключиться к AirPods.
- Включите вывод звука и микрофон от AirPods. В Windows 10 зайдите в Параметры — Система — Звук и убедитесь, что в качестве устройств вывода и ввода установлены AirPods.

- В Windows 7 и 8.1 перейдите в «Устройства записи и воспроизведения» (через правый клик по динамику в области уведомлений) и установите AirPods в качестве устройства по умолчанию для воспроизведения и записи (нажатие правой кнопкой по AirPods — использовать по умолчанию и использовать как устройство связи по умолчанию). В Windows 10 также лучше заглянуть в такой раздел (см. Как открыть устройства записи и воспроизведения Windows 10). В некоторых мессенджерах (например, Skype) выбрать микрофон по умолчанию нужно в настройках самой программы.


Как правило, на этом все настройки заканчиваются — AirPods работают с Windows и каких-либо проблем нет, а повторное подключение обычно происходит автоматически (или без сопряжения, а простым подключением устройства в параметрах устройств). Единственный нюанс — при использовании с iPhone, наушники придется подключать к нему заново.
Возможные проблемы при подключении AirPods и AirPods Pro в Windows 10, 8.1 и Windows 7
Далее — некоторые распространенные проблемы при использовании AirPods на компьютере с Windows и возможные подходы для их решения:
- Bluetooth работает (видит другие устройства), но AirPods не находит — такое бывает со старыми Bluetooth адаптерами (а также дешевыми USB-Bluetooth адаптерами для ПК), либо нередко вызвано драйверами. Попробуйте удалить имеющийся драйвер Bluetooth (в диспетчере устройств удаляем адаптер и ставим отметку «Удалить драйверы этого устройства») и установить его вручную с официального сайта производителя ноутбука. Также, у себя столкнулся с тем, что наоборот, с официальным драйвером наушники не находились, а после его удаления и автоматической установки драйвера самой Windows 10 всё заработало исправно. Если вы не уверены, что Bluetooth исправно работает (а бывает, что у вас отключен адаптер, хотя драйвер установлен и «устройство работает нормально), ознакомьтесь с отдельным руководством: Что делать, если не работает Bluetooth на ноутбуке.
- Связь с AirPods обрывается, прерывистый звук. Здесь опять же можно поэкспериментировать с различными версиями драйверов, пока не найдется стабильный. Иногда помогает отключение экономии электроэнергии для Bluetooth адаптера (заходим в свойства адаптера в диспетчере устройств, на вкладке «Управление электропитанием» отключаем экономию энергии). Также может быть полезным: Звук отстает в Bluetooth наушниках.
Использование AirPods с компьютером — видео
В случае, если при попытке подключить AirPods к ноутбуку или компьютеру у вас что-то работает не так как ожидается, опишите ситуацию, особое внимание обратив на модель ноутбука и Bluetooth-адаптера, возможно, решение найдется.

Image: Yasar Turanli / shutterstock.com
Pairing AirPods or AirPods Pro with a PC may not be as dead simple as with an iOS device, but it’s only a tiny bit harder. You just connect the earbuds via Bluetooth—a straightforward, fast process in both Windows 10 and Windows 11 (though Windows 11 added steps to connect Bluetooth devices). Just follow our steps below and you’ll be off and running.
Do note, however, that as an Apple product, AirPods and AirPod Pros lose some functionality in Windows. They work well for listening to audio, but fall quite short of microphone quality you’d get on iOS or macOS, and simply having the microphone active can affect audio quality as well. So while Apple’s earbuds can handle Zoom calls in a pinch, we’d steer clear of them as your main Windows headset.
First, make sure your AirPods are fully charged with both earbuds in the case, and the lid is shut. Also confirm your Windows 10 PC is capable of running Bluetooth devices. (The overwhelming majority of modern laptops have Bluetooth built in, as do prebuilt desktop PCs from vendors like Dell and HP.) If your system lacks support, you can buy an inexpensive dongle like this TP-Link oneRemove non-product link to add that feature.
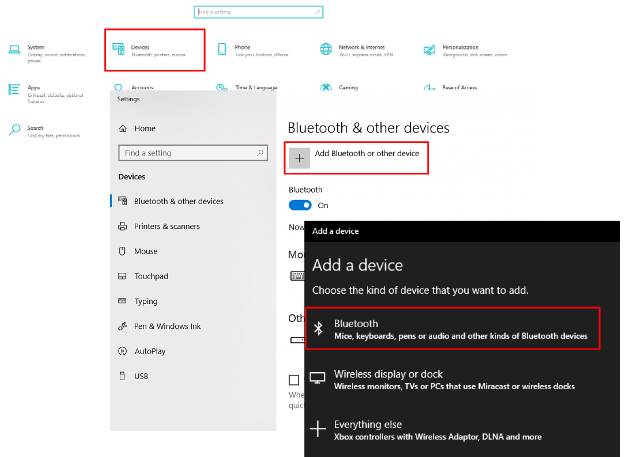
- Open the Settings app in Windows 10. You can find it by typing settings in the Windows 10 search bar and selecting the app once it appears. Its icon looks like a cog. Alternatively, you can press the Windows key + I at the same time.
- In the Settings menu, choose Devices.
- The Bluetooth & other devices page will pop up. First, make sure that Bluetooth is turned on by checking the toggle near the top of the page. If it isn’t, flip it on.
- Select Add Bluetooth or other device.
- The Add a device menu will pop up, asking you which kind of device you’d like to pair with. Select Bluetooth.
- Grab your AirPods or AirPods Pro and open the lid.
- Hold down the circular button on the back of your AirPods for around three to eight seconds. The charging light on your AirPods will eventually start pulsing white. When this happens, lift your finger and look back at the Add a device menu.
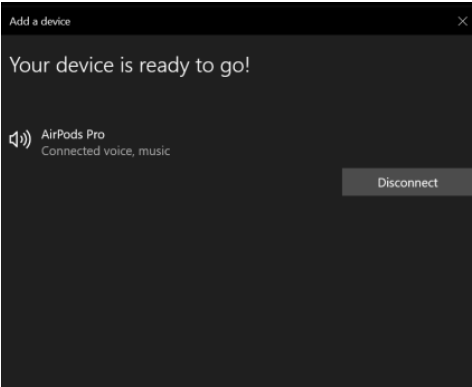
- Be patient. It might take a couple of seconds for the AirPods to appear. When they do, they’ll likely appear as “Headphones” at first and then Windows 10 will load them as “AirPods Pro” (or whatever name you gave them on iOS, if you have an iPhone or iPad you previously used them with). Select them.
- You’ll get a notification saying, “Your device is ready to go!”
Your AirPods should immediately become your default listening device. When you put them back into your case, Windows 10 will automatically revert to the last audio device you used.
Hold the button on the back of your AirPods or AirPods Pro to put them into pairing mode.
How to pair AirPods or AirPods Pro with Windows 11
Before pairing, your AirPods should be fully charged, with both earbuds in the case and the lid shut. Also verify that your Windows 11 computer supports Bluetooth connections. Most laptops have Bluetooth built in, as do desktop PCs purchased through companies like Dell or HP. If your PC can’t run Bluetooth devices, you can buy an inexpensive dongle (like this TP-Link model) to add the feature.
- Open the Settings app in Windows 11. You access it by clicking on the Start menu, then clicking on the grey cog icon labled Settings. You can also bring it up by typing settings into the search bar, or pressing Windows + I on your keyboard.
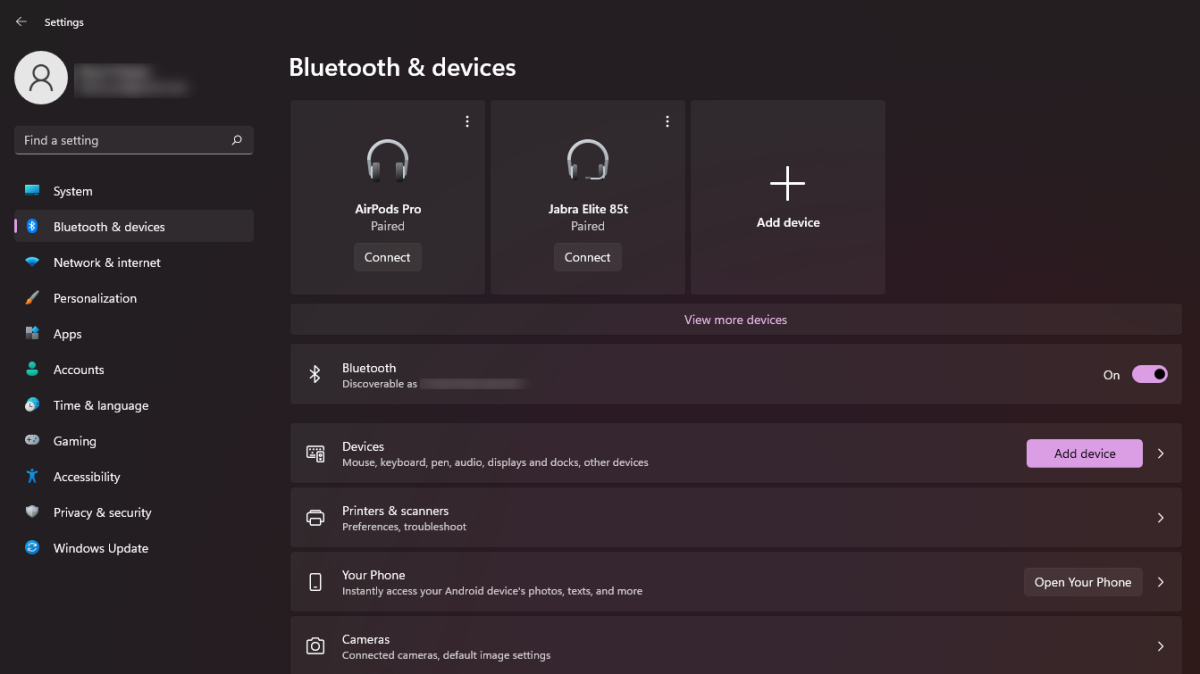
- In the Settings menu, choose Bluetooth & devices.
- Confirm that the toggle for Bluetooth is turned on. If it’s not, click on it.
- At the top of the screen, click on the big button that says Add device.
- When the Add a device menu appears, choose Bluetooth from among the options.
- Now open the lid on your AirPods or AirPods Pro. If this is your first time ever pairing the device, you can skip to Step 8.
- Otherwise, hold down the circular button on the back of your AirPods. The charging light on your AirPods will eventually start pulsing white after several seconds. (It can take as long as 10 seconds, though.) When this happens, lift your finger and look at the Add a device menu.
- Be patient, as it can take a few seconds for the AirPods to appear. They’ll likely appear as “Headphones” at first and then Windows 11 will load them as “AirPods” or “AirPods Pro” (or whatever you’ve renamed them to, if you’ve previously used them with an iPhone or iPad). Select them.
- A new window will appear that says “Your device is ready to go!”
Your AirPods should now be your active listening device. You’ll see it as a new button at the top of the Bluetooth & devices screen; its status should be marked with a green dot and listed as Connected voice, music. You can put them back into the case to automatically disconnect them. Windows 11 will then automatically switch to the last audio device you used.
How to reconnect or disconnect AirPods with your PC (Windows 10)
Your AirPods should automatically start working with your PC once you put them back in your ears. If they don’t, you can connect them manually.
- Open the Settings app in Windows 10.
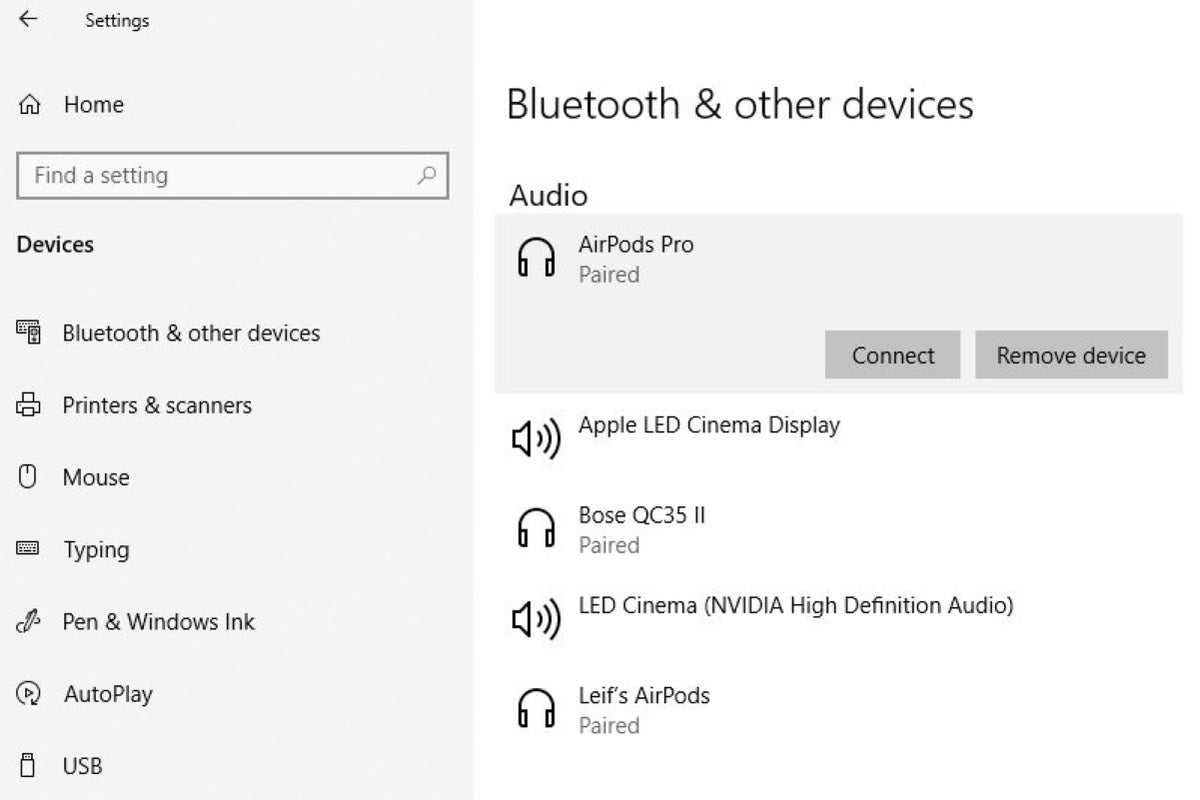
- Select Devices.
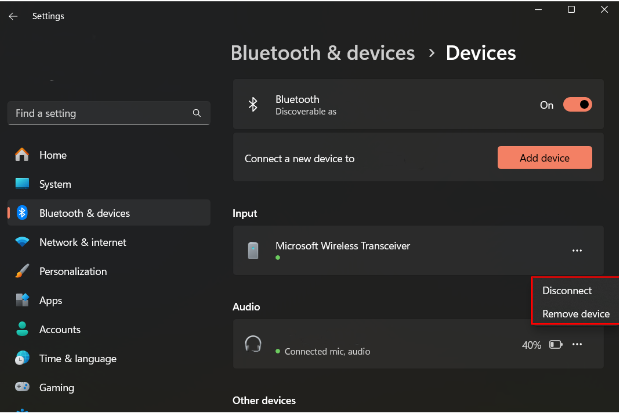
- Scroll down to the Audio section and select your AirPods.
- In the prompt that pops up, press Connect. Your AirPods should now work.
You can also use these same steps to disconnect your AirPods from your PC if you want to use them with an iPhone, iPad, or Mac you’ve previously paired them with. Just keep in mind that you’ll now need to manually connect your AirPods through the Bluetooth menus on those devices while your AirPods are still paired with your Windows PC.
Keep in mind that you might have to scroll down a bit in order to see the Audio section.
How to reconnect or disconnect AirPods with your PC (Windows 11)
Your AirPods should automatically reconnect to your Windows 11 PC after you pull them from your case. If they don’t, you can connect them manually.
- Open the Settings app in Windows 11.
- Choose Bluetooth & devices.
- At the top of the screen, you should see a large button for your AirPods (e.g., “AirPods Pro”).
- Click the Connect button.
- If you don’t see your AirPods among the buttons on this screen, click on View more devices just underneath them. Then scroll down to Audio.
- On the AirPods entry, click on the vertical set of three dots.
- In the pop-up window that appears, choose Connect.
Your AirPods should now work. To disconnect them from your PC, use these same steps. If you want to use your AirPods with a previously paired device, you may need to connect to it manually through its Bluetooth menu if automatic connection fails.
PCWorld
How to unpair your AirPods from your Windows 10 PC
Permanently unpairing your AirPods involves a similar series of steps as reconnecting them, but with a single difference.
- Open the Settings app.
- Press Devices.
- Scroll down to the Audio section and select your AirPods.
- In the prompt that pops up, press Remove device.
How to unpair your AirPods from your Windows 11 PC
To remove your AirPods as a device, you’ll take similar steps as when reconnecting them.
- Open the Settings app.
- Select Bluetooth & devices.
- Locate the big button for your AirPods (e.g., “AirPods Pro”).
- Click on the vertical line of three dots at the upper-right corner of the button.
- In the small pop-up window that appears, choose Remove device.
- If you can’t find your AirPods among the buttons on this screen, click View more devices just underneath them. Then scroll down to Audio.
- On the AirPods entry, click on the vertical set of three dots.
- Choose Remove device.
Troubleshooting when your AirPods won’t connect to your PC
If you’re having difficulties getting your AirPods and your PC to connect, try these suggestions to fix the issue:
- Put the AirPods back into their case until they disconnect from your PC. Then pull them back out to try reconnecting them.
- Try one AirPod at a time (leave the other in the case) to see if they’ll connect independently to your PC.
- Switch off Bluetooth on your PC, wait for all devices to disconnect, then turn the signal back on.
- Reboot your PC.
- Temporarily turn off Bluetooth on any other nearby devices (especially those that the AirPods may also be already paired with).
- Unpair the AirPods from your PC, then re-pair them.
- If you have an Apple device (like an iPhone or iPad), check for any pending updates to your AirPods.
- Run Windows’ hardware troubleshooter (using Win + R, entering msdt.exe -id DeviceDiagnostic into the run box, and clicking Next).
Table of contents
- How to Connect Your AirPods to a Windows Computer
- Windows 10
- Windows 11
- How to Disconnect and Unpair Your AirPods from a Windows Computer
- Common AirPods Connection Issues
- Conclusion
- FAQ
If you’re wondering how to connect AirPods to a PC , you’ve just found the right place. Despite being designed to operate seamlessly with Apple devices, you can still easily connect AirPods to a laptop or a PC on Windows.
How to Connect Your AirPods to a Windows Computer
AirPods are specifically made to work within the Apple ecosystem. But can you connect AirPods to a laptop running Windows? You sure can! And it couldn’t be easier. Let’s take a walk through the steps to connect your AirPods to a Windows 10 or 11 running computer.
Windows 10
Here’s how to bluetooth AirPods to a laptop or PC on Windows 10:
- Prepare your AirPods: Before you begin, ensure that your AirPods are in their charging case and have a minimum of 20% battery.
- Turn on Bluetooth: Open Settings and navigate to Devices > Bluetooth & other devices. Make sure Bluetooth is turned on. This is the essential step as you connect AirPods to a Windows 10 running computer through Bluetooth.
- Add a Bluetooth device: Click on “Add Bluetooth or other device” at the top of the Bluetooth & other devices menu. Select Bluetooth from the options presented.
- Activate the pairing mode: Open the lid of your AirPods case and press the small, circular button on the back of the case. Keep holding it until you see the LED lights inside (for older AirPods) or on the front (for AirPods Pro) flashing. This indicates that your AirPods are visible to other devices.
- Select your AirPods: After a few seconds, a list of available Bluetooth devices will appear. Look for your AirPods in the list and click on them to initiate the pairing process.
- Complete setup: Once connected, a pop-up screen will declare “Your device is ready to go.” Click Done. From this point onward, your AirPods should automatically connect to your laptop or PC whenever they are in range.
As you can see, pairing your AirPods with Windows 10 running computers is a walk in the park. But how to connect Apple AirPods to a laptop or a PC on Windows 11 OS? Let’s figure it out.
Windows 11
It’s as simple to connect AirPods to Windows 11 systems as it is with Windows 10 ones. All you need is to follow these steps:
- Prepare your AirPods: Ensure your AirPods are in their charging case and have a minimum of 20% battery.
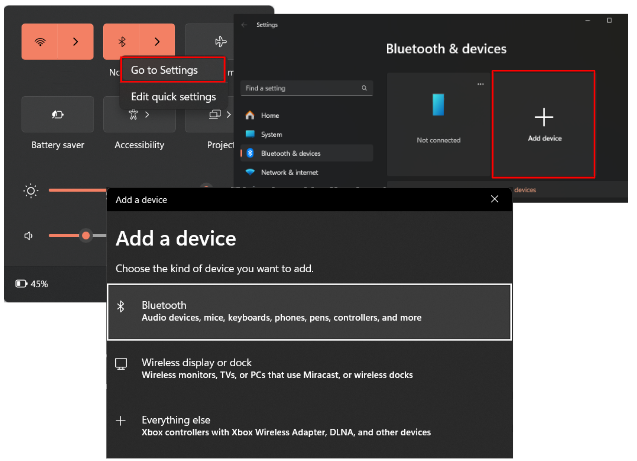
- Turn on Bluetooth: Open Quick Settings located on the right side of the taskbar, locate the Bluetooth sign, and make sure it’s not grayed out.
- Add a Bluetooth device: Right-click on the Bluetooth sign and select Go to Settings. Click on Add device, then select Bluetooth from the options presented.
- Activate the pairing mode: Open the lid of your AirPods case and press the small, circular button on the back of the case. Keep holding it until you see the LED lights inside (for older AirPods) or on the front (for AirPods Pro) flashing. This indicates that your AirPods are visible to other devices.
- Select your AirPods: After a few seconds, a list of available Bluetooth devices will appear. Look for your AirPods in the list and click on them to initiate the pairing process.
- Ready to go: After you get the “Your device is ready to go” pop-up, click Done. Your AirPods are now ready to use with your Windows 11 computer. Whenever your AirPods are in range and Bluetooth is enabled on your computer, they should automatically connect.
All in all, that is how to connect AirPods to a laptop or PC. Whether you are using a Windows 10 or 11 running computer, the process is smooth and easy.
How to Disconnect and Unpair Your AirPods from a Windows Computer
In the previous part of the article, we’ve learned how to connect AirPods Pro to a laptop . But what if it’s your friend’s laptop and you need to disconnect and unpair your AirPods before returning it? Here’s how you can do it:
- Open Bluetooth settings: Navigate to Settings and select Bluetooth & devices (Device > Bluetooth & other devices in Windows 10).
- Locate your AirPods: In the list of paired devices, find your AirPods under the Audio section. They will be listed by their name.
- Disconnect: Click on your AirPods (or the three dots next to them in Windows 11) and select Disconnect. Confirm the action if prompted.
- Unpair AirPods: After disconnecting, click on your AirPods again (or the three dots next to them in Windows 11) and select Remove device. This will unpair your AirPods from the Windows computer permanently.
Now that we’ve covered how to connect AirPods to a Windows PC and learned how to disconnect and unpair them, let’s take a look at the most common AirPods connection issues and ways to avoid them.
Common AirPods Connection Issues
- Intermittent connectivity:
- Issue : AirPods may experience intermittent disconnections or drops in audio during usage.
- Possible causes : Interference from other wireless devices, outdated firmware, or Bluetooth signal disruptions.
- Fixes : Check for interference from other devices; ensure AirPods have the latest firmware updates; reset AirPods by holding the setup button on the charging case.
- Failure to connect:
- Issue : Failure in establishing a connection between AirPods and a device.
- Possible causes : Bluetooth settings, outdated Bluetooth drivers, or AirPods not in pairing mode.
- Fixes : Activate AirPods’ pairing mode and ensure Bluetooth is enabled on the device; forget and re-pair AirPods with the device; check your laptop/PC Bluetooth version (should be 4.0 or higher).
- Audio quality issues:
- Issue : Poor audio quality, distortion, or imbalanced sound.
- Possible causes : Bluetooth signal interference, outdated firmware, or hardware issues.
- Fixes : Check for interference from other devices; ensure AirPods and Windows have the latest updates installed.
- Mic malfunctions:
- Issue : Microphone-related problems, such as low sensitivity or inaudible audio during calls.
- Possible causes : Software issues, debris in the microphone, or hardware malfunctions.
- Fixes : Remove any debris from the microphone area; ensure AirPods and Windows have the latest updates installed.
Related: How to Fix an Auto Muting Microphone
- Unresponsive touch controls:
- Issue : AirPods not responding to touch gestures for play/pause or skipping tracks.
- Possible causes : Software bugs, outdated firmware, or hardware issues with the touch sensors.
- Fixes : Reset AirPods and reconfigure touch controls; ensure AirPods have the latest firmware updates.
Preventive measures
First and foremost, you need to make sure your Bluetooth and audio drivers are up to date. We recommend using Auslogics Driver Updater as it is a reliable and convenient tool that automatically scans your system for outdated drivers (not only those discussed) and installs the most current, manufacturer-recommended ones.
Download Auslogics Driver Updater
Prevent hardware errors and ensure problem-free device operation with this advanced tool that detects outdated drivers and safely gets them updated.
Also read: Auslogics Driver Updater: Update Your Drivers in One Click!
Here are some other general preventive measures to keep you clear of connection issues:
- Keep your Windows system updated,
- Regularly update AirPods firmware,
- Regularly check your computer for malware,
- Regularly clean your devices from dust and debris.
Also read: Auslogics Anti-Malware: Features and Reviews
Just follow these simple recommendations and you should have no problems when trying to connect AirPods to Windows 11 or 10 running computers.
Conclusion
Hopefully, you’re already enjoying your favorite music or a movie, thanks to our tips on how to connect AirPods to a PC provided in this article.
Don’t forget to update your drivers and regularly check for Windows and AirPods updates, and you will most certainly evade connection issues while relishing those precious moments of music listening more often.
Feel free to share your favorite songs and sound settings in the comments section below!
FAQ
How to put AirPods in pairing mode?
To put your AirPods in pairing mode, open the case, press and hold the button on the back until the LED starts flashing. Your AirPods are now ready to connect.
Why do my AirPods keep disconnecting from my Windows PC?
If your AirPods frequently disconnect, try updating Bluetooth drivers, ensuring Windows is up to date, and checking for interference from other Bluetooth devices.
Can I customize touch controls for AirPods when using them with a Windows PC?
As of now, Apple’s official customization of touch controls is primarily designed for iOS devices. You will need an iPhone or another iOS device to customize AirPods touch controls.
If you’re trying to make your Airpods pro mic working on Windows PC, you’ve come to the right place. This post will show you fixes that have been proved by users.
Before trying fixes
Make sure you’ve done basic troubleshooting before trying any complicated fixes.
- Make sure your AirPods buds are working properly on iPhone
- Make sure they’re fully charged
- Make sure there’s no dirt
- Make sure you’ve turned on the volume
- Reconnect AirPods to Windows (Remove the device and pair it again)
- Restart your computer
If the issue still exists, move to the below fixes.
Try these fixes:
You don’t have to try them all; just work your way down the list until you find the one that works for you.
- Set as default communications device
- Update your Bluetooth drivers
- Install Windows updates
- Use a Bluetooth adapter
Fix 1: Set as default communications device
To make your AirPods mic work, you have to set it as default communications device.
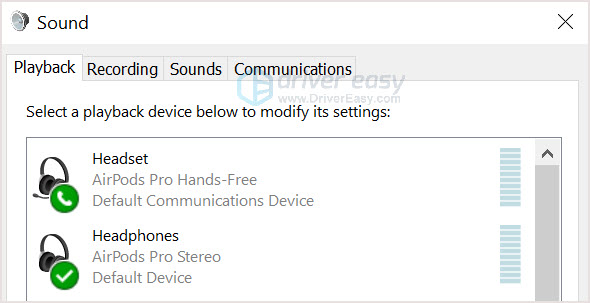
- Right-click on the sound icon then click Sounds.
- In the Playback tab, right-click on the AirPods headset and click Set as Default Communication Device.

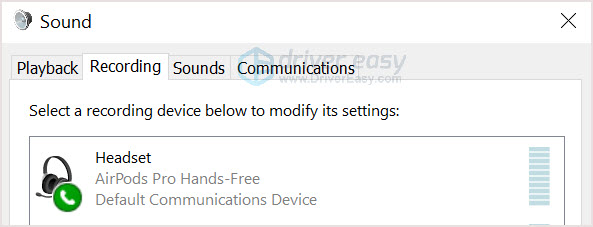
- In the Recording tab, right-click on the AirPods headset and click Set as Default Communication Device.

- Select the AirPods Hands-Free option as a playback device when using Windows apps.
Fix 2: Update your Bluetooth Drivers
Normally, if your AirPods microphone isn’t working properly, it’s probably using a broken or outdated Bluetooth driver. Then, updating your Bluetooth driver would fix this problem.
There’re 2 ways to update drivers, manually and automatically.
Option 1 – Install the latest Bluetooth driver manually
- On your keyboard, press the Windows logo key and R at the same time to invoke the Run box.
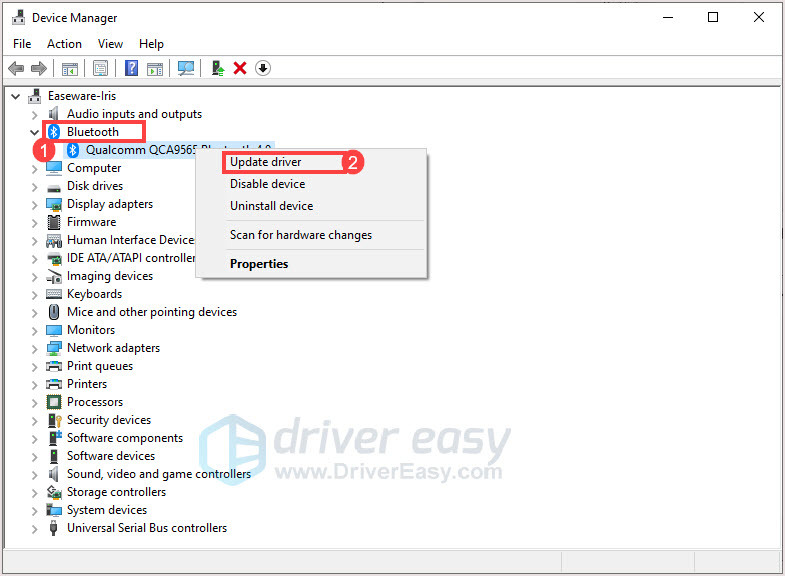
Then, type devmgmt.msc and click OK.
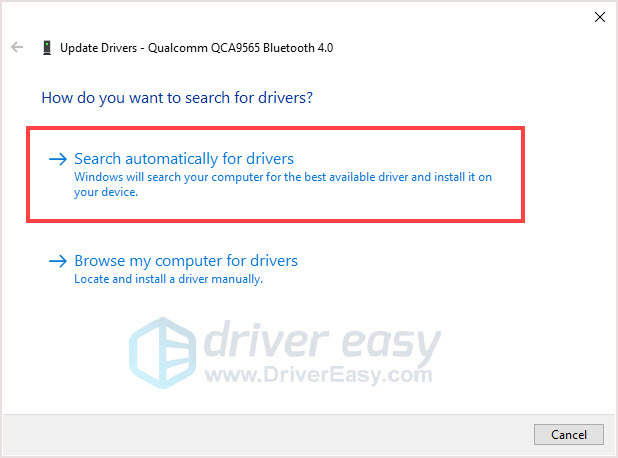
- Click Bluetooth to expand the category. Right-click your Bluetooth adapter and select Update driver.

- In the pop-up window, click Search automatically for drivers.

- Follow the on-screen instructions to finish the process.
- Restart your PC and check your AirPods mic.

Option 2 – Install the latest Bluetooth driver automatically (Recommended)
If you’re not familiar with your computer hardware, no time or patience to search around, we recommend you to use Driver Easy.
Driver Easy will automatically recognize your system and find the correct drivers for it. You don’t need to know exactly what system your computer is running, you don’t need to risk downloading and installing the wrong driver, and you don’t need to worry about making a mistake when installing.
- Download and install Driver Easy.
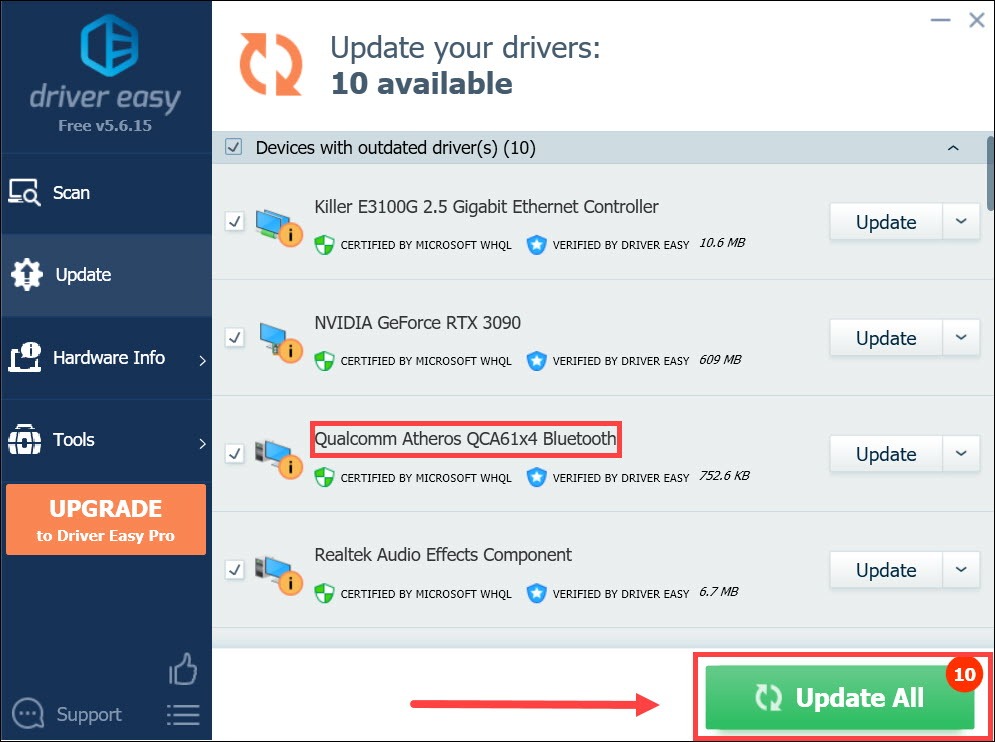
- Run Driver Easy and click the Scan Now button. Driver Easy will then scan your computer and detect any problem drivers.

- Click Update All to automatically download and install the correct version of all the drivers that are missing or out of date on your system.(This requires the Pro version – you’ll be prompted to upgrade when you click Update All. If you don’t want to pay for the Pro version, you can still download and install all the drivers you need with the free version; you just have to download them one at a time, and manually install them, the normal Windows way.)


If you need assistance, please contact Driver Easy’s support team at support@drivereasy.com.
After updating your Bluetooth driver, reboot your PC to check if you can use AirPods microphone on Windows.
If it’s not working, move to the next fix.
Fix 3: Install Windows updates
Microsoft releases Windows 10 updates to fix certain issues and offer new features. Many times, users find their problems were solved after running Microsoft Windows updates, and there’re users have reported the mic started working after updating Windows 10 to the latest build.
So follow the steps below to install the latest Windows updates.
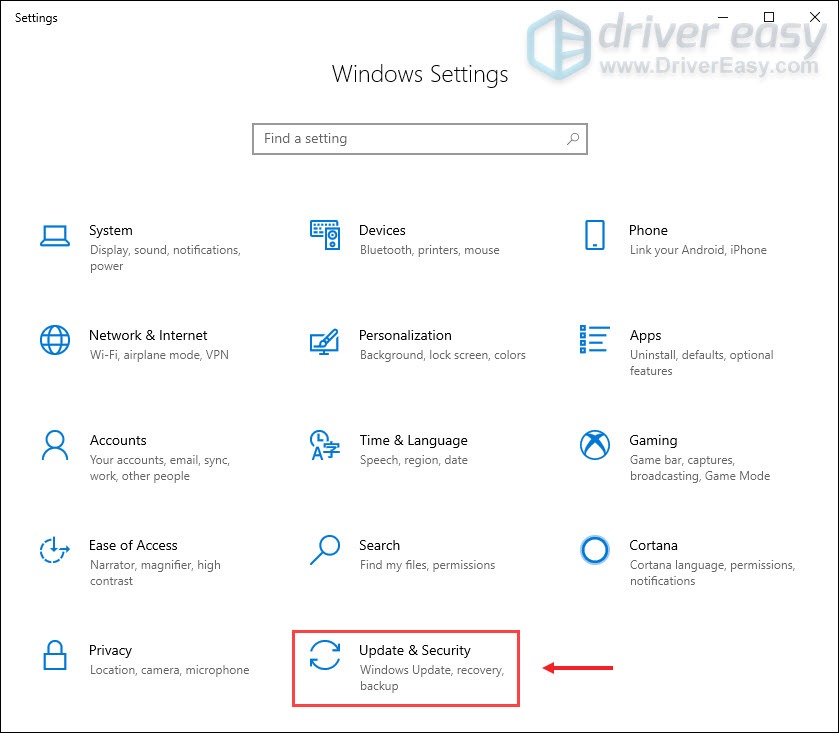
- Press the Windows logo key and I at the same time on your keyboard to open Windows Settings. Then, click Update & Security.

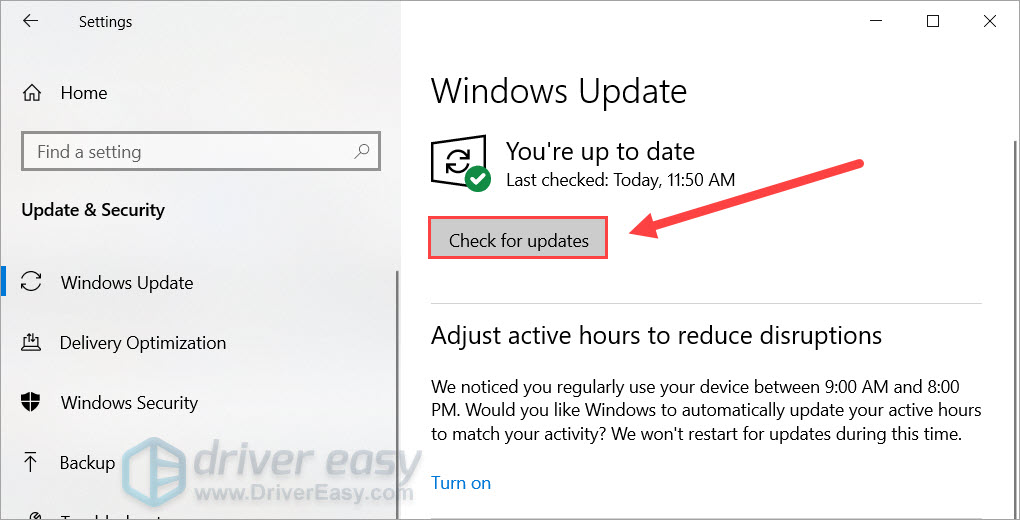
- In the Windows Update panel, click Check for updates. Windows will check and download the latest available patches automatically.

If you see “You’re up to date” after clicking the button, your PC confirms that it has all Windows updates.
- Restart your PC and check the AirPods microphone after the whole process is finished.
If this fix doesn’t work for you, the next one might suit you.
Fix 4: Use a Bluetooth adapter
In some cases, the built-in Bluetooth adapter cannot handle AirPods, so your AirPods microphone can’t work properly. The solution is to use a new Bluetooth adapter.
If your AirPods are working well on iPhone and there’s nothing you can do to your PC, give the new Bluetooth adapter a go.
Here I suggest you to borrow from your family member or friend, if it’s working, then you can consider buying a new Bluetooth adapter.
AirPods are great, hope this post would help you fix the AirPods mic not working issue. But if nothing works for you, maybe turn to other hands-free headsets would be a good idea.
11
11 people found this helpful