
If you’re running into random glitches with your Oculus device such as Oculus Rift or Sensor, there may be something wrong with your Oculus driver. To fix the issue and leverage the full power of your VR gears, you should upate your Oculus driver to the latest version, and here are two options for you:
Option 1 – Manually – You’ll need some computer skills and patience to update your drivers this way, because you need to find the exactly right driver online, download it and install it step by step.
OR
Option 2 – Automatically (recommended) – This is the quickest and easiest option. It’s all done with just a couple of mouse clicks – easy even if you’re a computer newbie.
Option 1 – Download and install the driver manually
Device manufacturers will regularly update their drivers to fix bugs or add new features. To get the right Oculus driver, you’ll need to install the Oculus app on your PC. Here’s the detailed guide:
- Go to the official support page of Oculus.
- Scroll through the page to find your Oculus model and click Download Software to initiate the download process.
- Open the downloaded file and follow the on-screen instructions to install the software.

- Plug your Oculus device into the computer. Then the Oculus app should automatically detect it and install the appropriate driver.
If this method doesn’t meet your needs, try the easier option below.
Optin 2 – Automatically update the Oculus driver (recommended)
To make the most out of your Oculus gears and enjoy the best VR experience, you should not only update your Oculus driver but also install the latest drivers for essential devices like graphics card and USB. If you don’t have the time, patience or computer skills to update the drivers one by one, let Driver Easy do all the job for you.
Driver Easy will automatically recognize your system and find the correct drivers for it. You don’t need to know exactly what system your computer is running, you don’t need to risk downloading and installing the wrong driver, and you don’t need to worry about making mistakes when installing.
You can update your drivers automatically with either the 7 days free trial or the Pro version of Driver Easy. It takes just 2 clicks, and you get full support and a 30-day money-back guarantee with the Pro version:
- Download and install Driver Easy.
- Run Driver Easy and click the Scan Now button. Driver Easy will then scan your computer and detect any problem drivers.

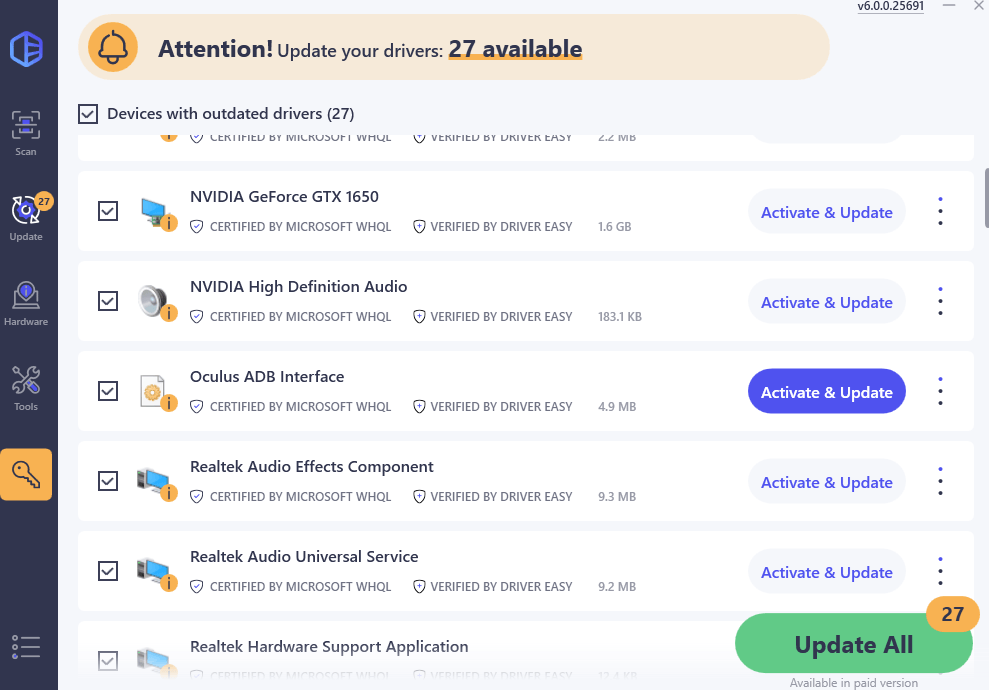
- Click the Activate & Update button next to the flagged device to automatically download and install the correct version of this driver.
Or click Update All to automatically download and install the correct version of all the drivers that are missing or out of date on your system (You’ll need the Pro version for this – when you select Update All, you’ll get a prompt to upgrade. If you’re not prepared to purchase the Pro version yet, Driver Easy provides a 7-day trial at no cost, granting access to all Pro features like fast downloads and easy installation. No charges will occur until after your 7-day trial period ends.)

- After updating, restart your computer to take effect.

The Pro version of Driver Easy comes with full technical support.
If you need assistance, please contact Driver Easy’s support team at support@drivereasy.com.
Now try your Oculus device again to check whether the new driver works properly.
Hopefully this post is helpful to you. If you have further questions or suggestions, please feel free to leave a comment below.
13
13 people found this helpful
Available in other languages
In diesem Beitrag zeigen wir Ihnen, wie Sie den Oculus Treiber herunterladen, installieren und updaten, um Probleme zu beheben.
All Products >
Categories

Any questions?
Couldn’t find what you were looking for?
Do not hesitate to contact us!
Get in touch
Missing a product?
Tell us which product you would like to see
in our Knowledge Base.
Request a product

FAQ
-
Who is owner of the Knowledge Base?
The Knowledge Base is operated and maintained by VR Expert. VR Expert is Europe’s leading provider of VR/AR hardware and software.
-
What can I find in the developer corner?
In the Developer Corner you will find the latest release notes and an SDK library for the most popular VR/AR hardware and software. The Developer Corner is currently under construction and will be updated with more content soon.
-
What if I can’t find a question?
You can easily search our entire knowledge base via the search bar. If you can’t find the answer to your question in our Knowledge Base, don’t hesitate to contact us, we are happy to help you!
-
How many times is a new product uploaded?
The Knowledge Base is constantly updated and expanded by VR Expert. We upload a new product every month and take care of updating existing articles as needed. If there is a specific product you would like to see in the knowledge base, please share it with us.
-
Why should I comment on an article?
Through the comment function of the VR Expert Knowledge Base, users are able to share their thoughts and expertise with each other. For example, by commenting on articles, you can help others with any difficulties that may arise in connection with certain articles. You also help us to discover and correct possible errors in our articles more quickly.
-
How do I request a new Knowledge Base product?
If you are missing a specific product on the VR Expert Knowledge Base, we would be very happy if you would share it with us using the request form provided for this.
-
How can I give feedback?
You can leave comments and give feedback under all articles in the VR Expert Knowledge Base. If you would like to share general feedback with us, please feel free to contact us at any time.
-
What is the VR Expert Community?
The VR Expert Community is a Discord server on which users from all over the world discuss and exchange information about topics in the field of virtual and augmented reality. In the various channels, both gamers and developers can find like-minded people and share their knowledge with each other. Join the Community now!
Top 10 users
Руководство по установке драйверов
Важное: На Windows 11 возможно потребуется отключить проверку подписи драйверов. Как это сделать
Первый способ:
Отключаем кабель от шлема.
Скачиваем официальный установщик драйверов Oculus: oculus-drivers-1.71.0.000017-w10.zip
(этот пакет входит в состав приложения для ПК — Oculus Home.)
Распаковываем и стартуем файл oculus-driver.exe. Никаких сообщений вы не увидите, но если зайти в Диспетчер задач, то в списке процессов обнаружите его. Как только он исчезнет из списка — драйверы установлены.
Подключаем кабель к шлему и идем в Диспетчер устройств. Раскрываем раздел Oculus Device, должна быть такая картинка:
Новая версия Meta Quest Link может установить драйверы с другим названием:
(если Режим разработчика не включен, устройства Compiste ADB Interface вы не увидите, будет только один пункт — Composite XRSP Interface)
Второй способ (ручная установка):
Скачиваем драйверы с сайта Oculus: https://developer.oculus.com/downloads/package/oculus-adb-drivers/
Распаковываем их.
Подключаем кабель к шлему
Заходим в Диспетчер устройств, в раздел Oculus Device и пробуем подсунуть их по-очереди к устройству с восклицательным знаком.
Добиваемся, чтобы получилось как на картинке выше.
Второй с половиной способ: в распакованных драйверах находим файл android_winusb.inf, кликаем на него правой кнопкой мыши — Установить.
Третий способ: Скачиваем Quas, последовательно нажимаем пункты: J — V — P. Драйверы будут установлены автоматически, в зависимости от установленной операционной системы ПК.
В декабре прошлого года мы выпустили подробный гайд о подключении Oculus Quest 2 к ПК. За это время многое успело измениться. Нужно обсудить некоторые моменты, которые возникли в 2022 году. Что за ошибка «Невозможно установить связь с сервером Oculus» и что с этим делать?
Видео-версия:
Многие из вас догадались, что потеря связи с сервером связана с блокировкой Facebook* в России. Блокировка коснулась и ничего плохого не совершившей виртуальной реальности, потому что практически все сервера FB находятся в запрещенной в нашей стране организации. К счастью, достать «волшебную пилюлю» не так сложно.
Подключение Oculus Quest 2 к ПК: Oculus Link
Что потребуется:
◉ Гарнитура Oculus Quest 2;
◉ Совместимый компьютер/ноутбук;
◉ Программное обеспечение Oculus;
◉ Кабель Oculus Link.
О совместимом компьютере/ноутбуке:
Вы можете посмотреть, совместим ли ваш компьютер с Quest 2 на официальном сайте, но минимальная конфигурация сильно занижена. В статье про VR Ready компьютеры мы подобрали реальные минимальные характеристики.
О кабеле Oculus Link:
Для подключения потребуется специальный кабель с пометкой Link. Кабель от смартфона не подойдет, поскольку ему не хватит скорости передачи данных. Тип кабеля зависит от наличия разъемов в вашем ПК: USB-C – USB-C или USB-C – USB 3.0.
Шаг 1. Скачайте «пилюлю».
Скачайте любой действующий «сервис, который нельзя популяризовать с 1 марта» на компьютер. Вы можете попробовать бесплатный доступ на 1 день. Он потребуется всего один раз на этап установки софта.
Шаг 2. Скачайте официальное приложение Oculus.
Перейдите по этой ссылке, спуститесь чуть ниже и нажмите синюю кнопку «Download software». Для того, чтобы зайти на страницу, потребуется «сервис, который нельзя называть».

Установите приложение. После успешной установки приступаем к настройке гарнитуры.

Шаг 3. Включите шлем и подключите его кабелем к разъему USB 2.0/3.0.
Для настройки технически подойдет USB 2.0, но при запуске игр переподключите к 3.0 на материнской плате (сзади корпуса). От переднего USB 3.0 соединение может быть нестабильным в дешевых корпусах!
Наденьте шлем и нажмите «запретить доступ данных».
Шаг 4. Выберите способ подключения Link (кабель).
В ПО после подключения у вас появится окно выбора способа подключения. Выберите первый.

При успешном соединении загорится зеленая галочка. Нажмите продолжить несколько раз до завершения настройки.

Шаг 5. Наденьте гарнитуру.
В главном меню нажмите на Quest Link и далее «запустить». Вы должны оказываться в белом пространстве Rift.

Шаг 6. Включаем «Неизвестные источники» и играем в Steam-игры.
Важный нюанс! Для запуска игр из Steam вам нужно включить один ползунок.
Открываем ПО Oculus, заходим в «Настройки» во вкладку «Общие». Активируйте «Неизвестные источники».

После этого штриха запускаем Steam и скачиваем SteamVR. По завершению загрузки, открываем его и всегда держим в оверлее.

Теперь вы можете запускать любую игру для Rift или Steam на Oculus Quest 2 по кабелю.
Компьютер не видит шлем. Что делать?
Вариантов может быть много. Самое элементарное:
● Сбой в ПО. Попробуйте выдернуть кабель и заново подключить к ПК. Переустановите приложение Oculus на ПК. Перезагрузите Oculus Quest 2.
● Бракованный кабель. Подключайте Quest 2 к компьютеру только через кабель с пометкой Link. Софт Oculus не видит кабели от смартфонов, планшетов и т.п. Если вы купили кабель Link на вторичном рынке у подозрительного продавца, есть вероятность, что вас обманули.
● Компьютер не подходит для VR. Возможно, у компьютера устаревшая конфигурация, либо не подходит для VR. Сверяйтесь с официальным сайтом.
О беспроводном способе мы расскажем в одной из следующих статей. У наших клиентов, подписчиков в Telegram и YouTube накопилось очень много вопросов по подключению через Air Link, поэтому логичнее будет сделать полноценный FAQ по всем возможным проблемам.
*Meta и ее продукты признаны экстремистскими на территории РФ
If you wish to get on with the Oculus driver download and update on Windows 11/10, then this simple guide will help you with everything required.
Oculus is a Facebook-acquired VR-device manufacturer and game developer. The brand offers some of the smartest devices that allow you to get a realistic and the best VR experience. And with the introduction of Meta Verse, the products from Oculus saw a tremendous rise in popularity.
You can easily connect any Oculus device to a Windows PC and enjoy the most realistic VR experience. However, to enjoy a great performing device, you need to get on with the Oculus driver download and update. This will allow your Windows PC to retain a stable connection with the Oculus device and use it.
Hence, to help you get the driver with ease, we have brought together this simple guide for you. Here, you will find different techniques to get the required Oculus driver for Windows 11/10. So, let’s proceed to the same.
Methods to Execute Oculus Driver Download or Update on Windows 11/10
In the upcoming sections of this article, we will have a look at different methods to execute Oculus driver download/update. Both manual and automatic methods are explained. You can use any of these as required and get the driver with ease.
Visit the Registered Website of Oculus Manufacturer for Oculus Driver
The first method to download the Oculus driver for Windows 10/11 is to use the registered website of the Oculus manufacturer. However, this method is manual and you may fail to download the driver if you don’t have enough information about the Oculus device. Follow the instructions below for installing the driver:
- Visit the official website of Oculus.
- Click on Support from the menu of the page.

- Scroll down the support page and click on Oculus Developer.

- The browser will be redirected to the developer’s section of Oculus. Click on Support from the menu of the page.
- Under the Downloads category, click on See All.

- To Select Your Preferences, select Web Platform under the platform category and Oculus Quest or Oculus Rift, under Device as per the product you own. Click on Save to proceed.
- Under the Tools category on the page, click on Oculus ADB Drivers.
- Hit the Download button on the page.

- Once the driver downloads, double-click the file to install it.


If you think that this method to get on with the driver download for Windows 11/10 was a little too much, try the next one.
Also know: Using The Oculus Device For The First Time No Longer Requires A Facebook Account
Take The Assistance of the Windows Device Manager
Another great way, but manual, to get on with the Oculus driver update on Windows 10/11 is to use the Device Manager. This Windows-integrated tool assists you with the management of the device connected to your PC or laptop in any way. Hence, you can also use the same to download and update the drivers as well. Follow the steps shown below to see how you can do this:
- Press the Win+S keys, type Device Manager, and hit the Enter key.
- When the tool appears, double-click the category stating Oculus VR Devices.
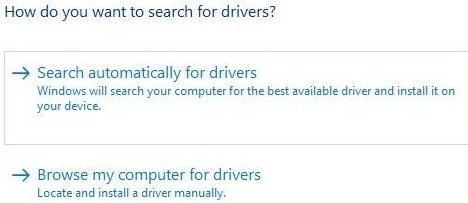
- Look for your Oculus device in the category and right-click on it to Update the Driver.
- Click on the option named Search Automatically for Driver Updates.

- Wait while the tool looks for updates and follow the on-screen instructions to install it.
Once you restart your device, the Oculus driver update and installation on your Windows device will be successful. Use the next alternative if this one doesn’t float your boat.
Automatic Oculus Driver Download and Update with Bit Driver Updater
As you may have felt, the above two methods to get the Oculus driver for Windows 11/10 were manual and effort-taking. Additionally, even if you follow the methods accurately, you may fail to get the required updates. So, the best solution in such a case is to use a reliable third-party driver updating utility like the Bit Driver Updater.
This is one of the most downloaded and easy-to-use updaters. A single click on the tool can provide you with the latest Oculus driver update and that for other devices. Hence, when you use the tool, you get instant updates as well as a better-performing Windows device.
Additionally, the tool can also help you schedule the updates if you don’t want instant updates. Here’s the best part, Bit Driver Updater also allows you to back up and restore drivers when required. Apart from this, you can also ignore the updates of any device if you want.
The tool is quite reliable as it offers WHQL-certified drivers only. Hence, there are no threats related to viruses or malware of any kind. Furthermore, the interface of the tool is multilingual, which means that you can change the language of the updater and use it as convenient.
And that’s not all, there are tons of other features and functions offered by the Bit Driver Updater. You will find all of these when you download and use the tool. For now, let’s know how to use the tool for driver updates.
How to Execute Oculus Driver Update with Bit Driver Updater?
Take the assistance of the below procedure to see how to use the tool with ease for driver updates of all kinds:
- Click on the button below and Download the Bit Driver Updater setup.
- Install the updater on your Windows computer.
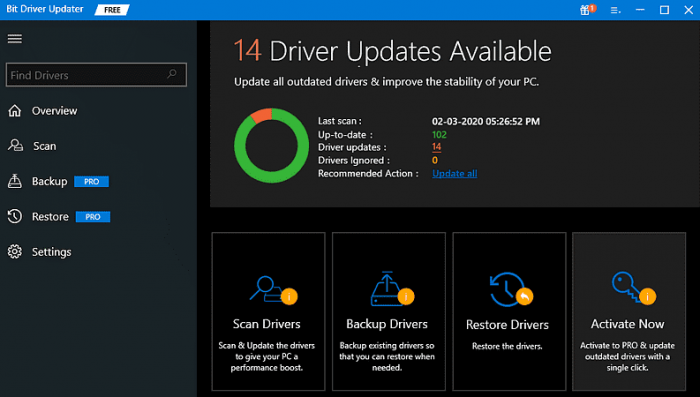
- Once the installation is complete, run it and Scan the Drivers present on your device.

- When the updates appear, click on the Update Now button to update the Oculus device driver for Windows 11. Alternatively, you can also use the Update All button, if you have or want to purchase the pro version of the tool, to update all the drivers instantly.

- Restart the system when the required drivers are updated.

Also know: The Best Virtual Reality Headset
Oculus Driver Download and Update for Windows 11/10: Successful
So, these were the methods to get the Oculus device driver for the Windows operating system. These methods are quite reliable and allow you to get the required updates instantly. To steer clear of all the problems and confusion, we recommend you use the Bit Driver Updater. This is a reliable tool that will help you with everything.
If you have any questions related to this Oculus driver guide, ask the same in the comments below.