

Давно уже работаю с серверами Supermicro, но почему-то ещё ни разу не устанавливал Windows на RAID массив, собранный на встроенном программном RAID контроллере чипа Intel.
Intel PCH: контроллеры AHCI и SCU
Linux без проблем определяет программные массивы, собранные на контроллере SATA или sSATA. Windows Server в этом плане снова отличился. Казалось бы, серверная система, предназначена для установки на сервера…
Сегодня ставлю Windows Server 2016 на сервер Supermicro на базе материнской платы X11DDW-NT. Эта материнская плата оснащена набором микросхем Intel C622. Этот контроллер способен объединять диски SATA3 (6 Gbps) в массивы RAID 0,1,5,10. Сколько диском можно объединять в массив — это нужно читать мануал, я встречался с ситуацией, когда в RAID10 нельзя было объединить более 4 дисков, странно, но факт.
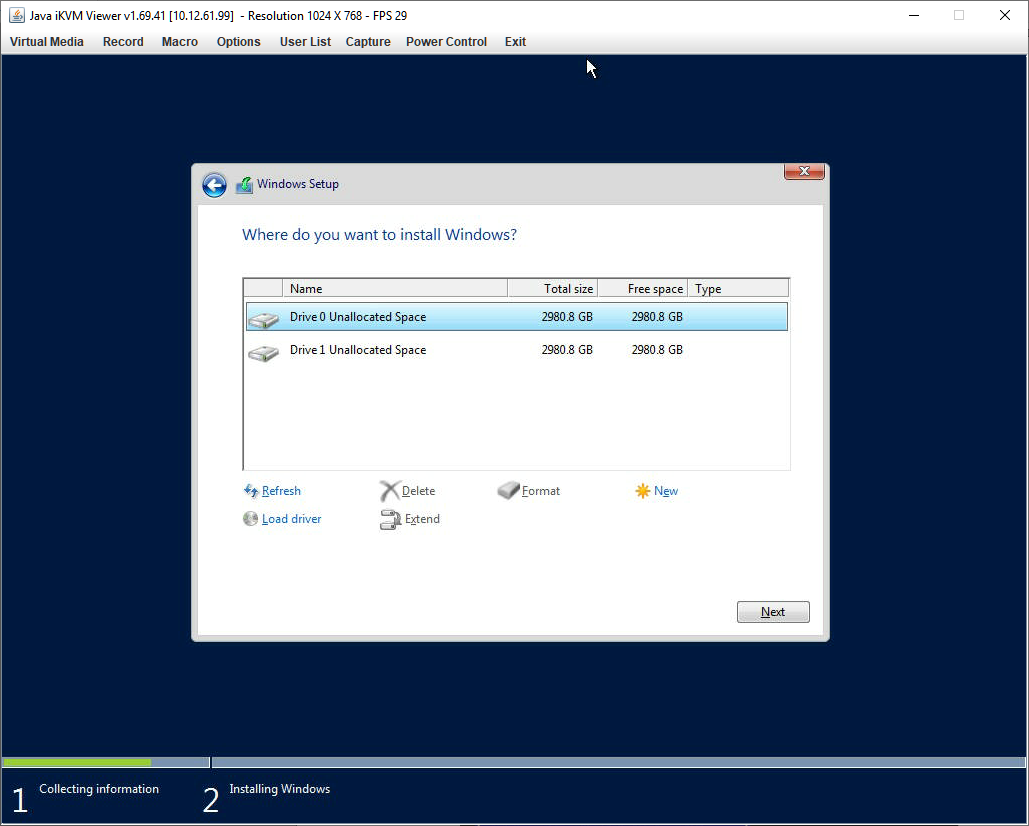
При установке Windows видит обычные диски, а RAID массив видеть не хочет.
В этом случае действуем по простой схеме. Переходим на страничку материнской платы:
https://www.supermicro.com/en/products/motherboard/x11ddw-nt
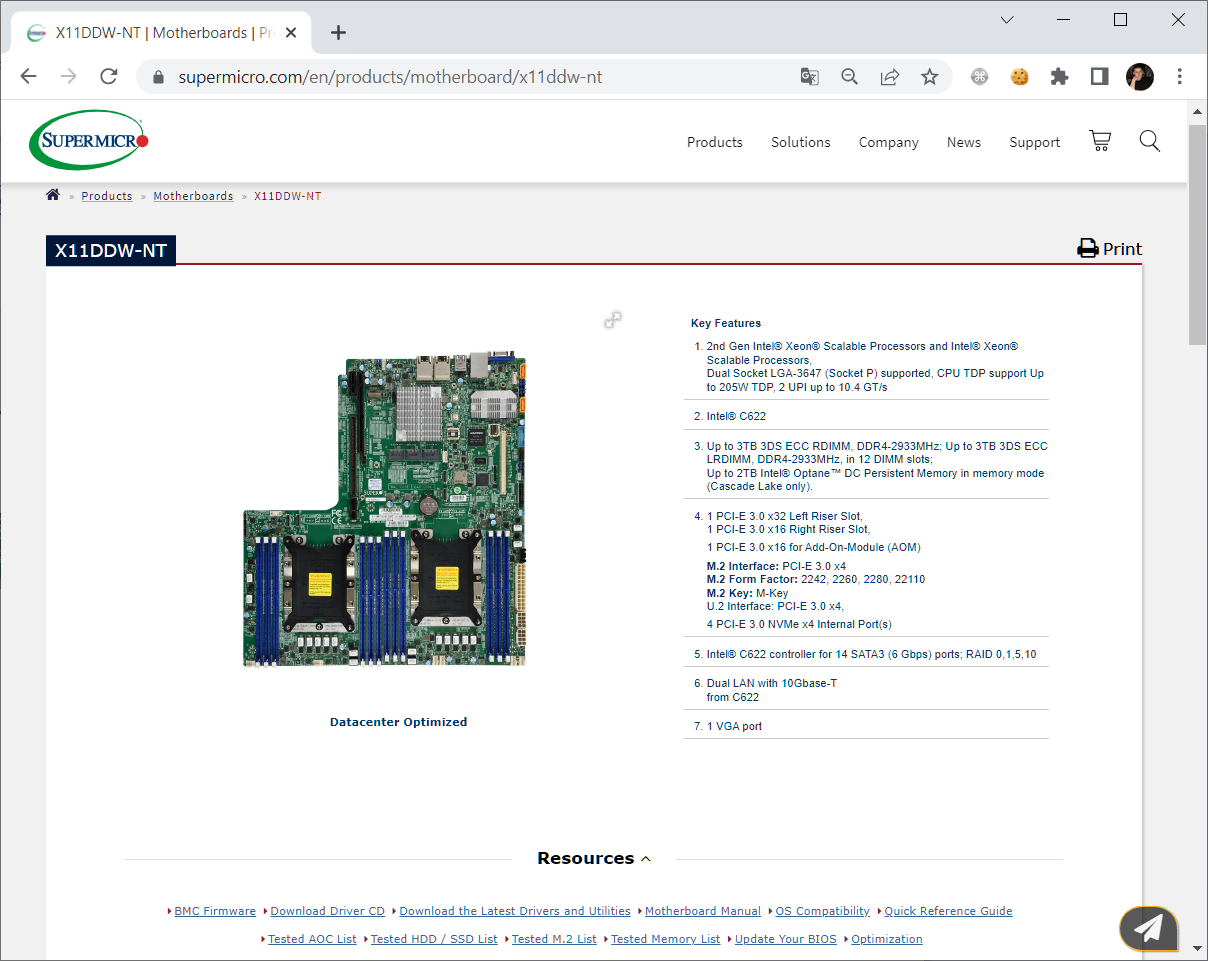
И скачиваем последние драйвера и утилиты: Download the Latest Drivers and Utilities.
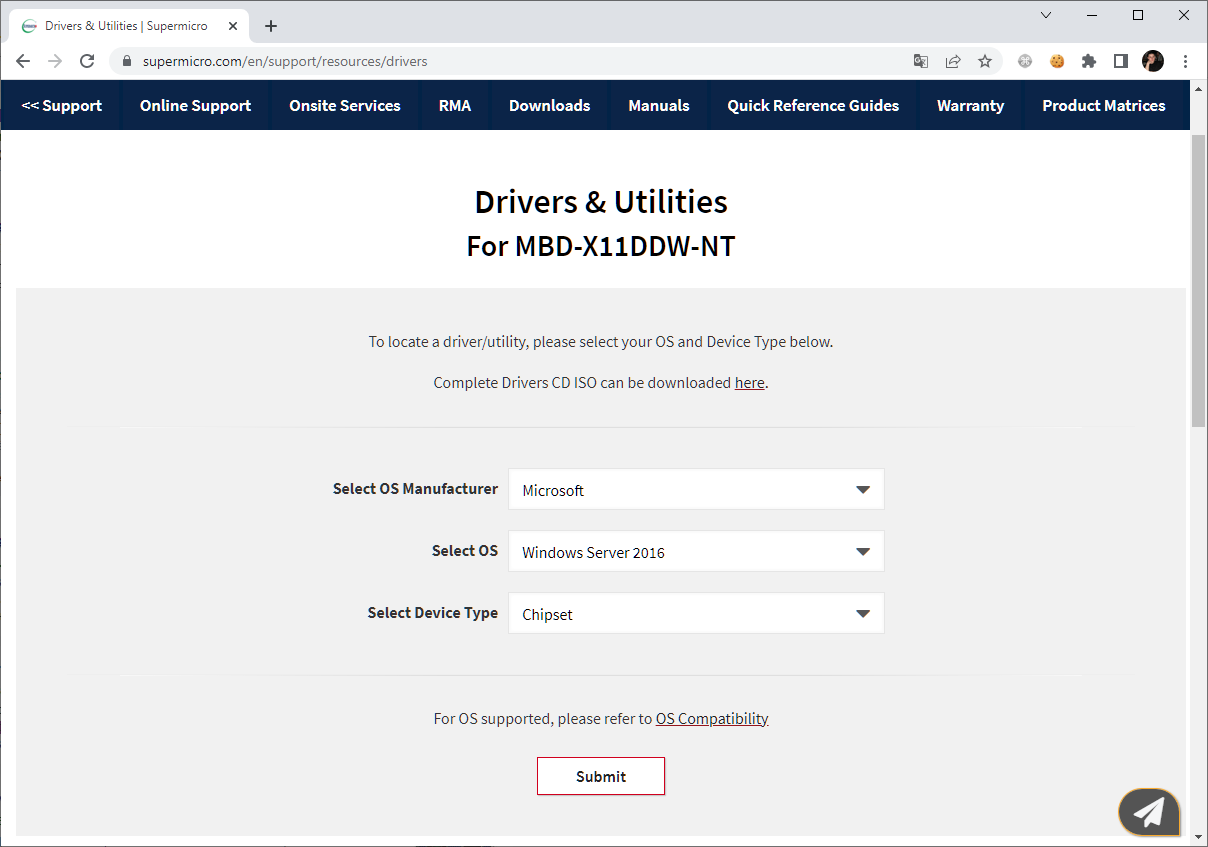
Выбираем операционную систему и тип драйвера. Для RAID контроллера понадобятся драйвера для чипсета.
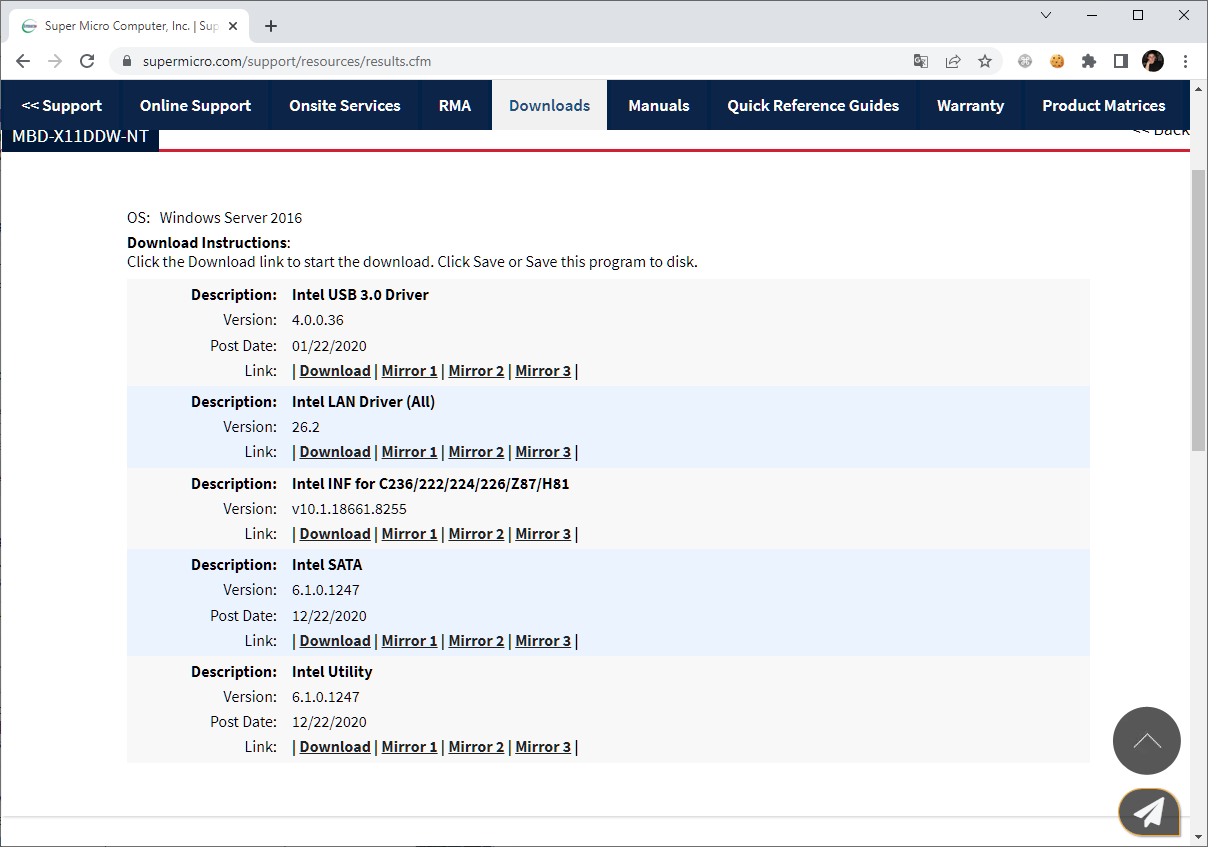
Сейчас нужен драйвер Intel SATA. Но можно все скачать, после установки пригодятся. Распаковываем архив и создаём ISO образ с драйверами. Поможет в этом UltraISO:
UltraISO — создать ISO образ с файлами
Демонтируем инсталляционный образ Windows Server 2016 с сервера и монтируем новый образ с драйверами. Нажимаем Load Driver.
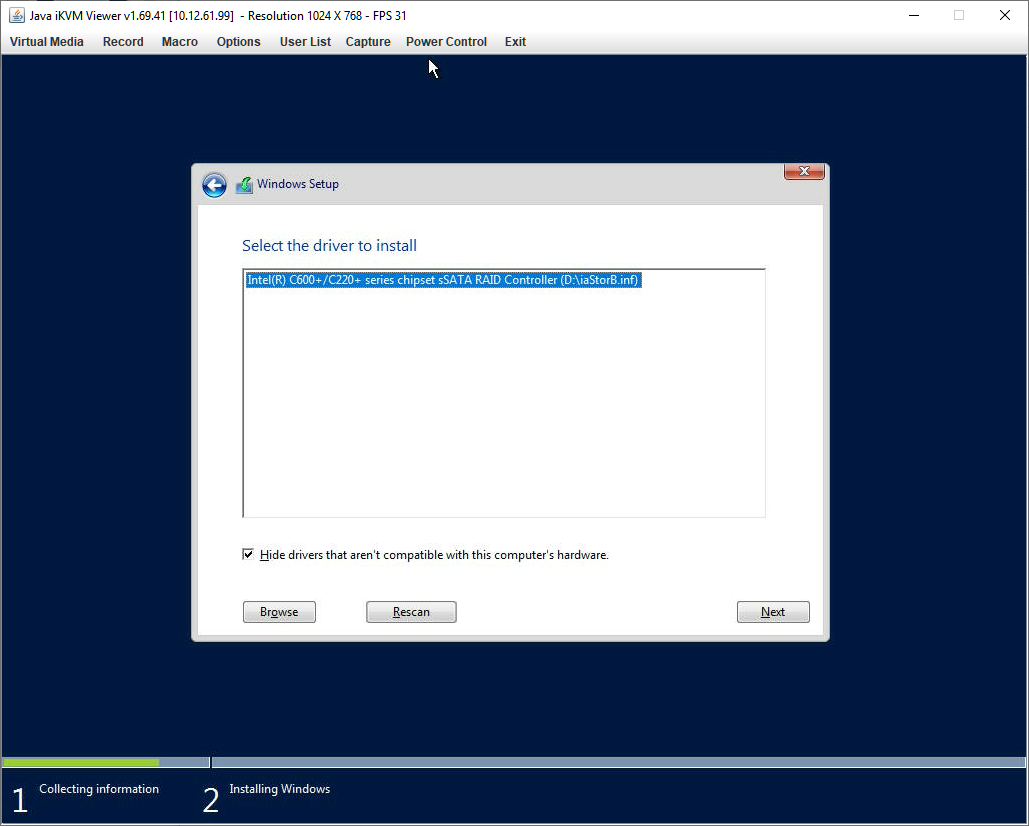
Драйвер RAID контроллера нашёлся. Next. Драйвер установится.
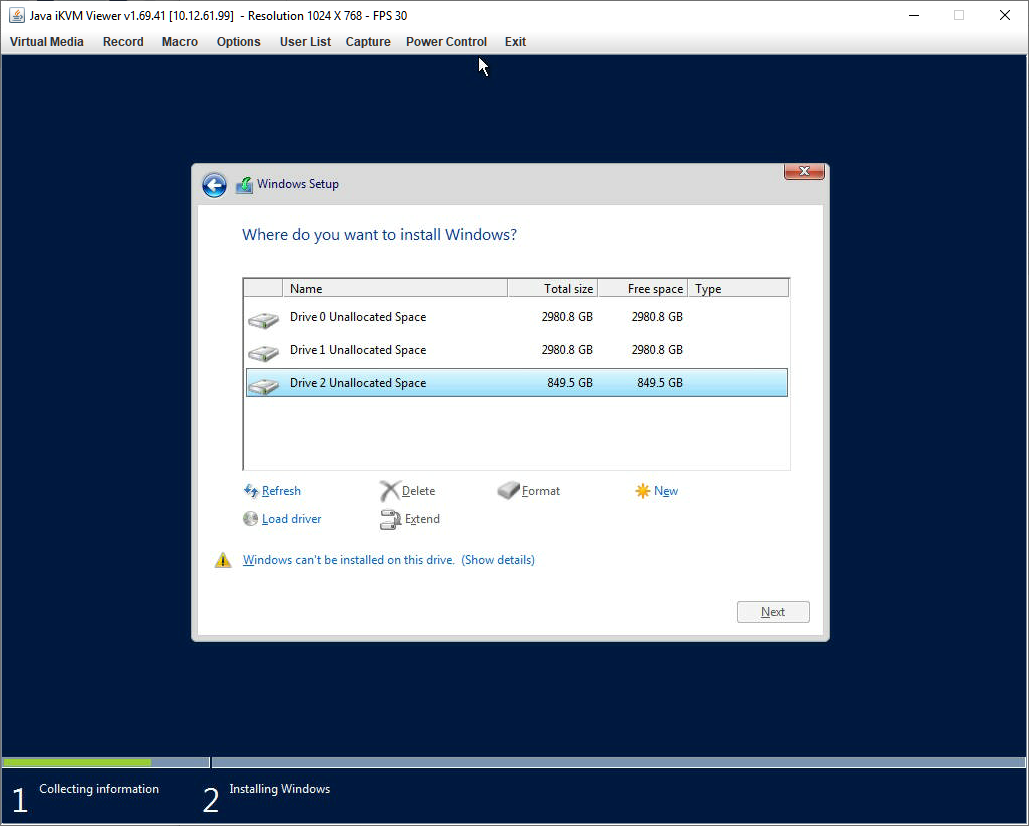
Обнаружен новый дисковый массив, на него и будем устанавливать Windows. Демонтируем ISO образ с драйверами и снова монтируем инсталляционный ISO образ Windows Server 2016. Refresh.
Становится доступна кнопка Next.
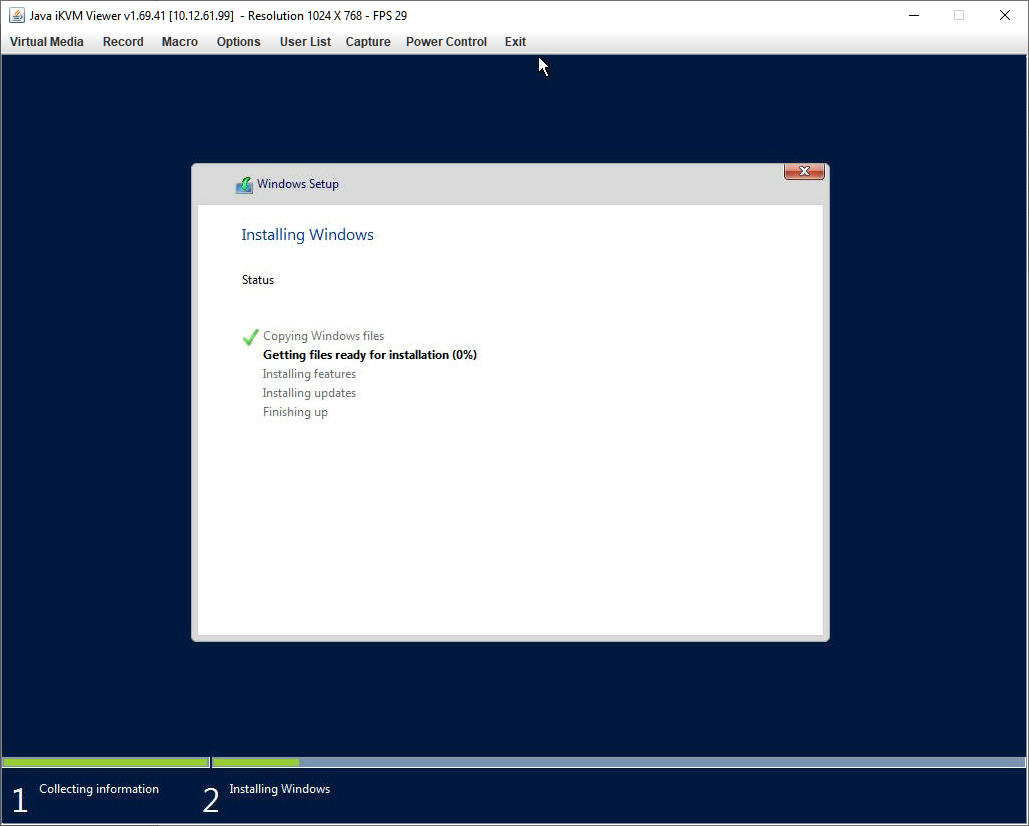
Дальше продолжаем установку как обычно, главную проблему мы решили.
Установка Windows Server 2016 на сервер Supermicro с контроллером MegaRAID 9460-8i
Привет друзья! В предыдущих статьях мы узнали, что программный RAID 1 массив — это зеркальное отображение ваших данных на нескольких жёстких дисках, если один накопитель выходит из строя, то вся информация остаётся на другом в сохранности. Мы с вами купили два одинаковых винчестера и объединили их программно в независимый массив недорогих дисков, но данная инструкция не подойдёт, если вы захотите установить на RAID 1 операционную систему Windows, в этом случае придётся действовать чуть сложнее.
Как настроить RAID 1 массив и установить на него Windows 7, 8.1, 10
После прочтения предыдущих статей о создании программного RAID 1 массива средствами операционной системы вы конечно зададите вопрос: «А как установить саму систему на RAID 1 массив или может существует возможность переноса уже готовой и настроенной Windows с программами на рейд массив. Ведь неожиданно сломаться может и винчестер с установленной операционкой, а не только второстепенный жёсткий диск с файлами?» Потеря операционной системы со всеми установленными приложениями, при отсутствии резервной копии, может вывести из работы на несколько дней любую организацию, поэтому я считаю обязательным создание RAID 1 массива на рабочем месте и установки на него Windows.
- Примечание: Друзья, кроме RAID 1 массива, ещё существует RAID 0 массив, способный увеличить быстродействие Вашей операционной системы в два раза.
В сегодняшней статье мы соберём RAID 1 массив из двух жёстких дисков на материнской плате ASUS и установим на него Windows 10
{banner_google1}
Друзья, конечно можно ничего не устанавливать заново, а просто включить в БИОС технологию RAID, а затем перенести на него существующую винду с помощью различных программ, но сделаем мы это в следующих статьях, а сегодня произведём простую установку системы.
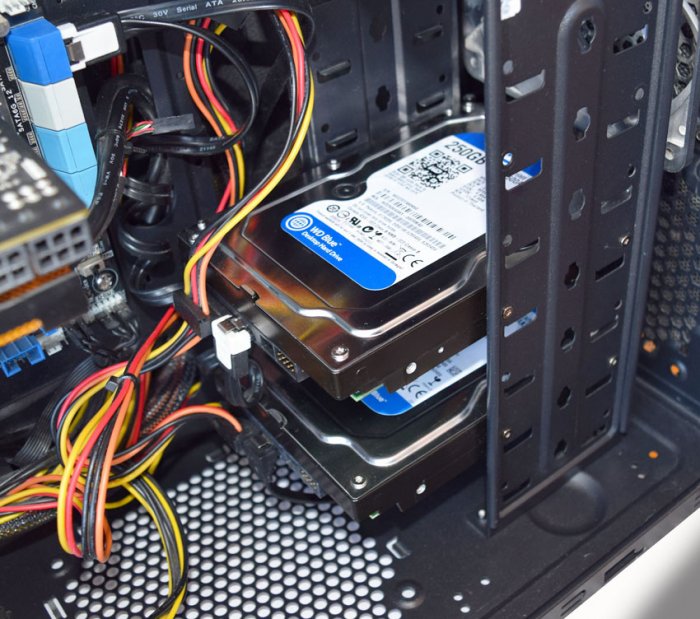
Если вы хотите собрать RAID 1 массив и установить на него операционку, то опять же понадобится два жёстких диска или два твердотельных накопителя SSD, и ваша материнская плата должна поддерживать технологию RAID. Для примера возьмём два винчестера объёмом по 250 ГБ каждый.
Устанавливаем винчестеры в системный блок.
Чтобы настроить систему с массивом RAID, первым делом нужно включить соответствующую опцию в BIOS и делается это очень просто. Невозможно в одной статье описать соответствующие настройки всех существующих типов БИОС, в этой статье я включу RAID на материнской плате ASUS, а в следующих статьях постараюсь показать подобные настройки на материнских платах GIGABYTE и ASRock.
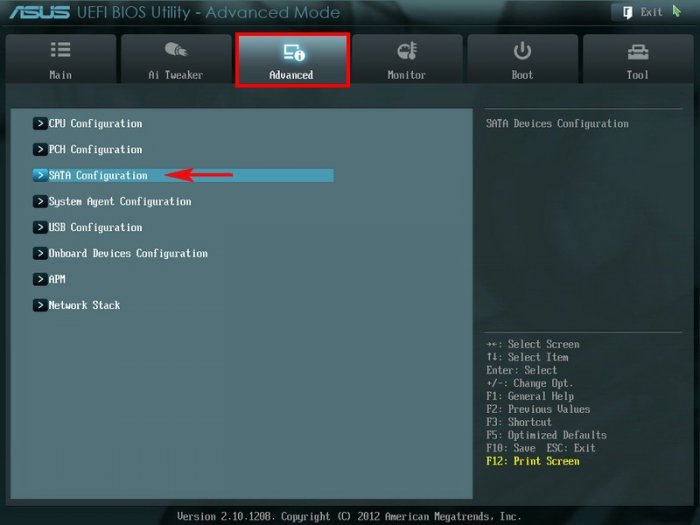
Включаем компьютер и входим в БИОС с помощью нажатия DEL при загрузке. Переходим на вкладку Advanced, опция SATA Configuration
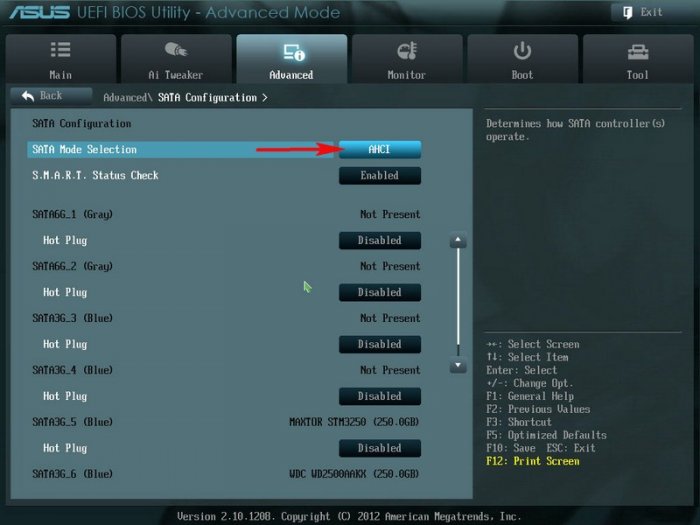
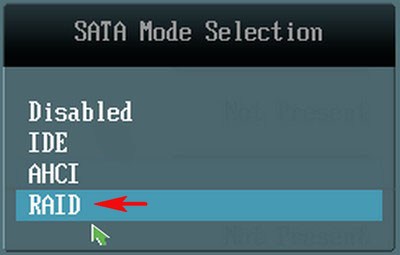
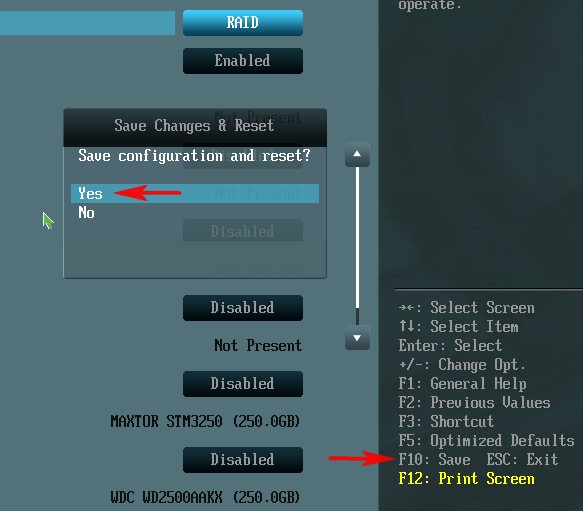
SATA Mode Selection выставляем в положение RAID.
HotPlug — (горячее подключение) выставляем в Enabled для жёстких дисков объединяемых в массив.
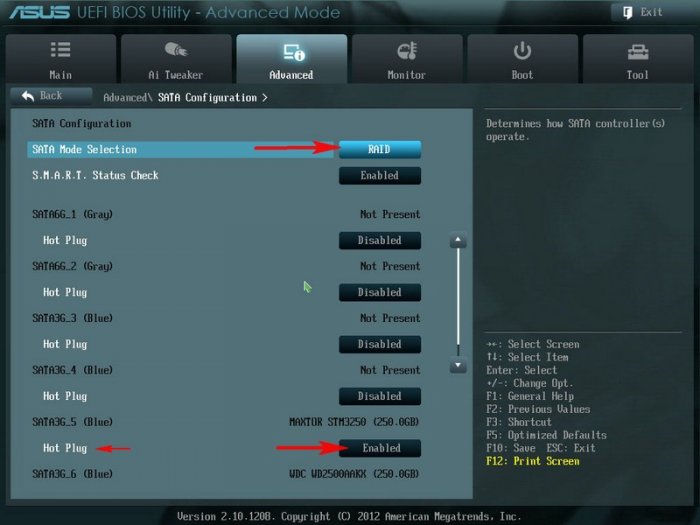
Для сохранения внесённых изменений жмём F10 и выбираем Yes. Происходит перезагрузка.
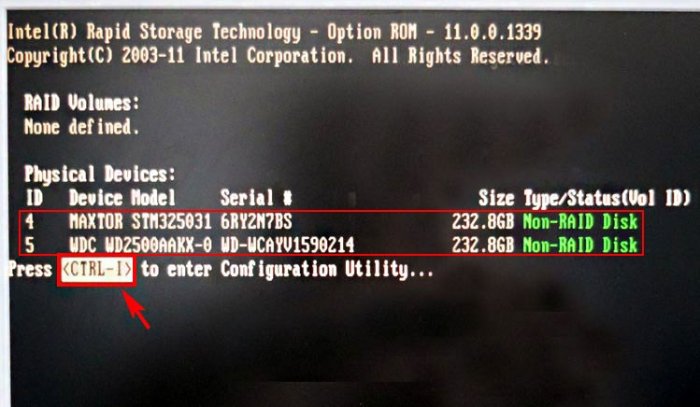
После включения в БИОС технологии RAID, на экране монитора при загрузке на несколько секунд возникнет предложение нажать клавиатурное сочетание (CTRL-I), чтобы войти в настройки конфигурации RAID.
Также видно два подключенных к портам 4 и 5 жёстких диска SATA: Maxtor и WD, находящихся пока не в RAID-массиве (Non-RAID Disk). Нажимаем CTRL-I.
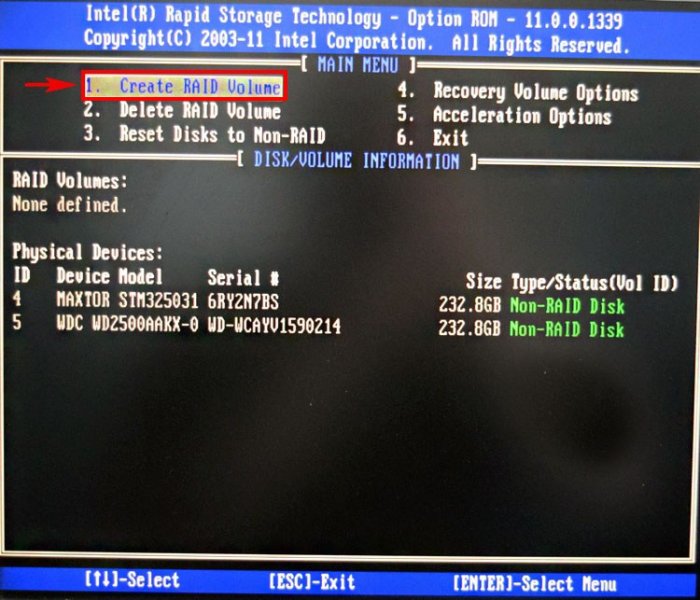
В начальном окне настроек выбираем с помощью стрелок на клавиатуре Create a RAID Volume (Создать том RAID) и жмём Enter.
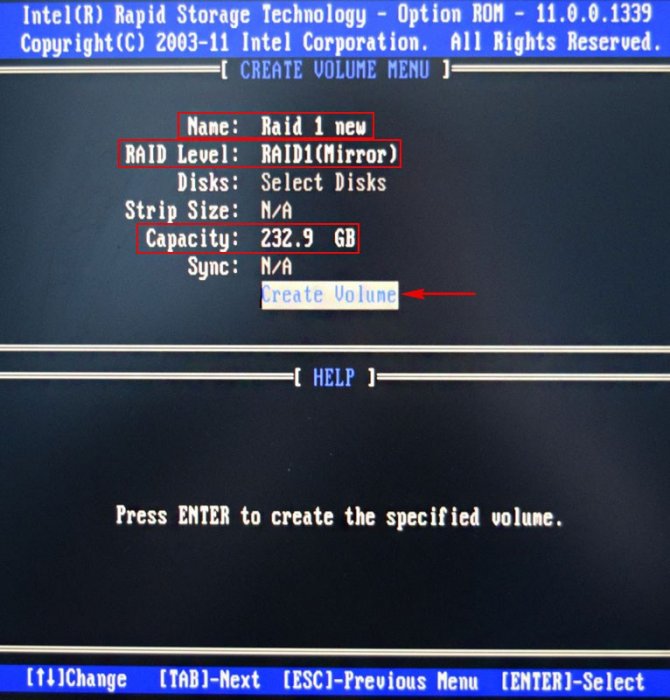
В данном окне производим основные настройки RAID-массива.
Name (название RAID-массива). Жмём на клавишу «пробел» и вводим наименование,
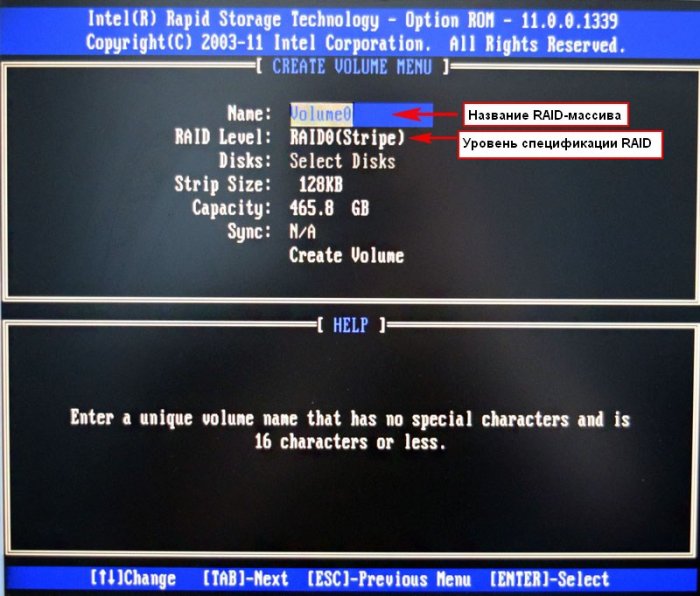
например «RAID 1 new» и жмём Enter. Передвигаемся ниже с помощью клавиши Tab.
RAID Level: (Уровень RAID). Мы будем создавать RAID1(Mirror) -«зеркалирование» — при отказе одного из дисков, точная копия данных останется на другом диске и контроллер сразу переключиться на использование дублирующего диска. Выбираем этот уровень с помощью стрелок на клавиатуре.
Capacity (объём) выставляется автоматически. Объём двух наших дисков 500 ГБ превращаются в 250 ГБ, так как мы используем уровень RAID1(Mirror) и два наших винчестера работают как один.
Больше ничего не меняем и передвигаемся к последнему пункту Create Volume и жмём Enter.
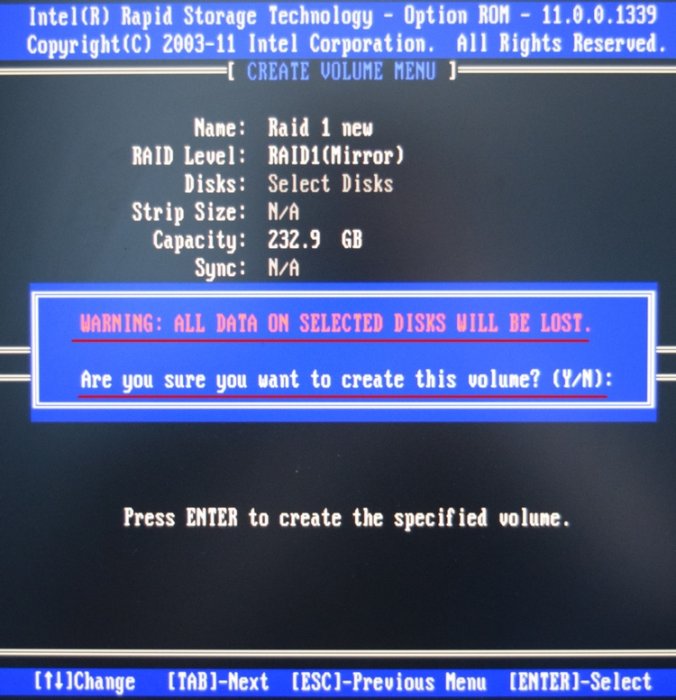
Выходит предупреждение:
WARNING: ALL DATA ON SELECTED DISKS WILL BE LOST.
Are you sure you want to create this volume? (Y/N):
ВНИМАНИЕ: ВСЕ ДАННЫЕ на выбранных дисках будут потеряны.
Вы уверены, что хотите создать этот объем ? (Y / N):
Жмём Y (Да) на клавиатуре.
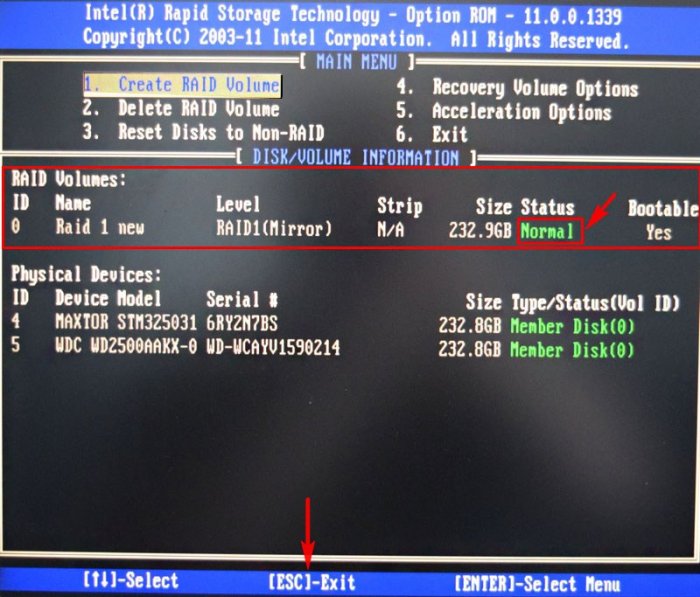
RAID 1 создан и находится со статусом Normal (нормальный). Для выхода жмём на клавиатуре клавишу Esc
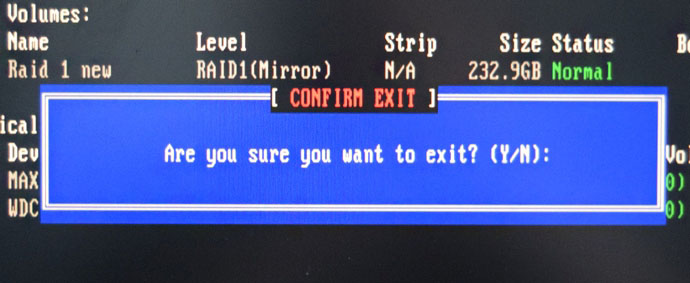
Are you sure you want to exit (Вы уверены что хотите выйти? Нажимаем Y (Да).
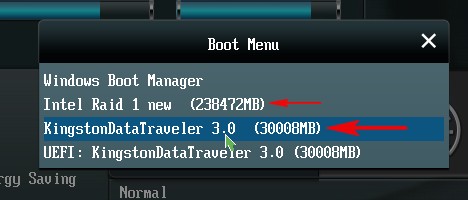
Компьютер перезагружается. Входим в загрузочное меню и выбираем загрузку с установочной флешки Kingston содержащей файлы Windows 10. Если в загрузочное меню компьютера вы попасть не можете, тогда смените приоритет загрузки на флешку в БИОС.
Как видим, только что созданный нами RAID 1 массив с названием «RAID 1 new» тоже находится в загрузочном меню.
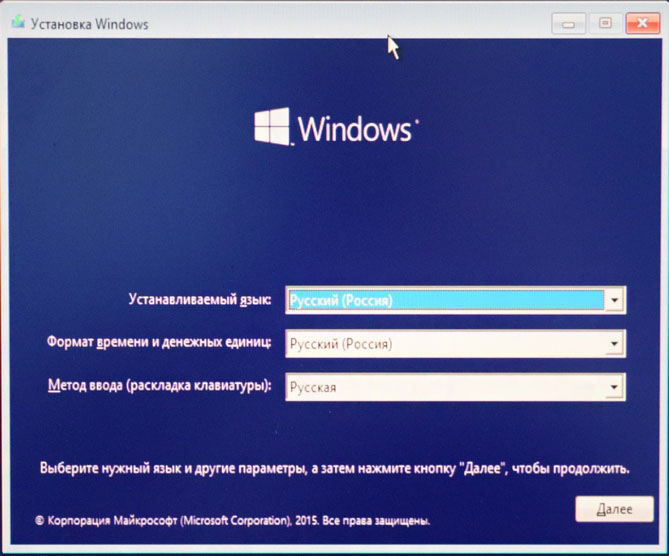
Загружаемся с флешки в программу установки Windows 10. Далее действуем как при обычной установке операционной системы.
{banner_google1}
Далее
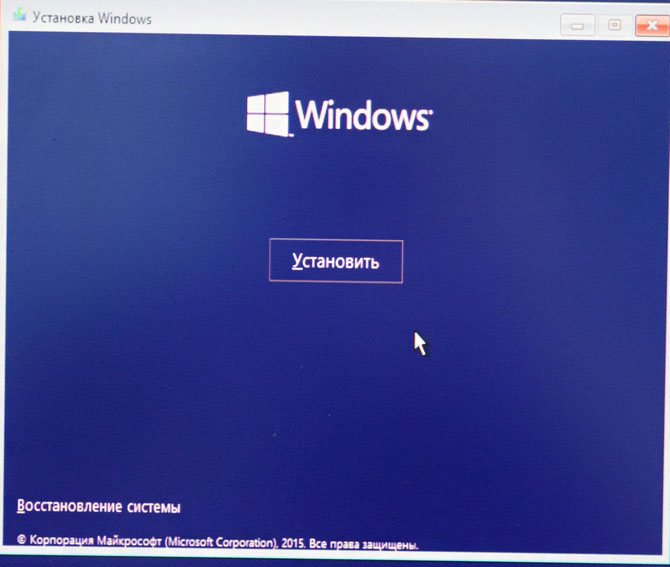
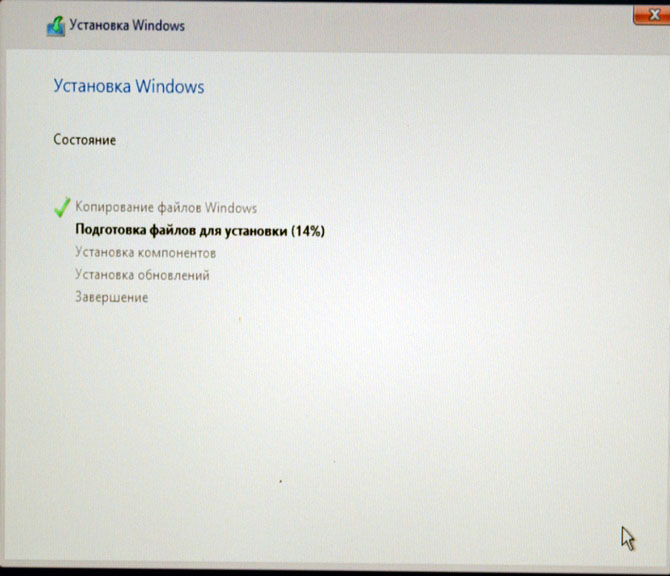
Установить
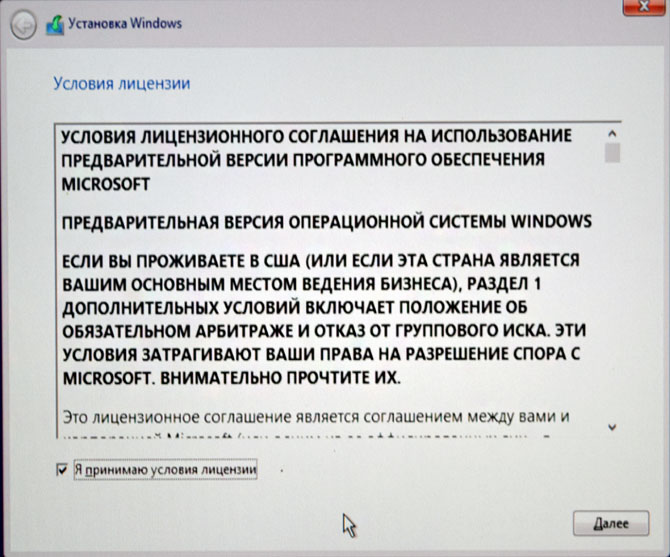
Принимаем лицензионное соглашение
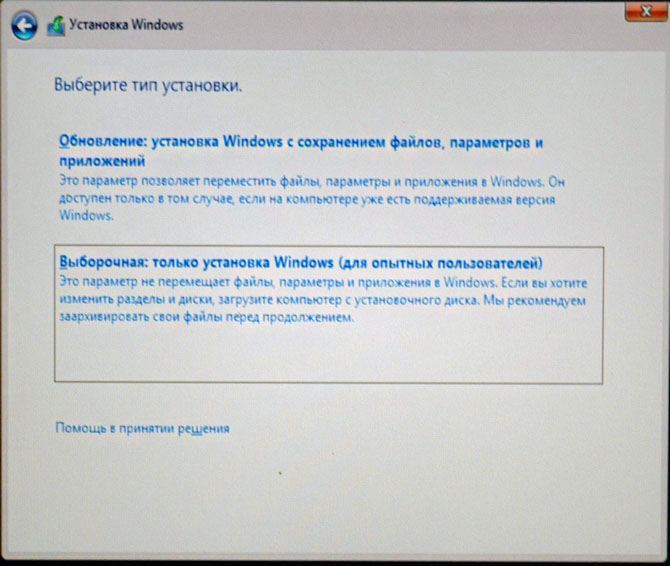
Выборочная: Только установка Windows
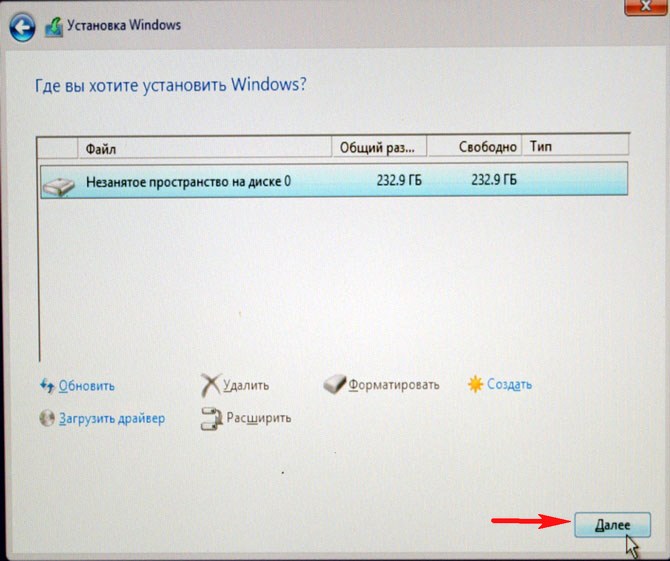
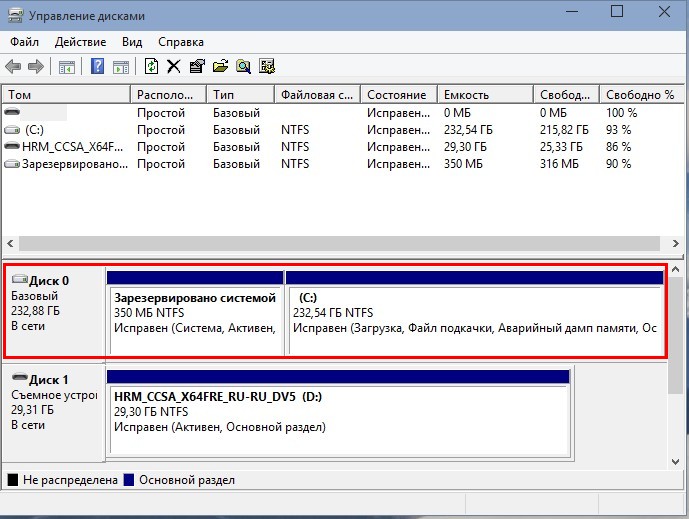
Два жёстких диска объединённых в RAID-массив установщик Win 10 видит как один.
{banner_google1}
Если хотите, можете создать разделы. Далее

Пропустить этот шаг

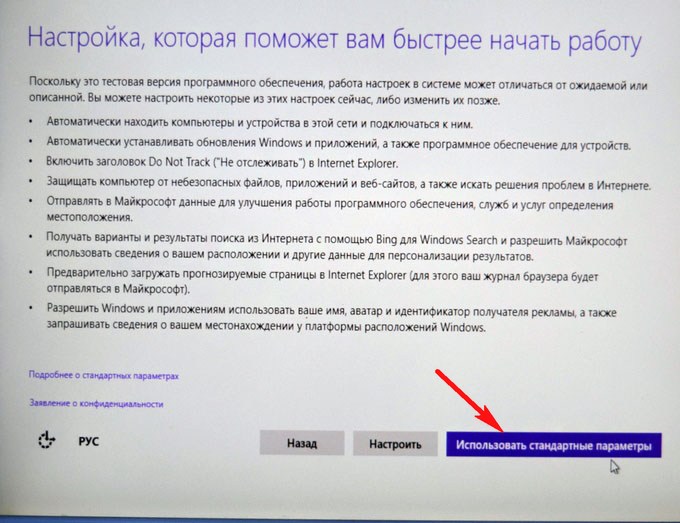
Использовать стандартные параметры
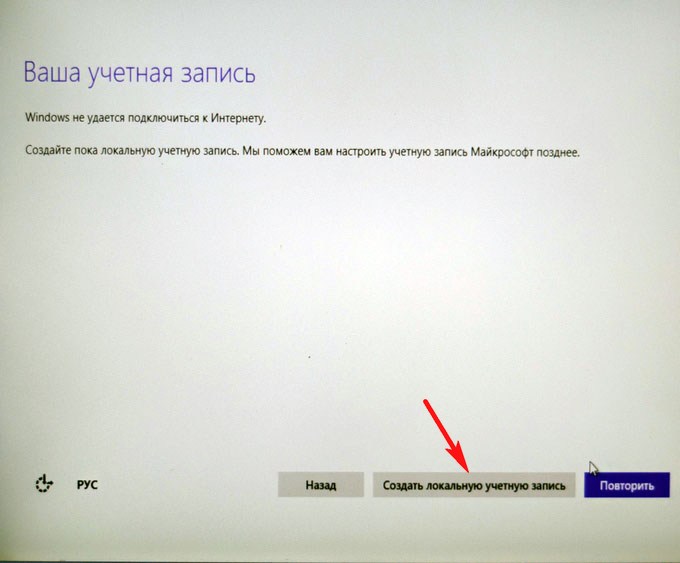
Создать локальную учётную запись
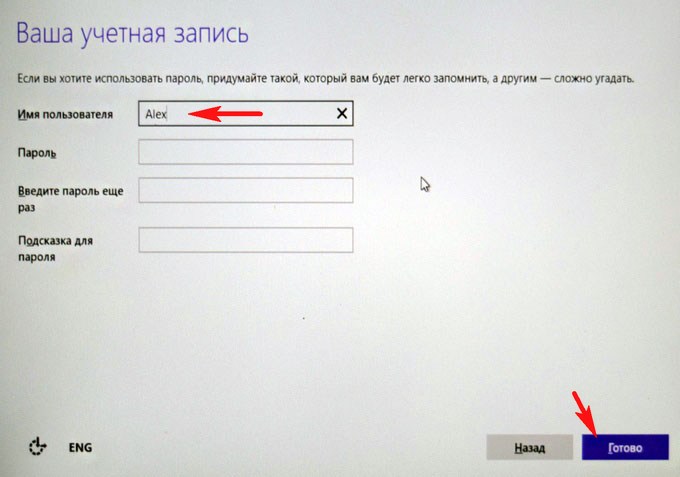
Вводим имя учётной записи и жмём Готово.

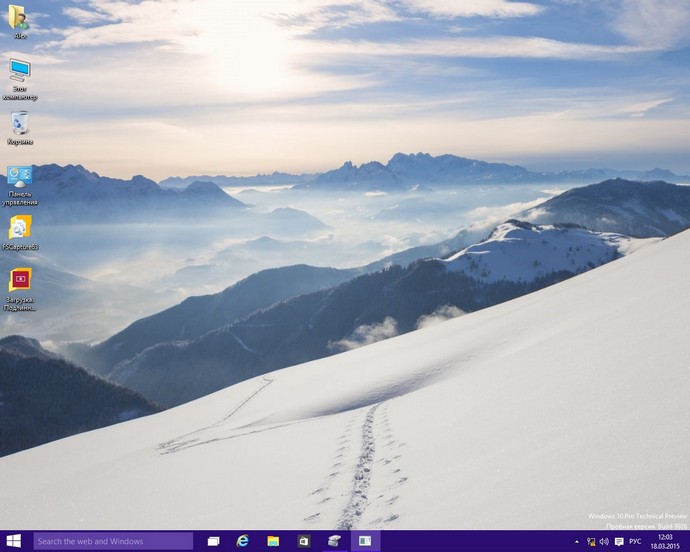
Windows 10 установлена на RAID 1 массив.
Диспетчере устройств.
Управление дисками.
RAID 1 массив и флешка с Windows 10.
Друзья, если один жёсткий диск в независимом массиве вышел из строя, то операционная система загрузится со второго исправного винчестера, то есть с вашими данными ничего не случится, а вот как воссоздать RAID — массив, об этом поговорим в следующей статье.
Статья на эту тему: Создание RAID-массива или Зеркалирование дисков в новейшей Windows 10 Fall Creators Update
Home
Hardware
By
Bhishu Acharya
After setting up hardware or software RAID, it’s crucial to download the dedicated drivers for proper functionality. Without them, the OS won’t recognize your storage drives in the array.
In order to install the RAID driver, first navigate to Intel or AMD’s support page. Find SATA/NVMe driver that’s compatible with your chipset, operating system, RAID level, and processor generation. Download and copy this into your thumb drive. Finally, load the dedicated driver in the Windows Setup wizard or directly execute the setup file.
Here’s a detailed guide to download and install RAID drivers on both Intel and AMD motherboards.
Identifying RAID Drivers
Before proceeding, you need to know the appropriate RAID drivers required for your platform. Here are the key points to consider:
- The RAID drivers are CPU-specific. You can find the relevant
.inffiles on both Intel and AMD’s support pages. - While you’re at it, ensure to install the drivers corresponding to your chipset, processor’s generation, and operating system. Similar ones specified for different chipsets might not work.
- Also, the drivers you’re seeking to download need to support the RAID level you have configured.
- No matter the type of RAID (SATA or NVMe), manufacturers bundle the relevant drivers in a single package. Therefore, the same drivers should be applicable for both.
- If you created a RAID set using Intel or AMD’s Windows Desktop application, the required drivers should be automatically installed. In that case, there’s no need to hassle about downloading additional drivers.
- Lastly, the drivers for hardware controllers and software/Fake RAID also vary.
Installing RAID Drivers on AMD Motherboards
RAIDXpert2 is the latest technology from AMD that lets you arrange your compatible storage drives in a RAID array. After setting this up from your BIOS utility, you require manual installation of the drivers, whether it’s during OS installation or for a non-bootable RAID drive.
Download Appropriate Drivers
The first step involves downloading the dedicated driver from the official AMD support page. As mentioned earlier, you should keep in mind the supported chipset and processor:
- Start by navigating to the official AMD Drivers and Support webpage.
- Under ‘Select your product from the list’, choose Chipsets.
- Move to the right and select the socket. This should further come up with another selection box.
 1")
- Now, select the chipset and hit the Submit button.
- Next, expand the Windows version and a list of drivers should be listed.
- Look for AMD RAID Driver (SATA, NVMe RAID).
- Expand Driver Details and check whether it supports your processor, chipset, and RAID level to be super sure.
- Once confirmed, hit the Download button.
 1")
 2")
 3")
Note: For non-bootable OS drives, download AMD RAID Installer (SATA, NVMe RAID) and run the setup file. Proceed with the on-screen instructions and this should install the relevant drivers for your RAID set.
Copy Drivers to USB Drive
 4")
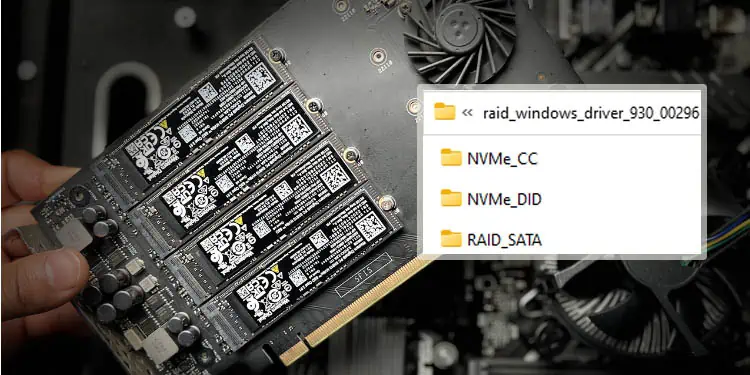
Once the download is complete, navigate to the destination folder and unzip it. When you move into the OS directory (further inside the architecture sub-directory), you’ll find three folders–NVMe_CC, NVMe_DID, and RAID_SATA.
Depending on your RAID set (NVMe or SATA), send the respective folder to a USB flash drive. While RAID_SATA is self-explanatory, the NVMe_CC and NVMe_DID depend on the Ryzen processor. The below list should help you select the appropriate folder:
| Ryzen Processors | NVMe Folder Selection |
| 1000 series | NVMe_CC |
| 2000 series | NVMe_CC |
| 2000 series with Radeon Graphics | NVMe_CC |
| 3000 series | NVMe_CC |
| 3000 series with Radeon Graphics | NVMe_DID |
| 4000 series with Radeon Graphics | NVMe_DID |
| 5000 series | NVMe_CC |
| 5000 series with Radeon Graphics | NVMe_DID |
| 1st Gen Threadripper | NVMe_CC |
| 2nd Gen Threadripper | NVMe_DID |
| 3rd Gen Threadripper | NVMe_DID |
| A Series (7th Gen) | NVMe_CC |
Load Drivers During Windows Installation
After creating a SATA or NVMe RAID set, you may exit BIOS mode from your ASUS PC. Insert the bootable flash drive and proceed to install Windows. However, you’re likely not going to get any configured drives during the process due to missing drivers:
- In the ‘Where do you want to install Windows?’ section, click on the Load driver option.
- Then, hit the Browse button and look for the folder that you had copied earlier.
- Load each of these files in succession–rcbottom, rccfg, and rcraid. For each, load the first driver on the screen.
- If that didn’t help, try the second driver.
- Repeat the process (if required) until your RAID disk shows up on the initial drive installation window.
- By default, the ‘Hide drivers that aren’t compatible with this computer’s hardware’ option is checked. In case you didn’t see any driver listed, uncheck this and try again.
- Once you have loaded the drivers, move ahead and complete your Windows installation process.
 5")
 6")
 7")
 8")
 9")
 10")
Installing RAID Drivers on Intel Motherboards
Once you have created a RAID 0, RAID 1, RAID 5, or RAID 10 configuration using the Intel Rapid Storage Technology, the next step is to install the drivers. The process is similar to AMD with slight variations.
You might have noticed that Intel provides just a tad of options on its website, making it difficult to find the relevant drivers. But with my step-by-step guide below, you should be able to do it without any hassle.
Download Appropriate Drivers
While you can navigate to the official Intel support page to search for the Intel RST drivers, this isn’t as straightforward as you might think. Instead, follow my instructions below to find the appropriate drivers for your RAID set:
- Go to the official Support for Intel Rapid Storage Technology (Intel RST) page.
- Select Drivers & Software.
- Now, look for User Interface and Driver and click on View Details.
- Get to the Detailed Description section and check whether it supports the configured RAID level, your OS, and processor generation.
- From the Available Downloads section, press the Download
SetupRST.exebutton.
 11")
 12")
 13")
 14")
Copy Drivers to USB Drive
I like to prepare the drivers before configuring a RAID array. But if you have already started the Windows installation process, use another working computer to download the related drivers and copy them into your flash drive.
For non-bootable RAID arrays, directly open the .exe file and proceed with the on-screen instruction. However, to load the drivers during Windows OS installation, you can’t extract the .exe file directly. Instead, follow the below steps:
- First, navigate to the destination folder where the file got downloaded.
- Right-click anywhere on the empty space and pick Open in Terminal. This should launch Windows Powershell.
- Here, paste the following cmdlet and hit Enter. Change SetupRST_extracted if its file name is different.
./SetupRST.exe -v EXTRACTDRIVERS=SetupRST_extracted
- Hit Yes once the User Account Control prompt pops up.
- All the content inside the
SetupRST.exefile now gets extracted into a new folder. Send this to your USB flash drive.
 15")
 16")
 17")
 18")
Load Drivers During Windows Installation
Then, you can proceed with the Windows installation (don’t forget to insert the USB drive with the prepared RAID drivers). I am pretty sure you’re not going to find your drive in the ‘Where do you want to install Windows?’ screen unless loading the relevant driver:
- Hit the Load driver option in the drive selection window.
- Next, click the Browse button in the Load driver prompt.
- Navigate to the driver folder and start by loading the
iaStorAC.inffile.
- A list of drivers might be shown. Start by selecting the first one and proceeding with the others (if the former didn’t work).
- In case that didn’t help, try loading the
iaStorSW.infandiaStorExt.infin a similar fashion.
- Also, try with the ‘Hide drivers that aren’t compatible with this computer’s hardware’ option unchecked. While this isn’t a recommended option, it can sometimes do the trick.
- Pick the unallocated space (noting the total storage of your RAID setup) and complete the Windows installation.
 19")
 20")
 21")
Troubleshooting RAID Drivers
Did the RAID drivers not load or you met with some form of error message during the Windows installation process? We’ve been there too.
Our team failed to load the Intel RST drivers when we created RAID arrays on some of our ASUS and Gigabyte motherboards. But the issue didn’t arouse with most of the ASRock models. Here are some troubleshooting tips that should solve some command issues with RAID drivers:
Download From Motherboard’s Support Page
 22")
Once our team couldn’t bypass the ‘We couldn’t find any drives’ page even after loading the RAID drivers that we got from Intel. Later, we downloaded from the PRIME B660-K D4 motherboard’s support section and this one worked for us.
Your motherboard manufacturer has a list of all the drivers corresponding to each model. Navigate to their official support page and download the relevant RAID drivers:
- Get to the Downloads or Drivers & Utilities section.
- Select the appropriate OS.
- Look for SATA/RAID driver or floppy image (the option varies for every manufacturer) and download it.
- Extract the zipped folder and copy it to your USB flash drive.
- Load the relevant drivers in the Windows Setup screen, as demonstrated earlier.
Update Drivers on Device Manager
Sometimes, during the non-OS RAID configuration, the respective drivers might not be recognized on the Device Manager or a yellow exclamation mark might appear. In such cases, go through the following steps to update it:
- Press Windows + X and choose Device Manager from the list.
- Look for your RAID driver under Storage Controllers, Other Devices, or Disk Drives section.
- Right-click and pick Update driver.
- Pick Browse my computers for drive.
- Next, press the Browse button, navigate to the downloaded folder, and select the relevant driver.
- Wait for the update to complete and your problem should be solved.
 23")
 24")
 25")
Other Fixes
If you’re yet experiencing issues with the RAID driver installation/update, here are other things you might want to try:
- Recheck whether the downloaded drivers are compatible with the chipsets, processor generation, and configured RAID level.
- Get to your BIOS and ensure the drives are configured to RAID. Also, note that CSM is disabled.
- If you have the motherboard’s DVD, you should find the dedicated drivers here. Copy them to a USB drive and load them as prescribed above.
- In case you’re getting the INACCESSIBLE_BOOT_DEVICE BSOD error (when creating a non-bootable array with SATA drives and you have OS installed on an NVMe drive), ensure you disable the RAID mode for NVMe.
Для AMD B450 чипсета — шаги следующие.
Подготовка:
Скачать драйвера на RAID — в архиве их будет 3: rcbottom, rcraid, rccfg.
Скопировать все 3 на флешку или карту памяти, которую при загрузке видно в BIOS как доступный диск.
Назвать том с системой так, чтобы его было легко обнаружить например «System», том флешки тоже должен быть поименован узнаваемо.
Заходим в BIOS и переключаем контроллер из режима AHCI в режим RAID.
Сохраняем и перезагружаемся.
Снова заходим в BIOS, появятся настройки RAID.
В моем случае я из 2х 4ТБ дисков сделал 1 8 Тб. Остальные диски остались в неизменном состоянии — то есть RAID видит их как обычные диски.
Сохраняем и перезагружаемся второй раз.
Windows естественно повиснет на загрузке.
Требуется перезагружать ПК до тех пор, пока не будет предложено вызвать консоль восстановления.
Начать придется с того, чтобы найти диск, на котором уже установлена исходная Windows
Поможет в этом утилита
| Windows Batch file | ||
|
Вызываете её, вводите команду
| Windows Batch file | ||
|
видите там том с той же меткой, что и ваш том с системой, но скорее всего буква будет другой. В моем случае диск с исходной Windows имел букву J. А том флешки был с буквой С.
Время покинуть diskpart и вернуться в консоль.
В консоли переходим на том флешки и директорию с драйверами.
| Windows Batch file | ||
|
Время устанавливать драйверы:
| Windows Batch file | ||
|
При выполнении данных команд, успешное добавление можно будет понять по тому, что в сообщении будет добавлен «Oem??.inf».
Пишем в консоль
После перезагрузки, моя система подумала немного, затем загрузилась в ту же ОС, что и была до переключения контроллера в режим RAID.
Из положительных новостей — скорость доступа к спаренному диску возросла.
Из отрицательных — надежность системы ожидаемо упала, а ещё показатели SMART я пока как смотреть у жестких дисков подключенных к RAID не разобрался.
Думаю что для других RAID контроллеров принцип похожий.
Добавлено через 5 часов 32 минуты
На самом деле, я забыл, что при первом запуске внутри консоли восстановления, драйвер RAID ещё не будет запущен, поэтому том c Windows виден не будет.
Первично надо после поиска томов, определить букву тома флешки, выйти из diskpart и зайти в директорию с драйверами на флешке.
| Windows Batch file | ||
|
Затем запустить драйвер RAID внутри консоли восстановления:
| Windows Batch file | ||
|
Снова запускаем diskpart
и вызываем команду обновления списка томов, а затем снова просматриваем список томов:
| Windows Batch file | ||
|
Тома подключенные позже, получат буквы следующие за текущими — консоль восстановления не является копией имеющейся Windows и поэтому диск с системой может получить очень странное имя — у меня оказалась буква J:
Только теперь время выходить из diskpart и дополнять образ существующей системы командой DISM.
Надеюсь что теперь мне удалось полностью восстановить последовательность действий.