
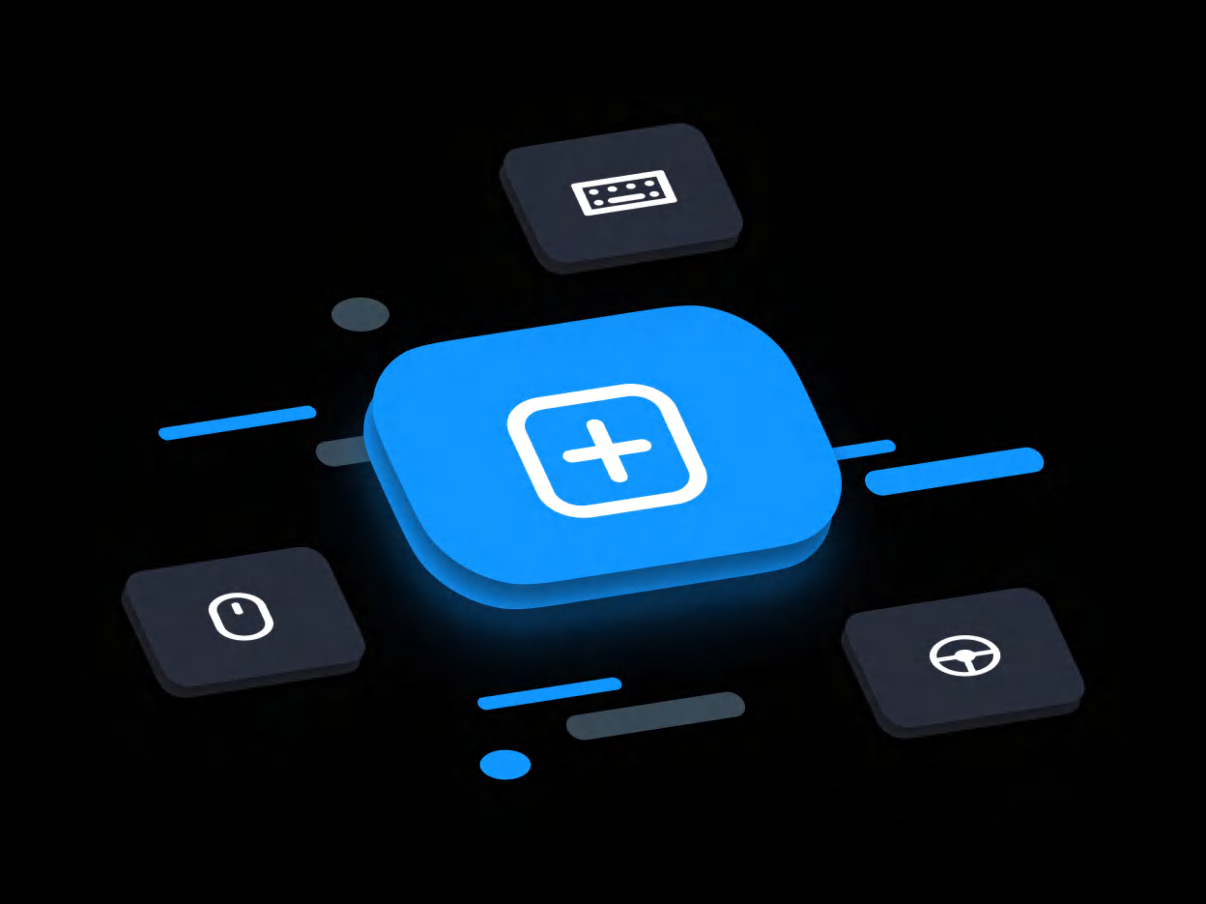
Introducing Logi Options+, the next-gen Options app. Get the best features from Options with a fresh, easy-to-use interface – for free.
OPTIMIZED GESTURES FOR WINDOWS® AND macOS
Reproduce trackpad gestures you’re already familiar with when you press the gesture button. Hold it and move the mouse up, down, left or right to activate different actions such as Windows Task View or Mission Control on the Mac. Control your media playback, pan, zoom, and rotate too.
APP-SPECIFIC SETTINGS
Get the most out of your favorite apps like Zoom® or Microsoft Teams®. Application-specific settings let you customize buttons on MX Master 3, MX Anywhere 3 or ERGO M575 mice. Start or stop your Zoom video with the forward button, or press the back button to mute/unmute the mic. Customize your buttons for each of the apps you use.
SEE DEVICE STATUS AT A GLANCE
With Notifications & Status, you’ll get device-specific information such as battery level, key backlighting level, and Caps Lock at the right moment. Know when your battery life is about to run out and when it’s time to recharge so you’re never caught off guard. For Easy-Switch™ enabled keyboards, you’ll be able to see which computers are paired to channels 1-2-3.
MANY DEVICES. SEAMLESS FLOW.
Using two or three computers at the same time is no problem with Logitech Flow. You can automatically switch between computers just by moving your cursor to the edge of the screen. It also makes transferring text, images and files between your computers effortless—just copy on one and paste on the other.
BACKUP YOUR DEVICE SETTINGS
Create an account in Options to backup your device settings to the cloud automatically. You can retrieve the settings you want from one of your backups to set up your device on any computer easily.
System Requirements
Windows 10 and higher
macOS 11 and higher
Compatibility
To install both Options and Options+ on your computer, you need to update to Options version 8.54 and higher. Simply download and install the latest version.
Languages
English, Simplified Chinese, Korean, Japanese, German, Spanish, French and Russian.
Supported Mice
Supported Keyboards
Discover More Software
Все способы:
- Причина 1: Устаревшее программное обеспечение
- Причина 2: Плохое качество связи (беспроводной вариант)
- Причина 3: Устройство установлено неправильно
- Причина 4: Аппаратные неисправности
- Вопросы и ответы: 17
Причина 1: Устаревшее программное обеспечение
Если проблемная мышь приобретена недавно, но вы уже некоторое время пользовались Лоджитек G Hub, возможно, дело в том, что версия вашей программы устарела. Следовательно, рассматриваемый сбой можно устранить обновлением ПО.
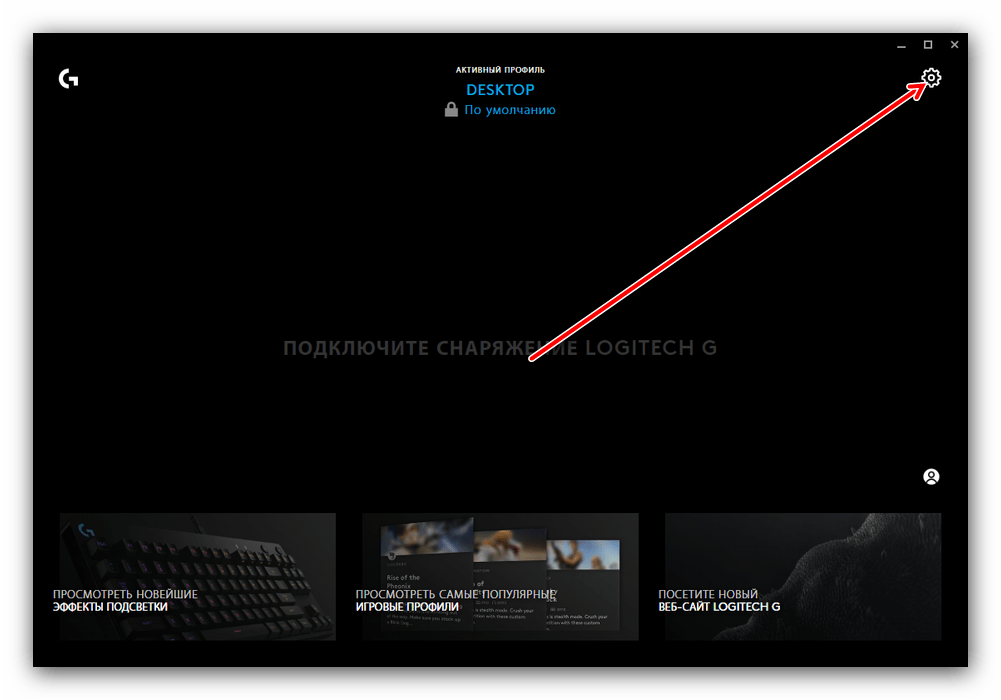
- Откройте Logitech G Hub, затем нажмите на иконку перехода в меню настроек.
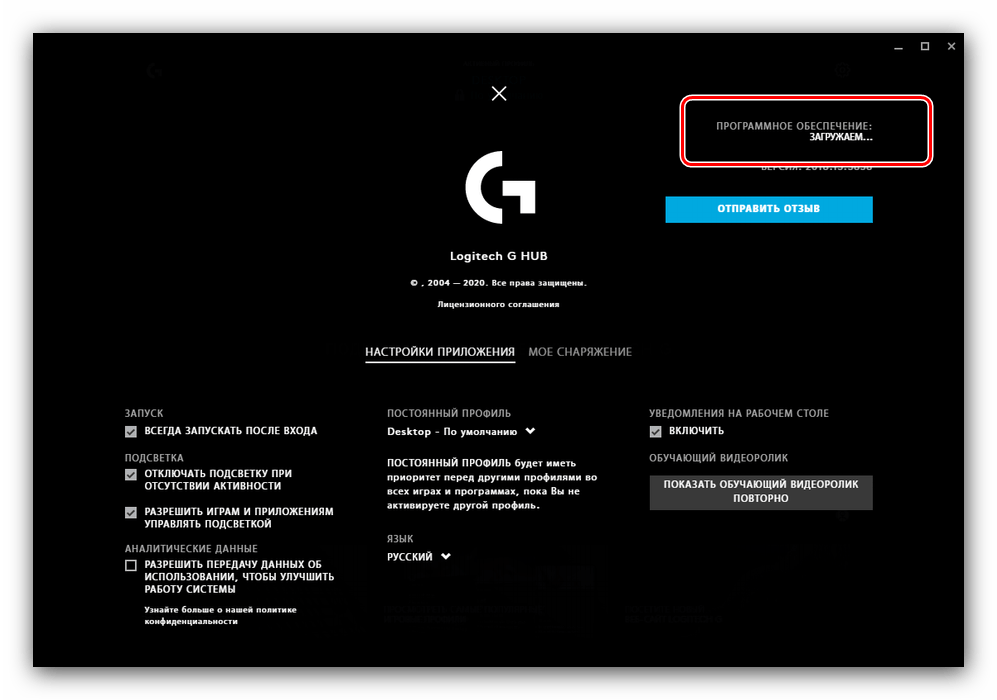
- В параметрах программы обратите внимание на верхний правый угол – там должна быть доступна кнопка «Проверить обновления», нажмите на неё.
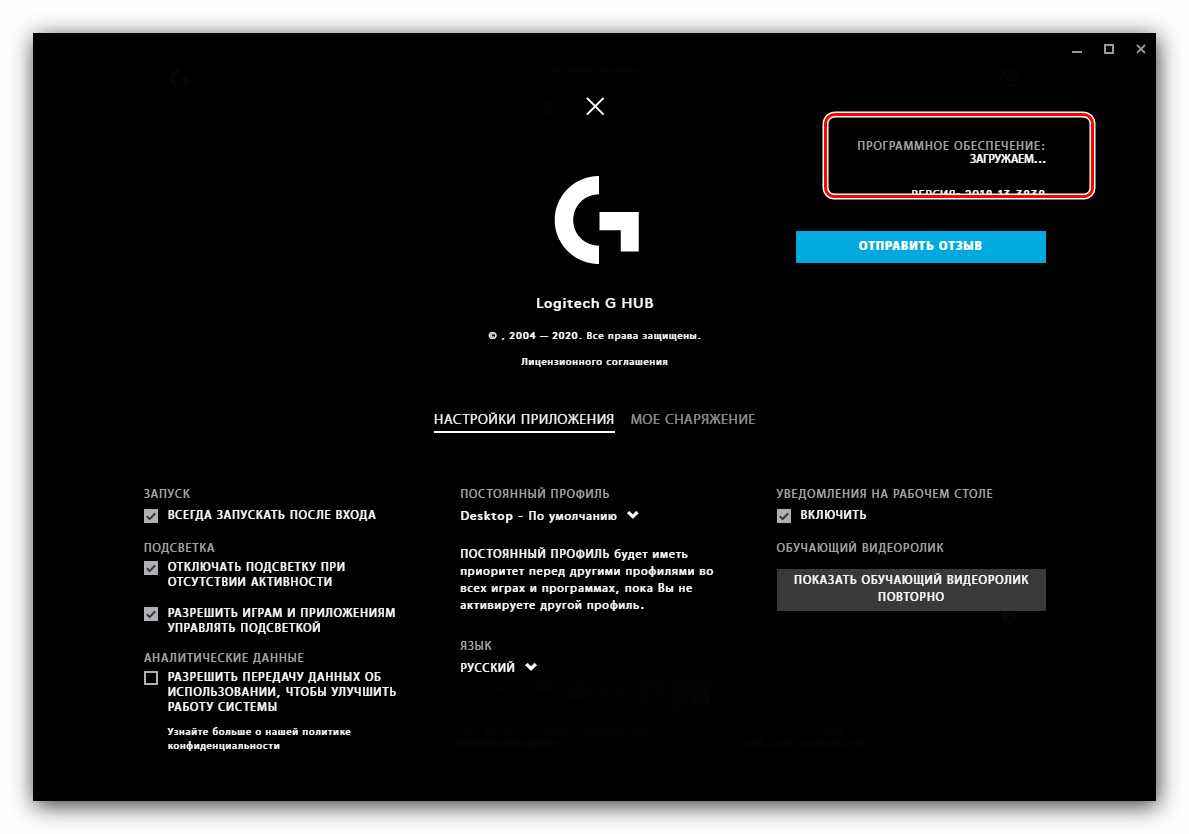
- С большой долей вероятности приложение обнаружит, что текущая версия неактуальна, и начнёт загрузку обновления.
- Дождитесь окончания процедуры, после чего перезагрузите компьютер.
В обычных условиях обновление фирменного софта помогает устранить проблему.
Причина 2: Плохое качество связи (беспроводной вариант)
Для мышей Logitech с подключением по радиомодулю или Bluetooth сбой распознавания программой может заключаться в плохой связи. Придерживайтесь следующих рекомендаций:
- Помните об эффективной дальности соединения между модулем и мышью – в среднем она составляет около 10-15 метров.
- Для манипуляторов с радиосвязью – убедитесь, что модуль хорошо соединён с USB-портом, и целевой компьютер его распознаёт. Если используется хаб, не лишним будет подключить приёмник напрямую, к порту, выведенному на материнской плате.
- Владельцам Bluetooth-мышей важно удостовериться, что на ПК или ноутбуке включена соответствующая опция, и что она работает без сбоев.
Подробнее: Как включить Bluetooth на Windows 7 и Windows 10
- В некоторых случаях нормальной связи устройства и приёмника могут мешать помехи от других девайсов, использующих беспроводные соединения – например, роутеров Wi-Fi. Для проверки попробуйте их отключить и подключить мышь к компьютеру – если выясниться, что проблема заключалась именно в этом, пересмотрите планировку и установите источник помех где-нибудь в другом месте.
Иногда причиной сбоев со связью может быть брак либо поломка самого манипулятора или его приёмника. Столкнувшись с этим, обратитесь в сервисный центр или магазин, если ещё действует гарантия, в противном случае ваш путь – в ближайшую мастерскую.
Причина 3: Устройство установлено неправильно
Порой источник сбоя – ошибки при первичной установке девайса в системе, из-за чего оно распознаётся некорректно и не может адекватно работать. Об этом обычно сигнализирует работоспособность его базовых возможностей (передвижение курсора, правой и левой кнопок, ролика), но проблемы с дополнительной функциональностью. Эффективным методом ликвидации сбоя будет удаление девайса.
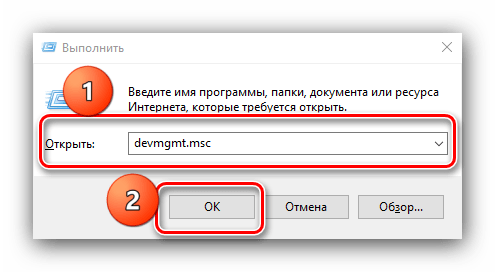
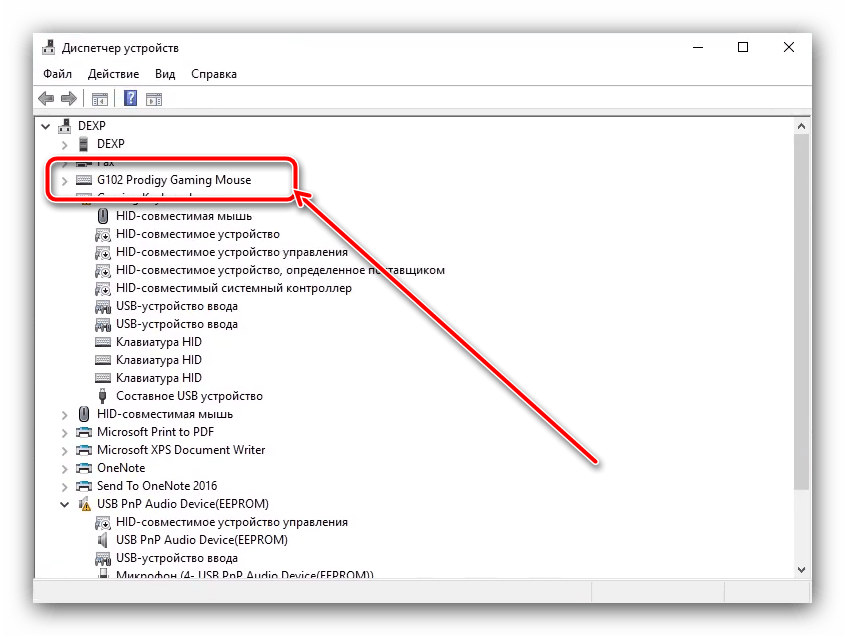
- Откройте «Диспетчер устройств», например, посредством окна «Выполнить». Нажмите сочетание клавиш Win+R, после появление оснастки введите в ней запрос
devmgmt.mscи кликните «ОК». - Продукция Logitech обычно имеет свою собственную категорию в перечне, которая носит название модели – например G502 HERO Gaming Mouse и похожее по смыслу. Найдите такую категорию и раскройте её.
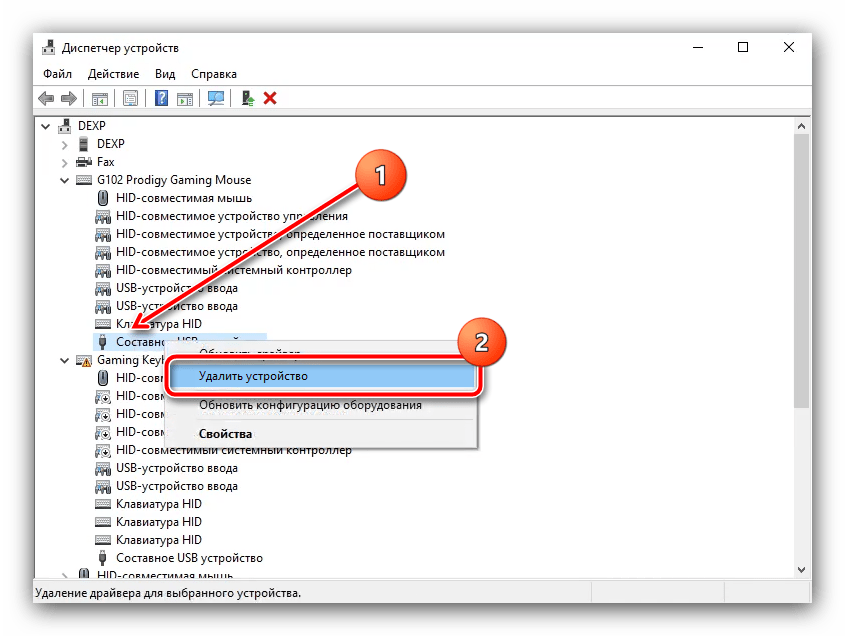
- Поищите в перечне запись с названием «Составное USB-устройство», кликните по ней ПКМ и выберите пункт «Удалить устройство».

Подтвердите своё намерение.
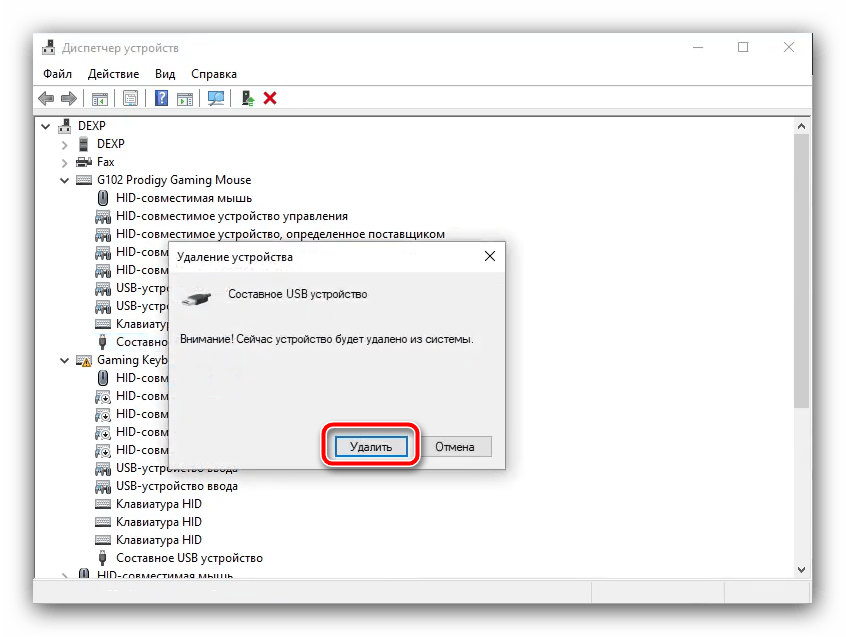
После завершения операции отключите манипулятор от компьютера, затем подсоедините обратно – на этот раз установка должна пройти успешно.
Причина 4: Аппаратные неисправности
Наконец, последней причиной, по которой приложение не может распознать мышь, являются аппаратные поломки. Продиагностировать манипулятор можно следующим образом:
- Подключите устройство к другому компьютеру (желательно с той же версией операционной системы) или иному девайсу с поддержкой такого варианта ввода ‒ например, смартфону или планшету под управлением Android.
Подробнее: Как подключить мышку к Android
Если проблема по-прежнему наблюдается, скорее всего, вы столкнулись именно с поломкой.
- Для мышей с проводным подключением проверьте кабель ‒ нередко при интенсивном использовании он перетирается в месте захода в корпус или соединения с USB-коннектором. Однозначным симптомом перебитого провода является работоспособность манипулятора в каком-то определённом положении.
- Аппаратную поломку у беспроводных аксессуаров вычислить сложнее, особенно у вариантов с радиосвязью, единственный надёжный признак ‒ невозможность установить связь в любых условиях и с любым девайсом.
- Нельзя исключать и вероятные проблемы с целевым компьютером ‒ с беспроводным модулем или USB-портами в частности. О неполадках сигнализируют трудности с подключением любых девайсов, не только мыши, а также иконки ошибок рядом со значками соответствующих комплектующих в «Диспетчере устройств».
К сожалению, большинство аппаратных неполадок с манипулятором или компьютером нельзя устранить в домашних условиях ‒ остаётся только визит в сервисный центр.
Наша группа в TelegramПолезные советы и помощь
THANK YOU FOR DOWNLOADING G HUB.
Register your email and enjoy 15% off on your First purchase at Logitech G.
Check our Latest Gaming Deals.
NEWS, TIPS AND TRICKS
Check out the latest updates and learn how to dial in your gaming setup.
TIPS & TRICKS
BLUE VOICE — PLAY LOUD AND CLEAR… OR AS AN ALIEN
BLUE VO!CE is an advanced set of broadcast style filters and effects that makes sure you are heard loud and clear.Troll your buddies in Discord or role play as your favorite demon or alien, all out of the mic path of your compatible device.
TIPS & TRICKS
G HUB BASICS
Set your DPI, make your first assignment and try out some cool LIGHTSYNC effects. Take a hands on tour of the basics of G HUB.
TIPS & TRICKS
KEYCONTROL
KEYCONTROL is the new UI and featureset to configure your G keyboards. With the launch of the new PRO X 60 WIRELESS GAMING KEYBOARD, check out the nearly unlimited ways to PLAY.
TIPS & TRICKS
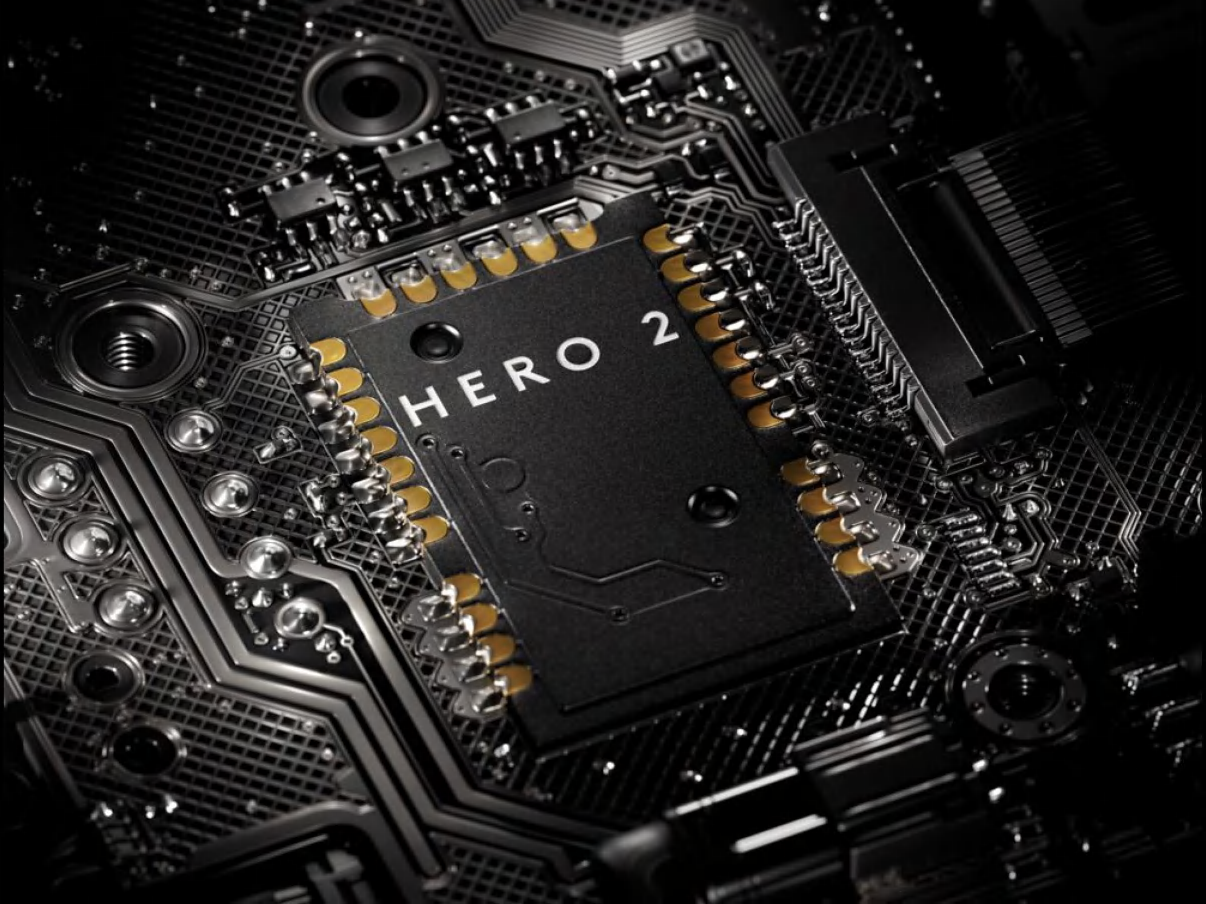
HERO 2 SENSOR
HERO 2 is our flagship gaming grade optical mouse sensor and we continue to bring new ways to take advantage of the power of HERO 2 through G HUB! Check out how to dial in the exact settings for you.
TIPS & TRICKS
LIGHTSYNC RGB
LIGHTSYNC RGB technology is awesome for personalization and setting your vibe. There are many ways to set up the blinky like custom animations, syncing all your G devices and even using Dynamic Lighting from Windows to tie your whole desktop together.
SUPPORTED DEVICES
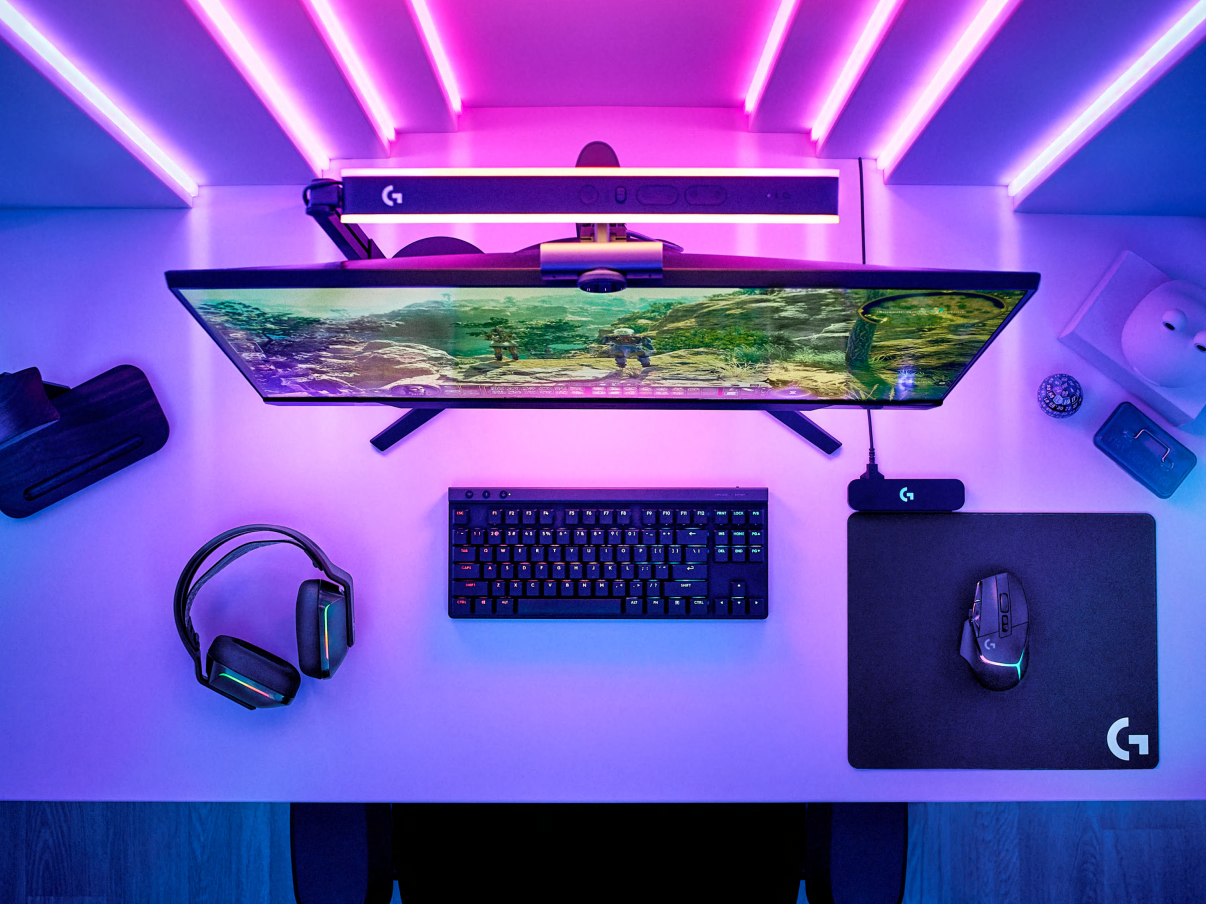
GAMING SETUPS
Find the right combo to make your desktop perfect for you. Take a look at some popular combinations of gear and features for the next level of PLAY.
DESIGNED FOR PROS. ENGINEERED TO WIN.
To PLAY at your best, you need the best gear. Designed in collaboration with the world’s best pro players, these products deliver performance and features to let you focus on what matters: the win.
EASY AND POWERFUL
Get started with quick presets and fast onboarding to dial it in and kick off your gaming session. Add features and customization as you go.
EXPAND YOUR FAVORITES
Add to your legend with new ways to PLAY. Pair some of the most iconic gear ever made with nearly endless customization for unique and game changing capabilities.
FOR THE LOVE OF THE GAME
Show the world how it’s done and shout from the mountain tops with every tool in the box. Make your mark as a complete champion of your realm.
FAQ
G HUB supports the latest three major releases of MacOS and Windows 10 version 1809 and beyond to the latest release of Windows 11.
G HUB Community is a portal to accessing settings, presets and profiles from other users with similar devices and games. You can access this from the main navigation or by clicking “BROWSE” in the preset menu of some device features like Lightsync, BLUE VO!CE and KEYCONTROL.
G HUB has a robust automatic profile system which can switch profiles automatically when you launch games. If you are using the profile system (which is off by default), and launch a game with an automatic profile that doesn’t have any settings configured, your settings will revert to default as that is the starting point for new profiles. To address this, make sure your profiles for your games have the settings you need.
KEYCONTROL is only available currently on the PRO X 60 Gaming Keyboard.
Need Additional Help?
Get more information about our apps and products or get access to customer service.
To get your wireless Logitech mouse working, update the Logitech Mouse Driver using the different ways explained in the post below. Here, we explain how to download the latest and compatible version of the Logitech wireless mouse on Windows.
Why Update Logitech Mouse Driver?
Tip : Even after adding new batteries and connecting to the right port, if your Logitech mouse suddenly stops working or the Logitech mouse is not working, you need to update the USB and Logitech mouse driver to fix issues that might be interfering with the working of the mouse. The easiest way to update drivers is to use Advanced Driver Updater. The driver updating software detects and helps update outdated drivers without any hassle. To get Advanced Driver Updater, click the button below.
Logitech is well known for providing the best-in-class computer accessories. But sometimes, when we fail to update the drivers, the nifty pointing device (mouse) stops working. This means your productivity will decline, you won’t be able to play games seamlessly, and your work will be interrupted.
If you can relate to what we are saying, let’s read ahead: what to do when the Logitech mouse stops working, and how to update Logitech mouse drivers for Windows 11 & 10.
Must See- How to Download the Logitech M510 Mouse Driver
Before Updating the Mouse Driver, Try These Basic Fixes
When you encounter a Logitech mouse not working issue, follow these basic fixes.
1. Disconnect the mouse and reconnect.
2. Restart the PC
3. Refresh the Mouse
4. Change the Mouse Battery
5. Connect the Mouse Receiver to an Alternate USB port
6. Move the Mouse away from other electric gadgets
7. Scan for Hardware Changes
8. Perform a Clean Boot
9. Scan the PC for malware infections
10. Connect the Mouse to Another PC
See Also- How to Fix Logitech Mouse Lagging in Windows 11, 10
Best Ways To Update Logitech Mouse Driver in Windows 11, 10
The driver can be updated either manually or automatically.
To update manually, you will need to head to Device Manager. To update automatically, Advanced Driver Updater is the best driver updater for Windows.
Note : Updating drivers manually is daunting and requires patience. Also, the chances of downloading and installing incorrect Logitech driver updates are more. If you are okay taking these risks, move with manual steps.
But if you are smart, you will not want to spend time updating drivers – a task that can be done automatically using a third-party driver updating tool called Advanced Driver Updater.
Method 1 – Manually Updating Logitech Mouse Driver Via Device Manager
Method 2 – Automatically Updating Logitech Mouse Driver Using Advanced Driver Updater (Recommended)
Method 1 – Manually Updating Logitech Mouse Driver Via Device Manager
1. Open the Run window by pressing the Windows + R keys.
2. Type devmgmt.msc and hit the Enter key.

2. Go to Mice and other pointing devices option.
3. Explore the category by double-clicking it.
4. Right-click Logitech mouse or wireless mouse > Update driver.

5. This will open a new window; click “Search automatically for updated driver software.”

6. Wait for Windows to look for an available update. If available, it will be installed automatically.
However, if Windows cannot find the update, you must reinstall the Logitech mouse driver.
Method 2 – Automatically Updating Logitech Mouse Driver Using Advanced Driver Updater (Recommended)
If you are wondering where to download Logitech mouse drivers without wasting time, use Advanced Driver Updater.
Advanced Driver Updater is one of the popular third-party tools that help update drivers automatically. To use the tool, you need to download, install, and run the tool; the rest of everything will be taken care of by the Advanced Driver Updater.
This professional driver updater will automatically learn about the operating system and outdated drivers and show the latest updates.
Note : If you are using the Free version of the tool, you will have to update each driver manually by clicking the Update driver option next to each outdated driver. If you have the paid version, you may use the Update All option to update all missing, corrupt, and troublesome drivers at once.
To perform Logitech Mouse Driver update on Windows 10, follow the steps below:
1. Get Advanced Driver Updater
2. Launch the driver updater tool for Windows to scan the PC for outdated drivers.

3. Click Start Scan Now to scan the system for outdated, corrupt, and missing drivers.
4. Wait for the scan to finish.

5. Once you have the scan result look for the Logitech mouse driver or HID Keyboard Device and click Update driver to update all other outdated drivers also next to it.

6. Wait for the download to finish.
7. Reboot the computer to apply the Logitech mouse driver update changes.
Now try to use the Logitech wireless mouse. You should not face any problems.
Must Read- How to Download the Logitech M510 Mouse Driver
FAQ-Logitech Mouse Driver
1. How do I fix my Logitech mouse driver error?
To fix the Logitech Mouse driver error, you can update the drivers manually or use third-party software like Advanced Driver Updater.
2. Why update the Logitech mouse driver?
By updating the Logitech Mouse Driver, you ensure there is uninterrupted communication between the Windows OS and the Mouse hardware. This will not cause any lag or mouse cursor freeze issues and fix the Logitech mouse not working issue.
3. How to Download Logitech Mouse Driver?
Logitech mouse drivers can be downloaded from the manufacturer’s website by locating the right driver for the mouse. Once on the Logitech website > select the mouse category > look for the mouse model number for which you want to download the driver. Double-click it to launch it and follow the onscreen instructions to complete the installation.
4. How to Reinstall Logitech Mouse Driver?
- Head to Logitech’s official website.
- Here, on the driver download page, look for the right driver based on the Operating System and the bit you are using.
- Double-click on the downloaded file and follow the on-screen instructions once the driver downloads.
- Restart the PC to apply changes for the Logitech driver update.
5. How to update the Logitech mouse driver?
To fix issues like a Logitech wireless mouse not working, you need to update drivers. This can be done manually using the Device Manager tool or automatically using the Advanced Driver Updater tool. Both these methods have been explained in this article in detail.
Get the Logitech Mouse Driver Updated and Fix Driver Related Issues
We hope to use the methods explained above. You can get Logitech mouse drivers working and be able to update Logitech drivers for Windows 11,10. The easiest way to update the driver is to use Advanced Driver Updater. Hopefully, you will give it a try. If you have queries regarding the product, feel free to send them to support@systweak.com.
Also, share your feedback and suggestions in the comments box below.
Related:-
How to Fix Logitech Mouse M310 Driver Errors
How to Fix Logitech Mouse Lagging in Windows 11, 10
How to Download Logitech G Pro X Superlight Wireless Gaming Mouse Drivers
Does your wireless Logitech mouse lag? Then, download and update Logitech mouse driver to resolve the issue. In this tutorial, we are going to put together 3 methods that come in handy.
Logitech is a globally recognized label for offering excellent computer accessories. But sometimes, when we forget to update the drivers released by the brand, then the Logitech products stop working fine as expected. That means, the production efficiency will decline and the outcomes will be affected. Additionally, we have seen numerous users complaining about the unresponsive behavior of their wireless Logitech mouse.
If you also find it relatable then follow the write-up till the end to know how to update the Logitech mouse driver on Windows 11, 10.
Simplest Way to Update Logitech Mouse Driver in Windows 11, 10
To install the latest version of the Logitech Mouse driver with ease, you can use Bit Driver Updater. It is the best driver updater utility tool that automatically scans PCs for outdated or corrupt drivers and provides only genuine drivers. Bit Driver Updater provides only WHQL-tested and signed drivers. Plus, it comes with additional features to improve overall PC performance. You can download Bit Driver Updater for Free from the button below
Easy Methods to Download, Install and Update Logitech Mouse Driver on Windows 11, 10 PC
If your Logitech mouse stopped working, then you can try to update the associated drivers to fix this issue. Below, you will learn 3 methods to perform Logitech mouse driver update on Windows 10.
Method 1: Manually Install Logitech Mouse Driver from Official Webpage
If you are confident about your computer skills, then you can find the correct drivers on the official website of Logitech. You need to download the drivers based on your Windows operating system and the bit you are currently using.
After that, once you have the driver file downloaded, then click double on it and comply with the on-screen instructions to install the drivers on your PC.
However, installing the wrong driver will cause numerous problems to your system and also make it vulnerable. So, be careful while installing the drivers manually.
Also See: Troubleshoot Mouse Problems in Windows 10 – Fix Mouse Problems
Method 2: Use Bit Driver Updater to Automatically Update Logitech Mouse Driver (Recommended)
If the above method seems too much work, or you don’t want to put your system at stake, then you can use Bit Driver Updater to do this task automatically.
Bit Driver Updater is one of the most popular third-party utility tools that help users to find and install drivers automatically. To use this software, you only need to download, install and launch it on your PC. The rest of the work will be performed by the Bit Driver Updater.
This advanced and professional driver updater utility tool will automatically detect the operating system and the correct version, later on, will also show the available updates.
Important: So, the software is available in both versions i.e., free or pro. If in case you are using the free version, then you will have to install each required driver update manually by making a click on the Update Now button. Furthermore, the users with the pro version can update all broken, faulty, or corrupted drivers in one click by making a click on Update All.
Now, have a look at the steps below to automatically update Logitech Mouse driver:
Step 1: Get the setup file of Bit Driver Updater from the download button below.
Step 2: Run the installer and follow the wizard.
Step 3: Launch the amazing driver updater software for Windows.
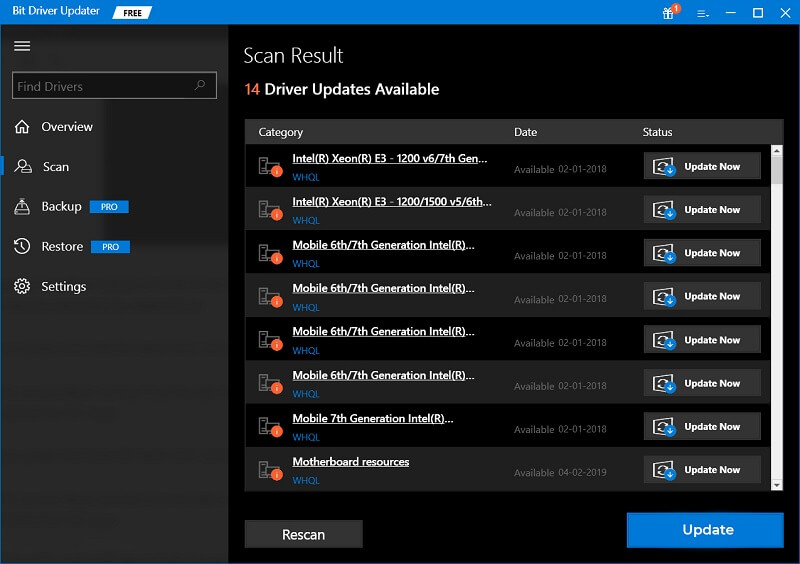
Step 4: Click on Scan to scan your PC for missing, faulty or outdated drivers.

Step 5: Wait for the process to finish.
Step 6: From the scan results locate the Logitech mouse driver and click on Update Now adjacent to it.
Step 7: Wait and let the downloading process be finished.
Reboot your PC to apply the new changes and try to use your Logitech gaming mouse to test the issue. Now, you should not encounter any problems.
Also See: How to Fix Connections to Bluetooth Mouse in Windows 10 {SOLVED}
Method 3: Download and Update Logitech Mouse Driver in Device Manager
Another way to get the latest version of Logitech mouse drivers installed is using Device Manager. It is Windows in-built utility tool that can help you manage hardware and its drivers in Windows PC. To use this method, follow the steps outlined below:
Step 1: Press Windows + X keys to open Device Manager.
Step 2: In Device Manager, navigate to the Mice and other pointing devices category and double click on it.
Step 3: Then, click right on Logitech mouse driver and choose Update driver software.
Step 4: From the next window, choose Search automatically for updated driver software.
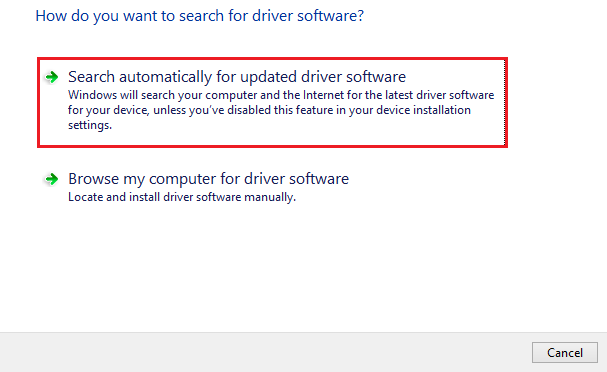
Now, the Device Manager will search for the available driver updates and later on will install them too automatically.
Bonus-Tip: How to Reinstall Logitech Mouse Driver on Windows PC?
Is your Logitech mouse not working even after a driver update? If that is the case, then you need to uninstall the currently installed drivers, afterward install the compatible drivers again. This might work for you. To do so, you can use the Windows default utility program, Device Manager. Follow the steps below:
Step 1: Open the Run Dialog box and type devmgmt.msc inside it. Then, hit the Enter key from your keyboard.

Step 2: In the Device Manager window, double click on the Mice and other pointing devices category.
Step 3: Find and right-click on the problematic Logitech mouse driver to select the Uninstall Device option.
Step 4: Next, click Yes if a box pops up for your confirmation.
Step 5: Wait and let the existing drivers be uninstalled.
Once done, then reboot your PC and visit the official website of Logitech to reinstall Logitech mouse drivers for Windows PC.
Also See: Logitech M510 Wireless Mouse Driver Download for Windows 10
Logitech Mouse Driver Download and Install: DONE
We hope using the aforementioned methods you can make your Logitech mouse driver work again and fix all related issues. In our opinion, Bit Driver Updater is a more straightforward way to update Logitech mouse driver for Windows 11,10. You should give it a try. If in case you have any sort of doubts regarding the software, feel free to share them in the comments below.
Also, please let us know in the comments below if you have any better suggestions. For more technical information, do subscribe to our Newsletter.