
Article ID: kb00157Last Modified: 22-Aug-2024
Situation
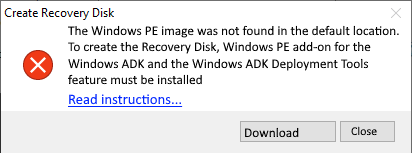
Upon a Recovery Disk creation, the following warning box pops up.
Cause
The occurrence of this warning means that some parts required for bootable USB drive creation are missed or damaged. To continue with the bootable USB drive creation, manually download the components required to create the bootable USB drive.
Generally, these components are:
- Windows Preinstallation Environment (Win PE)
- Deployment Tools of the Windows ADK
Windows PE (WinPE) is a small operating system used to install, deploy, and repair Windows desktop editions, Windows Server, and other Windows operating systems. With Windows PE, you can:
- Set up your hard drive before installing Windows
- Install Windows by using apps or scripts from a network or a local drive
- Capture and apply Windows images
- Modify the Windows operating system while it’s not running
- Set up automatic recovery tools
- Recover data from unbootable devices
- Add your own custom shell or GUI to automate these kinds of tasks
Solution
First, make sure about the Windows version you have. Note that this is important, since the instructions for downloading kits are different for different Windows versions.
To find out which version of Windows your computer is running, press the Windows logo key + R, type winver in the Open box, and then select OK.
Or use the alternative way:
- Click Start -> Settings -> System -> About.
- Under Device specifications -> System type, see if you are running a 32-bit or 64-bit version of Windows.
- Under Windows specifications, check which edition and version of Windows your device is running.
Windows 11
You can use the Assessment and Deployment Kit for Windows to install Windows 11 and Windows Server 2022.
- Download the Windows ADK for Windows 11.
- Download the Windows PE add-on for the Windows ADK for Windows 11.
Older Windows Versions
Choose the right ADK for your scenario: this is crucial.
If possible, use the ADK version that matches the Windows version you’re working with. If your environment has a mix of Windows versions, use the ADK version that matches the latest operating system in your environment.
If You Have More Than One Windows Version
- Windows PE
- You can use Windows PE to deploy earlier operating systems
- If you customize Windows PE, make sure to use the WinPE optional components that match the version of Windows PE you’re customizing
- Windows 11 is not available in a 32-bit architecture, so the 32-bit version of Windows PE for Windows 11 is not supported. The last supported 32-bit version of Windows PE is for Windows 10, and can’t be used to deploy Windows 11.
- Deployment tools
- Newer versions of the Deployment Tools can be used on versions of Windows that are older than the ADK version you’re using
- Other tools
- For USMT, WSIM, and the Assessment kit, use the versions from the ADK that match the OS you’re using the tools on
- For other tools, check the documentation to determine compatibility with the OS you’re working with

Hello dear visitor!
On this topic, I will show you how to download and install WindowsRE add-on for windows ADK Toolkit in Windows 11 or Windows 10, or windows 8.1 OS.
ADK stands for Windows Assessment and Deployment Kit, and WinPE or WindowsPE stands for Windows Preinstallation Environment. Both tools can be used together to customize Windows images, and to test the quality and performance of system, its components, and the apps running on it.
In Windows 10 version 1803 and older editions, WinPE was included in ADK setup, but in Windows 10 version 1809 or newer versions and in Windows 11, WinPE addon installation is separated from the ADK installation, however, in both cases it can’t be installed or used without ADK installation.
So, to install WindowsPE, you have to download and then install Windows ADK files first.
HOW TO DOWNLOAD ADK FILES FOR OFFLINE USE?
- Download adksetup.exe file using this direct link or from Microsoft official website using this link.
- The previous link is to download ADK setup file for Windows 11 version 22H2 or new versions.
- So if you have windows server, windows 10 or windows 8, download the applicable file to your system from this list.
- Open adksetup file to start downloading ADK files.
- If you want to install ADK on the same computer directly without keeping installation files, select this option: “Install Windows Assessment and Deployment Kit to this Computer”
- If you want to download and keep the required files for offline use, select this option: “Install Windows Assessment and Deployment Kit for installation on a Separate Computer‘
- This option option will download all required files for ADK toolkit without installation, so you can use them later as an offline installation on the same computer or on another computer.
- After that click Next to continue
- Click Accept option to continue
- This process will take several minutes according to your internet speed.
HOW TO DOWNLOAD WINPE SETUP FILES FOR OFFLINE USE?
- Download ADKWinPESetup.exe file using this direct link or from Official Microsoft website
- Note: Microsoft recommends to install WinPE that is the same or newer version than installed windows version. Don’t install older version to avoid incompatibility issue during image deployment processes.
- So if you have windows server, windows 10 or windows 8, download the applicable version according to your system from this list.
- Double click the downloaded file to start it
- Chose the second option if you have selected the same option with adksetup in previous part
- then click Next to continue
- Click Accept option to download Windows Preinstallation Environment (WinPE) files for offline use.
- If your internet connection is lost while downloading files, you will see this error message:
- “Setup cannot locate cab or MSI file or whatever is the file type that failed to download”.
- To fix that, close Setup and start it again, or download the lost file using IDM or another downloader as followings:
- Press Windows logo + R keys from keyboard to open Run tool
- Type this path and press Enter to open ADKWINPEADDONS Folder”
- %TEMP%\ ADKWINPEADDONS
- Open last log file and navigate to the end of file
- Locate the problematic URL and copy it
- Download the file using IDM or internet browser and memorize the downloading path
- Chose Locate Content on a Local Computer or a Network Share”, and navigate to the downloaded path to load the file.
- To fix that, close Setup and start it again, or download the lost file using IDM or another downloader as followings:
After finishing download process, you have to install both tools manually If you chose the second installation option on the first part of this topic. If you have selected the first option, you don’t need to apply the next part.
OFFLINE INSTALLATION:
HOW TO INSTALL WINDOWS ADK TOOLKIT OFFLINE IN WINDOWS 10 OR WINDOWS 11?
- Navigate to the folder in which you have saved ADK toolkit in first part of this topic
- The default path is on this path: “%USERPROFILE%\Downloads\Windows Kits\10\ADK\”
- Double Click adksetup.exe file to to start installation wizard.
- Select the first option to install Windows ADK on the running computer
- Select what features or toolkits to install if you want, otherwise, click Install icon to start installation process using default features and toolkits.
HOW TO INSTALL WinPE ADD-ON OFFLINE IN WINDOWS 10/11?
As state previously, Windows Preinstallation Environment (WinPE) Addon require ADK toolkit to be installed previously, otherwise, you will fail to install or to run WinPE in your computer.
- After installing Windows ADK successfully, back to ADKWINPEADDONS folder on this path:
- “%USERPROFILE%\Downloads\Windows Kits\10\ADKWinPEAddons\”
- Double-click ADKWinPESetup.exe file to run installation wizard
- Note: Close ADK or another setup window if any, before starting installation, to avoid appearance of this error message: ‘Setup is Already Running“.
- Follow on-screen options to install Windows Preinstallation Environment toolkit.
- To open WindowsPE, type Deployment into search box and then select Deployment and Imaging Tools Environment from search result to start the CMD tool’s console.
VIDEO:
For more details about WinRE and ADK online offline installation, watch this video to see everything step by step:
Please follow and like us:
Businesses that need to deploy Windows in a larger environment often require customization before they can go about their operations and processes. This large-scale deployment is carried out by IT professionals and system administrators on many computers using the toolset, known as the Windows Assessment and Deployment Kit, or simply, Windows ADK.
Microsoft Windows ADK is a collection of tools that you can combine to prepare, assess, and launch image-based large-scale Windows deployments. These tools are also used to test the operating system’s quality and performance, as well as the applications running on it.
The Windows Assessment and Deployment Kit was earlier known as the Windows Automated Installation Kit (WAIK).
Windows ADK can be deployed on a broad range of devices, such as desktops, notebooks, Internet of Things (IoT) devices, etc. This toolkit works across platforms that work with devices with and without screens.
Windows ADK was first introduced in Windows Vista and since then has always been available in the latest Windows operating systems. The tools currently available in Windows ADK have varied through the years, but currently, they include the following:
- Windows System Image Manager
- Windows Preinstallation Environment (WinPE)
- Deployment Image Servicing and Management tool (DISM)
The key advantage of using Windows ADK for IT teams is to apply different tools to test software, drivers, and hardware compatibility before finally moving to Windows 11 or 10.
The Application Compatibility Toolkit, for instance, lets developers and IT professionals test how 32 and 64-bit Windows applications work on a new operating system before the final installation. IT admins can also use Windows ADK to automate large-scale deployments of Windows.
Download Windows 10 and 11 ADK Versions
On a high level, Windows ADK has two different formats, which have their own versions. One format is reserved for Windows Insider Preview users. The other format is available publicly and can be downloaded via the Windows ADK page on Microsoft’s website.
The variant available publicly is usually around 2 MB in size and comes in different versions, where each new release of Windows ADK involves new features and product enhancements.
If you want to know about the version history, take a look at the list below:
| Windows ADK Versions | Download Links |
| Windows ADK for Windows 11 22H2 | Download ADK Download WinPE Addon |
| Windows ADK for Windows 11 21H2 | Download ADK Download WinPE Addon |
| Windows ADK for Windows 10 version 22H2 | Download ADK Download WinPE Addon |
| Windows ADK for Windows 10 version 21H2 | Download ADK Download WinPE Addon |
| Windows ADK for Windows 10 version 21H1 | Download ADK Download WinPE Addon |
| Windows ADK for Windows 10 version 20H2 | Download ADK Download WinPC Addon |
| Windows ADK for Windows 10 version 2004 | Download ADK Download WinPE Addon |
| Windows ADK for Windows 10 version 1909 | Download ADK Download WinPE Addon |
| Windows ADK for Windows 10 version 1903 | Download ADK Download WinPE Addon |
| Windows ADK for Windows 10 version 1809 | Download ADK Download WinPE Addon |
| Windows ADK for Windows 10 version 1803 | Download ADK |
| Windows ADK for Windows 10 version 1709 | Download ADK |
| Windows ADK for Windows 10 version 1703 | Download ADK |
| Windows ADK for Windows 10 version 1607 | Download ADK |
| Windows ADK for Windows Insider Preview | Download ADK |
The Windows Preinstallation Environment (WinPE) comes as a separate download from the Assessment and Deployment Kit (ADK), before Windows 10 version 1809. To add Windows PE to your ADK installation, you need to download and install the Windows PE add-on after installing the ADK.
When it comes to features, Windows 10 ADK allows you to select specific features at the time of installation. You can pick and choose the exact features you want to include in the toolkit. The options include:
- Application Compatibility Tools
- Deployment Tools
- Windows Preinstallation Environment (Windows PE)
- Imaging and Configuration Designer (ICD)
- Configuration Designer
- User State Migration Tool (USMT)
- Volume Activation Management Tool (VAMT)
- Windows Performance Toolkit
- Windows Assessment Toolkit
- Microsoft User Experience Virtualization (UE-V)
- Application Virtualization Sequencer (App-V)
- Microsoft Application Virtualization Auto Sequencer (App-V)
- Media experience Analyzer
In general, these features let you perform the following functions:
- Add product branding, applications, along with settings
- Keep Windows up to date with the latest updates, language packs, and drivers
- Look for and identify application compatibility
- Perform user data migration between Windows installations
- Manage bulk activation of Windows
How to Install Windows ADK
Since you can only install one version of Windows ADK at a time, you will need to uninstall any existing ADK installation before installing the new one.

Otherwise, you will need to install the new ADK using the command line for multiple ADK versions working on the same computer.
Follow these steps to install Windows ADK using the traditional method:
-
Download the correct ADK version from above.
-
Run the “adksetup.exe” file to start the installation.
-
Now select “Download the Windows Assessment and Deployment Kit for installation on a separate computer” and click Next.

Install ADK on a separate computer -
Select either Yes or No for Windows Kits Privacy and click Next.
Select privacy preferences -
Click Accept to agree to the licensing terms.
Accept license agreement The download process will now start.
-
Once downloaded, close the wizard.
Close the wizard


After the download process is complete, you can move the downloaded files onto the computer on which you want to install Windows ADK.
If you wish to install it on the current computer, then you must select the first option “Install the Windows Assessment and Deployment Kit on this computer” in Step 3 above and then select the components to install.

Download and Install WinPE Add-On
As discussed earlier in the article, starting with Windows 10 ADK version 1809, WinPE is no longer part of the ADK tool. If you wish to get WinPE, follow these steps to download and install the add-on:
Note: The minimum estimated disk space required is 6.0 GB for the WinPE add-on. Hence, it may take longer for the installation to finish than the ADK. The package includes Windows PE(x86), Windows PE (AMD64), Windows PE (ARM), and Windows PE (ARM64).
-
Begin by downloading the WinPE setup file from the links given above for your respective OS version.
-
Run the downloaded “adkwinpesetup.exe” file.
-
The rest of the process is the same as Windows ADK installation.
Windows ADK Validation
To confirm the Windows ADK installation on a device, follow these steps:
-
Open the Programs and Feature applet by typing in “appwiz.cpl” in the Run Command box.
Open Programs and Features -
Check that Windows ADK and Windows PE have been installed.

Windows ADK has been installed

Conclusion
In order to deploy Windows OS on a large scale, you need a Windows Assessment and Deployment Kit. This article covers the basics of the Windows ADK toolkit, its download links directly from Microsoft, and how to install it.
You can also use this tool and its add-on in conjunction with Windows Deployment Server to level up your automation and operations.
If you’re not aware of, Microsoft released Windows 11 image with some special requirements to be stricter followed. Check it out on the following link for better details: Windows 11 Specifications
Basically you’ll need:
- TPM (Trusted Platform Module), version 2.0
- Disk Encryption
Ok… so if you’re using VMware Horizon and need to install a VDI Image for your customer and having all VMs with the same vTPM chip and encryption data seems not to be a great idea, ins’t it? So how can you overcome this?
Follow me on the steps-by-steps I created to help you out during this task
Note: Created based on VMware approved method to create Golden Image + without vTPM, accordingly documented on https://kb.vmware.com/s/article/88320
Download Windows ADK / PE add-on
You will need to download the following softwares to create your image:
- Windows ADK
- Windows PE add-on for the Windows ADK
Link: https://docs.microsoft.com/en-us/windows-hardware/get-started/adk-install
Create Windows Virtual Machine to Build WinPE Image (Windows Server is recommended)
You need to create a Virtual Machine to be used as Assessment and Deployment Kit for creating your Windows 11 WinPE image
Suggested VM creation:
- Windows Server 2019 / 2022
- 2vCPU
- 4 GB RAM
- 40 GB Disk
Note: You can use a Windows 10 / 11 to install Windows ADK as well. I recommend using a Windows Server in order to have it working to future configuration we may have, like this documented in here: https://techzone.vmware.com/using-automation-create-optimized-windows-images-vmware-horizon-vms
Windows Assessment and Deployment Kit (ADK) – Install
After installing virtual machine, install Windows Assessment and Deployment Kit (ADK) following the pictures below:
Run ADKSetup as Administrator

Install the Windows Assessment and Deployment Kit

Click Next

Click Accept

Select the following features accordingly picture:

Installing Features

Don’t need to launch Getting Started. You can Close it

Windows Preinstallation Environment (PE) ADK Add-on – Install
Now install Windows Preinstallation Environment (PE) ADK Add-on on the same virtual machine, following the pictures below:
Run ADKWinPeSetup as Administrator

Select install the Windows Assessment and Deployment Kit Windows Preinstallation Environment Add-ons

Click on Next

Accept License Agreement

Select the following feature accordingly picture:

Installing features

Press Close after installation is completed

Configuring Virtual Machine
You’ll need to create 3 directories as it follows:
C:\test\mount\ – used as the mount directory of WinPE image
C:\test\drivers\ – (optional) contains the drivers files
C:\test\scripts\ – contains the scripts
Folders created into Virtual Machine

Open Deployment and Imaging Tools Environment running as administrator:
Opening Deployment and Imaging Tools Environment

Once open, type the following command to create C:\test\winpe as working directory of WinPE.
copype amd64 c:\test\winpeSet Working Directory


Execute this command to mount WinPE image in directory C:\test\mount\:
dism /Mount-Image /ImageFile:C:\test\winpe\media\sources\boot.wim /index:1 /MountDir:C:\test\mount\Mount Operation Completed Successfully

Note: In case you have problems and need to unmount images, you can use the following commands (only if you need to unmount):
dism /Unmount-Wim /Mountdir:C:\test\mount\ /commitor
dism /Unmount-Image /MountDir:C:\test\mount\ /discardor
dism.exe /Cleanup-MountpointsDownload Script files from KB or get them from my GitHub account and add them into c:\test\scripts:
https://github.com/valcesia/Windows/tree/main/Horizon/Windows11
Note: I strongly recommend not using Unattend.xml file for this image creation, so you can see how process will work.
Folder structure created on your Windows Server

Execute the following commands:
cd c:\test\scripts
copy startnet.cmd C:\test\mount\Windows\System32\
copy deploy.cmd C:\test\mount\
copy CreatePartitions-UEFI.txt C:\test\mount\
Create PVSCSI driver files
- Download latest VMware Tools from: https://packages.vmware.com/tools/releases/latest/windows
- Mount ISO into your Virtual Machine
Mounted ISO on Virtual Machine

- Execute the following command (check whether you have your VMware Tools ISO into E: drive, which is my case in here):
copy "E:\Program Files\VMware\VMware Tools\Drivers\pvscsi\Win10\amd64\" C:\test\drivers\Copied files after command successfully run

Files structure on Windows Server

- Add VMware PVSCSI driver or other drivers to WinPE image by executing this command:
dism /image:C:\test\mount\ /add-driver /driver:C:\test\drivers\ /RecurseDriver package successfully installed

- Commit the changes and unmount the image, then create the WinPE ISO fille:
dism /Unmount-Image /Mountdir:C:\test\mount\ /commitImage Servicing and Management Tool operation completed

MakeWinPEMedia /ISO C:\test\winpe C:\test\WinPE_amd64.isoCreate WinPE Media as a final Step

Save WinPE_amd64.iso file to be used into your Windows 11 VM.
Create a Virtual Machine on your VMware Workstation / VMware Fusion
Let’s create now a virtual machine to be our Windows 11 Image and use this VM into your VMware Horizon environment.
Note: If you didn’t, download Windows 11 image file from Microsoft Software Download:
- https://www.microsoft.com/en-us/software-download/windows11
Select the Windows 11 Download Media from Microsoft Software Downloads page


After you download it, let’s create a virtual machine using your VMware Workstation / Fusion.
Click on New

Click or Drag your Windows 11 ISO image downloaded from Microsoft page


Create it as Windows 10 and later x64

Select Firmware Type as UEFI

Important: Click on Customize Settings before moving on. We need to make some adjustments

Save as Windows 11 Image

Let’s make the following changes:
- Configure Virtual Machine to 4 GB (4096 MB)

- Reduce the Virtual Disk size to 20 GB (enough for testing purpose)

- Add Device

- Add another CD/DVD Drive (Yeah, you read it right!)

- Add WinPE Image on CD/DVD 1 (the one you created before)
- Add Windows 11 image on CD/DVD 2


After that, start up your virtual machine

If everything works, you’ll see information to Press any key to boot from CD or DVD

Press any key
You can select the best Windows 11 image for your desire. For now, let’s move on using Windows 11 Pro (Index 6).

After pressing 6 on your keyboard, Windows 11 will start install using DISM (Deployment Image Servicing and Management tool

Your virtual machine will reboot and start installing Windows 11 for you

Note: You can use Unattended.xml file which is present at VMware KB (https://kb.vmware.com/s/article/88320). If that’s the case, you’ll need to use a FromBase64String Powershell cmdlet to know which password you’re setting this up. Be aware of this!
# Decoding Base64 Password to Plain Text
$Base64 = "dgBtAHcAYQByAGUAMQAwADAAJQBPAEsA"
[System.Text.Encoding]::Unicode.GetString([System.Convert]::FromBase64String($Base64))
From this point on, you just need to configure your virtual machine using the username / password, country / region, etc.

After you have your image done. You can configure the following ones using Windows 11 requirements, which are written on this URL: https://docs.microsoft.com/en-us/windows/whats-new/windows-11-requirements .
- Processor: 1 gigahertz (GHz) or faster with two or more cores on a compatible 64-bit processor or system on a chip (SoC).
- RAM: 4 gigabytes (GB) or greater.
- Storage: 64 GB* or greater available storage is required to install Windows 11.
- Extra storage space might be required to download updates and enable specific features.
- Graphics card: Compatible with DirectX 12 or later, with a WDDM 2.0 driver.
- System firmware: UEFI, Secure Boot capable.
- TPM: Trusted Platform Module (TPM) version 2.0.
- Display: High definition (720p) display, 9″ or greater monitor, 8 bits per color channel.
- Internet connection: Internet connectivity is necessary to perform updates, and to download and use some features.
- Windows 11 Home edition requires an Internet connection and a Microsoft Account to complete device setup on first use.
I wish this helps you on your Windows 11 Image creation!
Enjoy the ride, cheers!
-
Home
-
News
- Download and Install Windows ADK for Windows [Full Versions]
By Daisy | Follow |
Last Updated
When you try to provision Windows 11/10, you need the corresponding version of Windows ADK (Windows Assessment and Deployment Kit) to help you finish the task. This post from MiniTool teaches you how to download and install Windows ADK.
What Is Windows ADK
What is Windows ADK? Windows ADK is the abbreviation of Windows Assessment and Deployment Kit. The Windows ADK was originally introduced in Windows Vista and has been available in the latest Windows operating system versions ever since.
Windows ADK is a set of tools that can be used to prepare, assess, and launch large-scale image-based Windows deployments. These tools are also used to test the quality and performance of the operating system and the applications.
Windows 10 ADK can be deployed on many devices, such as desktops, laptops, and Internet of Things (IoT) devices. Windows ADK toolkit is available for platforms that can be used with both screened and screenless devices.
When you download and install Windows ADK, there are other tools you can choose:
- Windows Performance Toolkit
- Windows Assessment Toolkit
- Windows Preinstallation Environment (Windows PE)
- Application Compatibility Tools
- Deployment Tools
- Imaging and Configuration Designer (ICD)
- Configuration Designer
- User State Migration Tool (USMT)
- Microsoft User Experience Virtualization (UE-V)
- Application Virtualization Sequencer (App-V)
- Microsoft Application Virtualization Auto Sequencer
How to Download Windows ADK for Windows 11/10
Windows ADK has two formats – one is for Windows 11/10 Insider Preview users and the other one is public and all users can download it via the Windows ADK page on Microsoft’s website according to their operating system version.
Note:
1. Starting with Windows 10 version 1809, the Windows Preinstallation Environment (PE) is released separately from the ADK.
2. Starting with ADK version 22H2 for Windows 11, the 32-bit version of Windows PE is no longer included in the Windows PE add-in.
3. The last supported 32-bit version of Windows PE is available in the Windows PE Add-in for Windows 10, version 2004.
How to download Windows ADK? You can download it from the following sheets based on your operating system version.
| Windows Version | Download Link |
| Windows 11 |
|
| Windows 10 version 2004 |
|
| Windows 10 version 1903 |
|
| Windows 10 version 1809 |
|
| Windows 10 version 1803 | Windows ADK Windows 10 version 1803 |
| Windows 10 version 1703 | Windows ADK Windows 10 version 1703 |
| Windows 10 version 1603 | Windows ADK Windows 10 version 1603 |
How to Install Windows ADK for Windows 11/10
After downloading Windows ADK, you need to install Windows ADK for Windows 11/10. This part introduces how to do that:
Step 1: Find the Windows ADK exe file and double-click it to start the installation.
Step 2: There are 2 options for you to install ADK:
- Install Windows Assessment and Deployment Kit on this computer
- Download the Windows Assessment and Deployment Kit for installation on a separate computer
Step 3: Select the second option to download Windows ADK offline.
Step 4: On the Windows kits privacy page, click Yes to allow Microsoft to collect insights for the Windows Kits.
Step 5: Accept the license agreement and click Next. Then, it will start the installation.
About The Author
Position: Columnist
Having been an editor at MiniTool since graduating college as an English major, Daisy specializes in writing about data backups, disk cloning, and file syncing as well as general computer knowledge and issues. In her free time, Daisy enjoys running and going with friends to the amusement park.