
Скачать PuTTY: Русская версия
Русскоязычная сборка PuTTY 0.73-RU-17 от 21 декабря 2019:
| Обычная версия: | putty-0.73-ru-17.zip |
| Портативная версия: | putty-0.73-ru-17-portable.zip |
| PuTTY: | putty.exe |
| PuTTY Portable: | putty_portable.exe |
| PSCP: | pscp.exe |
| PSFTP: | psftp.exe |
| Plink: | plink.exe |
| Pageant: | pageant.exe |
| PuTTYgen: | puttygen.exe |
| Исходный код: | putty-0.73-ru-17-src.zip |
| Контрольные суммы: | sha256sums |
Стабильный релиз PuTTY 0.82 от 27 ноября 2024. Скачать официальную версию Telnet/SSH клиента:
64-разрядная версия:
| Инсталлятор: | putty-64bit-0.82-installer.msi | (цифровая подпись) |
| Архив Zip: | putty.zip | (цифровая подпись) |
| PuTTY: | putty.exe | (цифровая подпись) |
| PSCP: | pscp.exe | (цифровая подпись) |
| PSFTP: | psftp.exe | (цифровая подпись) |
| Plink: | plink.exe | (цифровая подпись) |
| Pageant: | pageant.exe | (цифровая подпись) |
| PuTTYgen: | puttygen.exe | (цифровая подпись) |
| PuTTYtel: | puttytel.exe | (цифровая подпись) |
| PTerm: | pterm.exe | (цифровая подпись) |
| Контрольные суммы: | md5sums | (цифровая подпись) |
| sha1sums | (цифровая подпись) | |
| sha256sums | (цифровая подпись) | |
| sha512sums | (цифровая подпись) |
32-разрядная версия:
| Инсталлятор: | putty-0.82-installer.msi | (цифровая подпись) |
| Архив Zip: | putty.zip | (цифровая подпись) |
| PuTTY: | putty.exe | (цифровая подпись) |
| PSCP: | pscp.exe | (цифровая подпись) |
| PSFTP: | psftp.exe | (цифровая подпись) |
| Plink: | plink.exe | (цифровая подпись) |
| Pageant: | pageant.exe | (цифровая подпись) |
| PuTTYgen: | puttygen.exe | (цифровая подпись) |
| PuTTYtel: | puttytel.exe | (цифровая подпись) |
| PTerm: | pterm.exe | (цифровая подпись) |
| Контрольные суммы: | md5sums | (цифровая подпись) |
| sha1sums | (цифровая подпись) | |
| sha256sums | (цифровая подпись) | |
| sha512sums | (цифровая подпись) |
Регулярная тестовая сборка PuTTY собирается каждый день из Git-репозитория.
Нашли ошибку в стабильной версии и ждёте её исправления? Можно рассчитывать, что здесь этот фикс появится намного раньше, чем выйдет следующий релиз. Эта версия для вас, если вам не терпится опробовать все нововведения раньше остальных. С другой стороны, тестовые сборки иногда могут получиться крайне нестабильными.
64-разрядная версия:
| Инсталлятор: | putty-64bit-installer.msi | (цифровая подпись) |
| Архив Zip: | putty.zip | (цифровая подпись) |
| PuTTY: | putty.exe | (цифровая подпись) |
| PSCP: | pscp.exe | (цифровая подпись) |
| PSFTP: | psftp.exe | (цифровая подпись) |
| Plink: | plink.exe | (цифровая подпись) |
| Pageant: | pageant.exe | (цифровая подпись) |
| PuTTYgen: | puttygen.exe | (цифровая подпись) |
| PuTTYtel: | puttytel.exe | (цифровая подпись) |
| PTerm: | pterm.exe | (цифровая подпись) |
| Контрольные суммы: | md5sums | (цифровая подпись) |
| sha1sums | (цифровая подпись) | |
| sha256sums | (цифровая подпись) | |
| sha512sums | (цифровая подпись) |
32-разрядная версия:
| Инсталлятор: | putty-installer.msi | (цифровая подпись) |
| Архив Zip: | putty.zip | (цифровая подпись) |
| PuTTY: | putty.exe | (цифровая подпись) |
| PSCP: | pscp.exe | (цифровая подпись) |
| PSFTP: | psftp.exe | (цифровая подпись) |
| Plink: | plink.exe | (цифровая подпись) |
| Pageant: | pageant.exe | (цифровая подпись) |
| PuTTYgen: | puttygen.exe | (цифровая подпись) |
| PuTTYtel: | puttytel.exe | (цифровая подпись) |
| PTerm: | pterm.exe | (цифровая подпись) |
| Контрольные суммы: | md5sums | (цифровая подпись) |
| sha1sums | (цифровая подпись) | |
| sha256sums | (цифровая подпись) | |
| sha512sums | (цифровая подпись) |
Доступна официальная версия PuTTY для ARM-устройств под управлением Windows — перейти на страницу загрузки.
PuTTY можно найти в репозиториях практически всех популярных дистрибутивов. Например, для установки PuTTY на Ubuntu, Debian, Linux Mint, ALT Linux, достаточно выполнить команду:
sudo apt-get install putty
PuTTY на OS X можно установить из портов через системы сборки MacPorts и Homebrew — подробнее в статье.
Для удобства предоставлено несколько версий исходного кода, для различных платформ. Фактически, нет существенной разницы между архивами исходников для Unix и Windows; различия находятся главным образом в форматировании (имена файлов, окончания строк, и т.д.).
Если вы хотите внести свой вклад в разработку PuTTY, мы настоятельно рекомендуем начать с исходного кода Development Snapshot.
Исходный код PuTTY для Windows:
Для получения дополнительной информации о компиляции PuTTY из исходников, читайте файл README.
Исходный код PuTTY для Linux:
Для сборки исходников release-версии, распакуйте архив, перейдите в директорию unix, и выполните команду:
make -f Makefile.gtk
Для сборки snapshot-исходников достаточно запустить стандартные:
./configure && make
Для дополнительной информации читайте файл README.
Доступ к Git
Если вы хотите следить за развитием PuTTY вплоть до минуты, или посмотреть журнал изменений для каждого файла в базе исходников, вы можете получить доступ напрямую к git репозиторию PuTTY.
Версию исходников master (последнее состояние, с самыми свежими изменениями) можно получить используя команду:
git clone https://git.tartarus.org/simon/putty.git
Также по адресу https://git.tartarus.org/?p=simon/putty.git доступен WWW браузер по репозиторию Git.
Юридическое предупреждение:
Использование PuTTY, PSCP, PSFTP и Plink может оказаться незаконным в тех странах или организациях, где шифрование полностью или частично запрещено. Полагаем, что на данном этапе развития законодательной базы в сфере IT в России и русскоязычных странах, использование применяемых протоколов шифрования не противоречит законам, но мы не юристы, и поэтому, если у вас есть сомнения, вы должны обратиться за юридической помощью прежде, чем загрузить что-либо с этого сайта.
Использование отдельного Telnet-клиента PuTTYtel не ограничено законами о криптографии, так как данные в нём не шифруются.
Package Files
You probably want one of these. They include versions of all the PuTTY utilities (except the new and slightly experimental Windows pterm).
MSI (‘Windows Installer’)
Unix Source Archive
Alternative Binary Files
putty.exe (the SSH and Telnet client itself)
pscp.exe (an SCP client, i.e. command-line secure file copy)
psftp.exe (an SFTP client, i.e. general file transfer sessions much like FTP)
Read the PuTTY Guide Now!
puttytel.exe (a Telnet-only client)
plink.exe (a command-line interface to the PuTTY back ends)
pageant.exe (an SSH authentication agent for PuTTY, PSCP, PSFTP, and Plink)
puttygen.exe (a RSA and DSA key generation utility)
pterm.exe (a PuTTY-style wrapper for Windows command prompts)
putty.zip (a .ZIP archive of all the above except PuTTYtel and pterm)
Read the PuTTY Guide Now!
System Requirements for Windows
- Operating System: PuTTY is compatible with all versions of Windows, including Windows 10, 8, 7, Vista, XP, and Windows Server editions.
- Processor: Any modern x86 or x86-64 processor should work well with PuTTY.
- Memory: Minimal memory requirements; PuTTY is lightweight and doesn’t consume much RAM.
- Disk Space: Very little disk space is needed for the PuTTY executable and configuration files.
Download and Install PuTTY for Windows
- Look for the Windows installer package suitable for your system architecture (32-bit or 64-bit) and click on the download link.
- Save the installer file to a location on your computer.
- Once the download is complete, locate the installer file and double-click on it to start the Installation process.
- The PuTTY installer wizard will open. Click “Next” to proceed.
- Read and accept the license agreement, then click “Next“.
- Choose the destination folder where you want to install PuTTY or leave the default location as is. Click “Next”.
- Select the components you want to install. By default, all components are selected. If you’re unsure, it’s recommended to leave the default selection. Click “Next”.
- Choose the start menu folder where shortcuts for PuTTY will be created. You can either leave the default name or enter a custom name. Click “Next”.
- Select the additional tasks you want the installer to perform, such as creating desktop icons or adding PuTTY to the system PATH. Make your selections and click “Next”.
- Review your installation settings on the summary screen, and if everything looks correct, click “Install” to begin the installation process.
- Wait for the installation to complete. You will see a progress bar indicating the installation progress.
- Once the installation is finished, you will see a “Completing the PuTTY Setup Wizard” screen. Make sure the “Start PuTTY now” option is checked and click “Finish”.
- PuTTY should now be installed on your Windows system. You can launch it by locating the PuTTY shortcut in the start menu or desktop.
WinSCP 6.5.1
WinSCP — удобный в использовании инструмент для защищенного копирования файлов между…
PuTTY 0.82
Putty – бесплатный Telnet/SSH клиент. Это клиентская программа для протоколов SSH и Telnet, SCP и SFTP, утилита для генерации RSA и DSA ключей, и многое другое…
FileZilla 3.69.1
FileZilla — Один из лучших, бесплатный FTP-менеджер, предназначенный для загрузки и скачивания…
KiTTY 0.76.1.13
KiTTY — модификация популярнейшего Telnet-SSH-клиента PuTTY, но с некоторыми улучшениями и оптимизациями для более удобной и продуктивной работы…
SecureCRT 9.6.2.3540
SecureCRT — Win32 эмулятор терминала, позволяющий производить соединения с компьютером в…
ZOC 7.11.3
ZOC — терминальная программа. Возможности: соединение через модем, telnet, SSH, Unix Rlogin; передача…
PuTTY is a popular SSH, Telnet, and SFTP client for Windows. It is typically used for remote access to server computers over a network using the SSH protocol. This is the download page.
For more information on PuTTY, see the PuTTY page. For information on SSH (Secure Shell), see here. For information on Telnet, see here. For information on SFTP secure file transfers, see here.
Download PuTTY installation package for Windows
Master download site
Simon Tatham publishes new PuTTY versions on his personal home page.
Installation and setup instructions
-
Installation instructions for Windows
-
Setting up public key authentication using PuTTYgen
Verifying release signatures
The releases are signed with GPG, using the PuTTY release key.
To verify the signatures, you need the gpg tool. On Debian-based Linux, it can be installed with aptitude install gnupg. On Red Hat 7, it can be installed with yum install gnupg2.
To import the signature key into GPG, use:
gpg --import putty-release-2015.ascTo check the signature of a file, use:
gpg --verify <signaturefile> <datafile>For example:
gpg --verify putty-64bit-0.69-installer.msi.gpg putty-64bit-0.69-installer.msiPackage contents: putty.exe, puttygen.exe, psftp.exe, pscp.exe, pagent.exe
The installation package includes putty.exe, puttygen.exe, psftp.exe, pscp.exe, and pagent.exe.
putty.exe is the main executable for the terminal client. It can also be used standalone, without the installation package, by simply copying the executable to a USB stick and running it on a new machine. This way, the user can carry the executable with them. However, this should not be assumed to provide great security — malware on the machine where it is used can still compromise the software (cf. CIA hacking tool bothanspy) and viruses may get installed on the USB stick whenever it is inserted in a new machine.
puttygen.exe is can be used for generating SSH keys on Windows. See the separate puttygen page on how to create and set up SSH keys with it.
psftp.exe is an SFTP file transfer client. It only works on the command line, and does not support graphically dragging and dropping files between systems. See Tectia SSH if you’d like that functionality.
pscp.exe is a command line SCP client.
pagent.exe is an SSH agent for PuTTY. Keys are first created with puttygen.exe and can then be loaded into pagent for automating logins and for implementing single sign-on.

Alternatives
For other SSH clients and comparison, see the SSH clients page. Several more modern alternatives are available.
Server for Windows or other platforms
You don’t need to worry about a server if you are going to connect to a school or work server. However, if you are planning to use PuTTY to log into your own systems, then you may need to install and enable a server.
Most Linux and Unix systems come with OpenSSH preinstalled. On some distributions, you may need to install the server. On Debian-derived systems, the following will install the server:
sudo aptitude install openssh-serverOn Red Hat systems, the following will install the server:
sudo yum install openssh-serverDepending on the system, you may also need to start the server if you don’t want to reboot. The following should work on most systems:
sudo service sshd restartFor Windows, the Tectia SSH is a popular choice and comes with commercial support services. It also runs on IBM z/OS mainframes. Unix/Linux are available with support for business-critical applications.
SSH key management needs attention
SSH is often used with public key authentication to implement automation and single sign-on.
Public key authentication uses a new kind of access credential, the SSH key, for authentication. It is much more secure than traditional password authentication, especially compared to hard-coded passwords in scripts, but the keys need proper management.
Most organizations with more than a hundred servers have large numbers of SSH keys. Usually, these keys have not been properly managed and audited. An SSH risk assessment is recommended. Organizations should consider deploying key management software to establish proper provisioning, termination, and monitoring for key-based access.
Risks of unmanaged SSH keys include uncontrolled attack spread across the server infrstructure, including to disaster recovery data centers and backup systems.
Organizations should also be aware of security risks related to SSH port forwarding. It is a technology that has many good uses, but it can also enable unfettered access across firewalls. Employees and attackers can leave tunnels back into the internal network from the public Internet. This particularly affects organizations using cloud computing services.

Using telnet is not recommended
In addition to SSH, the PuTTY can be used as a telnet client. Telnet is insecure. Its use is not recommended.
The main problem with telnet is that it transmits all passwords and any transmitted data in the clear. Anyone with access to any computer on the same network can steal user names and passwords that are transmitted. Such password sniffing attacks were very common on the Internet already in the 1990s.
Telnet sessions can also be hijacked in the network. Attackers can inject their own commands into telnet sessions. Protection from such attacks was the main reason why Tatu Ylonen developed SSH as a replacement for telnet in the first place. Use of telnet has not been recommended for 20 years.
SFTP file transfer support
File transfer support is implemented as a separate program, PSFTP. It is available only as a command-line tool. There is no graphical user interface for file transfers.
SCP file transfers are supported via the PSCP program. This is also command-line only.
Modern implementations, such as Tectia SSH, have integrated file transfers in the terminal client.
Screenshots
PuTTY terminal window

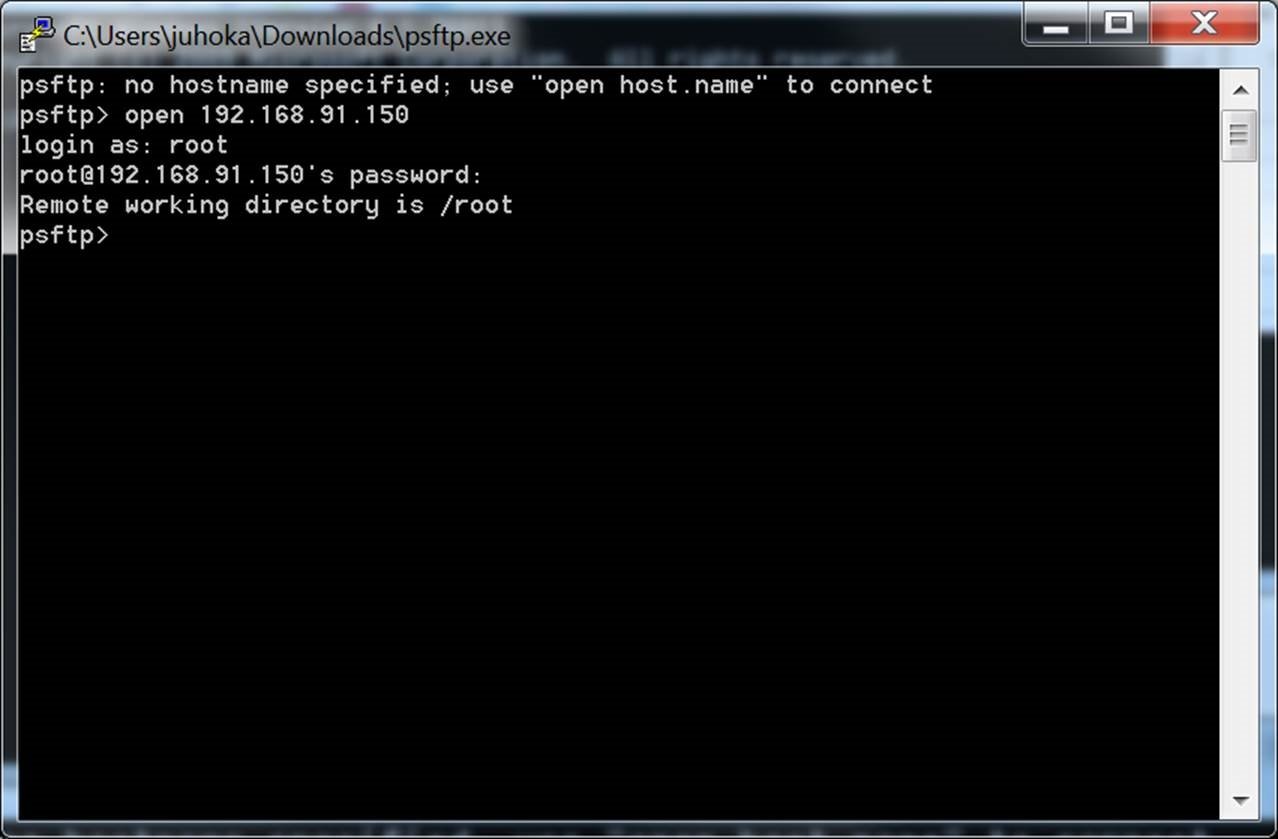
PSFTP command line Use
Now, you can easily install PuTTY with the PuTTY.msi package. There is no need for separate downloading. You can easily install and run the PuTTYgen very quickly once you download the PuTTY software.
Please note: Command-line adaption SSH commands are available for Linux operating system, and for Windows, the puTTYgen.exe is the software interface.
Download PuTTY (0.77) LATEST
Download MSI (‘Windows Installer for PuTTY’)
Unix source archive
Download PuTTY (0.76)
Download MSI (‘Windows Installer for PuTTY’)
Unix source archive
Download Alternative Binary Files for PuTTY (Windows)
putty.exe (the SSH and Telnet client itself)
pscp.exe (an SCP client, i.e. command-line secure file copy)
psftp.exe (an SFTP client, i.e. general file transfer sessions much like FTP)
puttytel.exe (a Telnet-only client)
plink.exe (a command-line interface to the putty back ends)
pageant.exe (an SSH authentication agent for putty, PSCP, PSFTP, and Plink)
puttygen.exe (a RSA and DSA key generation utility)
putty.zip (a .ZIP archive of all the above)
Important Note: You can download it for 32 bit and 64 bit. For the 64-bit operating system, install the 64-bit version of PuTTY, i.e., putty-64bit–installer.msi, and for the 32-bit operating system, the 32-bit version of PuTTY, i.e., putty–installer.msi, has to be installed.
Download PuTTY For Windows
Simon Tatham develops PuTTY to connect the servers. It offers the facility of files transferring, manipulating data, etc.SSH, Telnet, SCP, SFTP, and Serial, etc., are the various network protocol supported by it. “psftp’ is a command-line tool that helps transfer a file securely between computers over SSH connections.
The operating systems supported by PuTTY are as follows:
- Windows 95, 98
- Windows ME, NT
- Windows 2000, 2003, 2008
- Windows XP
- Windows Vista
- Mac OSX
Installing PuTTY on Windows (Step-By-Step)
After downloading PuTTY for windows, follow the installation step for PuTTY software. Download the .msi file by double click on it and begin the setup process.

Step 1: First Click on Next.

Step 2: Select the Installation Path.

Step 3: Select the product feature and click on Install button.

Step 4: Click on finish to complete the setup and close the dialog box.
Installation: Using SSH in PuTTY (Windows)
PuTTY Configuration
After installation, navigate the folder’s location where you have installed the application and run the .exe file.
Download PuTTY For MacOS
First, install the PuTTY, then you can run PuTTYgen on Mac. From the top menu, go to Finder and opt for Go → utilities. Then search the terminal, which supports SSH connections to remote servers. Various multiples options are available to install PuTTY, which is Mac Port. The command-line option can install it.
Installation: SSH with MacOS Terminal
- Go to finder → application menu → utilities and find the terminal. A small screen will open put the log into the doc by alternate or control-click on the terminal.
- Click the option “keep in Doc”. Get the terminal
- There are two ways for word circle. You can add the SSH comment into the terminal directly or go to the Menu bar → Shell → “New Remote Connection”. The New Remote connection window will open with various options.
- Select the secure shell option → add a new address
- For remote type, access types, the globe IB, and it stores the user account carefully. If you forget the login choose the server for SSH and enter the user name.
- Click the “connect button” and a new window will open. It will ask for the passwords. Please do not do any abstract with a password and do follow it and write the password. Enable the colors for the directory by simple modifications in the profile information.
- The command for the bash file
cp.bash_profile bash_profile_backup
- Edit the file by the following command and press the enter button.
vi.bash_profile
- Window open, and the colors actually coming in color-coded.
- If you want to specify, the color go to the work terminal window and give the following command.
Is **colors
bash_profile_backup message.txt public.html
- The next command
Is vi.bash_profile
- If you want to edit the text *Enabling colors with this command*
Alias is="Is - - color"
Escape key
- The command prompt will open and give the command.
Is exit
- Click on Connect button of the New Remote Connection Windows.
- Give the alias command to see the color option.
Is – l command
How to Install PuTTY on MacOS?
There are four steps to install putty on Mac operating system. To use PuTTY, the user needs to install the following application on macOS.
Install PuTTY Using Homebrew
You can install ported PuTTY for Mac with the help of Homebrew.
The steps to install PuTTY using Homebrew are as follows:
- Install MacPorts.
- Command-line to install PuTTY.
sudo brew install putty
Install PuTTY Using Command-line Tool
Tool packages are available under Unix Toolkit, which facilitates the utilities, tools, compiler (GCC, Perl, svn, git ), etc. By default, many commands are available on the Linux installation.
- Move to the Apple developer website.
- Download section → Login
- Search for command Lines Tools.
- Install .dmg file.
Install PuTTY using Xcode
IDE supports the source codes for the various programming languages like C, C++, Java, etc., its tools help develop the software of MAC OS and many more.
Steps to Install Putty using Xcode are as follows:
- In Application/Utilities, find the terminal to be launch.
- Type Command string for install:
xcode-select –install
- Click Install at the pop-up window.
- Agree with the Terms of services to Install Xcode
- Wait for the Command Line Tools package download.
- The installer goes on its own to complete it.
Note: Directory where complete command-line tool package gets placed:
/Library/Developer/CommandLineTools/
Note: There are many ways to install Putty on Mac. For SSH clients, the Cyber-Duck is widely used for Mac OS. Users can convert the PuTTY derived key format into Open SSH once PuTTY is installed on the Mac OS.
The private key can be converted into the Standard PEM Format by the following command or convert .pem file to .ppk using PuTTY:
privatekey.ppk -O private-openssh -o privatekey.pem
Install PuTTY Using MacPorts
It is open-source software, and one can install few packages by giving the command in the terminal. Play a significant role in simplifying the installation of other software. Dependencies related to the software can be installed automatically. You can save preferences and connections easily to connect to the server.
Steps to install PuTTY using MacPorts:
- Install → Xcode.
- From Apple Account → Install Command Line Tools.
- Application/Utilities → Launch the terminal.
- Type the following command:
Xcode-select –install
- Download+ install Quartz.
- Download + install MacPorts.
sudo port -v selfupdate
- Type the following command:
sudo port install putty
- terminal → Type
PuTTY
- create a shortcut :
cp/opt/local/bin/putty ~/Desktop/PuTTY
Download PuTTY for Ubuntu (Linux)
Users should install the PuTTY first to download the PuTTYgen for Ubuntu(Linux) OS. PuTTYgen needs to be installed from the PuTTY client in some Linux distributions for the SSH key generation tool.
How to use PuTTY on Ubuntu (Linux)
You can understand how to use PuTTY on Linux with the example of Debian Linux. It required the following code to install the PuTTY key generator.
sudo apt install putty-tools
For Authentication in Linux Generate PuTTY Key Pair use the following command:
puttygen -t rsa -b 2048 -C "user@host" -o keyfile.ppk
Steps to Connect The SSH (PuTTY) to Access The 123 Reg Linux VPS Server
There are four steps to connect, which is as follows:
- Open the putty and enter the Hostname and IP Address in the mentioned field. The default port is 22. To open the command line windows, click on the Open button.
- Type the SSH user name at the login as a prompt in the command line window and press the enter key
- Type in the SSH password at the login as prompt in the command line window and press the enter key.
- By SSH access, you can be logged into your VPS server.
Various Command Line Options of PuTTY in Linux
Linux operating system has a few important commands for PuTTY, which is as follows:
PuTTYgen [-t keytype [-b bits] [-q] | key file]
[-C new-comment] [-P]
[-O output-type | -p | -l | -L]
[-o output-file]
Options:
Linux Operating System Commands
| Commands | Description |
|---|---|
| Keyfile | The name of the existing file and used to read when changing the current key. |
| –t keytype | RSA and dsa.rsa1 are its acceptable value, and it specifies the type of key to create. |
| –b bits | Command specify the total number of bit in a particular key. For the DSA key, the size is 1024, and for RSA, the size can be 2048 or 4096. |
| –q | Suppress the message which is about to progress at the time of key generation. |
| –c new-comment | Used for new and/or existing key and specify the comment to describe the key. It is not considered very reliable since any value can be applied for it. |
| –p | Passphrase of the key can be updated. Update or add on the command line not updated by the passphrase. To a new passphrase, a tool is used to prompt it. Passphrase helps to encrypt the private key. |
| –old-passphrase-file | Command is used when the passphrase protects the key, and the old password remains in the file. |
| –new-passphrase-file | Prompts the new passphrase of the key. |
| –O output-type | By default, the private key is the output. |
All the above command is used for the Putty in Linux OS. Many other commands are available to perform multiple tasks from the command prompt in Linux at flank speed.