
BootCamp — use TouchID to unlock Windows 10 on Macbook Pro
Dear community!
As far as I understand, this problem exists for more than 2 years, after release of new MacBooks in 2016.
For now, what situation do I have: I want to change my current laptop, and I thought for a really long time towards MacBook Pro (and still I do same)… but. A few days ago I found on a net dozens of posts, where people, which use Windows as their main OS and have switched to Macbook, have problems with logging to Windows using Touch ID (Windows Hello). And, as I understood, BootCamp does not provide such functionality, and no one, which use Macbook Pro with Windows 10 cant login using Touch ID. And, as for me, it’s really terrible when you buy very expensive brand device and you can’t just log into OS with your finger (not writing a password). It’s really faster, more secure and better. Actually, I dont want to buy any other Windows laptop, because I really love functionality and abilities of Macbook Pro. But, I want to stay secure with my new notebook.
So, here’s the question: how can I do that? How can I log into a Windows on a Macbook Pro with TouchID? Does Apple provide any solution to this problem? Does any drivers or apps exists for Windows, which provide TouchID work with Windows Hello, as on any other Windows laptop? Thank you!
MacBook Pro TouchBar and Touch ID,
Windows 10
Posted on Nov 4, 2018 4:16 AM
Posted on Nov 5, 2018 6:56 PM
Многие современные ноутбуки имеют встроенный сканер отпечатков пальцев, а Windows 10, в свою очередь — встроенную поддержку входа в систему по отпечатку. Обычно, первоначальная настройка осуществляется после первого входа в систему на новом устройстве, но, если вы переустановили Windows, вход по отпечатку перестал работать после обновления или вам потребовалось добавить дополнительные отпечатки, сделать это можно в соответствующих параметрах системы.
В этой простой инструкции подробно о том, как настроить вход по отпечатку пальца, добавить отпечатки и о возможных проблемах, с которыми можно столкнуться в процессе.
- Настройка входа по отпечатку пальца
- Как добавить отпечаток пальца Windows 10
- Что делать, если перестал работать сканер отпечатка пальца
Настройка входа по отпечатку пальца в Windows 10
Внимание: далее предполагается, что сканер отпечатков пальцев исправно работает, а в Windows 10 уже настроен ПИН-код (настраивается в Параметры — Учетные записи — Варианты входа), он необходим для использования входа с помощью биометрических датчиков в Windows 10.
Если ранее вы не настраивали вход с использованием отпечатка пальца, то выполнить первоначальную настройку (при условии, что сканер работает), можно с помощью следующих шагов:
- Зайдите в «Параметры» (можно нажать клавиши Win+I) и откройте пункт «Учетные записи».
- В параметрах учетных записей откройте пункт «Варианты входа».
- Нажмите по пункту «Распознавание отпечатков пальцев Windows Hello», а затем — по кнопке «Настройка».

- Откроется мастер настройки Windows Hello, в котором следует нажать «Начать», затем ввести ПИН-код для входа в Windows 10, а далее следовать указанием мастера настройки отпечатков пальцев — касаясь его, пока процесс не будет завершен.

- По завершении вы увидите окно, сообщающее о возможности использования отпечатка пальца для разблокировки компьютера в дальнейшем, и предлагающее добавить еще один палец (это можно сделать и позже).


Готово, теперь, если всё работает исправно, при входе в систему вы можете просто приложить палец (для которого выполнялась настройка) к соответствующему сканеру на ноутбуке.
Как добавить отпечаток пальца Windows 10
Добавление альтернативных отпечатков предлагается выполнить сразу после первоначальной настройки их распознавания, но сделать это можно и позже:
- Зайдите в Параметры — Учетные записи — Варианты входа.
- Откройте пункт «Распознавание отпечатков пальцев Windows Hello» и нажмите кнопку «Добавить ещё».

- Введите ваш ПИН-код и выполните настройку нового отпечатка пальца для входа в систему.


Перестал работать вход по отпечатку или сканер отпечатка пальца в Windows 10
Как и при использовании других функций Windows 10, при входе по отпечатку могут возникать проблемы, по порядку рассмотрим наиболее распространенные:
- Сканер отпечатков пальцев работает (в диспетчере устройств отображается без ошибок), но вход не происходит: никакой реакции на прикладывание пальца. Случается после обновлений Windows Если попробовать добавить отпечатки снова, сообщается, что они очень похожи на уже имеющиеся и зарегистрированные. Решение: в Параметры — Учетные записи — Варианты входа в разделе настройки отпечатков пальцев нажать кнопку «Удалить», а затем снова добавить нужные отпечатки. Если этот вариант не подошел, обратите внимание на дополнительное решение, которое будет описано в конце статьи.
- Аналогично тому, что вы можете наблюдать на смартфонах, влажные руки или загрязнение сканера могут быть причиной того, что сканер отпечатков пальцев ноутбука не срабатывает.
- Если при попытке настроить отпечаток пальца вы видите сообщение «Не удалось найти сканер отпечатков пальцев, совместимый с функцией Распознавание отпечатков пальцев Windows Hello», причина чаще всего в драйверах сканера (не установлены или установлены не те), решение — скачать и установить их вручную с сайта производителя ноутбука для вашей модели (ищем драйвер для Fingerprint Sensor или аналогичный). В некоторых случаях для старых ноутбуков (изначально выпускавшихся на Windows 7 или
 может оказаться, что датчик действительно не совместим с Windows Hello. В диспетчере устройств сканер отпечатков пальцев находится в разделе «Биометрические устройства».

- Для работы функции должна работать «Биометрическая служба Windows», проверить её статус можно в Win+R — services.msc, тип запуска по умолчанию — «Автоматически».

 может оказаться, что датчик действительно не совместим с Windows Hello. В диспетчере устройств сканер отпечатков пальцев находится в разделе «Биометрические устройства».


Дополнительный вариант, на случай если есть подозрение на неправильную работу функций входа с использованием биометрии, в том числе по отпечатку пальца (перед этим желательно создать точку восстановления системы и знать свои пароль и ПИН-код для Windows 10):
- В services.msc остановите и отключите биометрическую службу Windows.
- Перенесите файлы из папки C:\Windows\System32\WinBioDatabase в другое расположение (откуда их при необходимости можно будет восстановить), там чтобы их не осталось в указанной папке.
- Запустите и включите тип запуска «Автоматически» для биометрической службы Windows.
- Добавьте отпечатки пальца для входа через Параметры Windows
Надеюсь, инструкция поможет разобраться, а при наличии каких-либо проблем оперативно решить их.
|
19 января 2022 15
Владельцы MacBook давно привыкли разблокировать ноутбук по отпечатку пальца.
На некоторых Windows-лэптопах тоже есть этот сканер, но большинство моделей продаются без него.
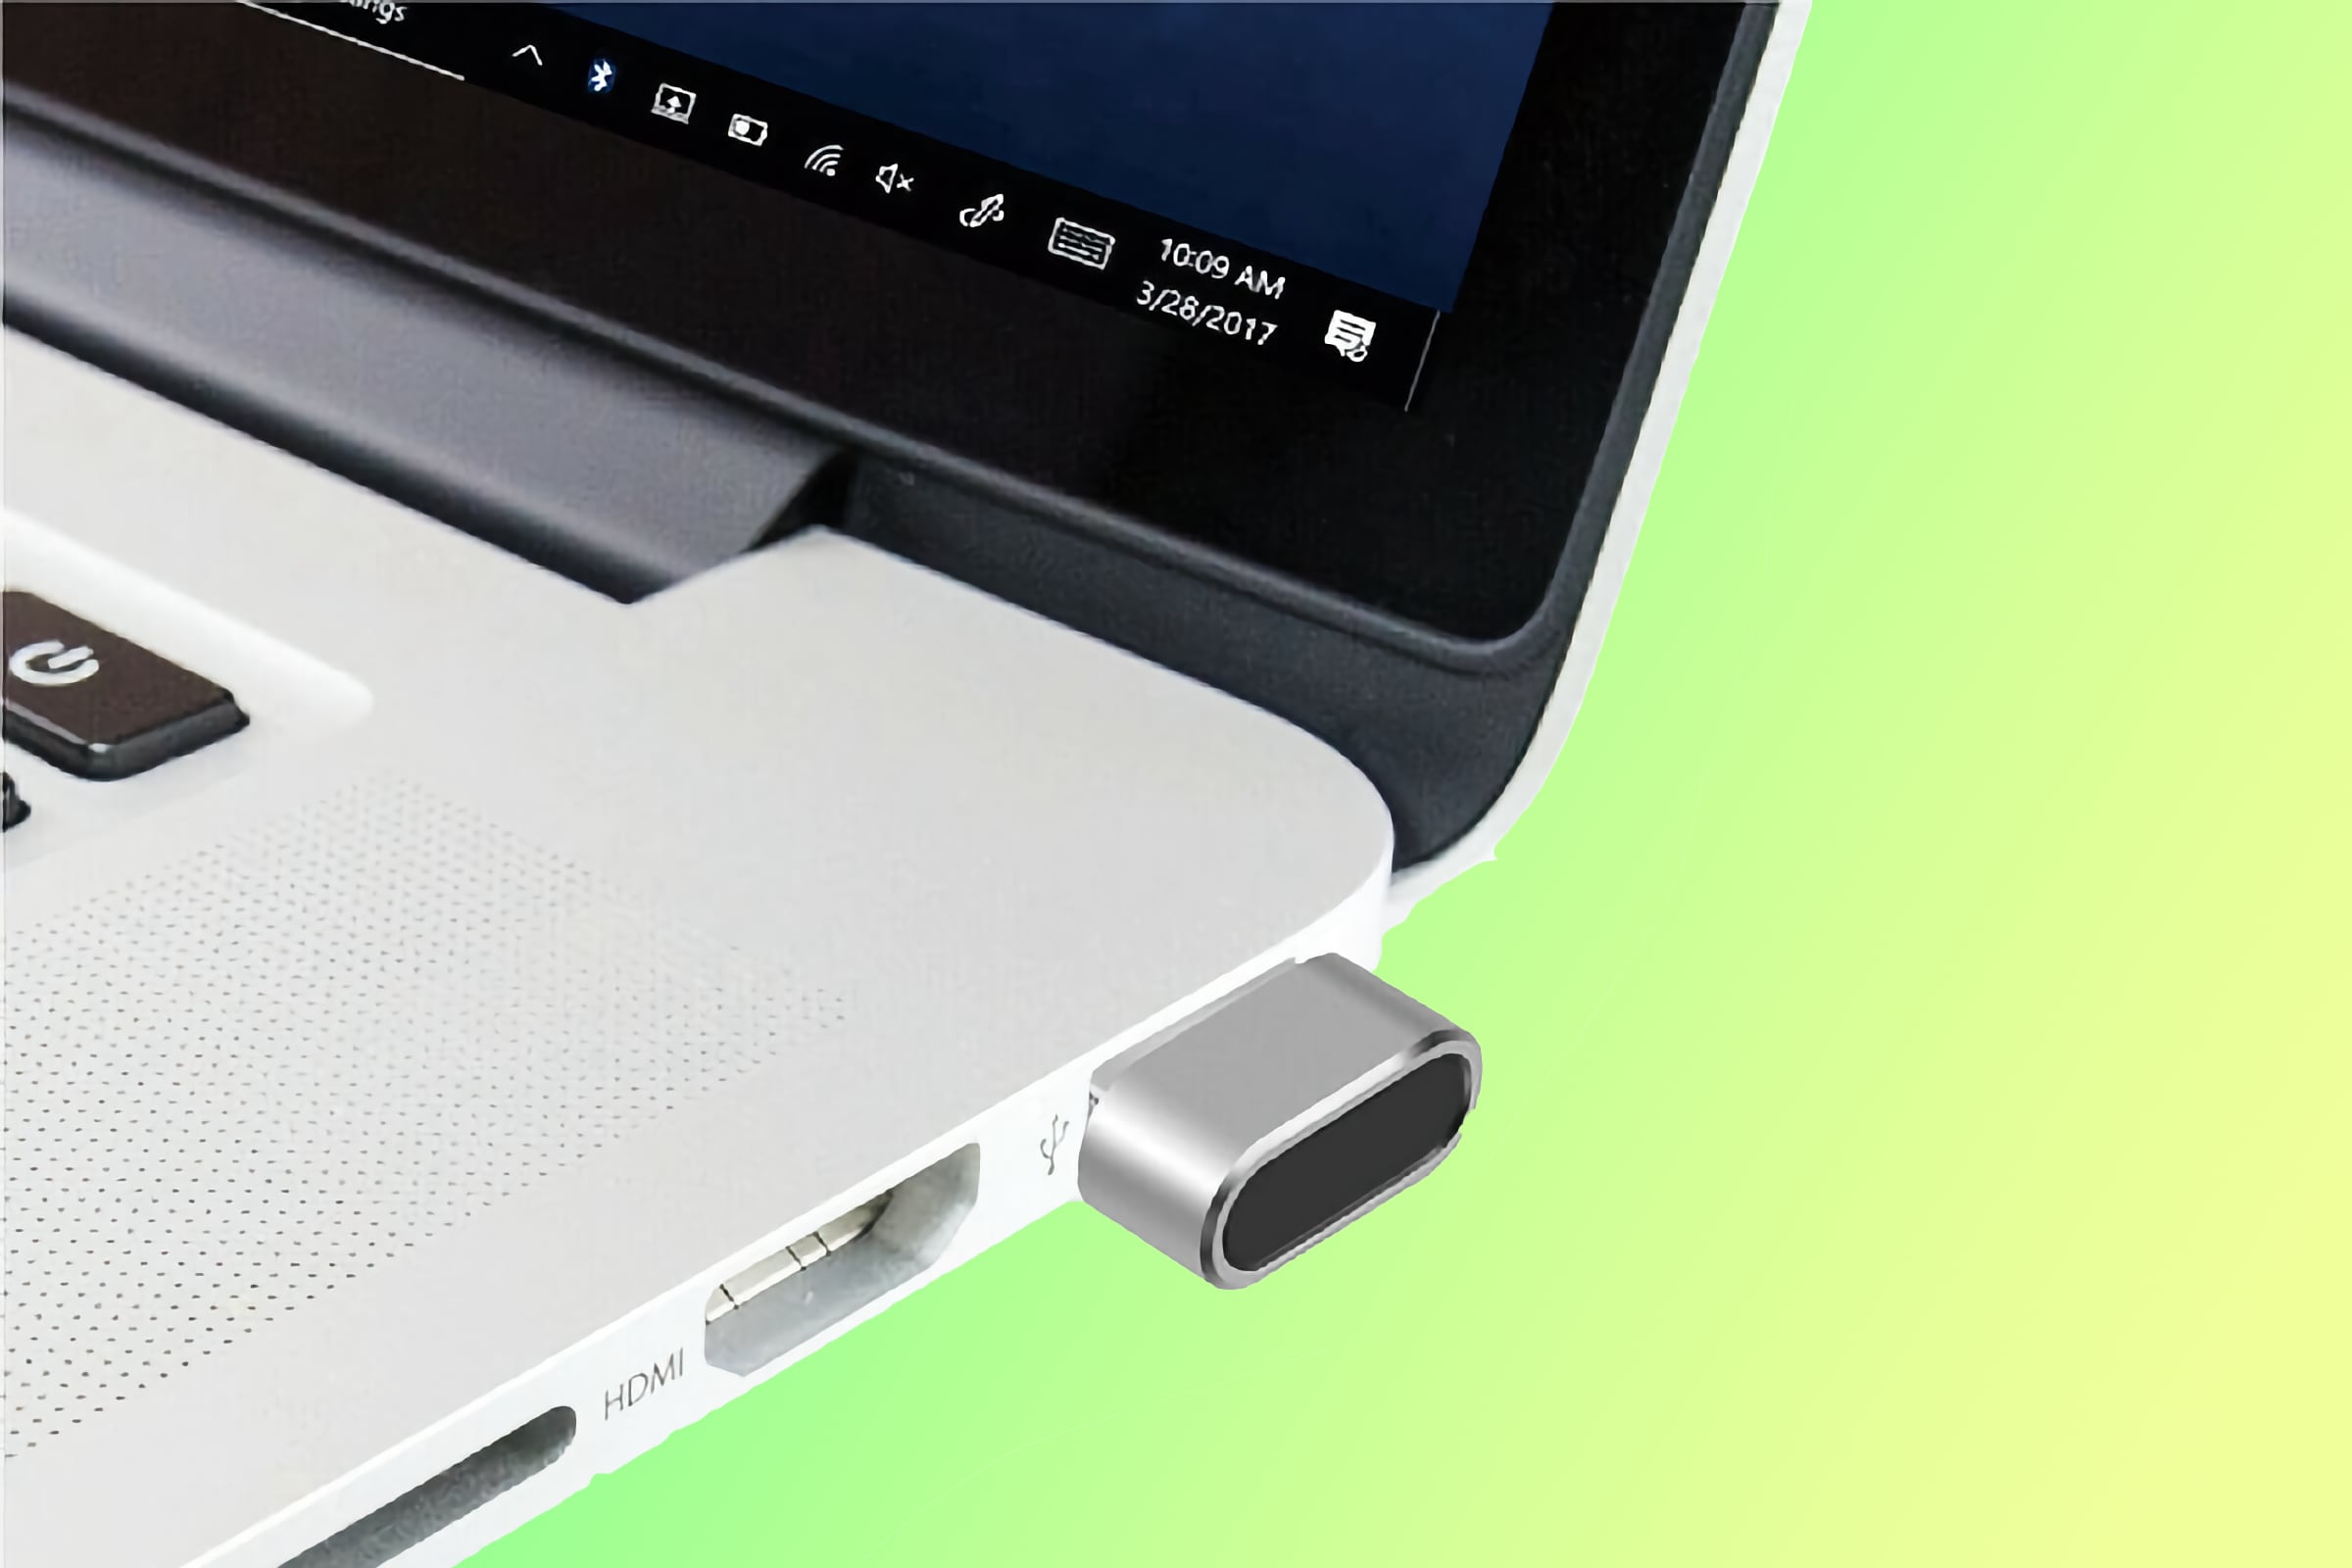
Благодаря AliExpress, сканер отпечатков пальцев можно добавить в любой компьютер на Windows.
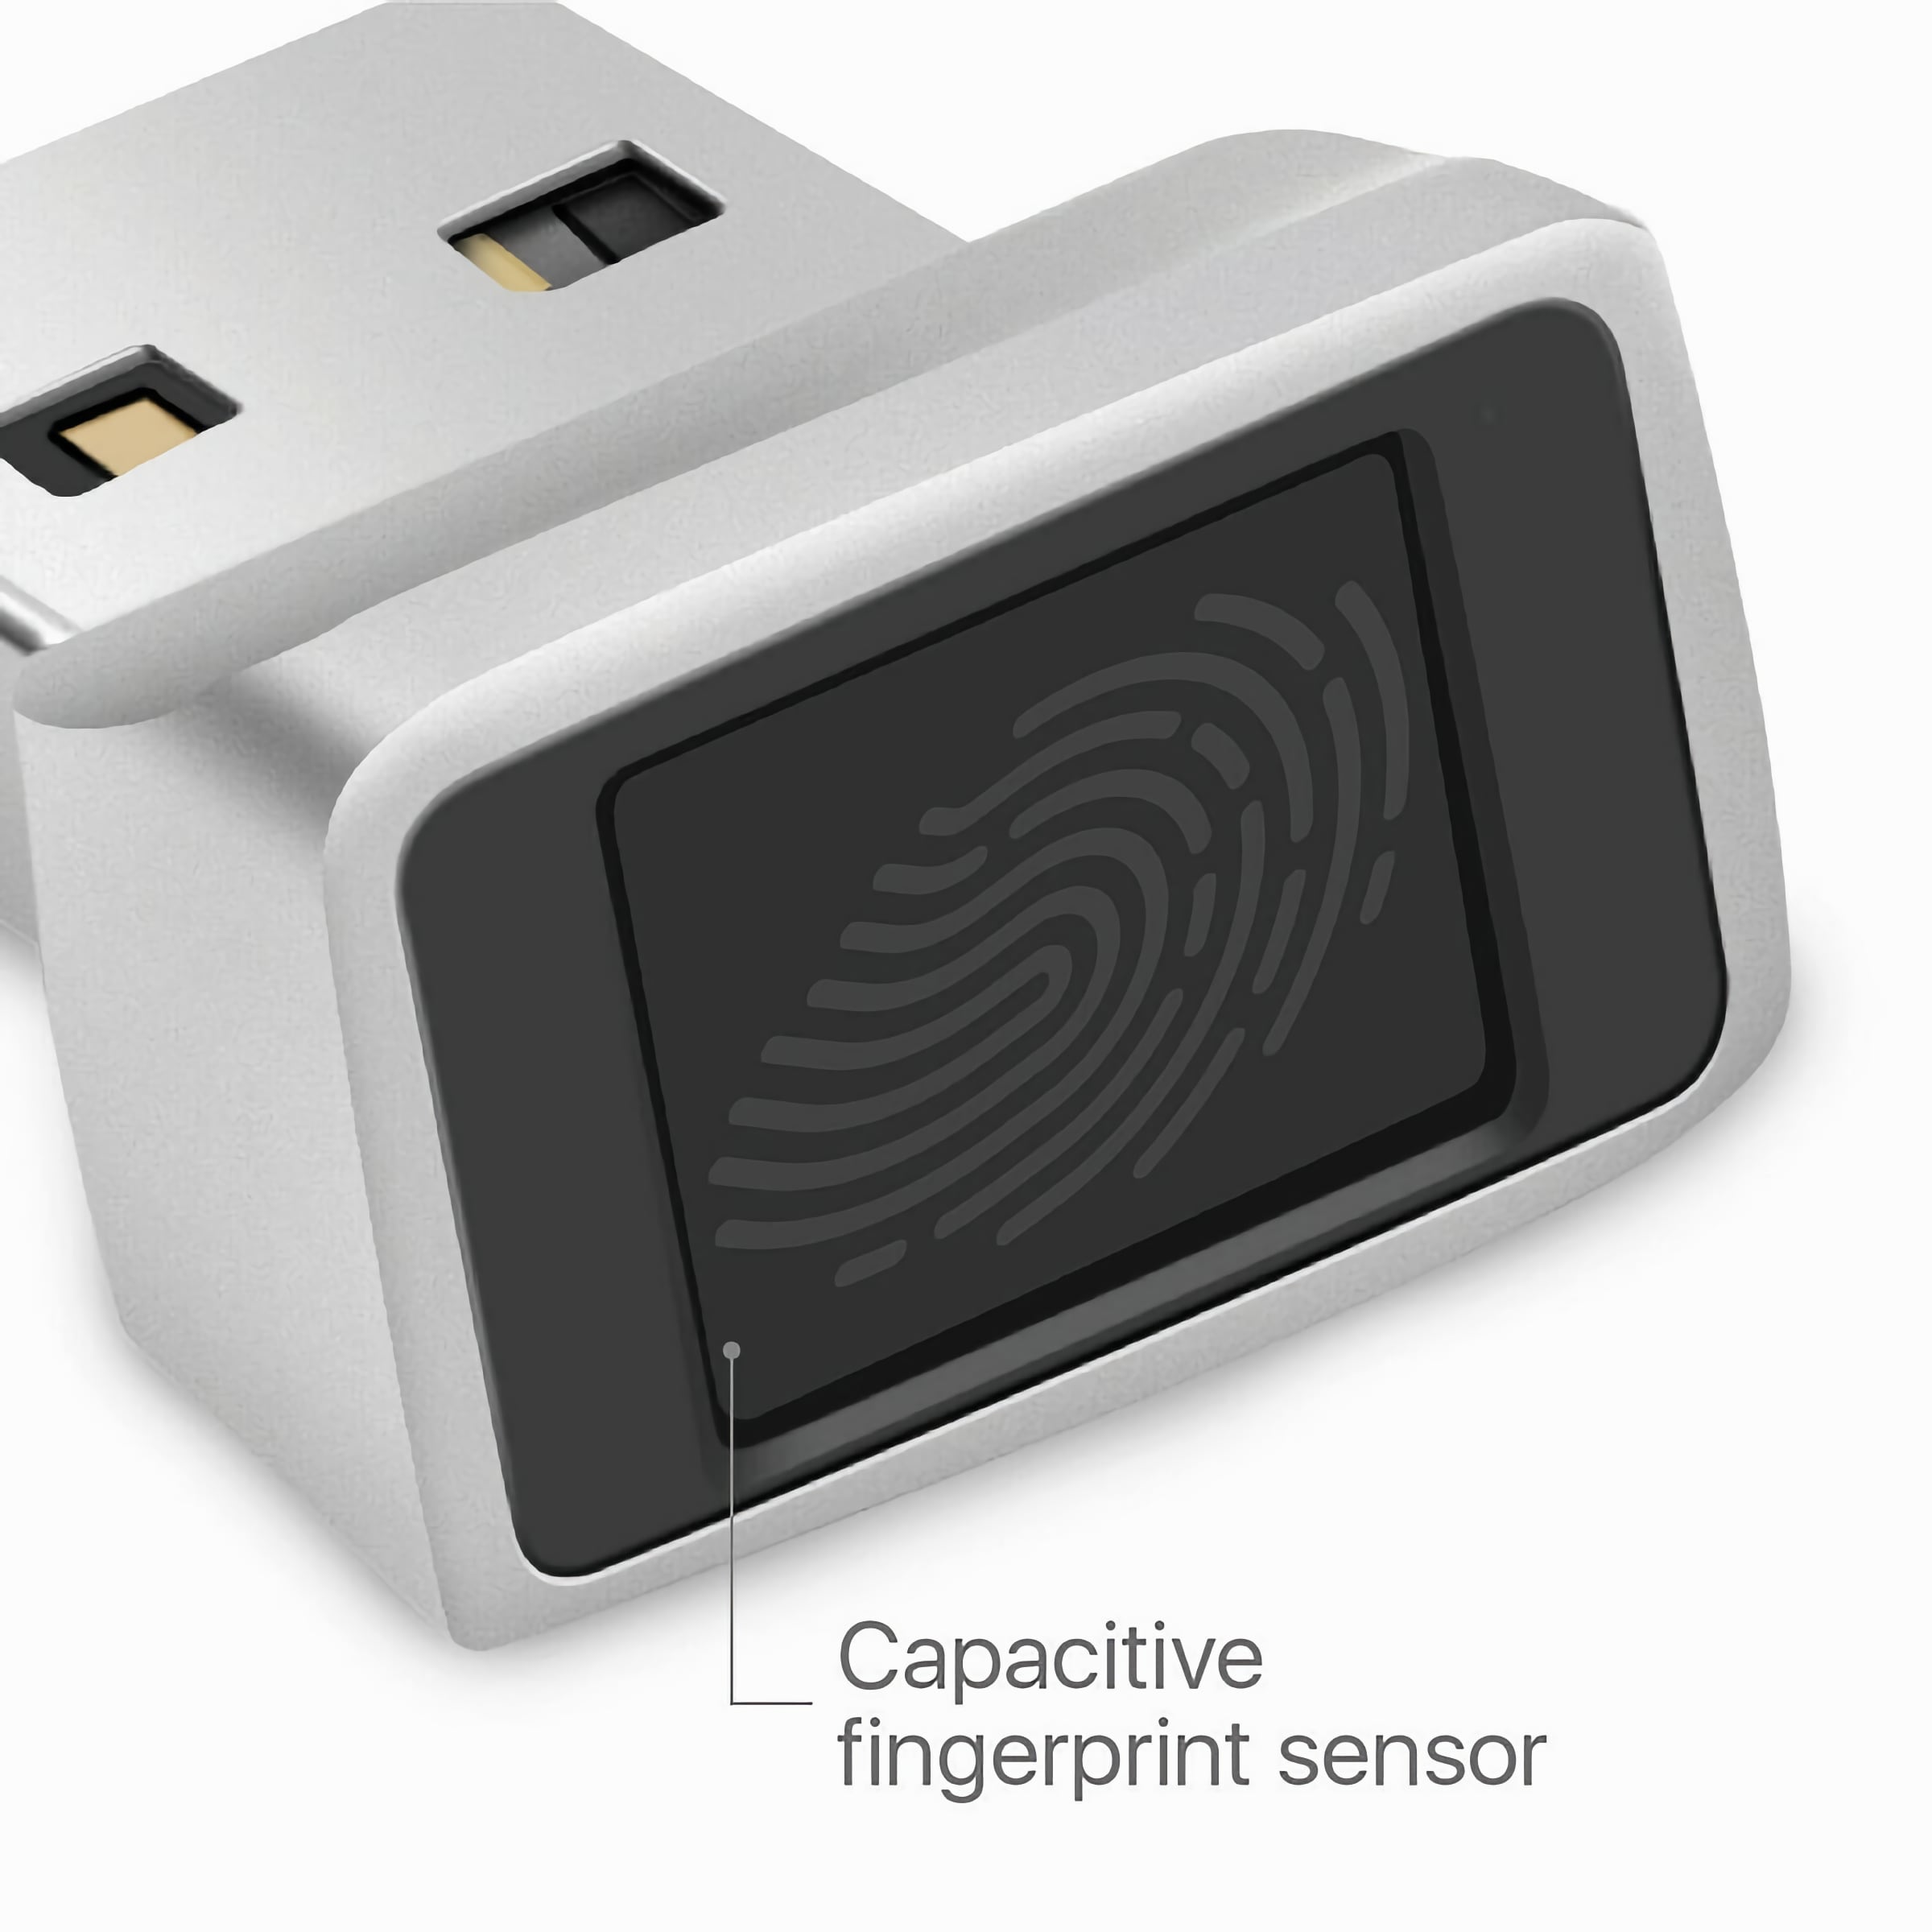
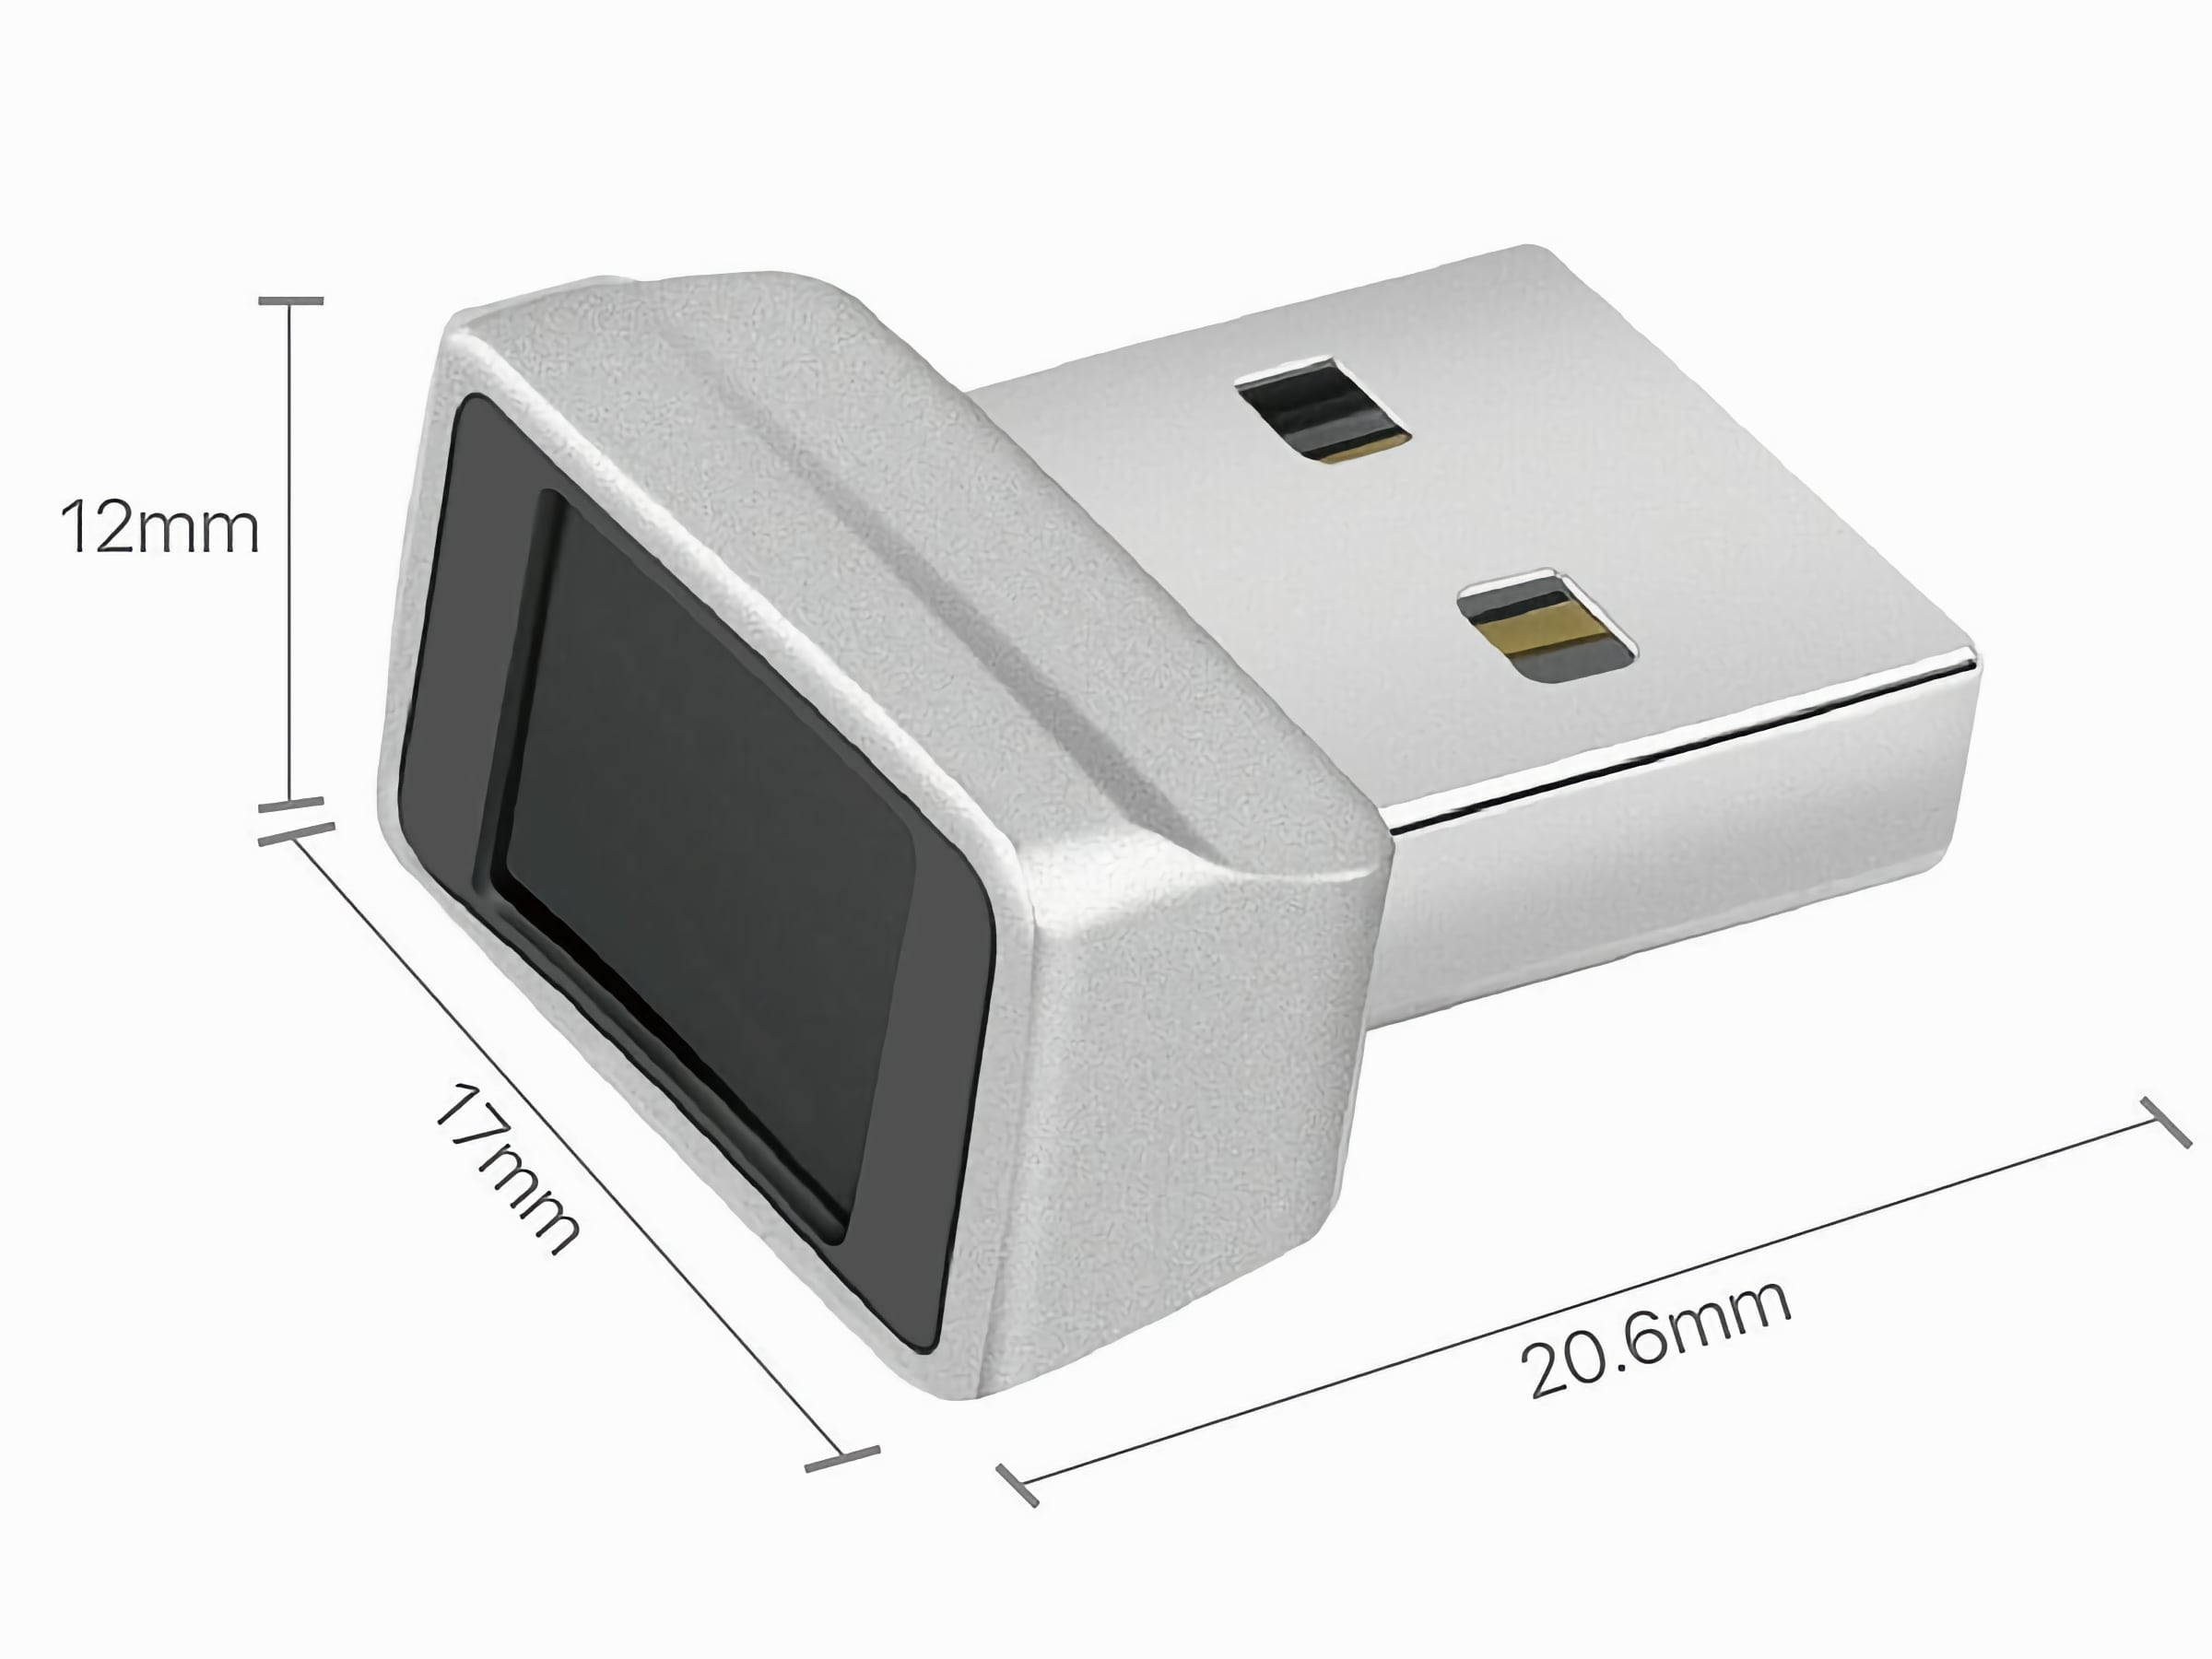
Сканер подключается к ноутбуку через порт USB-A. Драйвера на Windows 10 и 11 устанавливаются автоматически.
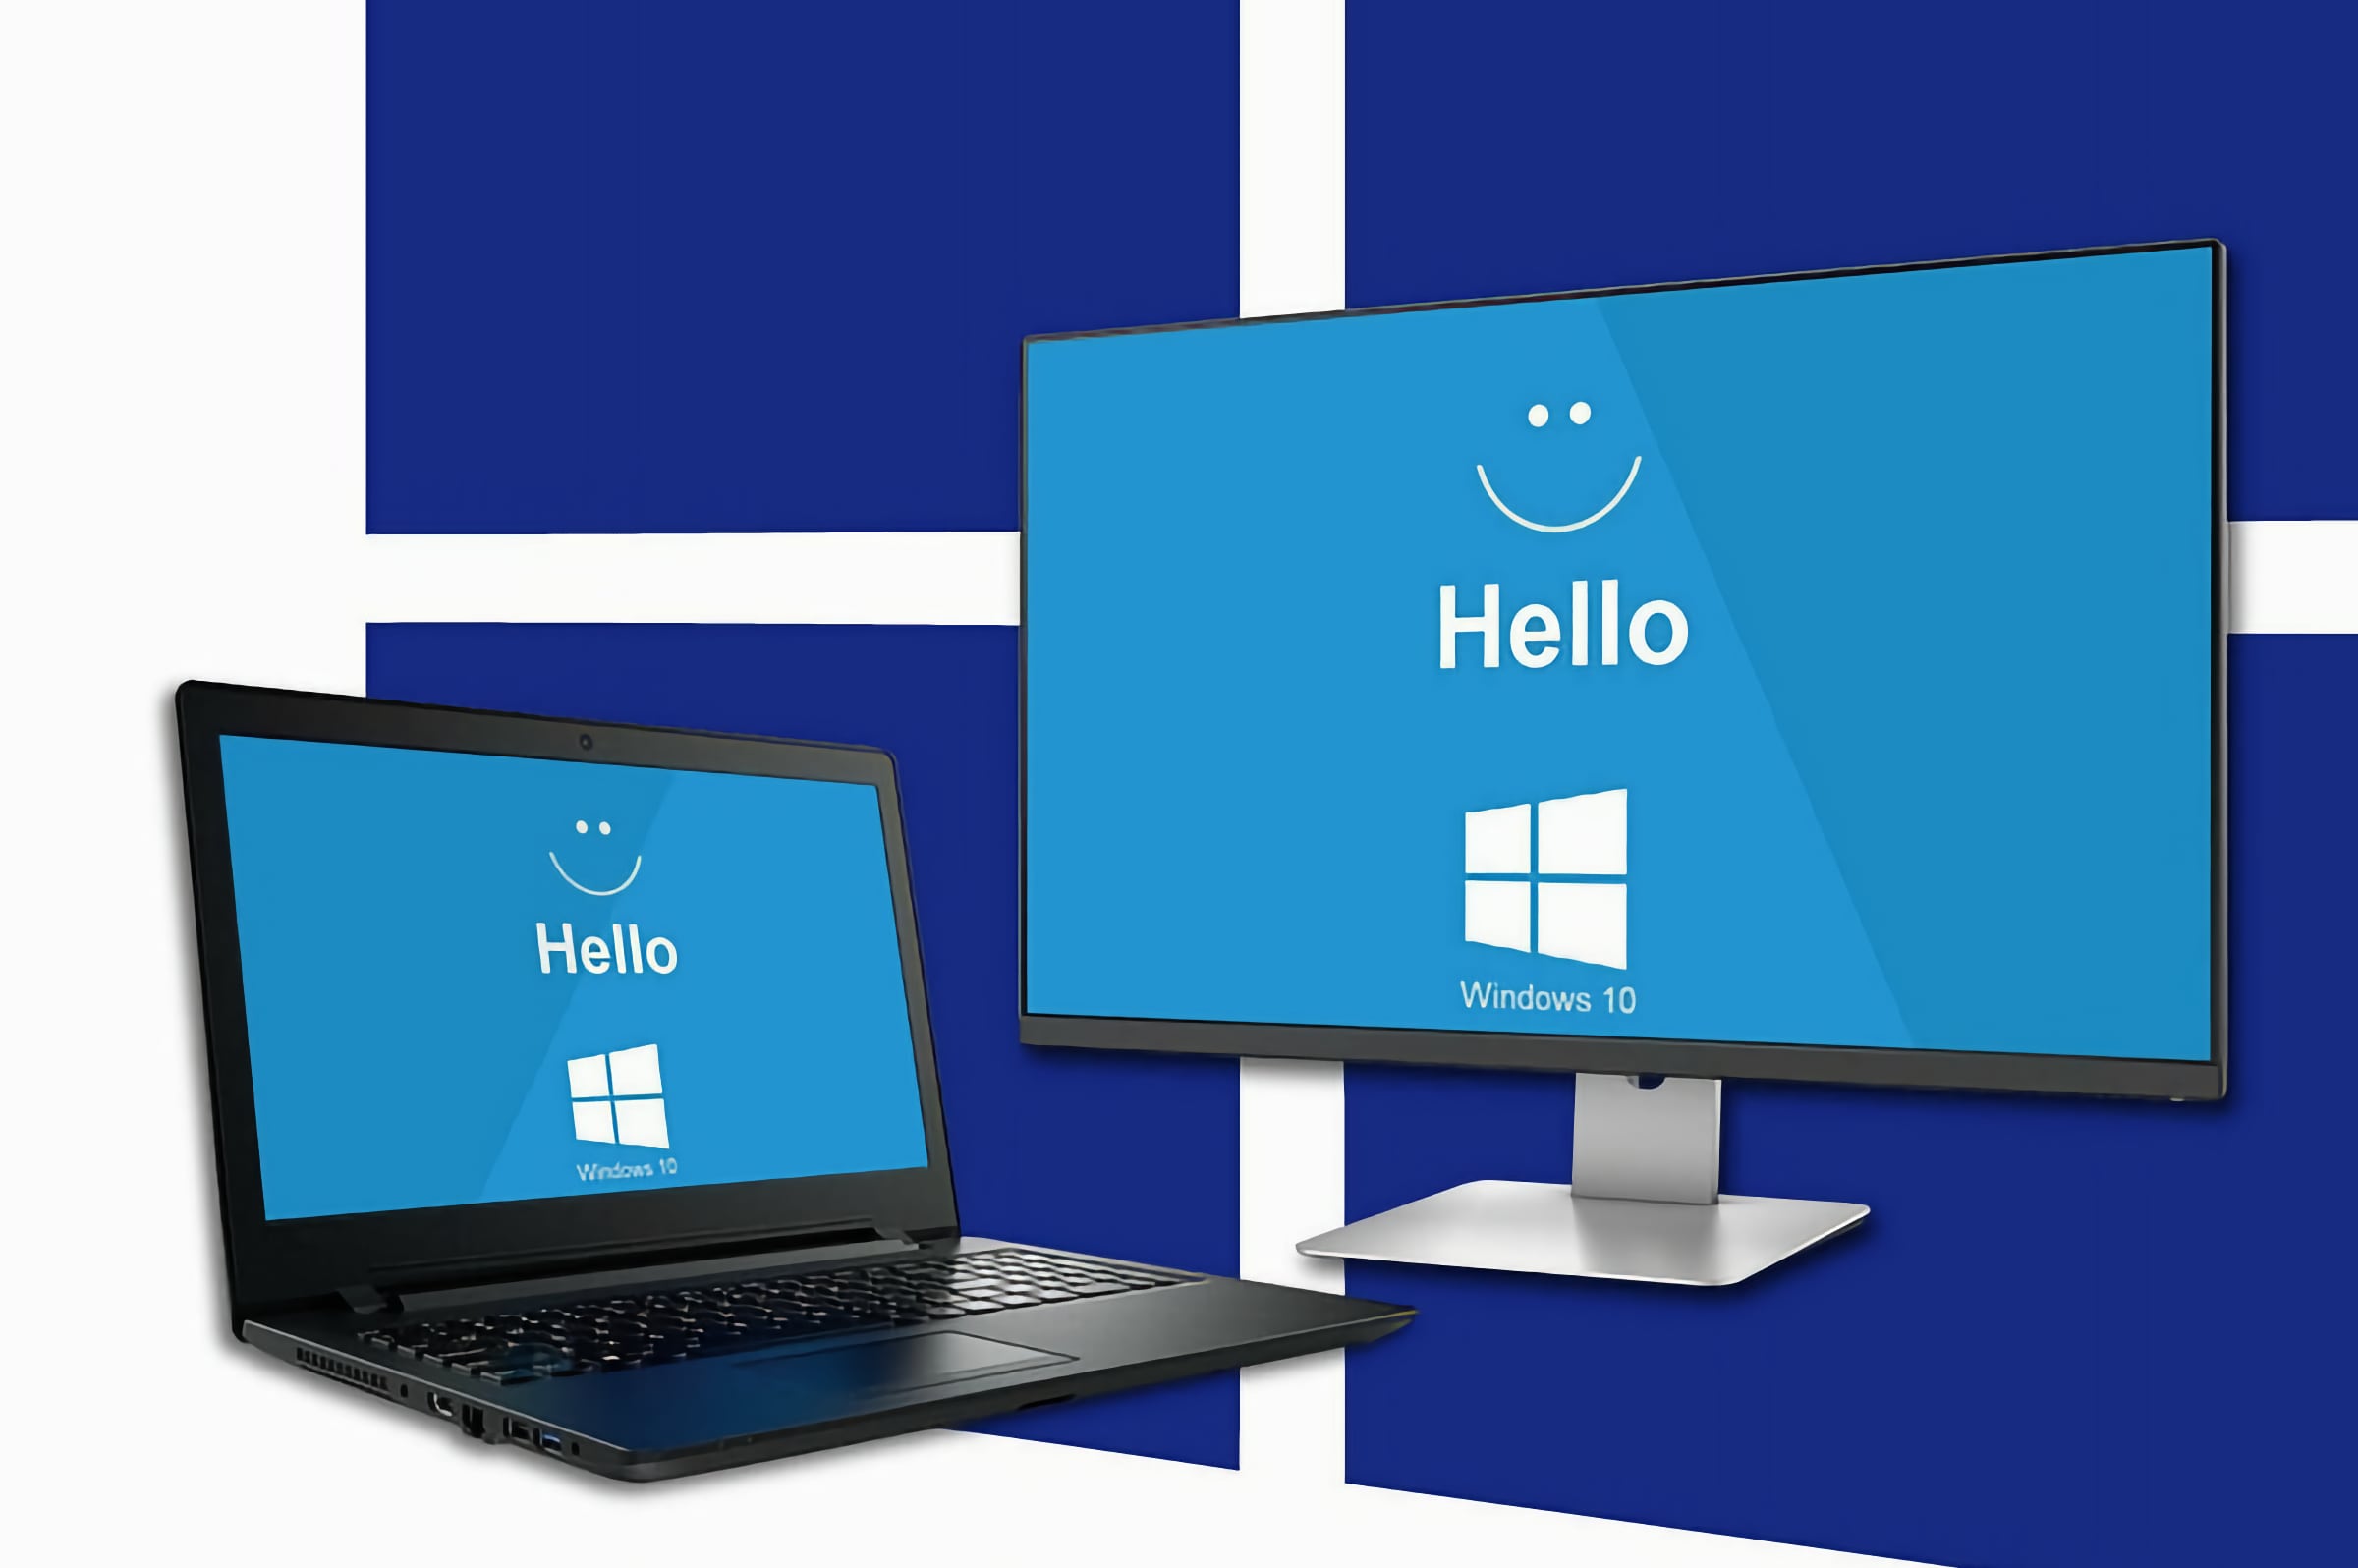
После этого пользователи могут настроить его через функцию Windows Hello.
Она может добавить до пяти отпечатков пальцев.
С помощью сканера можно разблокировать ноутбук и подтверждать действия в системе.
Поскольку он подключается через USB, то на серьезную защиту данных рассчитывать не стоит.
Но зато сканер сильно упрощает использование компьютера.
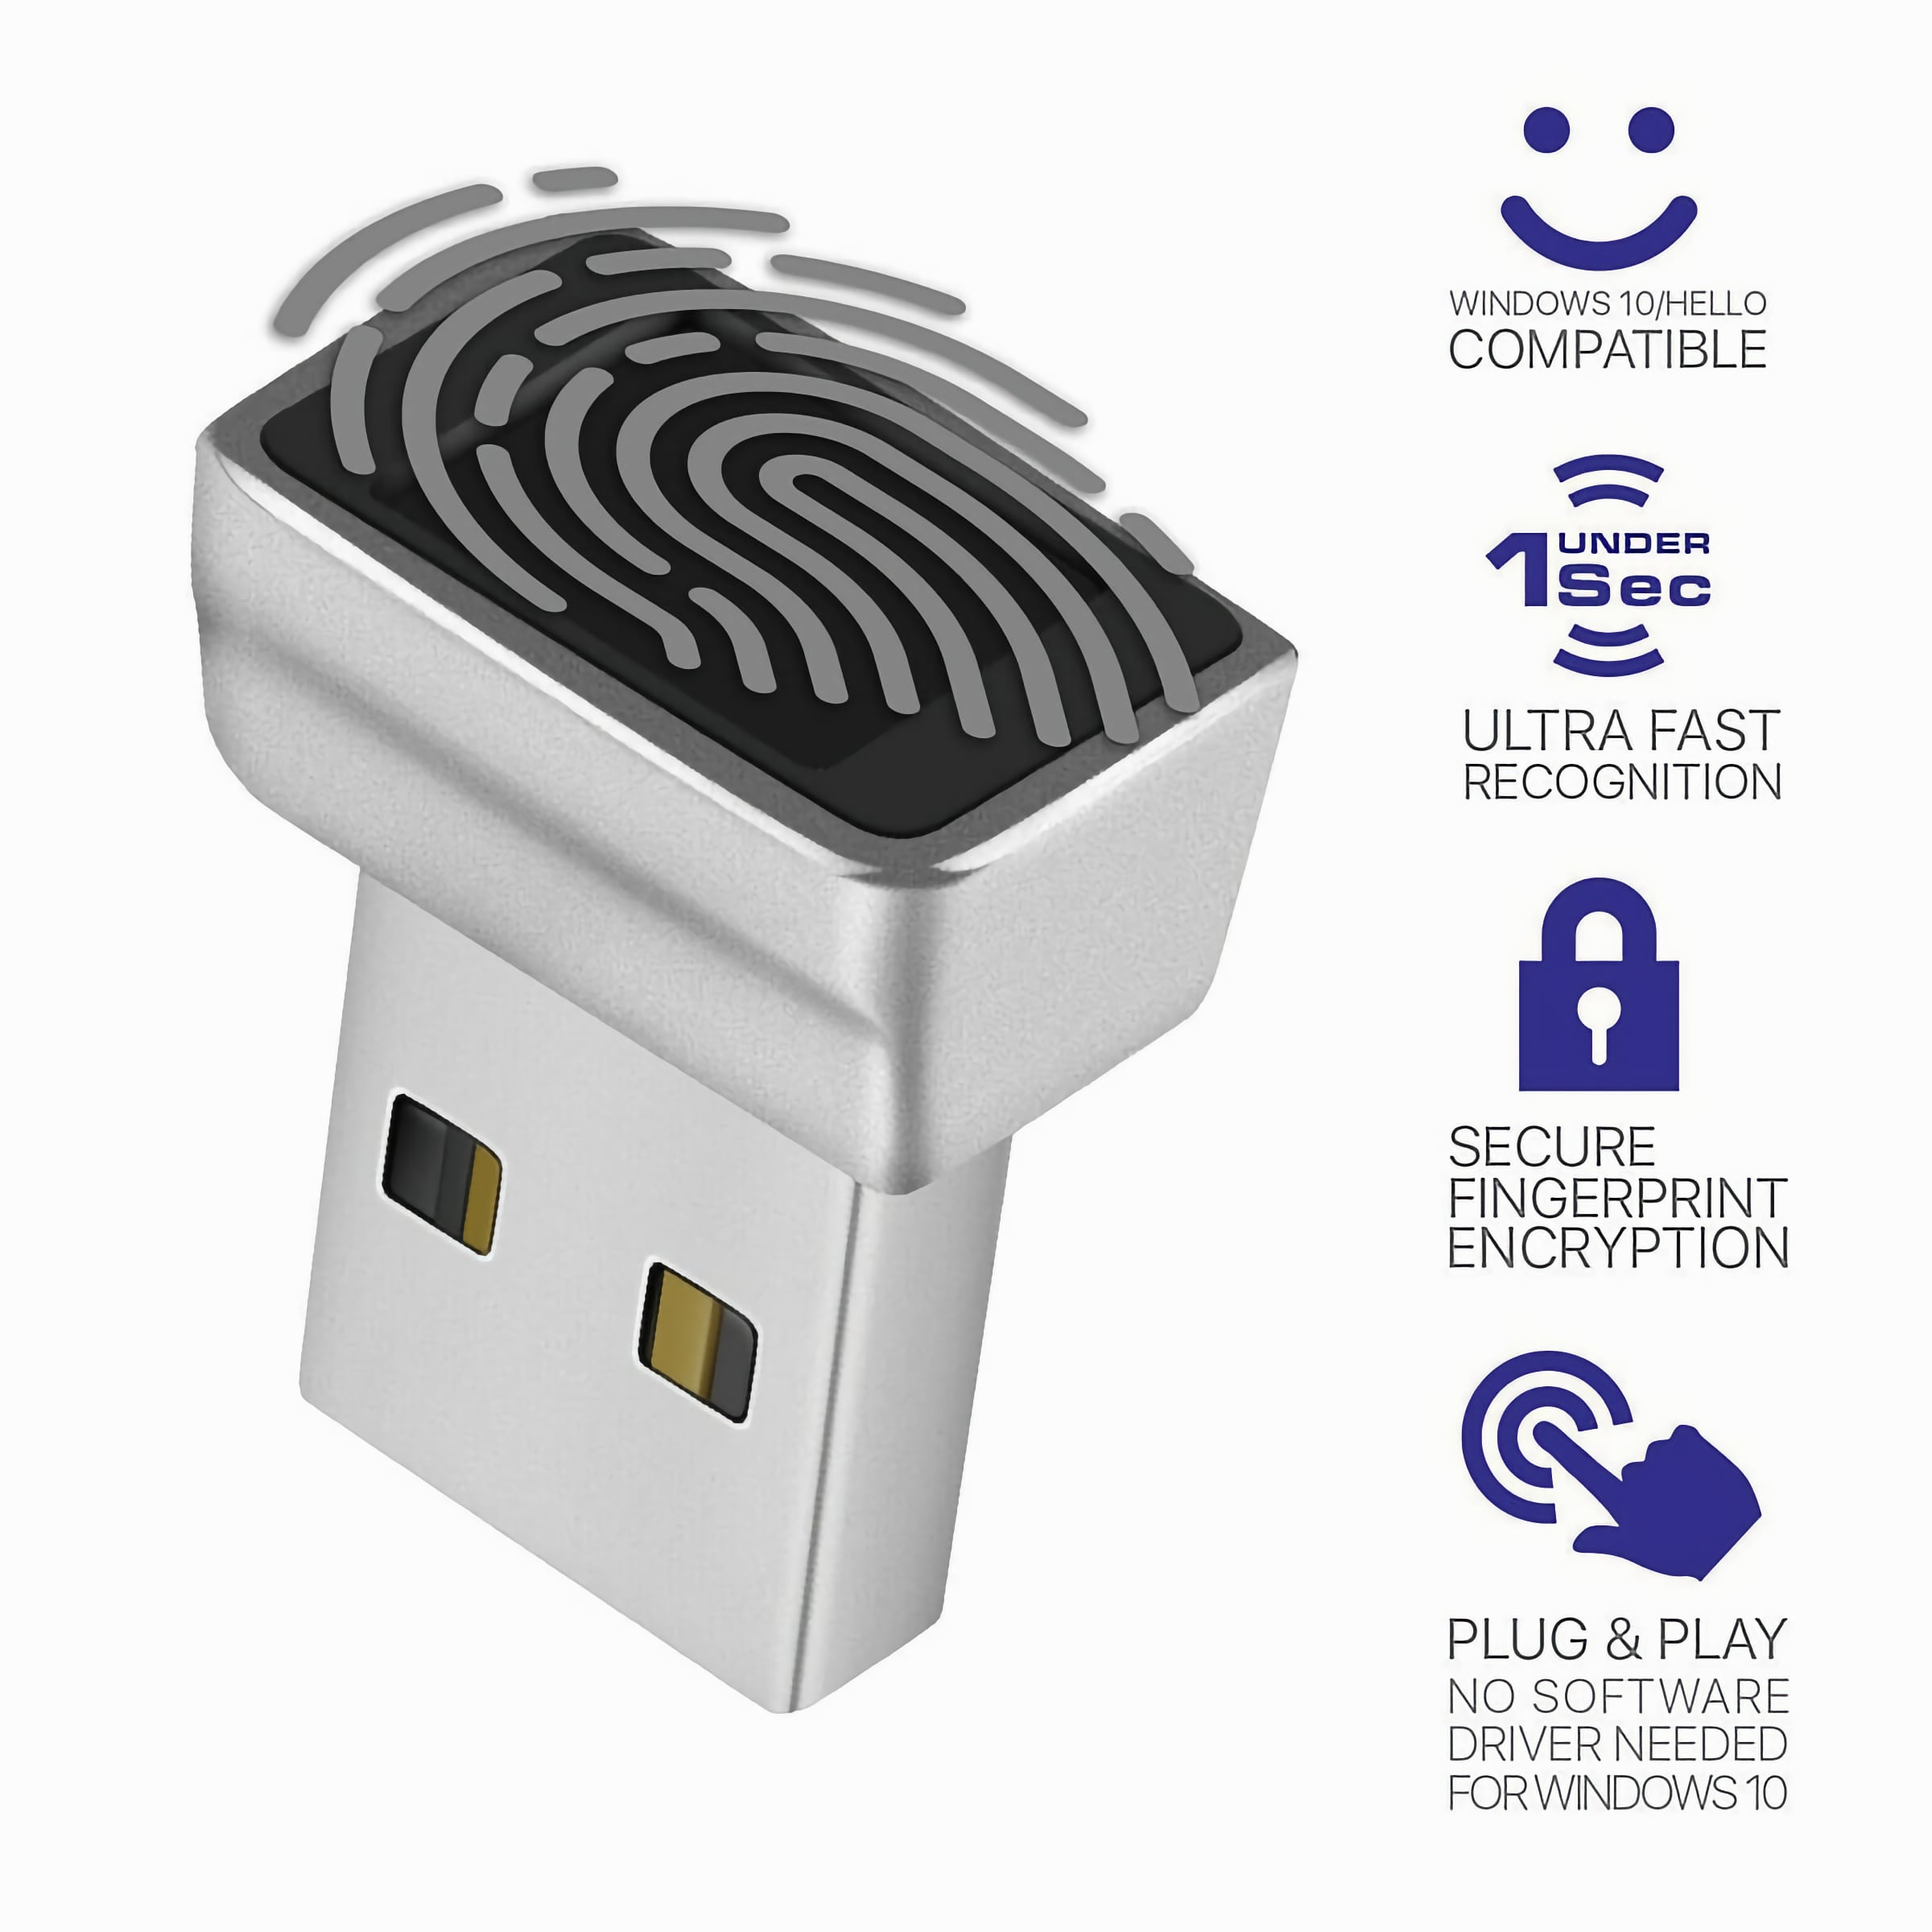
На AliExpress сканер отпечатков пальцев для Windows стоит 1575 рублей. Доставка из Китая стоит 142 рубля и длится примерно 3-4 недели.
(17 голосов, общий рейтинг: 4.24 из 5)
iPhones.ru
Он настраивается через функцию Windows Hello.
Илья Сидоров
@ilyasidorov
Пишу новости, статьи про технологии и не только, а в свободное время увлекаюсь детейлингом.
Как сделать скриншот (screenshot) в операционной системе Windows, который запускается на компьютерах mac (Macbook Pro, iMac).
Работа в Windows на компьютерах Mac имеет свои особенности. В частности это касается особенностей клавиатуры, на которой отсутствуют привычные windows клавиши.
Аналог клавиши с логотипом Windows (Win) на компьютерах Mac является клавиша Command.
Делаем скриншот в Windows 10 на Bootcamp
Сочетание клавиш для создания скриншота:
Сочетание клавиш для записи и остановки видео:
Запись видео происходит через приложение Xbox, которое установлено в Windows 10. Изображения и видео при этом не сохраняются в папке Изображения, а сохраняются по такому пути:
C:\Users\user_name\Videos\Captures
In this page, you will be informed how to print screen on a Mac running Windows or Windows with a Mac keyboard. For those who are running Windows 10 on a Mac through Bootcamp or Parallels, then you are able to print screen on Mac by following these following steps.
- Function (fn) + Shift + F11: This key combination can be pressed if you want to take a Mac print screen of the whole screen.
- Option (alt) + Function (fn) + Shift + F11: This key combination can be pressed if you want to take a Mac print screen of the front most window.
After you have taken the screenshot, you will need to open Paint, Microsoft Word, or any other apps and do the paste action in order to paste the screen in the document. Please take a note that on the Touch Bar equipped MacBooks, the on screen F11 key will become visible when you press the fn key.
For everyone who is a long time user of Mac, you might be confused by the term “print screen Mac”. In fact, there is nothing to be confused as it is just another term used to call a screenshot on Mac.
Aside from the method to print screen on Mac running Windows or Windows with a Mac keyboard, you will also be informed some other ways to print screen on Mac and some different kinds of keyboards that you might be using, including the normal Mac keyboards, Touch Bar equipped Mac keyboards, and Windows keyboards that being used on Mac.
Print screening on Mac with normal keyboard
Print screen Mac function is really easy to do. Each screenshot taken by using this method is placed on the desktop by default.
- Command + Shift + 3: This key combination can be used to take a screenshot of the entire screen if you have multiple monitors attached to your Mac. This step will take a screenshot on all of them.
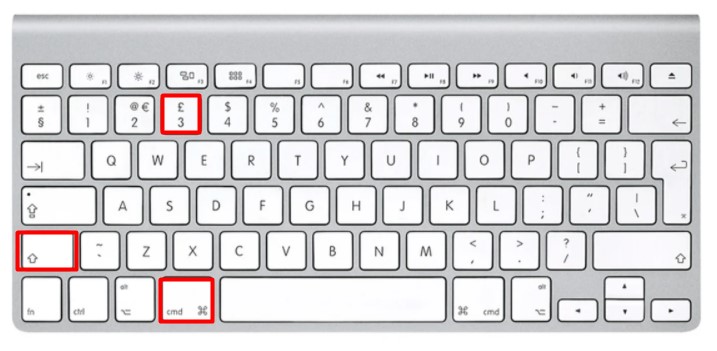
- Command + shift + 4: This key combination can be used to take a screenshot of a specific portion of the screen. After pressing the key combination, then you will need to use the mouse or trackpad in order to choose the portion of the screen that you want to include in the screenshot.

- Command + shift + 5: This key combination can be used to take a screenshot of a specific screen. Once you have pressed all the keys you will get a camera cursor on the screen. Feel free to move the cursor to the screen that you want to take the screenshot of and then left click.

- Command + shift + 4 + Space bar: This key combination can be used to take a screenshot of a specific app or window. Keep in mind that the space bar should be pressed separately from the Command + Shift + 4. After that, click on the app or window that you want to take the screenshot of.

Print screening on Mac with Touch Bar keyboard
If you have a MacBook Pro that comes with a Touch Bar, then you have the special print screen Mac functions that makes it easier for you to print the screen on Mac. With the MacBook Pro that has a Touch Bar, you are able to take a screenshot simply by pressing the Command + Shift + 4 key combination. Your Mac will show the special screenshot buttons on the Touch Bar as soon as you press this key combination.
Then, you can tap on the first button in order to take the screenshot of the full screen or tap on the second one to choose the certain screen or the app on the screen for the screenshot. Apart from that, there is also the third button that allows you to choose the portion of the screen for the screenshot.
In addition, there is a special print screen option on Mac that is exclusively available on Touch Bar keyboard. This one allows you to select the location to store the screenshot. From the Touch Bar of the Mac, you can tap on the option named “Desktop” which is able to be found next to the “Save to” text and from the screen select the folder that you want to save the screenshot in.
Besides, you can also choose the Clipboard option if you want the next screenshot to only be saved to the clipboard. You are then able to paste the screenshot wherever you want. On top of that you can also directly save the screenshot in the Preview app, Messages app, and Mail app.
Print screening on Windows with Mac with keyboard
For those who have Pc running Windows 10 but you are using a Mac keyboard, then you are able to print screen on Windows with Mac keyboard using these following actions.
- Function (fn) + Shift + F11: This key combination can be used if you want to take a print screen of the whole screen.

- Option (alt) + Function (fn) + shift + F11: This key combination can be used if you want to take a print screen of the front most window.

Once you have taken the screenshot, you will have to open Microsoft Word or Paint and do the paste action in order to paste the print screen in the document.
The term “print screen” is normally used in the Windows environment in order to describe and give the power for you to capture the content that you are able to see on the screen. On the Windows compatible keyboards, in particular, you will be able to see that Print Screen is an actual button. On Mac, there is no button named that way. Fortunately, there is a series of keystrokes that you are able to perform if you want to print screen. Basically, they have the same function as Print Screen of Windows. Instead of “print screen”, you might hear the term “capture” or “screenshot” on Mac.
AUTHOR BIO
On my daily job, I am a software engineer, programmer & computer technician. My passion is assembling PC hardware, studying Operating System and all things related to computers technology. I also love to make short films for YouTube as a producer. More at about me…