
Let me start by saying that it is quite hard to exactly understand the different Docker editions. Only this page is already confusing. There is a Community Edition (CE) and an Enterprise Edition (EE). But in the table there are three editions listed and none of them are named exactly the same as the names in the list. As far as I understand, the Docker Community is for free, while Docker Enterprise is the paid version.
And there is also something called Docker Engine – Community and Docker Engine – Enterprise. It seems like these are free versions, whereas the Community version for Windows 10 is also called Docker Desktop for Windows. Docker Desktop for Windows comes with an installation program and has a (basic) GUI. The version for Windows Server is Docker Engine – Enterprise and does not have a GUI nor an installation program.
Why do I start with this? Because both Docker Desktop for Windows and Docker Engine – Enterprise can be downloaded and installed for free. The Docker website does not mention any pricing for these products and the documentation makes clear how to install and does not talk about any license. I wanted to make clear that what I’m about to tell you is legal and not an infringement of any license terms.
What’s the point? Well, Docker Desktop for Windows requires Hyper-V to be enabled on your Windows 10 system, while Docker Engine – Enterprise (from now on referred to as Docker EE) does not. I was wondering if it would be possible and officially supported to install Docker EE on Windows 10. And it appears to be the case.
Why would I want that? Not because I have a problem with Hyper-V on itself. I’ve used it for many years to maintain different installations of Dynamics NAV. And even when Microsoft started to ship Dynamics NAV and Business Central as docker images, I used an Hyper-V VM with Docker installed instead of using Docker directly on my laptop. Just because Docker only supported containers in Hyper-V mode on Windows 10, which my laptop did not really like in combination with other native Hyper-V VM’s.
Since Docker supports process isolation on Windows 10 (starting with version 1809) it became time to say goodbye to my Hyper-V setup and switch to running containers directly on Windows 10. And because I didn’t need Hyper-V anymore, I also decided to get totally rid of it. That was wrong. Docker Desktop installed without complaining, but it didn’t want to start. Instead, I was presented with this screen:

And when I chose Cancel, I got this error message:

Too bad… even if you plan to not use Hyper-V based containers, you have to install Hyper-V otherwise Docker Desktop will not run after installation. I’ve heard it is because of Linux containers. They can only run inside an Hyper-V based container. And because Docker Desktop supports to switch between Windows and Linux containers, it simply expects you to have Hyper-V installed, no matter what.
Ok, but is that so bad after all? Well, maybe it is, maybe not. In my experience, Hyper-V can cause problems when combined with Docker running in process isolation mode. Especially networking seems to be quite vulnerable when Docker and Hyper-V have to work together with virtual networks.
Because Windows 10 and Windows Server share the same codebase, I was wondering if it would be possible to install Docker EE on Windows 10. Just like you install it on Windows Server. So I followed the instructions, but to no avail. I ran into another error:

Bummer…
Because I’m that kind of curious guy, I tried to find out the what this error is about. And you know what? It’s just a bug in the installation script. It’s not because Windows 10 is not supported with Docker EE. Just a bug in the script that could be solved a year ago. The script of DockerMsftProvider is available on GitHub. Make sure you are in the master branche, in case you take a look. The default development branche is already quite some commits behind master (sigh).
So, what’s the bug? There is a test on operating system, because it wants to run a different cmdlet when installing on Windows 10. It wants to test if the Windows feature Containers is installed.

And you know what? My system does not have ‘Microsoft Windows 10’ as output, but ‘Microsoft Windows 10 Pro‘. So the script fails, because it tries to run the cmdlet Get-WindowsFeature which is only available on Windows Server.

But wait… it gets worse. The suggestion in the script is that there is a difference between Windows 10 and Windows Server. Which is not true. The cmdlet Get-WindowsOptionalFeature works both on Windows Server and Windows 10! So why using the other cmdlet that is only supported on Windows Server? That’s a cmdlet you use when you want to work on a remote system. In this case that’s not what we do, so the solution here would be to just use Get-WindowsOptionalFeature (and a few lines later Enable-WindowsOptionalFeature). Without even testing on operating system, the script would be valid for both Windows 10 and Windows Server!
Of course I have made a bugfix, including some other small fixes, and created a pull request. The bad news is, there were already 5 pull request waiting, the oldest waiting for more than a year (and coincidentally for the very same bug, just a different solution). I wouldn’t be surprised if my pull request will be ignored as well.
So, what can we do to install Docker EE on Windows 10? Well, I have two options for you. Option number 1 is do a manual install, which is quite easy to do. Option number 2 is to download my version of the module DockerMsftProvider and let it install Docker for you.
Option 1: Manual install
The documentation of Docker EE contains a step-by-step instruction to use a script to install Docker EE. Follow that script and you will be safe. It can also be used to update Docker, just by downloading the latest files and overwrite the existing files.
Here is a modified version of that script. It will automatically detect the latest stable version, download and extract it and install it as a service.
# Install Windows feature containers
$restartNeeded = $false
if (!(Get-WindowsOptionalFeature -FeatureName containers -Online).State -eq 'Enabled') {
    $restartNeeded = (Enable-WindowsOptionalFeature -FeatureName containers -Online).RestartNeeded
}
if (Get-Service docker -ErrorAction SilentlyContinue)
{
    Stop-Service docker
}
# Download the zip file.
$json = Invoke-WebRequest https://dockermsft.azureedge.net/dockercontainer/DockerMsftIndex.json | ConvertFrom-Json
$stableversion = $json.channels.cs.alias
$version = $json.channels.$stableversion.version
$url = $json.versions.$version.url
$zipfile = Join-Path "$env:USERPROFILE\Downloads\" $json.versions.$version.url.Split('/')[-1]
Invoke-WebRequest -UseBasicparsing -Outfile $zipfile -Uri $url
# Extract the archive.
Expand-Archive $zipfile -DestinationPath $Env:ProgramFiles -Force
# Modify PATH to persist across sessions.
$newPath = [Environment]::GetEnvironmentVariable("PATH",[EnvironmentVariableTarget]::Machine) + ";$env:ProgramFiles\docker"
$splittedPath = $newPath -split ';'
$cleanedPath = $splittedPath | Sort-Object -Unique
$newPath = $cleanedPath -join ';'
[Environment]::SetEnvironmentVariable("PATH", $newPath, [EnvironmentVariableTarget]::Machine)
$env:path = $newPath
# Register the Docker daemon as a service.
if (!(Get-Service docker -ErrorAction SilentlyContinue)) {
  dockerd --exec-opt isolation=process --register-service
}
# Start the Docker service.
if ($restartNeeded) {
    Write-Host 'A restart is needed to finish the installation' -ForegroundColor Green
    If ((Read-Host 'Do you want to restart now? [Y/N]') -eq 'Y') {
      Restart-Computer
    }
} else {
    Start-Service docker
}
Run this script, and you will have Docker EE installed on Windows 10. Make sure to save the script and use it again to update to a newer version.
Option 2: Use DockerMsftProvider
If you want to use DockerMsftProvider with my fixes, then download the module from my GitHub repository and copy it to your PowerShell modules folder. I have create a little script that downloads the two files to the PowerShell modules folder and runs the script for you.
A smal note: while testing the script again, I noticed that the path variable was not updated. I guess it’s another bug, not sure about it. So you might want to go with option 1 anyway… 😉
$paths = $env:psmodulePath.Split(';')
$modulePath = Join-Path $paths[0] "DockerMsftProvider"
if (!(Test-Path $modulePath)) {
  New-Item -Path $modulePath -ItemType Directory
}
$outfile = Join-Path $modulePath 'DockerMsftProvider.psm1'
Invoke-WebRequest -UseBasicParsing -OutFile $outfile -Uri https://raw.githubusercontent.com/ajkauffmann/MicrosoftDockerProvider/master/DockerMsftProvider.psm1
$outfile = Join-Path $modulePath 'DockerMsftProvider.psd1'
Invoke-WebRequest -UseBasicParsing -OutFile $outfile https://raw.githubusercontent.com/ajkauffmann/MicrosoftDockerProvider/master/DockerMsftProvider.psd1
Install-Package Docker -ProviderName DockerMsftProvider -Force

And here you have Docker EE running on Windows Server 10.
Portainer
Another benefit of installing Docker EE is that Portainer works out of the box. You don’t need to do any settings, like exposing port 2375. The next two docker commands download and install Portainer for you.
docker pull portainer/portainer
docker run -d --restart always --name portainer --isolation process -h portainer -p 9000:9000 -v //./pipe/docker_engine://./pipe/docker_engine portainer/portainer
Open portainer with http://localhost:9000, provide a username and password and then click on Manage the local Docker environment. Click Connect to continue.

Then click on the local connection to manage your containers and images in a GUI.

That’s it! As you can see, it is perfectly possible to install and run Docker EE on Windows 10. For me this was really a set-and-forget installation.
Good luck!
Disclaimer: scripts are tested on my Windows 10 v1809 installation. No guarantee it will work on your installation. Scripts are provided ‘as-is’ and without any support. 😉
Если у вас появилась потребность в запуске Docker под Windows на машине со старым железом (без поддержки hyper-v), то в данной статье я расскажу как это сделать.

Скорее всего при запуске Docker Вы получили следующее сообщение:
An error occurred
Hardware assisted virtualization and data execution protection must be enabled in the BIOS. See https://docs.docker.com/docker-for-windows/troubleshoot/#virtualization-must-be-enabled
Данное сообщение говорит о том, что у вас в bios отключена система аппаратной виртуализации и ее необходимо включить.
К сожалению не все машины имеют данную систему виртуализации.
Или же при использовании Windows 10 Home вы могли получить следующее сообщение:
Docker for Windows requires Windows 10 Pro or Enterprise version 14393 to run.
Данное сообщение говорит о том, что для работы Docker требуется версия Windows 10 PRO.
К сожаление с hyper-v системой виртуализации можно работать только в PRO версии системы.
Как быть если в BIOS нельзя включить HYPER-V или ваша версия операционной системы не позволяет вам этого сделать?
Для этого вам понадобится
Docker ToolBox
.
Скачать его можно
тут
(официальный сайт).
Для запуска/установки Docker ToolBox вам может понадобиться
VirtualBox
.
Вы можете выбрать любую другую версию VIrtualBox на
официальном сайте
.
Далее после установки Docker ToolBox у вас появятся ярлыки для запуска Docker Quickstart Terminal и Kitematic (Alpha).
В данной статье я расскажу как запустить контейнер hello-world-nginx в Kitematic (Alpha).
Запустите Kitematic (Alpha):
В списке доступных контейнеров будет hello-world-nginx.
Он нам и нужен. Нажмите create. После чего контейнер будет скачан с Docker hub
и скорее всего автоматически запущен
.
Откройте вкладку Setting, а в ней вкладку Hostname / ports:

Теперь необходимо задать порты для вашего контейнера.
В первой колонке DOCKER PORT задайте 80 порт. Во второй колонке PUBLISHED IP:PORT необходимо прописать порт 9090.
На всякий случай, для избежания конфликтов, убедитесь, что данные порты на вашей машине свободны.
После проведения данных манипуляций необходимо перезагрузить машину и снова запустить Kitematic (Alpha).
После загрузки Kitematic (Alpha) вы увидите созданный контейнер:

Запустите его, нажав кнопку start и перейдите по IP указанному в настройках hostname/ports (В моем случае на скриншоте это был IP 192.168.99.100 и порт 9090).
После перехода в браузере по данному URL и порту вы должны увидеть страницу со следующим содержимым:

На этом все! Docker установлен, контейнер запущен.
Do you want to install Docker on Windows 10/8/7 or server without enabling the Hyper-V (Hypervisor Platform)? Then here is the tutorial, the easiest way to start a Docker container on Windows…
Step to install Docker-CE on Windows 10 or 7 without Hyper-V using ToolBoxDownload Docker ToolBoxRun the installerSelect Destination LocationSelect Docker ToolBox Components to installSelect Additional TasksRun Docker Quickstart Terminal Without Hyper-VCheck the Docker workingKitematic GUI, Access Containers to run commands
Docker, an open-source platform offers containerized virtual machines to run various apps and operating systems in an isolated environment. As compared to other virtual machines software, the Docker is lightweight, and images on it use the system’s kernel to provide optimized speed. Moreover, the images meant to run on it are also stripped down or very light, for example, Ubuntu Image which is far small in size and lighter as compared to regular Ubuntu server CLI ISO available online to download and use.
In terms of version, Docker offers two editions one is Enterprise and the other community that is open-source software. Although the open-source which is free to use has all the functions required to operate containers and can be used on servers and on development to test machines; the things which make it different from the Enterprise version are the support and some management functions to also use them in productive operations.
So, if you don’t want to enable Hyper-V in order to preserve Virtualization support to other software such as VirtualBox or Vmware workstation player then here is the simple way to install Docker-CE on Windows 10 or 7 using the Docker ToolBox.
What we learn here:
- How to run Docker without using Hyper-V?
- Installation of Docker ToolBox for windows 10 and 7
- Pull and run Docker Images on Windows 10 without Hypervisor -Hyper-V
Pre-requisites:
- Docker ToolBox executable file
- Windows 10 or 7
- Administrator access
- Internet connection
Download Docker ToolBox
The first thing we need is the ToolBox, a package that contains various tools that are: Docker, Docker-machine, docker-compose, Kitematic Web-based GUI, and VirtualBox. You can see that VirtualBox is there, thus in the Docker ToolBox instead of Hyper-V, it will use that to run the base Linux image to create further containerized machines. The Toolbox is available for both macOS and Windows 10/8/7 platforms, here is the Github page to download the executable binaries.
Run the installer
Once you have the installer using the above link, simply run it like any other Windows software. You will see the “Docker Toolbox Setup Wizard“. Click on the Next button.

Select Destination Location
By default like any other Windows application, the wizard will also install the Docker files and folder in the C: Drive. However, if you want to save it in some other directory then select that, here.

Select Docker ToolBox Components to install
The benefit of using the ToolBox is it comes with all the essential components we need for using the Docker including the Graphical user interface app called Kitematic to graphically install, start, stop, and delete Docker images pulled from Docker Hub. By default, all of them will be selected and it is recommended to let them as it is, however, if you are an advanced user then select accordingly.
Components are:
- Docker client for Windows
- Docker machine for Windows
- Docker Compose for WIndows
- VirtualBox
- Kitematic for Windows (Alpha)
- Git for Windows

Select Additional Tasks
To create various virtual containers the Docker uses a lightweight Linux distro and to run without Hyper-V it uses VirtualBox. Thus, leave the default options such as Upgrade Boot2Docker VM, Binaries to Path as it is, and click on the Next button.

Run Docker Quickstart Terminal Without Hyper-V
Finally, after installing everything you will see an icon on your Desktop- Docker Quickstart Terminal, double click on that to start the Bash terminal for setting up the Docker Virtual Machine image on VirtualBox.

Check the Docker working
Either you can use the same terminal window or open the Command prompt to check whether the Docker is working fine or not. On the Terminal type:
docker pull ubuntu
The above command will fetch the latest Docker image of Ubuntu from Docker Hub.
Start the Ubuntu container
One the image is pulled, run that as a container:
docker run -it ubuntu
You will see the Ubuntu bash with root user, simply start running all the commands you generally run on Ubuntu Linux OS.
Kitematic GUI, Access Containers to run commands
In case you don’t want to use the command-line interface, then there will be another icon on your Desktop with the label “Kitematic (Alpha)” double click that to run. Select the VirtualBox option from its interface. You will see all the running containers on your system including the recommend images.

You can directly execute commands from the interface of Kitematic to your installed and selected container via PowerShell. Just select the container and click on the Exec option given on the menu. This will open the PowerShell to run container supported commands.

In this way, we can easily get all the benefits of Docker but without enabling Hyper-V on our Windows system. You can also install Docker ToolBox using the Chocolatey…
I’m a big advocate for using Docker, however, it can be a large pain on Windows. Although I am primarily a linux user, I do a lot of my development on a Windows machine for work, and run several VM’s for various purposes, predominatly using Virtual Box. Docker Community Edition’s requirment for Hyper-V limtis it’s availability, with many neeeding to forgo it for their other needs.
This tutorial will show you how to setup Docker using Windows Subsystem for Linux (WSL), hiding the daemon away in a VM so you can still run all your commands and access your containers from a VM. It assumes that you WSL installed. If not, follow these instructions.
I estimate this should take 10-15 minutes.
Setup your VM and install the Docker Daemon
Install Virtual Box from here, and ensure that you install the Host Only Network Adapter.
Once setup, download the CentOS Minimal ISO, and build a VM, installing CentOS. I gave my machine 2048MB of RAM. It’s best too also give your machine a user, and avoid using the root account. USE THE SAME USERNAME AS YOUR WSL USERNAME. This isn’t completley essential, but is helpful for avoiding potential errors later on. After setup has concluded, and you can ensure the machine can get out to the internet, power it down.
Now, go to the settings of your newly created VM, in my case named Containers. Under Networking, enable Adapter 2, and attach it to your Host Only Network Adapter. Power on the machine.
Back inside the machine, power it on, we need to discover our new adapters IP, which we’ll use for later. To do so, we’ll need the ifconfig command found from net-tools.
Run the following commands:
sudo yum -y install net-tools
ifconfig -a
The second command will result in something similar to the following.
Make sure you write the IP down somewhere.
Time to install Docker. I’ve pulled the commands from Docker’s Docs, which I recommend reading for your own knowledge.
    sudo yum install -y yum-utils \
        device-mapper-persistent-data \
        lvm2

    sudo yum-config-manager \
        --add-repo \
        https://download.docker.com/linux/centos/docker-ce.repo

    sudo yum install docker-ce docker-ce-cli containerd.io
Docker is now installed, time to enable it.
sudo systemctl enable docker
And now, make sure it’s running with
sudo systemctl status docker
Finally, add our user too the docker group.
Note, if you’re using a different username on WSL, add it instead of $USER.
sudo usermod -a -G docker $USER
Setting up Docker CLI on WSL to control Docker from Windows.
Now, exit your VM, and load up WSL. Install Docker’s dependencies, add the pgp key, and add the stable repository for Ubuntu.
    sudo apt-get install -y \
        apt-transport-https \
        ca-certificates \
        curl \
        software-properties-common
curl -fsSL https://download.docker.com/linux/ubuntu/gpg | sudo apt-key add -
    sudo add-apt-repository \
        "deb [arch=amd64] https://download.docker.com/linux/ubuntu \
        $(lsb_release -cs) \
        stable"
Now, update your system, and install the latest
    sudo apt-get update -y
    sudo apt-get install -y docker-ce
Install Docker Compose using PIP (with commands should you not already have it)
    sudo apt-get install -y python python-pip
    pip install --user docker-compose
Ensure Volume Mounts Work.
I’d like to thank Nick Jatekins and his blog post for pointing this solution out to me.
For this, we need to edit our volume mounts to make sure things are working. This requires you to have the Windows 10 1803 or later.
Add the following too 3 lines to /etc/wsl.conf with a text editor of your choice. I use VIM.
    [automount]
    root = /
    options = "metadata"
You’ll need to restart to make these changes take effect.
We need to point WSL to use our VM’s Docker Host. Remember the IP for the Host Only Network Adapter before? Here is where we will use it, substituting it(VMIP) and the VM’s username below (VMUN).
    echo "export DOCKER_HOST=ssh://<VMUN>@<VMIP>:2375" >> ~/.bashrc
    source ~/.bashrc
-
Time to get going, run docker info, and we should be good to go.
docker info
We’ll be prompted for the VM’s password, and then the result will be returned.
Setting up SSH Keys
It obviously will get very tedious setting up SSH Keys every time we run a command, so we can setup SSH Keys to avoid this.
Generate an RSA SSH Key in WSL
ssh-keygen -t rsa
Create the .ssh folder on your VM
ssh <VMUN>@<VMIP> mkdir -p .ssh
Add your SSH Key to the Authorised Keys on the VM
cat .ssh/id_rsa.pub | ssh <VMUN>@<VMIP> 'cat >> .ssh/authorized_keys'
Set he permissions on the VM’s .ssh directory
ssh <VMUN>@<VMIP> "chmod 700 .ssh; chmod 640 .ssh/authorized_keys"
Now, Docker, as well as any other sessions over SSH will work without being prompted for a password.
Editing your Hosts File
Edit your hosts file on your local windows machine, as remembering your IP can get annoying after a while.
Add the following two lines (the first being a comment), to the hosts file, found in C:\Windows\System32\drivers\etc.
Please remember to replace the IP with your own.
    ## Docker
    <VMIP> docker
Testing
Now, time to test it. Let’s use WSL, where we should be running all our commands from. Let’s install and run web page test.
docker pull webpagetest/server
docker run -d -p 4000:80 --rm webpagetest/server
This will launch the web page, mapping the containers port 80 to the Docker Daemon (VM)’s port 4000.
Now, head to docker:4000 on your windows machine in a browser of your choice, and if everything is running correctly, you should be greated with the following web page.
Publish Date:
2022-03-23
Word Count:
317
Read Times:
1 Min
Read Count:
Introduction
Docker is an open-source tool that allows you to run numerous software and operating systems in a containerised environment. The background story is that I wish to run an Android app on Mumu, and this app requires the Hyper-V service to be closed. However, I still need to use Docker to deploy my machine learning project, which requires Hyper-V to be enabled. This puts me in a very difficult position. So in this article, I will try to install and run Docker without using Hyper-V service.
Steps
- Disable
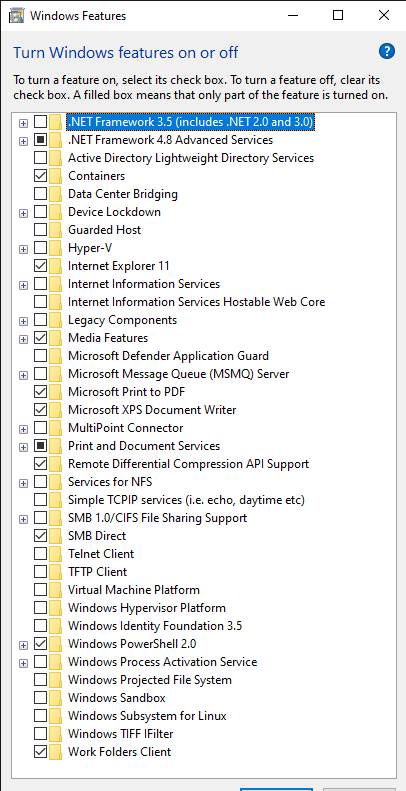
Virtual Machine Platform,Windows Hypervisor PlatformandWindows Subsystem for Linuxfrom Windows Features.
-
Install
Docker ToolBoxexecutable file. Download the executable binaries from their Github Page. -
Run the installer via
Docker Toolbox Setup Wizard. Click on all the Next button like installing any other Windows application. -
Finally, after installing everything you will see an icon on your Desktop, and next run
Docker Quickstart TerminalWithout Hyper-V.
- Check the Docker is working or not.
docker versionClient:
Version: 19.03.1
API version: 1.40
Go version: go1.12.7
Git commit: 74b1e89e8a
Built: Wed Jul 31 15:18:18 2019
OS/Arch: windows/amd64
Experimental: false
Server: Docker Engine - Community
Engine:
Version: 19.03.12
API version: 1.40 (minimum version 1.12)
Go version: go1.13.10
Git commit: 48a66213fe
Built: Mon Jun 22 15:49:35 2020
OS/Arch: linux/amd64
Experimental: false
containerd:
Version: v1.2.13
GitCommit: 7ad184331fa3e55e52b890ea95e65ba581ae3429
runc:
Version: 1.0.0-rc10
GitCommit: dc9208a3303feef5b3839f4323d9beb36df0a9dd
docker-init:
Version: 0.18.0
GitCommit: fec3683References
- https://www.how2shout.com/how-to/install-docker-without-hyper-v-on-windows-10-7.html
- https://poweruser.blog/docker-on-windows-10-without-hyper-v-a529897ed1cc
- https://www.zhihu.com/question/264353707
- https://mumu.163.com/help/20210511/35041_946700.html?fqbanner
- https://github.com/docker/for-win/issues/2192
Reprint policy:
All articles in this blog are used except for special statements
CC BY 4.0
reprint polocy. If reproduced, please indicate source
Yang Wang
!
Previous

Story of Two Returns
In finance, return is a profit on an investment. It can be used to gauge different metrics, all of which help determine how profitable a investment target is. A positive return represents a profit while a negative return marks a loss.
Next

Equivalent WATCH Command in Windows
In Linux, the watch command is extremely handy for running a command on a regular basis and displaying the results. This is particularly useful if you need to keep track of any changes in the output of a command that is run repeatedly. The watch command has no direct equivalent in Windows, however the while loop in Windows PowerShell or the for loops in a Windows command-line prompt (CMD) can achieve the same result.