
I wanted to access a full DFS tree of shared folders from my Windows Server 2008R2 network from an Ubuntu Linux 12.04 machine running on the same network.
My first attempt at using “sudo mount –t cifs …blah-blah-blah… “ simply would not work. Sometimes it *seemed* to connect, but the folders were always empty. I wasted hours trying to figure out how to solve this.
Here is the original post I made on ServerFault.com asking for help, back in March 2012: http://serverfault.com/questions/370338/ubuntu-linux-cannot-see-files-in-folders-when-connected-to-a-dfs-tree-on-windo
I never solved the problem, that is, until I tried again in October 2012. I’m now running Ubuntu 12.04. So, I started all over… I tried a bunch of things from Google… And I finally got it working, even from “Connect to Server” in Nautilus!!!
These are the steps that finally made it work:
1. Enable/configure proper WINS resolution
Follow this discussion to enable WINS resolution of Windows computer names on the network http://askubuntu.com/questions/93302/windows-hostnames-are-not-resolved
Basically, it boils down to making this change:

2. Install SMBFS and KeyUtils
Every time I tried to call the MOUNT command, I was getting some error like “cifs_mount failed w/ return code = -22” that I could see by running dmesg | tail
So, some posts lead me to install these things:
|
sudo apt—get install smbfs sudo apt—get install keyutils |
See: http://thats-not-working.blogspot.com/2008/02/cifssmb-mount-problem-on-debian.html
and http://technopragmatica.blogspot.com/2011/03/connecting-to-dfs-shares-with-ubuntu.html?m=1
Some posts state that the Samba stuff on Ubuntu is now deprecated or replaced by the newer CIFS stuff, and for some things, CIFS is the only thing needed, but I assure you that the original Samba package is also required to connect to a DFS tree on a Windows server.
You will notice that “smbfs” will also install “cifs-utils” if it’s not already installed.
3. Configure smb.conf
I also made a few tweaks in /etc/samba/smb.conf. Uncomment these lines, and enter the correct values for your network:

4. Finally – a very important discovery…
This is the magic that finally made this work for me!!! Changing one little parameter…
I happened to notice this teensy little difference in one of my files compared to a blog post referenced in the only reply to my original question on SeverFault.
In the /etc/request-key.conf, I changed this line:
create cifs.spnego * * /usr/sbin/cifs.upcall <font style=«background-color: #ffff00»>—c</font> %k
to this:
create cifs.spnego * * /usr/sbin/cifs.upcall <font style=«background-color: #ffff00»>—t</font> %k
Note: This file is created by the “keyutils” install. It was not present before, as I looked for it. I noticed that it appeared after installing keyutils via apt-get.
Two things to note here…
1. According to http://www.samba.org/samba/docs/man/manpages-3/cifs.upcall.8.html, the –c option is deprecated and is currently ignored. So, I don’t know why that option is included in the file in first place.
2. Warning: The suggested –t option has something to do with “trusting” the DNS server to resolve and retrieve kerberos session keys. I really don’t understand what it all means, but it is explained in the link listed right above here. All I know is, from my trial-and-error testing, this allows Windows DFS tree mounting to work, and it DOES NOT work without –t on this one line.
So, read the above link to learn more about this and make sure it’s safe for your environment. I tried several times to make it work without the –t option, but whenever it connected It gave me folder names from the DFS tree, but they were empty when viewed in Nautilus.
You need to restart your terminal window after making these changes and before going to the final step below:
Finally, let’s connect to a DFS tree or any other shared folder on the server.
Open a new Terminal window, and type the following:
|
mount —t cifs //servername/sharename /mnt/temp –-verbose -o username=my_user_name,password=my_password,workgroup=DOMAIN_NAME |
The –verbose option adds logging info about the mount, which you can read from this command:
Or, from Nautilus file browser, you can use “Connect to Server” from the File menu, and make these entries in the dialog window:

Kaboom!!! It worked. At least for me.
Good luck to others who need this.
Уровень сложностиСредний
Время на прочтение6 мин
Количество просмотров11K

Если на компьютере под Linux нужно быстренько запустить Windows или MacOS, самый простой и быстрый способ сделать это — ввести команду для скачивания и загрузки докер-контейнера с этой ОС.
В маркетплейсе RuVDS много готовых образов с установленными операционными системами. Там разные дистрибутивы Linux, Windows Server и CentOS. Но нет контейнеров с операционными системами.
Операционная система в докер-контейнере (в QEMU) не требует ручной инсталляции ОС. Всего одна команда в консоли — и контейнер Windows скачивается и запускается.
Набор контейнеров Dockur
Хороший набор докер-контейнеров с готовыми образами операционных систем в виртуальных машинах QEMU можно найти в репозитории Dockur.
Для выбора версии Windows при установке контейнера нужно изменить соответствующее значение в переменной окружения конфигурационного файла:
environment:
  VERSION: "11"
В наличии следующие контейнеры Windows:
Предупреждение. Windows 8 потребляет очень много ресурсов CPU и RAM.
Есть также контейнеры MacOS, тут выбор поменьше:
Запуск через Docker Compose:
services:
  macos:
    image: dockurr/macos
    container_name: macos
    environment:
      VERSION: "13"
    devices:
      - /dev/kvm
      - /dev/net/tun
    cap_add:
      - NET_ADMIN
    ports:
      - 8006:8006
      - 5900:5900/tcp
      - 5900:5900/udp
    volumes:
      - ./macos:/storage
    restart: always
    stop_grace_period: 2m
Из консоли:
docker run -it --rm --name macos -p 8006:8006 --device=/dev/kvm --device=/dev/net/tun --cap-add NET_ADMIN -v ${PWD:-.}/macos:/storage --stop-timeout 120 dockurr/macosДля выбора версии тоже следует изменить значение в переменной окружения конфигурационного файла:
environment:
  VERSION: "13"
Версии MacOS перечислены в таблице выше.
Запуск контейнера Windows на сервере
Установить контейнер можно через Docker Compose, вот файл compose.yaml, который практически идентичен файлу для MacOS:
services:
  windows:
    image: dockurr/windows
    container_name: windows
    environment:
      VERSION: "11"
    devices:
      - /dev/kvm
      - /dev/net/tun
    cap_add:
      - NET_ADMIN
    ports:
      - 8006:8006
      - 3389:3389/tcp
      - 3389:3389/udp
    volumes:
      - ./windows:/storage
    restart: always
    stop_grace_period: 2m
Или из командной строки:
docker run -it --rm --name windows -p 8006:8006 --device=/dev/kvm --device=/dev/net/tun --cap-add NET_ADMIN -v ${PWD:-.}/windows:/storage --stop-timeout 120 dockurr/windowsПо умолчанию устанавливается Windows 11 Pro, другие версии можно указать, изменив параметр переменной окружения, как написано выше.
Дальнейший процесс полностью автоматический, нужно дождаться, пока контейнер скачается и запустится. Docker будет доступен через браузер на порту 8006.
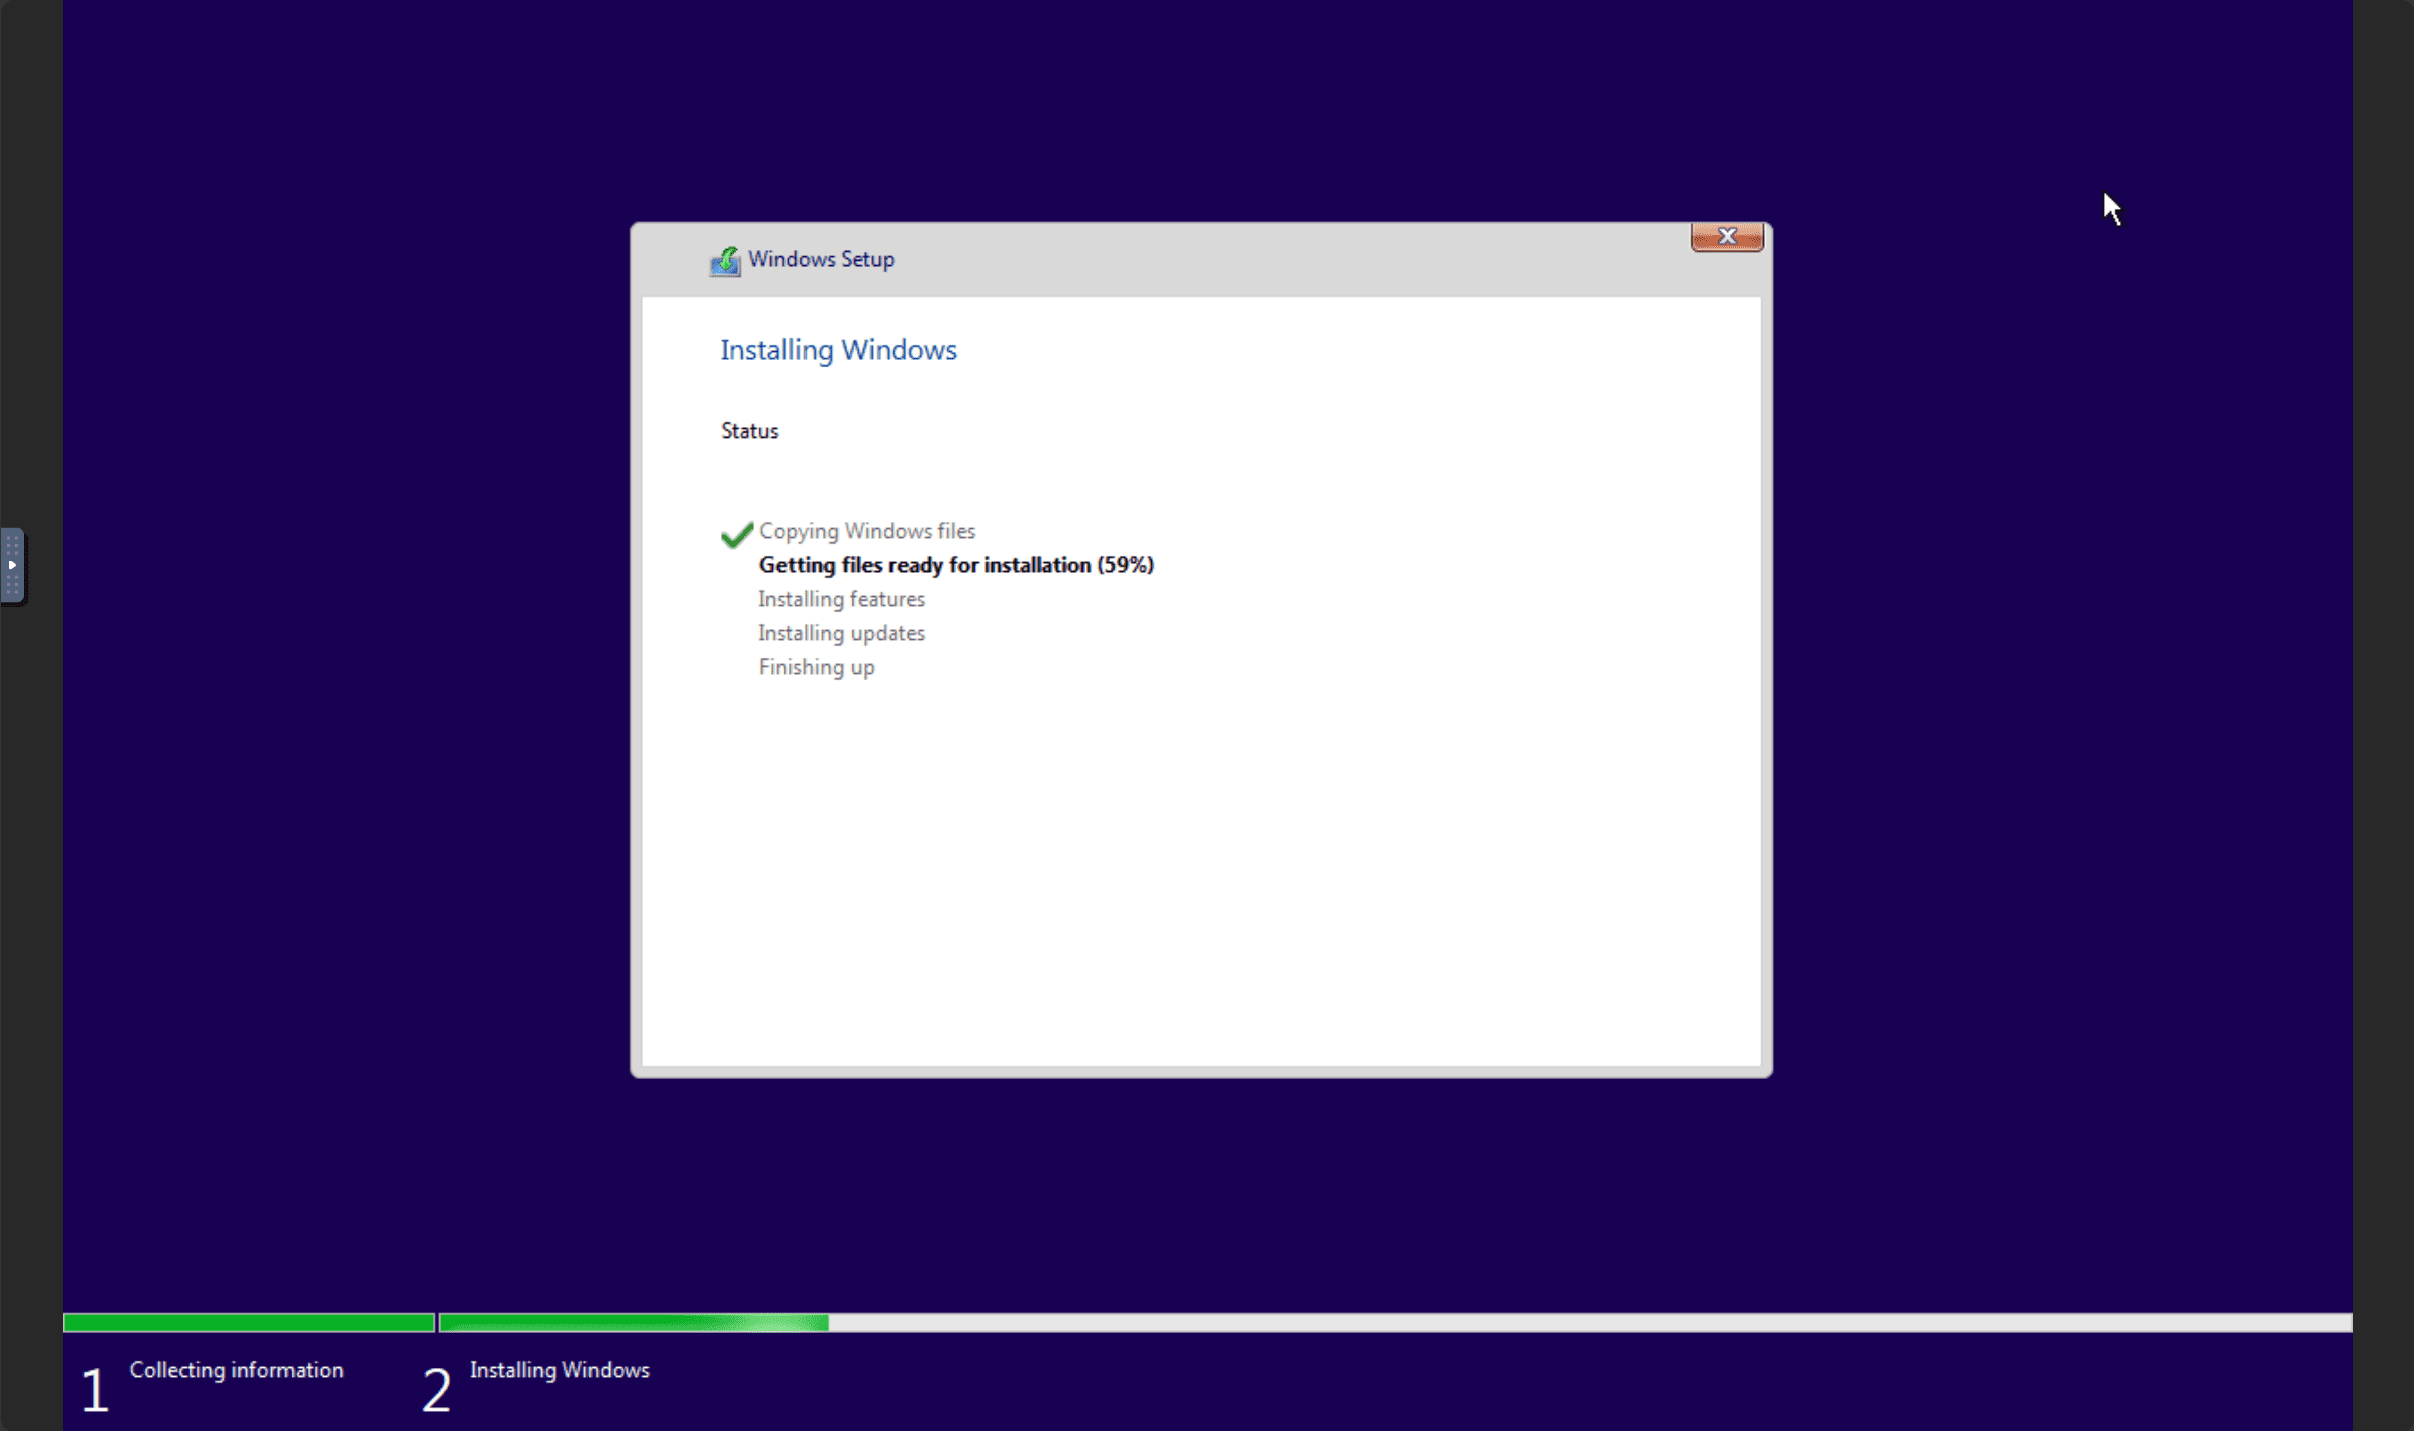
Если зайти по нашему IP-адресу и указанному порту, мы увидим процесс скачивания ISO-образа Windows с сервера Microsoft:

Потом автоматическая установка и настройка Windows:

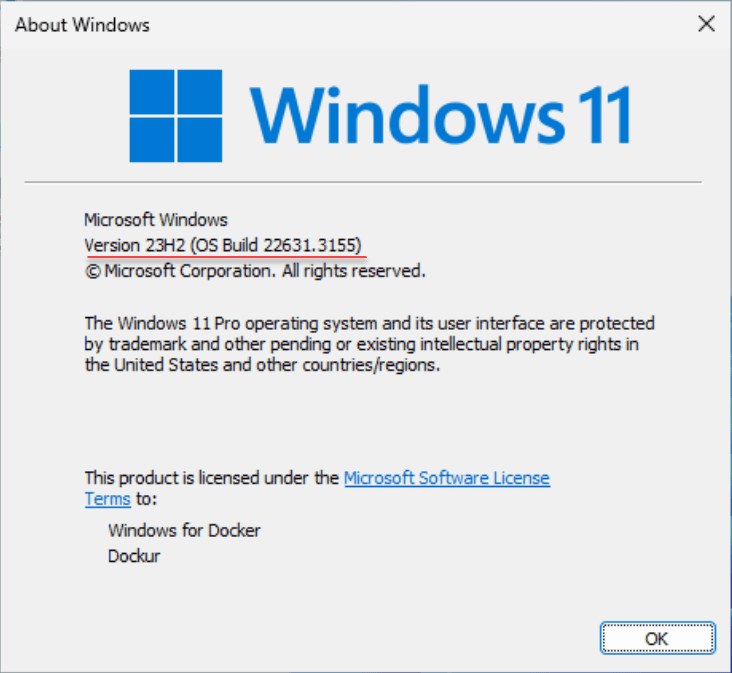
Это специальная версия Windows for Docker, она свободно распространяется с сайта Microsoft и требует активации для полноценной работы. Более старые версии Windows работают 30 дней без активации.

После завершения процесса в браузере откроется рабочий стол Windows:
Через браузер у нас работает система удалённого доступа к рабочему столу VNC (Virtual Network Computing), которая заметно подтормаживает, не поддерживает передачу звука и некоторых других функций. Для максимального комфорта рекомендуется настроить удалённый доступ через RDP. Собственно, этот доступ уже настроен в вышеуказанном файле compose.yaml, в котором присутствуют такие строки:
- 3389:3389/tcp
- 3389:3389/udp
По этим портам и осуществляется удалённый доступ к системе из RDP-клиента, такого как Microsoft Remote Desktop, можно на той же физической системе.
В командной строке для запуска контейнера мы видим параметр --device=/dev/kvm. Это указывает на использование виртуальной машины KVM (Kernel-based Virtual Machine), опенсорсной технологии виртуализации, встроенной в Linux. В частности, KVM позволяет превратить Linux в гипервизор для запуска нескольких изолированных виртуальных окружений, то есть виртуальных машин.
KVM — это часть Linux с 2006 года (с версии ядра 2.6.20), то есть в данном случае мы работаем с нативной виртуальной машиной Linux. Чтобы это стало возможным, материнская плата должна поддерживать технологию виртуализации на аппаратном уровне:

Чтобы проверить наличие поддержки KVM на сервере под Linux, можно запустить следующую команду:
sudo apt install cpu-checker
sudo kvm-ok
Если kvm-ok выдаёт ошибку, то нужно проверить, что:
- в BIOS включены соответствующие расширения виртуализации (Intel VT-x, VT-d или AMD SVM),
- включена «вложенная виртуализация», если контейнер запускается внутри виртуальной машины.
К сожалению, большинство облачных провайдеров не разрешают вложенную виртуализацию на своих VPS:

Поэтому Windows в докер-контейнере запустится только на выделенном сервере или на домашнем сервере/ПК.
Если kvm-ok не выдаёт никакой ошибки, но контейнер всё равно сообщает об отсутствии KVM-устройства, причиной может быть проблема с правами, в качестве решения можно добавить параметр privileged: true в файл compose (или sudo в команду docker).
KVM обеспечивает виртуальной машине доступ к USB-устройствам и другим аппаратным ресурсам. Он позволит даже редактировать BIOS, как в примере выше.
По умолчанию, контейнеру Windows выделяется два ядра CPU и 4 ГБ RAM, это минимальные требования для запуска Windows 11. Чтобы изменить объём выделяемых ресурсов, следует добавить следующие строчки в конфигурационный файл:
environment:
  RAM_SIZE: "8G"
  CPU_CORES: "4"
Увеличение объёма дискового пространства со стандартных 64 ГБ (по умолчанию) до 100 ГБ:
environment:
  DISK_SIZE: "100G"
Виртуальная машина будет занимать столько места на диске, сколько реально занимает контейнер с файлами, а не максимальное указанное значение.
Добавить несколько дисков:
environment:
  DISK2_SIZE: "32G"
  DISK3_SIZE: "64G"
volumes:
  - ./example2:/storage2
  - ./example3:/storage3
Зачем это нужно
Распространённая причина запуска Windows в контейнере — если у нас чисто линуксовое (или яблочное) окружение, вокруг нет ни одного компьютера под Windows, но срочно понадобилось запустить какую-то специфическую программу, которая работает только под Windows. В окружении виртуализации типа Wine эта программа не полностью функциональна. Например, старая утилита для редактирования BIOS (как AMIBCP на скриншоте) запускается под Wine, но не даёт реально изменять значения BIOS, то есть не сохраняет образ ROM:

Конечно, можно установить на ПК мультизагрузчик и вторую ОС или запустить виртуальную машину, но это тоже непростой и многоступенчатый процесс: сконфигурировать гипервизор, выделить аппаратные ресурсы.
Копия Windows в контейнере — самый простой и быстрый способ, если срочно нужна эта ОС. И самое удобное то, что не нужно проходить через процесс инсталляции системы вручную, потому что она устанавливается автоматически и сразу готова к работе. Вся процедура скачивания и запуска контейнера занимает несколько минут.
Другие наборы контейнеров
Кроме перечисленных выше, в репозитории Dockur есть и другие наборы докер-контейнеров, а также программы, полезные для самохостинга:
- Windows для ARM64,
- сервер Samba SMB,
- Dnsmasq,
- strfry, рилей-сервер Nostr,
- casa, операционная система CasaOS для самохостинга (личное облако или домашний дата-центр),

- statping — страничка с красивыми графиками, аналитикой и плагинами, всё для мониторинга сайтов и приложений,
- lemmy — агрегатор ссылок и форум, аналог Reddit или Hacker News, только для децентрализованной сети будущего, где у каждого пользователя свой сервер.

Windows на виртуальном сервере
Хотя KVM не работает на VPS, в маркетплейсе RUVDS есть четыре образа с установленной системой Windows Server 2019 и специализированным программным обеспечением:
- METATRADER 5 (MT5) – SERVER CORE с торговым терминалом MT5,
- SQL EXPRESS – SERVER CORE c бесплатной редакцией SQL Server 2019 и SQL Server Management Studio 18.4. Максимальный размер БД в этой редакции ограничен 10 ГБ,
- сервер Minecraft,
- VPN L2TP — позволяет сразу после установки шаблона подключаться к серверу по VPN, целиком меняя IP-адрес подключившегося.

Если выбрать такой образ — мы получаем готовую лицензированную Windows и настроенный софт.
Кроме того, при ручной конфигурации сервера в конфигураторе есть возможность выбрать несколько версий серверной ОС Windows для установки:
- Windows Server 2022.
- Windows Server 2019.
- Windows Server 2016.
- Windows Server 2012 R2.
- Windows Server Core 2022.

Есть и готовые тарифы с Windows:

Самая дешёвая Windows 2012 R2 стоит 588 руб. в месяц (470 руб. при оплате за год).
С 2023 года у российских пользователей возникли проблемы с покупкой Windows в условиях санкций. В такой ситуации выбор VPS с предустановленной Windows или докер-контейнер с официальным образом — легальный выход из ситуации.
Кстати, таким же удобным способом в Docker/QEMU можно запускать и Linux-контейнеры.
© 2025 ООО «МТ ФИНАНС»
Telegram-канал со скидками, розыгрышами призов и новостями IT 💻

I learned about an exciting project via an email from the developer. I would like to share a new project that allows you to run Windows inside a Docker container without jumping through a lot of hoops. What’s more, you can do this using a Linux Docker host with KVM installed. Let’s take a look at this really cool project in the following content to see how we can run Windows in this context.
Table of contents
- What is Dockurr?
- Prerequisites
- Install Kernel Virtual Machine (KVM)
- Pull down Dockurr in a container and spin up Windows in a Docker container
- Connecting RDP to Windows 11 desktop running in the container
- Running different Windows OS images in Docker
- Custom images
- Networking
- CPU and memory
- What use case does this solve?
- Different than traditional Windows containers
- Docker desktop is still a viable solution
- Wrapping up running Windows 11 Desktop in a Docker container
What is Dockurr?
It is a free and open-source project that allows running Windows client and Windows Server desktop installations inside a Docker container environment. It also allows you to do this on a Linux Docker host that would normally only be able to run Linux containers. Using KVM acceleration, it allows you to run Windows containers on a Linux container host without the need to install and start Docker Desktop or other compatibility issues that are typical with mixing OS’es between Linux and Windows.
You can find the project link to the official Github site here: dockur/windows: Windows in a Docker container. (github.com) .
Instead you can run Windows containers simultaneously with Linux containers using the solution after loading a Docker installation, Docker daemon, etc. Typically Docker Desktop is needed to run the Docker Engine and be able to run containers on Windows, or the reverse is true to run Linux on Windows, using something like WSL, WSL2, or Hyper-V.
It also provides a VNC connection to the container during the installation process. It also allows you to connect via Remote Desktop Protocol (RDP) to the Windows installation running in Docker.
What Windows distro configurations are supported?
- Windows 11 Pro
- Windows 10 Pro
- Windows 10 LTSC
- Windows 8.1 Pro
- Windows 7 SP1
- Windows Vista SP2
- Windows XP SP3
- Windows Server 2022
- Windows Server 2019
- Windows Server 2016
- Windows Server 2012 R2
- Windows Server 2008 R2
- Tiny 11 Core
- Tiny 11
- Tiny 10
Prerequisites
As mentioned, you will need:
- A Linux Docker host (so a Windows Docker host is not required)
- You will need to install Kernel Virtual Machine (KVM) on the Docker host
Install Kernel Virtual Machine (KVM)
First, let’s quickly look at installing Kernel Virtual Machine (KVM) that is used to run virtual machines. If you don’t have KVM installed and attempt to run the container, you will receive an error. I am using an Ubuntu Server 22.04 LTS machine running as a Virtual Machine with nested virtualization enabled on the VM, which allows you to enable hardware virtualization. However, you could use Debian, or another distribution that you like to work with.
Run the following from the command line to install KVM. Make sure you are root or in the sudo users permissions group.:
sudo apt install libvirt-clients libvirt-daemon-system libvirt-daemon virtinst bridge-utils qemu qemu-kvm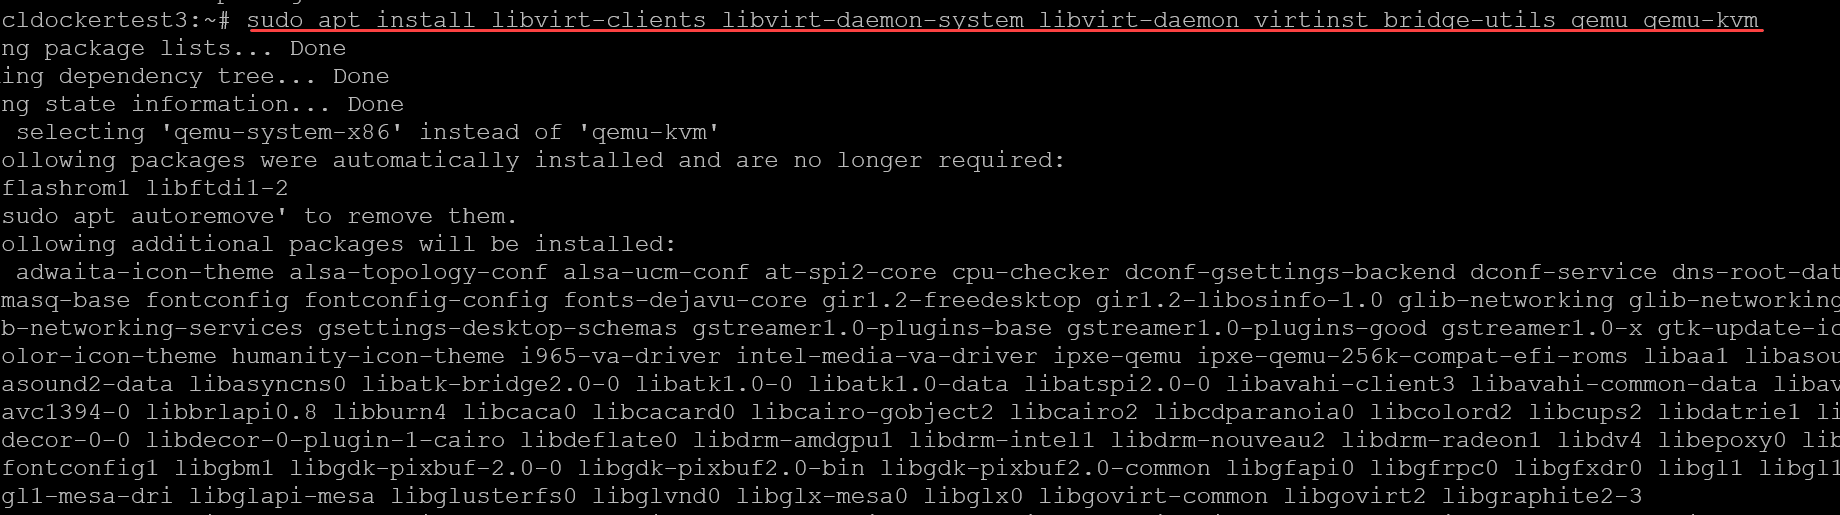
Pull down Dockurr in a container and spin up Windows in a Docker container
After installing KVM on our Linux Docker host, we can now spin up the Docker container called Dockurr, which uses the isolation of KVM. We can do this with some simple Docker compose code. When you spin up the default container configuration, it will pull a Windows 11 Docker image. Note the example Docker compose configuration below:
version: "3"
services:
  windows:
    image: dockurr/windows
    container_name: windows
    devices:
      - /dev/kvm
    cap_add:
      - NET_ADMIN
    ports:
      - 8006:8006
      - 3389:3389/tcp
      - 3389:3389/udp
    stop_grace_period: 2m
    restart: on-failure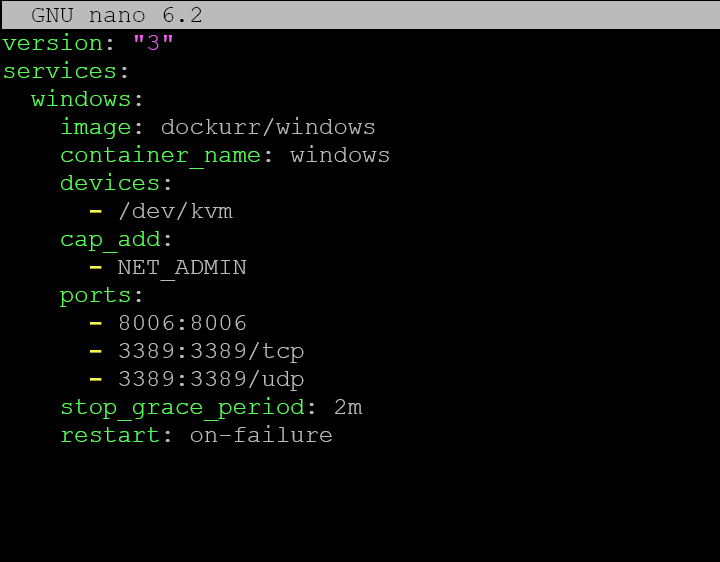
Below, we are running a docker-compose up -d command to bring up the container.
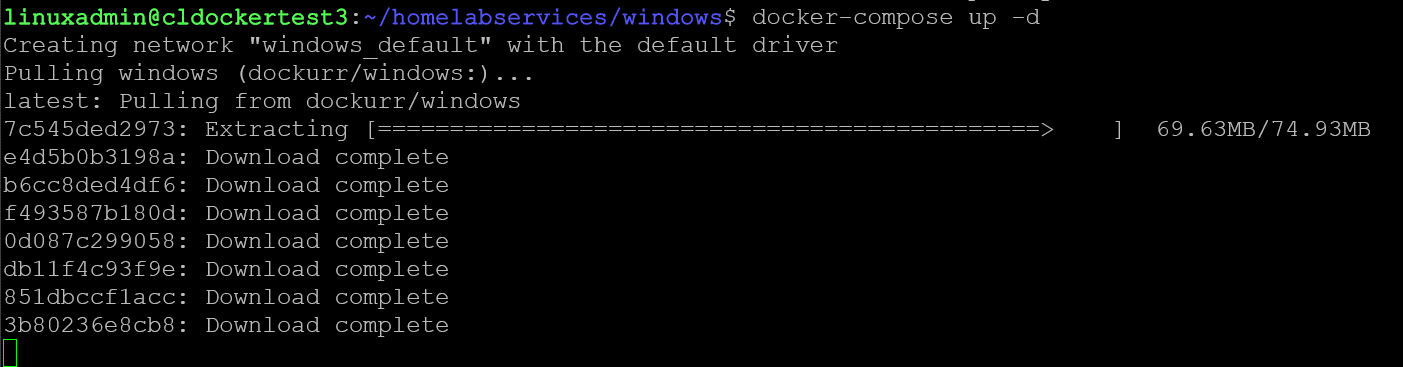
You an also use a docker run command from the docker CLI to pull the container down as well:
docker run -it --rm --name windows -p 8006:8006 --device=/dev/kvm --cap-add NET_ADMIN --stop-timeout 120 dockurr/windows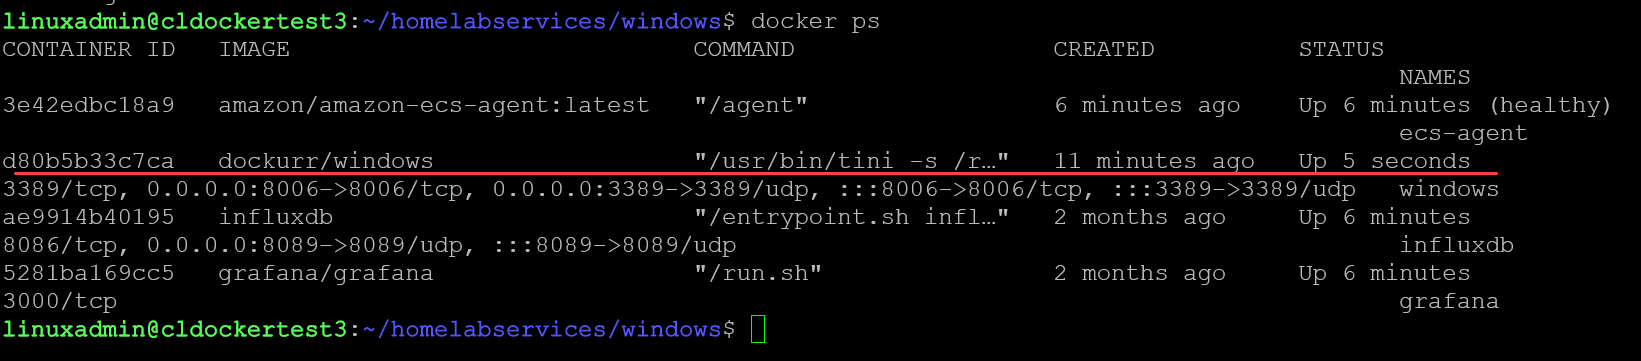
After you use the above commands to pull down the Dockurr solution, you can connect to the container on your container host by connecting to your container host in a browser on port 8006 for UI access.
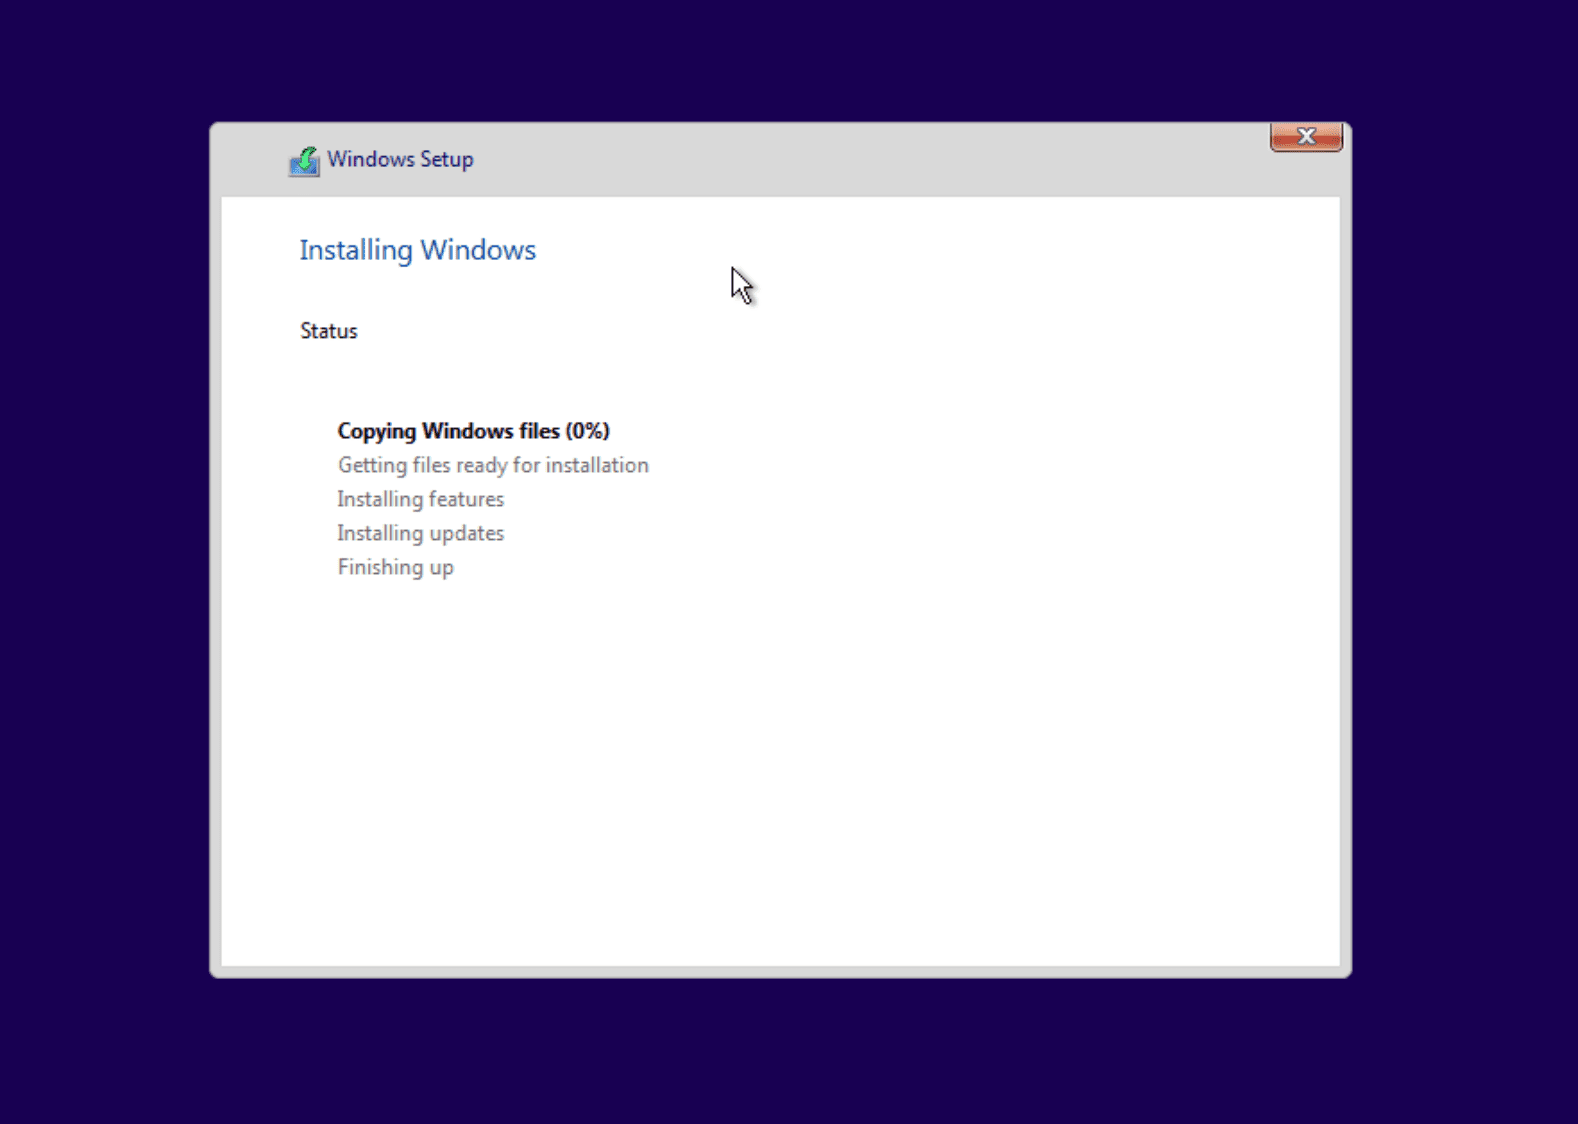
You will see the following screens during the install. It will show that itis downloading the image and a few other things as it gets distracted.
The image will show it is downloading, and then extracting the files it needs for the installation in the background.
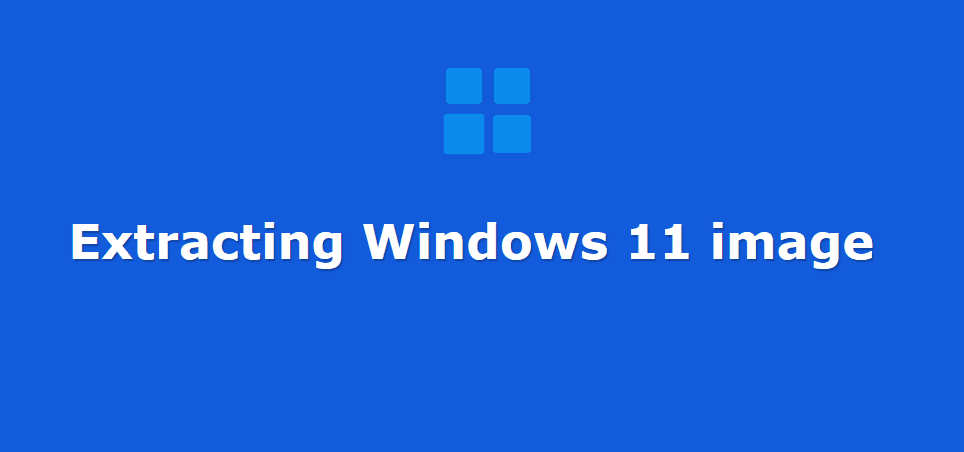
After the extraction is complete, it will show to be building.
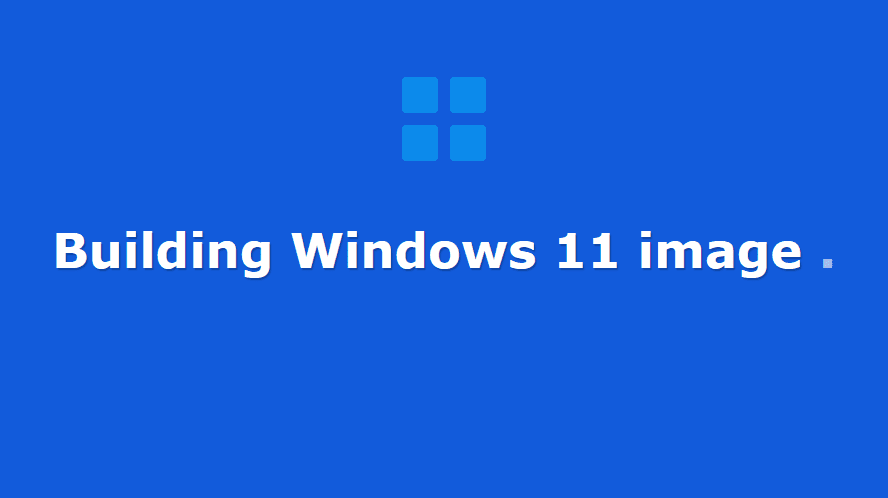
Setup starts with Windows 11 and the order of step configuration below will be familiar.
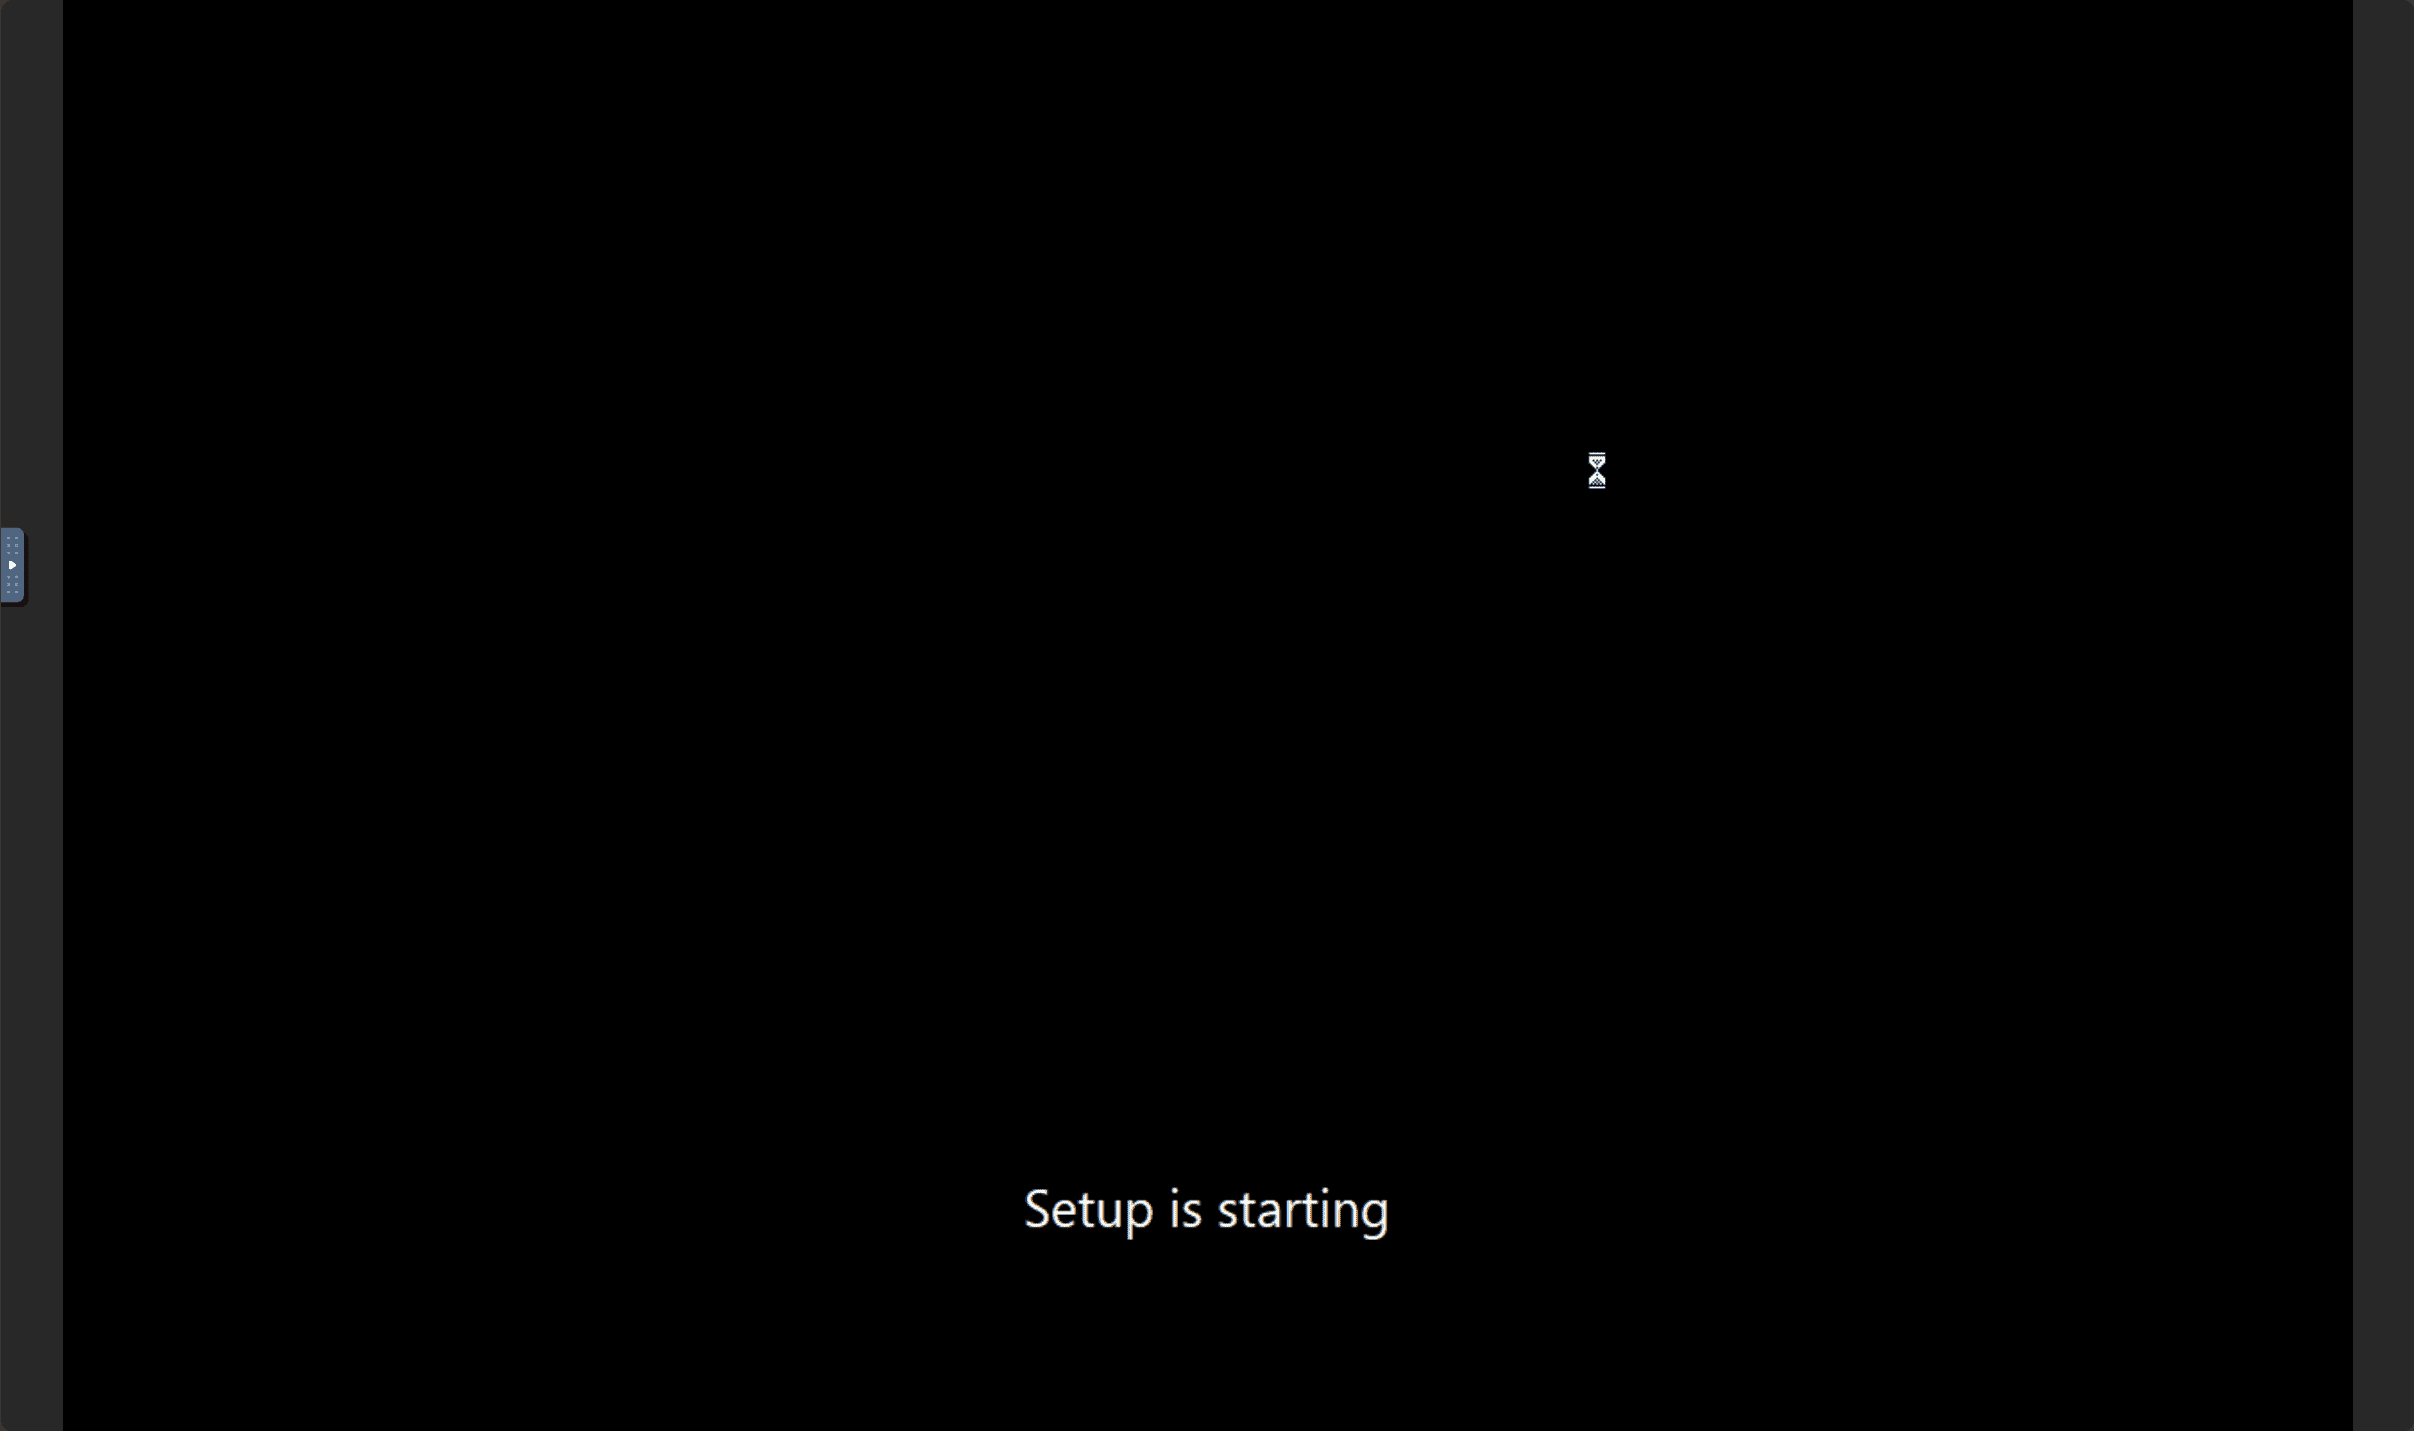
You will see the normal Windows installation start in the web console.
You will see the installation begin automatically as it does when you have an unattend file, which is likely what is happening under the hood.
After the installation completes, it will automatically login using the docker username.

You may wonder which variant of Windows 11 is installed by default. From the Windows command prompt, you can run a winver command using Windows terminal and it looks to install Version 23H2 OS Build 22631.3155.
Connecting RDP to Windows 11 desktop running in the container
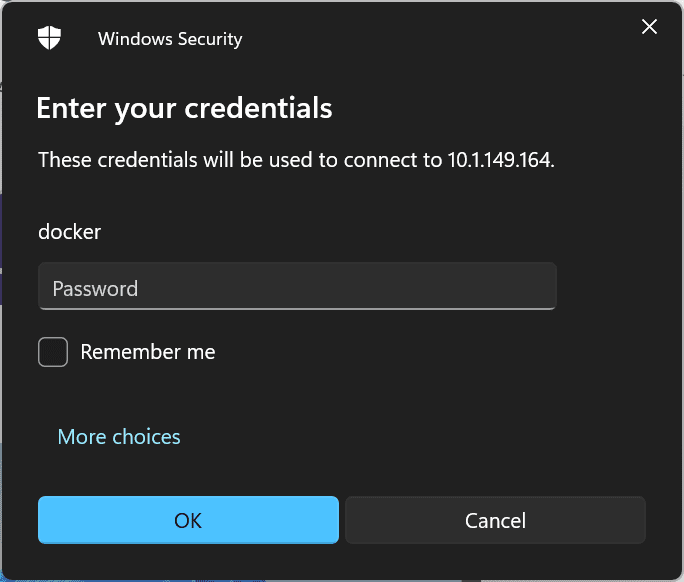
Now, we know we can connect using VNC over port 8006. Let’s see if we can connect using Remote Desktop Protocol (RDP).
Connect to the hostname or IP of your Docker host, port 3389. The login credentials are:
- username: docker
- password: {blank}
Running different Windows OS images in Docker
As mentioned at the outset, you can run a wide range of different Windows operating systems in this tool. How do you specify a different version of Windows to be used instead of the default Windows 11 image?
environment:
  VERSION: "win11"
You can use the following designators in the environment variable to note which version of Windows you want to spin up (win11, win10, ltsc10, win7, etc) in the information list below:
| win11 | Windows 11 Pro | Microsoft | Fast | 6.4 GB |
| win10 | Windows 10 Pro | Microsoft | Fast | 5.8 GB |
| ltsc10 | Windows 10 LTSC | Microsoft | Fast | 4.6 GB |
| win81 | Windows 8.1 Pro | Microsoft | Fast | 4.2 GB |
| win7 | Windows 7 SP1 | Bob Pony | Medium | 3.0 GB |
| vista | Windows Vista SP2 | Bob Pony | Medium | 3.6 GB |
| winxp | Windows XP SP3 | Bob Pony | Medium | 0.6 GB |
| 2022 | Windows Server 2022 | Microsoft | Fast | 4.7 GB |
| 2019 | Windows Server 2019 | Microsoft | Fast | 5.3 GB |
| 2016 | Windows Server 2016 | Microsoft | Fast | 6.5 GB |
| 2012 | Windows Server 2012 R2 | Microsoft | Fast | 4.3 GB |
| 2008 | Windows Server 2008 R2 | Microsoft | Fast | 3.0 GB |
| core11 | Tiny 11 Core | Archive.org | Slow | 2.1 GB |
| tiny11 | Tiny 11 | Archive.org | Slow | 3.8 GB |
| tiny10 | Tiny 10 | Archive.org | Slow | 3.6 GB |
Custom images
In addition to the versions of Windows you can install by default, you can also use custom images for your Windows media. It is as easy as defining the web location of the Windows custom ISO like the following:
environment:
  VERSION: "https://example.com/win.iso"
Networking
If you want to connect your Windows containers to a specific network in production, you can do this with some additional configuration. By default, the containers use bridged networking so that it uses the IP address of the Docker host. However, according to the documentation details, you can manually change this:
docker network create -d macvlan \
    --subnet=192.168.0.0/24 \
    --gateway=192.168.0.1 \
    --ip-range=192.168.0.100/28 \
    -o parent=eth0 vlan
Then, you Docker compose file can use this new network by changing it like the following:
services:
  windows:
    container_name: windows
    ..<snip>..
    networks:
      vlan:
        ipv4_address: 192.168.0.100
networks:
  vlan:
    external: true
CPU and memory
You can also configure the CPU and memory resources, using the following:
environment:
  RAM_SIZE: "8G"
  CPU_CORES: "4"
What use case does this solve?
In case you are wondering, where you would use this type of solution, running Windows inside a Docker container. It is true, we are adding a layer of complexity to the backend instead of just directly running Windows VMs by adding the Docker container layer on top of that.
However, I think this solution would be great for home labs or developers since it allows you to spin up Windows clients and servers very easily in running containers instead of having to provision full virtual machines. Now, granted, you can have a similar experience of easily provisioning Windows virtual machines with something like Packer and Terraform or provisioning using PowerShell.
But, the containers make this even easier. Also, by using Docker containers for the Windows environments, you are saving a considerable amount of disk space for each new virtual machine you spin up, since they are sharing the Windows image.
Different than traditional Windows containers
As noted, we are using a Linux container host, so we are not using a Windows Server to run Windows containers. Windows containers allow you to containerize Windows-based applications in the same way as Linux applications.
Docker provides the following packaged components for your applications: code, runtime, system tools, libraries, and settings. Since it uses traditional Docker technologies, Windows containers must be run on a Windows Docker host.
Keep in mind too, these are not Windows containers that run the Windows desktop. These are generally Windows Server Core images that run Windows applications which can be pulled from the Microsoft repository.
Docker desktop is still a viable solution
Docker Desktop for Windows is an application that leverages Docker’s technology to deploy and manage containers on a Windows 10 or Windows 11 system. It integrates easily with your operating system, allowing you to run both Linux and Windows containers.
Installing Docker Desktop is straightforward. You just download the installer from the Docker Hub website. Once downloaded, run the installer and follow the on-screen instructions. If you run into issues with installing or running Docker Desktop, check out my blog post guide here on Docker Desktop.
Wrapping up running Windows 11 Desktop in a Docker container
Running Windows inside Docker containers can have enormous benefits for spinning up multiple virtual machines for lab environments, development, training scenarios, or other use cases. Using KVM underneath the hood, the performance is good since it is true virtualization and not just emulation. The benefits of containerization for Windows-based applications can help with increased productivity, easier scalability, and consistent operating environments for software development and deployment.
In this article, we have seen how the Dockurr solution allows running Windows desktop environments using Docker containers. It is easy to get started using and managing Windows desktops in this way. This could be a viable alternative to running Kubevirt on top of Kubernetes as it has many features and is perfectly legal since it makes use of Microsoft’s trial software. Let me know your feedback in the comments, or post a new thread in the VHT forums.
Содержание
- 1 Общая информация
- 2 Проверка требований
- 3 Установка Samba
- 4 Настройка Samba
- 5 Проверка работы и отладка
- 6 Дополнительная настройка
- 7 Доступ к Samba из Windows 7 и 2008 r2
- 8 Работа над ошибками
- 8.1 Winbind не запускается
- 8.2 Ошибка получения билета Kerberos
- 9 Полезные комманды
- 10 См. также
- 11 Cсылки
Общая информация
Если вам нужно просто предоставить сетевой доступ к ресурсам Linux компьютера, то смотрите статью Samba.
В этой статье мы опишем как подключить Linux компьютер к домену под управлением Microsoft Active Directory и сделать из него файловый сервер.
После выполнения этой инструкции мы будем иметь в сети файловый сервер под управлением ОС Линукс, входящий в домен Windows 2003 и ничем не отличающийся от файлового сервера под Windows. Пользователи домена смогут обращаться к его ресурсам под своими учётными записями. Доступ регулируется группами домена AD.
По этой инструкции настраивались Debian (4, 5), Ubuntu 9.10, создавалась она на основе официальной документации и многих рекомендаций и инструкций из Интернета. Остальные Linux’ы настраиваются сходным образом.
Для Alt Linux написана хорошая инструкция http://freesource.info/wiki/AltLinux/Dokumentacija/SambaInWin2kDomain?v=omo&
Проверка требований
- Проверяем что Samba собрана с поддержкой Kerberos:
# smbd -b | grep KRB

   HAVE_KRB5_H
   HAVE_ADDRTYPE_IN_KRB5_ADDRESS
   HAVE_DECODE_KRB5_AP_REQ
   HAVE_KRB5
   HAVE_KRB5_AUTH_CON_SETUSERUSERKEY
   HAVE_KRB5_C_ENCTYPE_COMPARE
   HAVE_KRB5_C_VERIFY_CHECKSUM
   HAVE_KRB5_ENCRYPT_BLOCK
   HAVE_KRB5_ENCRYPT_DATA
   HAVE_KRB5_FREE_AP_REQ
   HAVE_KRB5_FREE_DATA_CONTENTS
   HAVE_KRB5_FREE_KEYTAB_ENTRY_CONTENTS
   HAVE_KRB5_FREE_KTYPES
   HAVE_KRB5_FREE_UNPARSED_NAME
   HAVE_KRB5_GET_PERMITTED_ENCTYPES
   HAVE_KRB5_GET_RENEWED_CREDS
   HAVE_KRB5_KEYBLOCK_IN_CREDS
   HAVE_KRB5_KEYTAB_ENTRY_KEY
   HAVE_KRB5_KEYUSAGE_APP_DATA_CKSUM
   HAVE_KRB5_KT_FREE_ENTRY
   HAVE_KRB5_LOCATE_KDC
   HAVE_KRB5_MK_REQ_EXTENDED
   HAVE_KRB5_PRINCIPAL2SALT
   HAVE_KRB5_PRINC_COMPONENT
   HAVE_KRB5_SET_DEFAULT_TGS_KTYPES
   HAVE_KRB5_SET_REAL_TIME
   HAVE_KRB5_STRING_TO_KEY
   HAVE_KRB5_TKT_ENC_PART2
   HAVE_KRB5_USE_ENCTYPE
   HAVE_LIBGSSAPI_KRB5
   HAVE_LIBKRB5
   HAVE_MAGIC_IN_KRB5_ADDRESS
   HAVE_TICKET_POINTER_IN_KRB5_AP_REQ
   KRB5_VERIFY_CHECKSUM_ARGS
- Также проверим что поддерживается LDAP
# smbd -b | grep LDAP

   HAVE_LDAP_H
   HAVE_LDAP
   HAVE_LDAP_ADD_RESULT_ENTRY
   HAVE_LDAP_DN2AD_CANONICAL
   HAVE_LDAP_INIT
   HAVE_LDAP_INITIALIZE
   HAVE_LDAP_SET_REBIND_PROC
   HAVE_LIBLDAP
   LDAP_SET_REBIND_PROC_ARGS
- Для корректной работы Samba в домене Windows 2003 нужны версии MIT Kerberos version >=1.3.1. Проверим:
# dpkg -l | grep krb

ii  krb5-config    1.22                       Configuration files for Kerberos Version 5
ii  libkrb53       1.6.dfsg.4~beta1-5lenny1   MIT Kerberos runtime libraries
- Для корректной работы с Windows 2008 серверами сама Samba должна быть достаточно свежая:
# smbd -V

Version 3.2.5
Установка Samba
- Устанавливаем сервер и клиент samba.
# apt-get install samba samba-client krb5-config
При настройке krb5-config лучше указывать IP адреса контроллеров домена, а не их DNS имена.
Настройка Samba
- Для подключения к домену Active Directory удобно использовать утилиту Likewise-Open.
- Для администрирования Samba удобно использовать SWAT или webmin, которые предоставляют веб интерфейс. Попасть на него можно по адресу http://server_address:901 и https://server_address:10000 соответственно, указав для соединения пользователя root. Но будьте осторожны — он полностью переписывает smb.conf и некоторые параметры может просто игнорировать. Лучше предварительно сделать резервную копию файла. Я сначала использовал SWAT, а затем дорабатывал конфигурационный файл /etc/samba/smb.conf руками. Вот, что осталось у меня не закоментированным (принтеры к этому серверу не подключены):
[global]
        unix charset = LOCALE
        realm = WORKGROUP.DOMAIN.LOCAL
        server string = Storage samba server
        interfaces = eth0
        bind interfaces only = Yes
        security = ADS
        obey pam restrictions = Yes
        passdb backend = tdbsam
        passwd program = /usr/bin/passwd %u
        passwd chat = *Enter\snew\sUNIX\spassword:* %n\n *Retype\snew\sUNIX\spassword:* %n\n *password\supdated\ssuccessfully* .
        log level = 3
        syslog = 0
        log file = /var/log/samba/log.%m
        max log size = 100
        name resolve order = lmhosts host wins bcast
        printcap name = CUPS
        local master = No
        domain master = No
        dns proxy = No
        ldap ssl = no
        panic action = /usr/share/samba/panic-action %d
        idmap uid = 10000-20000
        idmap gid = 10000-20000
        template shell = /bin/bash
        invalid users = root

[print$]
        comment = Printer Drivers
        path = /var/lib/samba/printers

[distrib]
        path = /data/distrib
        valid users = @WORKGROUP\DistribGroup
        write list = @WORKGROUP\DistribGroup
        read only = No
        create mask = 0777
        directory mask = 0777

[backup]
        path = /data/backup
        valid users = @WORKGROUP\BackupGroup
        write list = @WORKGROUP\BackupGroup
        read only = No
        create mask = 0777
        directory mask = 0777
Мы описали два общих каталога:
- backup — доступ имеют только пользователи входящие в группу BackupGroup в Active Directory. Они могут создавать и удалять файлы/каталоги
- distrib — доступ имеют все пользователи входящие в группу DistribGroup в Active Directory
В приведённой конфигурации подразумевается, что eth0 — это сетевой интерфейс в локальную сеть, где домен имеет полное имя WORKGROUP.DOMAIN.LOCAL
- редактируем /etc/nsswitch:
passwd:         compat winbind
group:          compat winbind
shadow:         compat winbind

hosts:          files dns wins
networks:       files dns

protocols:      files
services:       files
ethers:         files
rpc:            files

netgroup:       files
- Проверим, что в /etc/hosts есть корректная запись для нашего сервера, также можно добавить записи для контроллеров доменов:
10.0.0.15      storage.domain.local storage
10.0.0.85      dcwg1.domain.local dcwg1
10.0.0.245     dcwg2.domain.local dcwg2
- Удаляем если есть (или переносим в резервные копии) файл /etc/samba/secrets.tdb и все файлы из /var/lib/samba/*.tdb
- Проверяем конфигурацию (не обязательно):
- testparm -s
В Ubunto testparm находится в пакете samba-common-bin
- Проверим как Samba-3 winbind общается с контроллером домена Active Directory посредством протокола Kerberos:
# net ads info

LDAP server: 10.0.0.85
LDAP server name: dcwg1.workgroup.domain.local
Realm: WORKGROUP.DOMAIN.LOCAL
Bind Path: dc=WORKGROUP,dc=DOMAIN,dc=LOCAL
LDAP port: 389
Server time: Срд, 03 Мар 2010 13:12:14 NOVT
KDC server: 10.0.0.85
Server time offset: -5
На рассхождение времени в секундах указывает строка «Server time offset: -5». Обратите внимание, что протокол Kerberos зависим от времени, и расхождение с часами контроллера домена допускается лишь незначительное, поэтому желательно настроить NTP клиент (см. статьи по настройке NTP). В Ubuntu это указывается в файле /etc/default/ntpdate:
NTPSERVERS="10.0.0.85 10.0.0.245"
- В Debian (и его сыновьях, таких как Ubuntu и внуках вроде Linux Mint) при установке пакета krb5-cofig сразу предлагается его настройка. Лучше всего попробовать работать с этими настройками, но если ничего предложено не было или мы хотим что-то изменить, то редактируем /etc/krb5.conf (я для более стабильной работы использовал ip адреса вместо имён серверов):
[libdefaults]
        default_realm = WORKGROUP.DOMAIN.LOCAL

# The following krb5.conf variables are only for MIT Kerberos.
        krb4_config = /etc/krb.conf
        krb4_realms = /etc/krb.realms
        kdc_timesync = 1
        ccache_type = 4
        forwardable = true
        proxiable = true
#
#...
#
# The following libdefaults parameters are only for Heimdal Kerberos.
        v4_instance_resolve = false
        v4_name_convert = {
                host = {
                        rcmd = host
                        ftp = ftp
                }
                plain = {
                        something = something-else
                }
        }
        fcc-mit-ticketflags = true

[realms]
        WORKGROUP.DOMAIN.LOCAL = {
                kdc = 10.0.0.85
                kdc = 10.0.0.245
                admin_server = 10.0.0.85
        }
#
#...
#
[login]
        krb4_convert = true
        krb4_get_tickets = false
- Проверим работает ли Kerberos, постараемся получить билет и просмотреть его:
# kinit administrator@WORKGROUP.DOMAIN.LOCAL
Password for administrator@WORKGROUP.DOMAIN.LOCAL:

# klist
Ticket cache: FILE:/tmp/krb5cc_0
Default principal: administrator@WORKGROUP.DOMAIN.LOCAL

Valid starting     Expires            Service principal
03/06/10 14:51:41  03/07/10 00:51:47  krbtgt/WORKGROUP.DOMAIN.LOCAL@WORKGROUP.DOMAIN.LOCAL
        renew until 03/07/10 14:51:41
- Удалим полученный билет:
# kdestroy
- Присоединяемся к домену:
# net ads join -UAdministrator

Administrator's password:
Using short domain name -- WORKGROUP
Joined 'STORAGE' to realm 'WORKGROUP.DOMAIN.LOCAL'
Всё, компьютер включен в домен, что можно проверить на контроллере. Даже если после приведённых строк получили следующие:
[2010/03/06 15:04:00,  0] libads/kerberos.c:332(ads_kinit_password)
  kerberos_kinit_password STORAGE$@WORKGROUP.DOMAIN.LOCAL failed: Client not found in Kerberos database DNS update failed!
Проверка работы и отладка
- Для удобства отладки сделаем ссылку на каталог журналов:
# ln -s /var/log/samba /etc/samba/log
- Запускаем samba и winbind:
# /etc/init.d/samba start
# /etc/init.d/winbind start
- Для проверки правильно ли подключение к домену можно посмотреть список пользователей и групп домена (не обязательно):
# wbinfo -u
# wbinfo -g
Если нас не понимают, то подсказываем пароль для wbinfo и смотрим: список доменов в сети, информацию о домене WORKGROUP, список пользователей и групп домена:
# wbinfo --set-auth-user=root%root_password
# wbinfo --all-domains
# wbinfo -D WORKGROUP
# wbinfo -t
- Проверяем, как работает NSS. Команда getent показывает инфо о пользователе, который может быть как в домене, так и юниксовый:
# getent passwd | grep pm
pm:x:15000:15000::/home/WORKGROUP/pm:/bin/false

# getent passwd | grep pavel
pavel:x:500:500:Pavel Malahov:/home/pavel:/bin/bash
- Теперь можно использовать ресурсы на линукс-сервере, на которые мы дали доступ, как обычные доменные ресурсы.
Дополнительная настройка
- Можно также сопоставить (но это не обязательно) локальные учётные данные и из домена Windows. Для сопоставления пользователей редактируем файл /etc/samba/smbusers.conf:
root = admin administrator
- для сопоставления (мапирования от англ. Map) групп домена и групп UNIX выполняем:
# net groupmap modify ntgroup="Domain Admins" unixgroup=root
# net groupmap modify ntgroup="Domain Users" unixgroup=users
# net groupmap modify ntgroup="Domain Guests" unixgroup=nobody
- После того как всё отлажено, можно понизить уровень записи в журнал до «1». В /etc/samba/smb.conf:
log level = 1
Доступ к Samba из Windows 7 и 2008 r2
Начиная с этих версий параметры авторизации у MS поменялись. Скорее всего Samba вскоре это учтёт, а пока подружить системы можно изменив на Win7 свойства сетевой безопасности:
Пуск — Панель управления — Администрирование — Локальная политика безопасности — Локальные политики — Параметры безопасности
- Сетевая безопасность: минимальная сеансовая безопасность для клиентов на базе NTLM SSP — убрать галочку с «Требовать 128-битное шифрование». Таких параметра два — выполнить для обоих
- Сетевая безопасность: уровень проверки подлинности LAN Manager — выбрать в списке пункт «Отправлять LM- и NTML-ответы»
Работа над ошибками
Winbind не запускается
При запуске Samba обнаруживаем, что winbind не запустился:
# /etc/init.d/winbind status
 * winbind is not running
В журнале log.winbindd обнаруживаем запись:
[2010/03/06 13:54:34,  2] winbindd/winbindd_util.c:235(add_trusted_domain)
  Added domain BUILTIN  S-1-5-32
[2010/03/06 13:54:34,  2] winbindd/winbindd_util.c:235(add_trusted_domain)
  Added domain STORAGE  S-1-5-21-3963871611-1338977097-196861091
[2010/03/06 13:54:34,  0] winbindd/winbindd_util.c:782(init_domain_list)
  Could not fetch our SID - did we join?
[2010/03/06 13:54:34,  0] winbindd/winbindd.c:1385(main)
  unable to initialize domain list
Видим, что добавлен «встроенный домен» (BUILTIN) и домен «название компьютера» (STORAGE), подключиться к домену AD не удалось.
Решение: Переподключить компьютер в домен. Удалять придётся с самого контроллера, т.к. комадна net ads leave скорее всего не поможет.
Ошибка получения билета Kerberos
При попытке получить билет Kerberos получили:
kinit: KDC reply did not match expectations while getting initial credentials
Решение: указать имя домена в другом регистре. Скорее всего нужны все заглавные
Полезная ссылка: http://subscribe.ru/archive/comp.soft.win.linuxsa/200510/19115643.html
Полезные комманды
| $ smbclient -N -L 10.0.0.117 | показывает ресурсы компьютера с адресом 10.0.0.117 |
| $ smbclient //10.0.0.117/common | Вход в расшаренную директорию. Пользователь unix от которого выполняется команда должен быть зарегистрирован в домене. |
| # net ads join -U pavel -d 3 | Добавить в домен пользователя pavel |
| # winbindd -d 3 -i | Режим отладки (-d), winbindd запускается не как демон (-i) |
| # wbinfo -a mydomain\\myuser%mypasswd | авторизируемся в домене (через winbindd, wbinfo входит в этот пакет) |
| # ldapsearch | запросы к LDAP серверу, в нашем случае к MS Active Directory |
| # tdbdump /etc/samba/secrets.tdb | просмотреть содержимое файла *.tdb |
См. также
- Статья Samba даёт краткий общий обзор пакета Samba утилит для него, а также описывает простой (без авторизации в домене) способ предоставления каталогов в общий доступ.
Cсылки
- http://linux.yaroslavl.ru//docs/serv/samba/samba-win2000.html — Samba и доменная аутентификация Windows2000
- http://us6.samba.org/samba/docs/man/Samba-Guide/unixclients.html#adssdm- Active Directory Domain with Samba Domain Member Server — подробная инструкция как подключить Linux сервер с помощью Samba 3 к домену под управлением AD Windows 2003.
- http://us6.samba.org/samba/docs/man/Samba-Guide/kerberos.html#id397375 — пример настройки доступа для пользователей Active Directory
- Samba-HOWTO-Collection.pdf, стр.54-57 (поставляется с исходниками) или
- http://jcifs.samba.org/ntstatus.txt — описание статусов
This blog post is a guide on how to add a Linux Samba share as a DFS Target Folder.
Installation of DFS
- Open an administrator PowerShell window
-
Install the DFS feature
- Windows 2008 R2: servermanagercmd –i FS-DFS-Namespace, RSAT-DFS-Mgmt-Con
- Windows 2012 : add-Windowsfeature FS-DFS-Namespace, RSAT-DFS-Mgmt-Con
Configuration of DFS
- Open the DFS Management console.
-
Expand the DFS Management and click Namespaces
-
Right Click Namespace à New Namespace
-
Select the one of the servers that have the DFS feature installed.
-
Type the name for the DFS. Ex: files. Click Edit Settings to configure the share permissions.
-
Configure the permissions for the share. In this example we will use Administrator have full access; other users have read and write permissions.
-
Select the type of DFS you will use. In this case we will use Domain-based namespace and select “Enable Windows Server 2008 mode” then press next.
-
Press Create to go ahead and configure the DFS.
-
Press Close to finish the installation.


Adding Namespace Servers
- Open the DFS Management console
-
Click the existing DFS (\\domain\share) à Add Namespace Server
-
Type the name of the other server with DFS feature installed. In this example DFS is installed on the DC’s. Click Edit Settings to configure the share security settings
-
Configure the permissions for the share. In this example we will use Administrator have full access; other users have read and write permissions.
-
After you add all your DFS servers you will see all your namespace servers in the Namespace Server tab


Add Folder to the DFS
Folders are the way DFS present the different shares to the users. You will have to add a folder for each Share that you want to present to the DFS.
-
Right click the DFS à New Folder
- Type a name. In this case I will call it SambaShare
-
Press Add to add the location of the folder.
-
Press OK when you finished adding the folder.
-
Open a computer and browse your new DFS. Ex: \\cavarpe\files , you will see your new share, if you browse the folder you will see the files in the share.


Add a second folder target
In the DFS folder you can have multiple targets to direct the users to the closes server.
-
Left click the Folder à Add Folder Target.
-
-
In the Replication message select No as we do not want windows to manage the replication for the Linux Shares.
-
You will see all the targets in the Folder Target tab.


Detect the site of a Windows Client or Server
In order to detect the client Active Directory Site you can follow this steps.
- Open an Administrator Command Prompt
- Type: nltest /dsgetsite
-
You should see the site where the computer is located at that time.