
You probably heard from the new kid around the block called «Docker»?
You are a PHP developer and would like to get into that, but you didn’t have the time to look into it, yet?
Then this tutorial is for you! By the end of it, you should know:
— how to set up Docker «natively» on a Windows 10 machine
— how to build and run containers from the command line
— how to log into containers and explore them for information
— what a Dockerfile is and how to use it
— how containers can talk to each other
— how docker-compose can be used to fit everything nicely together
Note: I will not only walk on the happy path during this tutorial. That means I’ll deep-dive into
some things that are not completely related to docker (e.g. how to find out where the configuration
files for php-fpm are located), but that are imho important to understand, because they enable you to
solve problems later on your own.
But if you are short on time, you might also jump directly to the tl;dr.
All code samples are publicly available in my
Docker PHP Tutorial repository on Github.
The branch for this tutorial is
part_1_setting-up-php-php-fpm-and-nginx-for-local-development-on-docker.
All published parts of the Docker PHP Tutorial are collected under a dedicated page at
Docker PHP Tutorial. The following part is
Setting up PhpStorm with Xdebug for local development on Docker .
If you want to follow along, please subscribe to the RSS feed
or via email
to get automatic notifications when the next part comes out 
Table of contents
- Introduction
- Preconditions
- Why use Docker?
- Transition from Vagrant
- Setup Docker
- Setting up the PHP cli container
- Installing Xdebug in the PHP container
- Persisting image changes with a Dockerfile
- Setting up a web stack with php-fpm and nginx
- Setting up nginx
- Setting up php-fpm
- Installing xdebug
- Connecting nginx and php-fpm
- Putting it all together: Meet docker-compose
- The tl;dr
Introduction
Preconditions
I’m assuming that you have installed Git bash for Windows. If not, please do that before,
see Setting up the software: Git and Git Bash.
Why use Docker?
I won’t go into too much detail what Docker is and why you should use it, because
others
have
already
talked about this extensively.
As for me, my main reasons were
— Symlinks in vagrant didn’t work the way they should
— VMs become bloated and hard to manage over time
— Setup in the team involved a lot of work
— I wanted to learn Docker for quite some time because you hear a lot about it
In general, Docker is kind of like a virtual machine, so it allows us to develop in an OS of our choice (e.g. Windows)
but run the code in the same environment as it will in production (e.g. on a linux server). Thanks to its core principles,
it makes the separation of services really easy (e.g. having a dedicated server for your database) which — again —
is something that should happen on production anyway.
Transition from Vagrant
On Windows, you can either use the Docker Toolbox
(which is essentially a VM with Docker setup on it) or the Hyper-V based Docker for Windows.
This tutorial will only look at the latter.
A word of caution: Unfortunately, we cannot have other Gods besides Docker (on Windows).
The native Docker client requires Hyper-V to be activated which in turn will cause Virtualbox to not work any longer.
Thus, we will not be able to use Vagrant and Docker alongside each other.
This was actually the main reason it took me so long to start working with Docker.
Setup Docker
First, download Docker for Windows
(requires Microsoft Windows 10 Professional or Enterprise 64-bit). The version I am using in this tutorial is 18.03.1-ce-win65.
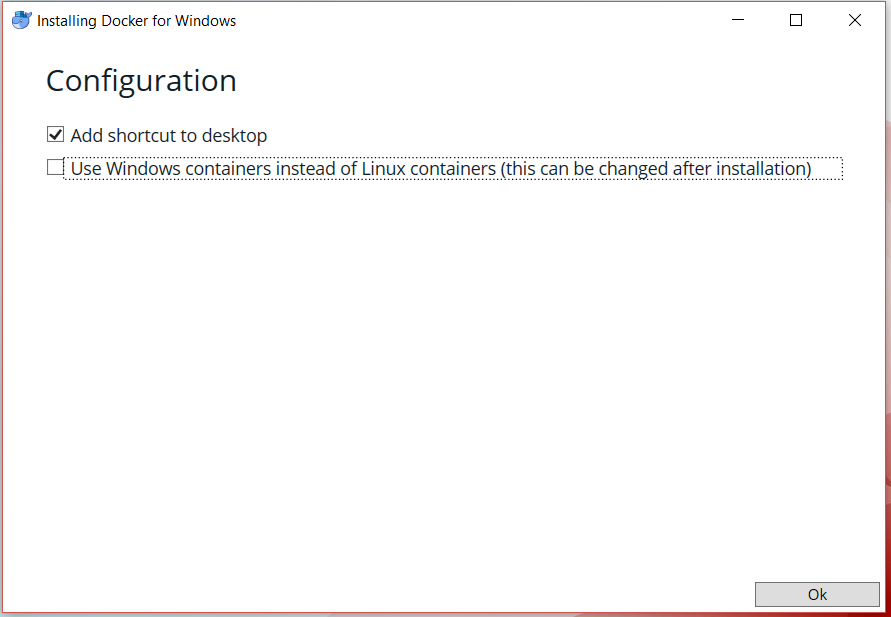
During the installation,
leave the option «Use Windows Containers instead of Linux containers» unticked as we intend to develop on linux containers
(you can change it later anyway).
After the installation finishes, we need to log out of Windows and in again.
Docker should start automatically. If not, there should be a «Docker for Windows» icon placed on your desktop.
If Hyper-V is not activated yet, Docker will automatically urge you to do so now.
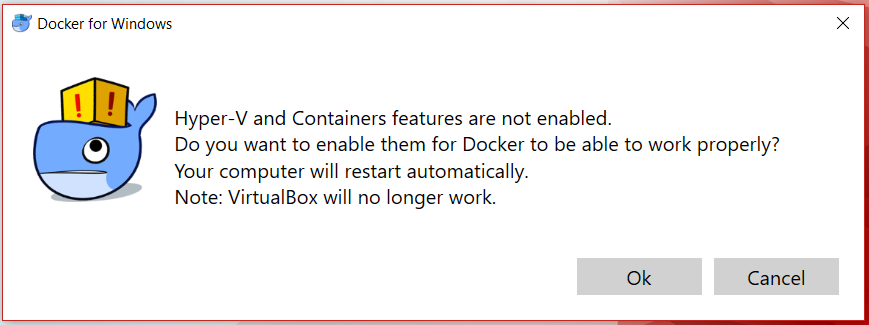
If you agree, Hyper-V and container features are activated and a reboot is initiated.
See Install Hyper-V on Windows 10
to deactivate it again.
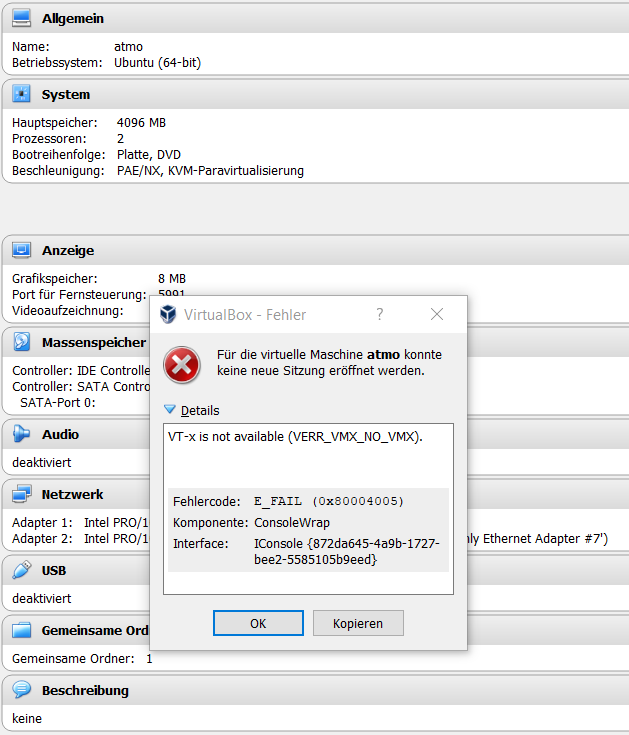
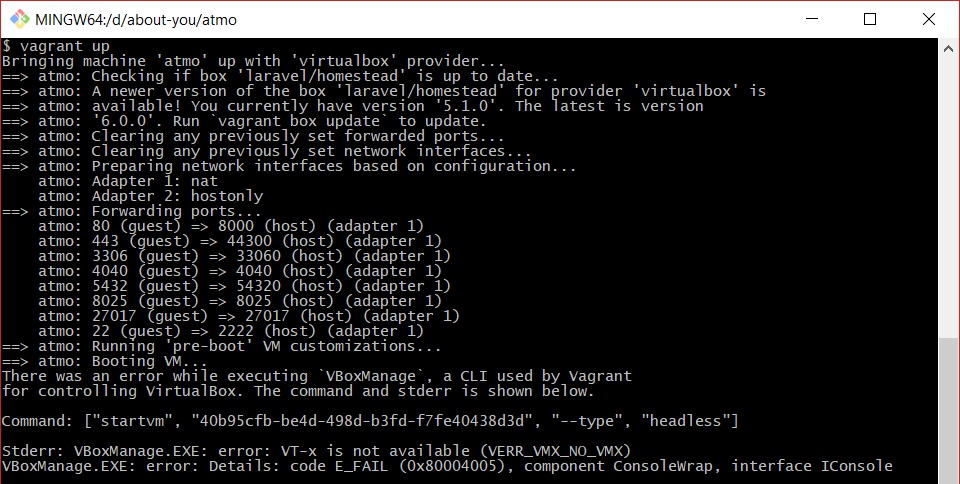
Caution: VirtualBox will stop working afterwards! Starting one of my previous machines from the VirtualBox interface
or via vagrant up fails with the error message
VT-x is not available (VERR_VMX_NO_VMX)
After rebooting, Docker will start automatically and a welcome screen appears.
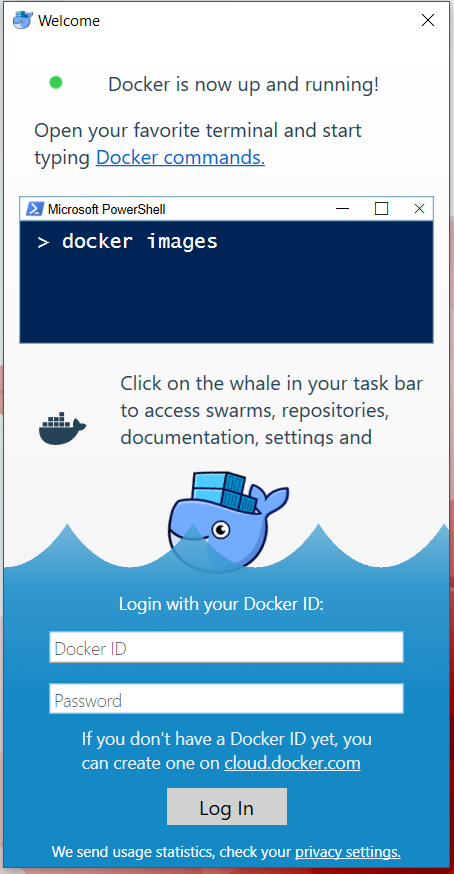
We can ignore that (close the window).
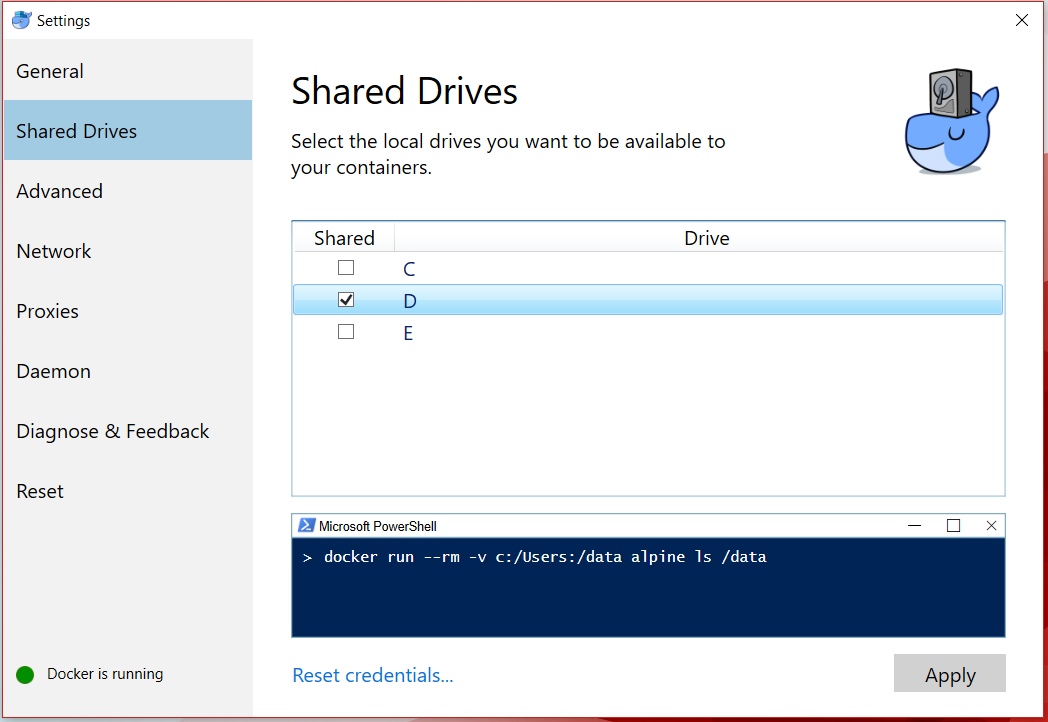
In addition, a new icon is added to your system tray. A right-click reveals the context menu.
Open the tab «Shared Devices» and tick the hard drives on your host machine that you want to share with Docker containers.
Note: We will still need to define explicit path mappings for the actual containers later on, but the hard drive that the path belongs
to must be made available here. After clicking «Apply», you will be prompted for your credentials
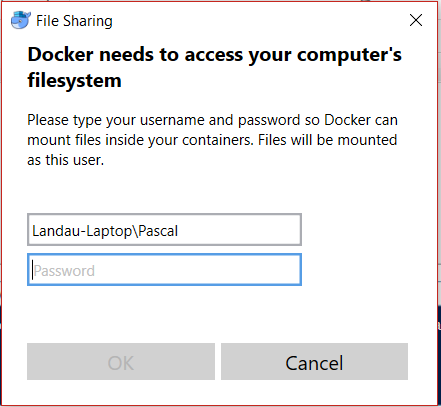
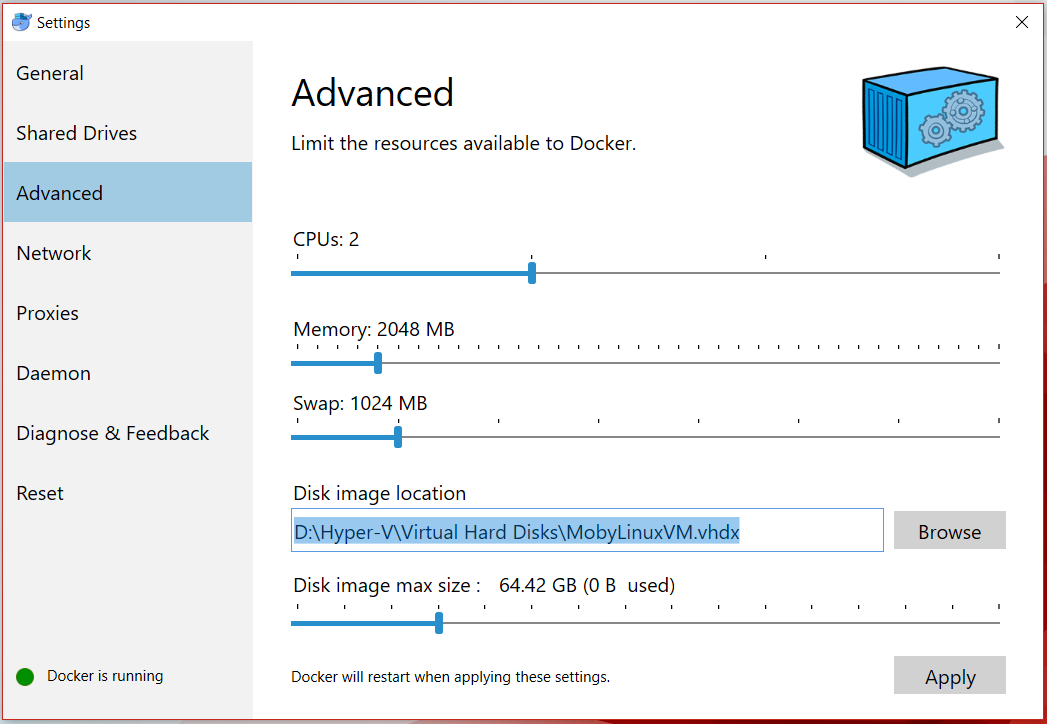
Next, open tab «Advanced». You don’t actually have to change any of the settings but if you (like me)
don’t have C:/ set up as you biggest partition, you might want to change the «Disk image location».
I’m putting mine at C:\Hyper-V\Virtual Hard Disks\MobyLinuxVM.vhdx. It might take some minutes for Docker to process the changes.
Docker «physically» stores the container images in that location.
Congratulations, Docker is now set up on your machine 😊
Setting up the PHP cli container
Now that we have the general stuff out of the way, let’s set up our first container.
I’ve created the directory C:/codebase/docker-php/ and will run the remaining examples in there.
Firstly, lets create a directory for our sourcecode:
mkdir -p "C:/codebase/docker-php/app"
For the sake of simplicity, we will stick to the official PHP image and run:
docker run -d --name docker-php -v "C:/codebase/docker-php/app":/var/www php:7.0-cli
Which means:
docker run                               // run a container
-d                                       // in the background (detached)
--name docker-php                        // named docker-php
-v "C:/codebase/docker-php/app":/var/www // sync the directory C:/codebase/docker-php/app on the
                                         // windows host with /var/www in the container
php:7.0-cli                              // use this image to build the container
The result looks something like this:
$ docker run -d --name docker-php -v "C:/codebase/docker-php/app":/var/www php:7.0-cli
Unable to find image 'php:7.0-cli' locally
7.0-cli: Pulling from library/php
f2aa67a397c4: Pulling fs layer
c533bdb78a46: Pulling fs layer
65a7293804ac: Pulling fs layer
35a9c1f94aea: Pulling fs layer
54cffc62e1c2: Pulling fs layer
153ff2f4c2af: Pulling fs layer
96d392f71f56: Pulling fs layer
e8c43e665458: Pulling fs layer
35a9c1f94aea: Waiting
54cffc62e1c2: Waiting
153ff2f4c2af: Waiting
96d392f71f56: Waiting
e8c43e665458: Waiting
c533bdb78a46: Verifying Checksum
c533bdb78a46: Download complete
35a9c1f94aea: Verifying Checksum
35a9c1f94aea: Download complete
f2aa67a397c4: Verifying Checksum
f2aa67a397c4: Download complete
153ff2f4c2af: Verifying Checksum
153ff2f4c2af: Download complete
54cffc62e1c2: Verifying Checksum
54cffc62e1c2: Download complete
e8c43e665458: Verifying Checksum
e8c43e665458: Download complete
96d392f71f56: Verifying Checksum
96d392f71f56: Download complete
f2aa67a397c4: Pull complete
65a7293804ac: Verifying Checksum
65a7293804ac: Download complete
c533bdb78a46: Pull complete
65a7293804ac: Pull complete
35a9c1f94aea: Pull complete
54cffc62e1c2: Pull complete
153ff2f4c2af: Pull complete
96d392f71f56: Pull complete
e8c43e665458: Pull complete
Digest: sha256:ff6c5e695a931f18a5b59c82b1045edea42203a299e89a554ebcd723df8b9014
Status: Downloaded newer image for php:7.0-cli
56af890e1a61f8ffa5528b040756dc62a94c0b929c29df82b9bf5dec6255321f
Since we don’t have the image on our machine (see Unable to find image 'php:7.0-cli' locally),
Docker attempts to pull it from the official registry at https://hub.docker.com/.
We’ve specifically chosen the «7.0-cli» version of the PHP image (which means: PHP 7.0 CLI only).
See https://hub.docker.com/_/php/ for a list of all available tags/images.
Now let’s see if the container is actually running via docker ps
$ docker ps
CONTAINER ID        IMAGE               COMMAND             CREATED             STATUS              PORTS               NAMES
Weird. For some reason, we don’t see our newly created container there. Let’s check with the -a flag to list all containers,
even the ones that are not running.
$ docker ps -a
CONTAINER ID        IMAGE               COMMAND                 CREATED             STATUS                      PORTS               NAMES
56af890e1a61        php:7.0-cli         "docker-php-entrypoi…"   27 seconds ago     Exited (0) 25 seconds ago                       docker-php
Aha. So the container was created, but immediately stopped (see Created 27 seconds ago; Exited (0) 25 seconds ago).
That’s because a container only lives as long as it’s main process is running.
According to the docs,
A container’s main running process is the ENTRYPOINT and/or CMD at the end of the Dockerfile.»
This answer explains the difference between CMD and ENTRYPOINT quite well.
Since we don’t have a Dockerfile defined, we would need to look at the
Dockerfile of the base image
we’re using, but I actually don’t wanna go down this rabbit hole for now. Basically, the «problem» is, that the
container doesn’t have a long running process / service defined, (as the php-fpm or the nginx containers do later on).
To keep the container alive, we need to add the -i flag to the docker run command:
docker run -di --name docker-php -v "C:/codebase/docker-php/app":/var/www php:7.0-cli
But then this happens:
Pascal@Landau-Laptop MINGW64 /
$ docker run -di --name docker-php -v "C:/codebase/docker-php/app":/var/www php:7.0-cli
C:\Program Files\Docker\Docker\Resources\bin\docker.exe: Error response from daemon: Conflict. The container name "/docker-php" is already in use by container "56af890e1a61f8ffa5528b040756dc62a94c0b929c29df82b9bf5dec6255321f". You have to remove (or rename) that container to be able to reuse that name.
See 'C:\Program Files\Docker\Docker\Resources\bin\docker.exe run --help'.
Apparently, we cannot use the same name (docker-php) again. Bummer. So, let’s remove the previous container first via
docker rm docker-php
and try again afterwards:
Pascal@Landau-Laptop MINGW64 /
$ docker rm docker-php
docker-php

Pascal@Landau-Laptop MINGW64 /c/codebase/docker-php
docker run -di --name docker-php -v "C:/codebase/docker-php/app":/var/www php:7.0-cli
7b3024a542a2d25fd36cef96f4ea689ec7ebb758818758300097a7be3ad2c2f6

Pascal@Landau-Laptop MINGW64 /c/codebase/docker-php
$ docker ps
CONTAINER ID        IMAGE               COMMAND                 CREATED             STATUS              PORTS               NAMES
7b3024a542a2        php:7.0-cli         "docker-php-entrypoi…"   5 seconds ago      Up 4 seconds                            docker-php
Sweet, so now that the container is up and running, let’s «log in» via
docker exec -it docker-php bash
You might get the following error message
Pascal@Landau-Laptop MINGW64 /c/codebase/docker-php
$ docker exec -it docker-php bash
the input device is not a TTY.  If you are using mintty, try prefixing the command with 'winpty'
If so, prefixing the command with winpty should help:
winpty docker exec -it docker-php bash
Pascal@Landau-Laptop MINGW64 /c/codebase/docker-php
$ winpty docker exec -it docker-php bash
root@7b3024a542a2:/#
A quick php -v within the container verifies, that we can actually run php scripts in there:
root@7b3024a542a2:/# php -v
PHP 7.0.30 (cli) (built: May 23 2018 23:04:32) ( NTS )
Copyright (c) 1997-2017 The PHP Group
Zend Engine v3.0.0, Copyright (c) 1998-2017 Zend Technologies
Remember the path mapping, that we specified? Let’s create a simple «hello world» script on the windows 10 host machine
at C:\codebase\docker-php\app\hello-world.php to make sure it works:
cd "C:\codebase\docker-php\app"
echo '<?php echo "Hello World (php)\n"; ?>' > hello-world.php
Should look like this on the host machine:
Pascal@Landau-Laptop MINGW64 /c/codebase/docker-php
$ ls -alh app
total 1,0K
drwxr-xr-x 1 Pascal 197121  0 Mai 28 12:29 ./
drwxr-xr-x 1 Pascal 197121  0 Mai 28 11:46 ../
-rw-r--r-- 1 Pascal 197121 49 Mai 28 12:30 hello-world.php
And like this from within the container:
root@7b3024a542a2:/# ls -alh /var/www
total 4.5K
drwxr-xr-x 2 root root  0 May 28 10:29 .
drwxr-xr-x 1 root root 4.0K May 28 10:00 ..
-rwxr-xr-x 1 root root   31 May 28 10:31 hello-world.php
Let’s run the script in the container via
php /var/www/hello-world.php
root@7b3024a542a2:/# php /var/www/hello-world.php
Hello World
Purrfect. We created the file on our host system and it’s automatically available in the container.
Installing Xdebug in the PHP container
Since we intend to use Docker for our local development setup, the ability to debug is mandatory. So let’s extend our image with the xdebug extension.
The readme of the official Docker PHP repository does a good job at explaining
how to install extensions.
For xdebug, we’ll use PECL. To install the extension, make sure to be logged into the container and run
pecl install xdebug-2.6.0
You should see an output like this:
root@7b3024a542a2:/# pecl install xdebug-2.6.0
[...]
Build process completed successfully
Installing '/usr/local/lib/php/extensions/no-debug-non-zts-20151012/xdebug.so'
install ok: channel://pecl.php.net/xdebug-2.6.0
configuration option "php_ini" is not set to php.ini location
You should add "zend_extension=/usr/local/lib/php/extensions/no-debug-non-zts-20151012/xdebug.so" to php.ini
The xdebug extension has been build and saved in /usr/local/lib/php/extensions/no-debug-non-zts-20151012/xdebug.so.
To actually activate it, run
docker-php-ext-enable xdebug
That helper command will place the file docker-php-ext-xdebug.ini in the directory for additional php ini files with the content
zend_extension=/usr/local/lib/php/extensions/no-debug-non-zts-20151012/xdebug.so
which enables the extension. Btw. you can locate the additional php ini files folder by running
php -i | grep "additional .ini"
Result:
root@7b3024a542a2:/# php -i | grep "additional .ini"
Scan this dir for additional .ini files => /usr/local/etc/php/conf.d
When we check the contents of that folder, we will indeed find the xdebug.ini file with the before mentioned content and php -m reveals,
that xdebug is actually active.
root@7b3024a542a2:/# ls -alh /usr/local/etc/php/conf.d
total 12K
drwxr-sr-x 1 root staff 4.0K May 28 13:30 .
drwxr-sr-x 1 root staff 4.0K Apr 30 20:34 ..
-rw-r--r-- 1 root staff   81 May 28 13:30 docker-php-ext-xdebug.ini
root@7b3024a542a2:/# cat /usr/local/etc/php/conf.d/docker-php-ext-xdebug.ini
zend_extension=/usr/local/lib/php/extensions/no-debug-non-zts-20151012/xdebug.so
root@7b3024a542a2:/# php -m | grep xdebug
xdebug
Now we’ll log out of the container (type «exit» or hit CTRL +D) and stop the container via
docker stop docker-php
Pascal@Landau-Laptop MINGW64 /c/codebase/docker-php
$ docker stop docker-php
docker-php

Pascal@Landau-Laptop MINGW64 /c/codebase/docker-php
$ docker ps -a
CONTAINER ID        IMAGE               COMMAND                 CREATED             STATUS                      PORTS               NAMES
7b3024a542a2        php:7.0-cli         "docker-php-entrypoi…"   2 hours ago        Exited (137) 7 seconds ago                      docker-php
Now we start the container again via
docker start docker-php
log back in and check if xdebug is still there:
Pascal@Landau-Laptop MINGW64 /c/codebase/docker-php
$ docker start docker-php
docker-php

Pascal@Landau-Laptop MINGW64 /c/codebase/docker-php
$ winpty docker exec -it docker-php bash
root@7b3024a542a2:/# php -m | grep xdebug
xdebug
And… it is! So the changes we made «survived» a restart of the container. But: They won’t survive a «rebuild» of the container.
First we stop and remove the container via
docker rm -f docker-php
The -f flag forces the container to stop. Otherwise we would need an additional docker stop docker-php before.
Then we rebuild it, log in
docker run -di --name docker-php -v "C:/codebase/docker-php/":/codebase php:7.0-cli
inpty docker exec -it docker-php bash
and check for xdebug:
php -m | grep xdebug
… which won’t be there anymore.
Pascal@Landau-Laptop MINGW64 /c/codebase/docker-php
$ docker rm -f docker-php
docker-php

Pascal@Landau-Laptop MINGW64 /c/codebase/docker-php
$ docker run -di --name docker-php -v "C:/codebase/docker-php/":/codebase php:7.0-cli
1da17524418f5327760eb113904b7ceec30f22b41e4b4bd77f9fa2f7b92b4ead

Pascal@Landau-Laptop MINGW64 /c/codebase/docker-php
$ winpty docker exec -it docker-php bash
root@1da17524418f:/# php -m | grep xdebug
root@1da17524418f:/#
Note the new container ID (before: 7b3024a542a2; now: 1da17524418f) and that php -m | grep xdebug doesn’t yield anything.
Persisting image changes with a Dockerfile
Simply put, a Dockerfile describes the changes we make to a base image,
so we (and everybody else) can easily recreate the same environment. In our case,
we need to define the PHP base image that we used as well as instructions for installing and enabling xdebug.
To clearly separate infrastructure from code, we’ll create a new directory at C:/codebase/docker-php/php-cli/.
Create a file named Dockerfile in this directory
mkdir "C:/codebase/docker-php/php-cli/"
touch "C:/codebase/docker-php/php-cli/Dockerfile"
and give it the following content:
FROM php:7.0-cli
RUN pecl install xdebug-2.6.0 \
    && docker-php-ext-enable xdebug
Change to the C:/codebase/docker-php/php-cli/ directory and build the image based on that Dockerfile
cd "C:/codebase/docker-php/php-cli/"
docker build -t docker-php-image -f Dockerfile .
The -f Dockerfile is actually optional as this is the default anyway. «docker-php-image» is the name of our new image.
If you encounter the following error
"docker build" requires exactly 1 argument.
See 'docker build --help'.

Usage:  docker build [OPTIONS] PATH | URL | - [flags]

Build an image from a Dockerfile
you probably missed the trailing . at the end of docker build -t docker-php-image -f Dockerfile . 
Pascal@Landau-Laptop MINGW64 /c/codebase/docker-php/php-cli
$ docker build -t docker-php-image -f Dockerfile .
Sending build context to Docker daemon   5.12kB
Step 1/2 : FROM php:7.0-cli
 ---> da771ba4e565
Step 2/2 : RUN pecl install xdebug-2.6.0    && docker-php-ext-enable xdebug
 ---> Running in ff16ef56e648
downloading xdebug-2.6.0.tgz ...
Starting to download xdebug-2.6.0.tgz (283,644 bytes)
[...]
You should add "zend_extension=/usr/local/lib/php/extensions/no-debug-non-zts-20151012/xdebug.so" to php.ini
Removing intermediate container ff16ef56e648
 ---> 12be27256b12
Successfully built 12be27256b12
Successfully tagged docker-php-image:latest
SECURITY WARNING: You are building a Docker image from Windows against a non-Windows Docker host. All files and directories added to build context will have '-rwxr-xr-x' permissions. It is recommended to double check and reset permissions for sensitive files and directories.
Note, that the building takes longer than before, because Docker now needs to do the extra work of installing xdebug.
Instead of using the base php:7.0-cli image, we’ll now use our new, shiny docker-php-image image to start the container and check for xdebug.
docker run -di --name docker-php -v "C:/codebase/docker-php/app":/var/www docker-php-image
Pascal@Landau-Laptop MINGW64 /c/codebase/docker-php/php-cli
$ docker run -di --name docker-php -v "C:/codebase/docker-php/app":/var/www docker-php-image
C:\Program Files\Docker\Docker\Resources\bin\docker.exe: Error response from daemon: Conflict. The container name "/docker-php" is already in use by container "2e84cb536fc573142a9951331b16393e3028d9c6eff87f89cfda682279634a2b". You have to remove (or rename) that container to be able to reuse that name.
See 'C:\Program Files\Docker\Docker\Resources\bin\docker.exe run --help'.
Aaaand we get an error, because we tried to use the same name («docker-php»), that we used for the previous, still running container.
Sigh.. fortunately we already know how to solve that via
docker rm -f docker-php
Retry
docker run -di --name docker-php -v "C:/codebase/docker-php/app":/var/www docker-php-image
Pascal@Landau-Laptop MINGW64 /c/codebase/docker-php/php-cli
$ docker rm -f docker-php
docker-php

Pascal@Landau-Laptop MINGW64 /c/codebase/docker-php/php-cli
$ docker run -di --name docker-php -v "C:/codebase/docker-php/app":/var/www docker-php-image
f27cc1310c836b15b7062e1fd381f283250a85133fb379c4cf1f891dec63770b

Pascal@Landau-Laptop MINGW64 /c/codebase/docker-php/php-cli
$ winpty docker exec -it docker-php bash
root@f27cc1310c83:/# php -m | grep xdebug
xdebug
Yep, all good. Btw. since we «only» want to check if xdebug was installed, we could also simply pass -m to the docker run command:
Pascal@Landau-Laptop MINGW64 /c/codebase/docker-php/php-cli
$ docker run docker-php-image php -m | grep xdebug
xdebug
Be aware that this will create a new container every time it’s run (, note the first entry with the wonderful name «distracted_mclean»):
Pascal@Landau-Laptop MINGW64 /c/codebase/docker-php/php-cli
$ docker ps -a
CONTAINER ID        IMAGE               COMMAND                 CREATED             STATUS                      PORTS               NAMES
abc9fec8a88b        docker-php-image    "docker-php-entrypoi…"   4 minutes ago      Exited (0) 4 minutes ago                        distracted_mclean
f27cc1310c83        docker-php-image    "docker-php-entrypoi…"   10 minutes ago     Exited (137) 6 minutes ago                      docker-php
Before we move on, let’s []stop and remove all containers via](https://coderwall.com/p/ewk0mq/stop-remove-all-docker-containers).
docker rm -f $(docker ps -aq)
The $(docker ps -aq) part returns only the numeric ids of all containers and passes them to the docker rm -f command.
Pascal@Landau-Laptop MINGW64 /c/codebase/docker-php/php-cli
$ docker rm -f $(docker ps -aq)
abc9fec8a88b
f27cc1310c83
Setting up a web stack with php-fpm and nginx
Since most people are probably not only working on CLI scripts but rather on web pages,
the next step in this tutorial is about setting up an nginx web server and connect it to php-fpm.
Setting up nginx
We’re gonna use the official nginx image and since we don’t know anything about that image yet,
let’s run and explore it a bit:
docker run -di nginx:latest
yields
Pascal@Landau-Laptop MINGW64 /
$ docker run -di nginx:latest
Unable to find image 'nginx:latest' locally
latest: Pulling from library/nginx
[...]
Status: Downloaded newer image for nginx:latest
15c6b8d8a2bff873f353d24dc9c40d3008da9396029b3f1d9db7caeebedd3f50
Note that we only used the minimum number of arguments here. Since we did not specify a name, we will simply use the ID instead to log in
(so be sure to use the one that your shell returned — don’t just copy the line below :P)
$ winpty docker exec -it 15c6b8d8a2bff873f353d24dc9c40d3008da9396029b3f1d9db7caeebedd3f50 bash
root@15c6b8d8a2bf:/#
We would expect that there is an nginx process running, but upon checking with ps aux we get
bash: ps: command not found" as a response.
This is common when using docker images, because they are usually kept as minimal as possible.
Although this is a good practice in production, it is kind of cumbersome in development.
So, let’s install ps via
apt-get update && apt-get install -y procps
and try again:
root@15c6b8d8a2bf:/# apt-get update && apt-get install -y procps
Get:1 http://security.debian.org/debian-security stretch/updates InRelease [94.3 kB]
[...]
associated file /usr/share/man/man1/w.procps.1.gz (of link group w) doesn't exist
Processing triggers for libc-bin (2.24-11+deb9u3) ...
root@15c6b8d8a2bf:/# ps aux
USER        PID %CPU %MEM    VSZ   RSS TTY      STAT START   TIME COMMAND
root          1  0.0  0.2  32608  5148 ?        Ss   06:46   0:00 nginx: master process nginx -g daemon off;
nginx         5  0.0  0.1  33084  2388 ?        S    06:46   0:00 nginx: worker process
root         14  0.0  0.1  18132  3272 pts/0    Ss   06:50   0:00 bash
root        259  0.0  0.1  36636  2844 pts/0    R+   06:53   0:00 ps aux
root@15c6b8d8a2bf:/#
Ah. Much better. Lets dig a little deeper and see how the process is configured via nginx -V
root@15c6b8d8a2bf:/# nginx -V
nginx version: nginx/1.13.12
built by gcc 6.3.0 20170516 (Debian 6.3.0-18+deb9u1)
built with OpenSSL 1.1.0f  25 May 2017
TLS SNI support enabled
configure arguments: --prefix=/etc/nginx --sbin-path=/usr/sbin/nginx --modules-path=/usr/lib/nginx/modules --conf-path=/etc/nginx/nginx.conf --error-log-path=/var/log/nginx/error.log --http-log-path=/var/log/ng
inx/access.log --pid-path=/var/run/nginx.pid --lock-path=/var/run/nginx.lock --http-client-body-temp-path=/var/cache/nginx/client_temp --http-proxy-temp-path=/var/cache/nginx/proxy_temp --http-fastcgi-temp-path
=/var/cache/nginx/fastcgi_temp --http-uwsgi-temp-path=/var/cache/nginx/uwsgi_temp --http-scgi-temp-path=/var/cache/nginx/scgi_temp --user=nginx --group=nginx --with-compat --with-file-aio --with-threads --with-
http_addition_module --with-http_auth_request_module --with-http_dav_module --with-http_flv_module --with-http_gunzip_module --with-http_gzip_static_module --with-http_mp4_module --with-http_random_index_module
 --with-http_realip_module --with-http_secure_link_module --with-http_slice_module --with-http_ssl_module --with-http_stub_status_module --with-http_sub_module --with-http_v2_module --with-mail --with-mail_ssl_
module --with-stream --with-stream_realip_module --with-stream_ssl_module --with-stream_ssl_preread_module --with-cc-opt='-g -O2 -fdebug-prefix-map=/data/builder/debuild/nginx-1.13.12/debian/debuild-base/nginx-
1.13.12=. -specs=/usr/share/dpkg/no-pie-compile.specs -fstack-protector-strong -Wformat -Werror=format-security -Wp,-D_FORTIFY_SOURCE=2 -fPIC' --with-ld-opt='-specs=/usr/share/dpkg/no-pie-link.specs -Wl,-z,relr
o -Wl,-z,now -Wl,--as-needed -pie'
Sweet, so the configuration file is placed in the default location at /etc/nginx/nginx.conf
(see --conf-path=/etc/nginx/nginx.conf). Checking that file will show us, where we need to place additional config files
(e.g. for the configuration of our web site). Run
cat /etc/nginx/nginx.conf
… and see
root@15c6b8d8a2bf:/# cat /etc/nginx/nginx.conf

user  nginx;
worker_processes  1;

error_log  /var/log/nginx/error.log warn;
pid        /var/run/nginx.pid;


events {
    worker_connections  1024;
}


http {
    include       /etc/nginx/mime.types;
    default_type  application/octet-stream;

    log_format  main  '$remote_addr - $remote_user [$time_local] "$request" '
                      '$status $body_bytes_sent "$http_referer" '
                      '"$http_user_agent" "$http_x_forwarded_for"';

    access_log  /var/log/nginx/access.log  main;

    sendfile        on;
    #tcp_nopush     on;

    keepalive_timeout  65;

    #gzip  on;

    include /etc/nginx/conf.d/*.conf;
}
Note the line include /etc/nginx/conf.d/*.conf at the end of the file. In this directory, we’ll find the default nginx config:
ls -alh /etc/nginx/conf.d/
cat /etc/nginx/conf.d/default.conf
root@15c6b8d8a2bf:/# ls -alh /etc/nginx/conf.d/
total 12K
drwxr-xr-x 2 root root 4.0K Apr 30 13:55 .
drwxr-xr-x 3 root root 4.0K Apr 30 13:55 ..
-rw-r--r-- 1 root root 1.1K Apr  9 16:01 default.conf
root@15c6b8d8a2bf:/# cat /etc/nginx/conf.d/default.conf
server {
    listen       80;
    server_name  localhost;

    #charset koi8-r;
    #access_log  /var/log/nginx/host.access.log  main;

    location / {
        root   /usr/share/nginx/html;
        index  index.html index.htm;
    }

    #error_page  404              /404.html;

    # redirect server error pages to the static page /50x.html
    #
    error_page   500 502 503 504  /50x.html;
    location = /50x.html {
        root   /usr/share/nginx/html;
    }

    # proxy the PHP scripts to Apache listening on 127.0.0.1:80
    #
    #location ~ \.php$ {
    #    proxy_pass   http://127.0.0.1;
    #}

    # pass the PHP scripts to FastCGI server listening on 127.0.0.1:9000
    #
    #location ~ \.php$ {
    #    root           html;
    #    fastcgi_pass   127.0.0.1:9000;
    #    fastcgi_index  index.php;
    #    fastcgi_param  SCRIPT_FILENAME  /scripts$fastcgi_script_name;
    #    include        fastcgi_params;
    #}

    # deny access to .htaccess files, if Apache's document root
    # concurs with nginx's one
    #
    #location ~ /\.ht {
    #    deny  all;
    #}
}
So the server is listening on port 80. Unfortunately, we cannot reach the web server from our windows host machine,
as there is currently (2018-05-31) an open bug for accessing container IPs from a windows host
(don’t worry, we’ll fix that with port mappings in a second)).
So, in order to verify that the server is actually working, we’ll install curl inside the nginx container and fetch 127.0.0.1:80:
apt-get install curl -y
curl localhost:80
Looks like this:
root@15c6b8d8a2bf:/# apt-get install curl -y
Reading package lists... Done
Building dependency tree
[...]
Running hooks in /etc/ca-certificates/update.d...
done.
root@15c6b8d8a2bf:/# curl localhost:80
<!DOCTYPE html>
<html>
<head>
<title>Welcome to nginx!</title>
<style>
    body {
        width: 35em;
        margin: 0 auto;
        font-family: Tahoma, Verdana, Arial, sans-serif;
    }
</style>
</head>
<body>
<h1>Welcome to nginx!</h1>
<p>If you see this page, the nginx web server is successfully installed and
working. Further configuration is required.</p>

<p>For online documentation and support please refer to
<a href="http://nginx.org/">nginx.org</a>.<br/>
Commercial support is available at
<a href="http://nginx.com/">nginx.com</a>.</p>

<p><em>Thank you for using nginx.</em></p>
</body>
</html>
Looks good! Now let’s customize some stuff:
— point the root to /var/www
— place a «Hello world» index file in /var/www/index.html
sed -i "s#/usr/share/nginx/html#/var/www#" /etc/nginx/conf.d/default.conf
mkdir -p /var/www
echo "Hello world!" > /var/www/index.html
To make the changes become effective, we need to reload nginx via
nginx -s reload
root@15c6b8d8a2bf:/# nginx -s reload
2018/05/29 09:22:54 [notice] 351#351: signal process started
Check with curl, et voilá:
root@15c6b8d8a2bf:/# curl 127.0.0.1:80
Hello world!
With all that new information we can set up our nginx image with the following folder structure on the host machine:
C:\codebase\docker-php
+ nginx\
  + conf.d\
    - site.conf
  - Dockerfile
+ app\
  - index.html
  - hello-world.php
nginx\Dockerfile
FROM nginx:latest
nginx\conf.d\site.conf
server {
    listen      80;
    server_name localhost;
    root        /var/www;
}
app\index.html
Hello World
Clean up the «exploration» nginx container, cd into /c/codebase/docker-php/nginx and build the new image:
docker rm -f $(docker ps -aq)
cd /c/codebase/docker-php/nginx
docker build -t docker-nginx-image .
Pascal@Landau-Laptop MINGW64 /c/codebase/docker-php
$ docker rm -f $(docker ps -aq)
15c6b8d8a2bf
Pascal@Landau-Laptop MINGW64 /c/codebase/docker-php
$ cd nginx
Pascal@Landau-Laptop MINGW64 /c/codebase/docker-php/nginx
$ docker build -t docker-nginx-image .
Sending build context to Docker daemon  3.584kB
Step 1/1 : FROM nginx:latest
 ---> ae513a47849c
Successfully built ae513a47849c
Successfully tagged docker-nginx-image:latest
SECURITY WARNING: You are building a Docker image from Windows against a non-Windows Docker host. All files and directories added to build context will have '-rwxr-xr-x' permissions. It is recommended to double check and reset permissions for sensitive files and directories.
And then run the «new» container via
docker run -di --name docker-nginx -p 8080:80 -v "C:\codebase\docker-php\nginx\conf.d":/etc/nginx/conf.d/ -v "C:\codebase\docker-php\app":/var/www docker-nginx-image
where
-p 8080:80                                                  // maps port 8080 on the windows host to port 80 in the container
-v "C:\codebase\docker-php\nginx\conf.d":/etc/nginx/conf.d/ // mounts the conf.d folder on the host to the correct directory in the container
-v "C:\codebase\docker-php\app":/var/www                    // mounts the "code" directory in the correct place
Thanks to the port mapping we can now simply open http://127.0.0.1:8080/ in a browser on the host machine
and see the content of our app\index.html file.
If you want some more information about running nginx on Docker, check out
this tutorial.
Before we move on, let’s clean up
docker stop docker-nginx
Setting up php-fpm
We are already familiar with the official docker PHP image but have only used the cli-only version so far.
FPM ones can be pulled in by using the -fpm tags (e.g. like php:7.0-fpm).
As with nginx, let’s explore the php-fpm image first:
docker run -di --name php-fpm-test php:7.0-fpm
The first thing to note is, that the image automatically exposes port 9000 as a docker ps reveals:
$ docker ps
CONTAINER ID        IMAGE               COMMAND                  CREATED             STATUS                      PORTS                  NAMES
c5d23b694563        php:7.0-fpm         "docker-php-entrypoi…"   4 hours ago         Up 4 hours                  9000/tcp               php-fpm-test
When we examine the Dockerfile that was used to build the image
(click here and search for the «7.0-fpm» tag
that currently (2018-05-31) links here),
we can see that it contains an EXPOSE 9000 at the bottom.
What else we can we figure out…
winpty docker exec -it php-fpm-test bash
First, will check where the configuration files are located via php-fpm -i | grep config:
root@c5d23b694563:/var/www/html# php-fpm -i | grep config
Configure Command =>  './configure'  '--build=x86_64-linux-gnu' '--with-config-file-path=/usr/local/etc/php' '--with-config-file-scan-dir=/usr/local/etc/php/conf.d' '--enable-option-checking=fatal' '--disable-c
gi' '--with-mhash' '--enable-ftp' '--enable-mbstring' '--enable-mysqlnd' '--with-curl' '--with-libedit' '--with-openssl' '--with-zlib' '--with-libdir=lib/x86_64-linux-gnu' '--enable-fpm' '--with-fpm-user=www-da
ta' '--with-fpm-group=www-data' 'build_alias=x86_64-linux-gnu'
fpm.config => no value => no value
[...]
--with-config-file-path=/usr/local/etc/php is our suspect. So it is very likely,
that we will find the global directives config file at
/usr/local/etc/php-fpm.conf (unfortunately, we cannot resolve the location directly).
grep‘ing this file for include= reveals the location for the
pool directives config:
grep "include=" /usr/local/etc/php-fpm.conf
root@c5d23b694563:/var/www/html# grep "include=" /usr/local/etc/php-fpm.conf
include=etc/php-fpm.d/*.conf
Hm — a relative path. That looks kinda odd? Let’s get a little more context with the -C option for grep:
grep -C 6 "include=" /usr/local/etc/php-fpm.conf
root@c5d23b694563:/var/www/html# grep -C 6 "include=" /usr/local/etc/php-fpm.conf
; Include one or more files. If glob(3) exists, it is used to include a bunch of
; files from a glob(3) pattern. This directive can be used everywhere in the
; file.
; Relative path can also be used. They will be prefixed by:
;  - the global prefix if it's been set (-p argument)
;  - /usr/local otherwise
include=etc/php-fpm.d/*.conf
Ah — that makes more sense. So we need to resolve etc/php-fpm.d/*.conf relative to /usr/local.
Resulting in /usr/local/etc/php-fpm.d/*.conf (usually you’ll at least find a www.conf file in there).
The pool config determines amongst other things how php-fpm listens for connections (e.g. via Unix socket or via TCP IP:port).
cat /usr/local/etc/php-fpm.d/www.conf
root@c5d23b694563:/var/www/html# cat /usr/local/etc/php-fpm.d/www.conf
[...]
; The address on which to accept FastCGI requests.
; Valid syntaxes are:
;   'ip.add.re.ss:port'    - to listen on a TCP socket to a specific IPv4 address on
;                            a specific port;
;   '[ip:6:addr:ess]:port' - to listen on a TCP socket to a specific IPv6 address on
;                            a specific port;
;   'port'                 - to listen on a TCP socket to all addresses
;                            (IPv6 and IPv4-mapped) on a specific port;
;   '/path/to/unix/socket' - to listen on a unix socket.
; Note: This value is mandatory.
listen = 127.0.0.1:9000
[...]
php-fpm ist listening on port 9000 on 127.0.0.1 (localhost). So it makes total sense to expose port 9000.
Installing xdebug
Since we probably also want to debug php-fpm, xdebug needs to be setup as well. The process is pretty much the same as for the cli image:
pecl install xdebug-2.6.0
docker-php-ext-enable xdebug
php-fpm -m | grep xdebug
Of course we’ll also put that in its own Dockerfile:
C:\codebase\docker-php
+ php-fpm\
  - Dockerfile
php-fpm\Dockerfile
FROM php:7.0-fpm
RUN pecl install xdebug-2.6.0 \
    && docker-php-ext-enable xdebug
Clean up the test container and build the new image
docker rm -f php-fpm-test
cd /c/codebase/docker-php/php-fpm
docker build -t docker-php-fpm-image .
Connecting nginx and php-fpm
Now that we have containers for nginx and php-fpm, we need to connect them.
To do so, we have to make sure that both containers are in the same network and can talk to each other
(which is a common problem).
Docker provides so called
user defined bridge networks
allowing automatic service discovery. That basically means,
that our nginx container can use the name of the php-fpm container to connect to it.
Otherwise we would have to figure out the containers IP address in the default network every time we start the containers.
docker network ls
reveals a list of the current networks
Pascal@Landau-Laptop MINGW64 /
$ docker network ls
NETWORK ID          NAME                DRIVER              SCOPE
7019b0b37ba7        bridge              bridge              local
3820ad97cc92        host                host                local
03fecefbe8c9        none                null                loca
Now let’s add a new one called web-network for our web stack via
docker network create --driver bridge web-network
Pascal@Landau-Laptop MINGW64 /
$ docker network create --driver bridge web-network
20966495e04e9f9df9fd64fb6035a9e9bc3aa6d83186dcd23454e085a0d97648

Pascal@Landau-Laptop MINGW64 /
$ docker network ls
NETWORK ID          NAME                DRIVER              SCOPE
7019b0b37ba7        bridge              bridge              local
3820ad97cc92        host                host                local
03fecefbe8c9        none                null                local
20966495e04e        web-network         bridge              local
Start the nginx container and connect it to the new network via
docker start docker-nginx
docker network connect web-network docker-nginx
Finally, we need to mount the local code folder app\ we mounted to the nginx container at /var/www
also in the php-fpm container in the same location:
docker run -di --name docker-php-fpm -v "C:\codebase\docker-php\app":/var/www --network web-network docker-php-fpm-image
Note that we specified the network in the run command via the --network option.
We can verify that both containers are connected to the web-network by running
docker network inspect web-network
Pascal@Landau-Laptop MINGW64 /c/codebase/docker-php/php-fpm
$ docker network inspect web-network
[
    {
        "Name": "web-network",
        "Id": "20966495e04e9f9df9fd64fb6035a9e9bc3aa6d83186dcd23454e085a0d97648",
        "Created": "2018-05-30T06:39:44.3107066Z",
        "Scope": "local",
        "Driver": "bridge",
        "EnableIPv6": false,
        "IPAM": {
            "Driver": "default",
            "Options": {},
            "Config": [
                {
                    "Subnet": "172.18.0.0/16",
                    "Gateway": "172.18.0.1"
                }
            ]
        },
        "Internal": false,
        "Attachable": false,
        "Ingress": false,
        "ConfigFrom": {
            "Network": ""
        },
        "ConfigOnly": false,
        "Containers": {
            "3358e813423165880d59c8ebc2cb4c563ee8ad1d401595f8bfcf763ff5db8f4a": {
                "Name": "docker-php-fpm",
                "EndpointID": "d2f1d6285a0932817e1fb8839bef3a6d178f5306a2116307dba200038ea2a3a3",
                "MacAddress": "02:42:ac:12:00:03",
                "IPv4Address": "172.18.0.3/16",
                "IPv6Address": ""
            },
            "eaa5c05942788985e90a80fa000723286e9b4e7179d0f6f431c0f5109e012764": {
                "Name": "docker-nginx",
                "EndpointID": "274fa9a6868aff656078a72e19c05fb87e4e86b83aaf12be9b943890140a421d",
                "MacAddress": "02:42:ac:12:00:02",
                "IPv4Address": "172.18.0.2/16",
                "IPv6Address": ""
            }
        },
        "Options": {},
        "Labels": {}
    }
]
The «Containers» key reveals that the docker-php-fpm container has the IP address 172.18.0.3
and the docker-nginx container is reachable via 172.18.0.2.
But can we actually connect from nginx to php-fpm? Let’s find out:
Log into the nginx container
winpty docker exec -ti docker-nginx bash
and ping the IP
ping 172.18.0.3 -c 2
Pascal@Landau-Laptop MINGW64 /c/codebase/docker-php/php-fpm
$ winpty docker exec -ti docker-nginx bash
root@eaa5c0594278:/# ping 172.18.0.3 -c 2
bash: ping: command not found
.. well, after we make the command available by installing iputils-ping:
apt-get update && apt-get install iputils-ping -y
ping 172.18.0.3 -c 2
root@eaa5c0594278:/# apt-get update && apt-get install iputils-ping -y
root@eaa5c0594278:/# ping 172.18.0.3 -c 2
PING 172.18.0.3 (172.18.0.3) 56(84) bytes of data.
64 bytes from 172.18.0.3: icmp_seq=1 ttl=64 time=0.142 ms
64 bytes from 172.18.0.3: icmp_seq=2 ttl=64 time=0.162 ms

--- 172.18.0.3 ping statistics ---
2 packets transmitted, 2 received, 0% packet loss, time 1071ms
rtt min/avg/max/mdev = 0.142/0.152/0.162/0.010 ms
We can ping the container — that’s good. But we were also promised we could reach the container by its name docker-php-fpm:
ping docker-php-fpm -c 2
root@eaa5c0594278:/# ping docker-php-fpm -c 2
PING docker-php-fpm (172.18.0.3) 56(84) bytes of data.
64 bytes from docker-php-fpm.web-network (172.18.0.3): icmp_seq=1 ttl=64 time=0.080 ms
64 bytes from docker-php-fpm.web-network (172.18.0.3): icmp_seq=2 ttl=64 time=0.131 ms

--- docker-php-fpm ping statistics ---
2 packets transmitted, 2 received, 0% packet loss, time 1045ms
rtt min/avg/max/mdev = 0.080/0.105/0.131/0.027 ms
And we can — awesome! Now we need to tell nginx to pass all PHP related requests to php-fpm by changing the
nginx\conf.d\site.conf file on our windows host to
server {
    listen      80;
    server_name localhost;
    root        /var/www;

   location ~ \.php$ {
        try_files $uri =404;
        fastcgi_pass docker-php-fpm:9000;
        include fastcgi_params;
        fastcgi_param  SCRIPT_FILENAME $document_root$fastcgi_script_name;
    }
}
Note the fastcgi_pass docker-php-fpm:9000; line that tells nginx how to reach our php-fpm service.
Because we mounted the nginx\conf.d folder, we just need to reload nginx:
nginx -s reload
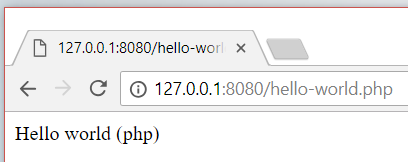
and open http://127.0.0.1:8080/hello-world.php on a browser on your host machine.
Btw. there’s also a good tutorial on geekyplatypus.com on how to
Dockerise your PHP application with Nginx and PHP7-FPM.
But since it’s using docker-compose you might want to read the next chapter first
Putting it all together: Meet docker-compose
Lets sum up what we have do now to get everything up and running:
1. start php-cli
2. start nginx
3. start php-fpm
docker run -di --name docker-php -v "C:\codebase\docker-php\app":/var/www --network web-network docker-php-image
docker run -di --name docker-nginx -p 8080:80 -v "C:\codebase\docker-php\nginx\conf.d":/etc/nginx/conf.d/ -v "C:\codebase\docker-php\app":/var/www  --network web-network docker-nginx-image
docker run -di --name docker-php-fpm -v "C:\codebase\docker-php\app":/var/www --network web-network docker-php-fpm-image
Hm. That’s alright I guess… but it also feels like «a lot». Wouldn’t it be much better to have everything neatly defined in one place?
I bet so! Let me introduce you to docker-compose
Compose is a tool for defining and running multi-container Docker applications.
With Compose, you use a YAML file to configure your application’s services.
Then, with a single command, you create and start all the services from your configuration.
Lets do this step by step, starting with the php-cli container. Create the file C:\codebase\docker-php\docker-compose.yml:
# tell docker what version of the docker-compose.yml we're using
version: '3'

# define the network
networks:
  web-network:

# start the services section
services:
  # define the name of our service
  # corresponds to the "--name" parameter
  docker-php-cli:
    # define the directory where the build should happened,
    # i.e. where the Dockerfile of the service is located
    # all paths are relative to the location of docker-compose.yml
    build:
      context: ./php-cli
    # reserve a tty - otherwise the container shuts down immediately
    # corresponds to the "-i" flag
    tty: true
    # mount the app directory of the host to /var/www in the container
    # corresponds to the "-v" option
    volumes:
      - ./app:/var/www
    # connect to the network
    # corresponds to the "--network" option
    networks:
      - web-network
Before we get started, we’re gonna clean up the old containers:
docker rm -f $(docker ps -aq)
To test the docker-compose.yml we need to run docker-compose up -d from C:\codebase\docker-php
cd "C:\codebase\docker-php"
docker-compose up -d
Pascal@Landau-Laptop MINGW64 /c/codebase/docker-php
$ docker-compose up -d
Creating network "docker-php_web-network" with the default driver
Building docker-php-cli
Step 1/2 : FROM php:7.0-cli
 ---> da771ba4e565
Step 2/2 : RUN pecl install xdebug-2.6.0     && docker-php-ext-enable xdebug
 ---> Using cache
 ---> 12be27256b12
Successfully built 12be27256b12
Successfully tagged docker-php_docker-php-cli:latest
Image for service docker-php-cli was built because it did not already exist. To rebuild this image you must use `docker-compose build` or `docker-compose up --build`.
Creating docker-php_docker-php-cli_1 ... done
Note that the image is build from scratch when we run docker-compose up for the first time.
A docker ps -a shows that the container is running fine, we can log in and execute source code from the host machine.
Pascal@Landau-Laptop MINGW64 /c/codebase/docker-php
$ docker ps -a
CONTAINER ID        IMAGE                       COMMAND                  CREATED             STATUS              PORTS               NAMES
adf794f27315        docker-php_docker-php-cli   "docker-php-entrypoi…"   3 minutes ago       Up 2 minutes                            docker-php_docker-php-cli_1
Logging in
winpty docker exec -it docker-php_docker-php-cli_1 bash
and running
php /var/www/hello-world.php
works as before
root@adf794f27315:/# php /var/www/hello-world.php
Hello World (php)
Now log out of the container and run
docker-compose down
to shut the container down again:
Pascal@Landau-Laptop MINGW64 /c/codebase/docker-php
$ docker-compose down
Stopping docker-php_docker-php-cli_1 ... done
Removing docker-php_docker-php-cli_1 ... done
Removing network docker-php_web-network
Add the remaining services to the docker-compose.yml file:
# tell docker what version of the docker-compose.yml we're using
version: '3'

# define the network
networks:
  web-network:

# start the services section
services:
  # define the name of our service
  # corresponds to the "--name" parameter
  docker-php-cli:
    # define the directory where the build should happened,
    # i.e. where the Dockerfile of the service is located
    # all paths are relative to the location of docker-compose.yml
    build:
      context: ./php-cli
    # reserve a tty - otherwise the container shuts down immediately
    # corresponds to the "-i" flag
    tty: true
    # mount the app directory of the host to /var/www in the container
    # corresponds to the "-v" option
    volumes:
      - ./app:/var/www
    # connect to the network
    # corresponds to the "--network" option
    networks:
      - web-network

  docker-nginx:
    build:
      context: ./nginx
    # defines the port mapping
    # corresponds to the "-p" flag
    ports:
      - "8080:80"
    tty: true
    volumes:
      - ./app:/var/www
      - ./nginx/conf.d:/etc/nginx/conf.d
    networks:
      - web-network

  docker-php-fpm:
    build:
      context: ./php-fpm
    tty: true
    volumes:
      - ./app:/var/www
    networks:
      - web-network
And up again…
docker-compose up -d
Pascal@Landau-Laptop MINGW64 /c/codebase/docker-php
$ docker-compose up -d
Building docker-nginx
Step 1/1 : FROM nginx:latest
 ---> ae513a47849c
Successfully built ae513a47849c
Successfully tagged docker-php_docker-nginx:latest
Image for service docker-nginx was built because it did not already exist. To rebuild this image you must use `docker-compose build` or `docker-compose up --build`.
Building docker-php-fpm
Step 1/2 : FROM php:7.0-fpm
 ---> a637000da5a3
Step 2/2 : RUN pecl install xdebug-2.6.0     && docker-php-ext-enable xdebug
 ---> Running in 4ec27516df54
downloading xdebug-2.6.0.tgz ...
Starting to download xdebug-2.6.0.tgz (283,644 bytes)
[...]
---> 120c8472b4f3
Successfully built 120c8472b4f3
Successfully tagged docker-php_docker-php-fpm:latest
Image for service docker-php-fpm was built because it did not already exist. To rebuild this image you must use `docker-compose build` or `docker-compose up --build`.
Creating docker-php_docker-nginx_1   ... done
Creating docker-php_docker-php-cli_1 ... done
Creating docker-php_docker-php-fpm_1 ... done
Only nginx and php-fpm needed to be built because the php-cli one already existed.
Lets check if we can still open http://127.0.0.1:8080/hello-world.php in a browser on the host machine:
Yes we can! So instead of needing to run 3 different command with a bunch of parameters we’re now down to
docker-compose up -d. Looks like an improvement to me
The tl;dr
The whole article is a lot to take in and it is most likely not the most efficient approach when you «just want to get started».
So in this section we’ll boil it down to only the necessary steps without in depth explanations.
- Download Docker for Windows
- Install Docker
- activate Hyper-V (Virtual Box will stop working)
- enable Disk Sharing in the settings
- Set up the following folder structure
««
C:\codebase\docker-php- nginx\
- conf.d\
- site.conf
- Dockerfile
- php-cli\
- Dockerfile
- php-fpm\
- Dockerfile
- app\
- index.html
- hello-world.html
- docker-compose.yml
«« - or simply
git clone [email protected]:paslandau/docker-php-tutorial.git docker-php && git checkout part_1_setting-up-php-php-fpm-and-nginx-for-local-development-on-docker
- nginx\
- Open a shell at
C:\codebase\docker-php - run
docker-compose up -d - check in browser via
- 127.0.0.1:8080
- 127.0.0.1:8080/hello-world.php
- run
docker-compose down
Your application code lives in the app\ folder and changes are automatically available to the containers.
This setup denotes the end of the first tutorial. In the next part we will learn how to set up Docker in PHPStorm,
especially in combination with xdebug.
Wrapping up
Congratulations, you made it! If some things are not completely clear by now, don’t hesitate to
leave a comment. Apart from that, you should now have a first idea on what docker is and how you
can use it.
If you want to go deeper, please check out the remaining articles of the
Docker PHP Tutorial series.
Please subscribe to the RSS feed or via email to get automatic
notifications when this next part comes out
Wanna stay in touch?
Since you ended up on this blog, chances are pretty high that you’re into Software Development
(probably PHP, Laravel, Docker or Google Big Query) and I’m a big fan of feedback and networking.
So — if you’d like to stay in touch, feel free to shoot me an email with a couple of words about yourself and/or
connect with me on
LinkedIn or
Twitter
or simply subscribe to my RSS feed
or go the crazy route and subscribe via mail
and don’t forget to leave a comment
Subscribe to posts via mail

Comments
×
Table of Contents
Overview
Overview Docker Implementations for Windows
- Docker for Windows requires Hyper-V for Virtualization
- Docker for Windows runs on Microsoft Windows 10 Professional or Enterprise 64-bit
- For previous versions like Windows 7 or for Windows 10 HOME you need to use Docker Toolbox.
- Docker Toolbox uses VirtualBox for Virtualization. Note Hyper-V Virtualization should be disabled.
Overview Docker ToolBox
- Docker Toolbox use VirtualBox for Virtualization
- Docker-machine creates a VM to host the Docker engine and assigns two interfaces to the machine.
- Host-only interface, which lets the local Docker process communicate with the Docker daemon running inside the VM.
- NAT interface, which allows the Docker containers to make outgoing connections to your local LAN and the Internet.
Versions Used
| Component | Version |
|---|---|
| OS | Windows10 Home |
| Docker | v18.09.0 |
| VirtualBox | VirtualBox 5.2.8r |
Note: In following we will use Docker ToolBox !
Installation and Setup Docker Machine
- Download & Install Docker ToolBox
- Click on Docker Quick-Start Terminal
Printout from Docker Quickstart Terminal
Running pre-create checks...
(default) Unable to get the local Boot2Docker ISO version:  Did not find prefix "-v" in version string
(default) Default Boot2Docker ISO is out-of-date, downloading the latest release...
(default) Latest release for github.com/boot2docker/boot2docker is v18.09.0
(default) Downloading C:\Users\helmut\.docker\machine\cache\boot2docker.iso from https://github.com/boot2docker/boot2docker/releases/download/v18.09.0/boot2docker.iso...
(default) 0%....10%....20%....30%....40%....50%....60%....70%....80%....90%....100%
...
(default) Creating VirtualBox VM...
(default) Creating SSH key...
(default) Starting the VM...
(default) Check network to re-create if needed...
(default) Windows might ask for the permission to configure a dhcp server. Sometimes, such confirmation window is minimized in the taskbar.
(default) Waiting for an IP...
Waiting for machine to be running, this may take a few minutes...
Detecting operating system of created instance...
Waiting for SSH to be available...
Detecting the provisioner...
Provisioning with boot2docker...
Copying certs to the local machine directory...
Copying certs to the remote machine...
Setting Docker configuration on the remote daemon...
Checking connection to Docker...
Docker is up and running!
To see how to connect your Docker Client to the Docker Engine running on this virtual machine, run: C:\Program Files\Docker Toolbox\docker-machine.exe env default


                        ##         .
                  ## ## ##        ==
               ## ## ## ## ##    ===
           /"""""""""""""""""\___/ ===
      ~~~ {~~ ~~~~ ~~~ ~~~~ ~~~ ~ /  ===- ~~~
           \______ o           __/
             \    \         __/
              \____\_______/

docker is configured to use the default machine with IP 192.168.99.100
For help getting started, check out the docs at https://docs.docker.com
Verfiy the Docker settings
C:\Users\helmut>docker-machine env default
SET DOCKER_TLS_VERIFY=1
SET DOCKER_HOST=tcp://192.168.99.100:2376
SET DOCKER_CERT_PATH=C:\Users\helmut\.docker\machine\machines\default
SET DOCKER_MACHINE_NAME=default
SET COMPOSE_CONVERT_WINDOWS_PATHS=true
REM Run this command to configure your shell:
REM     @FOR /f "tokens=*" %i IN ('docker-machine env default') DO @%i
Validate setup by using docker-machine command
A default Docker machine was created by above setup
C:\Users\helmut> docker-machine ls
NAME      ACTIVE   DRIVER       STATE     URL                         SWARM   DOCKER     ERRORS
default   *        virtualbox   Running   tcp://192.168.99.100:2376           v18.09.0

Verify the IP Adreess
C:\Users\helmut> docker-machine ip
192.168.99.100

Login into dogger-machine
C:\Users\helmut> docker-machine ssh
   ( '>')
  /) TC (\   Core is distributed with ABSOLUTELY NO WARRANTY.
 (/-_--_-\)           www.tinycorelinux.net

What drives are currently mounted ?
docker@default:~$ mount |  grep vbox
/c/Users on /c/Users type vboxsf (rw,nodev,relatime)

Verify the network Setup
docker@default:~$ ifconfig
docker0   Link encap:Ethernet  HWaddr 02:42:C9:C1:18:F8
          inet addr:172.17.0.1  Bcast:172.17.255.255  Mask:255.255.0.0
          UP BROADCAST MULTICAST  MTU:1500  Metric:1
          RX packets:0 errors:0 dropped:0 overruns:0 frame:0
          TX packets:0 errors:0 dropped:0 overruns:0 carrier:0
          collisions:0 txqueuelen:0
          RX bytes:0 (0.0 B)  TX bytes:0 (0.0 B)

eth0      Link encap:Ethernet  HWaddr 08:00:27:2D:22:35
          inet addr:10.0.2.15  Bcast:10.0.2.255  Mask:255.255.255.0
          inet6 addr: fe80::a00:27ff:fe2d:2235/64 Scope:Link
          UP BROADCAST RUNNING MULTICAST  MTU:1500  Metric:1
          RX packets:1288 errors:0 dropped:0 overruns:0 frame:0
          TX packets:927 errors:0 dropped:0 overruns:0 carrier:0
          collisions:0 txqueuelen:1000
          RX bytes:170783 (166.7 KiB)  TX bytes:179331 (175.1 KiB)

eth1      Link encap:Ethernet  HWaddr 08:00:27:84:00:6E
          inet addr:192.168.99.100  Bcast:192.168.99.255  Mask:255.255.255.0
          inet6 addr: fe80::a00:27ff:fe84:6e/64 Scope:Link
          UP BROADCAST RUNNING MULTICAST  MTU:1500  Metric:1
          RX packets:39 errors:0 dropped:0 overruns:0 frame:0
          TX packets:45 errors:0 dropped:0 overruns:0 carrier:0
          collisions:0 txqueuelen:1000
          RX bytes:10419 (10.1 KiB)  TX bytes:10880 (10.6 KiB)

lo        Link encap:Local Loopback
          inet addr:127.0.0.1  Mask:255.0.0.0
          inet6 addr: ::1/128 Scope:Host
          UP LOOPBACK RUNNING  MTU:65536  Metric:1
          RX packets:0 errors:0 dropped:0 overruns:0 frame:0
          TX packets:0 errors:0 dropped:0 overruns:0 carrier:0
          collisions:0 txqueuelen:1000
          RX bytes:0 (0.0 B)  TX bytes:0 (0.0 B)
Validate the Docker Installation by creating and running the Docker Hello World Container
C:\Users\helmut> docker run hello-world
Unable to find image 'hello-world:latest' locally
latest: Pulling from library/hello-world
d1725b59e92d: Pull complete
Digest: sha256:0add3ace90ecb4adbf7777e9aacf18357296e799f81cabc9fde470971e499788
Status: Downloaded newer image for hello-world:latest

Hello from Docker!
This message shows that your installation appears to be working correctly.

To generate this message, Docker took the following steps:
 1. The Docker client contacted the Docker daemon.
 2. The Docker daemon pulled the "hello-world" image from the Docker Hub.
    (amd64)
 3. The Docker daemon created a new container from that image which runs the
    executable that produces the output you are currently reading.
 4. The Docker daemon streamed that output to the Docker client, which sent it
    to your terminal.
Run and verify a basic Nginx Installation
Install Nginx Webserver in a new Container
C:\Users\helmut> docker run -d -p 80:80 --name webserver nginx Unable to find image 'nginx:latest' locally latest: Pulling from library/nginx 177e7ef0df69: Pull complete ea57c53235df: Pull complete bbdb1fbd4a86: Pull complete Digest: sha256:b543f6d0983fbc25b9874e22f4fe257a567111da96fd1d8f1b44315f1236398c Status: Downloaded newer image for nginx:latest 7d12192427fbb4466b72c4cb0044699d37e76263ac9d86b77d939419ee9aca36 C:\Users\helmut> docker-machine ip 192.168.99.100 Run an HTTP request using curl C:\Users\helmut> curl http://192.168.99.100/Welcome to nginx!
If you see this page, the nginx web server is successfully installed and working. Further configuration is required.
For online documentation and support please refer to nginx.org.
Check Webserver Logs C:\Users\helmut> docker logs webserver 192.168.99.1 - - [30/Dec/2018:15:13:01 +0000] "GET / HTTP/1.1" 200 612 "-" "curl/7.55.1" "-" Verify docker-machine and docker comtainer status C:\Users\helmut> docker-machine ls NAME ACTIVE DRIVER STATE URL SWARM DOCKER ERRORS default * virtualbox Running tcp://192.168.99.100:2376 v18.09.0 C:\Users\helmut> docker ps CONTAINER ID IMAGE COMMAND CREATED STATUS PORTS NAMES 7d12192427fb nginx "nginx -g 'daemon of…" 2 minutes ago Up 2 minutes 0.0.0.0:80->80/tcp webserver
Create a NEW Virtualbox Common Folder so we can easily copy HTML files to our Container
| Setup a Common Folder within VirtualBox |
|---|
| “;[/insert_php] |
After Common Folder was created in VirtualBox restart docker-machine
C:\Users\helmut> docker-machine stop
Stopping "default"...
Machine "default" was stopped.

C:\Users\helmut> docker-machine start
Starting "default"...
(default) Check network to re-create if needed...
(default) Windows might ask for the permission to configure a dhcp server. Sometimes, such confirmation window is minimized in the taskbar.
(default) Waiting for an IP...
Machine "default" was started.
Waiting for SSH to be available...
Detecting the provisioner...
Started machines may have new IP addresses. You may need to re-run the `docker-machine env` command.

Login to our docker-machine and validate mount status
C:\Users\helmut> docker-machine ssh
   ( '>')
  /) TC (\   Core is distributed with ABSOLUTELY NO WARRANTY.
 (/-_--_-\)           www.tinycorelinux.net

docker@default:~$ mount | grep vbox
/d/docker on /d/docker type vboxsf (rw,nodev,relatime)
/c/Users on /c/Users type vboxsf (rw,nodev,relatime)
Recreate the Webserver and mount a Volume for data Exchange
Validate Comtainers C:\Users\helmut> docker ps -a CONTAINER ID IMAGE COMMAND CREATED STATUS PORTS NAMES 78beb40c2cf1 nginx "nginx -g 'daemon of…" 8 seconds ago Up 8 seconds 0.0.0.0:80->80/tcp webserver 20736855e599 hello-world "/hello" 2 hours ago Exited (0) 2 hours ago elated_dewdney Drop Comtainer C:\Users\helmut> docker stop webserver webserver C:\Users\helmut> docker rm webserver webserver Recreate Containe and mount a volume C:\Users\helmut> docker run -d -p 80:80 -v /d/docker/nginx:/usr/share/nginx/html --name webserver nginx e21b8891b5d338e9baa4a3a23b7c387535561aa61af308e6c4b29efda28262f8 Copy a HTML File to the Windows Directory C:\Users\helmut> cat d:\docker\nginx\t1.htmlHallo Helmut
Use curl to validate our setup C:\Users\helmut> curl http://192.168.99.100/t1.htmlHallo Helmut
Reference
- Using Docker with VirtualBox and Windows 10
Enable docker-machine for DHCP networking
- For testing multipe docker images the docker-machine may need to get an IP Address from Your DHCP server
- To achieve this open VirtualBox Manager and create a 3.rd Briged Network Adapater
| Setup a brigde Network Apdapter with VirtualBox Manager |
|---|
| “;[/insert_php] |
Reboot your docker-machine and validate your Network settings
D:\dev\myprojects\dobby-the-companion>  docker-machine ssh
   ( '>')
  /) TC (\   Core is distributed with ABSOLUTELY NO WARRANTY.
 (/-_--_-\)           www.tinycorelinux.net


docker@default:~$ ifconfig
docker0   Link encap:Ethernet  HWaddr 02:42:2E:E3:AF:56
          inet addr:172.17.0.1  Bcast:172.17.255.255  Mask:255.255.0.0
          inet6 addr: fe80::42:2eff:fee3:af56/64 Scope:Link
          UP BROADCAST RUNNING MULTICAST  MTU:1500  Metric:1
          RX packets:32 errors:0 dropped:0 overruns:0 frame:0
          TX packets:69 errors:0 dropped:0 overruns:0 carrier:0
          collisions:0 txqueuelen:0
          RX bytes:2580 (2.5 KiB)  TX bytes:4752 (4.6 KiB)

eth0      Link encap:Ethernet  HWaddr 08:00:27:2D:22:35
          inet addr:10.0.2.15  Bcast:10.0.2.255  Mask:255.255.255.0
          inet6 addr: fe80::a00:27ff:fe2d:2235/64 Scope:Link
          UP BROADCAST RUNNING MULTICAST  MTU:1500  Metric:1
          RX packets:523 errors:0 dropped:0 overruns:0 frame:0
          TX packets:529 errors:0 dropped:0 overruns:0 carrier:0
          collisions:0 txqueuelen:1000
          RX bytes:47019 (45.9 KiB)  TX bytes:54701 (53.4 KiB)

eth1      Link encap:Ethernet  HWaddr 08:00:27:84:00:6E
          inet addr:192.168.99.100  Bcast:192.168.99.255  Mask:255.255.255.0
          inet6 addr: fe80::a00:27ff:fe84:6e/64 Scope:Link
          UP BROADCAST RUNNING MULTICAST  MTU:1500  Metric:1
          RX packets:417 errors:0 dropped:0 overruns:0 frame:0
          TX packets:409 errors:0 dropped:0 overruns:0 carrier:0
          collisions:0 txqueuelen:1000
          RX bytes:97354 (95.0 KiB)  TX bytes:80937 (79.0 KiB)

eth2      Link encap:Ethernet  HWaddr 08:00:27:4F:93:12
          inet addr:192.168.1.5  Bcast:192.168.1.255  Mask:255.255.255.0
          inet6 addr: fe80::a00:27ff:fe4f:9312/64 Scope:Link
          UP BROADCAST RUNNING MULTICAST  MTU:1500  Metric:1
          RX packets:6190 errors:0 dropped:0 overruns:0 frame:0
          TX packets:884 errors:0 dropped:0 overruns:0 carrier:0
          collisions:0 txqueuelen:1000
          RX bytes:448925 (438.4 KiB)  TX bytes:60435 (59.0 KiB)

lo        Link encap:Local Loopback
          inet addr:127.0.0.1  Mask:255.0.0.0
          inet6 addr: ::1/128 Scope:Host
          UP LOOPBACK RUNNING  MTU:65536  Metric:1
          RX packets:0 errors:0 dropped:0 overruns:0 frame:0
          TX packets:0 errors:0 dropped:0 overruns:0 carrier:0
          collisions:0 txqueuelen:1000
          RX bytes:0 (0.0 B)  TX bytes:0 (0.0 B)
Recreate and test your docker Image
- Nginx Webserver should not listen to 2 IPs including a DHCP address
D:\dev\myprojects\dobby-the-companion> docker stop webserver webserver D:\dev\myprojects\dobby-the-companion> docker rm webserver webserver D:\dev\myprojects\dobby-the-companion> docker run -d -p 80:80 -v /d/docker/nginx:/usr/share/nginx/html --name webserver nginx 534cc7f20d868978d90a2762c25a39dba05628bcb8fdd29f1fd14022a4c7c3ba Validate our Nginx Webserver - should now listening on both IPs D:\dev\myprojects\dobby-the-companion> curl http://192.168.1.5/t1.htmlHallo Helmut
D:\dev\myprojects\dobby-the-companion> curl http://192.168.99.100/t1.htmlHallo Helmut
Reference
- Adding a Briged Network Adapter to docker
Usefull Comannds
Recreate Certificates
C:\Users\helmut> docker-machine regenerate-certs
Regenerate TLS machine certs?  Warning: this is irreversible. (y/n): y
Regenerating TLS certificates
Waiting for SSH to be available...
Detecting the provisioner...
Copying certs to the local machine directory...
Copying certs to the remote machine...
Setting Docker configuration on the remote daemon...
Login into a Docker Container and run a Linux Command
C:\Users\helmut> docker exec -it webserver /bin/bash
root@9d1edf9c3952:/# uname -a
Linux 9d1edf9c3952 4.14.79-boot2docker #1 SMP Thu Nov 8 01:56:42 UTC 2018 x86_64 GNU/Linux
Login into a Docker Container and install add. packages
C:\Users\helmut> docker exec -it webserver /bin/bash
root@438da12bf45f:/# apt-get update
root@438da12bf45f:/# apt-get install iputils-ping
Potential Errors
C:\WINDOWS\system32> docker-machine restart
Restarting "default"...
Starting "default"...
(default) Check network to re-create if needed...
(default) Windows might ask for the permission to configure a dhcp server. Sometimes, such confirmation window is minimized in the taskbar.
Error setting up host only network on machine start: C:\Program Files\Oracle\VirtualBox\VBoxManage.exe modifyvm default --nic2 hostonly --nictype2 82540EM --nicpromisc2 deny --hostonlyadapter2 VirtualBox Host-Only Ethernet Adapter #3 --cableconnected2 on failed:
VBoxManage.exe: error: Code E_FAIL (0x80004005) - Unspecified error (extended info not available)
VBoxManage.exe: error: Context: "LockMachine(a->session, LockType_Write)" at line 525 of file VBoxManageModifyVM.cpp

-->Fix: Use Windows Taks Manager and kill all VBoxXXXXX processes
Miha Jakovac
.NET & DevOps Engineer | Cloud Specialist | Team Enabler
- CV
- LinkedIn Profile
- GitHub Profile
- MJC.si
- Beekn
- QAToolKit
My name is Miha and I’ve been tinkering with computers for some time now. I remember getting Pentium 100 in the late ’90s and that’s how it all started.
Specialities:
- Azure cloud development
- Devops services and expertise
- Back-end application development
- Enhancing team culture and communication
19 January 2021
by Miha J.
Sometimes you want to run the Nginx web server on Windows. Sometimes you want to run Nginx in Docker on Windows. Let me show you how you can do that.
To build a docker image, we need to create a Dockerfile. We need to select a Windows base image, such as Windows 2019 Core or Nano server images. Because official Nginx Windows binaries are not explicitly compiled for 64-bit operating systems, we can not use Windows Nano since it only supports 64-bit applications.
Let’s start with the Windows 2019 Core server docker image with PowerShell already installed. We will need PowerShell to install the Nginx and set up the necessary configurations.
Create a folder DockerTest on your disk and create three files:
Index.html
nginx.conf
worker_processes  1;
events {
    worker_connections  1024;
}
http {
    include       mime.types;
    default_type  application/octet-stream;
    sendfile        on;
    keepalive_timeout  65;

    server {
        listen       80;

        location / {
          root c:/nginx/enabled-sites/html;
          index index.html index.htm;
          try_files $uri $uri/ /index.html =404;
        }

        error_page   500 502 503 504  /50x.html;
        location = /50x.html {
            root   html;
        }
    }
}
Dockerfile
FROM mcr.microsoft.com/powershell:lts-windowsservercore-1809 as build-stage

ENV NGINX_VERSION 1.19.6

SHELL ["pwsh", "-command"]
RUN Invoke-WebRequest "http://nginx.org/download/nginx-$($env:NGINX_VERSION).zip" -OutFile C:\nginx.zip
RUN Expand-Archive C:\nginx.zip C:\nginx
RUN Remove-Item "C:\nginx\nginx-$($env:NGINX_VERSION)\conf\*.conf" -Verbose
RUN New-Item -type directory "c:\\nginx\\enabled-sites\\html"
RUN Remove-Item C:\nginx.zip

WORKDIR c:\\nginx\\nginx-$NGINX_VERSION
COPY ./index.html c:/nginx/enabled-sites/html
COPY ./nginx.conf c:/nginx/nginx-$NGINX_VERSION/conf/nginx.conf
CMD ["nginx", "-g", "daemon off;"]
Now open up PowerShell and navigate to the DockerTest folder and run:
docker build -f Dockerfile -t nginxhello:latest .
After the image is built, run the docker container from that image:
docker run --rm --name nginxhello -p 8888:80 -it nginxhello:latest
Now you can navigate to your browser at http://localhost:8888 and see your Index.html.
Because we use the Windows 2019 Core, the image size is pretty big, between 5-6GB. Alternatively, Windows Nano images are 10x smaller, and we will investigate installing Nginx on Windows Nano in a future post.
tags: docker — nginx

Hi devs
If you’ve been hearing a lot about Docker, Kubernetes, and Nginx, you’re not alone! These technologies are transforming how we deploy and scale applications. While they might seem intimidating at first, this post will break things down for beginners. By the end, you’ll have a basic Nginx server running in a Docker container, managed by Kubernetes on your Windows machine.
What You Need to Know
- Nginx: A high-performance web server, reverse proxy, and load balancer. It’s lightweight and great for serving web content.
- Docker: A platform that allows you to package applications and their dependencies into lightweight containers. These containers can run anywhere, making it easier to develop, ship, and scale applications.
- Kubernetes: A container orchestration platform. It helps you manage and scale containerized applications, ensuring they are running smoothly across multiple environments.
Setting Up Your Environment on Windows
Before we begin, let’s set up our development environment. We’ll be using Docker Desktop (which comes with Kubernetes support) and Minikube to simulate a Kubernetes cluster.
Step 1: Install Docker Desktop
- Download Docker Desktop for Windows from here.
- Follow the installation instructions.
- Enable Kubernetes support in Docker Desktop by going to the Settings > Kubernetes tab and checking Enable Kubernetes.
Step 2: Install Minikube
Minikube allows you to run Kubernetes locally. Download and install it by following the instructions here.
Step 3: Install kubectl
The kubectl command-line tool allows you to interact with your Kubernetes cluster. You can install kubectl by following the guide here.
Step 4: Dockerize Your Nginx Application
Let’s start by creating a simple Nginx web server using Docker. We’ll build a Docker image that serves a static HTML file.
-
Create a Directory for Your Project:
Open a terminal (PowerShell or Command Prompt) and create a project folder:
   mkdir nginx-docker-k8s
   cd nginx-docker-k8s
Enter fullscreen mode
Exit fullscreen mode
-
Create an HTML File:
In this directory, create a simpleindex.htmlfile:
   <!DOCTYPE html>
   <html lang="en">
   <head>
       <meta charset="UTF-8">
       <meta name="viewport" content="width=device-width, initial-scale=1.0">
       <title>Nginx on Docker & Kubernetes</title>
   </head>
   <body>
       <h1>Hello from Nginx, Docker, and Kubernetes on Windows!</h1>
   </body>
   </html>
Enter fullscreen mode
Exit fullscreen mode
-
Create a Dockerfile:
In the same directory, create aDockerfileto package your Nginx web server:
   # Use the official Nginx image from Docker Hub
   FROM nginx:alpine

   # Copy the HTML file into the Nginx server
   COPY index.html /usr/share/nginx/html/
Enter fullscreen mode
Exit fullscreen mode
-
Build the Docker Image:
Build your Docker image by running the following command in the terminal:
docker build -t my-nginx-app .
Enter fullscreen mode
Exit fullscreen mode
-
Run the Docker Container:
Now that we’ve built the image, let’s run it as a container:
docker run -d -p 8080:80 my-nginx-app
Enter fullscreen mode
Exit fullscreen mode
-
Test It: Open your browser and go to
http://localhost:8080. You should see your custom HTML page!
Step 5: Deploying Nginx to Kubernetes
Now that we have Nginx running in a Docker container, let’s move it to Kubernetes.
-
Create a Kubernetes Deployment:
Create a file namednginx-deployment.yamlwith the following content:
   apiVersion: apps/v1
   kind: Deployment
   metadata:
     name: nginx-deployment
   spec:
     replicas: 2
     selector:
       matchLabels:
         app: nginx
     template:
       metadata:
         labels:
           app: nginx
       spec:
         containers:
         - name: nginx
           image: my-nginx-app
           ports:
           - containerPort: 80
Enter fullscreen mode
Exit fullscreen mode
This file defines a Kubernetes deployment with 2 replicas (two copies of your Nginx app) running in the cluster.
-
Apply the Deployment:
Use thekubectlcommand to apply this deployment:
kubectl apply -f nginx-deployment.yaml
Enter fullscreen mode
Exit fullscreen mode
-
Create a Kubernetes Service:
To access the Nginx app from outside the Kubernetes cluster, we need to create a Service:
   apiVersion: v1
   kind: Service
   metadata:
     name: nginx-service
   spec:
     type: NodePort
     selector:
       app: nginx
     ports:
       - protocol: TCP
         port: 80
         targetPort: 80
         nodePort: 30000
Enter fullscreen mode
Exit fullscreen mode
-
Apply the Service:
Run the following command to expose your Nginx app to the outside world:
kubectl apply -f nginx-service.yaml
Enter fullscreen mode
Exit fullscreen mode
-
Access the Nginx App:
In your browser, go tohttp://localhost:30000and you should see your Nginx app running in the Kubernetes cluster!
Key Takeaways
-
Nginx + Docker: Docker makes it easy to package and run applications like Nginx in isolated containers, ensuring they run the same in any environment.
-
Nginx + Kubernetes: Kubernetes provides a robust platform to manage and scale your Docker containers. With Kubernetes, you can ensure your app stays available, even under high traffic.
-
Windows Compatibility: While Docker and Kubernetes are typically associated with Linux, they work just as well on Windows with tools like Docker Desktop and Minikube.
Final Thoughts
Starting with Nginx, Docker, and Kubernetes on Windows is a great way to explore the world of containerized applications. You’ll gain insight into how modern apps are deployed, scaled, and managed. Don’t be afraid to experiment—play around with scaling, add new features to your Nginx app, and explore more Kubernetes objects!
Containerizing web server workloads, such as NGINX, has become common across the modern IT industry. NGINX makes a perfect container workflow and marrying NGINX to Docker is a perfectly logical task.
In this tutorial, you will learn how to provision a new NGINX on Docker container running on any operating system such as Windows, macOS, or Linux!
Prerequisites
To follow along with this tutorial, be sure you have the following:
- Docker Desktop – This tutorial uses version 3.5.1.
- Windows 10 – The tutorial uses Windows to run Docker on but the same general steps can also be applied to Linux or macOS.
- The Docker engine if you’re on Linux.
Provisioning an NGINX on Docker Container
Let’s get started by first creating a Linux Docker image with NGINX already installed. This tutorial will use a minimal Linux distribution called Alpine Linux running the latest NGINX version available, which is 1.21.1 in this tutorial.
1. First, open a terminal session where you will run all of the necessary Docker commands.
2. Run the docker pull command to retrieve, or pull, the latest nginx image from the NGINX Docker Hub repository using the mainlin-alpine branch. The Docker Hub is an open-source repository of Docker Images available to Docker users.
docker pull nginx:mainline-alpine
nginx:mainline-alpine Docker imageRetrieving the latest image is great for development and testing, but it is often a best production practice to specify a specific version such as
docker pull nginx:1.21.0-alpine.
3. Next, run the docker run command to run a container from the nginx:mainline-alpine image.
-i– This parameter requests an interactive console, which returns internal container output to the terminal.-t– Here you ask for a Pseudo-TTY console to the running container which allows the use of the key commandctrl-cto exit the interactive container.--name– The name of this container run, must be unique for each new container (unless prior containers of the same name are removed).-p– What internal to external port to use, which in this case the internal port of80should be mapped to the external port of80.- “image name” – What Docker image to provision the container from, in this case, the previously pulled
nginx:mainline-alpineimage.
docker run -i -t --name nginx-mainline -p 80:80 nginx:mainline-alpine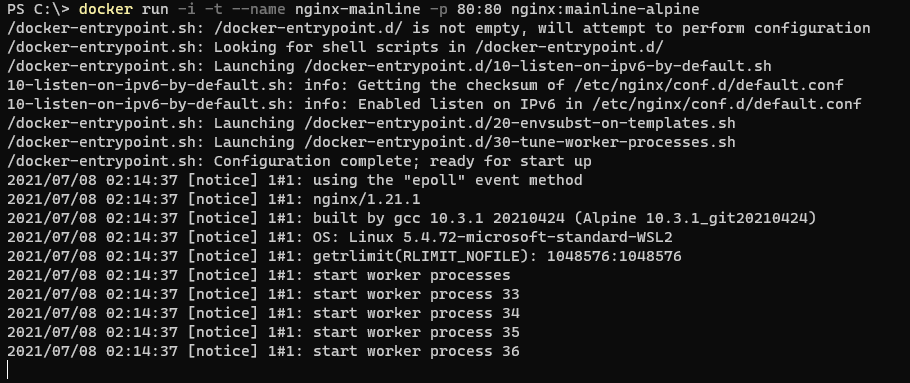
4. In a web browser, navigate to the running Docker container by going to http://localhost. If successful, you will see the default NGINX welcome page. Since in the previous step, you started the container mapping the external port 80 to the container’s port 80 (-p 80:80), NGINX should be available.
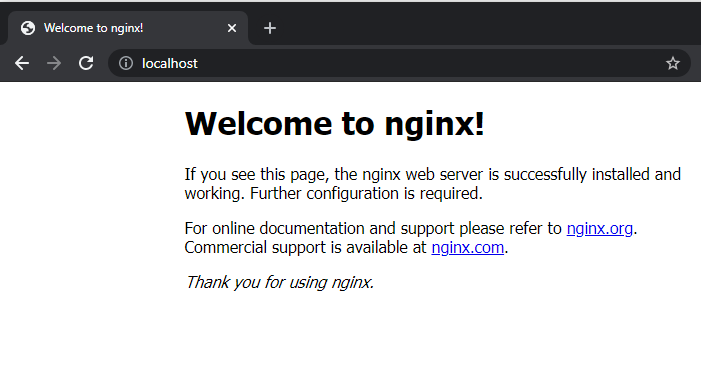
5. Finally, open your command line console again and hit the key combination of ctrl-c to exit the running container. You still have some work to do!
Mapping Website Files to a Container
At this point, you can easily bring up an NGINX Docker container with the sample webpage. You now need to upload your custom website to NGINX. Since containers are immutable and will purge any changes to them when recreated, you must provide a website source outside of the Docker image.
The NGINX web server running on Linux stores website files in the /usr/share/nginx/html directory. Rather than upload files directly to this directory, you should map a storage location to that location so that the container will pull those files from the storage location at bootup.
On your local host operating system:
1. First, create a directory to map to the NGINX Docker container. In this example, C:\Articles\NGINX is used to map to /usr/share/nginx/html.
2. In the newly-created directory, create a file, index.html, that contains the following. This file will be the file that NGINX serves up when navigating to the website.
<html>
    <head></head>
    <body>
        <h1>ATA Test!</h1>
        <p>Welcome to your custom NGINX index file.</p>
    </body>
</html>
3. Next, on the command line, invoke docker run with nearly all the same parameters as step three in the previous section. But this time, include the volume parameter, -v as shown below.
In the example below, the -v parameter is mapping the local C:\Articles\NGINX directory to the image’s /usr/share/nginx/html directory. Creating this mapping will allow you to modify the contents of the /usr/share/nginx/html container directory by modifying the contents of the C:\Articles\NGINX directory.
This demonstrates a Windows file location, but this command works the same on Linux. For example,
-v /usr/share/myfiles:/usr/share/nginx/html.
docker run -i -t -v c:\Articles\NGINX:/usr/share/nginx/html --name nginx-mainline -p 80:80 nginx:mainline-alpine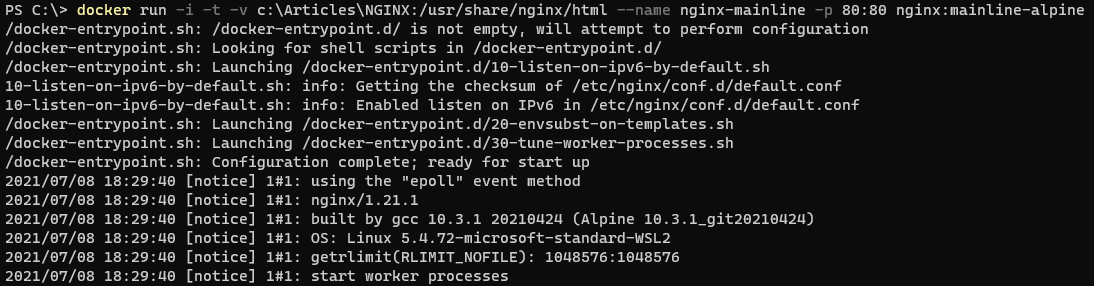
4. Finally, open a web browser and navigate to http://localhost. You will see the following displayed based on the newly created index.html file since it is now pulling files from the local C:\Articles\NGINX directory.
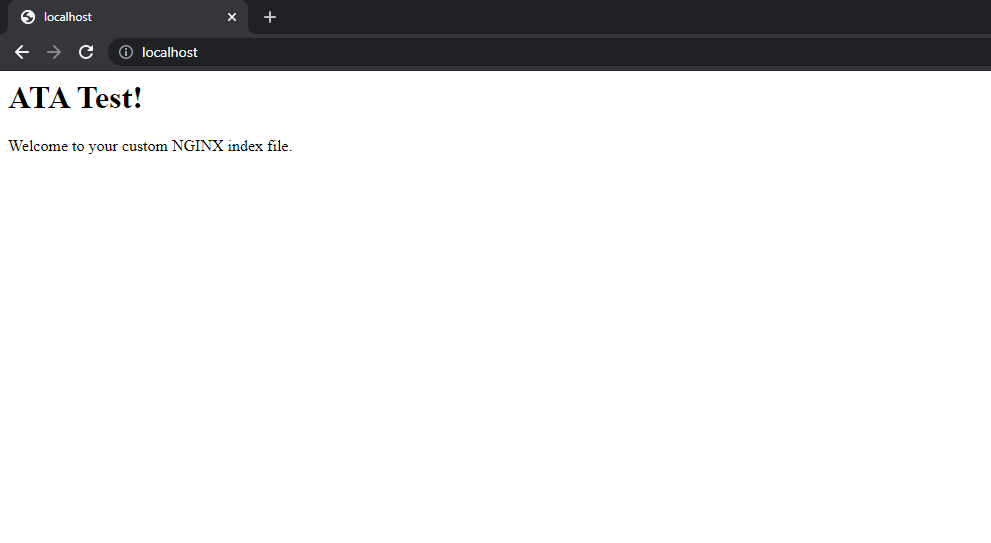
Running a PHP-FPM Application with a Docker NGINX Container
By now, you can bring up an NGINX Docker container and easily modify a website’s contents. If you need a super-basic setup, this might work. But, if you plan on running a web application on NGINX, you must do a little more work.
As an example, let’s enable the NGINX image just created to run the popular web scripting language PHP using PHP FastCGI Process Manager (FPM).
For this section, several new concepts must be introduced. To easily define a set of containers and their linkages, it is best to use a Docker Compose file. Docker Compose defines the series of services and related applications in a YAML (Yet Another Markup Language) file.
In addition, since you need to copy a custom configuration file for the default site, into the NGINX container, a custom version of the nginx:mainline-alpine image is needed. To extend an existing image, a dockerfile is used and built with the build step in the Docker Compose file.
1. Create a directory to contain your configuration files. In this example, the directory C:\Articles\NGINXPHP is used.
2. First, create the file, dockerfile, with the following contents.
# The image to pull the base configuration from
FROM nginx:mainline-alpine
# The directory where any additional files will be referenced
WORKDIR C:\Articles\NGINXPHP
# Copy the custom default.conf from the WORKDIR (.) and overwrite the existing internal configuration in the NGINX container
COPY ./default.conf /etc/nginx/conf.d/default.conf
3. Next, create the file docker-compose.yml file, containing the following.
# The specification version of docker-compose
version: "3.9"
# The collection of applications composing this service
services:
  # The NGINX custom container
  web:
    # Instead of referencing image: nginx:mainline-alpine here, use build to
    # reference the current directory (.), which will look for a dockerfile
    # by default
    build: .
    # The external directory location to map to an internal location
    volumes:
      - C:\Articles\NGINXPHP:/usr/share/nginx/html
    # The external port mapping to internal port mapping
    ports:
      - "80:80"
  php:
    image: php:fpm-alpine
    # It is important that both containers can reference the same files
    volumes:
      - C:\Articles\NGINXPHP:/usr/share/nginx/html
4. Finally, create the NGINX configuration file, default.conf, with the following.
server {
    # The port to listen on
    listen 80;
    # The root directory, which must exactly match the internal volume share
    root /usr/share/nginx/html;

    # For all files with the PHP extension run the following
    location ~ ^/.+\.php(/|$) {
        # Pass the request to the host "php" and port 9000 (default PHP-FPM port)
        fastcgi_pass  php:9000;
	# Include the default NGINX FastCGI Parameters
        include       fastcgi_params;
	# Define one additional parameter telling PHP-FPM where to find the file
        fastcgi_param SCRIPT_FILENAME $document_root$fastcgi_script_name;
    }
}
You may wonder where “PHP” for the hostname came from. By default, a network shared by all applications contained in the service is created using the name of the parent directory. Each container is assigned a hostname equal to the application name. In this example, the network is
nginxphpand the hostnames arewebandphp.
5. In a terminal session, navigate to your custom Docker configuration file directory, which in this example is C:\Articles\NGINXPHP. Run the command, docker-compose up to generate and start your custom service.
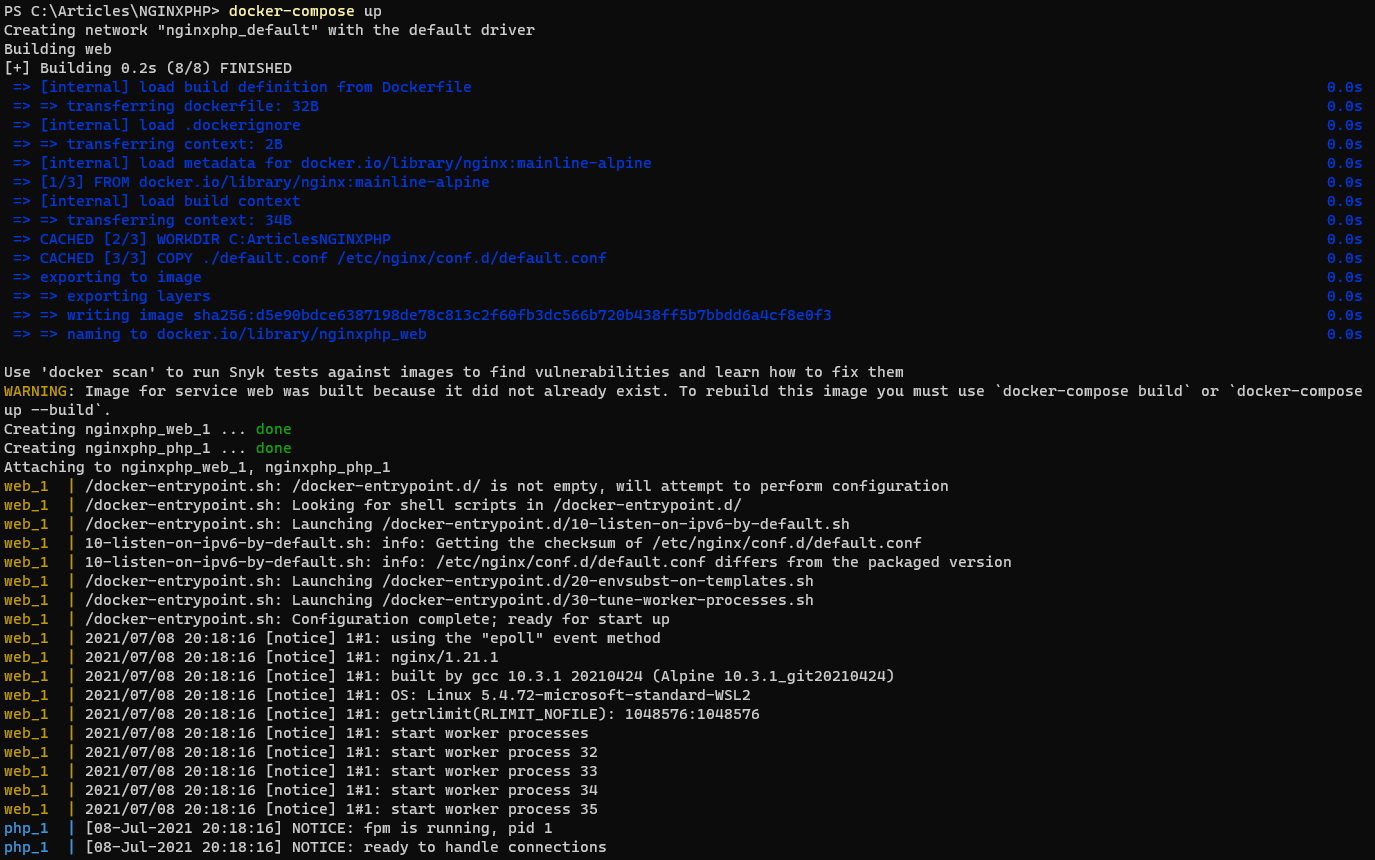
6. Now that the set of containers are up and running, you need a PHP file to test the configuration out. Create the file, index.php, in your NGINX Docker shared directory which is C:\Articles\NGINXPHP in this tutorial.
7. Open a web browser and navigate to http://localhost/index.php to verify that the PHP file is properly shown.
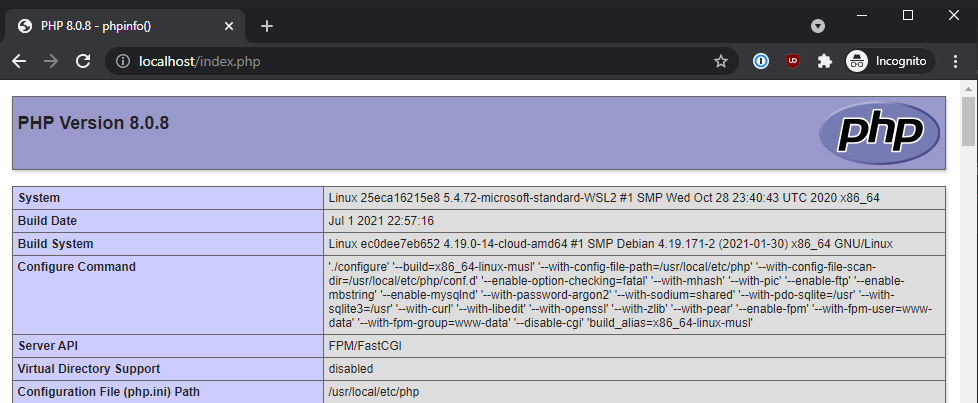
Conclusion
Docker NGINX containers are incredibly useful for testing and development. With proper care and attention, Docker containers can help to greatly increase a production web server’s capability as well!
Now that you have successfully provisioned an NGINX container and a linked PHP-FPM container, try adding a database container into the mix for a full web application environment.