
После установки Docker Machine посмотреть на список управляемых ей Docker хостов можно командой:
$ docker-machine ls
NAME ACTIVE DRIVER STATE URL SWARM DOCKER ERRORS
default - virtualbox Stopped Unknown
Я использую Mac и в качестве Docker хоста у меня используется виртуальная машина, управляемая VirtualBox. Как видно из примера, эта виртуальная машина называется default и в настоящий момент она остановлена. Чтобы запустить эту виртуальную машину и иметь возможность использовать ее в качестве Docker хоста, нужно выполнить команду:
$ docker-machine start default
Starting "default"...
(default) Check network to re-create if needed...
(default) Waiting for an IP...
Machine "default" was started.
Waiting for SSH to be available...
Detecting the provisioner...
Started machines may have new IP addresses. You may need to re-run the `docker-machine env` command.
Docker хост успешно запущен. Проверим этот факт:
$ docker-machine ls
NAME ACTIVE DRIVER STATE URL SWARM DOCKER ERRORS
default * virtualbox Running tcp://192.168.99.100:2376 v1.12.4
Звездочка (*) показывает, что данный Docker хост в настоящий момент активен, т.е. при запуске утилиты docker, все ее команды будут выполняться на этом хосте. Если звездочка в выводе отсутствует, то необходимо настроить переменные окружения для корректной работы клиента Docker. Посмотреть переменные окружения для работы с Docker хостом default можно командой:
$ docker-machine env default
export DOCKER_TLS_VERIFY="1"
export DOCKER_HOST="tcp://192.168.99.100:2376"
export DOCKER_CERT_PATH="/Users/amaksimov/.docker/machine/machines/default"
export DOCKER_MACHINE_NAME="default"
# Run this command to configure your shell:
# eval $(docker-machine env default)
Эта команда сама подсказывает, как применить эти переменные в вашем окружении, чтобы настроить клиента:
$ eval $(docker-machine env default)
После выполнения данной команды, клиент docker будет настроен на работу с Docker хостом default.
Помимо подготовки и настройки Docker хоста Docker Machine может осуществлять к нему ssh подключение:
$ docker-machine ssh default

Boot2Docker version 1.12.4, build HEAD : d0b8fd8 - Tue Dec 13 18:21:26 UTC 2016
Docker version 1.12.4, build 1564f02
docker@default:~$
При помощи плагинов Docker Machine при помощи команды docker-machine create может сразу запускать виртуальные серверы в Облаке.
Что такое Docker Desktop
Docker Desktop — это инструмент для работы с Docker-контейнерами на локальной машине. Он упрощает процесс разработки, тестирования и развертывания приложений, позволяя взаимодействовать с контейнерами как через консоль, так и через удобный интерфейс.
Ключевые особенности:
- понятный графический интерфейс,
- удобное управление образами и контейнерами,
- встроенные инструменты для мониторинга,
- возможность разработки и тестирования без привязки к серверу,
- поддержка работы с Docker Compose.
Если вы только начинаете изучение Docker и хотите разобраться в основах, рекомендуем ознакомиться с отдельным вводным обзором. В нем разобрали принципы работы Docker, его основные компоненты и решаемые задач. Из текста вы узнаете, как создать и запустить контейнер, а также какую роль играет Kubernetes в связке c Docker.

О системных требованиях
Перед установкой Docker Desktop важно выбрать подходящий бэкенд для работы с контейнерами: WSL 2 или Hyper-V. Оба имеют свои особенности, так что от выбора будут зависеть и системные требования. Далее в тексте разберемся, когда и какой бэкенд подойдет лучше.
Когда нужен WSL
WSL 2 (Windows Subsystem for Linux 2) — это усовершенствованная версия подсистемы Windows для Linux, которая использует виртуальную машину с реальным Linux-ядром. В отличие от первой версии, WSL 2 обеспечивает лучшую совместимость с Linux-инструментами, технологиями и приложениями, а также более высокую производительность.
Преимущества использования WSL 2 с Docker Desktop
Работа с Linux-контейнерами. Docker изначально разрабатывали для работы в Linux-среде, поэтому большинство контейнеров в Docker Hub — это образы, ориентированные на Linux. Использование WSL 2 предоставляет Docker Desktop полноценную Linux-среду на Windows.
Повышенная производительность. WSL 2 значительно ускоряет выполнение контейнеров, что особенно заметно в сравнении с WSL 1 или Hyper-V, о котором мы расскажем дальше. Это преимущество обеспечивает полноценное Linux-ядро, которое позволяет Docker работать гораздо быстрее и с меньшими накладными расходами.
Работа с файловой системой Linux. В WSL 2 можно монтировать файловую систему Linux, что позволяет работать с кодом и данными в нативной Linux-среде. Это особенно важно при разработке приложений, которые будут запускаться в Linux-контейнерах и требуют специфической настройки среды — например, прав доступа или структуры каталогов.
Когда нужен Hyper-V
Рассмотрим ключевые сценарии, в которых предпочтительнее использовать Hyper-V.
Если система не поддерживает WSL 2
Некоторые сборки системы не позволяют включать необходимые компонентов для работы WSL 2 В частности, это касается старых версий Windows, а также устройств, которые не поддерживают Windows 10 Pro или 11 Pro, — WSL 2 для них недоступна, так как требует включенной виртуализации на уровне системы. В таких случаях можно использовать Hyper-V для виртуализации контейнеров и запуска Docker Desktop.
Для работы с Windows-контейнерами
Docker Desktop поддерживает как Linux-, так и Windows-контейнеры. Однако последние требуют прямого взаимодействия с ядром Windows, а WSL 2 предоставляет только Linux-среду. Hyper-V позволяет запускать Windows-контейнеры благодаря виртуализации Windows-системы.
Для изоляции и обеспечения безопасности
Hyper-V создает полноценные виртуальные машины, обеспечивая строгую изоляцию контейнеров друг от друга и от хост-системы. Это может быть важно в корпоративной среде или при работе с чувствительными данными.
Разница между WSL 2 и Hyper-V
Если вам нужны Linux-контейнеры и высокая производительность — выбирайте WSL 2. Если же требуется строгая изоляция или работа с Windows-контейнерами, Hyper-V будет предпочтительнее. Подробнее о разнице по ключевым критериям — в таблице:
| Критерий | WSL 2 | Hyper-V |
| Производительность | Высокая (нативное Linux-ядро) | Низкая (работа через полноценную ВМ) |
| Изоляция | Относительно низкая | Высокая (контейнеры изолированы) |
| Типы контейнеров | Только Linux-контейнеры | Linux- и Windows-контейнеры |
Системные требования Docker Desktop
При использовании WSL 2 в качестве бэкенда
- WSL версии 1.1.3.0 или новее.
- Windows 11 64-bit Home / Pro / Enterprise / Education, версия 22H2 или новее.
- Windows 10 64-bit Home / Pro / Enterprise / Education, версия 22H2 (сборка 19045) или новее.
- Включенная функция WSL 2 в Windows. Подробная инструкция есть в документации Microsoft;
- 4 ГБ ОЗУ.
- Включенная аппаратная виртуализация в BIOS на вашей локальной машине.
При использовании Hyper-V в качестве бэкенда
- Windows 11 64-разрядная Enterprise / Pro / Education, версия 22H2 или новее.
- Windows 10 64-разрядная Enterprise / Pro / Education, версия 22H2 (сборка 19045) или новее.
- Включенная функция Hyper-V. Подробнее об установке — в документации Microsoft;
- 4 ГБ ОЗУ.
- Включенная аппаратная виртуализация в BIOS на вашей локальной машине.
Установка WSL 2
1. Откройте PowerShell от имени администратора и введите команду wsl —install. Она выполняет следующие действия:
- включает дополнительные компоненты WSL и платформы виртуальных машин;
- скачивает и устанавливает последнюю версию ядра Linux;
- задает WSL 2 в качестве среды по умолчанию;
- скачивает и устанавливает дистрибутив Ubuntu Linux.

2. После успешной установки всех компонентов перезапустите компьютер.

Первичная настройка
1. Откройте установленный дистрибутив с помощью меню Пуск — найдите установленный дистрибутив (Ubuntu).
2. При первом запуске системы нужно создать имя пользователя и пароль для дистрибутива Linux.

3. Первичная настройка завершена, можно приступать к использованию WSL 2.
Альтернативный вариант — запустить WSL через PowerShell. Для этого введите команду wsl и система предложит произвести первичную настройку.

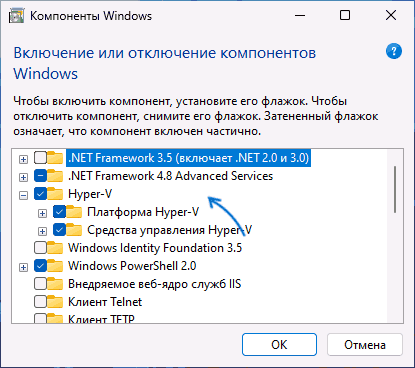
Установка Hyper-V
Для установки компонентов Hyper-V откройте PowerShell от имени администратора и выполните команду:
Enable-WindowsOptionalFeature -Online -FeatureName Microsoft-Hyper-V -All
Она установит все компоненты для работы Hyper-V, после чего нужно будет перезапустить компьютер.

Проверить корректность установки Hyper-V можно с помощью команды:
Get-WindowsOptionalFeature -Online -FeatureName *hyper*|ft

Установка Docker с бэкендом WSL 2
- Скачайте дистрибутив Docker Desktop с официального сайта и запустите установщик. Галочки оставьте на всех пунктах.

- После установки перезайдите в учетную запись и откройте ярлык Docker Desktop.
- Если все прошло успешно, вы увидите интерфейс инструмента:

Установка Docker с бэкендом Hyper-V
1. Скачайте дистрибутив Docker Desktop с официального сайта и запустите установщик. В инсталляционном окне уберите галочку Use WSL 2 instead of Hyper-V.

2. После установки перезайдите в учетную запись и откройте ярлык Docker Desktop.
3. Если установка выполнена корректно, программа запустится без ошибок и вы увидите интерфейс:

Запуск контейнера
Рассмотрим запуск первого контейнера на примере самого популярного образа — hello-world.
Поиск и скачивание образа
Поскольку вы только установили Docker Desktop, в системе нет образов контейнеров, которые можно запустить. Исправим это.
- Перейдите в раздел Images и нажмите кнопку Search images to run.

- Введите hello-world. В текущем окне на выбор есть две кнопки: Pull и Run. Если планируете для начала просто скачать образ, то выбирайте Pull. Если скачать и сразу запустить — Run.

- Оставляем стандартные настройки для запуска.

Проверка работы контейнера
Чтобы посмотреть запущенные контейнеры, перейдите во вкладку Containers и выберите созданный на прошлом этапе. В нашем примере для него было автоматически сгенерировано имя determined_jennings. Открыв контейнер, вы увидите сообщение, если настройка установка прошла успешно.

Как настроить запуск Docker при старте Windows
Для автозапуска Docker Desktop при авторизации на компьютере достаточно поставить галочку в настройках: Settings → General → Start Docker Desktop when you sign in to your computer.

После этого Docker Desktop будет запускаться автоматически при включении устройства.
Запуск Docker в облаке
Docker Desktop — удобный инструмент для локальной работы, но в ряде случаев может потребоваться облачная инфраструктура:
- если мощности вашего ПК не хватает для работы с контейнерами;
- если нужна среда для тестирования без нагрузки на локальную машину;
- если вы работаете с ML/AI и нужны видеокарты для обучения моделей.
1. В панели управления в верхнем меню перейдем в раздел Продукты → Облачные серверы.

2. Нажмем кнопку Создать сервер.

3. Выберем имя, регион и сегмент пула. Важно учесть, что от сегмента зависят доступные конфигурации и стоимость. После создания сервера менять сегмент пула нельзя.

4. В качестве источника выберите готовый образ, приложение, свой образ, сетевой диск или снапшот. В нашем случае — приложение Containers Ready с настроенной Ubuntu 22.04. Оно содержит:
- Docker версии 27.0.3;
- плагины для запуска Docker Compose версии 2.11.1;
- Portainer версии 2.20.3 — графический интерфейс для мониторинга и управления Docker-контейнерами, образами и сетью Docker.

5. Конфигурацию для примера возьмем базовую — 2 vCPU и 2 ГБ RAM, а в поле Диски выберем SSD Быстрый на 20 ГБ. Важно: это минимальные требования. Рекомендуем выбирать параметры серверы, исходя из ваших задач.
Помимо прочего, на этапе создания сервера или позже вы можете добавить GPU. При этом объем ОЗУ, который выделяется серверу, может быть меньше указанного в конфигурации — ядро ОС резервирует ее часть. Выделенный объем на сервере можно посмотреть с помощью команды sudo dmesg | grep Memory.

6. Для работы Containers Ready сервер должен быть доступен из интернета. Для этого создадим приватную подсеть и подключим публичный IP-адрес. В поле Сеть выберем Приватная подсеть и добавим новый публичный адрес. Подробнее о настройке подсети можно узнать в документации.

6. Добавьте SSH-ключ в поле Доступ. Подробнее о его генерации можно узнать в отдельной инструкции.

7. Ознакомьтесь с ценой и нажмите кнопку Создать сервер.

Сервер готов к использованию! Подробности о создании сервера с Сontainers Ready вы можете найти в документации. Если вам нужно запускать контейнеры с ML-моделями на мощных видеокартах, развернуть облачные серверы с GPU можно за несколько минут. Они помогут ускорить обучение нейросетей без закупки дорогого оборудования.
Читайте другие тексты о Docker
Начиная с версии Microsoft Windows 10, Docker можно установить непосредственное в операционной системе благодаря WSL 2 (Windows Subsystem for Linux) — это среда выполнения Linux, предоставляемая операционной системой Windows.
WSL позволяет запускать исполняемые файлы Linux напрямую в Windows без необходимости установки отдельной виртуальной машины или перезагрузки компьютера.
WSL2 использует Hyper-V и требует его включения, который использует VT-x исключительно для себя и не делит его с Virtualbox. Чтобы правильно использовать Virtualbox, на данный момент необходимо отключить Hyper-V, что отключает всё, что использует Hyper-V.
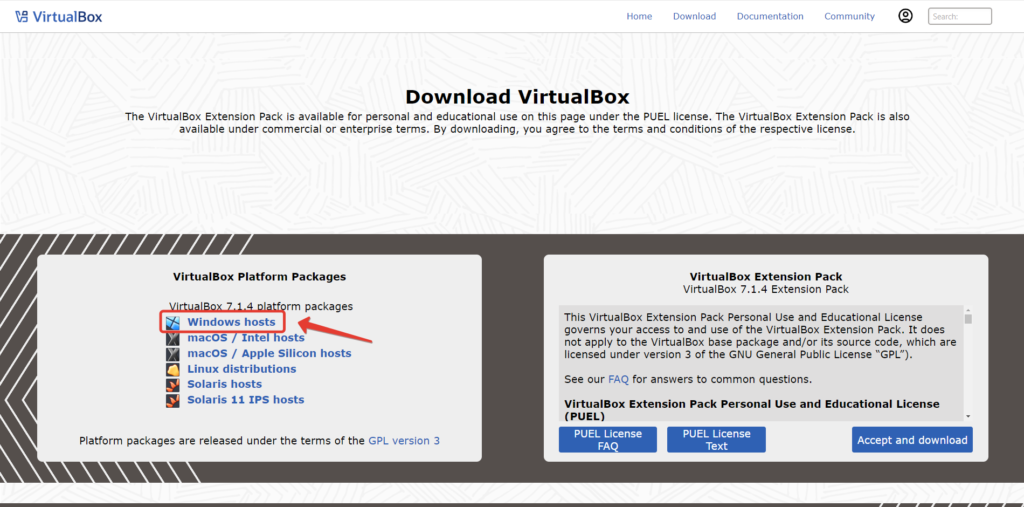
Скачайте Virtual Box с https://www.virtualbox.org/wiki/Downloads
Запустим загруженный файл VirtualBox-7.1.4-165100-Win.exe
Запустите установку VirtualBox
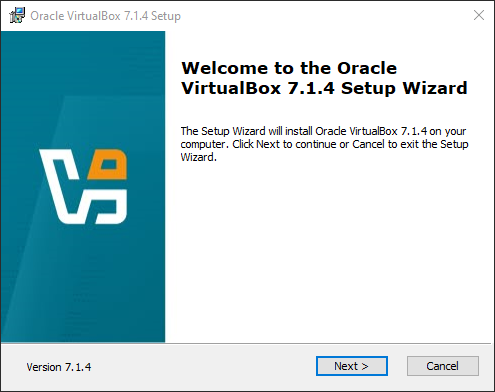
Выполняем шаги предложенные мастером установки, никаких сложностей возникнуть не должно. Установка его достаточно проста, заключается в нажатии кнопки “Next” несколько раз. Нет необходимости вносить изменения — нам подойдут параметры по умолчанию. После установки запустим VirtualBox.

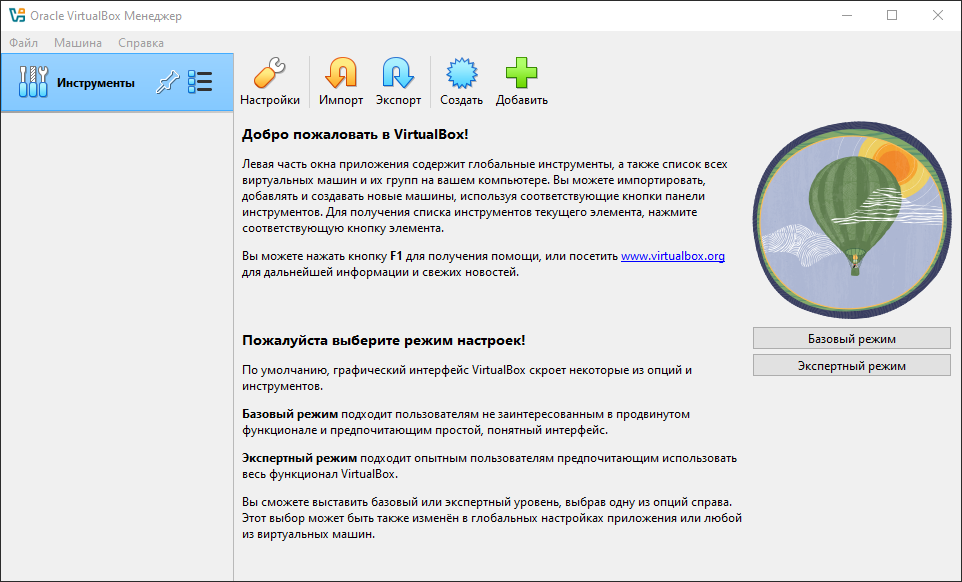
После окончания установки, VirtualBox запустится автоматически.
Можем начать создавать наш виртуальный сервер. Для установки операционной системы нам понадобится дистрибутив операционной системы.
Установка Linux в VirtualBox
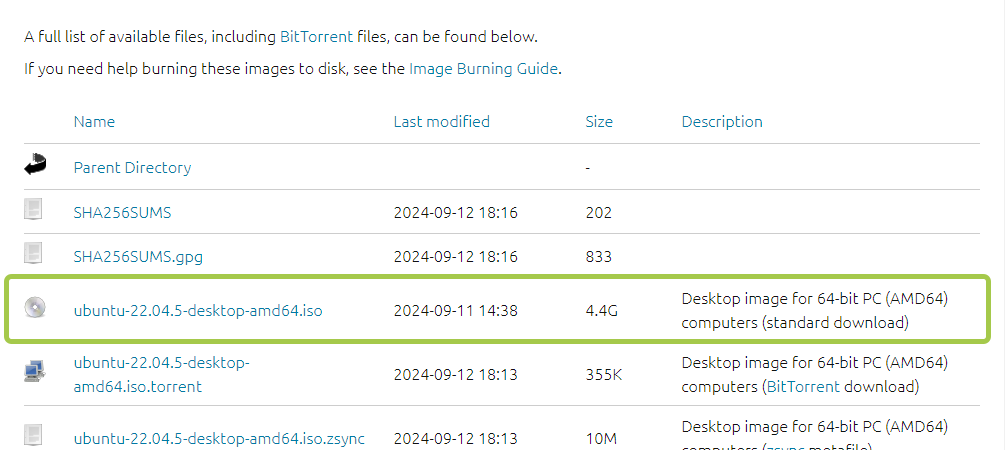
Чтобы начать работу, нам нужно скачать образ ОС Linux, для примера я возьму Ubuntu Server. Скачайте нужную вам версию Linux Ubuntu с releases.ubuntu.com.
Загрузка ISO образа Linux Ubuntu
Установка операционной системы на виртуальную машину или на реальный ПК/сервер ничем не отличается — разница заключается лишь в том, что может отличатся набор программного обеспечения эмулирующих работу системы виртуализации.
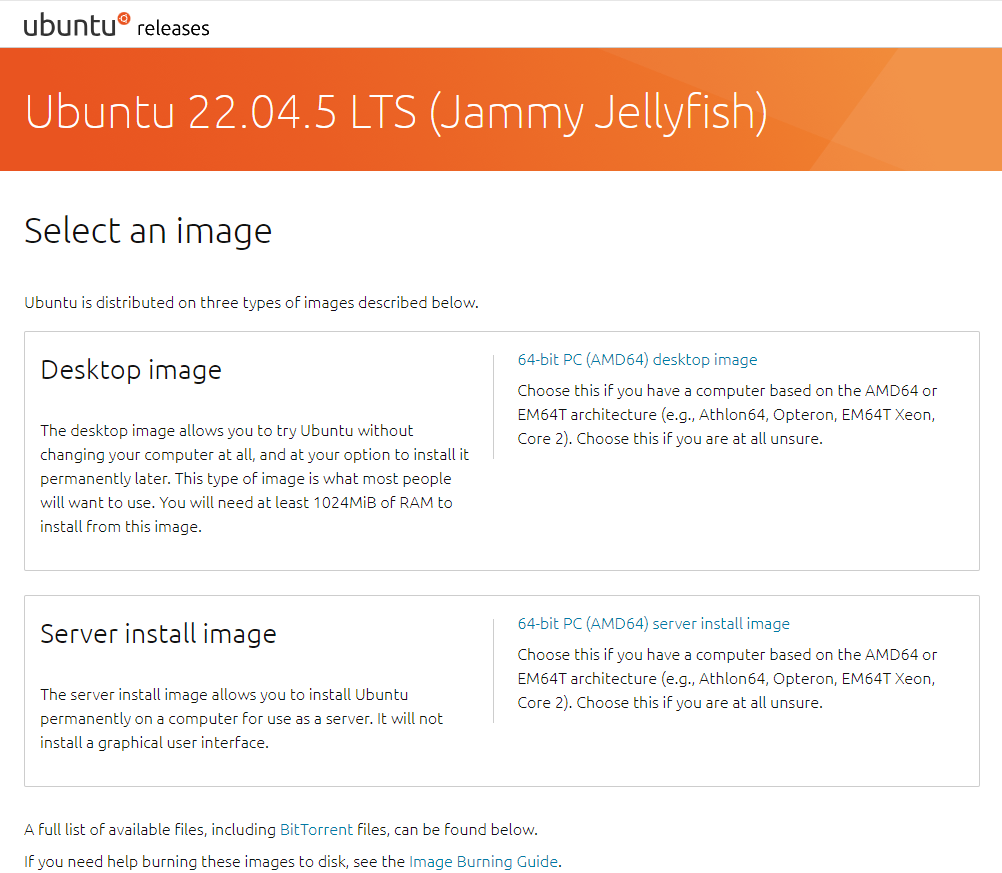
Я использую версию ubuntu-22.04.5-live-server-amd64.iso, которую вы можете найти здесь http://releases.ubuntu.com/22.04/

Если вы хотите Desktop версию, то скачайте ubuntu-22.04.5-desktop-amd64.iso, она поставляется сразу с графическим пользовательским интерфейсом (GUI).
Создание виртуальной машины в VirtualBox
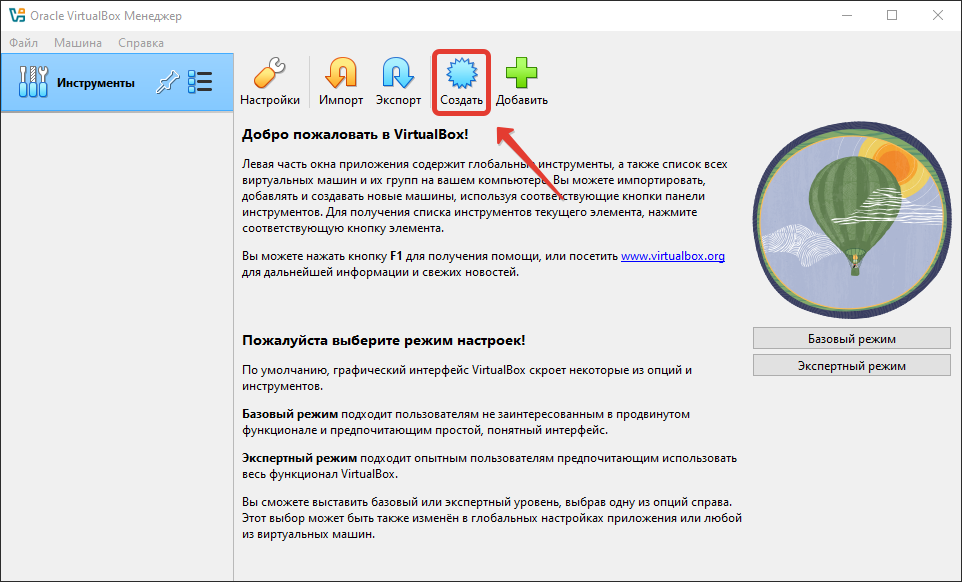
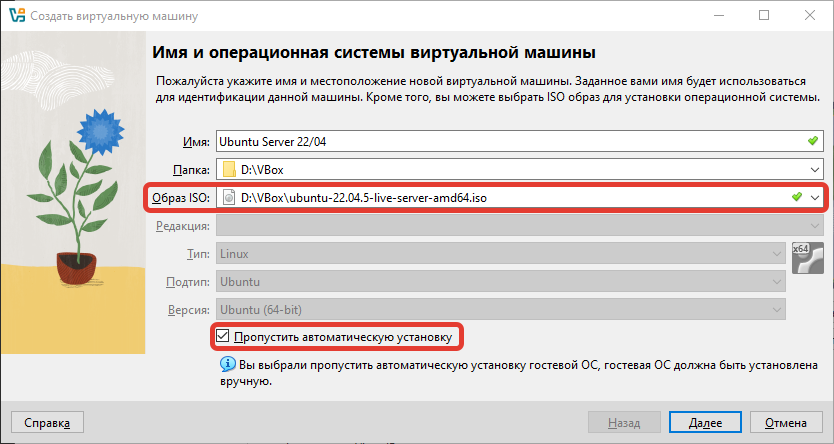
Теперь вернитесь в VirtualBox и запустите программу. Нажмите «Создать», и откроется окно. Появляется диалоговое окно создания виртуальной машины.
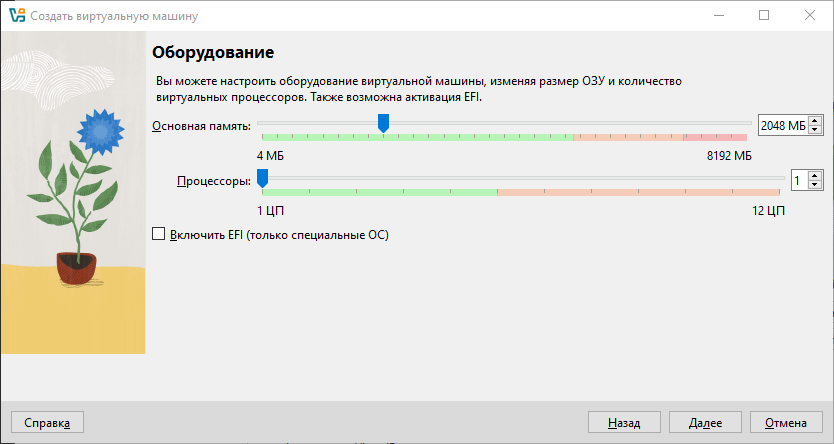
Необходимо ввести ее название, выбрать тип (в нашем случае Linux) и выбрать версию (в нашем случае Ubuntu x64).
Укажем размер оперативной памяти и количество ядер процессора.
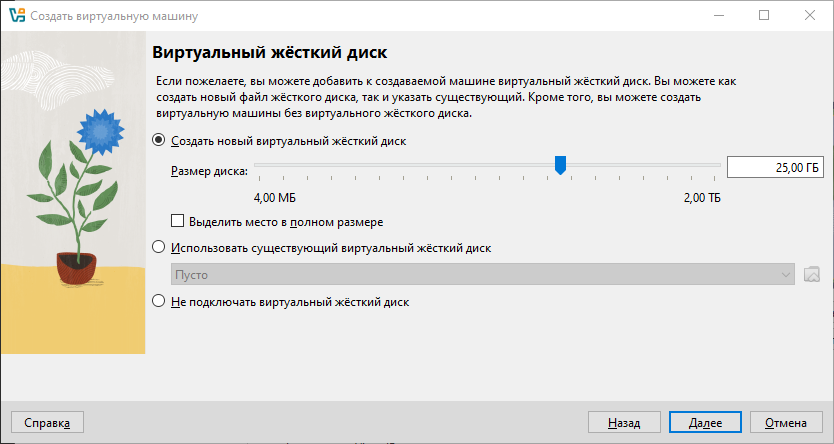
Размер виртуального жесткого диска.
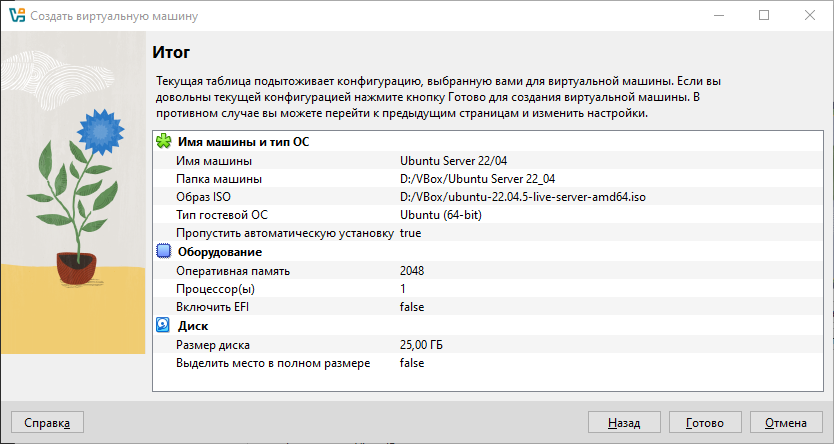
На итоговой странице помощника, проверим установленные параметры и кликнем по кнопке Готово.
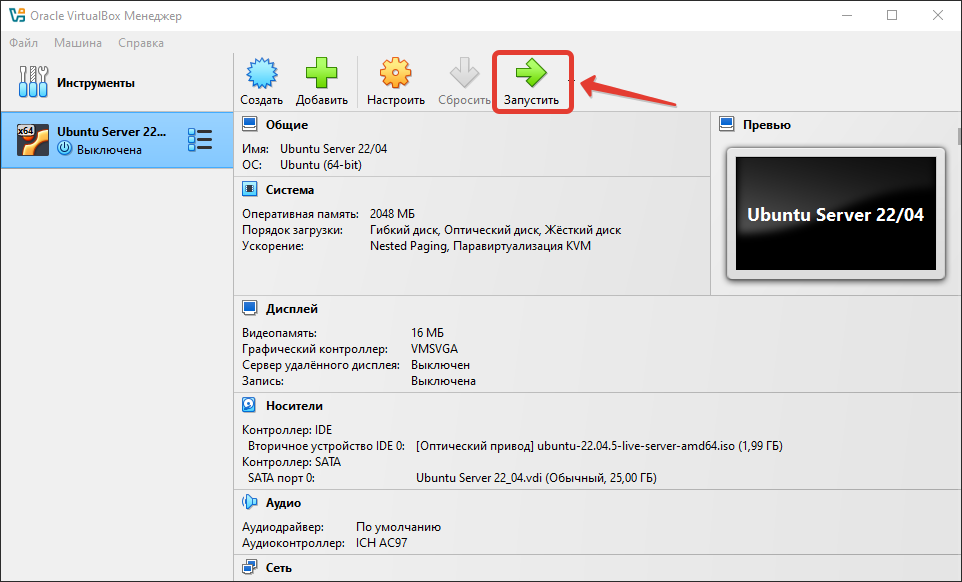
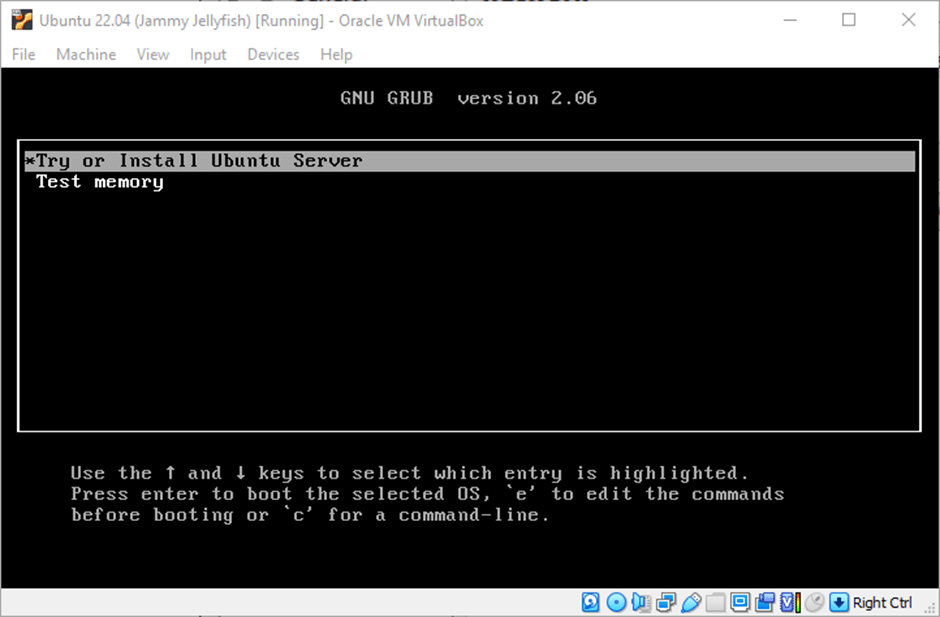
Запустим созданную виртуальную машину.
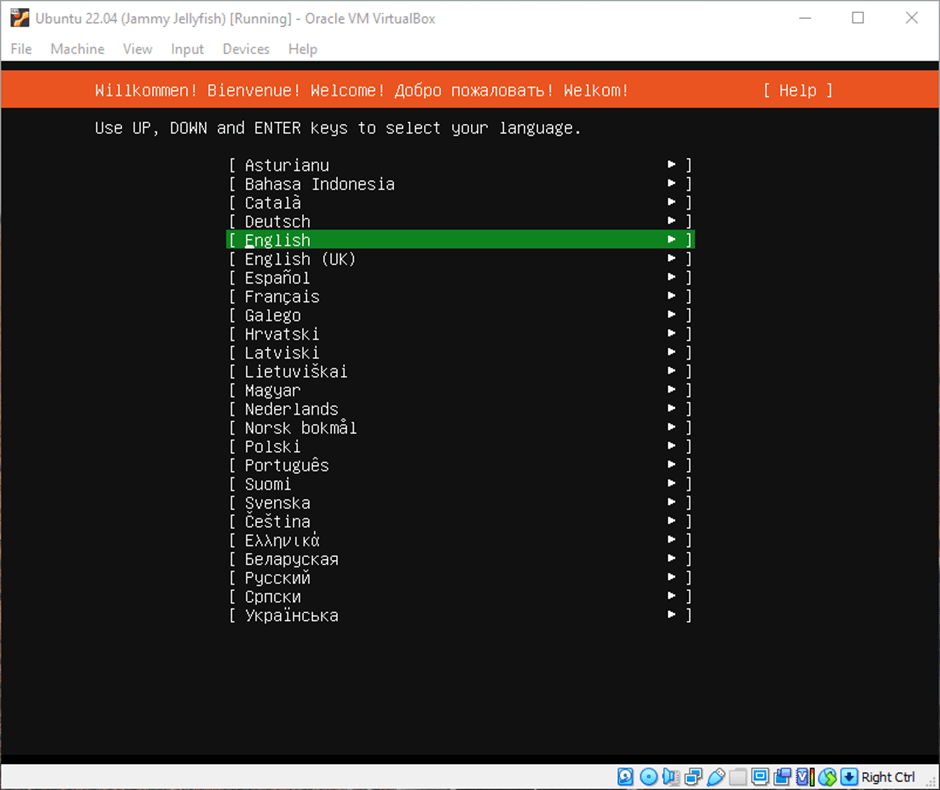
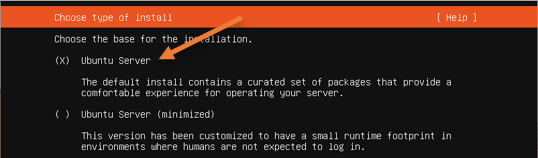
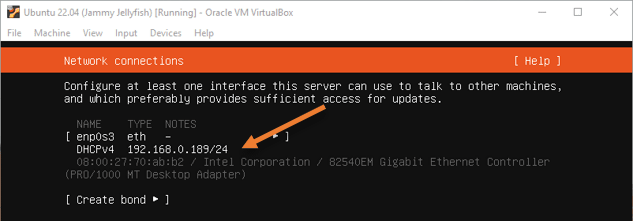
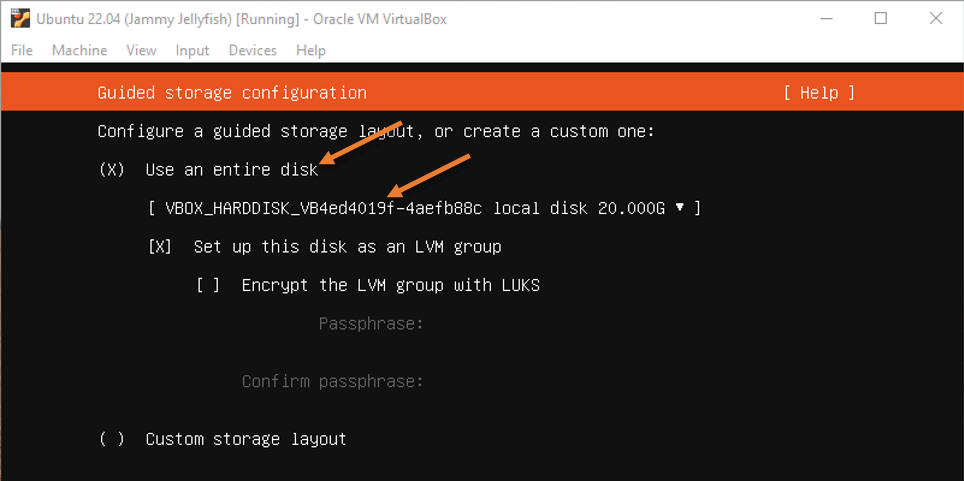
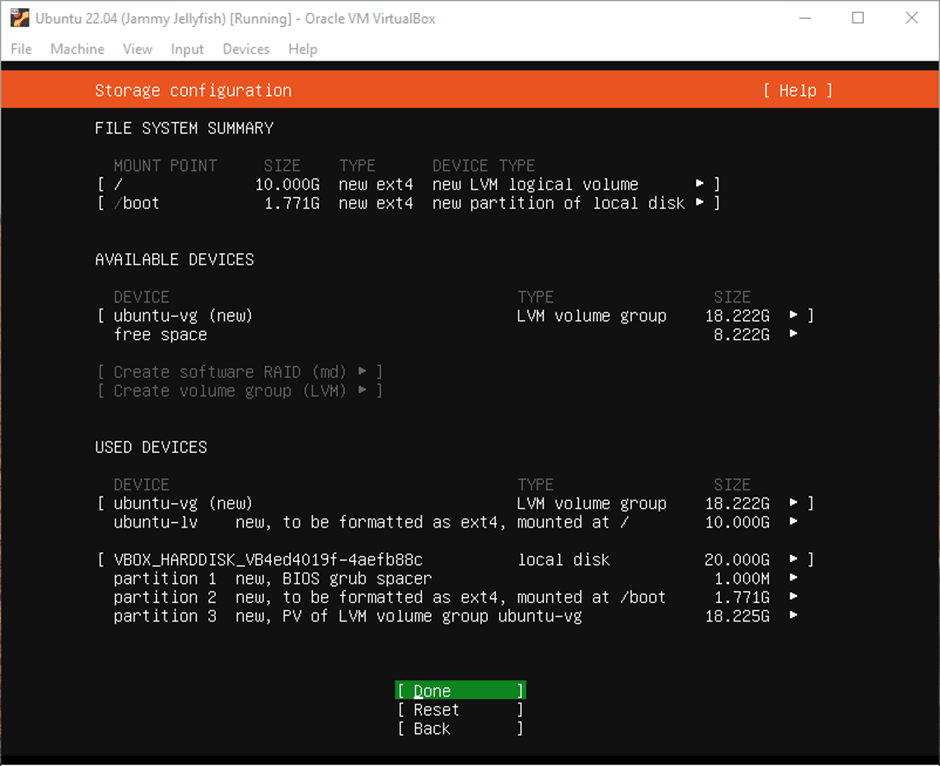
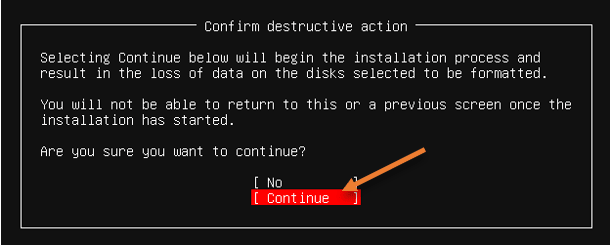
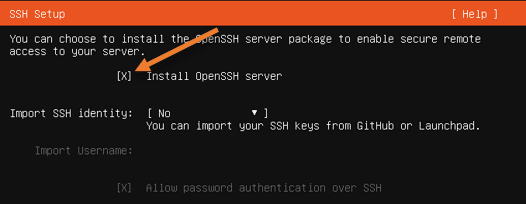
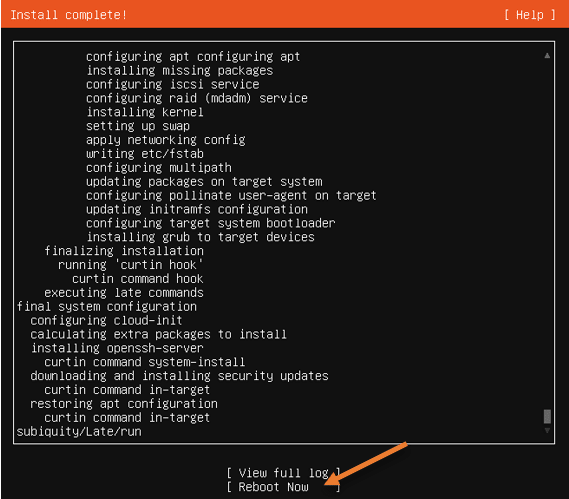
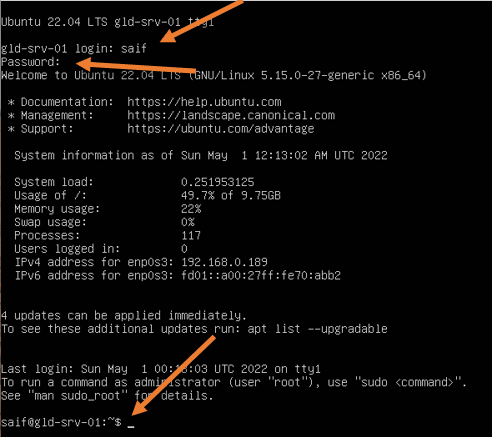
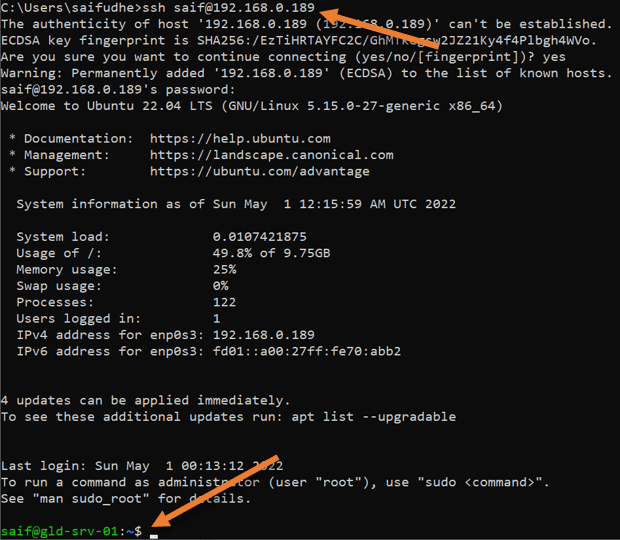
Установка Linux Ubuntu в VirtualBox
Установка Docker в VirtualBox
Ссылки
How to Install Ubuntu 22.04 LTS Server in VirtualBox?
Установка Ubuntu Linux на Virtual Box
Данная публикация является разбором особенностей контейнерной виртуализации Docker под системой Windows.
Она не претендует на роль исчерпывающей и по мере необходимости будет обновляться и дополняться.
За практическим руководством с нуля советую обратиться к этой публикации.
Содержание
- Предварительные настройки
- Выбор между Docker Toolbox on Windows или Docker for Windows
- Windows контейнеры и Linux контейнеры
- Особенности монтирования папок
- Монтирование с хост-машины или volume
- Особенности разметки диска GPT и MBR
- Docker Toobox to Windows
- Docker Swarm
- Проблемы с кодировкой
- Полезные ссылки
- Заключение
Предварительные настройки
Контейнерная виртуализация или виртуализация на уровне операционной системы Docker нативно работает только на дистрибутивах Linux и FreeBSD (экспериментально).
На Windows вам понадобится гостевая Linux система либо специальная минималистичная виртуальная машина с ядром Linux от разработчиков Docker, которая и ставится из коробки.
Само собой разумеется, что вы включили виртуализацию у себя в BIOS/UEFI
Пункт настройки может называться по-разному: VT-x, VT-d, Intel VT, AMD-V, Virtualization Technology.
Еще одним минимальным системным требованием будет разрядность системы x64 и версия не ниже Windows 7 Pro.
Выбор между Docker Toolbox on Windows или Docker for Windows
Появление Docker Toolbox on Windows и Docker Toolbox on Mac было большим событием.
Сборка включается в себя сам docker, утилиту docker-compose, утилиту для работы с виртуальной машиной docker-machine и клиент Kitematic.
Используется виртуальная машина (по умолчанию на VirtualBox) с минималистичным Linux окружением.
Позже для новых операционных систем выпустили Docker for Windows и Docker for Mac, которая на текущий момент является актуальной версией и продолжает развиваться.
Выбор между версиями не сложный:
— Если у вас Windows 10 x64 Pro, Enterprise или Education то включаем службу Hyper-V и ставим Docker for Windows.
Заметьте, что после включения службы Hyper-V пропадет возможность запускать и создавать x64 виртуальные машины на VirtualBox.
— Если же у вас другая версия Windows(7 Pro, 8, 8.1, 10 Home) то ставим VirtualBox и Docker Toolbox on Windows.
Несмотря на то, что Docker Toolbox разработчиками признан устаревшим работа с ним слабо отличается от Docker for Windows.
Вместе с установкой Docker Toolbox будет создана виртуальная машина.
В самом VirtualBox можно будет добавить оперативной памяти и ядер процессора на ваше усмотрение.
Windows контейнеры и Linux контейнеры
Docker for Windows предоставляет возможность переключать контейнеризацию между Linux и Windows версией.
В режиме Windows контейнеризации вы можете запускать только Windows приложения.
Замечу, что на май 2018 года в официальном Docker Hub существует всего 13 образов для Windows.
После включения Windows контейнеризации не забудьте добавить внешнюю сеть.
В конфигурационном файле docker-compose.yml это выглядит так:
networks:
  default:
    external:
      name: nat
Особенности монтирования папок
На примонтированных volume-ах не кидаются события файловой системы, поэтому inotify-tools не работает.
Спасибо пользователю eee
Если вы разрабатываете свой проект и пользуетесь docker-compose вне домашней папки то вам нужно будет проделать некоторые манипуляции.
Используя Docker for Windows для монтирования нового диска у вашего локального пользователя обязательно должен стоять пароль, который будет использоваться для доступа к shared папки.
Особенность заключается в том, что монтируемые внутрь контейнера диск будет монтироваться как от удаленной машины //10.0.75.1/DISK_DRIVE по протоколу SMB.
Для Docker Toolbox диски монтируются в самом VirtualBox на вкладке «Общие папки»
Пример для диска «D»:

Права доступа к монтируемым файлам и папкам
Как бы вам не хотелось, но для всех примонтированных из хост-машины файлов и папок будут стоять права 755 (rwx r-x r-x) и поменять их вы не сможете.
Остро встает вопрос при монтировании внутрь файла закрытого SSH ключа, права на который должны быть только у владельца(например 600).
В данном случае либо генерируют ключ при создании образа, либо прокидывают сокет ssh-agent с хост-машины.
Монтирование с хост-машины или volume
Монтирование внутрь контейнера происходит с использованием сети и протокола SMB, следовательно, внутри контейнера диск «D:\» будет примонтирован из источника //10.0.75.1/D
Использование volume внутри контейнера отображается как монтирование локального диска /dev/sda1, что влияет на скорость работы.
Простым тестом копирование файла на обычном HDD скорость работы получилась следующая:
Такая разница в скорости скорее всего связана с тем, что в volume данные сбрасываются на диск постепенно, задействуя кеш в ОЗУ.
Особенности разметки диска GPT и MBR
Данный пункт не является истинной так как опровергающей или подтверждающей информации в интернете найти не смог.
Если на хост-машине таблица разделов MBR, то контейнер с MySQL/MariaDB может упасть с ошибкой:
InnoDB: File ./ib_logfile101: ‘aio write’ returned OS error 122. Cannot continue operation
По умолчанию в базе данных включеён параметр innodb_use_native_aio, отвечающий за асинхронный ввод/вывод и его надо будет выключить.
Данная проблема также встречается на некоторых версиях MacOS.
Docker Toobox to Windows
Главное правило: начинать работу с запуска ярлыка на рабочем столе «Docker Quickstart Terminal», это решает 80% проблем.
— Бывает возникают проблемы с отсутствия переменных окружения, решается командой:
eval $(docker-machine env default)
— Если все же возникают проблемы из разряда «docker: error during connect», необходимо выполнить:
docker-machine env --shell cmd default
@FOR /f "tokens=*" %i IN ('docker-machine env --shell cmd default') DO @%i
Название Docker Machine по умолчанию default.
Docker Swarm
Ни в Docker for Mac, ни в Docker for Windows — нет возможности использовать запущенные демоны в качестве клиентов кластера (swarm members).
Спасибо пользователю stychos
Проблемы с кодировкой
Используя Docker Toolbox(на Docker for Windows не удалось воспроизвести) нашлась проблема с тем, что русские комментарии в docker-compose.yml файле приводили к ошибке:
Traceback (most recent call last):
  File "docker-compose", line 6, in <module>
  File "compose\cli\main.py", line 71, in main
  File "compose\cli\main.py", line 124, in perform_command
  File "compose\cli\command.py", line 41, in project_from_options
  File "compose\cli\command.py", line 109, in get_project
  File "compose\config\config.py", line 283, in find
  File "compose\config\config.py", line 283, in <listcomp>
  File "compose\config\config.py", line 183, in from_filename
  File "compose\config\config.py", line 1434, in load_yaml
  File "site-packages\yaml\__init__.py", line 94, in safe_load
  File "site-packages\yaml\__init__.py", line 70, in load
  File "site-packages\yaml\loader.py", line 24, in __init__
  File "site-packages\yaml\reader.py", line 85, in __init__
  File "site-packages\yaml\reader.py", line 124, in determine_encoding
  File "site-packages\yaml\reader.py", line 178, in update_raw
  File "c:\projects\compose\venv\lib\encodings\cp1251.py", line 23, in decode
UnicodeDecodeError: 'charmap' codec can't decode byte 0x98 in position 1702: character maps to <undefined>
[4176] Failed to execute script docker-compose
Полезные ссылки
Docker Toolbox on Windows
Docker for Windows
Практическое руководство по Docker
Заключение
Особенности работы с Docker контейнеризацией на системе Windows не отличается от работы на Linux за исключение разобранных выше.
В статье я умышленно не упомянул заметно низкую скорость работы контейнеров и overhead используя систему Windows как само собой разумеющееся.
Буду рад услышать ваши отзывы. Не стесняйтесь предлагать улучшения или указывать на мои ошибки.
Только зарегистрированные пользователи могут участвовать в опросе. Войдите, пожалуйста.
Какой версией Docker вы пользуетесь?
32% Docker Toolbox on Windows88
68% Docker for Windows187
Проголосовали 275 пользователей. Воздержались 196 пользователей.
A Step-by-Step Guide to Containerizing a Windows Virtual Machine — with RDP Access — on a Linux Docker Platform with KVM Hypervisor
Background
Recently, I was tasked with developing a PoC of a lab environment where students can access their pre-installed and pre-configured machines — Linux and Windows — to do necessary training exercises. I wanted to make the access to all machines uniform over HTTP/HTTPS (browser-based). While the web-based access to machines can easily be implemented using a platform like Guacamole, the greater challenge was how to deploy the machines in a way that utilizes system resources — particularly, CPU, RAM, and HDD — efficiently and with speed. It became evident by that point that technology like Docker containerization is the best way to go. However, that presented other challenges.
Each of Windows and Linux machines have their own containerization requirements — as will be discussed in the next section. Natively, one cannot run Linux and Windows containers simultaneously on the same Docker daemon. After some research, the solution that presented itself as the most viable was to install each Windows machine as a virtual machine inside a single Linux container. From the perspective of the Docker daemon, all containers are Linux-based. However, some of those containers run a hypervisor, and on top of which there is a Windows VM. Even though a container with a VM in it takes more disk space than other containers, the efficiency in saving disk space when we have many containerized VMs is still high compared to running un-containerized VMs.
Ultimately, I wanted to access a containerized Windows machine using RDP, and enjoy the full remote desktop access to that machine. Unfortunately, there are not satisfactory detailed tutorials and complete walkthroughs that explain the entire procedure easily and clearly. And I had to face many small challenges along the way. During my research, I have also seen many people — on various technical forums — struggling with such an implementation and expressing their frustration! I hope that this document serves as a complete guide to solving that problem.
Why Containerizing a VM: Our Use Case
You might be asking yourself why would someone want to install a VM inside a Container? It looks strange at first since the Container layer seems unnecessary and one can simply install the VM directly on the base OS. However, there are different reasons why this can be a solution and a necessary requirement.
Our particular use case involves spinning up multiple identical Windows VMs to be used by different users. Had we wanted a single VM only, then, there would not be any need to containerize it. But since we want to create many identical VMs, we will save tremendous resources (HDD, RAM, and CPU) by containerizing those VMs.
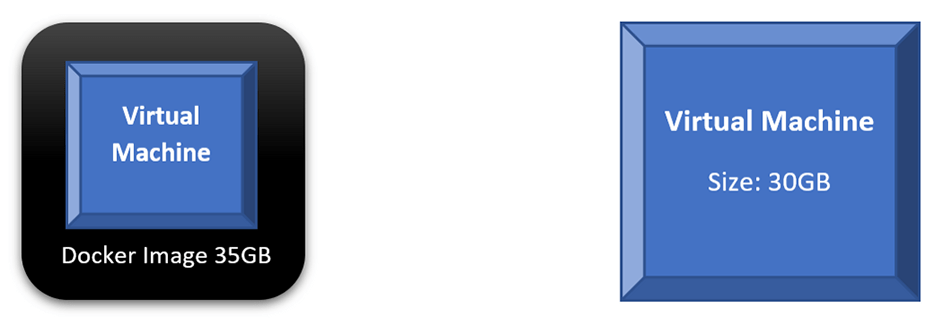
If we compare the scenario where we run a single VM directly on our base OS to a scenario of containerizing that VM, we will find out that both will consume similar disk space and other resources. In fact, every time we want to run the containerized VM, we will do two steps: run the container and then power on the VM. The following diagram shows those two scenarios; a direct VM occupies 30GB on the HDD, while the Docker Image occupies 35GB. Not much benefit — in terms of saving system resources — is achieved here.
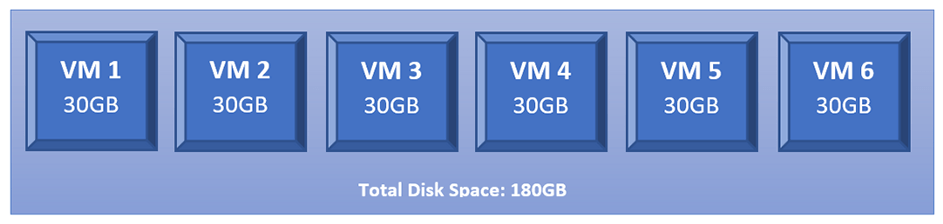
However, what happens if we want to run 6 copies of our intended VMs? We will have to create 6 copies of that VM where each occupies the same disk space as the original one. Thus, if the original VM is 30GB, having 6 copies will occupy 180GB on the HDD.
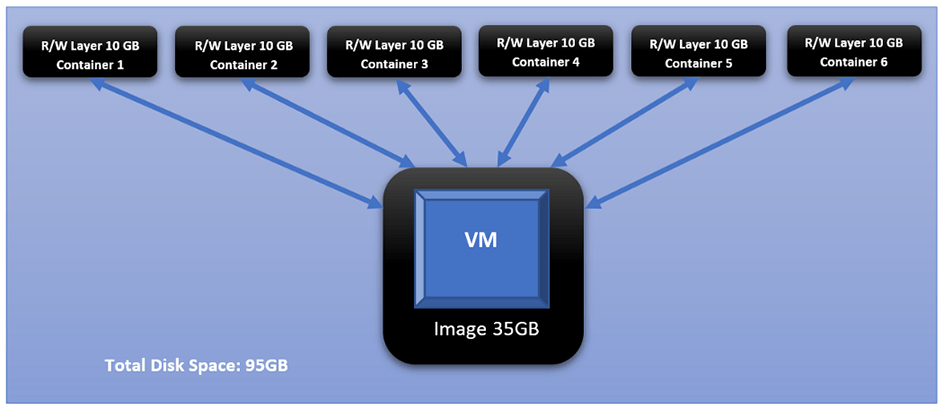
This changes dramatically when we containerize each of those identical VMs. This is the added value of Docker containerization technology. And it owes its value to how Docker differentiates between two main concepts: images and containers. Images are read-only and form the base of containers. Containers created from the same Image share the same read-only core (i.e., the image), while each container adds its own read-write layer that interacts with the read-only image. For more discussion on the difference between Images and Containers, please check this document: <click here>
If we take the 35GB Docker Image, in our example, and creates 6 Containers from it, each Container will create its own read-write layer through which will access the read-only image. At the time of creation, that R/W layer has 0 size; however, as the user starts interacting with the Container — doing things like powering on the VM — that layer’s size starts increasing. And if we assume that all dynamic changes in a single layer have accumulated size of 10GB, that means all 6 containers have added a total of 60BG on top of the original 35GB of the image.
Challenges
Challenge 1 Windows containers on Windows platform, and Linux containers on Linux platform
One of the biggest obstacles you face with Docker, and containerization in general, is that you cannot have Linux and Windows containers running simultaneously on the same platform (i.e., same Docker daemon). The reason for this is that Docker is an OS-Level Virtualization; meaning, its main function is to contain and isolate applications as they run on an Operating System. The Docker daemon provides each container with any necessary kernel-level properties so that the containerized application can run. Because of that, containers running Linux services/applications need to run on a Linux platform, and containers running Windows services/applications need to run on a Windows platform.
The Windows Docker Desktop has the feature of providing a Linux Subsystem; and in this case, running a Linux container can ultimately run on Windows. However, we should note that if this feature is enabled, only Linux containers can run while Windows containers cannot. One has to switch off this feature to run Windows containers; and in this scenario, Linux containers cannot run. It is still not possible to run both Linux and Windows containers simultaneously on the same platform.
If one needs to have Linux and Windows containers running simultaneously and communicating with others, a possible solution is to have each group run on their respective platform, then, configure the network routing, NAT, and port-forwarding rules.
Challenge 2 Windows Docker containers cannot be accessed through RDP or VNC, i.e., no graphical desktop
Even if we decided to have two separate platforms — Windows platform for Windows containers, and Linux platform for Linux containers — with appropriate network configuration, we will face the challenge that Windows containers cannot have a desktop environment. This is a fact for all Windows containers. They are designed and built to run services and applications, and they can be accessed using PowerShell/CMD command-line interface.
Unlike the Linux system where the Desktop environment is an installable service, Windows Desktop comes bundled directly with the OS as shipped by Microsoft. And when it comes to Windows-based containers, Microsoft has published certain images (known as base images) which form the base of any Windows container. Those base images do not come up with a Desktop service, and one does not have the luxury to install it later as an add-on.
For more information about Windows containers/images, <Click Here>
Architecture Overview
Our ultimate goal here is to have a fully running Windows OS, accessible through RDP, and containerized and managed by Docker daemon. And to achieve that, we will have the following:
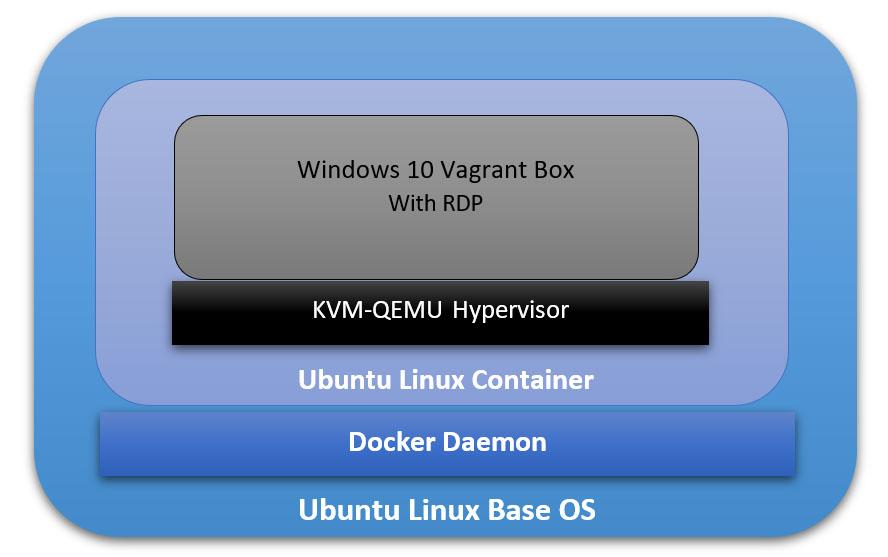
- The Base Operating System: it will be the main platform hosting everything else. In our particular example, it will be an Ubuntu 18.04 Linux machine.
- The Docker Daemon: this is the containerization platform installed on the Base OS. Through Docker, we will create our final “image” out of which we will spawn many containers.
- A Docker Image with an Operating System: This OS will be part of every created container, and its main function is to run a hypervisor on which the Windows VM will be running. In our case here, we will use the Ubuntu:18.04 Docker Image (available on Docker Hub).
- A Hypervisor on the Docker Image: Inside the Ubuntu Docker Image, we will also have a Hypervisor that will allow us to install the Windows VM later. In our particular case, we will use the KVM-QEMU hypervisor.
- The Windows Virtual Machine: this is the machine we are going to access at the end through RDP. In our example, we will use a pre-packaged Windows 10 Vagrant Box available at (https://app.vagrantup.com/peru/boxes/windows-10-enterprise-x64-eval)
Installing Docker on the Main Platform
The first thing we need to do is to install Docker into our main Operating System. For the sake of this tutorial, our main system is Ubuntu 20.04 (Linux Kernel 5.4.0–40-generic) with 70GB HDD, 4GB RAM, and 2 CPU Cores.
Follow the following steps to install Docker:
[1] Update the apt package index and install packages to allow apt to use a repository over HTTPS:
sudo apt-get update

sudo apt-get install apt-transport-https ca-certificates curl gnupg-agent software-properties-common
[2] Add Docker’s official GPG key:
curl -fSSL https://download.docker.com/linux/ubuntu/gpg | sudo apt-key add

sudo apt-key fingerprint 0EBFCD88
[3] Set up the stable Docker’s repository:
sudo add-apt-repository "deb [arch=amd64] https://download.docker.com/linux/ubuntu $(lsb_release -cs) stable"sudo apt updateNote: This is an important step after adding the new repository in Step 3.
[5] Install the latest version of Docker Engine:
sudo apt install docker-ce -yNote: You don’t need to install docker-ce-cli or containerd.io packages since they are installed directly with the docker-ce package.
[6] Start Docker now and configure it to automatically start after a reboot:
sudo systemctl start docker

sudo systemctl enable docker
Building the Right Docker Image
Now that Docker is installed, we can start building the image that will be the base for our Container on which we will have the VM. The first section below explains how to build this image manually without using a Dockerfile. Then, in the second section, I will explain how to automate building the image using a Dockerfile.
However, before building the image, we need to check if our system supports virtualization. Since our Container will run a hypervisor, it will not work unless the main platform supports virtualization. Otherwise, we will face an error later on when trying to install the VM. We can run the following command:
sudo egrep -c '(vmx|svm)' /proc/cpuinfoIf the output is a number greater than 0, then, you are good to proceed further. Otherwise, you need to make sure virtualization (VT-x) is enabled in the BIOS settings. If your main platform is itself a virtual machine, make sure VT-x is enabled through the virtualization software.
- Enable VT-x in VMWare Workstation
- Enable VT-x in Virtualbox
Building the Image without a Dockerfile
[1] Pull the core Docker image ubuntu:18.04:
sudo docker pull ubuntu:18.04Note: to verify that the image has been added successfully, issue the following command:
sudo docker image ls
[2] Run a Container (with the name ubuntukvm) from the Image ubuntu:18:04 with some privileged parameters:
sudo docker run --privileged -it --name ubuntukvm --device=/dev/kvm --device=/dev/net/tun -v /sys/fs/cgroup:/sys/fs/cgroup:rw --cap-add=NET_ADMIN --cap-add=SYS_ADMIN ubuntu:18.04 /bin/bashSince we will install a hypervisor (QEMU-KVM) in this container, we need to run it with certain parameters as follows:
— device=/dev/kvm will map the device /dev/kvm in the main OS inside the Container.
— device=/dev/net/tun will map the device /dev/net/tun in the main OS inside the Container.
—v /sys/fs/cgroup:/sys/fs/cgroup:rw will map the directory /sys/fs/cgroup in the main OS inside the Container, and the Container will have read-write permissions on that directory.
— cap-add=NET_ADMIN will add network admin capabilities to the Container.
— cap-add=SYS_ADMIN will add system admin capabilities to the Container.
Once the command runs successfully, you should be inside the Container with a shell prompt:
root@<container_id>:/#[3] Inside the Container, update the apt package index:
root@<container_id>:/# apt-get update -y[4] Inside the Container, install the hypervisor package QEMU-KVM and Libvirt:
root@<container_id>:/# apt-get install -y qemu-kvm libvirt-daemon-system libvirt-devYou don’t have to install libvirt-clients and bridge-utils as they would already be installed along with libvirt-daemon-sys.
The libvirt-dev is an important package specially to run Vagrant Boxes on.
[5] Change group ownership of /dev/kvm:
root@<container_id>:/# chown root:kvm /dev/kvmNote: the device /dev/kvm must be owned by the group kvm, and any user who needs to run VMs needs to be part of the kvm group.
[6] Start the Libvirt services:
root@<container_id>:/# service libvirtd start

root@<container_id>:/# service virtlogd start
[7] Install the Linux Image package which contains any necessary Kernel modules:
root@<container_id>:/# apt-get install -y linux-image-$(uname -r)Note: this is an important step. There are certain modules (e.g., ip_tables and ip6_tables) that are needed at a later stage; and if they are missing, an error message would be generated.
[8] Install the curl package (it is used to download the Vagrant application):
root@<container_id>:/# apt-get install curl -y[9] Install the net-tools package (it provides ipconfig utility):
root@<container_id>:/# apt-get install net-tools -y[10] Download and run the latest version Vagrant application:
root@<container_id>:/# apt-get install jq -y

root@<container_id>:/# vagrant_latest_version=$(curl -s https://checkpoint-api.hashicorp.com/v1/check/vagrant  | jq -r -M '.current_version')

root@<container_id>:/# echo $vagrant_latest_version

root@<container_id>:/# curl -O https://releases.hashicorp.com/vagrant/$(echo $vagrant_latest_version)/vagrant_$(echo $vagrant_latest_version)_x86_64.deb

root@<container_id>:/# dpkg -i vagrant_$(echo $vagrant_latest_version)_x86_64.deb
Note 1: The above commands perform the following actions:
— Install the JSON Query parser tool, jq, which will be used in the next command.
— Get the Vagrant latest version value and store it in the environment variable vagrant_latest_version.
— Download the latest version of Vagrant package.
— Install the downloaded Vagrant package.
Note 2: It is very important and critical that you download and install Vagrant in this method. Do NOT get it from the Ubuntu repository (or any other Linux repositories, like Red Hat’s) using the command apt-get install vagrant. The reason for this is that the WinRM library is not shipped with Vagrant packages provided by Linux distribution and is shipped natively with the official package. WinRM library is needed to run Windows Vagrant boxes.
[11] Install the Vagrant Libvirt plugin:
root@<container_id>:/# vagrant plugin install vagrant-libvirt[12] Download and install Windows10 Vagrant box:
root@<container_id>:/# mkdir /win10

root@<container_id>:/# cd /win10

root@<container_id>:/win10# vagrant init peru/windows-10-enterprise-x64-eval

root@<container_id>:/win10# VAGRANT_DEFAULT_PROVIDER=libvirt vagrant up
the vagrant init command will download a Vagrantfile which contains the instructions fof building the Vagrant box.
the vagrant up command will build the box. Please note that this command takes some time. The particular Vagrant box we are downloading here (peru/windows-10-enterprise-x64-eval) has a size of 5.62 GB.
once the above command finishes execution, type the following command which will attempt to access the box over RDP. Even though it will fail (since there is no RDP client installed in the Container), we will get the IP address of the Vagrant box:
root@< container_id >:/win10# vagrant rdp==> default: Detecting RDP info…
 default: Address: 192.168.121.68:3389
 default: Username: vagrant
==> default: Vagrant will now launch your RDP client with the connection parameters
==> default: above. If the connection fails, verify that the information above is
==> default: correct. Additionally, make sure the RDP server is configured and
==> default: running in the guest machine (it is disabled by default on Windows).
==> default: Also, verify that the firewall is open to allow RDP connections.
An appropriate RDP client was not found. Vagrant requires either
`xfreerdp` or `rdesktop` in order to connect via RDP to the Vagrant
environment. Please ensure one of these applications is installed and
available on the path and try again.
[13] Set up iptables port forwarding rules:
If you want to access the RDP port on the Vagrant box from out the Container, this is an important step. By default, the Vagrant application configures firewall rules to allow access only from within the Container to the Vagrant box and vice versa. Machines outside the Container do not have any access to the Vagrant box. We would like to set up the rules in such a way to allow our main OS (Ubuntu) to access the Vagrant box on RDP. The following diagram logically illustrates this:

Add the following rules to NAT/Port Forward connections from the main OS to the container on port 3389 to be forwarded to the Vagrant Box on port 3389:
root@<container_id>:/# iptables -A FORWARD -i eth0 -o virbr1 -p tcp --syn --dport 3389 -m conntrack --ctstate NEW -j ACCEPT

root@<container_id>:/# iptables -A FORWARD -i eth0 -o virbr1 -m conntrack --ctstate ESTABLISHED,RELATED -j ACCEPT

root@<container_id>:/# iptables -A FORWARD -i virbr1 -o eth0 -m conntrack --ctstate ESTABLISHED,RELATED -j ACCEPT

root@<container_id>:/# iptables -t nat -A PREROUTING -i eth0 -p tcp --dport 3389 -j DNAT --to-destination 192.168.121.68

root@<container_id>:/# iptables -t nat -A POSTROUTING -o virbr1 -p tcp --dport 3389 -d 192.168.121.68 -j SNAT --to-source 192.168.121.1
After that, we should remove the rules that reject all traffic to/from virb1 interface; these rules take precedent over our newly inserted rules:
root@<container_id>:/# iptables -D FORWARD -o virbr1 -j REJECT --reject-with icmp-port-unreachable

root@<container_id>:/# iptables -D FORWARD -i virbr1 -j REJECT --reject-with icmp-port-unreachable

root@<container_id>:/# iptables -D FORWARD -o virbr0 -j REJECT --reject-with icmp-port-unreachable

root@<container_id>:/# iptables -D FORWARD -i virbr0 -j REJECT --reject-with icmp-port-unreachable
if you mess up the iptables, or if the communication is problematic later, you may want to clear up all tables and then add the rules (mentioned above) on a clean slate. To clear the iptables, issue the following:
root@<container_id>:/# sudo iptables-save > $HOME/firewall.txt

root@<container_id>:/# sudo iptables -X

root@<container_id>:/# sudo iptables -t nat -F

root@<container_id>:/# sudo iptables -t nat -X

root@<container_id>:/# sudo iptables -t mangle -F

root@<container_id>:/# sudo iptables -t mangle -X

root@<container_id>:/# sudo iptables -P INPUT ACCEPT

root@<container_id>:/# sudo iptables -P FORWARD ACCEPT

root@<container_id>:/# sudo iptables -P OUTPUT ACCEPT
[14] Commit all Changes to Create a New Image:
Up to this point, we have a fully running Container with the desired Windows VM. However, we cannot transfer or store that Container. In addition, we cannot create multiple copies of this Container without going through all the steps we have done so far. For this reason, we need to commit the changes to a new Docker Image. The Image can be transferred or stored. Multiple Containers can be created — instantiated — almost immediately.
To commit the changes to a new Image, we need first to exit the Container:
root@<container_id>:/win10# exit

$ sudo docker ps -a
Take note of the Container ID; and then, issue the following command:
$ sudo docker commit <container_id> ubuntukvmNote 1: You can substitute the name “ubuntukvm” with any name you like. This will be the name of the new Image.
Building the Image Using a Dockerfile
Instead of building the Image in a manual way — as shown in the previous section, we can automate the whole process using a Dockerfile.
[1] Prepare the Dockerfile:
In a new directory, create a Dockerfile (with the name Dockerfile), and write the following commands in it. Mostly, they are the same commands we have executed individually in the previous section:
[2] Prepare a Startup Shell Script (startup.sh):
This file will be copied to the Image and will run automatically every time you instantiate a Container from that Image. The script will assign certain permissions and startup the necessary services. In addition, it will create the iptables rules that will port forward RDP traffic.
[3] Build the Container from the Docker file:
sudo chmod +x startup.sh

sudo docker build -t ubuntukvm:latest -f Dockerfile .
[4] Instantiate a Container and Run it:
sudo docker run --privileged -it --name kvmcontainer1 --device=/dev/kvm --device=/dev/net/tun -v /sys/fs/cgroup:/sys/fs/cgroup:rw --cap-add=NET_ADMIN --cap-add=SYS_ADMIN ubuntukvm bashTesting the RDP Access
By now, we should be able to access the RDP service on the Windows Vagrant box by connecting to the IP address of the Docker container. To test that port 3389/tcp (RDP) is reachable from the main OS, we will use a simple Nmap command.
First, if you are inside the Docker container, press Ctrl+p+q to put the Container in the background while running; this should return you to the main OS terminal prompt:
root@<container_id>:/win10# <Ctrl+p+q>

$ sudo nmap -Pn -p 3389 172.17.0.2
Next, we need to install an RDP client for Linux. A popular one is RDesktop:
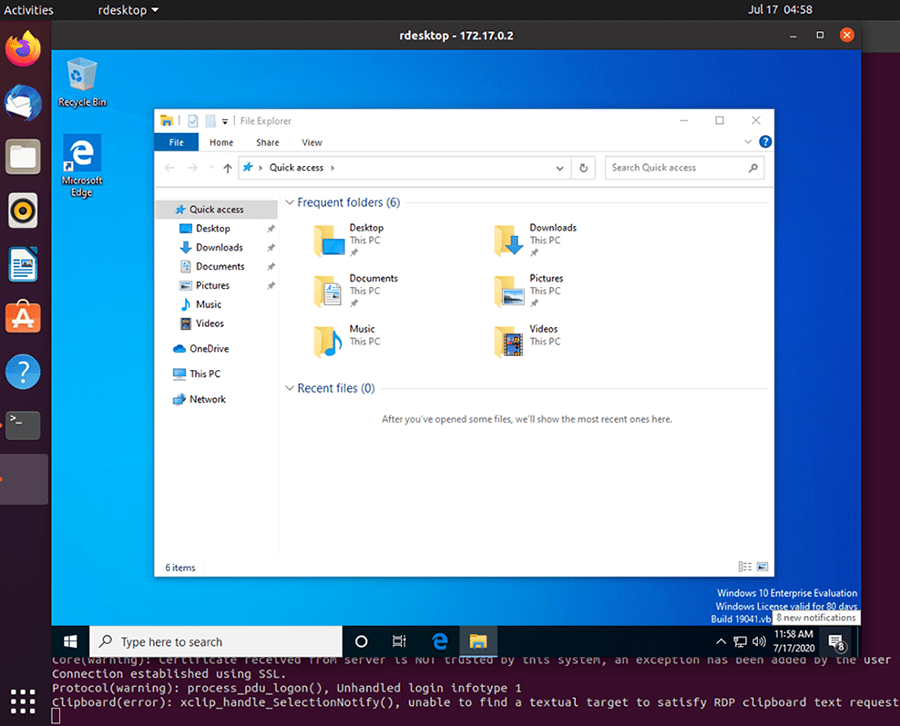
sudo apt-get install rdesktopFinally, we can access the Windows VM:
sudo rdesktop 172.17.0.2The Windows Vagrant box that we have installed has two built-in accounts:
- Username: vagrant Password: vagrant
- Username: Administrator Password: vagrant
Conclusion
I hope this post has been a comprehensive guide to containerize a virtual machine. There are different advantages of running a VM in a Container; one of them is running multiple Containers simultaneously. You can automatically build the desired image using a Dockerfile, or you can build it manually by running each command individually. We have covered both ways in this post.