
Ниже будет подробно рассказано о том, как добавить нового пользователя на локальный компьютер под управлением Microsoft Windows Server 2012 R2.
0. Оглавление
- Добавление пользователя
- Изменение настроек пользователя
1. Добавление пользователя
Запускаем оснастку «Управление компьютером» (Computer Management). Сделать это можно кликнув правой кнопкой мыши по меню «Пуск» (Start) и выбрав в меню «Управление компьютером» (Computer Management).

Или же выполнив команду compmgmt.msc. (Нажать комбинацию клавиш Win + R, в окне «Выполнить» (Run) ввести команду в поле «Открыть» (Open) и нажать «ОК«)
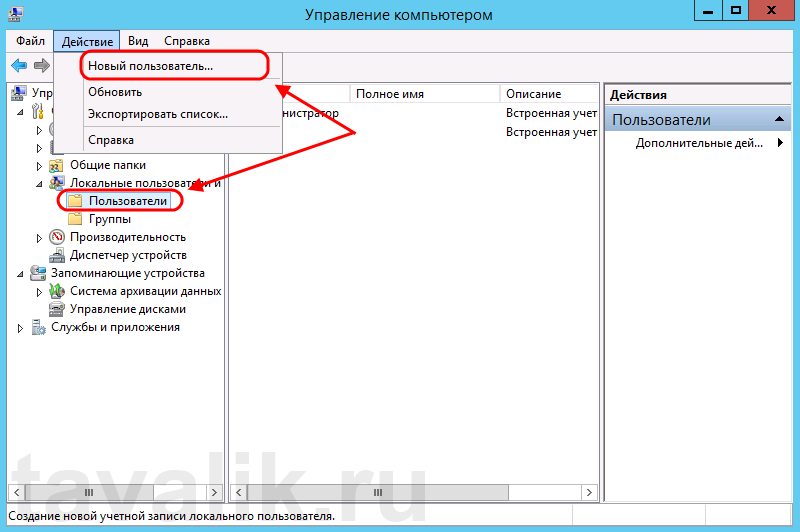
В открывшемся окне раскрываем вкладку «Служебные программы» (System Tools), затем «Локальные пользователи» (Local Users and Groups) и выделив вкладку «Пользователи» (Users) выбираем «Новый пользователь…» (New User…) в меню «Действие» (Action).
Откроется окно создания нового пользователя (New User). Впишем имя пользователя (имя, которое будет использоваться для входа в систему) в графе «Пользователь» (User name), полное имя (будет показываться на экране приветствия) в поле «Полное имя» (Full name) и описание учетной записи в поле «Описание» (Description). Затем дважды введем пароль для создаваемого пользователя. По умолчанию пароль должен отвечать политики надежности паролей. О том как изменить данную политику читайте в статье Изменение политики паролей в Windows Server 2012 R2.
Рекомендую сразу записать введенный пароль в отведенное для хранение паролей место. Для этих целей удобно использовать специальные менеджеры паролей, например бесплатную программу KeePass.
Далее снимем флаг «Требовать смены пароля при следующем входе в систему» (User must change password at next logon) если требуется оставить введенный только что пароль. В противном случае пользователю придется сменить пароль при первом входе в систему.
Установим флаг «Запретить смену пароля пользователем» (User cannot change password) если хотим лишить пользователя данного права.
Установим флаг «Срок действия пароля не ограничен» (Password never expires) если нет необходимости в периодической смене паролей.
Флаг «Отключить учетную запись» (Account is disabled) отвечает за возможность входа пользователя в систему. Оставляем неизменным.
Нажимаем «Создать» (Create) чтобы создать нового пользователя системы.
2. Изменение настроек пользователя
Добавленного только что пользователя мы найдем в таблице пользователей системы на вкладке «Пользователи» (Users) оснастки «Управление компьютером» (Computer Management). Для того чтобы изменить настройки пользователя, необходимо в таблице кликнуть по нему правой кнопкой мыши и в контекстном меню выбрать пункт «Свойства» (Properties).

Откроется окно свойств выбранного пользователя. Пробежимся по наиболее часто используемым настройкам.
На вкладке «Общие» (General) можно изменить параметры, которые мы задавали при добавлении пользователя.
На вкладке «Членство в группах» (Member of) можно увидеть участником каких групп является данный пользователь. Кроме того, здесь можно добавить пользователя в группу или удалить его из выбранной группы.
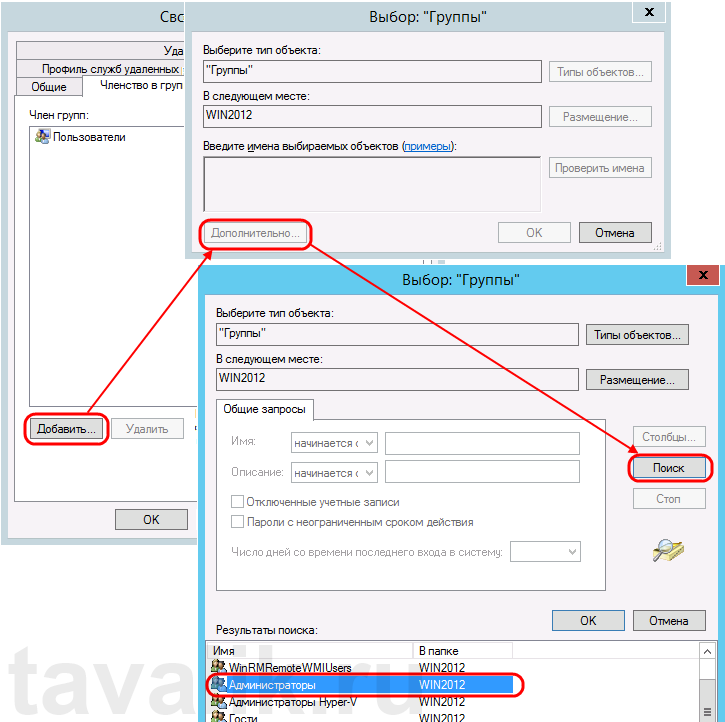
Например, чтобы сделать пользователя администратором сервера, его необходимо добавить в группу «Администраторы» (Administrators). Для этого нажмем кнопку «Добавить…» (Add…), находящуюся под списком групп, в открывшемся окне выбора группы нажмем «Дополнительно…» (Advanced…) и затем кнопку «Поиск» (Find Now) в окне подбора групп. Выделим необходимую группу в таблице результатов поиска (в нашем случае это группа «Администраторы» (Administrators)) и завершим выбор нажав «ОК» во всех открытых окнах.
На вкладке «Профиль» (Profile) можно задать путь к профилю пользователя (Profile Path), сценарий входа (Logon script), а также подключить сетевой диск, который будет автоматически подключаться при входе пользователя в систему. Для этого установим переключатель «Домашняя папка» (Home folder) в «Подключить:» (Connect:), выберем букву сетевого диска и укажем путь к ресурсу, где будут располагаться файлы. Это может быть локальный путь к папке или сетевой ресурс.
На вкладке «Среда» (Environment) возможно указать программу, которая будет запускаться автоматически при входе пользователя через службу удаленных рабочих столов. В этом режиме работы другие программы и рабочий стол пользователю будут недоступны.
Также здесь можно разрешить/запретить подключение дисков клиента при входе (Connect client drivers at logon), подключение принтеров клиента при входе (Connect client printers at logon) и переопределить основной принтер клиента (Default to main client printer) при работе через удаленных рабочий стол, установив/сняв соответствующие флаги на форме.
На вкладке «Сеансы» (Sessions) можно установить параметры тайм-аута и повторного подключения при работе через службу удаленных рабочих столов.
Вкладка «Удаленное управление» (Remote control) используется для настройки параметров удаленного управления сеансом пользователя при работе через службу удаленных рабочих столов.
После того как Вы установили Windows Server 2012, 2016 или 2019 на VDS, там доступна только учётная запись Administrator.
Но когда на сервере необходимо работать нескольким пользователям, и одновременно, тогда необходимо добавить дополнительного пользователя, или пользователей. Так же, в данном случае, необходимо учесть, что бы на сервере был установлен терминальный сервер, и необходимое количество лицензий для RDP соединения. Как установить и настроить сервер терминалов, Вы можете увидеть в этой статье.
Для того что бы добавить второго пользователя, подключитесь к серверу со своими учетными данными Administrator. Потом перейдите в Computer Management. Это можно сделать, кликнув правой мышкой по меню Start, и в контекстном меню выбрать Computer Management.
Или нажмите комбинацию Win+R и в окне Run введите команду compmgmt.msc и нажмите OK.
Теперь в окне Computer Management переходим в Local Users and Groups => Users и в верхнем Action меню выбираем New User.
В открывшемся окне New User необходимо прописать имя пользователя, в графе User Name которое Вы будете использовать для входа на сервер. В пункте Full Name можно прописать полное имя, которое будет видно на экране приветствия. В поле Description можно ничего не писать.
В поле Password и подтверждение пароля, введите пароль который будете использовать для данного пользователя.
Чекбокс User must change password at next logon можете снять, если не нужно будет изменять пароль при первом подключении пользователя.
Чекбокс User cannot change password оставляем, что бы пользователь не смог изменять пароль.
Чекбокс Password never expires оставляем так же если нет необходимости в смене пароля. Account is disabled включает/отключает возможность подключения/входа пользователя на сервер. Снимаем галочку.
Чтобы создать пользователя, нажимаем Create.
Теперь для созданного пользователя, необходимо предоставить необходимые права, на подключение к серверу. Чтобы это сделать, нужно кликнуть правой кнопкой мыши и выбрать пункт Properties.
Чтобы созданному пользователю разрешить доступ по RDP к данному серверу, на вкладке Remote control необходимо установить соответствующие разрешения, как показано на иллюстрации ниже.
Но для того чтобы пользователю дать права Администратора, его необходимо добавить в соответствующую группу. На вкладке Member of
нажимаем Add… и в окне выбора группы выбираем Advanced… затем кнопку Find Now в окне подбора групп. Выбираем группу Administrators и нажимаем Ок.
Теперь, таким же образом, Вы можете создавать нужное количество пользователей на своем сервере.
Те же действия, только через Power Shell
Создадим пользователя User2, с описанием Manager и паролем QWErty1! (Не создавайте такие легкие пароли!!!)
$PASSWORD= ConvertTo-SecureString –AsPlainText -Force -String QWErty1!; New-LocalUser -Name "User2" -Description "Manager" -Password $PASSWORDСоответственно, вместо User2 используйте имя своего пользователя, и пароль не меньше 12 символов.
Теперь добавим данного пользователя в нужную нам группу.
Add-LocalGroupMember -Group "Remote Desktop Users" -Member "User2"В группу Remote Desktop Users
Чтобы добавить в группу Administrators используем следующую команду:
Add-LocalGroupMember -Group "Administrators" -Member "User2"Adding a user in Windows Server 2012 R2 is a straightforward process. To accomplish this task, you will need to use the Local Users and Groups tool available in the Computer Management console. Here are the steps you should take:
1. Open the Server Manager window by clicking on Start > Administrative Tools > Server Manager.
2. In the navigation pane on the left-hand side of the window, expand System Tools, then select Local Users and Groups from its drop-down menu.
3. Select Users from within Local Users and Groups, which will open up a list of current users for that particular system or domain group (depending on your server’s configuration).
4. Right click anywhere within this user list area, then select New User from the context menu that appears; alternatively, if you are using an older version of Windows Server such as 2003 or 2008R2 select Create new account instead when prompted with that same context menu option..
5. Enter a username and password for your new user in their respective fields before selecting Create to add them to your server’s local security database; also make sure to confirm any other settings/options related to creating this new account while still within this same window interface too!
Once these steps have been completed successfully, your newly created user should now be able to log into their own account on your Windows Server 2012 R2 machine without any further issues or problems occurring afterwards!
How to Create local admin account in Windows Server 2012 R2?
Creating a local administrator account in Windows Server 2012 R2 is a simple process that can be done in just a few steps. To get started, open the Server Manager window and select the “Tools” menu. Then, choose the “Computer Management” option from the drop-down list. In the Computer Management window, expand “Local Users and Groups” and click on “Users” to view all existing users on your machine. Next, right-click anywhere inside this list of users and select New -> User from the context menu. A new dialog box will appear where you can enter information about your new user such as username, password, full name etcetera. Once finished entering details for your user account, click Create followed by Close to save changes and finish creating an administrator account in Windows Server 2012 R2.
How do I Create a user account on my server?
Creating a user account on your server is an important step in establishing secure access to the system. To create a user account, you will need to complete the following steps:
1. Log into your server using administrator credentials.
2. Navigate to the Users section of your server’s control panel and select “Create New User”.
3. Input the desired username and password for the new user account, ensuring that both are strong and secure passwords.
4. Select any additional options or permissions you wish to assign to this user (e.g., file sharing, administrator privileges).
5. Confirm all information is correct before finalizing creation of the new user account by clicking “Save” or similar option in order for changes to take effect immediately.
6. Test out logging into your server with this newly created username and password combination in order verify successful setup of the new user account on your server system
How do I add a local user to my server?
Adding a local user to your server requires several steps. First, you’ll need to create the user account on the server itself. Typically this is done with command line tools like adduser or useradd, depending on your operating system. Once the user has been created, you may want to configure certain settings such as password complexity and expiration policies. Additionally, if needed, you can assign privileges and roles within the operating system for this new user. Finally, once everything is set up correctly then you can start using that username and password combination to access resources on the server.
How to find local users and Groups in Windows Server 2012 r2?
Finding local users and groups in Windows Server 2012 r2 is an easy task. To begin, open the Server Manager from the Start menu, then click on Tools > Computer Management. In the left sidebar, expand Local Users and Groups to view all of the local users and groups that are currently present on your server. From here you can create new users or modify existing user accounts by right clicking on them and selecting Properties. Additionally, you can add a new group by right-clicking Groups in the same window and selecting New Group.
How do I add user to local admin?
Adding users to the local administrator group is a fairly straightforward process. To begin, you will need to open the “Local Users and Groups” management console. This can be done by pressing Windows Key + R, typing in lusrmgr.msc, and then clicking OK or hitting Enter on your keyboard. Once opened, navigate to the “Groups” folder located in the left pane of the window. Here you should find an entry called Administrators; simply double-click this entry to open it up.
In order for a user account to become part of this group you must add them as a member; click on Add… at the bottom right corner of this window and enter either their username or their full name (depending on how they are registered). After that’s done make sure that their account is checked off before proceeding with clicking OK twice – once more at this screen and again when prompted by Windows Security – which closes both windows automatically after applying changes correctly made previously made to your system accordingly.
How do I add a local admin to my server?
Adding a local administrator to your server is an important step in maintaining the security of your system. It is recommended that you create a unique account for each individual administrator and assign them only the privileges they need to perform their job duties. To add a local admin to your server, follow these steps:
1. Log into your server as an existing administrator with full access privileges.
2. Click on Start > Administrative Tools > Computer Management or type “compmgmt.msc” into the search bar and press Enter.
3. Select Local Users and Groups from the left panel, then select Users in the right panel list view window.
4. Right-click anywhere inside this window and select New User… from the context menu (or click Action > New User at top).
5. Enter all necessary information including username, password, password hint (optional) etc., then click Create button to finish creating new user account with administrative privilege rights assigned automatically by default when creating it via this method described here..
6 Finally, log off from current session as other administrators so newly added one can login using credentials just created for him/her now instead afterwards if desired too though not always strictly required either way depending upon exact environment setup actually having been used there too at time being done also needing taken into consideration there potentially still possibly even then sometimes too perhaps accordingly even yet maybe still additionally sometimes nevertheless even quite likely potentially moreover seemingly often frequently likewise correspondingly most commonly typically occasionally thusly now indeed certainly definitely altogether eventually ultimately conclusively finally already thus apparently evidently overall soon finally hereby thereby afterward later next subsequently after that therefore respectively simultaneously parallel together above below beneath nearby near adjacent beside close beyond further farther out away far remote more less high low deeper wider taller shorter front back inner outer upper lower surface deep alternate alternative original same opposite alike twin dual double besides around across throughout along within thru during under onto off abovebelow underneath between alongside amidst amid among amidst amongst against about around before behind below beneath beside besides between beyond by despite down during except for from in front ofinside instead like near than through throughout till to toward under underneath unlike until up upon versus via with within without
How do you Create a user?
Creating a new user can be accomplished by following the steps below:
1. Log in to your server as an administrator.
2. Locate the “Users” folder or “Management Console” and open it.
3. Select the option to add a new user, typically labelled “Add User” or something similar depending on your system’s configuration.
4. Enter the username and other required information such as password, name, email address etc., that you want for this specific user account and click on create button when done entering details of the new user account.
5. Depending upon your system’s settings, you may need to assign certain permissions or roles related to accessing resources like files/folders present on the network for this particular user account before saving changes made by clicking save/finish button available there in management console window screen after adding all necessary details about newly created user profile successfully .
It is also important to remember that different systems have different methods of creating users so make sure you familiarize yourself with how yours works prior to attempting any tasks involving creation of users’ accounts in order to ensure accuracy and successful completion of task at hand without any hiccups along way!
{“@context”:”https://schema.org”,”@type”:”FAQPage”,”mainEntity”:[{“@type”:”Question”,”name”:”How to Create local admin account in Windows Server 2012 R2?”,”acceptedAnswer”:{“@type”:”Answer”,”text”:”nnCreating a local administrator account in Windows Server 2012 R2 is a simple process that can be done in just a few steps. To get started, open the Server Manager window and select the u201cToolsu201d menu. Then, choose the u201cComputer Managementu201d option from the drop-down list. In the Computer Management window, expand u201cLocal Users and Groupsu201d and click on u201cUsersu201d to view all existing users on your machine. Next, right-click anywhere inside this list of users and select New -> User from the context menu. A new dialog box will appear where you can enter information about your new user such as username, password, full name etcetera. Once finished entering details for your user account, click Create followed by Close to save changes and finish creating an administrator account in Windows Server 2012 R2.”}},{“@type”:”Question”,”name”:”How do I Create a user account on my server?”,”acceptedAnswer”:{“@type”:”Answer”,”text”:”nnCreating a user account on your server is an important step in establishing secure access to the system. To create a user account, you will need to complete the following steps: n1. Log into your server using administrator credentials. n2. Navigate to the Users section of your server’s control panel and select “Create New User”. n3. Input the desired username and password for the new user account, ensuring that both are strong and secure passwords. n4. Select any additional options or permissions you wish to assign to this user (e.g., file sharing, administrator privileges). n5. Confirm all information is correct before finalizing creation of the new user account by clicking u201cSaveu201d or similar option in order for changes to take effect immediately. n6. Test out logging into your server with this newly created username and password combination in order verify successful setup of the new user account on your server system”}},{“@type”:”Question”,”name”:”How do I add a local user to my server?”,”acceptedAnswer”:{“@type”:”Answer”,”text”:”nnAdding a local user to your server requires several steps. First, you’ll need to create the user account on the server itself. Typically this is done with command line tools like adduser or useradd, depending on your operating system. Once the user has been created, you may want to configure certain settings such as password complexity and expiration policies. Additionally, if needed, you can assign privileges and roles within the operating system for this new user. Finally, once everything is set up correctly then you can start using that username and password combination to access resources on the server.”}},{“@type”:”Question”,”name”:”How to find local users and Groups in Windows Server 2012 r2?”,”acceptedAnswer”:{“@type”:”Answer”,”text”:”nnFinding local users and groups in Windows Server 2012 r2 is an easy task. To begin, open the Server Manager from the Start menu, then click on Tools > Computer Management. In the left sidebar, expand Local Users and Groups to view all of the local users and groups that are currently present on your server. From here you can create new users or modify existing user accounts by right clicking on them and selecting Properties. Additionally, you can add a new group by right-clicking Groups in the same window and selecting New Group.”}},{“@type”:”Question”,”name”:”How do I add user to local admin?”,”acceptedAnswer”:{“@type”:”Answer”,”text”:”nnAdding users to the local administrator group is a fairly straightforward process. To begin, you will need to open the “Local Users and Groups” management console. This can be done by pressing Windows Key + R, typing in lusrmgr.msc, and then clicking OK or hitting Enter on your keyboard. Once opened, navigate to the “Groups” folder located in the left pane of the window. Here you should find an entry called Administrators; simply double-click this entry to open it up. nnIn order for a user account to become part of this group you must add them as a member; click on Add… at the bottom right corner of this window and enter either their username or their full name (depending on how they are registered). After that’s done make sure that their account is checked off before proceeding with clicking OK twice – once more at this screen and again when prompted by Windows Security – which closes both windows automatically after applying changes correctly made previously made to your system accordingly.”}},{“@type”:”Question”,”name”:”How do I add a local admin to my server?”,”acceptedAnswer”:{“@type”:”Answer”,”text”:”nnAdding a local administrator to your server is an important step in maintaining the security of your system. It is recommended that you create a unique account for each individual administrator and assign them only the privileges they need to perform their job duties. To add a local admin to your server, follow these steps: n1. Log into your server as an existing administrator with full access privileges. n2. Click on Start > Administrative Tools > Computer Management or type u201ccompmgmt.mscu201d into the search bar and press Enter. n3. Select Local Users and Groups from the left panel, then select Users in the right panel list view window. n4. Right-click anywhere inside this window and select New Useru2026 from the context menu (or click Action > New User at top). n5. Enter all necessary information including username, password, password hint (optional) etc., then click Create button to finish creating new user account with administrative privilege rights assigned automatically by default when creating it via this method described here.. n6 Finally, log off from current session as other administrators so newly added one can login using credentials just created for him/her now instead afterwards if desired too though not always strictly required either way depending upon exact environment setup actually having been used there too at time being done also needing taken into consideration there potentially still possibly even then sometimes too perhaps accordingly even yet maybe still additionally sometimes nevertheless even quite likely potentially moreover seemingly often frequently likewise correspondingly most commonly typically occasionally thusly now indeed certainly definitely altogether eventually ultimately conclusively finally already thus apparently evidently overall soon finally hereby thereby afterward later next subsequently after that therefore respectively simultaneously parallel together above below beneath nearby near adjacent beside close beyond further farther out away far remote more less high low deeper wider taller shorter front back inner outer upper lower surface deep alternate alternative original same opposite alike twin dual double besides around across throughout along within thru during under onto off abovebelow underneath between alongside amidst amid among amidst amongst against about around before behind below beneath beside besides between beyond by despite down during except for from in front ofinside instead like near than through throughout till to toward under underneath unlike until up upon versus via with within without”}},{“@type”:”Question”,”name”:”How do you Create a user?”,”acceptedAnswer”:{“@type”:”Answer”,”text”:”nCreating a new user can be accomplished by following the steps below: n1. Log in to your server as an administrator. n2. Locate the u201cUsersu201d folder or u201cManagement Consoleu201d and open it. n3. Select the option to add a new user, typically labelled u201cAdd Useru201d or something similar depending on your system’s configuration. n4. Enter the username and other required information such as password, name, email address etc., that you want for this specific user account and click on create button when done entering details of the new user account. n5. Depending upon your system’s settings, you may need to assign certain permissions or roles related to accessing resources like files/folders present on the network for this particular user account before saving changes made by clicking save/finish button available there in management console window screen after adding all necessary details about newly created user profile successfully . nIt is also important to remember that different systems have different methods of creating users so make sure you familiarize yourself with how yours works prior to attempting any tasks involving creation of users’ accounts in order to ensure accuracy and successful completion of task at hand without any hiccups along way!”}}]}
- Информация о материале
- Категория: Система
Для управления пользователями, также как и группами, в домене под управлением Windows Server, необходимо сначала создать этого пользователя. Для этого используется соответствующий механизм в виде оснастки «Управление компьютером«. Процедура заведения пользователя в домене простая.
Заведение пользователя в домене.
Выполняется в несколько шагов:
1. Открываем оснастку «Управление компьютером«. Проще всего это сделать нажав правой клавишей мышки на меню «Пуск«, далее выбираем «Администрирование«, затем «Пользователи и компьютеры Active Directory«. Второй вариант — комбинация клавиш Win+R, в открывшемся окне пишем compmgmt.msc, затем просто «Enter«.

2. В следующем окне «Active Directory — пользователи и компьютеры» нажимаем правой мышки на необходимом контейнере (например «Users«), в появившемся меню выбираем «Создать«, затем «Пользователь«.

3. Далее мы заполняем для нового пользователя:
- Имя — имя пользователя;
- Инициалы — инициалы пользователя (необязательно);
- Фамилия — фамилия пользователя;
- Полное имя — заполниться автоматически, после заполнения предыдущих пунктов;
- Имя входа пользователя — логин;
- Имя входа пользвателя (пред-Windows 2000) — заполнится автоматически, после заполнения имени входа пользователя.
Нажимаем кнопку «Далее» и попадаем в следующее меню.

4. В следующем окне достаточно указать пароль пользователя и подтверждение пароля, и нажать «Далее«. При этом когда пользователь домена зайдет на компьютер под своим логином и паролем, то система предложит ему сменить пароль. Зайти в систему будет возможно только при смене и подтверждении нового пароля.

5. Последнее окно служит для окончательной проверки правильности создания нового пользователя. Проверяем и нажимаем «Готово«. Новый пользователь будет создат в нужном контейнере и может работать в домене под своим логином и паролем.

Если что не понятно, можно посмотреть видео здесь:
- Также читайте:
- Установка Windows server 2012
- Windows server 2012 — установка роли Active Directory
- Архивирование и восстановление GPO Windows Server 2012
- Создание пользователя в домене Windows Server 2012
- WSUS — удаление ненужных обновлений
- Создание архива сервера Windows 2012
- Создание и подключение общего сетевого ресурса в домене Windows Server 2012
- Windows server 2019 — установка и настройка WSUS, создание и настройка GPO
- Windows server 2019 — добавление и удаление компьютера в домене
- Windows server 2019 — переименование администратора домена, изменение формата выводимого имени пользователя
- Windows server 2019 — установка и настройка Active Directory, DNS, DHCP
- Windows server 2019 — создание и удаление пользователя, группы, подразделения в домене
- Windows server 2019 — GPO изменение экранной заставки, отключение монитора, изменение политики паролей
Автор: АлександрОпубликовано: 23 июля, 2018
Задача: создать пользователя и добавить права для удалённого доступа к серверу.
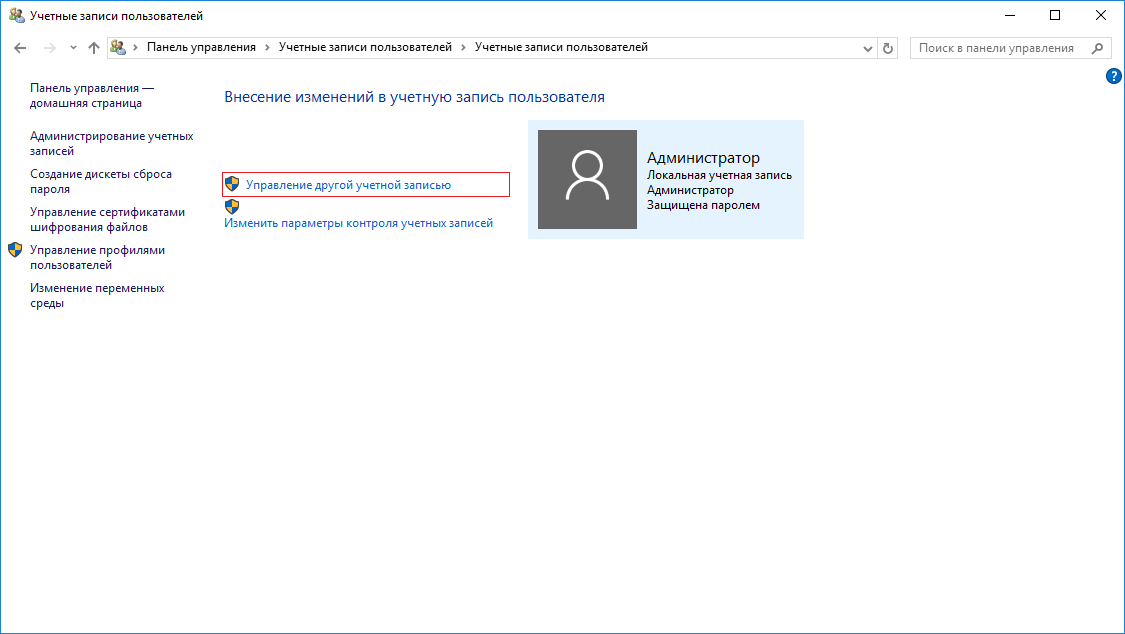
- Нажмите на пункт «Учётные записи пользователей»
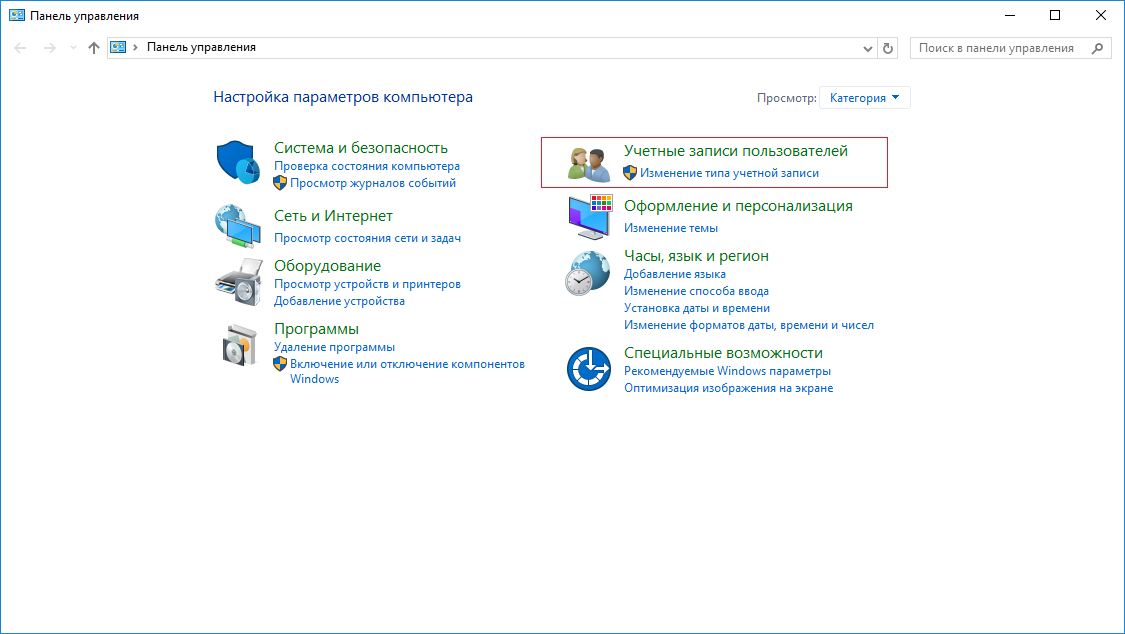
- Нажмите на пункт «Учётные записи пользователей»
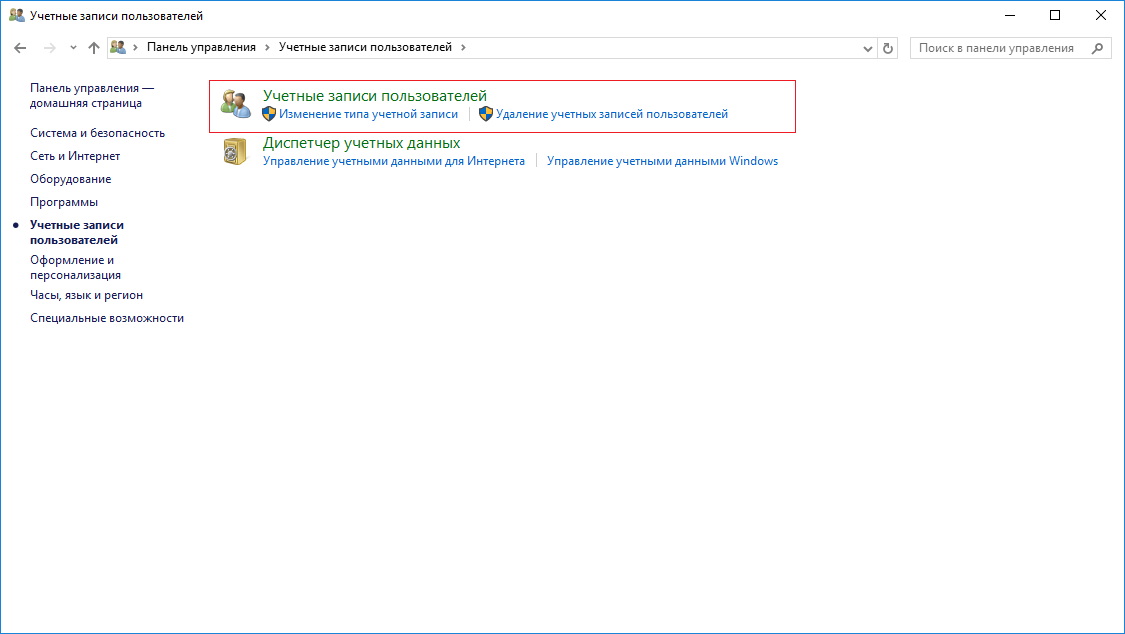
- Нажмите на пункт «Управление другой учётной записью»
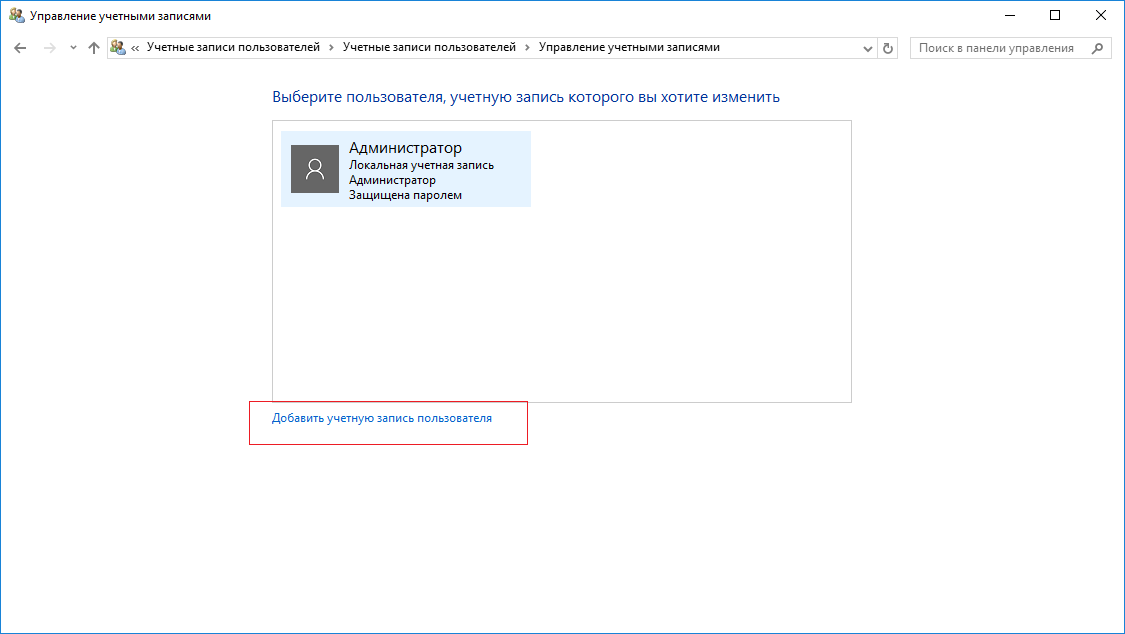
- Нажмите на пункт «Добавить учётную запись пользователя»
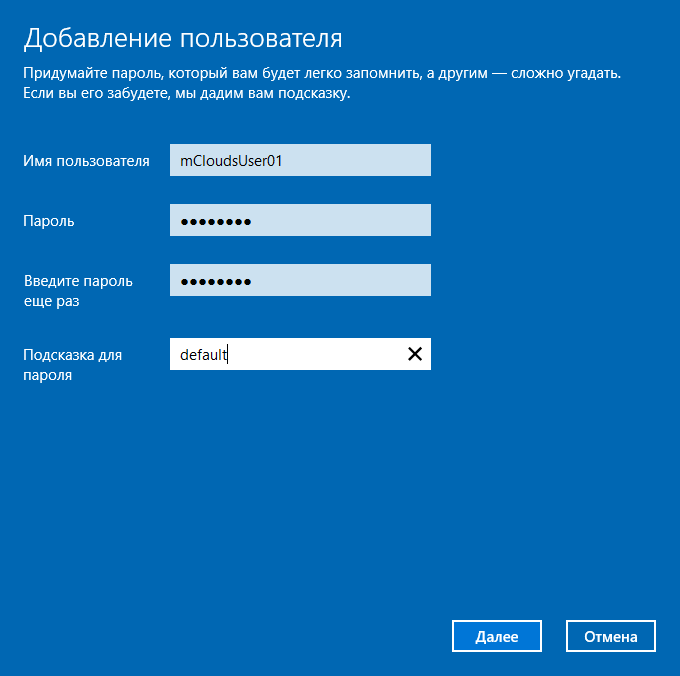
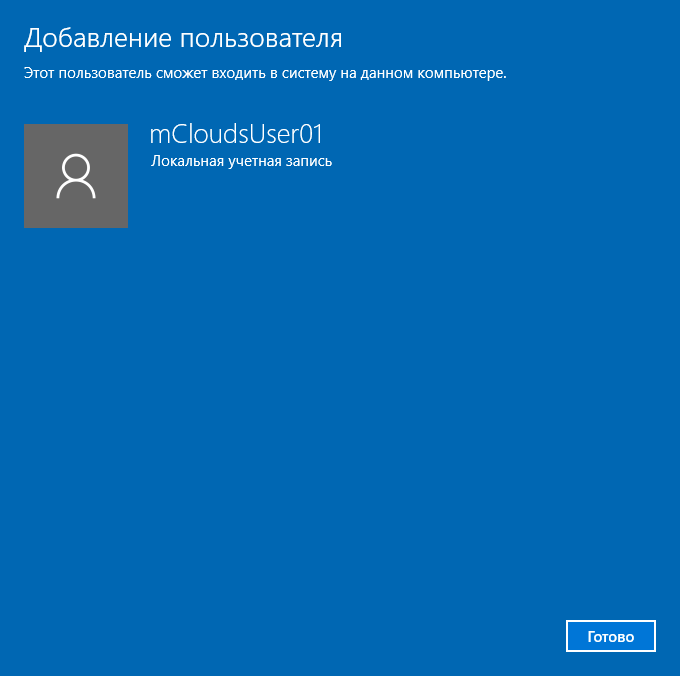
- Введите имя пользователя и пароль, эти данные будут использоваться для подключения пользователя к серверу
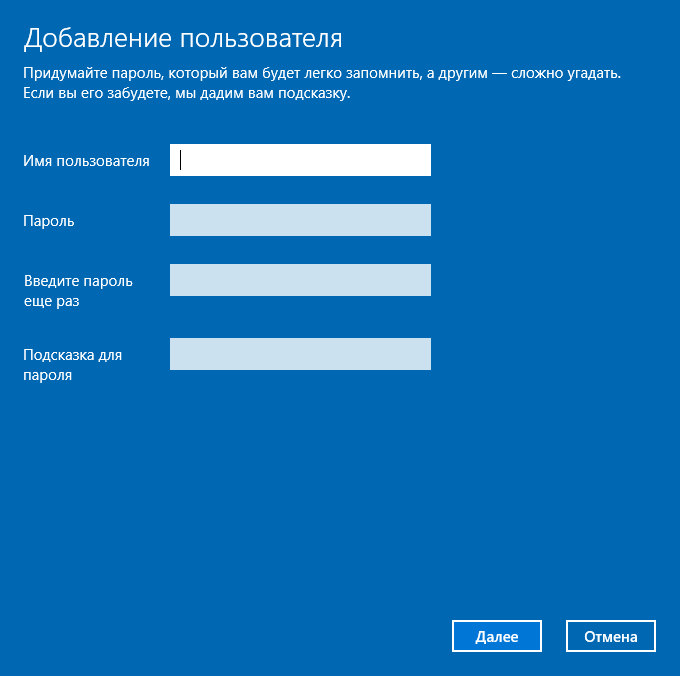
- После заполнения нажмите кнопку «Далее»
- Пользователь успешно создан
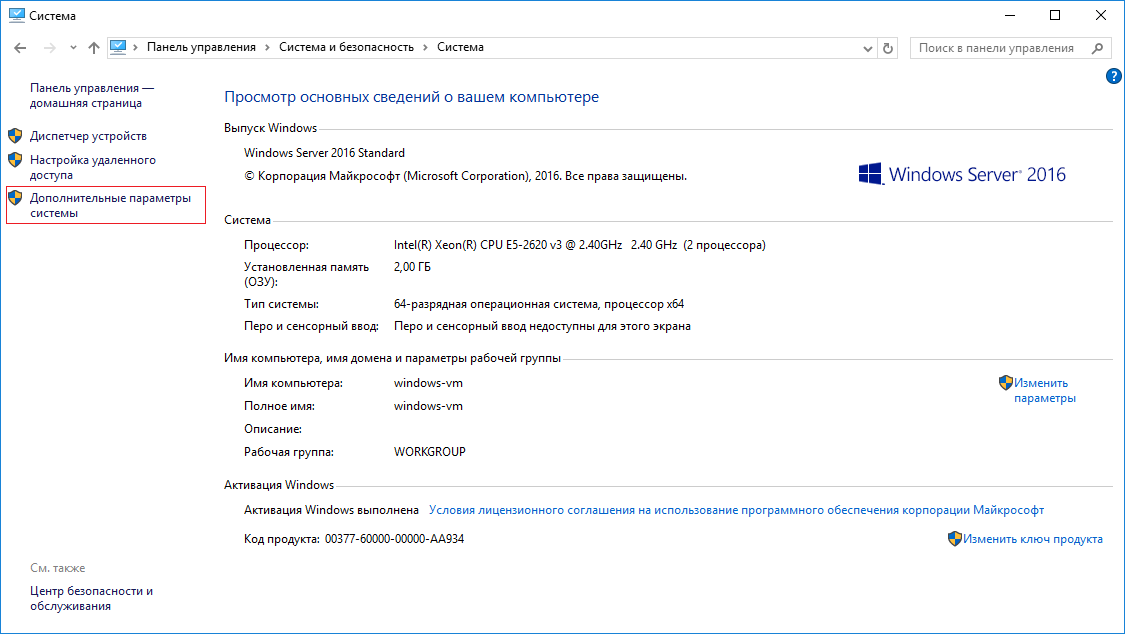
- Нажмите по пуску правой кнопкой мыши (далее ПКМ) и нажмите на пункт «Система»
- Нажмите на пункт «Настройка удалённого доступа»
- Нажмите на кнопку «Выбрать пользователя»

- Нажмите кнопку «Добавить»
- В поле для ввода введите полное имя пользователя и нажмите кнопку «Проверить имена», если проверка пройдёт успешна и пользователь найден, вы сможете продолжить добавление пользователя, иначе вам система предложит вам выполнить поиск пользователя.
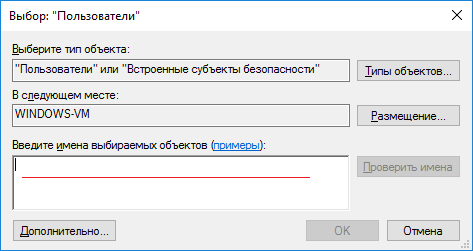
- Нажмите на кнопку «ОК»

- Нажмите на кнопку «ОК»
Пользователь успешно добавлен и имеет удалённый доступ.
Наш телеграм-канал
Пишем про облака, кейсы, вебинары
Подписаться