
How do I choose the “Windows version of the target computer” on the home page of Lazesoft Media Builder?
lazesoft media builder select target WinPE boot disk version
- If you choose “DO NOT Specify the Windows version of the target computer”, the program selects the WinPE version from the Windows version which you are running.
- If your Windows computer is 64 bit, we recommend you select the target Windows version, Windows 8.1 64 bit, on the home page of Lazesoft Media Builder.
- If your Windows computer is 32 bit, we recommend you select target Windows version, as Windows 8.1 32 bit, on the home page of Lazesoft Media Builder.
- Windows 8.1 WinPE disk has better hardware compatibility than the Windows 8/7/Vista WinPE disk.
- The 64 bit boot disk performs better than 32 bit boot disk. But, for UEFI boot mode:
- The 32 bit boot disk only works on 32 bit UEFI boot model computer.
- The 64 bit boot disk only works on 64 bit UEFI boot model computer.
When do I need to use the 32 or 64 bit boot disk?
- If your target computer uses the MBR boot mode, you can use the 32 bit boot disk for both 32 bit and 64 bit computers.
- If your target computer uses the UEFI boot mode, you must choose the 32 bit boot disk for a 32 bit computer.
- You can only use 64 bit boot disk on a 64 bit computer.
What if I get the error, “Secure BOOT Failure: a proper digital signature was not found”?
If you get the “BOOT Failure: a proper digital signature was not found” error message, please disable the “secure boot” feature in the bios.
Follow these steps to turn off the “secure boot” feature in the bios.
- Power up your computer and press the DELETE key from keyboard during the initial boot processing.
- While you are in the motherboard’s UEFI firmware settings, click/tap on “secure boot” menu, select Secure Boot option and press Enter to disable it.
- Click on the Exit menu > Save Changes and Exit
On Windows 10, Windows Update is enabled by default and Windows downloads all updates by default, as well as upgrades to newer versions of Windows 10.
If you want to make sure you stay on your current version of Windows 10, here’s how to do it through Group Policy (GPO) on Windows 10 Pro or Enterprise or through the Windows Registry on Windows 10 Home.
- Prevent Windows 10 from upgrading to a new version through Group Policy (GPO)
- Prevent Windows 10 from upgrading to a new version through the registry
1. Prevent Windows 10 from upgrading to a new version through Group Policy (GPO)
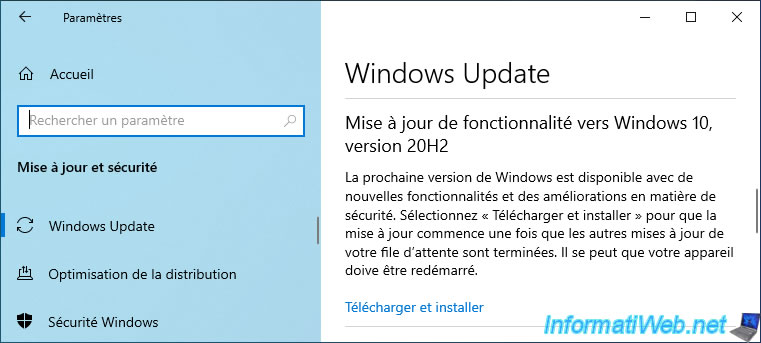
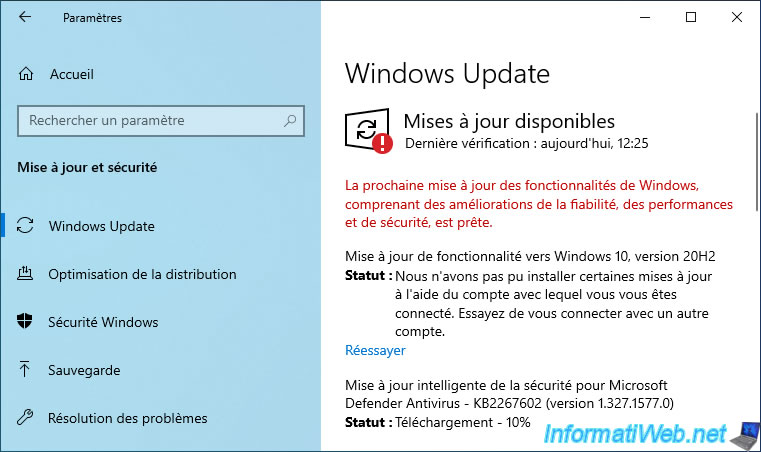
If you look in Windows 10 settings -> Windows Update, you may one day see a block like this : Feature update to Windows 10, version 20H2.
To prevent Windows 10 Professional or Enterprise from automatically upgrading to a new version, you can use Group Policies (GPOs).
Open the Windows 10 start menu and type «gpedit.msc» to open the Local Group Policy Editor.
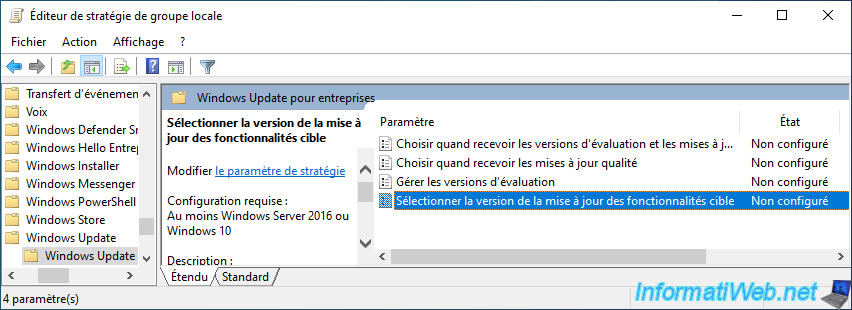
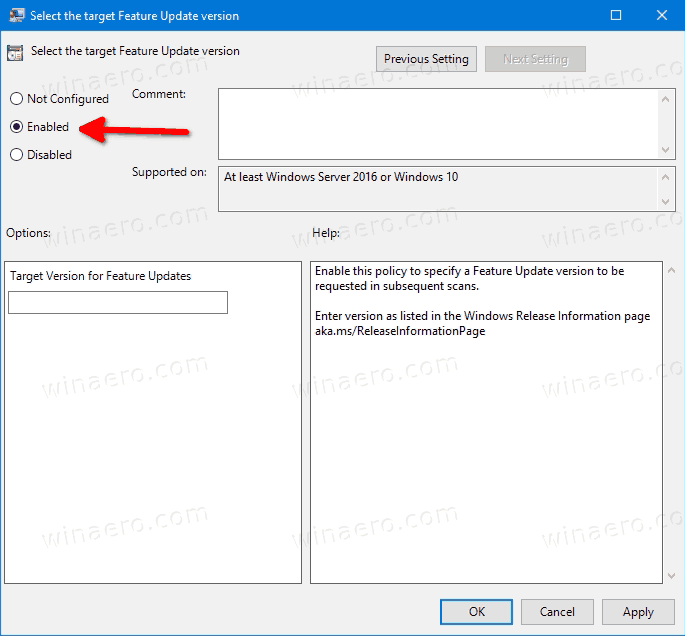
Then, go to «Computer Configuration -> Administrative Templates -> Windows Components -> Windows Update -> Windows Update for Business» and double click on the «Select the target Feature Update version» policy.
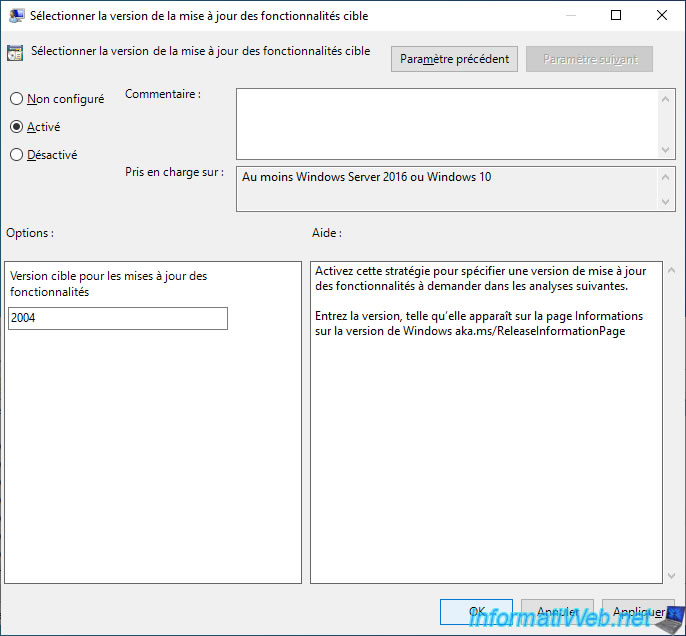
Enable this Group Policy and indicate the version of Windows 10 you want to stay under.
If you specify a version higher than the one you currently have, Windows 10 will be able to update to the specified version, but Windows will not exceed that version.
Warning : as indicated in the description of this policy, you must specify the version as indicated on the «Windows 10 release information» page of the Microsoft site.
Close the local group policy editor and force the update of your computer’s policy using the command :
Batch
gpupdate /force
If you go back to Windows 10 settings -> Windows Update, it’s possible that the message regarding the new version of Windows 10 is still present if it was already present before.
However, if you click on «Download and install», it will not work.
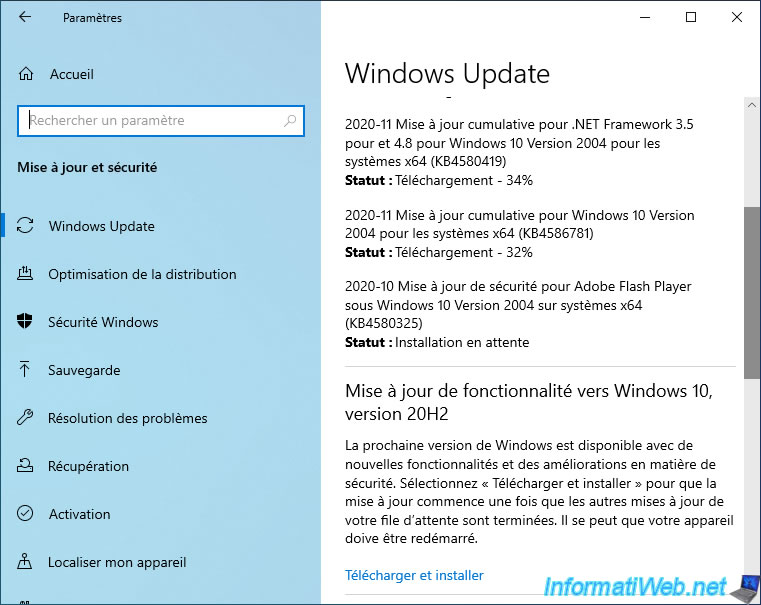
Indeed, you will receive this error :
We were unable to install some updates using the account you signed in with. Try to sign in with another account.
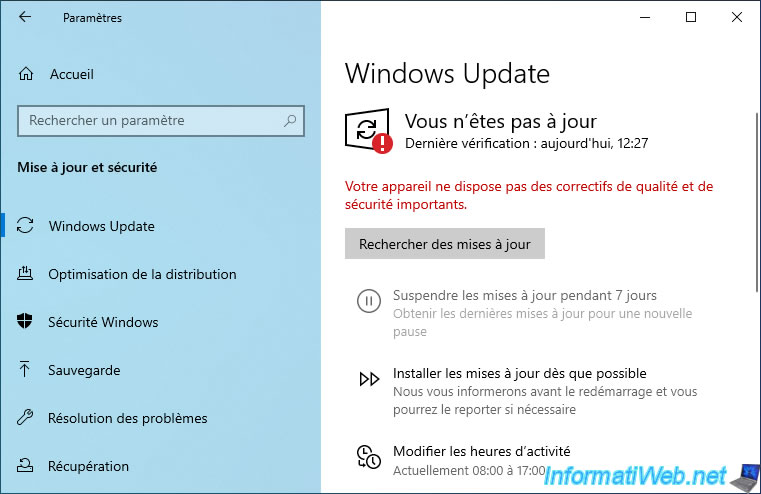
If you click on «Retry», this message will disappear completely.
2. Prevent Windows 10 from upgrading to a new version through the registry
On Windows 10 Home, you don’t have the ability to change Windows policies.
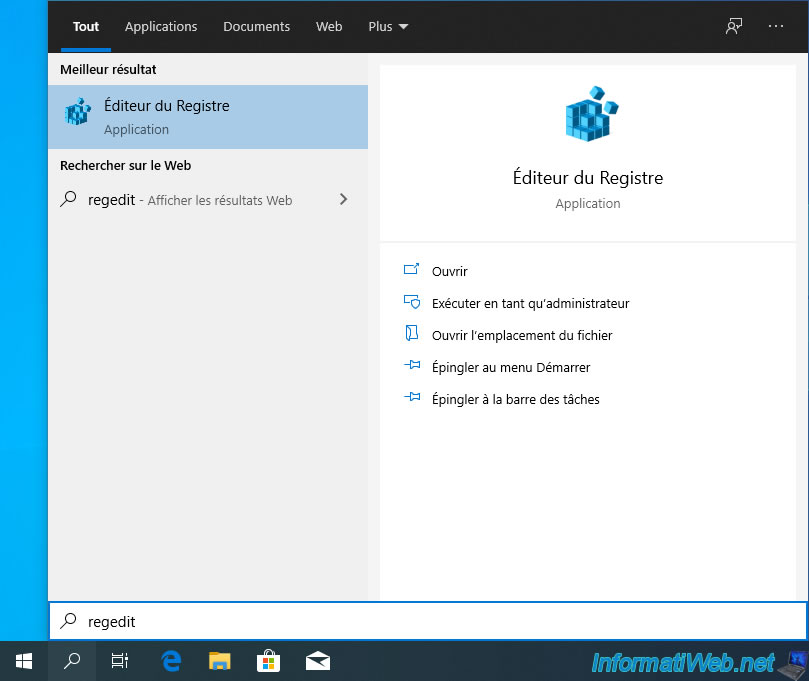
However, in this case, there is an alternative which is to modify the Windows 10 registry through the «regedit.exe» program.
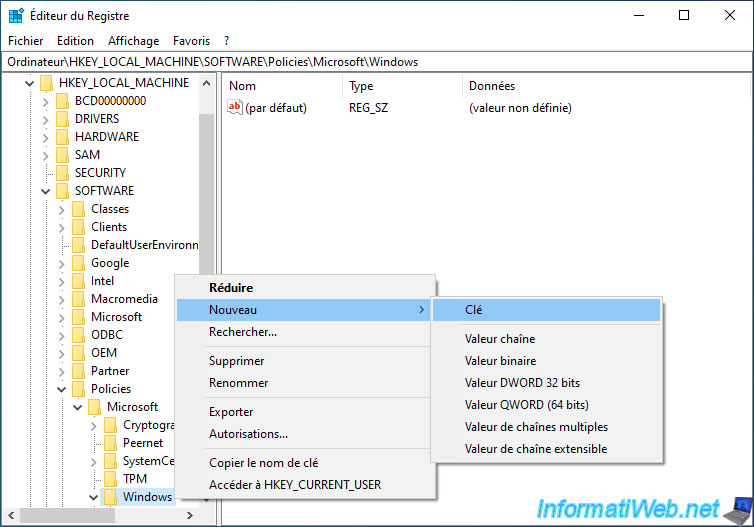
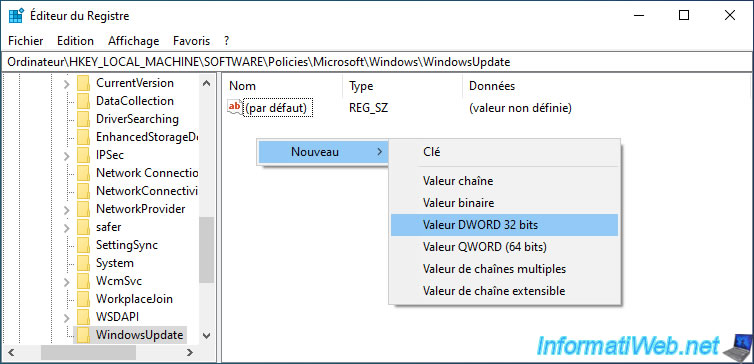
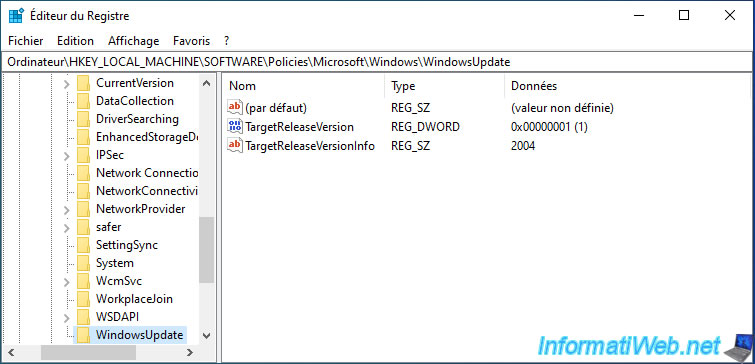
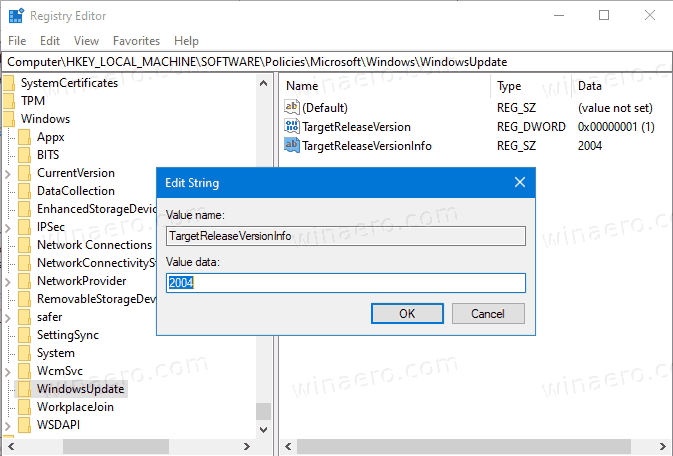
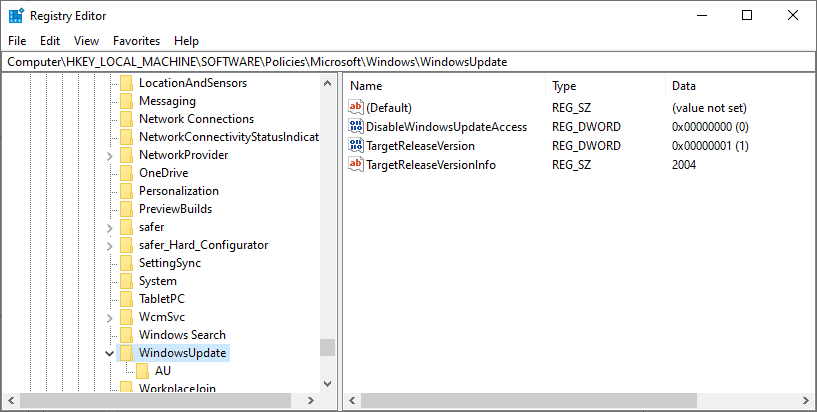
In the registry editor that appears, go to the «HKEY_LOCAL_MACHINE\SOFTWARE\Policies\Microsoft\Windows» key.
Right click «New -> Key» on the «Windows» folder and name the new key : WindowsUpdate.
In this new «WindowsUpdate» key, create a new DWORD (32-bit) value.
Name this value «TargetReleaseVersion».
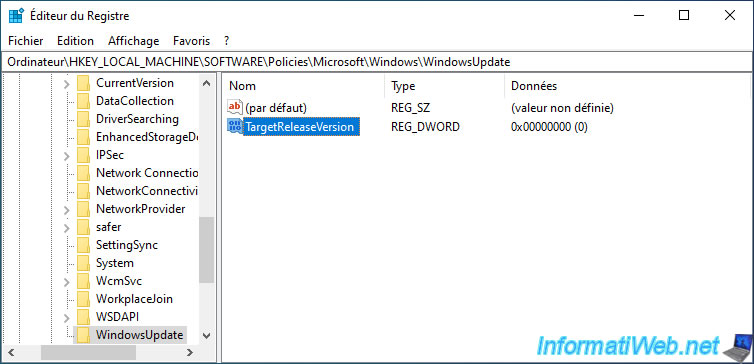
Double click on it to specify «1» as the value and click on OK.
Then, create a string value.
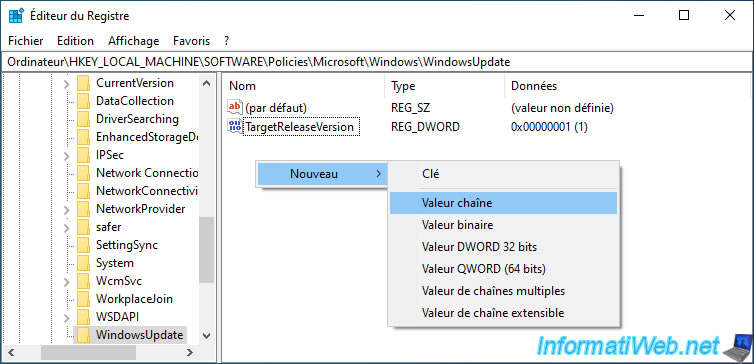
Name it : TargetReleaseVersionInfo.
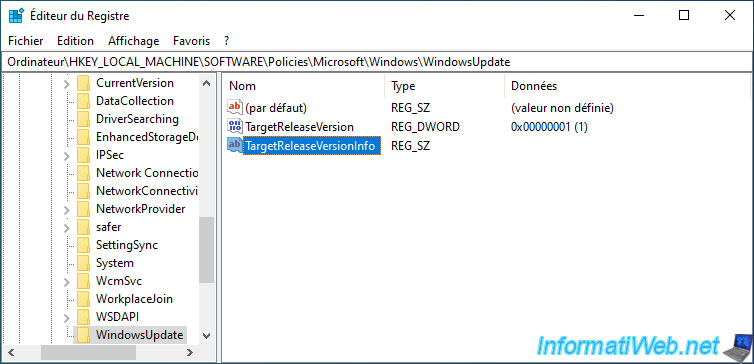
Specify which version of Windows 10 you want to stay (or not exceed) and click OK.
Warning : the version must be indicated as on the «Windows 10 release information» page of the Microsoft site.
Here is what it gives.
For this change to take effect, you will need to restart your computer.
В Windows 10 Pro последней версии из параметров исчезла возможность отложить обновление компонентов (обновление до новой версии Windows 10), в домашней версии этой возможности не было и раньше. Однако в случае, если на вашем компьютере установлена именно Pro версия системы, вы можете указать целевую версию ОС в реестре, и Windows 10 не будет обновляться до более новых версий.
В этой инструкции о том, как именно указать нужную версию Windows 10 Pro с помощью соответствующих параметров реестра, отключив тем самым обновление до более новых версий раз в полгода. Другие материалы об отключении различных обновлений: Отключение обновления Windows 10 и Windows 11 до новой версии в программе InControl, Как отключить обновления Windows 10.
Отключение обновлений Windows 10 Pro до новых версий
Все необходимые параметры вы можете задать с помощью редактора реестра:
- Запустите редактор реестра (Win+R, ввести regedit).
- Перейдите к разделу реестра
HKEY_LOCAL_MACHINE\SOFTWARE\Policies\Microsoft\Windows\WindowsUpdate
При отсутствии указанного подраздела, создайте его (правый клик по разделу «Windows» — создать раздел).
- В этом разделе создайте параметр DWORD (32-бит, даже для 64-бит Windows) с именем TargetReleaseVersion и укажите значение 1 для параметра.
- Создайте новый строковый параметр с именем TargetReleaseVersionInfo и укажите номер версии. Например, «2004» или «1909» (без кавычек), если вы не хотите получать следующих обновлений компонентов Windows 10.


Обратите внимание: функция поддерживается начиная с версии 1803, при этом в качестве целевой версии вы можете указать либо текущую, либо более новую версию системы, но не одну из предыдущих (например, если у вас установлена версия 2004, а в целевой указана 1909, эффекта не будет).
Готово, с этого момента система не будет получать обновлений до версии выше указанной. При необходимости отменить изменения, просто удалите созданные параметры реестра.
Если вы не хотите вручную менять параметры реестра, то просто создайте reg-файл со следующим содержимым и импортируйте его в реестр:
Windows Registry Editor Version 5.00

[HKEY_LOCAL_MACHINE\SOFTWARE\Policies\Microsoft\Windows\WindowsUpdate]
"TargetReleaseVersion"=dword:00000001
"TargetReleaseVersionInfo"="2004"
Этот файл устанавливает версию Windows 10 2004 в качестве целевой. Также может оказаться полезным: Программы для управления обновлениями Windows 10.
How to Set Target Windows 10 Version to Stay on or Upgrade To
With Windows 10 version 2004, Microsoft has introduced a new group policy, which allows the user to lock down the OS to a specific feature upgrade. Eagle-eyed users have already spotted it in screenshots in my previous article. Here’s how to activate and use it.
If you are following Windows 10 version 2004 development, you may be aware of the updated Group Policy templates for Windows 10, and the Group Policy Settings Reference spreadsheet. The latter document is really useful, as it highlights policies first introduced with Windows 10 May 2020 Update. Advanced users and system administrators may apply them with Local Group Policy Editor, or in the Registry.
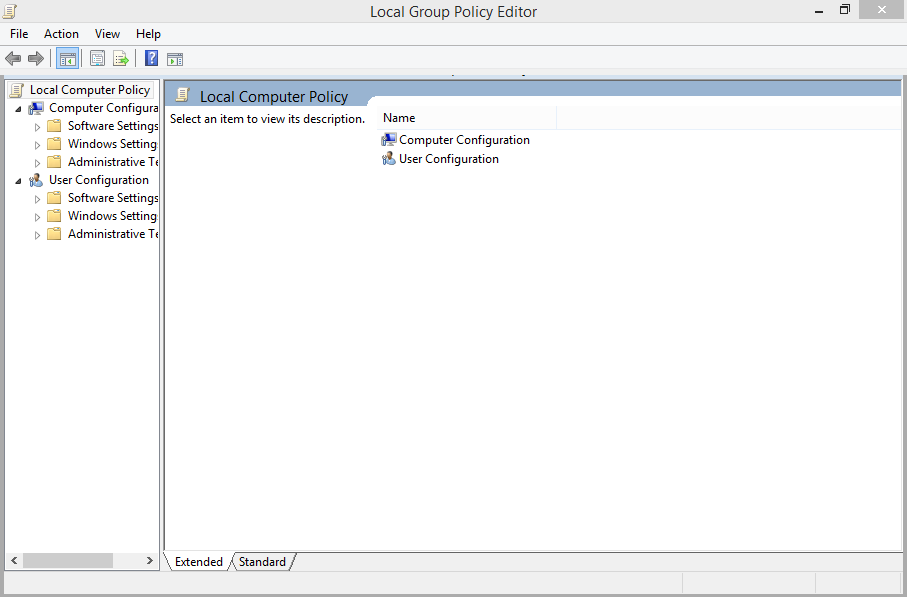
Local Group Policy and its GUI
The Local Group Policy Editor is a Microsoft Management Console (MMC) snap-in that provides a single user interface through which all the settings of Local Group Policy objects can be managed.
Local Group Policy Editor is not available in certain editions of Windows 10. Only Windows 10 Pro, Enterprise, or Education edition include the Local Group Policy Editor app.
Local Group Policy Editor includes objects that apply to a computer (all users) and users (a specific user account, group, or per-user software software settings). It consists of two parts.
- Computer Configuration is used to set policies that will be applied to a computer. The change software settings, Windows settings, and administrative templates for all users. They typically change Registry keys under the HKEY_LOCAL_MACHINE Registry branch and require restarting the computer to make the change to take effect.
- User Configuration is a set of policies that apply to users. User Configuration comes with options for software settings, Windows settings, and administrative templates stored in the per-user Registry branch (HKCU).
Note: Certain options can be configured for both User Configuration and Computer Configuration. Such values can be stored in both HKCU and HKLM Registry branches. When both parameters are set, User Configuration takes precedence over the Computer Configuration value.
TargetReleaseVersion and TargetReleaseVersionInfo
There are two new policies, TargetReleaseVersion and TargetReleaseVersionInfo, which allow the user to specify the target feature upgrade for Windows 10. The information tells the OS that it is allow to upgrade to, or stay with, the specific release. The policy works starting in Windows 10 version 1803, and uses the two-number version format for the target release to stick with.
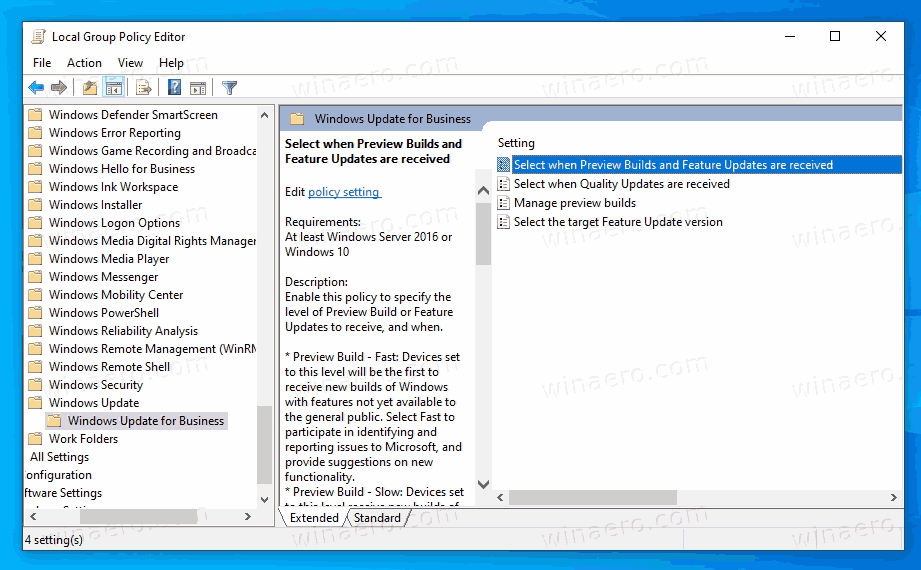
In Windows 10 version 2004, it can be found in gpedit.msc under Computer Configuration \ Administrative Templates \ Windows Components \ Windows Update \ Windows Update for Business. See the last parameter, Select the target Feature Update version.
Here’s how to use them.
- Open the Local Group Policy editor app.
- Navigate to Computer Configuration > Administrative Templates > Windows Components > Windows Update > Windows Update for Business on the left.

- On the right, find the policy setting
Select the target Feature Update version. - Double-click on it, and set it to
Enabled.
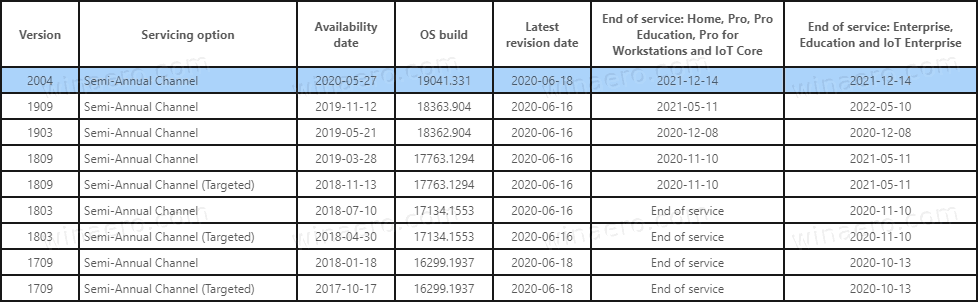
- Under Options, set the ‘Target Version for Feature Updates’ box to one a value as it listed in the following table, in the Version column, e.g.
1909or2004.

- Restart Windows 10.
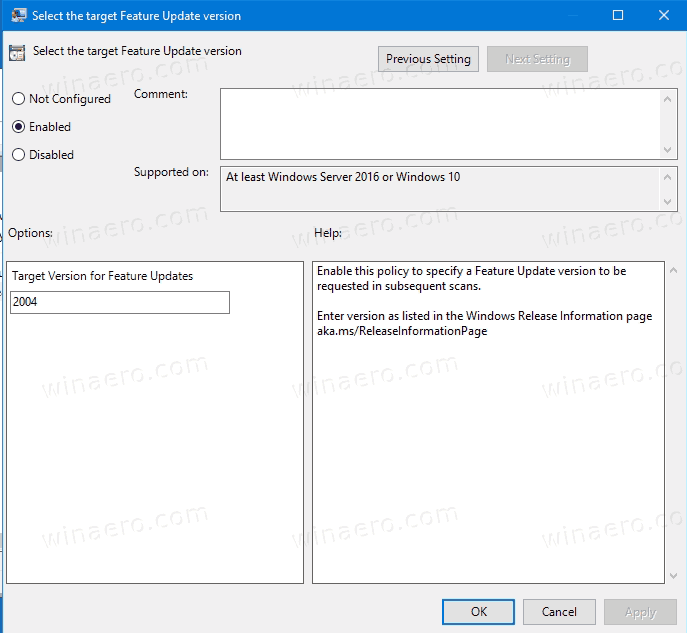
You are done! In the screenshot above, my Windows 10 won’t receive any feature update after version 2004.
There are also the appropriate Registry tweaks behind these Policy options. As Windows 10 Home doesn’t include gpedit.msc, Windows 10 Home users may try to apply them in order to make this upgrade lockdown feature work. However, I was not able to test these options in Windows 10 Home. If you have done it, please drop a comment if the tweaks work or not in your Home edition.
To Set Target Feature Upgrade Version in Windows 10 with a Registry Tweak,
- Open the Registry Editor app.
- Go to the following Registry key
HKEY_LOCAL_MACHINE\Software\Policies\Microsoft\Windows\WindowsUpdate. See how to go to a Registry key with one click. - If you don’t have such a key, then create it manually.
- On the right, create or modify the
TargetReleaseVersion32-Bit DWORD value and set it to 1.
- Now, modify or create a new string (REG_SZ) value
TargetReleaseVersionInfoand set its value data to the desired version number you want to upgrade to or stick with.
- You can use the following table for reference.

You are done!
Note: Setting the TargetReleaseVersionInfo value to a lower version than Windows 10 version you already have won’t downgrade the operating system. It won’t also stop the OS from receiving newer feature updates, so such settings are just ignored.
Support us
Winaero greatly relies on your support. You can help the site keep bringing you interesting and useful content and software by using these options:
If you like this article, please share it using the buttons below. It won’t take a lot from you, but it will help us grow. Thanks for your support!
Microsoft removed the option to defer feature updates in the Settings application in Windows 10 version 2004 for professional versions of the operating system. The option was never there to begin with for the Home editions.
Administrators may still use the Group Policy to defer updates in professional versions of Windows 10. To do that, open the Group Policy Editor and configure the Feature Updates are received policy here: Computer Configuration > Administrative Templates > Windows Components > Windows Update > Windows Update for Business.
What Microsoft did not reveal in the change announcement was that there is another option, an even better one.
The — almost — undocumented feature is managed in a Tech Community article only it appears and was discovered by Canadian blogger Ed Braiter (thanks Woody) . It allows administrators to specify a desired target version of Windows 10 in professional versions.
The setting works in all professional versions of Windows 10, e.g. Windows 10 Pro and Enterprise, and is supported from version 1803 onward.
All you have to do is specify the target release version of Windows 10 that you want the system to be on. Here is how that works in detail:
- Open the Windows Registry Editor, e.g. by selecting Start, typing regedit.exe, and selecting the result.
- Go to the following key: HKEY_LOCAL_MACHINE\SOFTWARE\Policies\Microsoft\Windows\WindowsUpdate
- Right-click on Windows Update and select New > Dword (32-bit) Value.
- Name it TargetReleaseVersion.
- Set its value to 1.
- Right-click on Windows Update and select New > String Value.
- Name it TargetReleaseVersionInfo.
- Set its value to the desired target version, e.g.
- 2004 for Windows 10 version 2004.
- 1909 for Windows 10 version 1909.
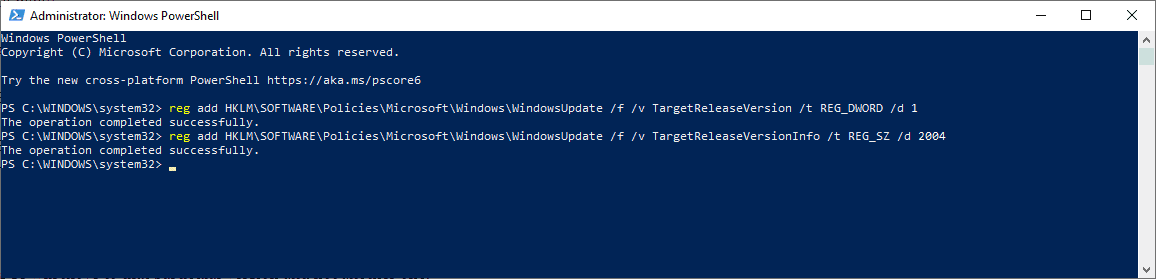
You can also use en elevated PowerShell prompt to make the changes:
- Use Windows-X to open the admin menu.
- Select Windows PowerShell (admin) from the list.
- Run the following commands (make sure you change XXXX in the second command to the desired target version, e.g. 1909:
- reg add HKLM\SOFTWARE\Policies\Microsoft\Windows\WindowsUpdate /f /v TargetReleaseVersion /t REG_DWORD /d 1
- reg add HKLM\SOFTWARE\Policies\Microsoft\Windows\WindowsUpdate /f /v TargetReleaseVersionInfo /t REG_SZ /d XXXX
Delete the created Dword values in the Registry again if you want to reset the functionality. You may also modify the target version at any time.
Note: you can only specify the current or a newer version of Windows 10. Specifying a previous version, e.g. 1803 while already on Windows 10 version 1909 will do nothing.
If you specify a newer version, Windows 10 will move to that particular version and not another one, even if a newer version is available; that’s great news for administrators who don’t want systems to be upgraded to the latest feature update version of Windows 10.
If the same version is specified, Windows 10 will stay on that version until the «end of service». Microsoft has a loose definition for the term «end of service» but it is clear that the updating will be enforced at one time before the Windows 10 version reaches end of support.
Summary
Article Name
You can now set the target Windows 10 version in professional editions
Description
Find out how to set a target feature update version of Windows 10 in all professional versions of the operating system.
Author
Martin Brinkmann
Publisher
Ghacks Technology News
Logo
Advertisement