
Imagine a situation in which you are using an application on your Windows 11 laptop or PC and it stops responding. You press the ever-popular Ctrl + Alt + Delete shortcut and click on the Task Manager button, hoping to force-close the crashed program using the system app, but it is all in vain. The Task Manager itself is not opening! The Task Manager not working or launching in Windows 11 can be one of the most frustrating situations for users, and we know that.
Although Microsoft completely revamped the Task Manager application in Windows 11, adding a brand new UI, a new search bar, and a new side panel to browse through different sections, many users have reported issues with the program recently. Citing the reports from various Windows 11 users, we have created this in-depth guide to help you fix the Task Manager in Windows 11 and get it up and running on your device again.
Fix Task Manager Not Working in Windows 11
Now, there can be a plethora of reasons why the Task Manager might not work in Windows 11. These include outdated Windows OS, viruses or malware in your system, missing/ corrupt system files, issues with your graphics driver, and more.
However, the good news is that all the solutions to fix Task Manager in Windows 11 are fairly easy to execute. With this information out of the way, let’s get into the fixes, shall we?
1. Restart Your Windows 11 PC/ Laptop
Now, the first and one of the most effective fixes that you can try when the Task Manager stops working in Windows 11 is restarting your system. Yes, we know that this is the most generic fix of all but its effectiveness is unmatched to date.
A quick restart of Windows 11 tends to fix most of the issues in the system as it clears the RAM and force closes all the applications and programs that are running in the background, one of which might be causing issues with the Task Manager.
If, however, you are stuck with a crashed application and cannot access the Restart button in Windows 11, you might want to force restart your PC or laptop by using the physical power button on your CPU or laptop body.
After the restart, try opening the Task Manager in Windows 11 by pressing Ctrl + Alt + Delete or via the Taskbar. It should work just fine now. If, however, it does not, proceed to the next fix.
2. Run SFC Scan in Windows 11
The next thing that could potentially fix the Task Manager not working in Windows 11 issue on your PC or laptop is an SFC scan. As mentioned before, the issue with the Task Manager can be a result of missing/ corrupt system files, and the System File Checker (SFC) scan can easily fix this.
It is essentially a command-line tool that checks the system file directory in Windows and replaces or fixes missing/ corrupt system files. Hence, a quick SFC scan can easily fix most system-level issues and system applications in Windows 11, including the Task Manager. To run an SFC scan on your Windows 11 PC or laptop, follow the steps right below.
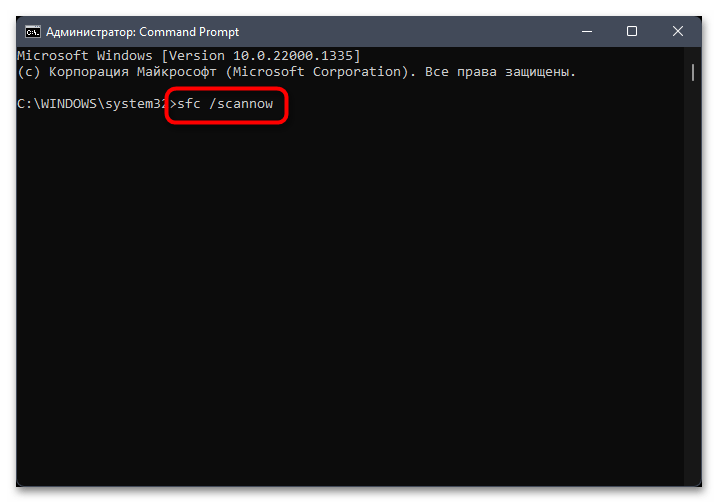
1. Use Windows search to find the Command Prompt tool and click the Run as administrator option.

2. Once the Command Prompt tool opens up, type in the following command and press Enter:
sfc /scannowNote: It might take some time for Command Prompt to complete the scan. Do not close the application mid-scan.

3. After the scan is completed, restart your Windows 11 PC or laptop.
Following the restart, check whether the Task Manager issue in Windows 11 is fixed or not, and if the program is running properly or not. If it does, well and good, but if does not launch or malfunctions, proceed to the next fix.
3. Run DISM Scans in Windows 11
The Deployment Image Servicing and Management (DISM) scans are a set of command-line tools, similar to the SFC scan, that checks the disk images in Windows and fixes various system-level issues.
Hence, running these scans on your Windows 11 device can surely fix the Task Manager and get it back to its usual state in a jiffy. To run the DISM scans on your Windows 11 laptop/ PC, follow the steps listed below:
1. Run the Command Prompt tool as administrator in Windows 11, as explained in the above fix.
2. Once it opens, type in the following commands and press Enter one by one:
DISM /Online /Cleanup-Image /CheckHealthDISM /Online /Cleanup-Image /ScanHealthDISM /Online /Cleanup-Image /RestoreHealthNote: Do not run the above scans in Command Prompt simultaneously. Start with the first one and move on to the next only when the previous scan gets completed.

3. After all three DISM scans get completed, restart your PC/ laptop.
Following the restart, the Task Manager not working in Windows 11 issue should be fixed on your device. If it is not, proceed to the next solution right below.
4. Update Graphics Driver in Windows 11
Now, another common reason that might cause the Task Manager not working in Windows 11 issue is an outdated graphics driver on your PC or laptop. In this case, all you need to do is update the graphics driver in your system. So, in order to update the graphics driver in your Windows 11 laptop or PC, follow the steps right below:
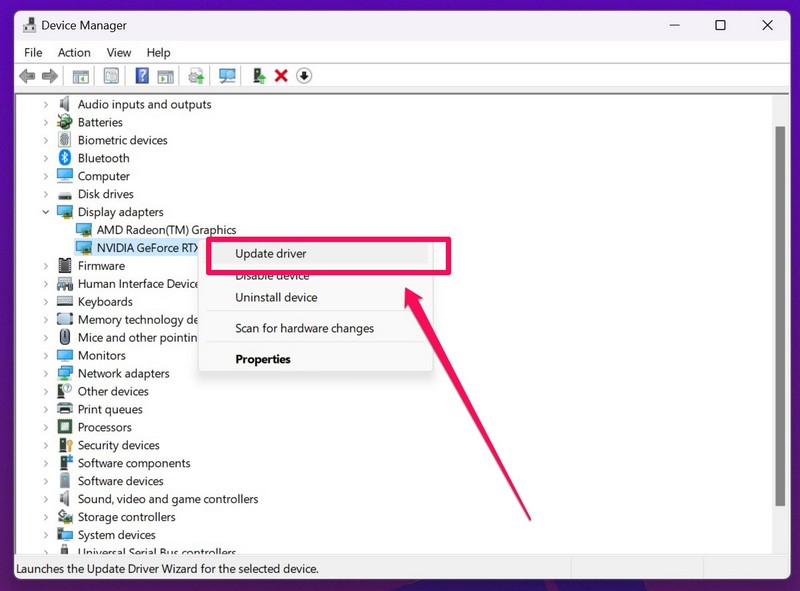
1. Right-click the Start icon to open the Quick Links menu.
2. Click on the Device Manager option.

3. Once the Device Manager opens up, click the tiny arrow beside the Display adapters option to expand it.

4. Then, right-click on your graphics card to open the context menu and click the Update driver option.
5. On the following prompt, choose the Search automatically for drivers option.
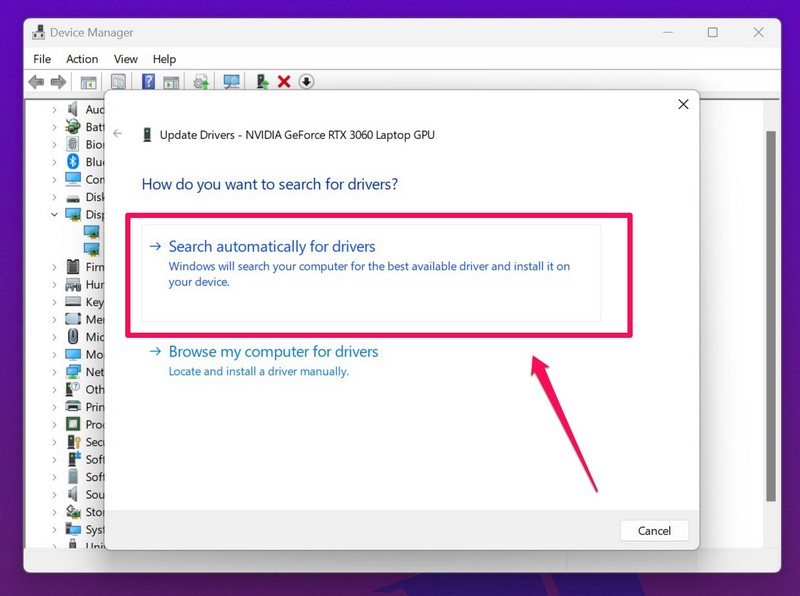
6. Wait for your graphics driver to automatically update.
7. Following the completion, restart your Windows 11 PC or laptop.
After you update the graphics driver and restart your device, try opening the Task Manager in Windows 11. It should work fine, given the issue was caused by an outdated graphics driver in your system. However, if the issue still persists, proceed to the next solution.
5. Use Windows Security to Check for Viruses/ Malware
Viruses and/ or malware residing in your system are other reasons why the Task Manager might not work properly in Windows 11. In this case, you can use the built-in Windows Security tool in Windows 11 to scan your PC or laptop to check for files or programs that contain threat actors, which might be causing issues with the Task Manager. So, to use Windows Security to check for viruses/ malware in Windows 11, follow the steps below:
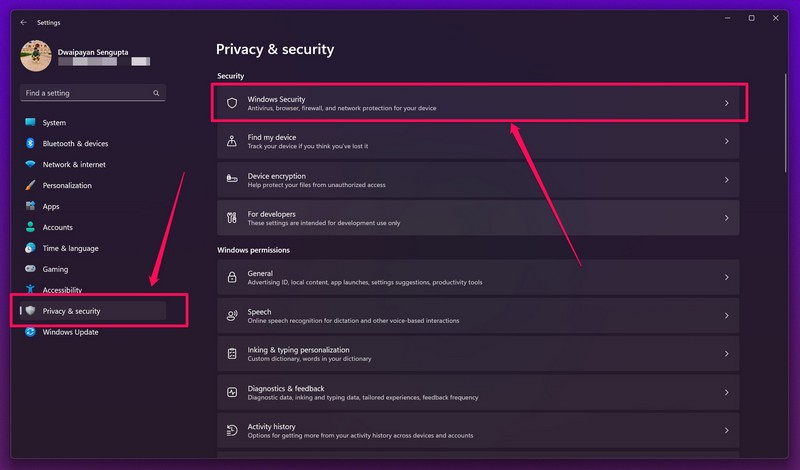
1. Launch the Settings app in Windows 11 with the Windows + I shortcut.
2. Go to the Privacy and security tab from the left pane and click the Windows Security option at the top.
3. Next, click the Virus and threat protection option.
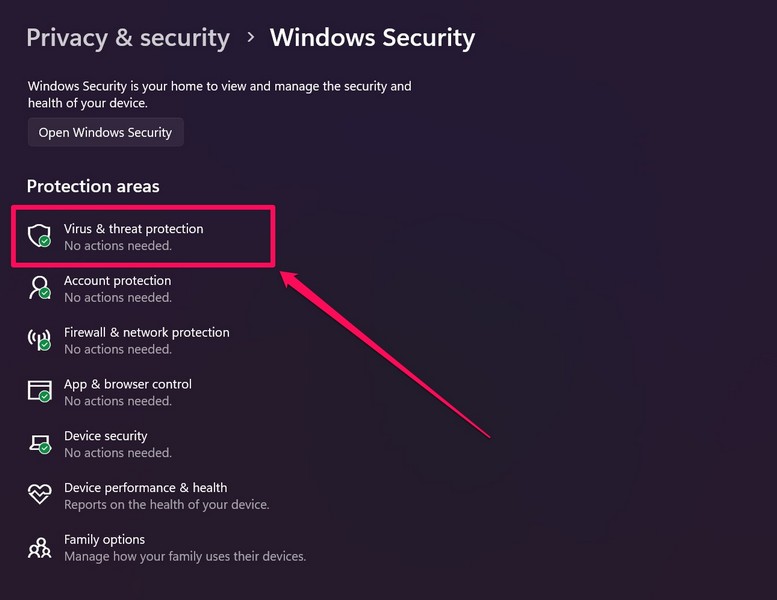
4. Then, find the Quick scan button at the bottom and click on it to start the scan.
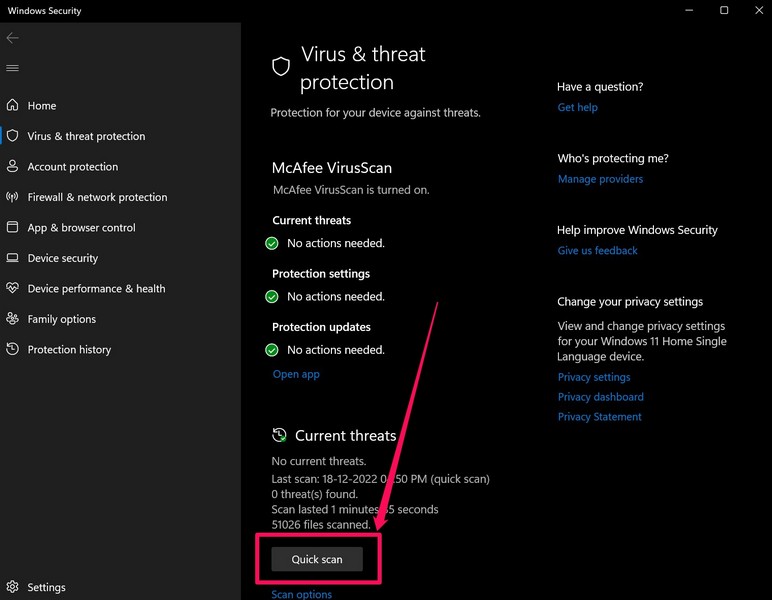
5. Wait for Windows Security to complete the scan.
Once the Windows Security tool completes the scan, it will show you the suspicious files or third-party programs that contain viruses or malware. Delete these files and/ or applications from your PC or laptop, and restart your device. Following the restart, open the Task Manager in Windows 11 to check if the issue is fixed or not.
6. Use System Maintenence in Windows 11
Now, another fix that you can try when the Task Manager stops working in Windows 11 is running the System Maintenance tool. It is essentially a native maintenance tool that runs a scan and fixes various issues in Windows 11.
Hence, there is a high chance that this will fix the Task Manager issue on your Windows 11 PC or laptop. To run the native system maintenance tool in Windows 11, follow the steps right below:
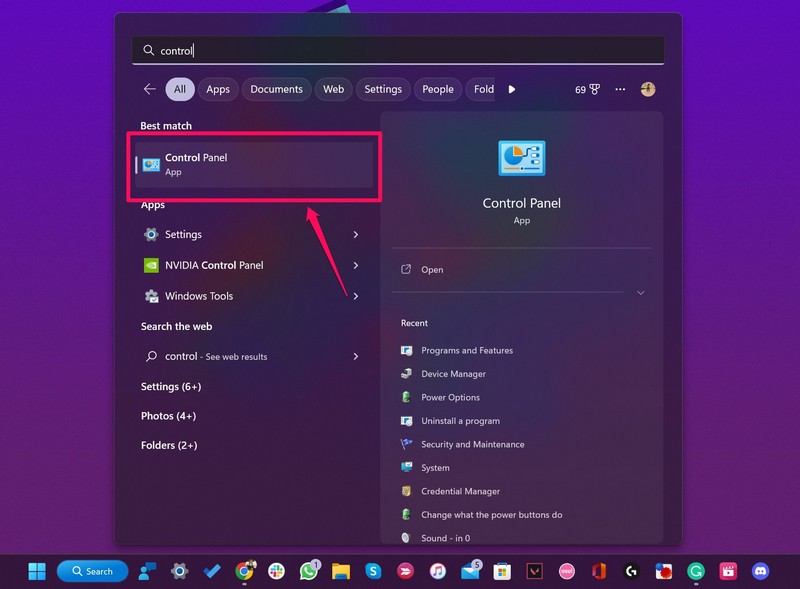
1. Use Windows search to find Control Panel and click it to open.
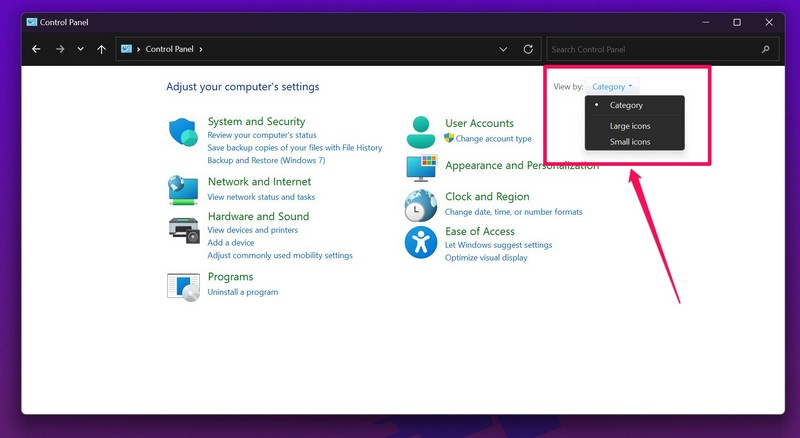
2. At the top-right, click the View by: section and change it from Category to Large/ Small icons.
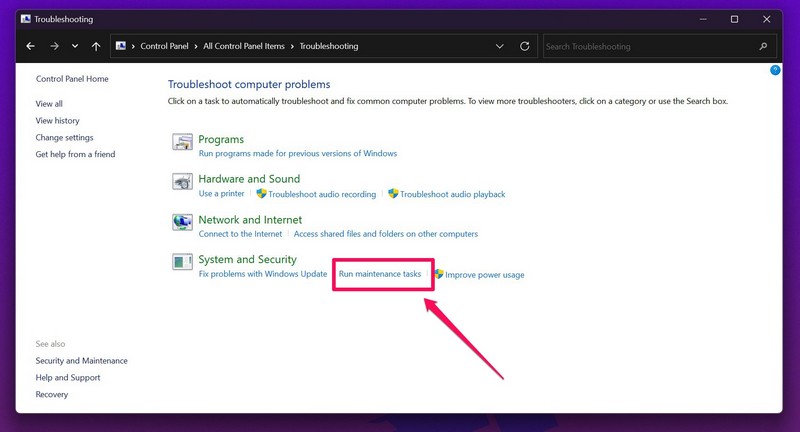
3. Now, open the Troubleshooting menu.
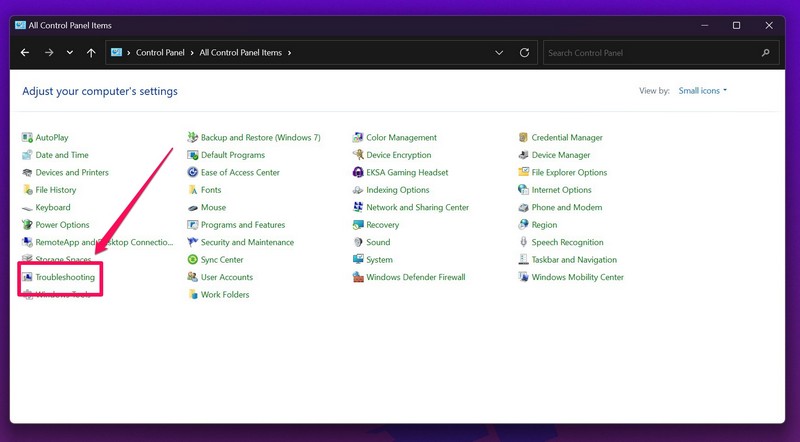
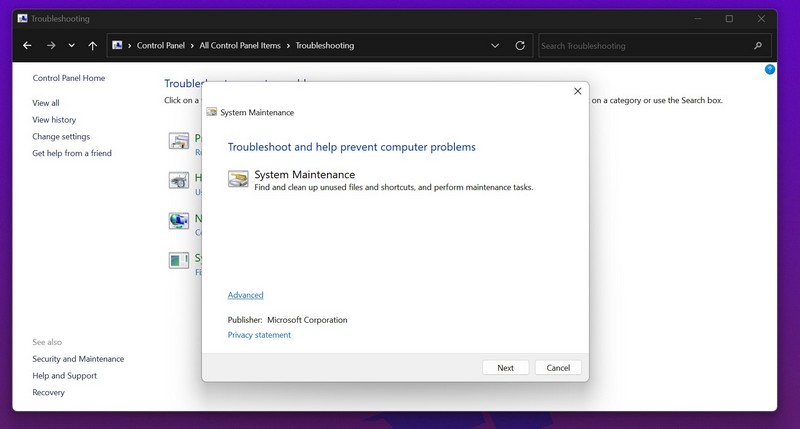
4. Then, under the System and Security section, click the Run maintenance tasks button.
5. Follow the on-screen instructions and wait for Windows to complete the maintenance tasks.
Following the completion, check whether the Task Manager not working issue in Windows 11 is fixed or not.
7. Check for Windows 11 Updates
Now, another thing that might cause issues with the Windows 11 Task Manager is a buggy Windows update. For instance, the KB5020044 Windows update contained a bug that caused UI issues in the Task Manager in Windows 11, showing unreadable content and UI sections when opened in Dark Mode.
So, if a buggy Windows update is causing the Task Manager not working in Windows 11 issue on your device, you can check for new updates via the Windows Settings app and download them to fix the issue on your PC or laptop. To do that, follow the steps right below:
1. Open the Windows Settings app on your PC or laptop.
2. Under the Windows Update section, click the Check for updates button.

3. If there are any updates available for your device, they will show up on this page.
4. Once they show up, click the Download and install button to get them right away.
5. Following completion, restart your Windows 11 PC or laptop, whether or not your device prompts to.
After restarting your device, check if the Task Manager issue is sorted in Windows 11. If a buggy Windows 11 update was preventing Task Manager to open on your Windows 11 PC or laptop, it should be fixed at this point.
Frequently Asked Questions
Why is the Task Manager not working in Windows 11?
The Task Manager not working in Windows 11 issue can be caused by many reasons, including buggy Windows updates, outdated graphics drivers, viruses/ malware, issues in system files, and others.
How to force close an app without Task Manager in Windows 11?
Force closing an app or program in Windows 11 does not always require the Task Manager. Without it, you can force close a running application by pressing Alt + F4 on your keyboard.
Is there a new Task Manager in Windows 11?
With the Windows 11 22H2 update, Microsoft rolled out a fully revamped Task Manager with a new UI, a dedicated search bar, and a new side panel to browse through different tabs.
Wrapping Up
So, these are some of the best fixes that you can try when the Task Manager stops working in Windows 11. Be sure to try out all the above solutions to get the Task Manager up and running again on your PC or laptop.
And if any of the above solutions help you to fix the Task Manager in Windows 11, do let us know about it in the comments below. You can also check out our other in-depth guides on a variety of Windows-related topics via this link.
Все способы:
- Способ 1: Использование альтернативных методов открытия
- Способ 2: Проверка ОС на наличие вирусов
- Способ 3: Редактирование локальной групповой политики
- Способ 4: Удаление параметра в реестре
- Способ 5: Удаление параметра через «Командную строку»
- Способ 6: Проверка целостности системных файлов
- Способ 7: Сброс Windows 11 до заводских настроек
- Вопросы и ответы: 2
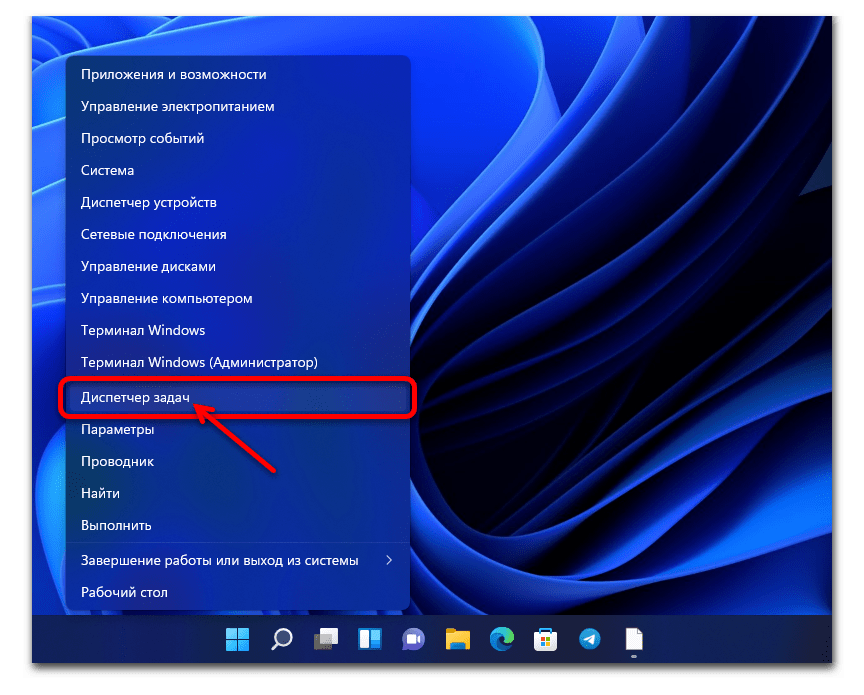
Способ 1: Использование альтернативных методов открытия
Иногда проблемы с открытием «Диспетчера задач» в Windows 11 касаются исключительно одного из методов перехода к приложению. Перед переходом к решениям исправления ситуации мы советуем проверить альтернативные методы запуска. Их существует довольно много, поэтому вы можете выбрать совершенно любой, который ранее не использовали. Поможет разобраться в этом другой материал на нашем сайте, доступный по следующей ссылке.
Подробнее: Вызов «Диспетчера задач» в Windows 11
Способ 2: Проверка ОС на наличие вирусов
Одна из распространенных причин рассматриваемой проблемы — блокировка приложения вирусами. Некоторые вредоносные программы специально не дают зайти в «Диспетчер задач», чтобы их нельзя было обнаружить, или же комплексно блокируют доступ к системным файлам, ограничивая права или даже стирая их с компьютера. Мы советуем в первую очередь проверить ПК на наличие вирусов одним из доступных средств.
Подробнее: Борьба с компьютерными вирусами
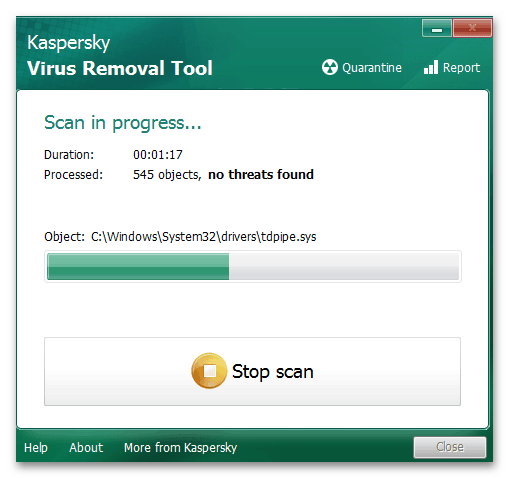
Если вирусы были найдены, поместите их в карантин или удалите. После этого приступайте к проверке запуска «Диспетчера задач». В случае сохранения проблемы понадобится рассмотреть следующие методы. Особенное внимание обратите на восстановление системных файлов, поскольку существует вероятность того, что вирус, которым был заражен ваш ПК, стер необходимые для запуска системные элементы.
Способ 3: Редактирование локальной групповой политики
Доступ к редактору локальной групповой политики есть у обладателей Windows 11 Pro и Enterprise. Если у вас установлена Home, понадобится перейти к следующему методу, чтобы выполнить примерно те же самые действия, но уже путем редактирования реестра. При наличии «Редактора локальной групповой политики» можно проверить параметр, который блокирует запуск «Диспетчера задач», и изменить его значение, если это будет нужно.
- Откройте утилиту «Выполнить», используя для этого сочетание клавиш Win + R. Введите команду
gpedit.mscи нажмите Enter для подтверждения. - В новом окне разверните раздел «Конфигурация пользователя» и выберите каталог с названием «Административные шаблоны».
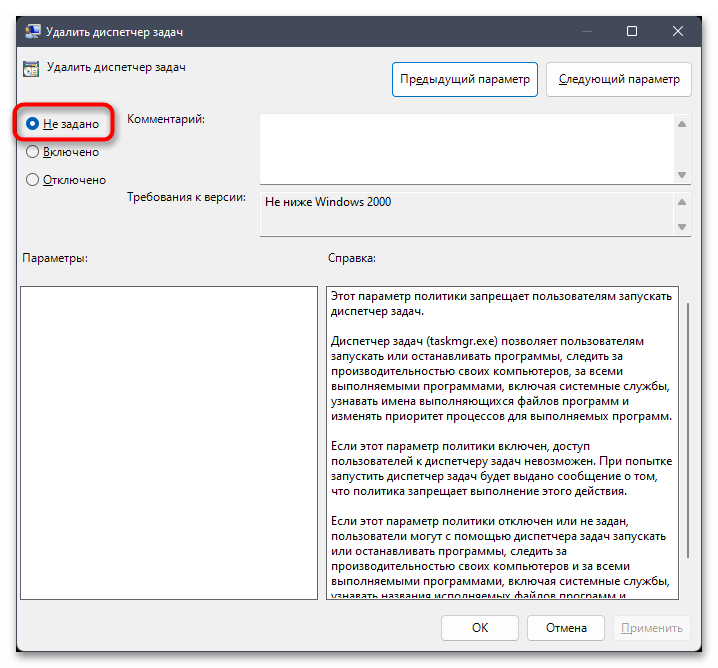
- В нем перейдите в «Система» и выделите путем нажатия левой кнопкой мыши папку «Варианты действий после нажатия CTRL + ALT + DEL». Найдите параметр «Удалить диспетчер задач» и дважды кликните по нему ЛКМ, чтобы открыть для редактирования.
- Установите значение «Не задано», поместив маркер в соответствующее положение. Примените изменения и перезагрузите компьютер, чтобы настройки вступили в силу. После этого приступайте к проверке запуска «Диспетчера задач».


Способ 4: Удаление параметра в реестре
За блокировку запуска «Диспетчера задач» отвечает параметр реестра, который может присутствовать в вашей операционной системе. Понадобится отыскать его вручную и удалить, если параметр существует и действительно оказывает влияние на работу классического приложения. Выполните следующие простые шаги, чтобы разобраться с этим методом.
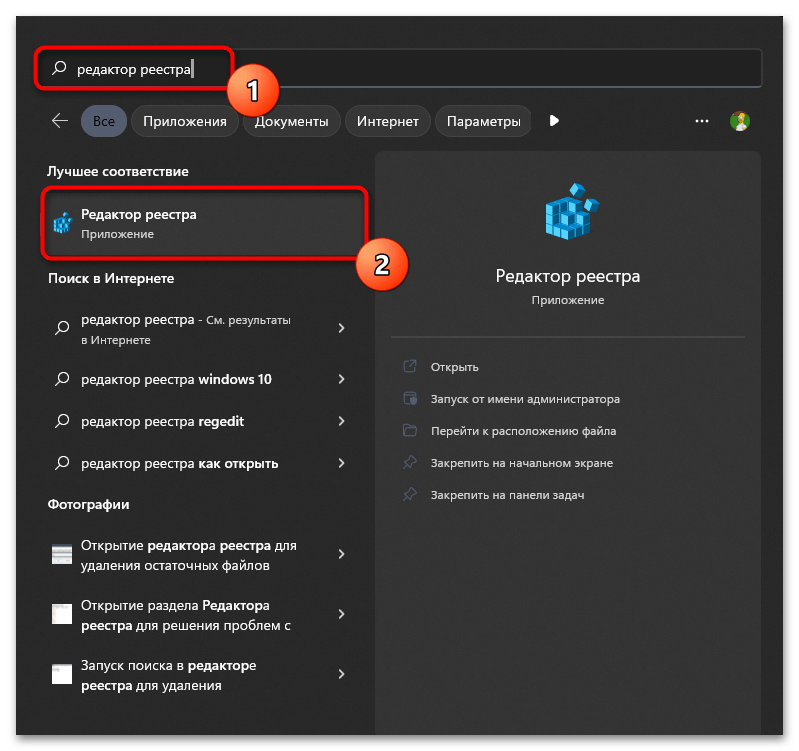
- Откройте «Пуск», через поиск отыщите «Редактор реестра» и запустите приложение.
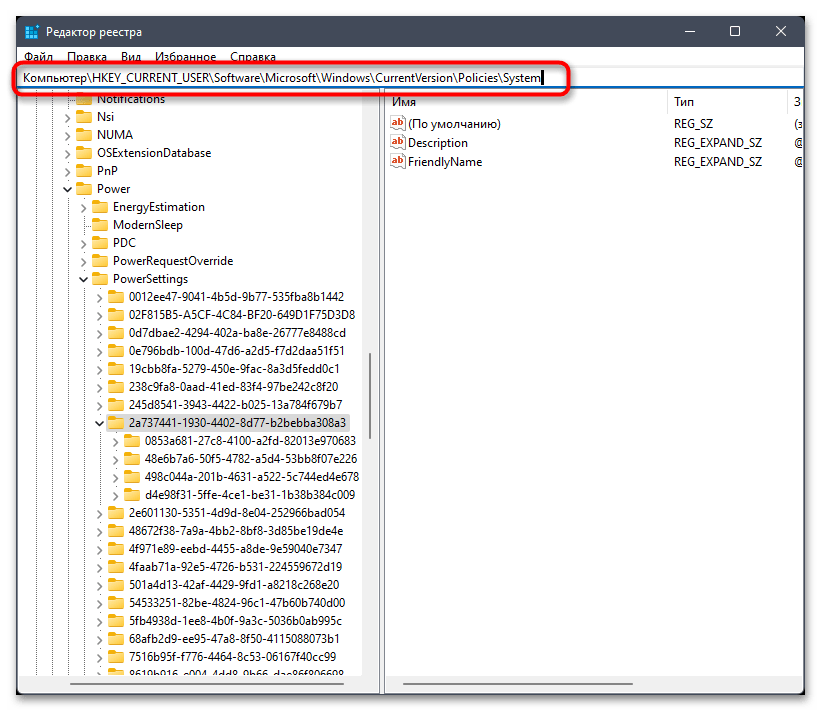
- В нем перейдите по пути
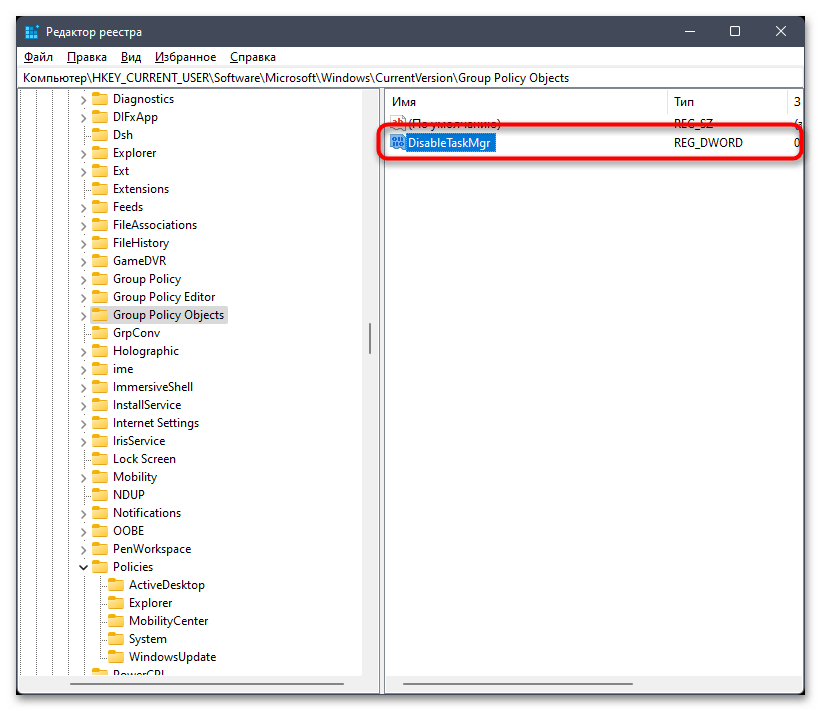
Компьютер\HKEY_CURRENT_USER\Software\Microsoft\Windows\CurrentVersion\Policies\System. - В конечной папке найдите параметр «DisableTaskMgr» и щелкните по нему правой кнопкой мыши для вызова контекстного меню.
- Из него выберите пункт «Удалить» и подтвердите удаление. Обязательно перезагрузите ПК и только после этого приступайте к тестированию решения.

Способ 5: Удаление параметра через «Командную строку»
Следующий вариант решения возникшей проблемы — удаление того же самого параметра, мешающего запуску «Диспетчера задач», но уже через «Командную строку» с повышенными привилегиями. Это позволит избавиться от ошибок, связанных с ограниченными правами доступа, и освободит пользователя от надобности обращаться к «Редактору реестра», если с этим возникают трудности.
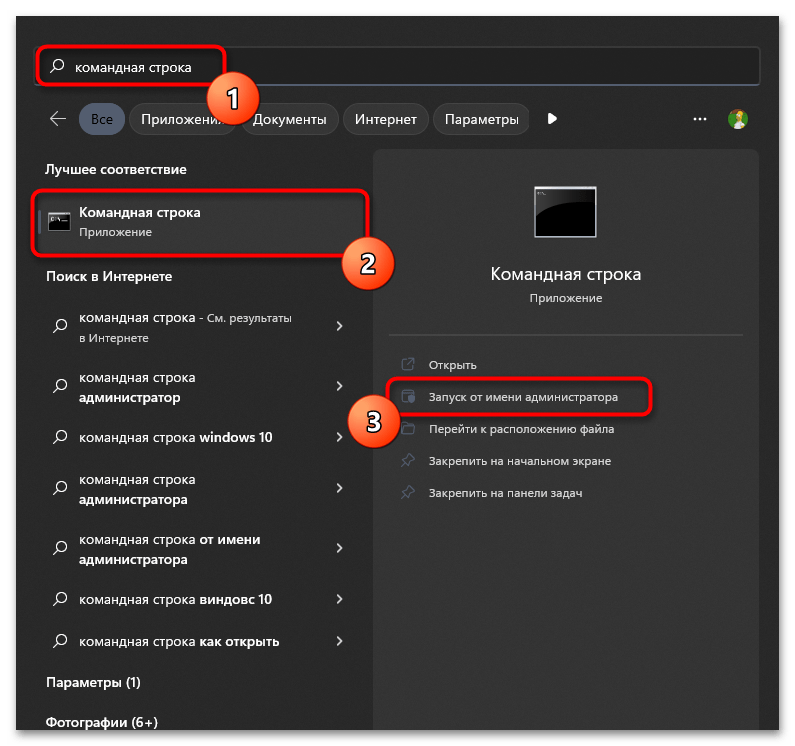
- Отыщите «Командную строку» через поиск в «Пуске» и обязательно запустите консоль от имени администратора.
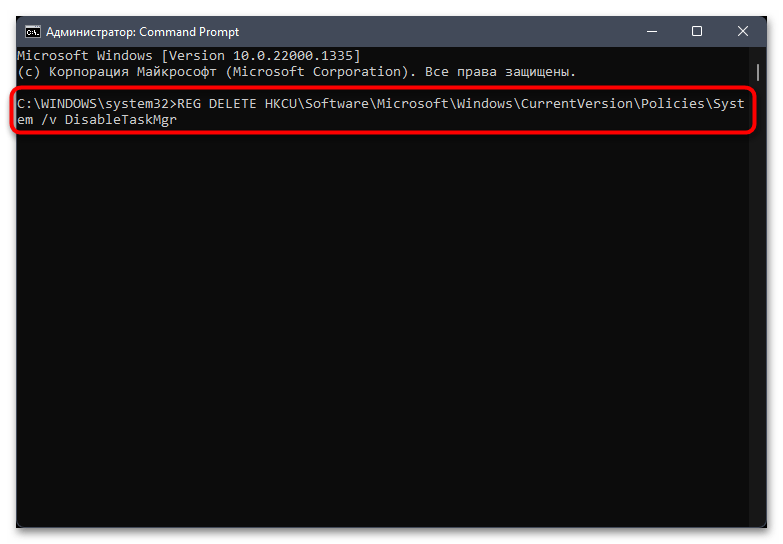
- Введите команду
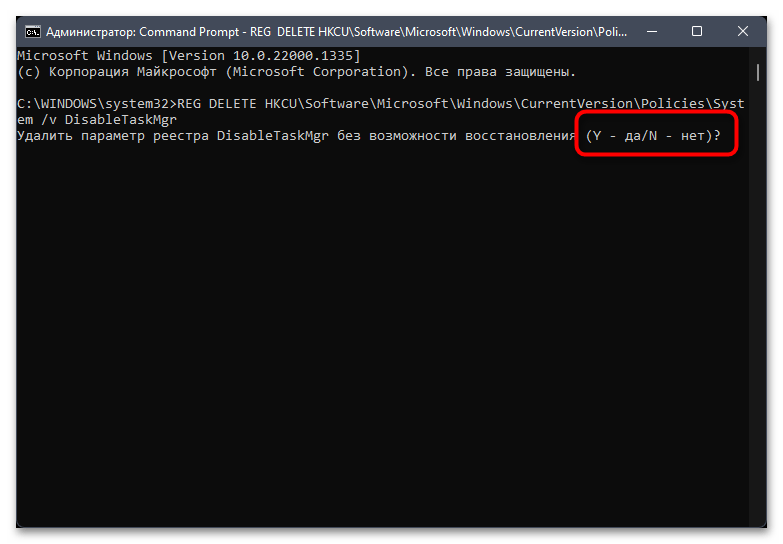
REG DELETE HKCU\Software\Microsoft\Windows\CurrentVersion\Policies\System /v DisableTaskMgrи нажмите Enter для ее применения. - На экране появится вопрос о безвозвратном удалении параметра. Вам необходимо ответить Y, чтобы подтвердить очистку.
- Если на экране появилось сообщение о том, что указанный раздел или параметр не найден, значит, он отсутствует и какие-либо действия в плане системных настроек не требуются. В случае успешного удаления вы получите соответствующее уведомление и сможете отправить ОС на перезагрузку.

Способ 6: Проверка целостности системных файлов
Теперь рассмотрим метод, который актуален в ситуациях, когда вам не удалось найти блокирующий параметр в редакторе групповых политик или в реестре. В таких случаях есть основания полагать, что «Диспетчер задач» не запускается в Виндовс 11 по причине нарушения целостности определенных системных файлов или их отсутствия. Понадобится использовать встроенные консольные утилиты для запуска проверки. Они же и вносят исправления при нахождении ошибок. Развернутую информацию по этой теме вы получите в статье по следующей ссылке.
Подробнее: Использование и восстановление проверки целостности системных файлов в Windows
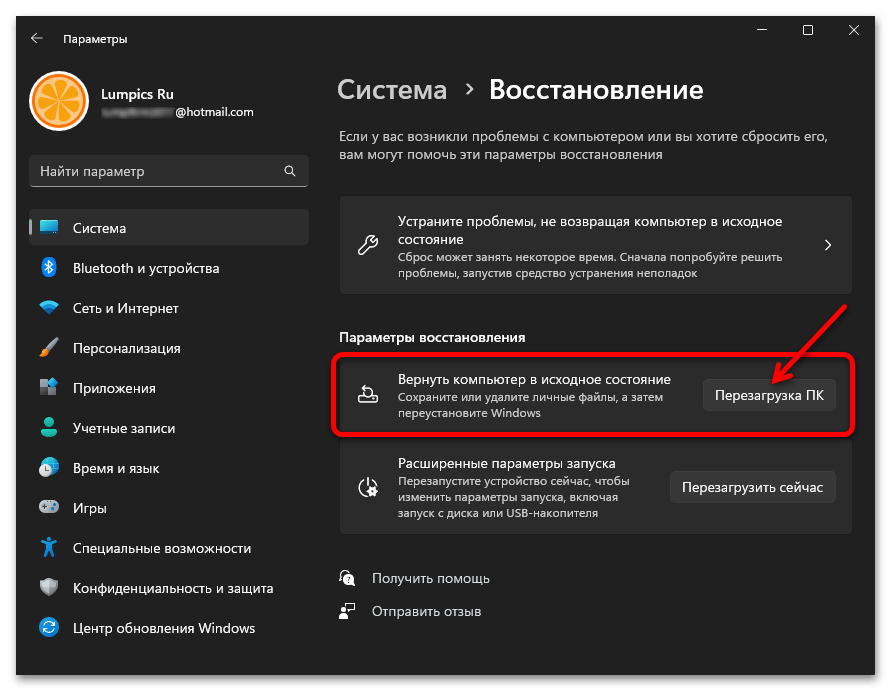
Способ 7: Сброс Windows 11 до заводских настроек
Самый радикальный вариант, к которому стоит прибегать только в том случае, если ничего из перечисленного выше не помогло, заключается в сбросе Windows 11 до заводских настроек. При этом вы можете самостоятельно решить, сохранять ли пользовательские файлы. Такой метод позволяет восстановить работу системных компонентов, выполняя их повторную установку. О том, как самостоятельно выполнить откат, читайте в статье, нажав по заголовку ниже.
Подробнее: Сброс Windows 11 к заводским настройкам
Наша группа в TelegramПолезные советы и помощь
Как пишет портал XDA, Microsoft выпустила крупный апдейт 24H2, который, однако, привел к множеству ошибок. Потом разработчики представили дополнительное обновление KB5044384, оно должно было устранить проблемы, но вместо этого вызвало новые неполадки. Одна из них — неправильное отображение количества запущенных приложений в «Диспетчере задач».
Так, на странице процессов число приложений стало равняться нулю. Эта ошибка появляется в том случае, если пользователь включил функцию «Группировать по типу».
На данный момент исправления этой проблемы Microsoft не выпустила, поэтому эксперты советуют удалить апдейт KB5044384.
Ранее сообщалось, что Android 15 превращает смартфоны Google Pixel 6 в кирпичи.
Пользователи Windows 11 столкнулись с неработающим «Диспетчером задач» после обновления. На это обратило внимание издание XDA.
Авторы медиа отметили, что крупное обновление 24H2 принесло в Windows 11 множество ошибок. В Microsoft выпустили дополнительное обновление KB5044384 для исправления проблем, однако с ним в ОС появилось несколько новых неполадок. Так, некоторые пользователи рассказали, что у них перестал корректно работать «Диспетчер задач».
В том числе «Диспетчер задач» стал неправильно показывать количество запущенных приложений. «Вместо отображения фактического числа на странице процессов неправильно показывается значение 0», — заметили специалисты. Авторы заявили, что поломка проявляется, если в «Диспетчере задач» включить отображение «Группировать по типу».
В материале говорится, что ошибка может ввести владельцев компьютеров в заблуждение относительно количества приложений, запущенных на ПК. Пока Microsoft не выпустит исправляющее обновление, пользователям рекомендовали удалить апдейт KB5044384.
В конце октября компания Microsoft заблокировала обновление Windows 11 24H2 для многих пользователей из-за определенных проблем. До той поры, пока создатели Windows и инженеры других компаний не устранят неполадки, апдейт будет недоступен.