
Все способы:
- Способ 1: Запуск cmd с правами администратора
- Способ 2: Проверка написания
- Способ 3: Установка обновления
- Способ 4: Восстановление DISM
- Вопросы и ответы: 1
Способ 1: Запуск cmd с правами администратора
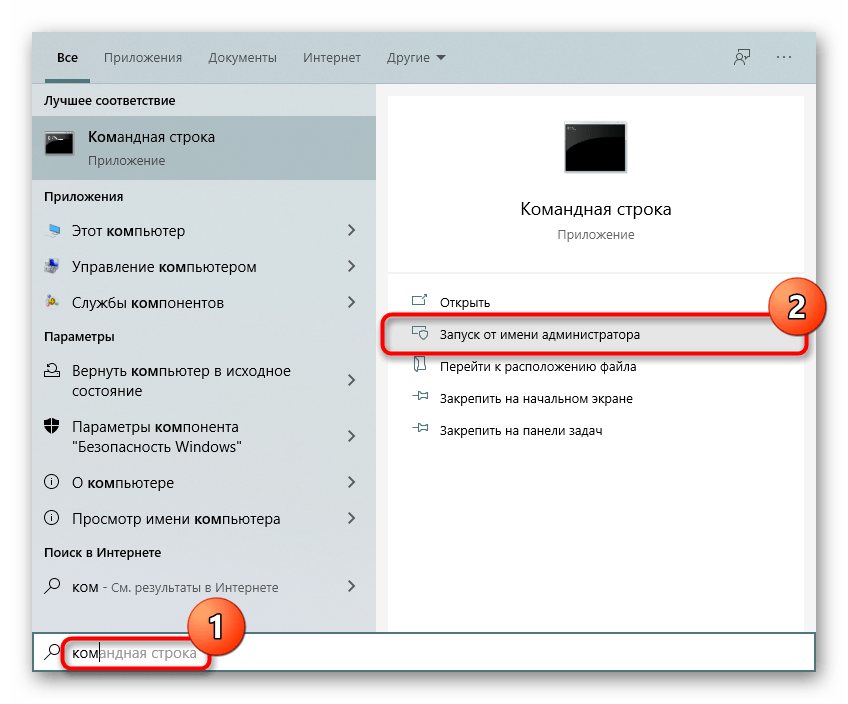
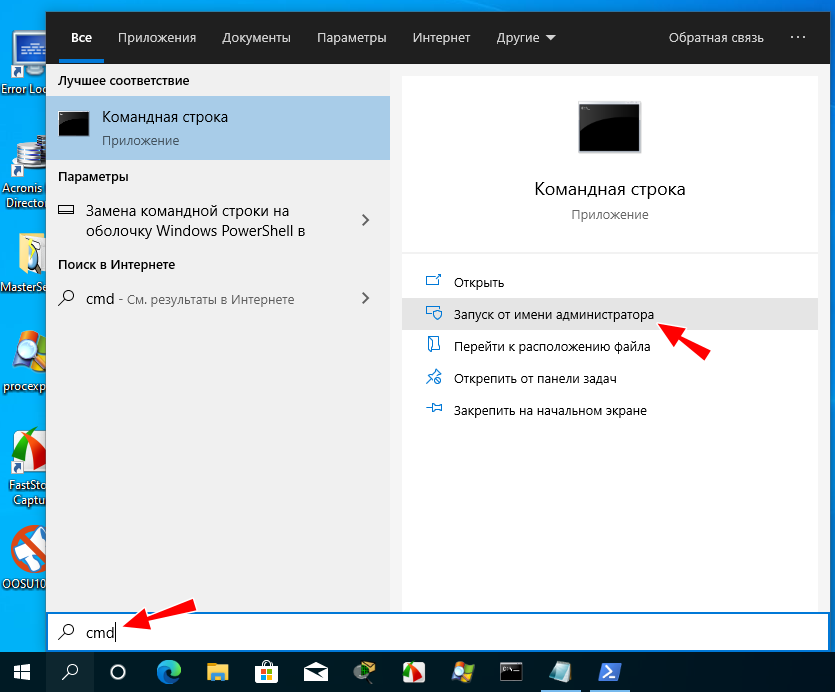
Нередко ошибку удается исправить, просто запустив «Командную строку» с администраторскими полномочиями. Для этого найдите приложение через «Пуск», кликните по нему правой кнопкой мыши и выберите пункт «Запуск от имени администратора».
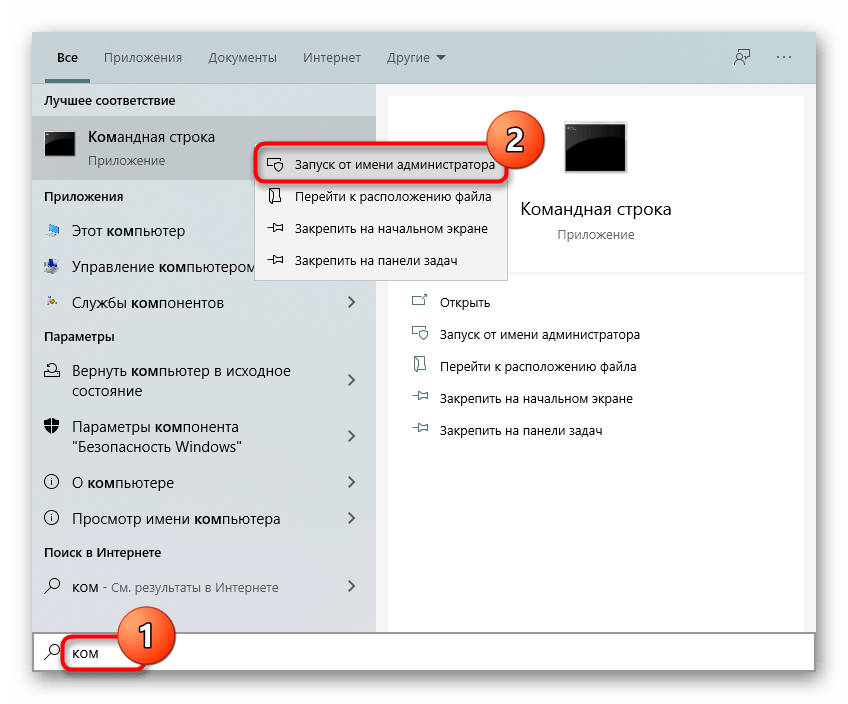
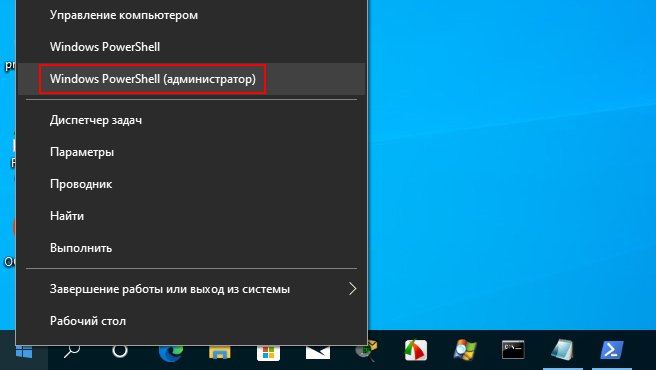
В «десятке» это можно сделать и через расширенное меню «Пуска».
Впишите команду еще раз.
Способ 2: Проверка написания
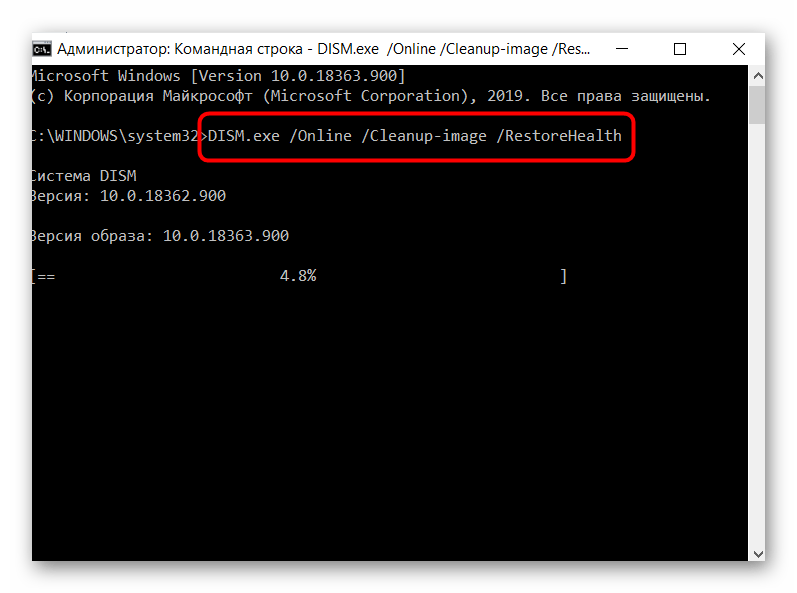
Часто пользователи не придают значения правильному написанию команды. В результате, даже если там нет ошибок, отсутствие, например, пробелов или косых черточек уже не позволит выполнить команду. Проверьте правильность ее написания, при необходимости скопируйте строчку ниже и вставьте в консоль клавишами Ctrl + V:
DISM.exe /Online /Cleanup-image /RestoreHealth
Способ 3: Установка обновления
В Windows 7, где действие команд DISM.exe /Online /Cleanup-image /ScanHealth и DISM.exe /Online /Cleanup-image /RestoreHealth объединено в одну (в первую), устранить ошибку 87 можно установкой обновления, без которого обе команды не работают в принципе. Скачивается пакет с официального сайта Microsoft по ссылке ниже.
Скачать KB2966583 с официального сайта Microsoft
- Выберите установленную на вашем ПК операционную систему и нажмите кнопку «Загрузите пакет».
- Укажите подходящий язык и кликните «Download».
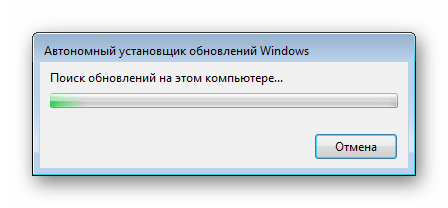
- Скачанный пакет запустите и дождитесь завершения проверки.
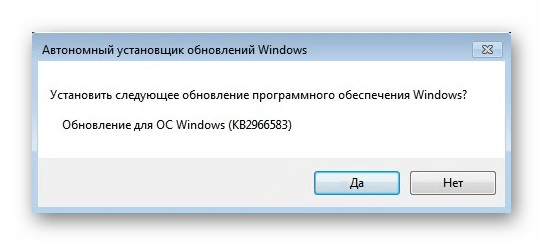
- В ответ на вопрос об установке нажмите «Да».
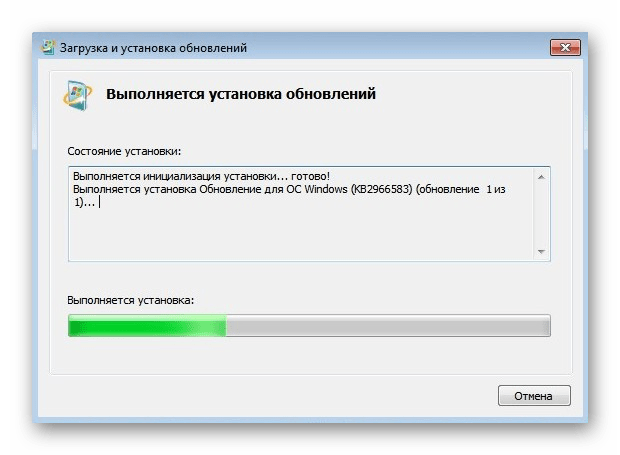
- Начнется инсталляция, которая не займет много времени.
- Закройте установочное окно.


Попробуйте снова запустить команду в консоли.
Способ 4: Восстановление DISM
Вероятно, если DISM был критически поврежден в результате действий пользователя, внутренних ошибок, использования «кривой» сборки Windows, есть смысл восстановить его работоспособность. Сделать это не очень просто, и может потребоваться создание загрузочной флешки. Более подробно этот процесс в Windows и в среде восстановления был рассмотрен в статье по следующей ссылке.
Подробнее: Использование и восстановление проверки целостности системных файлов в Windows
При использовании любительской сборки советуем перейти на чистую, а еще лучше лицензионную версию.
Наша группа в TelegramПолезные советы и помощь
Используя DISM в командной строке для проверки хранилища компонентов Windows или других целей, некоторые пользователи могут столкнуться с ошибкой 87: «Неизвестный параметр» или «Параметр не распознан в этом контексте».
В этой инструкции подробно о причинах ошибки 87 в командной строке при использовании DISM в Windows 11, Windows 10 и 7 и о возможных способах её исправления.
Проверьте правильность ввода команды DISM и набор известных параметров
Самая распространенная причина ошибки 87, особенно если речь идёт не о старых ОС, а о Windows 11 и Windows 10 — синтаксические ошибки при вводе команды, либо особенности списка поддерживаемых параметров.

Чаще всего это бывают следующие варианты ошибок:
- Отсутствие пробелов перед знаком «/» в указанных параметрах команды DISM.
- Неправильный порядок указания параметров (например, если изменить порядок параметров checkhealth или scanhealth и cleanup-image, вы получите указанную ошибку).
- Также русскоязычные пользователи, случается, путают латинские буквы C и S, U и Y.
- В некоторых случаях при вводе команд пользователь не учитывает, что список поддерживаемых параметров DISM отличается, в зависимости от того, запущена ли командная строка в работающей системе или в среде восстановления (или с загрузочной флешки). Более подробно на эту тему в инструкции, где рассмотрена именно такая ситуация: Неизвестный параметр Cleanup-Image при использовании DISM — причины и варианты решения.
Даже если вы копируете команду с какого-то сайта, следует учитывать, что ошибки могут быть и там — опечатки, копирование кода с ошибками, никто от этого не застрахован.
Версия DISM
Версии DISM и набор поддерживаемых команд отличаются. Не все команды, которые работают в DISM из Windows 11/10 будут работать в Windows 7 и 8.1. К примеру, если в современной ОС с DISM 10-й версии использовать команду
DISM /online /cleanup-image /checkhealth
она будет исправно работать, равно как и аналогичная по действию
DISM /online /cleanup-image /scanhealth
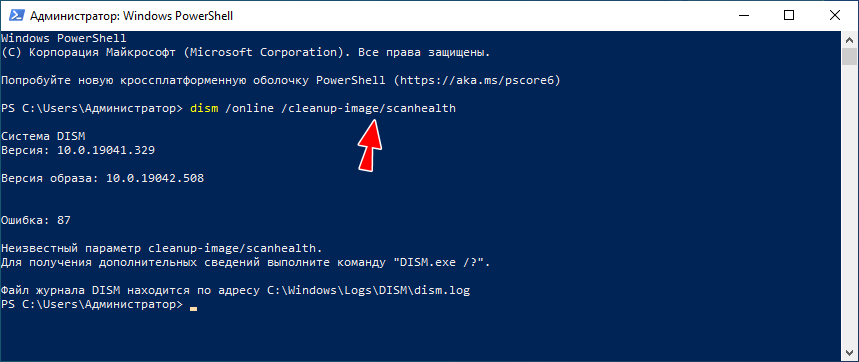
Если ту же команду (первую в списке) ввести в Windows 7, с DISM версии 6.1, результатом будет ошибка 87:

Возможные варианты решения:
- Не использовать неподдерживаемые команды, если они не критичны для получения нужного результата.
- Установить последнюю версию DISM, это можно сделать даже в старой версии системы, что будет рассмотрено далее.
Установка последней версии DISM в Windows старых версий
При необходимости использовать последнюю версию DISM в предыдущей версии Windows, вы можете скачать и установить Windows ADK (Комплект средств для развертывания и оценки Windows) нужной версии (например, мы можем установить ADK для Windows 10 в Windows 7) и выбрать пункт «средства развертывания» при установке:

Установщики последних версий Windows ADK доступны на официальной странице https://learn.microsoft.com/en-us/windows-hardware/get-started/adk-install при этом следует учитывать:
- Для установки последних версий требуется наличие .NET Framework 5 на компьютере.
- Это онлайн-установщики и загрузка необходимых компонентов из РФ без VPN не работает.
- Новая версия DISM не заменяет имеющуюся, а устанавливается отдельно, по умолчанию — в папке
C:\Program Files (x86)\Windows Kits\10\Assessment and Deployment Kit\Deployment Tools\amd64\DISM
и потребуется запускать её из этого расположения, либо добавлять в переменные среды.
Если ошибка сохраняется, можно учесть следующие нюансы и попробовать некоторые дополнительные варианты действий:
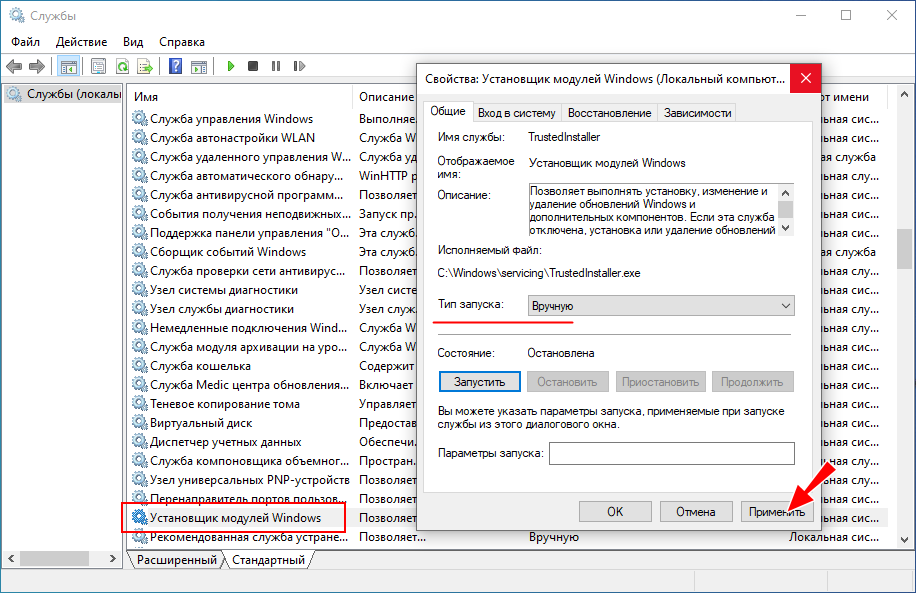
- Для работы некоторых параметров DISM, например, /spsuperseded требуется, чтобы служба «Установщик модулей Windows» была включена. Включить службу можно в Win+R — services.msc. Находим «Установщик модулей Windows» в списке, дважды нажимаем по службе и устанавливаем тип запуска «Вручную» — значение по умолчанию для этой службы.
- Выполнить проверку целостности системных файлов с помощью команды sfc /scannow
- Если ранее ошибка не возникала, попробовать использовать точки восстановления системы.
- Если есть обновления Windows — попробуйте установить их, однажды в очередном обновлении Windows 10 ошибка 87 была вызвана проблемами в самом обновлении и уже в следующем она была исправлена.
Если проблема сохраняется, опишите в комментариях, при каких обстоятельствах она возникает, а также укажите версию Windows, DISM (отображается после запуска команды), какую именно команду вы пробуете ввести — я постараюсь помочь.
Many error codes, such as 0x800f0954, 0x800f0950, 0x8024402c, etc., indicate the same problem – DISM failed on your computer. How desperate it is to see such an error message! But the good news is that there are several effective ways for you to troubleshoot the DISM errors.
If you search the internet, you’ll find numerous people care about this topic – DISM failed. This is a common error that can appear on any version of Windows system. So, what does this DISM error mean? How it will affect you? Can you fix it when DISM is not working? All these issues will be covered in this MiniTool post.
What Is DISM
DISM is the acronym for Deployment Image Servicing and Management; it is actually a command-line tool built into every Windows system. DISM is mainly used for mounting and servicing the Windows images (including the ones used for Windows Recovery Environment, Windows PE, and Windows Setup) before deployment. To put it simply, DISM is a basic Windows utility designed for network administrators to finish tasks like system image preparation, modification, and repair, when necessary.
What Does DISM Do
DISM can be used to fix some common problems. DISM command can be used to check and fix Windows system files and Windows images and corruption of the Windows image Component Store. Here gives some functions that DISM can make.
- Mount and get information about the Windows image (.wim) files or virtual hard disk (.vhd/.vhdx) files.
- Capture, split, or manage .wim files.
- Install, uninstall, configure, and update things like drivers, Windows features, packages, and international settings (in a .wim file or .vhd/.vhdx).
- Service a running operating system with the subsets of the DISM commands.
- Take the place of deployment tools, such as ImageX, PEimg, and Package Manager.
For more functions of DISM, please read this article: Repair Windows 10 Image with DISM and Other Useful Tips for DISM.
DISM Not Working & Failure
People are complaining on the internet that the DISM won’t run. When you try to repair the Windows image on Windows 10 by running “DISM /Online /Cleanup-Image /RestoreHealth” in the Command Prompt window, you may find the DISM not work. The DISM error 1910 “The object exporter specified was not found” could appear on your screen.
Some users said both the sfc /scannow and Dism /Online /Cleanup-image /RestoreHealth commands failed and they received 0x80240021 Failure DISM. See what you can do if DISM /Online /Cleanup-image /Restorehealth is stuck.
You can read the content below to find more methods to troubleshoot the issue.
How to Fix When DISM Failed
Some common error messages of DISM error:
- DISM failed no operation was performed: in the cases mentioned above, both users said their DISM failed and no operation was performed. You’re indeed able to fix this by using Windows 10 ISO file.
- DISM failed 0x8000ffff, 0x800f0954, 0x800f0950, 0x800f0907, 0x800f081f (The source files could not be found. Use the “Source” option to specify the location of the files that are required to restore the feature.): if you see error codes like this, you should use the install.wim file to start a DISM scan (after copying it from your Windows 10 ISO).
- DISM failure when attempting to copy boot files: some users said they have solved this error by cleaning up the system image components. You should try.
- DISM.exe failed validating command line, to load wim manager: if you are in the face of such problems, you should try to fix it by restarting the Windows update components, as many people said this method is helpful.
- Error Codes 2, 3, 11, 50, 87, 112, 1393, 1726, 1910, and so on.
- DISM failed while processing the command cleanup-image, add-package.
- DISM failed to load the provider, unload offline registry, flush file buffers, set the windows directory, mount the image.
- More waiting for you to discover…
# 1. Disable or Uninstall Antivirus or Security Programs
The antivirus software you have installed on your computer may cause a lot of problems such as compatibility issues, file loss, and the DISM error. The antivirus software of the security program is able to interfere with your system and intervene in any critical operation.
Therefore, if the DISM failed, I advise you to disable all the antivirus/security programs or uninstall them temporarily, and then repeat the DISM scan to see whether it works.
If this has helped to solve the DISM not working problem, you’d better consider changing the antivirus software or disabling the security features.
# 2. Disable Proxy on Your PC
Many users use proxy to protect their privacy from the public, but sometimes the proxy may interfere with system operation or lead to other problems. When you get the DISM error message, you can disable the proxy and then relaunch DISM to see if it works well.
Step 1: Press Win + I to open Settings.
Step 2: Choose Network & Internet.
Step 3: Shift to the Proxy option in the left pane.
Step 4: Turn off all the options in the right panel.
# 3. Run the Windows Update Troubleshooter
DISM errors can be caused by Windows Update in some cases. You can try this method when meet this problem.
Step 1: Press Win + I on the keyboard to open Settings.
Step 2: Choose Update & Security.
Step 3: Shift to the Troubleshoot option in the left pane.
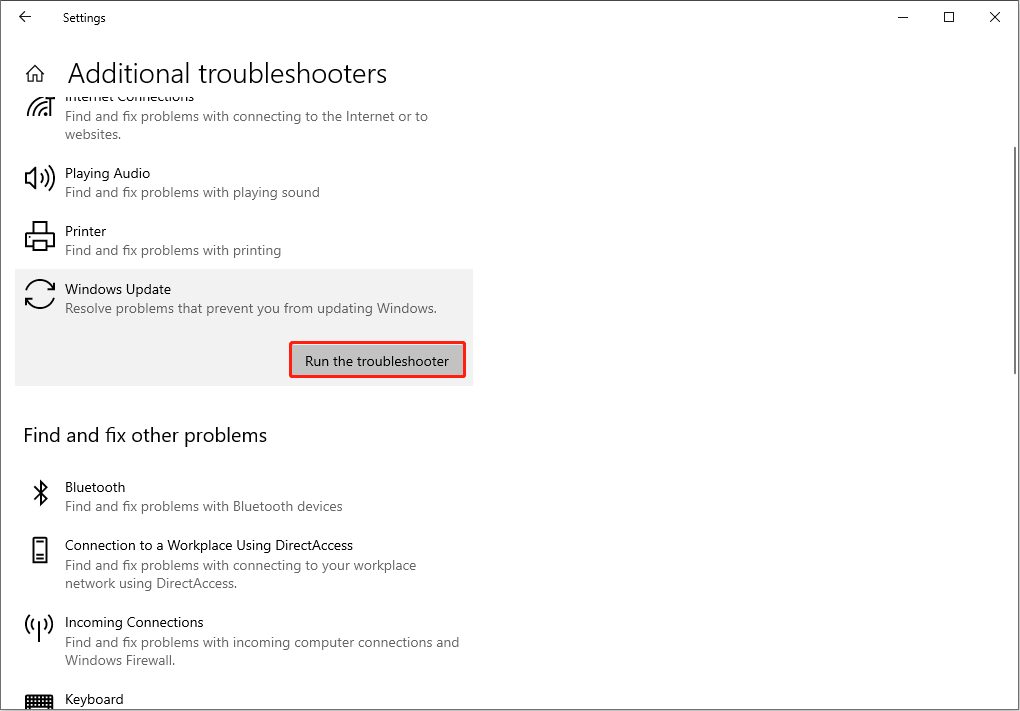
Step 4: Click Additional troubleshooters and then select Windows Update.
Step 5: Click on the Run the troubleshooter button.
Step 6: Follow the on-screen instructions to complete the rest process.
# 4. Run DISM Command in Clean Boot
This method works for cases where the DISM failed due to service conflict.
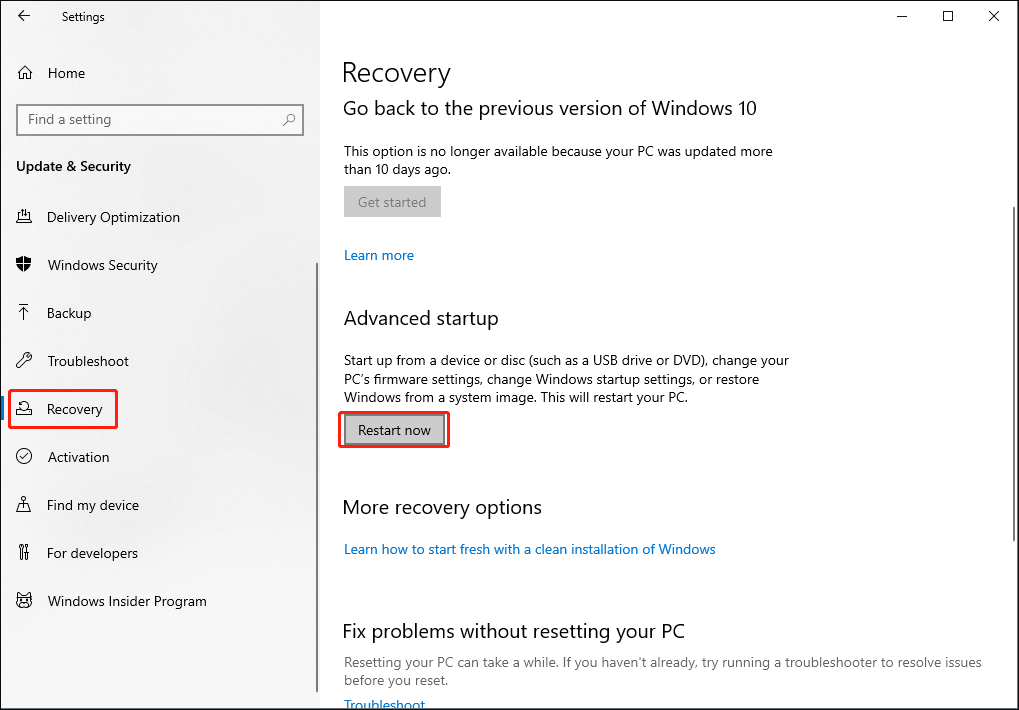
Step 1: Press Win + I to open Settings.
Step 2: Scroll down to the bottom and select Update & Security.
Step 3: Shift to the Recovery option in the left pane.
Step 4: Look for the Advanced startup section in the right pane. Then, click Restart now under it.
Step 5: Select Troubleshoot in the Choose an option window.
Step 6: Choose Advanced options, and then click Command Prompt.
Step 7: Choose your account to continue.
Step 8: Run the DISM command (for instance, DISM /Online /Cleanup-Image /CheckHealth) and see if it works or not.

# 5. Specify/Tweak Install.wim File
If you get an error message like “Can’t find the source files”, the most possible cause is the install.wim file’s wrong location or setting. You can follow the next steps to fix this issue.
Warning:
The DISM command is case-sensitive; you must confirm that your spell every word correctly before executing the command.
Case 1: Correct location of install.wim file:
1: Get the bootable disk or at least a Windows 10 ISO file. If you’re using an ISO file, please use it to create a bootable drive and remember its drive letter.
2: Press Win+ R and type cmd.
3: Press Shift + Ctrl + Enter to run as administrator.
4: Type this command into the Command Prompt window:
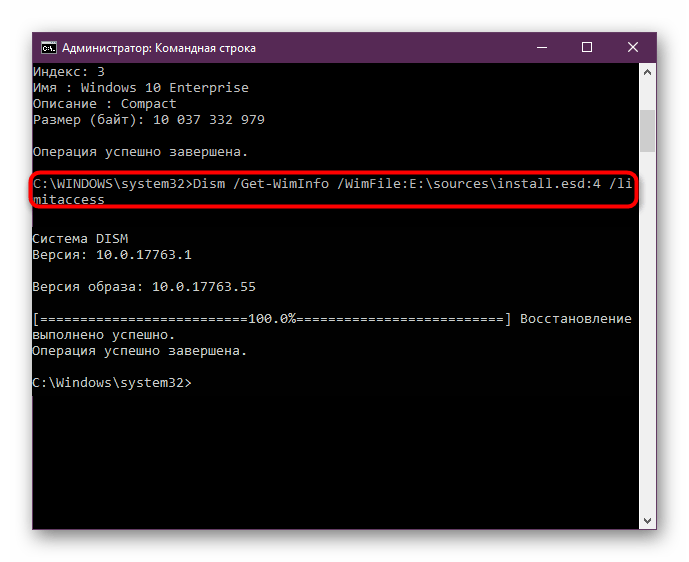
DISM /Online /Cleanup-Image /RestoreHealth /source:WIM:X:\Sources\Install.wim:1 /LimitAccess (* Please replace X with the drive letter).
5: Hit Enter on the keyboard and wait for the command to complete.
Case 2: Copy install.wim (from the bootable disk to local disk C:):
1: Insert the bootable disk into your computer or mount the ISO file.
2: Locate the install.wim file and then copy it to a local disk.
3: Paste the file to the local disk C: (here take drive C: as an example).
4: Run Command Prompt as administrator and type DISM /Online /Cleanup-Image /RestoreHealth /source:WIM:C:\Install.wim:1 /LimitAccess (C refers to the location where you paste the file).
5: Then, press Enter and wait for the command to finish.
Case 3: Uncheck Install.wim Read-Only
Some cases prove that the DISM error is caused by the Read-Only setting. You can change it with the following steps.
1: Right-click on the install.wim file and choose Properties on the context menu.
2: Switch to the General tab and uncheck the Read-Only option.
3: Click on the Apply button and OK button to confirm.
4: Now, run the DISM command by specifying the source again.
# 6. Clean up System Image Components
Step 1: Press Win + R and type cmd in the search bar.
Step 2: Click Shift + Ctrl + Enter simultaneously to run Command Prompt as administrator.
Step 3: Copy the command: Dism.exe /online /Cleanup-Image /StartComponentCleanup in the Command Prompt.
Step 3: Press Enter on the keyboard and wait for the command to finish.
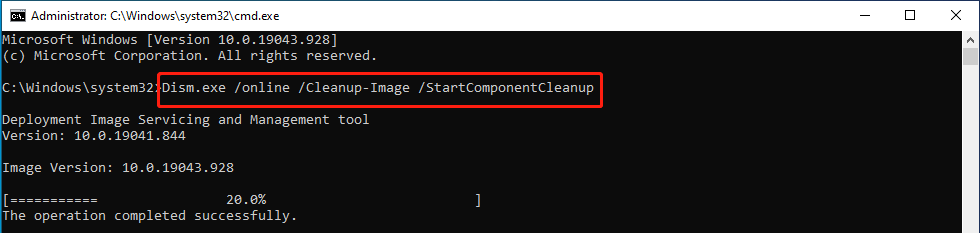
Step 4: Restart your computer and try to perform the DISM scan again.
If this command failed, you can take your chances with the following commands:
- DISM /Online /Cleanup-Image /StartComponentCleanup
- DISM /Online /Cleanup-Image /AnalyzeComponentStore
- DISM.exe /online /Cleanup-Image /StartComponentCleanup /ResetBase
# 7. Reset Windows Update Service
DISM error, like no operation was performed error, is related to Windows Update Service. When it begins to update but the service doesn’t support and disturbs the normal operation of the system, a DISM error occurs. Therefore, you can try to reset Windows Update Service to fix the issue.
Step 1: Type Command Prompt in the search bar from the Start menu.
Step 2: Select Run as administrator at the right panel.
Step 3: Type net stop wuauserv and hit Enter.
Step 4: Wait for the command to complete.
Step 5: Repeat steps 3 and step 4 to run these commands in order:
- cd %systemroot%SoftwareDistribution
- ren Download Download.old
- net start wuauserv
- net stop bits
- net start bits
- net stop cryptsvc
- cd %systemroot%system32
- ren catroot2 catroot2old
- net start cryptsvc.
Step 6: Restart your computer.
Recover Lost/Deleted Data on Windows
Although DISM errors are seldom caused by hardware issues, we can’t rule them out completely. Thus, it is necessary to check your data and recover them if necessary. MiniTool Power Data Recovery, the best free data recovery software for Windows, should be mentioned.
MiniTool Power Data Recovery is devoted to providing a safe and green data recovery environment. There is no damage to your data during the restoration process. Besides, it supports you retrieve data from different data storage devices such as external hard drives, USB flash drives, memory cards, and so on.
To improve data recovery efficiency, it provides more specific scan selections like desktop, recycle bin, and selected folder. Why not try the free edition to recover your data first?
Tips:
The free version of MiniTool Power Data Recovery allows you to recover up to 1 GB of data. If you need a larger data recovery capacity, please get an advanced edition through this page.
Step 1: Download MiniTool Power Data Recovery on your computer.
MiniTool Power Data Recovery FreeClick to Download100%Clean & Safe
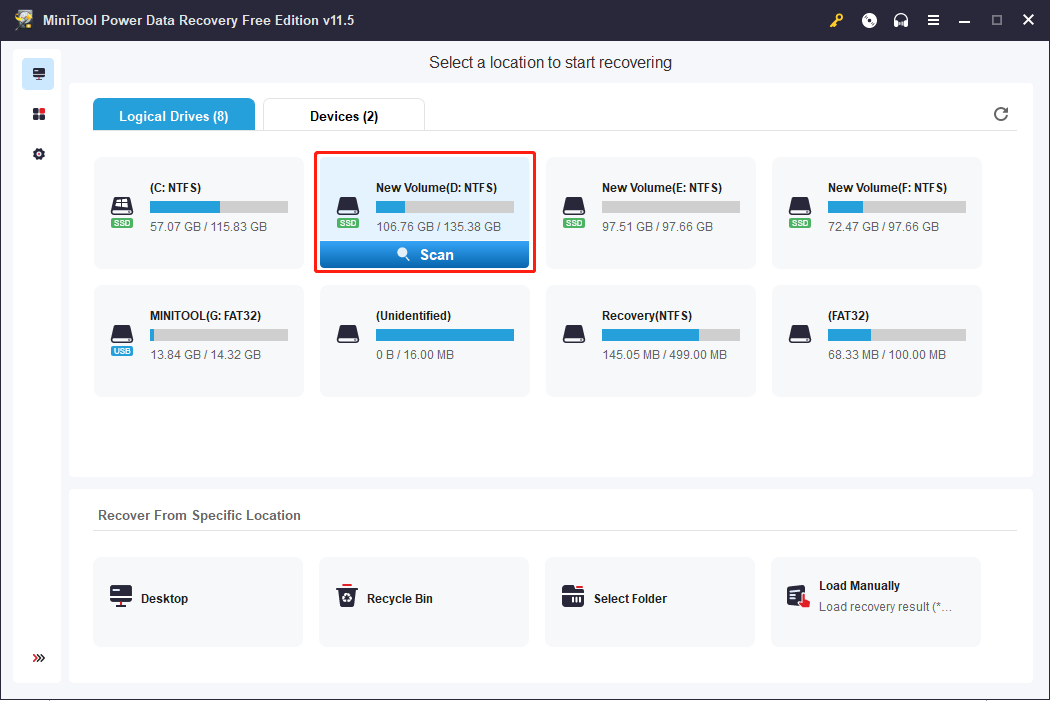
Step 2: Run the software and select a partition to scan. If you check the drive at one time, you can switch to the Devices tab to scan the entire disk.
Step 3: After the scan process is completed, browse the result page to find your desired files.
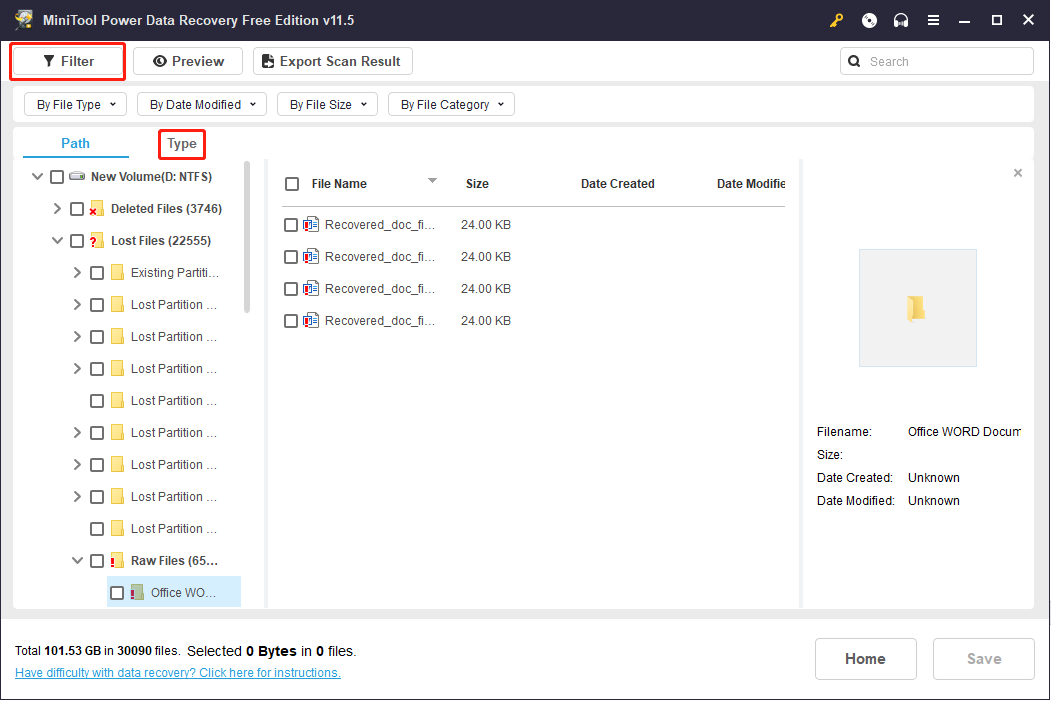
Tips:
If there are numerous data that you can’t locate wanted files quickly, you can choose Filter or Type function to reduce the distraction choices by setting different conditions, for instance, the type, size, created time, etc. The Search function works a lot when you remember the file’s names. Additionally, before saving the files, you can preview them to avoid restoring the wrong data.
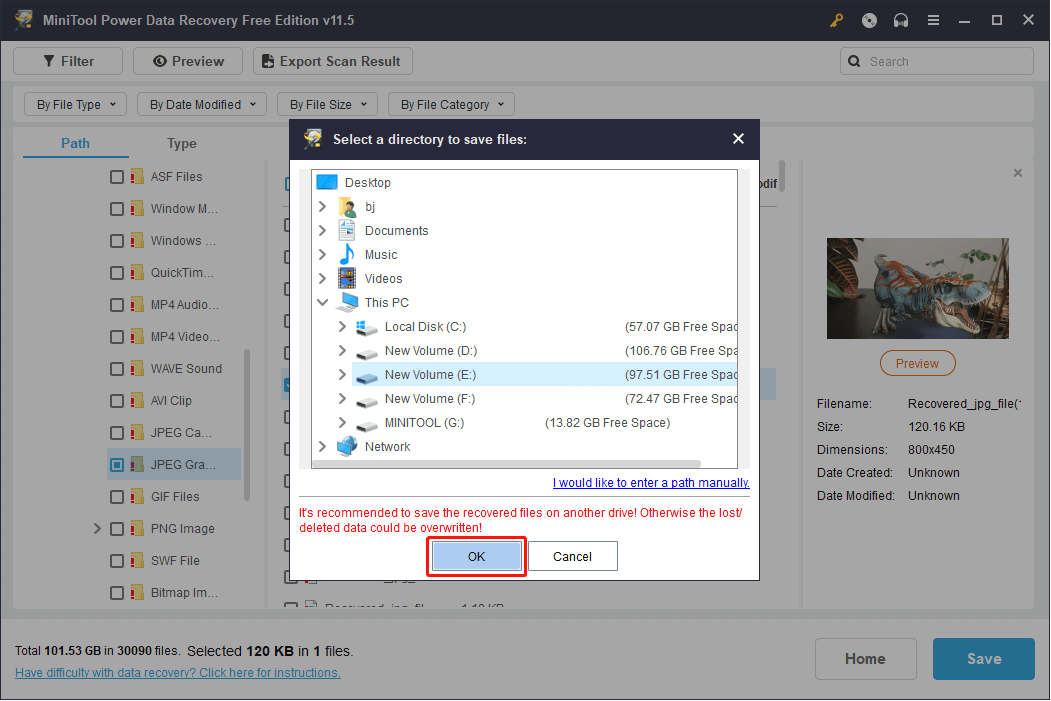
Step 4: Click the Save button and choose a storage path for the data.
Step 5: Click OK to confirm.
Final Words
DISM is a useful tool for repairing Windows images. When you find the DISM failed on your computer, don’t worry. You can try the methods mentioned in this post one by one to work out your problem. If finding your data lost or mistakenly deleted, please don’t hesitate to try MiniTool’s professional data recovery software.
MiniTool Power Data Recovery FreeClick to Download100%Clean & Safe
Please leave us a message via [email protected] if you are still in trouble or want to solve other disk and system problems.
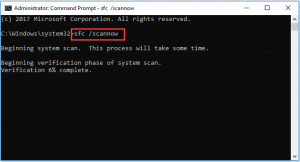
Одной из распространённых причин неполадок в работе Windows является повреждение системных файлов, например, вследствие внезапного отключения электропитания в момент перезаписывания файла. Для устранения таких неполадок в Windows предусмотрена специальная утилита SFC. Если запустить её с параметром SCANNOW, она просканирует систему на предмет повреждённых и/или удалённых файлов и восстановит их из хранилища компонентов WinSxS. Если SFC не справляется со своей задачей по причине повреждения хранилища, в ход идёт консольная утилита DISM, способная восстановить само хранилище.
Ошибка 87 в Windows при работе с DISM
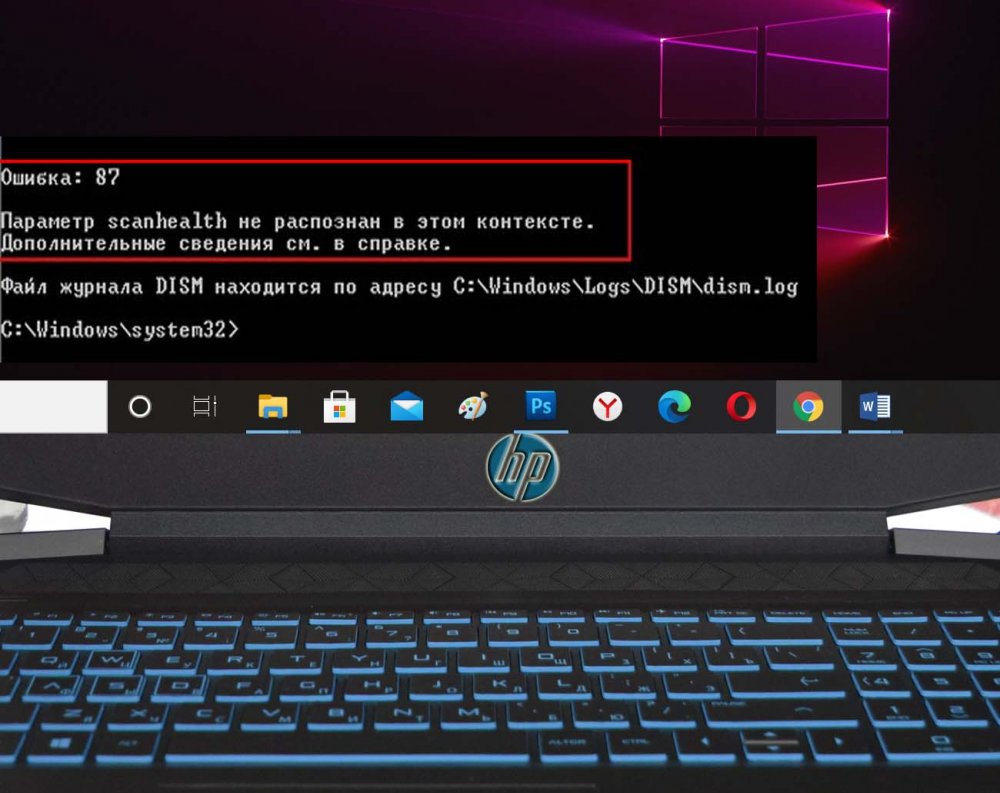
При этом сначала в командной строке обычно выполняется команда DISM /Online /Cleanup-Image /ScanHealth, а при обнаружении повреждений хранилища выполняется та же команда, но уже с параметром /RestoreHealth вместо /ScanHealth. Но было бы ошибочно считать DISM всесильной, утилита сама может завершить работу с ошибками. Таких ошибок у DISM существует около дюжины, и каждая из них имеет свой код и описание. Сегодня мы коснёмся распространённой ошибки с кодом 87, а заодно посмотрим, что можно предпринять в случае её возникновения.
Отсутствие привилегий
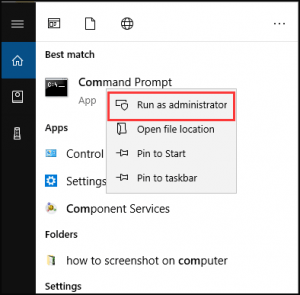
Ошибка 87 может возникнуть, когда пользователь выполняет команду в консоли, запущенной с правами обычного пользователя. Командную строку или PowerShell нужно запускать от имени администратора. Запустить PowerShell с повышенными правами в Windows 10 можно из контекстного меню кнопки Пуск, классическую командную строку — через поиск, так же выбрав в меню соответствующую опцию.
Ошибка синтаксиса
Очень часто причиной ошибки 87 становится банальная ошибка синтаксиса. Либо пользователь ошибается в момент ручного ввода, например, случайно пропускает пробел между передаваемыми параметрами, либо копирует команду DISM с веб-страницы, на которой в команде уже допущена ошибка. Понять, что причиной ошибки 87 стал именно синтаксис нетрудно: в описании ошибки будет указано «неизвестный параметр…» или «параметр не распознан в этом контексте». Проверьте корректность ввода команды, убедитесь, что между передаваемыми параметрами имеются пробелы.
Остановка системных служб
Ошибка с кодом 87 и сообщением «параметр не распознан в этом контексте» может также возникнуть при попытке сжать каталог WinSxS. Для этого DISM передаются параметры /cleanup-image, /spsuperseded и /hidesp, и именно /spsuperseded чаще всего вызывает ошибку. В данном случае к ней приводит остановка системной службы «Установщик модулей Windows». Проверьте её состояние в оснастке управления службами, она должна иметь тип запуска «Вручную». Если она отключена, включите и запустите её, а затем выполните команду DISM.
Отсутствие обновлений
В истории Windows 10, а именно в 2017 году, уже был прецедент с появлением ошибки 87 при работе с DISM. Тогда причиной ошибки была недоработка со стороны разработчиков Microsoft, которые вскоре после этого выпустили патч исправления. Нечто подобное может повториться и в будущем, и тогда вам нужно будет установить последние обновления Windows.
Ошибка 87 при применении образа
Появление ошибки 87 отмечалось и при попытке применения (использовании параметра /Apply-Image) образа Windows 10 в операционной системе более ранней версии. В таких случаях обычно рекомендуют «обновить» саму DISM, перенеся её с компьютера с более новой версией Windows, но это связано с целым рядом сложностей. Пожалуй, будет проще перейти на новую версию операционной системы или выполнить её сброс к исходному состоянию, чтобы восстановить нормальную работу инструмента.
This article show the fixes of dism error 87. DISM, whose full name is the Deployment Image Service and Management, is a built-in tool of Windows, first presented in Windows 7 and Windows Server R2. It can carry out servicing jobs on a Windows installation image, on an online or offline image within a folder, or on WIM files.
The DISM tool can be available from the Command Line or the Windows PowerShell. DISM tool can be used to update files and fix problems when a Windows image ends up being unserviceable.
Nevertheless, when running the DISM tool, you might get the mistake code 87 or some other codes like DISM error 50, DISM mistake 2, DISM error 3, DISM error 1639, and so on, as shown in the following photo: These DISM error codes imply that you can not proceed. Therefore, do you understand what may cause the DISM error 87 or other DISM mistake codes?
In this article, you can know about dism error 87 solution here are the details below;
What Causes DISM Error 87?
As a matter of fact, there are several factors resulting in the DISM error 87 Windows 10/8/7.
- The command is not correct.
This is the typical reason that results in the DISM error 87. The criterion is incorrect. In the majority of situations, users might forget to type a space before the slash when they type the command.
- The command does not face an elevated time.
The second cause for the DISM error 87 is that the command does not run into a raised Command Prompt window. If users run this command in a regular Command Line window, they may get the mistake 87 DISM.
- The machine utilizes the wrong DISM variation.
You might encounter the DISM error 87 if you utilize the wrong version of DISM when using a Windows 10 image. Hence, to repair this problem, you need to use the right DISM version.
We are having known what may result in the DISM restore health error 87. How to fix this DISM error?
6 Ways to Fix Scanning and Repairing Drive Stuck in Windows 10
In the following area, we will list several options to DISM error 87. If you have the very same problem, attempt these services.
Solution 1. Usage Correct DISM Command
As we have actually discussed in the above section, the DISM error 87 might be caused by the inaccurate command. For example, if you input the command without space before the slash like this DISM/online/cleanup-image/ check health, you will come across the DISM/online/cleanup-image/ restorehealth error 87.
So, in order to solve this DISM mistake code, please type the correct command. Please add the space before the slash, like these:
– DISM/ Online/ Cleanup-image/ Scanhealth.
– DISM/ Online/ Cleanup-image/ Restorehealth.
After that, you can inspect whether you still come across the DISM error 87.
Solution 2. Run This Command Using an Elevated Command Prompt.
Some people say that they experience the DISM error 87 when they do not run Command Prompt as administrator.
So in order to solve the mistake 87 DISM Windows 10, attempt to run Command Prompt as administrator.
Step 1: Type the command trigger in the search box of Windows 10 and pick the best-matched one.
Step 2: Right-click it to select Run as administrator to continue.
You can likewise describe the post Command Prompt Windows 10: Tell Your Windows to Take Actions to understand more ways to run Command Prompt as administrator.
After running Command Prompt as an administrator, type the command to continue and check whether the issue DISM error 87 is resolved.
Solution 3. Run Windows Update.
The DISM restore health error 87 might be triggered by the pending Windows upgrade. So in order to fix this mistake 87 DISM, you need to install all pending updates.
Now, here is the tutorial.
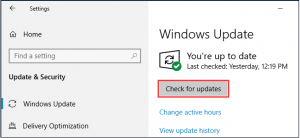
Step 1: Open Windows Update.
- Press Windows and I keys together to open Settings.
- In the pop-up window, pick Update & Security to continue.
Action 2: Check for updates.
- In the pop-up window, go to the Windows Update tab.
- Then choose to Check for Updates to continue.
Suggestion: During the Windows Update process, you might require to restart your computer.
When the process is finished, you can run Command Prompt as administrator and input the command again to inspect whether the mistake 87 DISM is fixed.
Solution 4. Run System File Checker.
If there are corrupted system files on your computer, you might likewise come across the mistake 87 DISM Windows 10/8/7. Thus, to fix this problem, you need to check and fix the corrupted system submits first of all.
For this reason, the Windows built-in tool System File Checker is a great choice to fix the corrupted system files.
Now, here is the tutorial on how to fix the corrupted system submits so as to repair the DISM error 87 Windows 7/8/10.
Step 1: Open Command Prompt.
- Type the command prompt in the search box of Windows 10 and choose the best matched one.
2.Right-click it to select Run as administrator to continue.
Step 2: Type the command to continue.
- In the pop-up window, type the command SFC/ scannow and hit Enter to continue.
- Please do not close the command line windows till you see the message verification 100% finished.
When the process is finished, you will effectively repair the damaged system files if there exists. Then open Command Prompt and run as administrator, type the command once again, and inspect whether the DISM error 87 is resolved.
If this SFC command does not work, you can describe the post Quickly Fix– SFC Scannow Not Working (Focus on 2 Cases) to try to find options.
Note: In addition to monitoring and fixing corrupted system files, you can likewise inspect whether there are bad sectors on a disk drive and fix them.
Solution 5. Utilize the Correct DISM Version.
Here, we will walk you through the fifth solution to fix the DISM error 87 Windows 10. If you are a Windows user, you need to run the Windows 10 variation of DISM because this variation needs the Wofadk.sys filter chauffeur.
Keep in mind: The Wofadk.sys filter is included in the Windows 10 Assessment and Deployment Kit. The chauffeur needs to be set up and configured with Windows 10 DISM when the command works on an earlier version of Windows host or Windows Preinstallation Environment.
So, in order to resolve DISM error 87 Windows 10, you require to use the Windows 10 Version of DISM with the wofadk.sys filter chauffeur. For more comprehensive information, you can see the DISM Supported Platforms and Install Windows 10 using a Previous version of Windows PE.
After that, you can reboot your computer and run Command Prompt as administrator once again, then type the command to check whether the DISM error 87 Windows 10 is resolved.
Solution 6. Reinstall Windows.
Now, we will reveal to you the last solution to DISM error 87. If none of the above approaches works, there is no other option for you except reinstalling Windows. For this reason, you can reinstall the os to repair the DISM error 87and other system issues.
But one important thing is that reinstalling the operating system will result in data loss. So before continuing, please back up very important files to start with.
After ensuring data safe, you can continue to reinstall the os.
I came across the DISM error 87 when running DISM, but I effectively fixed this DISM error code after I read this post. Click to tweet.
What to Do After Solving DISM Error 87?
After you have fixed the DISM restore health mistake 87, what can you do? It is highly suggested to develop a system image after fixing this issue. In this way, you can restore your Computer to the normal state if you encounter the mistake 87 DISM again later on.
In addition, if you come across some other OS problems during the utilizing process, you can also restore your Computer to a previous state with the system image created prior to.
Conclusion :
To sum up, this post has actually introduced what the DISM is and what might trigger the DISM error 87. Apart from that, this post has actually walked through 6 solutions to DISM error 87 Windows 7/8/10.
How do I repair mistake 87 DISM?
- Usage Correct DISM Command.
- Run this command utilizing a raised command prompt.
- Then Run Windows update.
- Run System File Checker.
- Use proper DISM version.
- Reinstall Windows.
What is the DISM?
DISM, likewise called Deployment Image Service and Management, is a Windows built-in tool that can be utilized to service and prepare Windows image, including the online or offline image within a folder or WIM file. Its functions consist of mounting and unmounting images, querying installed device drivers in an offline image, and adding a device driver to an offline image.
What does dism online cleanup-image RestoreHealth do?
Dism/ Online/ Cleanup-Image/ restorehealth tries to scan and fix damaged system submits that discovered on your Computer.
How do I fix damaged files on Windows 10?
- Type Command Prompt in the search box of Windows and pick the best matched one.
- Right-click it to pick Run as administrator.
- Type the command SFC/ scannow and struck Enter to continue.
- Wait for the procedure to be finished.
Check out over other article:
- [Fixed] NTOSKRNL.exe high CPU, Memory Disk usage problem
- 100% Solved File System Error 2147219196 in Photos or Other Store Apps
- How to Solve | Error code 50382 WM1 in Monster Hunter World
- OpenGL Error 1281 Invalid Value | How to Fix it
- {Solved} Secure Connection Failed PR_END_OF_FILE_ERROR on Firefox