

Macs no longer have internal DVD and CD-RW drives, but for Mac users who still need to use optical discs the Apple SuperDrive offers an external all-in-one USB solution that can read and write both CD and DVD discs, all you have to do is plug it into a USB port on the Mac and Mac OS will detect the SuperDrive. But that’s Mac OS, not Windows, and many Mac users also use Windows PC or Windows operating systems, so wouldn’t it be nice to use that Apple SuperDrive in Windows too?
But SuperDrive does not always work with Windows PC right away however, and sometimes the Apple SuperDrive either doesn’t function as expected, won’t accept a disc, or is not properly recognized in Windows, whether running natively on PC, or a Mac through Boot Camp, or a virtual machine either.
Whatever the scenario, if you’re trying to use an Apple SuperDrive with Windows and it’s not working as expected, try the steps below to get the SuperDrive functioning in Windows.
How to Use Apple SuperDrive in Windows
The steps below outline installing Apple SuperDrive drivers for Windows so that the SuperDrive will function as expected:
- Boot into Windows, or get on the Windows PC trying to use SuperDrive if you have not done so already
- Go here to to the Apple Support Downloads site and locate the latest version of “Boot Camp Support Software” (5.1.5722 or newer)
- Download the Boot Camp Support Software zip file and unzip it on the computer
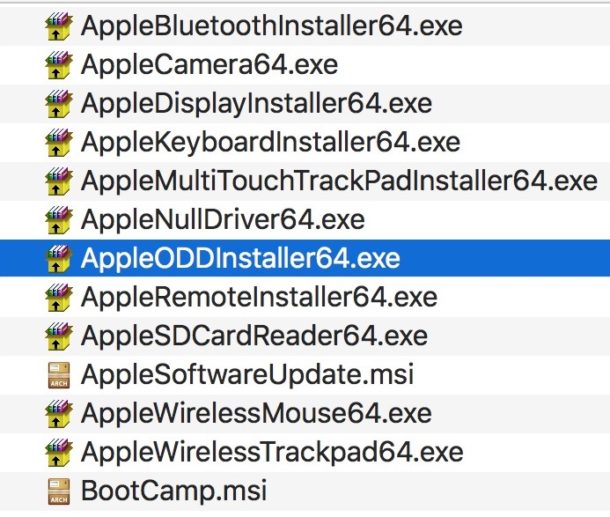
- From the unzipped “Bootcamp5” folder, navigate to \Bootcamp\Drivers\Apple\ and locate “AppleODDInstaller64.exe”
- Run the AppleODDInstaller64.exe executable file to install the appropriate drivers for Apple SuperDrive in Windows
These steps are intended to be from taken from Windows, however you could download the Boot Camp Support Software on a Mac and then transfer the zip file to Windows through USB, networking, or your method of choice if need be, or you could just extract the “\Bootcamp\Drivers\Apple\ AppleODDInstaller64.exe” (note it will be labeled “AppleODDInstaller.exe” if it’s 32-bit version) file on a Mac and transfer that exe installer to Windows. You must be in Windows to run and install the actual Bootcamp Drivers for SuperDrive, however.
This should work to get an Apple SuperDrive working on any modern Windows version, including Windows 7, Windows 8, and Windows 10. Note that if you’re on a notably older Windows release, you’d want to download an earlier version of Boot Camp drivers that contain the 32-bit exe rather than the 64-bit exe, and otherwise it should work the same as well.
Once the drivers are installed properly in Windows, the Apple SuperDrive should accept discs, read, write, and eject them as expected, just like it does on the Mac. Of course you could also just get a different external DVD-RW / CDRW drive too at less cost, as many of the other solutions either work immediately with plug-and-play in Windows and Mac OS, but the SuperDrive situation is helpful if you already have one from a Mac, or you want to stay consistent with Apple hardware. Why buy new hardware when you have something that already works, right? The same logic applies to using a Windows keyboard on a Mac, and many other common peripherals that are compatible with both a Mac and PC, even if they require some minor tinkering to get working as intended.
As technology evolves, an increasing number of laptops and even some desktop machines are being built without CD/DVD drives. With the rise to prominence of digital services such as Spotify, Netflix and Steam, it’s become more convenient to stream our music and movies than buying CDs and DVDs. Not only is it on-demand, there’s also no risk of damaging any disks.
However, for those of us with large collections of CDs, DVDs and computer games, this can be an inconvenience when the time comes to purchase a new computer. Thankfully, there are USB powered CD/DVD drives such as the Apple SuperDrive. I bought one after buying my new laptop and discovering it didn’t have an optical drive, and I found that initially it didn’t work. Whenever I’d attempt to insert a CD, the SuperDrive wouldn’t accept it. As it’s an Apple product, it’s designed to work with Apple computers, not Windows 10. But I didn’t have to get a return on the USB SuperDrive as you can get it working on Windows 10 in a few simple steps.
How to get the Apple USB SuperDrive to work on a Windows 10 computer:
- Download the Apple ODD Driver
- Unzip and run the installer
- Restart your PC
Once your computer has restarted, you should be able to use your Apple USB SuperDrive on your Windows 10 PC.
Did you find this post useful?
YesNo
I have a windows 10 PC that I want to use my Super Drive on, but I do not know what drivers I need to have to make it work.
MacBook Pro (Retina, 13-inch,Early 2015),
macOS High Sierra (10.13.3)
Posted on Feb 5, 2018 9:44 AM
Posted on Feb 5, 2018 10:09 AM
Try the following:
- Plug the SuperDrive into an available USB port on the Windows PC.
- Download that latest Boot Camp drivers from Apple.
- Right-click on the Boot Camp zip file in the Downloads folder, and then, click Extract All.
- Launch the AppleODDInstaller64.exe file, that is located at: /BootCamp/Drivers/Apple/AppleODDInstaller.exe, and then, follow the steps to install the driver on your PC.
- After successfully installing this driver, you should be able to use the SuperDrive as you normally would.
Similar questions
-
Can I use this external SuperDrive if I have a 2012 iMac with a internal drive that works?
Can I use this external SuperDrive if I have a 2012 iMac with a internal drive that works?
906
5
-
How do I use a superdrive on a windows 10 PC?
How do I use an Apple Superdrive with a windows 10 PC?
12211
3
-
purchased the USB Super Drive and I have connected it to the computer. However, no information on how to use it. Please help
Cannot find information on how to use the USB SuperDrive once it is connected to the computer. Don’t I need to install a driver?833
6
How do I use my Super Drive on my Windows 10 PC
Apple’s SuperDrive is a sleek and compact external DVD drive designed primarily for Mac computers. However, many users who are running Windows 10 or 11 may wonder if they can also make use of this elegant piece of hardware. The answer is a resounding yes! In this comprehensive guide, we’ll explore how to set up and use the Apple SuperDrive on Windows systems, troubleshoot common issues, and highlight some important features you won’t want to miss.
Understanding Apple SuperDrive
Before delving into the specifics of using the Apple SuperDrive on Windows, it’s important to understand what it is and what it does. The SuperDrive is an external optical disk drive that can read and write CDs, DVDs, and even some Blu-Ray discs. It connects via USB and is known for its portability and compatibility with macOS.
Connecting the SuperDrive to Windows 10/11
Getting started with the Apple SuperDrive on Windows is straightforward; follow these steps to connect the device:
-
Unbox the SuperDrive: Open the box and remove the SuperDrive along with the USB cable.
-
Connect the SuperDrive: Plug the USB end of the SuperDrive into an available USB port on your Windows laptop or desktop. Unlike traditional external drives, the SuperDrive doesn’t have an external power source, relying solely on the USB connection for power.
-
Driver Installation: Windows typically recognizes external devices and downloads necessary drivers automatically. It may take a moment, after which you should see a notification indicating that your device is ready to use.
Verifying Installation
Once you’ve connected your SuperDrive, you should verify that it’s recognized by your system:
-
Open Device Manager: Right-click the Start menu and select «Device Manager.»
-
Check Disk Drives: In the Device Manager, locate the section titled “Disk drives.” Here you should see your SuperDrive listed, usually as «Apple USB SuperDrive» or something similar.
If your SuperDrive does not show up in the Device Manager, try the following troubleshooting steps:
-
Try Different Ports: Sometimes, switching the USB port can help. If you’re using a USB-C adapter, ensure it’s functioning correctly.
-
Update Drivers: Right-click on the SuperDrive in Device Manager and select “Update Driver.” Choose the option to search automatically for updated driver software.
-
Check Cables: Ensure that the USB cable is securely connected and is not damaged.
Using the SuperDrive for Reading and Writing Discs
Once confirmed that the SuperDrive is working, you can begin using it to read and write discs. Here are the steps for both reading and writing.
Reading Discs
-
Insert a Disc: Simply place a CD or DVD into the drive. The drive should automatically spin the disc and recognize it.
-
Open File Explorer: Open File Explorer from your taskbar or Desktop.
-
Access the Disc: You should see your disc listed under «This PC» or «Devices,» usually as “DVD RW Drive (D:)” or similar. Click on it to view the contents of the disc.
Writing Discs
For writing data to discs using the SuperDrive, you’ll need compatible software—Windows does not include built-in support for burning discs in the same way Macs do. Various third-party applications can help you accomplish this:
-
Download Disc Burning Software: Common software options that work well with Windows for burning discs include:
- ImgBurn: A lightweight, free disc-burning tool that supports burning images and data to discs.
- CDBurnerXP: Another free software option that provides a user-friendly interface for burning data and audio discs.
- Nero: A popular choice that offers more comprehensive features, though it comes at a cost.
-
Prepare Your Files: Organize the files you intend to write to the disc on your computer.
-
Open Your Chosen Software: Launch the disc-burning software that you installed and follow the specific steps to create and burn the disc. This generally involves selecting the “Data Disc” or “Audio Disc” option and dragging files into the software interface.
-
Finalizing the Burn: Once you’ve added all the desired files, select the burn option. The software will prompt you to insert a blank CD or DVD into the SuperDrive. Wait for the burning process to complete.
-
Eject the Disc: After burning, you can eject the disc manually using the button on the SuperDrive or through the disc utility in the software.
Troubleshooting Common Issues
While many users report getting the SuperDrive to work on Windows without issues, there are some problems that might arise. Here are notable troubleshooting steps for these common dilemmas:
SuperDrive Not Detected
If the SuperDrive is not recognized:
-
Check Power Supply: Ensure that the SuperDrive is plugged in correctly and receiving power.
-
Check Device Manager Settings: If it’s not in Device Manager, try using a different USB port. You might also want to try restarting your computer with the SuperDrive attached.
Driver Issues
If you encounter driver issues, possibilities include:
-
Updating Windows: Make sure your Windows operating system is up to date. Go to “Settings,” then “Update & Security,” and click on “Check for updates.”
-
Using USB 3.0 Ports: If you’re using a USB 3.0 port, ensure that it’s functioning properly. Sometimes, switching to USB 2.0 ports can help with compatibility.
Speed Issues
Some users may experience slower read/write speeds. To enhance performance:
-
Minimize Background Processes: Close unnecessary applications to free up system resources.
-
Use Quality Discs: Always use high-quality blank discs for writing; low-quality discs can lead to slower speeds and writing errors.
-
Defragment Hard Drive: For spinning drives, defragmenting can also improve read/load times, leading to better overall performance.
Software Compatibility
Not all burning software is created equal. If you’re facing issues, consider trying different software options as mentioned earlier. Always read online reviews or community forums to ensure you choose reliable and effective tools for your burning needs.
Optional: Alternatives to Apple SuperDrive
If you find using the Apple SuperDrive challenging or limited in functionality, you might want to consider alternative optical drives. Here are a few popular ones:
-
External USB Drives from Other Brands: There are several high-performing external drives available from brands like LG, Samsung, and ASUS that offer added functionality, including Blu-ray support.
-
USB-C Optical Drives: If your system primarily uses USB-C connections, opt for a drive built explicitly for this connection type.
Conclusion
Using the Apple SuperDrive on Windows 10 or 11 can be a smooth experience if approached correctly. With continued compatibility being a key selling point for Apple products, it’s remarkable that even their external devices like the SuperDrive can seamlessly interface with PC systems. From setting up the device to troubleshooting potential issues, this guide aims to provide the knowledge needed to effectively use the SuperDrive on a Windows environment.
By understanding how to connect, utilize, and troubleshoot the SuperDrive, users can enjoy the sleek design and trusted performance of this Apple product in their Windows setting. Whether for burning media, reading data, or simply accessing files, the Apple SuperDrive is a valuable addition to your computing toolkit.
Apple USB SuperDrive — это внешний оптический привод, разработанный для компьютеров Mac. Он позволяет читать и записывать компакт-диски и DVD. Но что делать, если у вас есть SuperDrive, но вы хотите использовать его с компьютером под управлением Windows? В этой статье мы расскажем, как подключить Apple USB SuperDrive к Windows.
Шаг 1: Проверьте совместимость. Перед подключением SuperDrive к компьютеру с Windows необходимо убедиться в его совместимости. В частности, убедитесь, что компьютер имеет USB-порт и поддерживает внешние оптические приводы. Также обратите внимание, что некоторые пользователи сообщают о проблемах с использованием SuperDrive с Windows 10.
Шаг 2: Подготовьте SuperDrive. Привод Apple USB SuperDrive требует питания от USB-порта компьютера. Перед использованием убедитесь, что SuperDrive полностью заряжен или подключите его к источнику питания, используя кабель USB. Также убедитесь, что SuperDrive не поврежден и готов к работе.
Шаг 3: Подключите SuperDrive к компьютеру. Вставьте USB-кабель SuperDrive в USB-порт компьютера. Если компьютер не видит SuperDrive, попробуйте подключить его к другому USB-порту или перезагрузить компьютер. Если проблема не устраняется, проверьте состояние SuperDrive и его совместимость с компьютером.
Подключение Apple USB SuperDrive к Windows: пошаговая инструкция
Вот пошаговая инструкция:
| Шаг | Действие |
| Шаг 1 | Убедитесь, что ваш компьютер или ноутбук работает под управлением операционной системы Windows. |
| Шаг 2 | Подключите кабель USB SuperDrive к свободному порту USB на вашем компьютере или ноутбуке. |
| Шаг 3 | Дождитесь, пока Windows обнаружит устройство. Внешний привод должен появиться в списке устройств или проводнике. |
| Шаг 4 | Если внешний привод не открывается автоматически, откройте «Проводник» и найдите USB SuperDrive в списке устройств. |
| Шаг 5 | Щелкните правой кнопкой мыши на USB SuperDrive и выберите «Открыть» или «Исследовать» в контекстном меню. |
| Шаг 6 | Теперь вы должны иметь доступ к содержимому CD или DVD, вставленного в USB SuperDrive. |
Теперь вам необходимо подключение Apple USB SuperDrive к Windows. Вы можете играть музыку, просматривать фильмы или использовать привод для записи дисков вместе с вашим компьютером или ноутбуком на Windows.
Установка необходимых драйверов
Для корректной работы USB SuperDrive на Windows необходимо установить драйверы Apple.
Следуйте этим шагам, чтобы установить драйверы:
- Откройте веб-браузер и перейдите на официальный веб-сайт Apple.
- Перейдите на страницу поддержки.
- На странице поддержки найдите раздел «Загрузки».
- В разделе «Загрузки» найдите соответствующие драйверы для USB SuperDrive и нажмите на ссылку для их скачивания.
- После завершения загрузки, откройте скачанный файл с драйверами.
- Запустите файл установки и следуйте инструкциям мастера установки.
- После завершения установки перезагрузите компьютер.
Теперь USB SuperDrive должен быть готов к работе на Windows.
Подключение кабеля USB SuperDrive
Перед подключением кабеля USB SuperDrive к компьютеру с операционной системой Windows, убедитесь, что у вас есть подходящий порт USB. Кабель USB SuperDrive имеет USB-A разъем, поэтому вам понадобится либо свободный разъем USB-A на компьютере, либо адаптер, позволяющий подключить кабель USB-A к другому типу порта.
1. Включите компьютер и дождитесь полной загрузки операционной системы Windows.
2. Возьмите кабель USB SuperDrive и вставьте его USB-A разъем в свободный порт USB на компьютере или используйте адаптер для подключения кабеля к другому типу порта.
3. Если подключение произошло успешно, операционная система Windows должна распознать новое устройство и установить необходимые драйверы. Если этого не произошло автоматически, воспользуйтесь диском с драйверами, который часто поставляется в комплекте с кабелем USB SuperDrive, или загрузите драйверы с официального веб-сайта производителя.
4. После успешной установки драйверов вы сможете использовать USB SuperDrive для просмотра, записи и копирования дисков на компьютере с операционной системой Windows.
Обратите внимание, что некоторые функции USB SuperDrive могут быть ограничены при использовании с операционной системой Windows. Убедитесь, что ваши програмные средства поддерживают USB SuperDrive для полноценного функционирования.
Поиск и установка дополнительного софта
Для полноценной работы с Apple USB SuperDrive на компьютере под управлением Windows необходимо установить дополнительное программное обеспечение.
1. Откройте интернет-браузер и перейдите на официальный сайт Apple — www.apple.com.
2. В верхнем правом углу страницы найдите поле поиска и введите «SuperDrive software».
3. Нажмите клавишу «Enter» или кликните на значок поиска.
4. Из результатов поиска выберите официальную страницу загрузки дополнительного софта для SuperDrive.
5. На странице загрузки обратите внимание на версию операционной системы Windows, для которой предназначено программное обеспечение. Убедитесь, что выбранная версия соответствует вашей операционной системе.
6. Нажмите на ссылку для скачивания программы и дождитесь окончания загрузки.
7. Запустите загруженный файл и следуйте инструкциям мастера установки. В процессе установки убедитесь, что SuperDrive подключен к компьютеру.
8. После успешной установки дополнительного софта перезагрузите компьютер.
Теперь вы полностью готовы использовать Apple USB SuperDrive на компьютере под управлением Windows.
Проверка подключения
После того, как вы подключили Apple USB SuperDrive к компьютеру, вам следует проверить, правильно ли он был подключен и работает ли он нормально. Для этого выполните следующие шаги:
|
Шаг 1: |
Откройте Проводник Windows, чтобы убедиться, что Apple USB SuperDrive был успешно распознан вашим компьютером. |
|
Шаг 2: |
Вставьте диск в Apple USB SuperDrive и дождитесь, пока компьютер его распознает. На рабочем столе или в проводнике должно появиться новое устройство или диск. |
|
Шаг 3: |
Запустите любое приложение, которое может работать с диском (например, проигрыватель DVD или программу для записи дисков), чтобы убедиться, что Apple USB SuperDrive функционирует правильно. |
Если вы успешно выполните эти шаги и Apple USB SuperDrive будет работать без проблем, вы сможете наслаждаться преимуществами использования его с вашим компьютером на операционной системе Windows.
Открытие диска с помощью проводника
После подключения Apple USB SuperDrive к компьютеру на Windows, приступим к открытию диска с помощью проводника:
- Откройте проводник, щелкнув на значок «Проводник» на рабочем столе или выбрав его из меню «Пуск».
- В левой части окна проводника найдите раздел «Этот компьютер» и щелкните по нему.
- В списке устройств и накопителей найдите и щелкните правой кнопкой мыши на значке «Apple USB SuperDrive».
- В контекстном меню, которое появится, выберите опцию «Открыть».
После выполнения этих шагов диск, находящийся внутри Apple USB SuperDrive, будет открыт, и вы сможете просмотреть его содержимое через проводник.
Воспроизведение дисков
После успешного подключения Apple USB SuperDrive к компьютеру на операционной системе Windows вы можете начать воспроизводить диски.
1. Вставьте диск, который вы хотите воспроизвести, в открытый дисковод SuperDrive.
2. Дождитесь, пока компьютер определит и загрузит диск. Обычно это происходит автоматически, но в некоторых случаях вам может потребоваться выполнить дополнительные действия. Если диск не запускается автоматически, дважды щелкните на значке «Дисковод» на рабочем столе или найдите его в проводнике.
3. Воспользуйтесь программой для воспроизведения дисков, например, Windows Media Player, чтобы начать воспроизведение.
Примечание: При использовании Apple USB SuperDrive на Windows вы можете воспроизводить DVD-диски, а также CD-диски.
Важно: Некоторые диски могут быть защищены авторским правом или иметь ограничения на воспроизведение. Убедитесь, что вы имеете право использовать диск перед его воспроизведением.
Извлечение диска и отключение SuperDrive
Когда вы закончите использовать Apple USB SuperDrive, не забудьте правильно извлечь диск. Чтобы это сделать, выполните следующие шаги:
- Нажмите на кнопку «Извлечение» на передней панели SuperDrive.
- Как только диск выдвинется из привода, осторожно возьмите его за край и аккуратно вытащите из привода.
После извлечения диска вы можете безопасно отключить Apple USB SuperDrive от компьютера. Просто выдерните USB-кабель, соединяющий SuperDrive с компьютером. Если вы используете MacBook, убедитесь, что нажали на кнопку «Извлечение» на передней панели SuperDrive перед отключением кабеля.
Возможные проблемы и их решения
Проблема: Устройство не распознается системой Windows.
Решение: Переподключите USB-кабель и убедитесь, что он хорошо подключен. Если проблема не решена, попробуйте использовать другой порт USB на компьютере. Также стоит проверить обновления драйверов USB.
Проблема: Устройство работает неправильно или выдает ошибку.
Решение: Убедитесь, что у вас установлена актуальная версия iTunes на компьютере. Если проблема остается, попробуйте перезагрузить компьютер и повторить подключение.
Проблема: Устройство не совместимо с определенной версией Windows.
Решение: Проверьте совместимость USB SuperDrive с вашей версией Windows на официальном сайте Apple. Если ваша версия Windows не поддерживается, попробуйте использовать VirtualBox или Parallels, чтобы создать виртуальную машину с Mac OS и подключить USB SuperDrive к ней.
Проблема: Устройство не читает или не записывает диски.
Решение: Убедитесь, что диск правильно установлен в устройство. Также стоит проверить состояние диска и, если нужно, попробовать другой диск. Если проблема не решена, возможно, требуется замена USB SuperDrive.
Проблема: Отсутствует драйвер USB SuperDrive.
Решение: Драйвер для USB SuperDrive должен быть автоматически установлен при подключении устройства к компьютеру. Однако, если драйвер не был установлен или был удален, вы можете скачать его с официального сайта Apple и установить вручную.
Проблема: Устройство выплевывает диски после вставки.
Решение: Убедитесь, что вы правильно вставляете диск в устройство. Если проблема остается, проверьте диск на наличие повреждений или дефектов. Если диск исправен, возможно, требуется замена USB SuperDrive.