
Способ 1: Утилита «chkntfs»
Для управления режимом проверки дисков при загрузке в Windows 10 имеется встроенная утилита «chkntfs» — используйте ее, чтобы отключить автопроверку дисковых накопителей. Утилита не имеет графического интерфейса, поэтому работать с ней придется через консоль.
- Запустите от имени администратора «PowerShell» из контекстного меню кнопки «Пуск» или другим известным вам способом. Для этих же целей вы можете использовать классическую «Командную строку».
- Введите команду
chkntfs /x C:и нажмите клавишу ввода. Если нужно отключить автопроверку на диске D, укажите в команде его букву. Также буквы дисков можно указать через пробел.

В результате автоматическая проверка диска средствами «chkdsk» при загрузке операционной системы будет отключена.
Способ 2: Твик реестра
Для отключения автопроверки разделов накопителя можно использовать системный реестр, изменив значение одного из параметров.
- Запустите «Редактор реестра», для чего вызовите нажатием клавиш Win + R диалоговое окошко быстрого запуска и выполните в нем команду
regedit. - Разверните
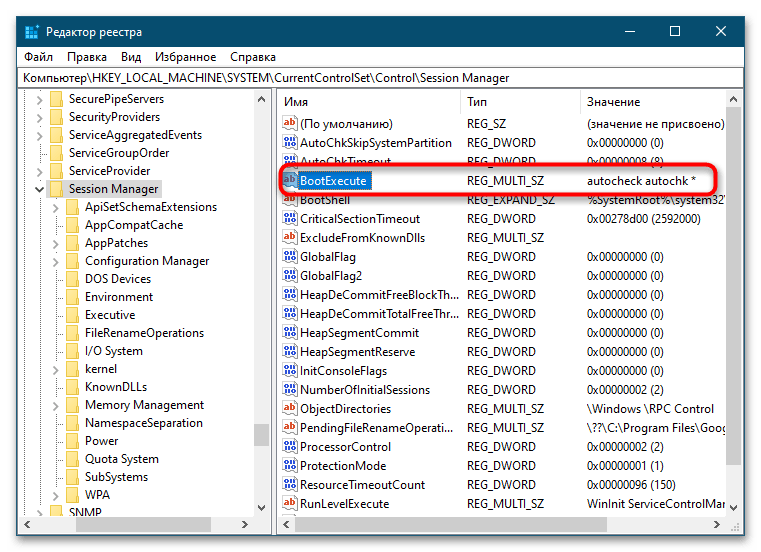
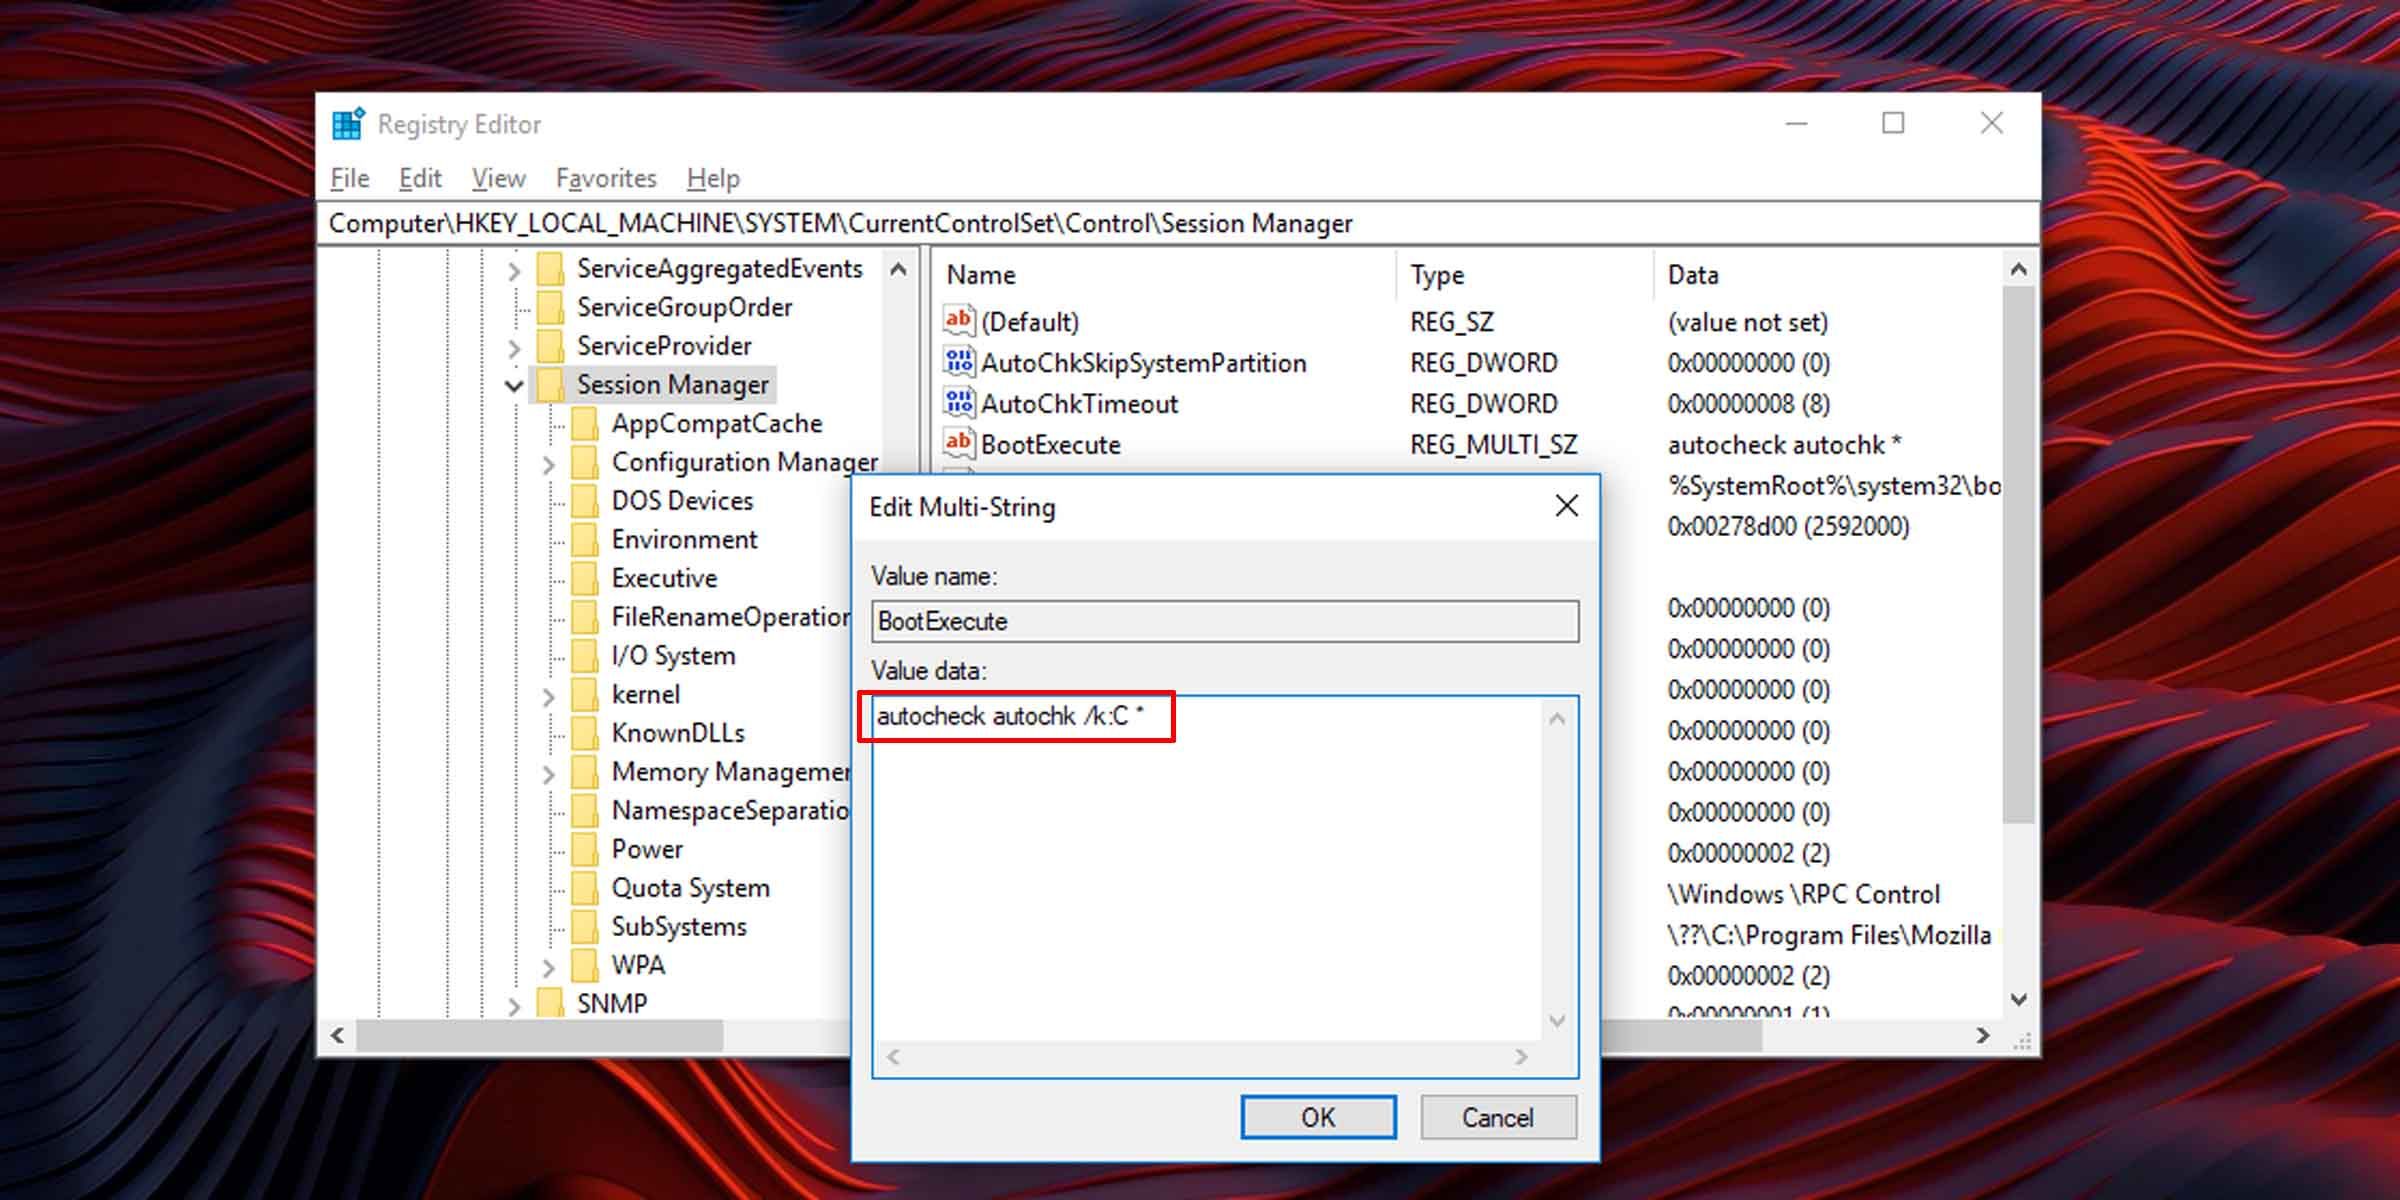
HKLM\SYSTEM\CurrentControlSet\Control\Session Manager, найдите справа параметр «BootExecute» и кликните по нему дважды, чтобы открыть его свойства. - Чтобы отключить автопроверку системного диска, отредактируйте значение параметра по умолчанию, добавив перед знаком звездочки
/k:C, вот так:autocheck autochk /k:C *. - Соответственно, если нужно проверить другой том, вместо C укажите его букву. Также литеры дисков, для которых производится отключение, можно указать через пробел, например
autocheck autochk /k:C /k:D *.
После применения твика нужно будет перезагрузить компьютер. Между прочим, стоит отметить, что отключать автопроверку диска при загрузке без особой нужды не рекомендуется, так как при этом вы утратите контроль за целостностью файловой системы. Более правильным решением будет установить причины активации автопроверки, которая может указывать на серьезные проблемы с жестким диском.
Наша группа в TelegramПолезные советы и помощь
При включении компьютера постоянно включается проверка диска Windows
Обновлено:
Опубликовано:
Описание
Каждый раз при включении или перезагрузке компьютера начинается проверка диска, которая может выполняться, довольно, долго.
Мы можем наблюдать строку:
To skip disk checking press any key
Если нажать любую кнопку, то процесс прекратится и запустится система. Или мы можем подождать его завершения. Но при следующей загрузке проверка начнется по новой.
Данная проблема характерна для многих версий Windows (7 / 8 / 10 / 11).
Причина
Система Windows может пометить диск как «грязный». Это происходит из-за неправильного выключения компьютера, нарушениях в файловой системе или повреждениях самого жесткого диска.
Решение
1. Запустить полную проверку диска
Удобнее всего выполнить проверку из командной строки. Для этого вводим команду:
chkdsk /r /f C:
* где C: — имя тома, который нужно проверить. Ключ /r запустить полную проверку; /f — исправит ошибки, если они будут найдены.
Также, в случае проверки системного тома мы увидим:
Невозможно выполнить команду CHKDSK, так как указанный том используется
другим процессом. Следует ли выполнить проверку этого тома при
следующей перезагрузке системы? [Y(да)/N(нет)]
В таком случае, отвечаем Y и нажимаем Enter.
Также мы можем воспользоваться графическим интерфейсом. Для этого откройте «Мой компьютер» > кликните правой кнопкой по диску, который постоянно проверяется > выберите «свойства» > на вкладке «сервис» нажмите кнопку «Выполнить проверку»
в открывшемся окне поставте все галочки и нажмите «запуск».
Если был выбран системный диск, выскочит предложение выполнить проверку при следующей загрузке системы — соглашаемся и перезагружаем компьютер.
Ждем окончания процесса проверки. Если проблема осталась, переходим к следующему пункту.
Также рекомендую воспользоваться дополнительными утилитами для проверки состояния диска. Они позволят лучше оценить его работу и увидеть больше информации. В качестве примера, могу привести программы HD Tune и CrystalDiskInfo.
2. Отключить проверку диска
Мы можем воспользоваться двумя способами отключения проверки. Рассмотрим оба.
Командная строка (способ 1)
Нажимаем «Пуск» — «Выполнить» — вводим cmd — нажимаем «OK». В открывшемся окне вводим команду:
chkntfs /X C:
* где С — имя диска, который постоянно проверяется.
Теперь проверка отключена. Если захотите ее снова включить, необходимо набрать команду chkntfs /D.
Реестр (способ 2)
Если есть причина использовать именно настройку реестра, открываем его командой:
regedit
После чего переходим в ветку: HKEY_LOCAL_MACHINE\SYSTEM\CurrentControlSet\Control\Session Manager и находим параметр BootExecute.
Значение по умолчению для данного параметра — autocheck autochk *. Нам нужно его поменять на:
autocheck autochk /k:C *
Это означает, что при загрузке системы мы должны проверить все диски, кроме диска C.
3. Отключение диска
Если идет постоянный запуск диска, который нами уже не используется, то можно просто его физически отключить. Есть, как минимум, два способа это сделать:
- Разобрать компьютер и отключить кабели питания и подключения к материнсткой плате.
- Выключить диск в БИОС.
При желании использовать диск в будущем, его можно отформатировать — постоянные проверки должны прекратиться.
Имейте ввиду, что на, какзалось бы, ненужном диске может находиться загрузочная область для старта операционной системы. Если после отключения диска, последняя перестала грузиться, возвращаем накопитель на место.
4. Чистка шлейфа
Плохой контакт может быть причиной проблем с диском. Пробуем выключить компьютер, отключить диск и почистить кабель с двух сторон.
В чем была проблема?
Если вам удалось решить проблему, поделитесь своим опытом для других. Что помогло:
* в процентах показаны результаты ответов других посетителей.
Check Disk, or more often known by its abbreviation CHKDSK, is a built-in tool in Microsoft Windows to scan hard disk drives for errors and bad sectors and repair them. This short tutorial will show you how to skip or disable disk checking on Windows 10 or Windows 11 so that it won’t run on startup again.
Why is disk checking forced to run on startup
If a disk check is automatically scheduled to run every time you turn on your laptop or desktop computer without your consent, it can indicates two possibilities:
- Windows has detected unusual shut down or restart behavior.
- Windows has detected issues on one of your hard disk drives.
If you attempt to interrupt and cancel the disk check by “pressing any key”, you can temporary cancel the disk check for the current session. However, the disk check operation will repeat on every startup until the process can be completed at least once and that the disk has no issue.
What are the proper things to do
Let’s not ignore the obvious. Repeated forced startup disk check is an indication of possible disk errors or even hardware failure. The proper action to be taken is to let the disk check run to completion.
The disk check process will automatically scan for errors and repair them. Once the errors are fixed, Windows will stop scheduling disk checking on startup if there is no other issue detected in any of your disk drives.
If the disk check finds any error that can’t be fixed, it will let you know in the scan reports at the end of the scan. If this is the case, it usually indicates that your hard drive has started to fail or has already failed. You may want to quickly backup any existing data on the disk if you don’t want to lose them later.
How to skip disk check on Windows 10/11
There are two methods to force cancel a scheduled startup disk check on Windows 11/10. If one doesn’t work, try the other.
Stop disk checking via “Command Prompt”
- On Windows 10/11 search bar, search for “cmd“. Right-click on Command Prompt from the search result and click “Run as administrator“.
Windows 10
Windows 11
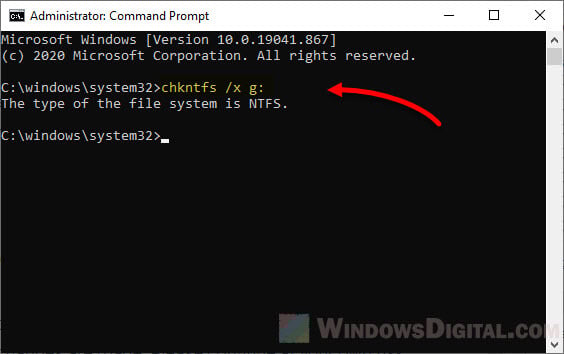
- Enter the following command:
chkntfs /x c:

- Note: Replace C: with the letter of the drive you wish to stop disk checking on Windows startup.
- The /x parameter is to disable auto check for the selected drives on startup.
- To stop disk check for multiple drives, add the drive letters to the end of the command. For example:
chkntfs /x c: d: e:
Disable startup check disk scan via “Registry Editor”
Caution: Registry editing can cause serious problem and may potentially corrupt your operating system if incorrect changes are made. Please continue at your own risk.
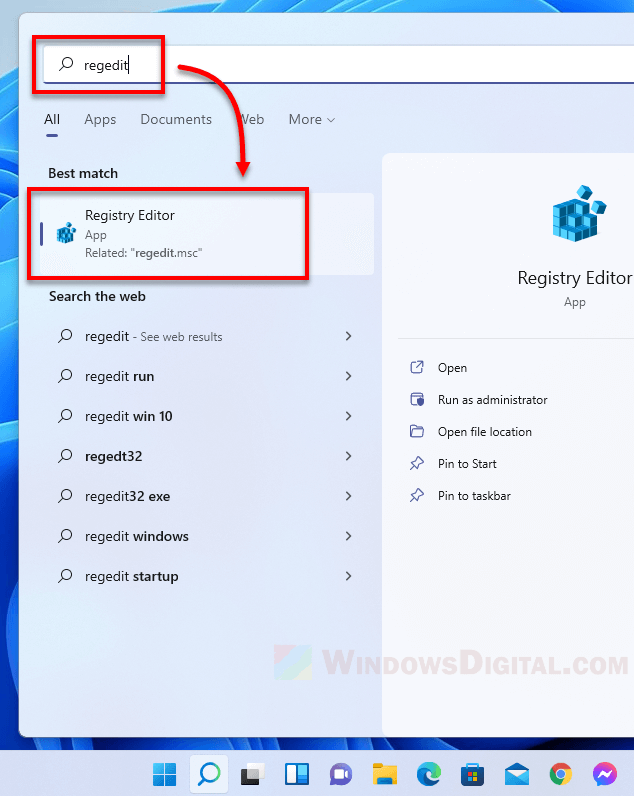
- On the Windows 10/11 start menu, search for and open “regedit” (Registry Editor).

- In the Registry Editor window, navigate to the following path.
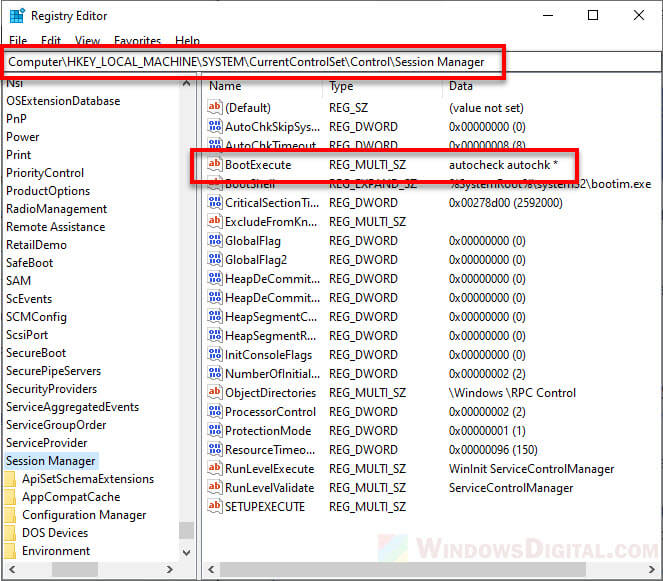
HKEY_LOCAL_MACHINE\SYSTEM\CurrentControlSet\Control\Session Manager
- Double-click on the “BootExecute” key in the right pane.

- In the “Value data” field, change the value to:
autocheck autochk /k:C *
- NOTE: Replace C with the letter of the drive you wish to disable disk checking on Windows startup.
- To disable disk checking for multiple drives, repeat the /k:x. For example:
autocheck autochk /k:C /k:D *
- The /k parameter is to tell autocheck to stop checking C: drive on Windows startup.
- Should you meet any unexpected result, you can change the key’s value back to its default:
autocheck autochk *
- Click OK to save changes.
Close Registry Editor and restart your PC. On the next Windows startup, the disk checking should not appear again.
If the disk checking persists on every startup
If the disk checking continues to run on every startup even after trying the methods above, you may want to seriously consider letting the disk check to complete the scan. If the scan finds any error that cannot be fixed, you may want to backup the existing data immediately before it’s too late, and replace the drive.
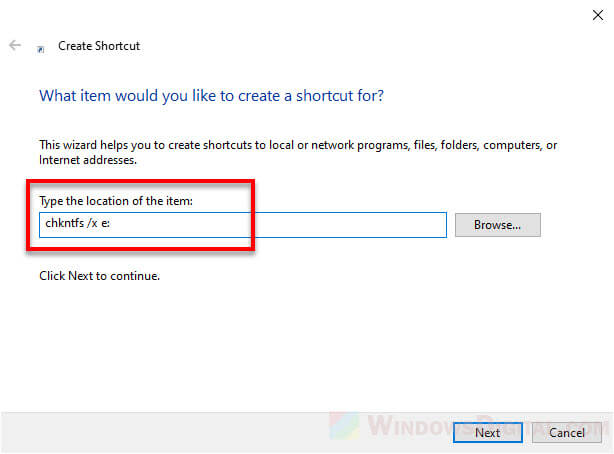
If you don’t care if the disk is faulty and that you might lose the data on the disk when it eventually fails, and just want to skip the disk checking on Windows startup, you can create a shortcut file to run the “chkntfs /x c:” (replace c: with the drive letter you wish to skip disk checking on startup) command and include the shortcut file as a startup program.
To create a shortcut file, right-click anywhere on your desktop, select New, then Shortcut. Enter the command as the shortcut path and follow the rest of the on-screen instruction to complete creating the shortcut.
Note that the shortcut file has to be run as administrator for the command to be executed successfully. You can set it to always and automatically run as admin by right-clicking the shortcut file > Properties > Shortcut tab > Advanced > Run as administrator.
To set the shortcut file as a startup program, press Win + R keys to open Run window. In the Run window, type in “shell:startup” and press enter. This will open a folder where all startup programs’ shortcuts are placed. Move the shortcut you’ve created to the startup folder.
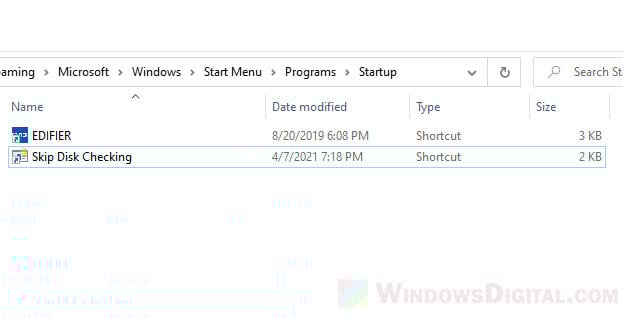
After doing so, the shortcut to execute the skip disk check command will automatically be run on every startup so that Windows will automatically skip the disk checking on the next startup.
Table of contents
- What Is Chkdsk.exe?
-
What Triggers Chkdsk.exe?
- Incorrect shutdowns
- A malware attack
- Hard drive issues
- How to Сancel Check Disk in Windows 10
- Using the system registry
- Using the Command Prompt
- Do I Need Check Disk in Windows 10?
- Should One Disable Check Disk?
- Why Does a Windows 10 and Windows 11 PC Run CHKDSK at Startup: Answered
You have probably realized that every time you turn on your computer, it does a disk check, something that it never used to do before. Should this be a cause for alarm? While disk scanning does not always mean harm, it is mostly trying to communicate about an underlying problem.
This used to be an issue in Windows 10. However, many users are also experiencing it in Windows 11. As it turns out, your operating system may be detecting possible issues with your drive that it needs to check to confirm that everything is alright.
What Is Chkdsk.exe?
This is pronounced as “check disk,” and it is basically a command that checks drives. It works by displaying the status report of the disk and can even fix the issues found. However, to use this tool, your computer should have Autochk.exe in its system.
The computer’s hard disk stores all the files in folders. Also, it contains some security information on who can access those files.
The hard disk carries so much information, and CHKDSK’s work is to ensure that all the information about the folders, data, and security status is correct. Unfortunately, an error might occur when the computer shuts down abruptly or when you eject or remove a USB device unsafely. It could also be a result of hardware issues or malware.
These problems are reflected in the hard disk’s administrative information, thus forcing the CHKDSK command to run in order to detect and fix those issues.
The CHKDSK command scans the hard disk and fixes any file issues on the drive. There is a range of possible reasons why the Check Disk command is triggered, some of which include:
What Triggers Chkdsk.exe?
What Triggers Chkdsk.exe?
Incorrect shutdowns
The primary trigger of the check disk process is if the system shuts down inappropriately. You are supposed to switch off the computer via the Start menu and give it time to shut down completely.
If the computer goes off abruptly or if you shut it down by pressing the Start button, you are likely to experience data losses and file system issues that force it to go through a check disk routine when booting.
Also, you should not make the mistake of shutting the computer down by unplugging it from the power supply. The Check Disk command is triggered to check if the hard disk is okay after undergoing the improper shutdown. This could also happen if you experience a power failure.
Also read: Shutting down a PC when the Windows 10/11 update is under progress
A malware attack
A check disk scan could also be an indication that your computer is under a malware attack, which might include viruses and other foreign programs that undermine the file system’s functionality.
You probably opened an unsecured link that threatened the safety of the computer system, and this triggers the Check Disk utility to run to ensure that there are no threats.
The best way to avoid this is by ensuring that you have a quality antivirus program installed at all times.
PRO TIP
We recommend using Auslogics Anti-Malware . The software is a comprehensive antivirus solution for a Windows PC and can detect even the rarest forms of malware. Once installed, Auslogics Anti-Malware will let you set up automatic safety checks so that no bad items can sneak onto your PC. Plus, the program is fully compatible with Windows and can run alongside other antivirus software!
Also read: How to Prevent Malware: Lock Down Your Online Safety
Hard drive issues
Chances are that some problems with the drive have been detected. This is the leading cause of Windows 10 running CHKDSK every time you turn your PC on. It does so to check for any file system issues, like bad sectors that put the entire computer system at risk and could even result in hard drive failure.
It is recommended that you give the program time to run, hoping that it will fix the problem. It will indicate if it finds any issues and show how they should be solved. The report is in Check Disk’s log file, which you can access by going to the Start menu and then typing “event viewer.”
Click on it and select the application. You will find comprehensive information on any found issues, and you can also do that by checking the system logs for any sources listed as the cause of the underlying problems. If you notice that the Check Disk utility keeps running after every startup, it means that the hard drive is failing, and that should cause alarm.
How to Сancel Check Disk in Windows 10
The Check Disk command is handy as it continually checks for bugs and failures in the computer system, but you do not need it to run every time after starting the computer.
If you have enabled the command, it is easier to stop it since you only need to click on any key to skip this step. You will have about 8 seconds to quickly skip checking, after which the process will automatically run.
The issues come in when you have a scheduled disk check and have no time to wait for the process to finish running. In such scenarios, you have no choice but to cancel the disk check.
Before doing so, you should determine if any of the drives have a scheduled check so you can cancel it by pressing skip on the next reboot.
That said, there are steps you can take to prevent the utility from running at startup. You don’t have to wait to hit a key to skip the automatic check desk routine whenever you turn on or restart your PC.
You can edit your system registry on Windows 10 or Windows 11 or use a command in the Command Prompt. We’ll walk you through both steps.
Using the system registry
The system registry controls many different processes in Windows. Whether you’re running Windows 10 or 11, the process is pretty much the same, and you have to be careful about how you adjust settings in the registry. That’s because one wrong turn or adjustment could cause severe damage to your operating system.
Warning!
It’s advisable that you create a backup of the entire registry before attempting to run this fix. This way, if you make a mistake, you can roll back the changes and undo the damage.
That said, you should look for an expert to handle this if you’re uncomfortable using the Registry Editor or don’t know how to navigate it.
Follow these steps to back up the registry in Windows 11 and Windows 10:
- On your keyboard, press the
Win + Rshortcut to summon the Run dialog window. - Type
regeditinto the Run text box and hit theEnterkey.
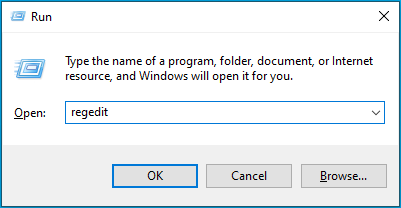
- Click on Yes when you see the UAC confirmation box.
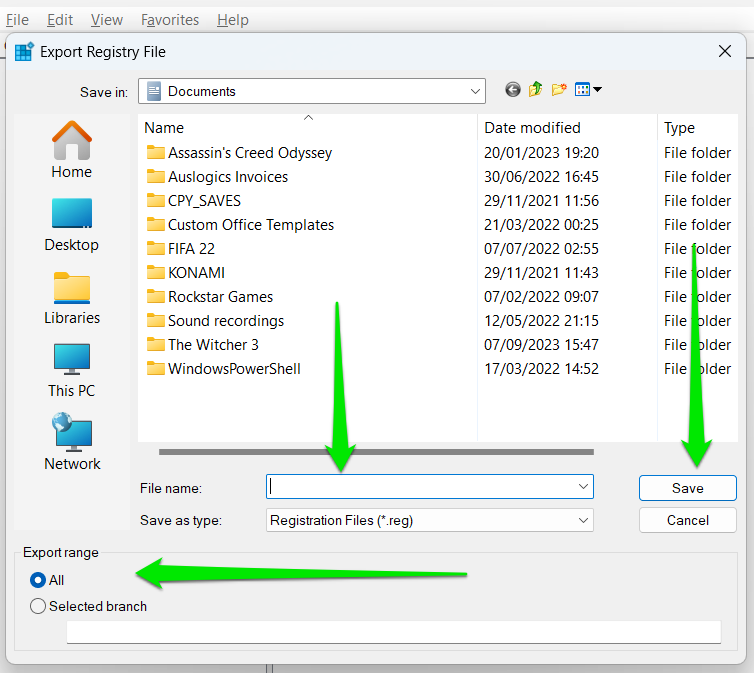
- After the Registry Editor appears, click on File and select Export from the context menu.
- Go to the File Name text box and enter a name for the backup file.
- Head to the Export Range section and select All. That means you’re backing up the entire system registry.
- Browse to the folder where you’d like to save the file, then click on the Save button.
- Whenever you want to recover the backup, click on File once you open the Registry Editor and select Import. Then, go to the folder where you saved the backup and double-click the file.
Now, follow these steps to prevent the system from running the CHKDSK utility at startup:
- Launch the Registry Editor and expand HKEY_LOCAL_MACHINE in the left pane.
- Next, expand the SYSTEM folder.
- After that, click the arrow beside CurrentControlSet to expand it.
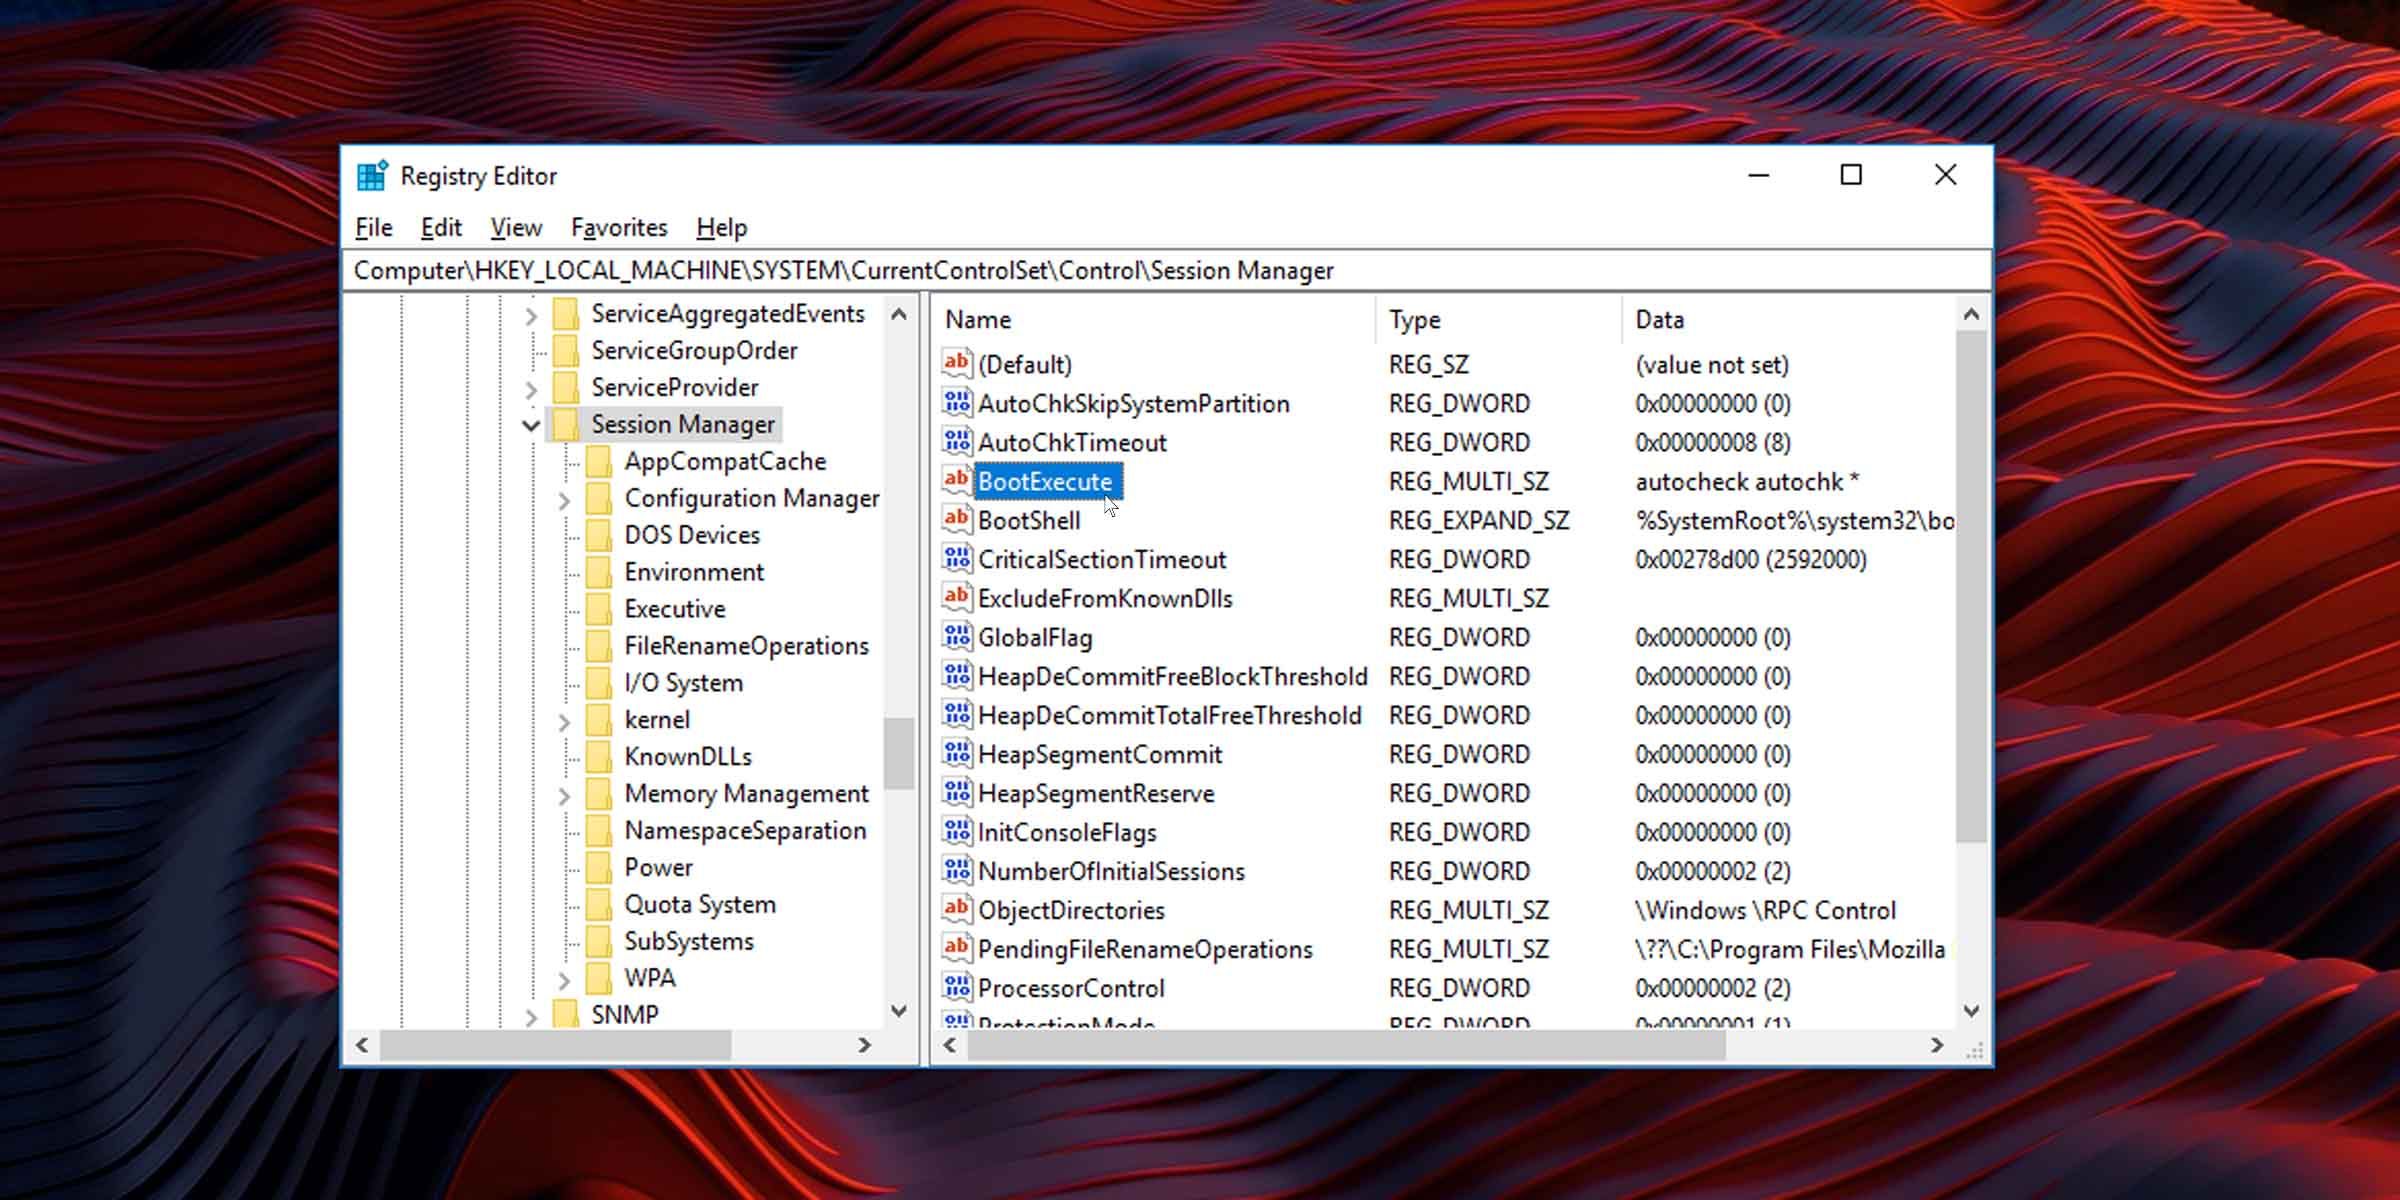
- Under CurrentControlSet, expand Control and scroll down to click on Session Manager.
- Go to the right side of the screen after clicking on Session Manager to locate the BootExecute string and double-click it.
- After the Edit Multi-String dialog appears, go to the Value data box and change the value to autocheck autochk *. Remember to add the space before the asterisk (*).
- Now, click on the OK button.
This should stop the CHKDSK utility from running on Windows startup, whether you’re running Windows 10 or Windows 11.
Also read: How to Back Up and Restore the Windows 10 Registry
Using the Command Prompt
You can also enter a series of command lines in the Command Prompt window to stop Windows from checking your disk whenever you turn on your computer or restart it.
Follow these steps:
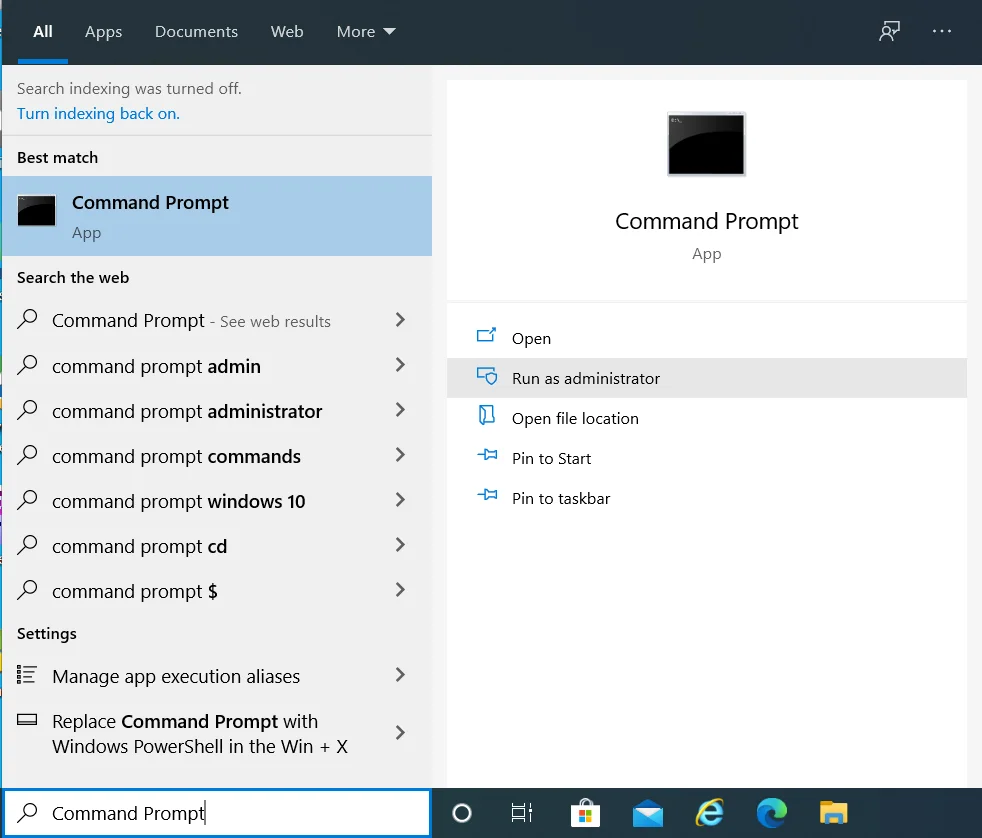
- Firstly, open the Command Prompt in admin mode. To do that, head to the Start menu, search for
CMD, then click on Run as administrator once you see the Command Prompt result. In some versions of Windows 10, you can right-click the Start button and select Command Prompt (Admin).
- Click on Yes in the UAC confirmation box.
- Once the Command Prompt opens, type
fsutil dirty query C:into the Command Prompt and hit theEnterkey.
Note
The command helps you confirm if Windows has marked the hard drive with a dirty bit value. That’s because the CHKDSK utility automatically checks drives that are marked dirty.
The “C:” part of the command should be replaced with your hard drive’s drive letter. So, if you want to query drive E’s dirty value, use “E:” instead.
- After that, type
chkntfs /x c:and hit theEnterkey. This command will prevent the Check Disk tool from checking the drive on startup. - You can also prevent the utility from scanning more than one drive on startup. To do that, use the following command:
chkntfs /x c: d: e:
Note
Always add a space after entering a drive letter and the column.
- That’s it!
Do I Need Check Disk in Windows 10?
The answer to this question is a simple yes. You may have noticed that disk checking in Windows 10 is a bit different from that on other Windows versions, but it offers great help in getting rid of bugs and other issues that could be slowing down the system. The Check Disk command helps in correcting any problems that could have been caused by corrupted software, sudden or improper shutdowns, or malware attacks. This, in turn, helps improve the computer’s performance.
Windows 10 has a disk checker, which is a tool meant for detecting and fixing disk issues automatically. This means that you do not have to run the traditional disk check to identify any underlying problems and fix them. The command periodically checks the hard drive for any bad sectors and system errors and automatically performs maintenance, so you do not have to run it.
To run CHKDSK in Windows 10 and Windows 11, you should:
- Open File Explorer and go to This PC.
- Right-click on the drive that you wish to scan.
- Click on Properties.
- Click the Tools tab.
- Press the Check button.
You can also run the CHKDSK tool using the Command Prompt. Here’s how:
- Firstly, open the Command Prompt in admin mode. To do that, head to the Start menu, search for
CMD, then click on Run as administrator once you see the Command Prompt result. - Click Yes in the UAC confirmation box.
- After the Command Prompt opens, type the following and tap the
Enterkey:
chkdsk C: /f /r /x
Note
The /f parameter attempts to fix any error that the utility finds.
The /r option locates bad sectors with recoverable information and attempts to recover those files.
The /x switch dismounts the drive or partition you want to scan before CHKDSK begins to check it. If the drive is in use, you’ll have to tap the Y keyboard button to start the check after your PC restarts.
- That’s how to run the utility using the Command Prompt on Windows 10 or Windows 11.
With this, the CHKDSK utility will check for any errors on the file system.
If there are any errors detected, the system will ask you to check the disk, and if there are no errors, then a message will pop up showing that you do not need the scan. However, when the CHKDSK tool keeps running after every computer startup, this could be a sign of an underlying problem, and you should have the issue checked.
Should One Disable Check Disk?
It depends on how the system behaves or operates. As mentioned earlier, the check disk process is crucial for detecting and fixing disk-related errors. However, if it becomes a nuisance, then you should disable it. The most annoying part of running a disk checker is when it keeps running when not needed. This mostly happens when you do not switch off the computer properly.
The blue screen may appear, and this means danger. On booting the computer, it says that it’s checking the file system or that one of the disks needs to be checked. Although you may cancel the command and go ahead to boot the computer, it is recommended that you let it finish the scan.
Pressing any key will stop the check disk process, but once you restart the computer, the command is likely to run again. If this happens, it means that your computer has an underlying issue that you should stop ignoring. It means that Windows still wants the drive to be scanned. If you ignore it, it will keep reminding you until you have it checked.
Letting the disk checker do its job is the best thing to do, but it can sometimes be time-consuming, and you do not have all that time to wait. Also, you may realize that even after letting it run the scan, it will still want to run after the next booting session. If you eject a USB flash before the system has finished running or if the system shuts down improperly, probably due to a power failure, Windows automatically detects the issue and will force another check disk scan. In such a case, you can disable it.
PRO TIP
If you are frequently running into bugs and slowdowns on your PC, consider optimizing it with Auslogics BoostSpeed . The software will quickly scan your system for anything that may be slowing it down (junk, temporary files, duplicates, leftover update files, etc.) and safely remove these items in just a few clicks!
Why Does a Windows 10 and Windows 11 PC Run CHKDSK at Startup: Answered
From this information, it is evident that CHKDSK is a crucial aspect of your computer, as it helps keep bugs at bay. However, it is most efficient when scheduled or when you run it manually. If you realize that it keeps running at startup, that means that your computer is experiencing some hard disk errors that need to be checked. You should let the disk checker finish the scan and identify the problems. If there are any issues detected, then let the tool fix them before continuing with the boot. If it shows that there are no errors, then you are good to go.
However, if you let it run the scan and it runs the same command during the next booting session, this could be a sign that your computer system has been attacked by malware and you should check to ensure that you have up-to-date antivirus software. If the issue continues, it is best if you let an expert look into the problem, as it could be an indication of a bigger underlying issue.
Sign in to your MUO account

Windows generally performs a check for disk integrity on startup if it detects an error with a drive or if the system was not shut down properly. But sometimes, it goes into a loop and surfaces a scan even if everything is alright. If that’s the case, you may want to disable disk checking on Windows startup.
It isn’t advised that you do this, but if you’re sure that Windows is offering to check disks in error and that your disks and the data they contain are fine, then there is a workaround.
How to Skip Chkdsk on Windows via the Command Prompt
An easy way to disable disk checking on Windows startup is to use the chkntfs command. Here’s what to do:
- Click on the Start menu and type “command prompt.”
- Right-click on the Command Prompt app and select Run as administrator. You may have to allow user access.
-
To skip disk checking on C drive, type the following into the console and hit Enter. You can replace C with any drive you want to be skipped.
Chkntfs /x C: -
If you want to skip more than one disk drive at Windows startup, simply append that drive letter to the command. The command for skipping C and D drive checking would look like this:
chkntfs /x C: D:
This should stop Windows from asking to check your disks at startup.
How to Cancel Disk Checking on Startup via the Registry
Alternatively, you can get Windows to skip surfacing the option to check your disks at startup. However, be warned that changing registry entries could make your system unstable. If you’re ready to give it a shot, here’s how.
- Press Win + R, type in “regedit,” and click on OK. You may be asked for user access control permission.
-
Navigate to the following location and click on the folder Session Manager to bring up its contents.
HKEY_LOCAL_MACHINE\SYSTEM\CurrentControlSet\Control\Session Manager -
Look for the string named BootExecute.

- Double-click it to open and edit its contents.
-
Type this into the value data field to skip disk checking on C drive:
autocheck autochk /k:C *
-
To skip disk checking on multiple drives add those drive names into the field. The value data for skipping C and D drive checking would look like this:
autocheck autochk /k:C /k:D *

If you want to revert to scanning and checking for disk errors at startup, you’ll need to reset BootExecute to its default value. To do this, simply set its value data to the following:
autocheck autochk *
If Disk Checking Persists, Run a Scan
If you’ve tried these methods but your computer still attempts to check disks on every startup, you should consider letting the system run a disk check. If the scan reports any errors, it could mean that there is a serious problem with one or more of your disk drives. In such cases, it’s best to back up your data as soon as possible.
Turn Off or Fix Windows Chkdsk
These workarounds should turn off disk checking on Windows startup, but it is advised that you do this only if you are sure that your disks are in good health. If, on the other hand, you are skipping Windows Chkdsk because it gets stuck or it freezes on startup, there are other fixes.