
Все способы:
- Параметры вкладки «Enhancements»
- Если нет вкладки
- Способ 1: Обновление аудиодрайвера
- Способ 2: Активация служб
- Способ 3: Проверка оборудования
- Вопросы и ответы: 0
Параметры вкладки «Enhancements»
На вкладке «Enhancements» у «Панели управления звуком» Windows 10 предусматриваются дополнительные эффекты звучания. Она и называется «Улучшения» или «Дополнительные эффекты», а доступна как для устройств вывода звука (например, встроенных динамиков или внешних колонок), так и для оборудования для ввода звука (микрофона).
Сразу следует отметить, что перечень эффектов улучшения отличается и зависит от возможностей звуковой карты. А в некоторых случаях вкладка и вовсе может отсутствовать – иногда причина в том, что есть проблемы в системных настройках, программном обеспечении или в самом оборудовании (наиболее распространенные неполадки мы рассмотрим позже).
Чтобы попасть в окно «Свойства» звукового оборудования, нужно проделать несколько простых шагов:
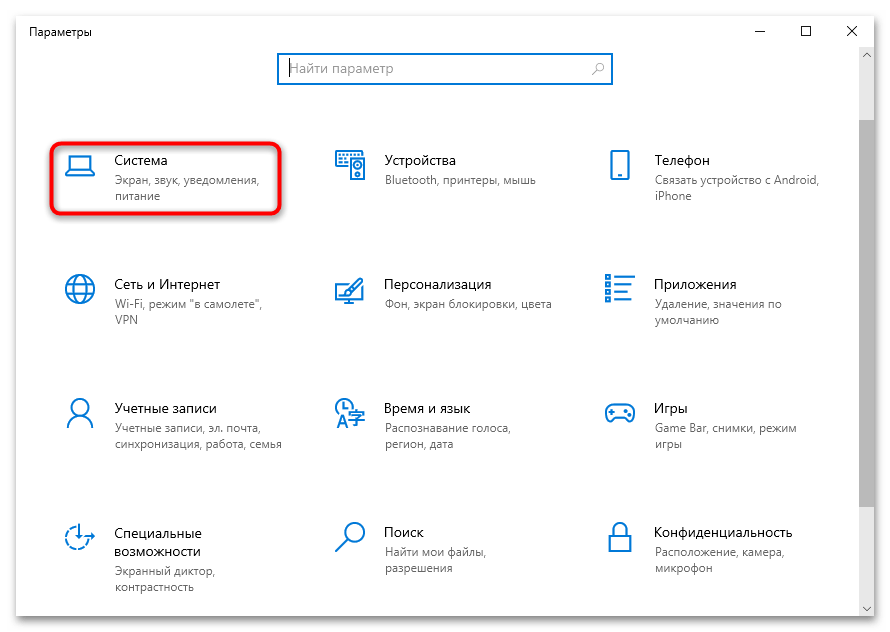
- Откройте штатные «Параметры» через главное меню Windows 10.
- Перейдите в раздел «Система».
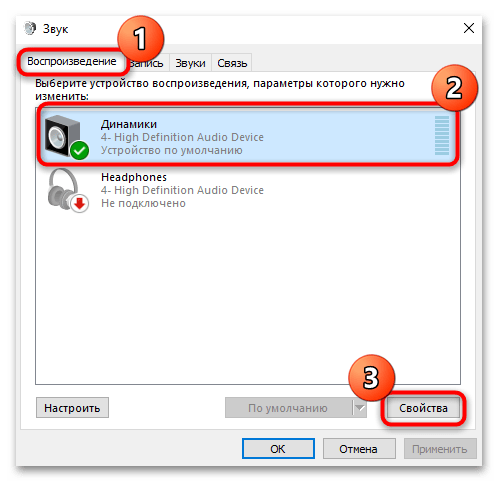
- На панели слева выберите вкладку «Звук», затем в центральной части окна кликните по строке «Панель управления звуком».
- В открывшемся окне на вкладке «Воспроизведение» найдите то оборудование, которое используется для вывода звука, выделите его и нажмите на кнопку «Свойства».
- Вы попадете в окно со свойствами устройства, где и есть вкладка «Enhancements».

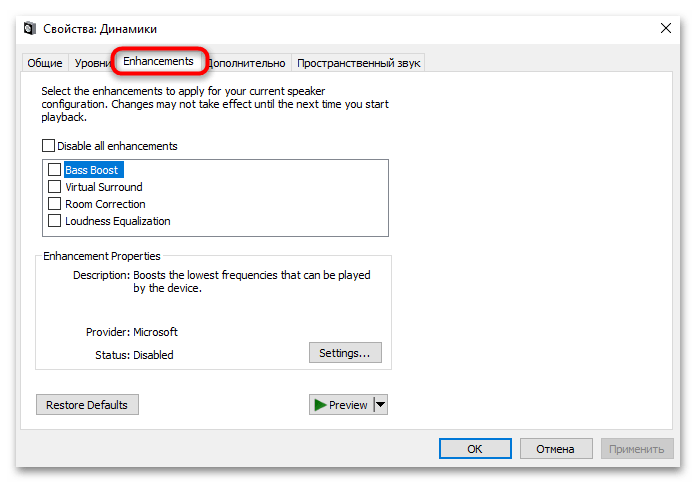
Кстати, параметры на вкладке могут быть как на русском языке, так и на английском. В первом случае упрощается настройка, поскольку при выборе того или иного эффекта в нижней части отображается описание данной функции. Мы разберем более подробно другой вариант:
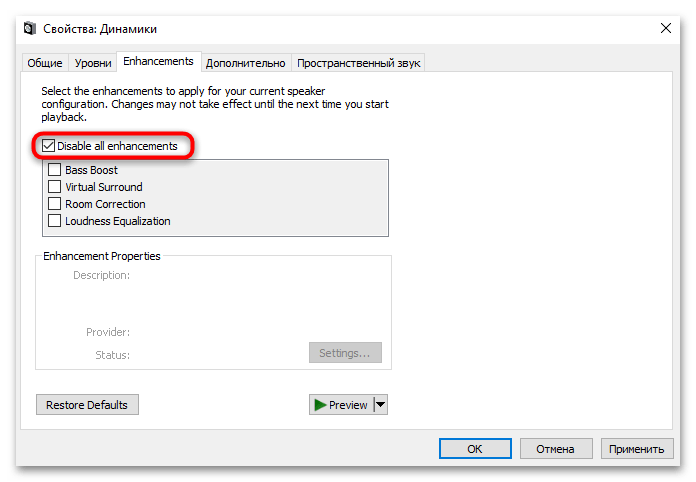
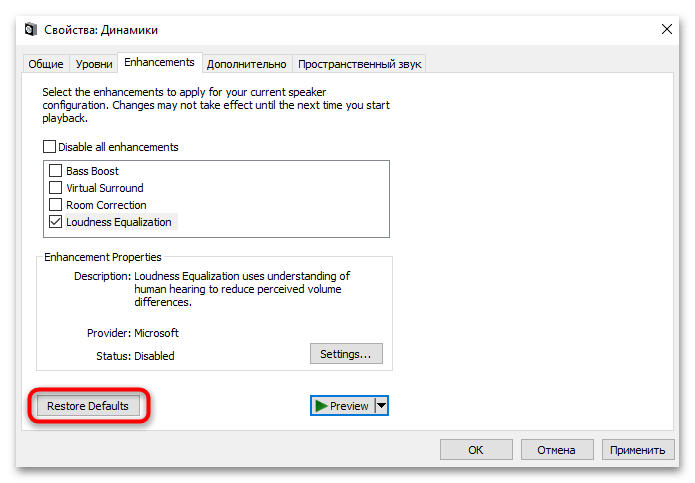
- При выборе опции «Disable all enhancements» вы отключите все активные эффекты, в том числе тонкомпенсацию, виртуальный звук и другие.
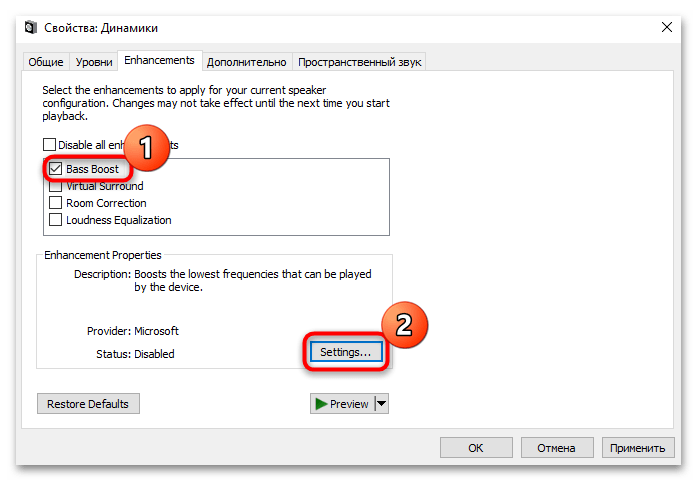
- Пункт «Bass Boost» («Тонкомпенсация») отвечает за усиление низких частот, которые сможет воспроизвести звуковое оборудование. Чтобы тонко настроить параметр, выделите и нажмите на кнопку «Settings».
- В новом окне вы сможете выбрать частоту и уровень громкости. Иногда такая настройка позволяет избавиться от различных помех, хрипов в динамиках – поэкспериментируйте со значениями параметров.
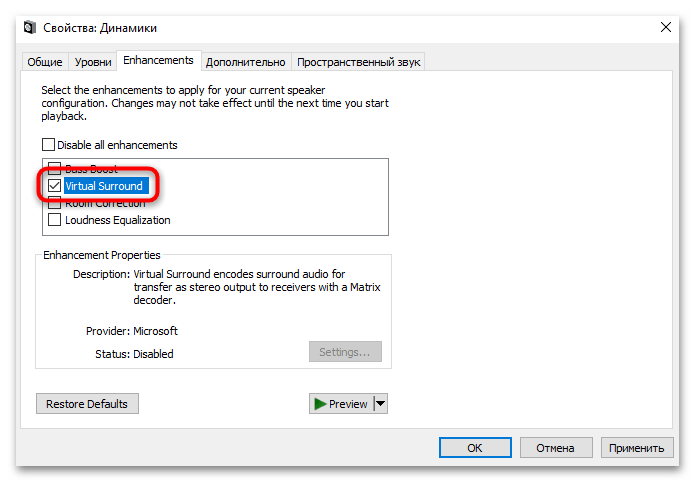
- Если у вас есть опция «Virtual Surround» («Виртуальный объемный звук»), тогда вы сможете включить кодировку объемного звука для передачи его в качестве стереозвука.
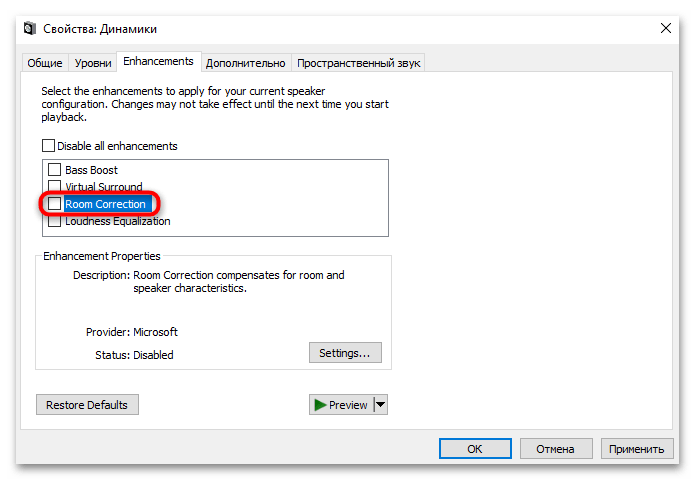
- «Room Correction» («Коррекция звучания») – улучшение предназначено для калибровки звука в соответствии с характеристиками помещения и самих динамиков.

Обратите внимание, что автоматическая калибровка доступна только при подключенном микрофоне.
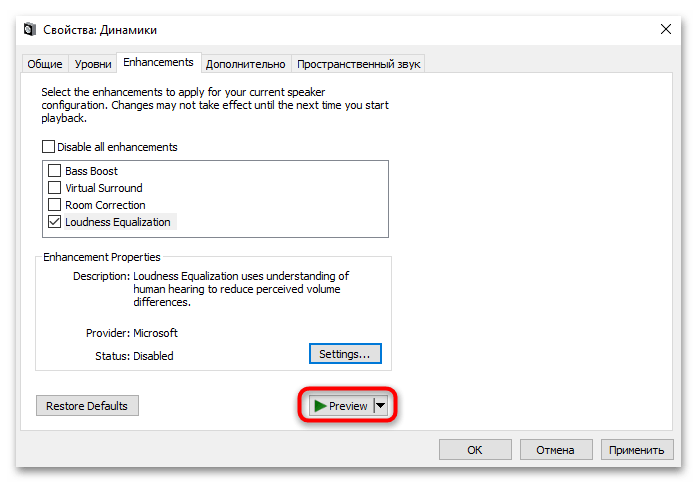
- «Loudness Equalization» («Выравнивание громкости») – параметр, который может убрать разницу в уровне воспроизведения звуков из разных источников. Например, если вы одновременно используете звук в браузере, плеере и мессенджере, то функция в значительной степени сгладит перепады звука. Доступна дополнительная настройка параметра – выделите его и нажмите на соответствующую кнопку («Settings»).
- В новом окне с помощью ползунка можно отрегулировать время затухания (чем левее расположен ползунок, тем короче затухание).
- Кнопка «Preview» позволяет прослушать звук с уже включенными эффектами.
- Чтобы сбросить все настройки к тем, которые были по умолчанию, нажмите на кнопку «Restore Defaults».
- Если дополнительные эффекты и улучшения были применены, не забудьте сохранить настройки нажатием на «ОК».


Мы разобрали основные улучшения на вкладке «Enhancements», которые встречаются у большинства звуковых карт. В отдельных случаях могут быть и дополнительные параметры, например пункт «Equalizer» — многополосный эквалайзер, позволяющий тонко настроить частоты звучания. В акустических системах стандарта 5.1 (и звуковых картах, которые его поддерживают и располагают соответствующими разъемами) также может присутствовать пункт «Speaker Fill», который отвечает за передачу звука во все динамики (заполнение динамиков).
Если нет вкладки
Если в вашем случае вкладки «Enhancements» нет, но звуковая карта поддерживает дополнительные эффекты, причиной могут быть неполадки в работе системы или звукового оборудования. Разберем наиболее распространенные проблемы, связанные с параметрами звука.
Способ 1: Обновление аудиодрайвера
Чаще всего отсутствие звуковых улучшений в свойствах аудиооборудования связано со сбоем в работе программного обеспечения звуковой карты. Вероятно, файлы оказались повреждены либо устарел драйвер. В этом случае может помочь переустановка/обновление ПО звукового оборудования. Выполняется оно с помощью встроенных средств системы или через фирменные вспомогательные утилиты от производителя карты или сторонних разработчиков. Также часто исправить проблему позволяет установка старых (базовых) драйверов. Обо всех способах поиска и установки драйверов для звуковой карты наш автор писал более развернуто в отдельном материале.
Подробнее: Поиск и инсталляция аудиодрайверов для Windows 10
Способ 2: Активация служб
Также стоит проверить работу соответствующих служб в системе. Вероятно, не все компоненты запускаются автоматически, отчего появляются проблемы не только с настройкой звучания, но и с самим воспроизведением.
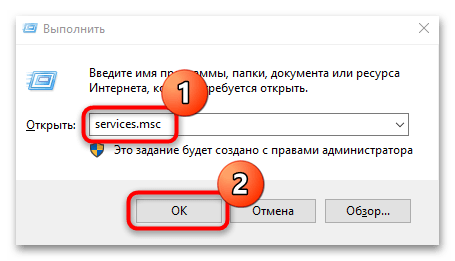
- Используйте сочетание клавиш «Win + R» для вызова окна «Выполнить», где нужно прописать команду
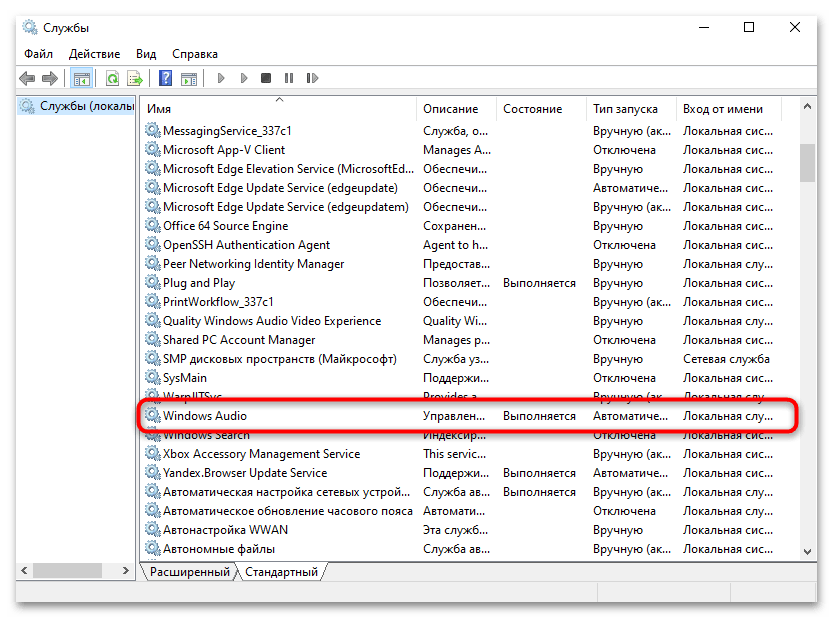
services.mscи нажать «ОК». - В списке служб отыщите «Windows Audio» и кликните по ней два раза левой кнопкой мыши.
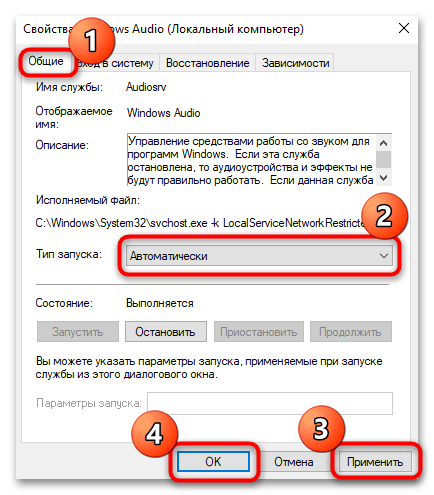
- На вкладке «Общие» в меню «Тип запуска» выставьте пункт «Автоматически», примените и сохраните настройки.
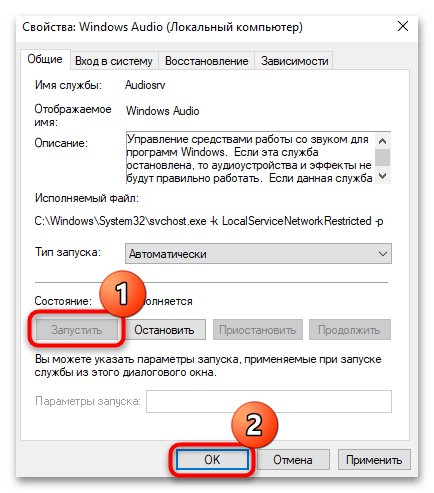
- Если же служба отключена, запустите ее вручную после выбора типа запуска и применения параметра. Подтвердите действие.
- На вкладке «Зависимости» просмотрите службы, которые связаны с «Windows Audio». Запомните названия, затем в окне оснастки служб найдите их и проделайте то же самое: включите автоматический тип запуска и при необходимости активируйте их вручную.

Выполнив все шаги, перезагрузите компьютер. Если проблема была в работе служб, теперь на панели звука вы увидите вкладку с дополнительными улучшениями.
Способ 3: Проверка оборудования
Можно проверить, определено ли звуковое оборудование операционной системой. Это пригодится при подключении колонок или наушников посредством USB-разъема или через внешний звуковой интерфейс.
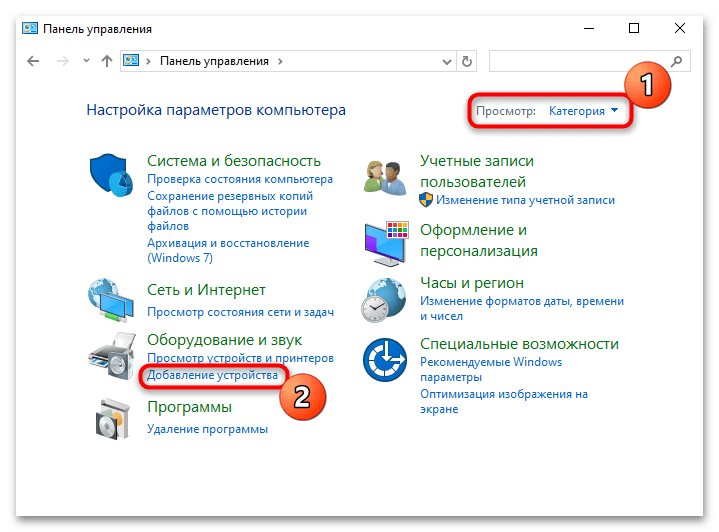
- Откройте классическую «Панель управления», отыскав средство через строку поиска.
- Для отображения разделов в блоке «Просмотр» измените значение на «Категории», затем под заголовком «Оборудование и звук» кликните по ссылке «Добавление устройства».
- Система начнет проверку подключенного оборудования. Если в списке отобразится нужное устройство, выберите его и нажмите на кнопку «Далее».

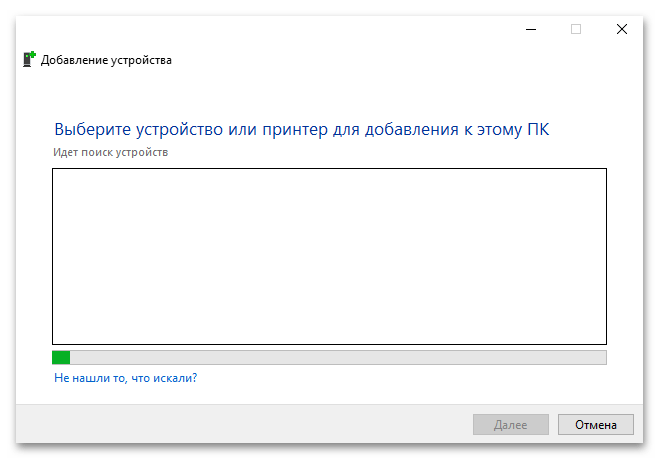
Останется следовать инструкциям пошагового мастера установки оборудования.
Наша группа в TelegramПолезные советы и помощь
If you don’t see a signal when you test the microphone, you may have a problem with your device’s audio enhancements (APOs). To disable audio enhancements:
-
Select Additional device properties from the Device Properties panel. (Start > Settings > System > Sound > Select your microphone from the dropdown under Input > Device Properties >Additional device properties)
-
Depending on your manufacturer, the setting to disable audio enhancements will either be on the Enhancements tab, or the Advanced tab.
-
On the Enhancements tab, select either the Disable all enhancements or the Disable all sound effects check box (depending on which option you see), and then select OK.
-
If you don’t see the setting there, select the Advanced tab, and look for the setting, Enable audio enhancements. If the manufacturer located the setting here, uncheck the box to disable audio enhancements.
-
If you have more than one audio input device, repeat these steps for each device and then test your microphone.
Need more help?
Want more options?
Explore subscription benefits, browse training courses, learn how to secure your device, and more.
Are you having issues with an automatic volume adjustment on your computer? It can get really annoying, especially when you want to listen to your favorite music or podcast. Don’t worry! In this article, we are here with a perfect guide on how to fix Volume Automatically Goes Down or Up in Windows 10.
What is an Automatic Volume Adjustment Issue?
Certain users have reported that the system volume automatically goes down or up without any manual intervention. According to some users, this issue occurs only when they have many windows/tabs open that play sound.
Other people have the opinion that the volume randomly increases to 100% for no reason at all. In most cases, the volume mixer values remain the same as before, even though the volume is visibly altered. An overwhelming number of reports also indicate that Windows 10 might be to blame.
What causes volume to automatically goes down or up in Windows 10?
- Realtek sound effects
- Corrupted or outdated drivers
- Dolby digital plus conflict
- Physical volume keys stuck

Table of Contents
Method 1: Disable All Enhancements
Several users were able to fix this strange behavior by navigating to the Sound options and removing all the sound effects:
1. To launch the Run dialogue box, use the Windows + R keys together.
2. Type mmsys.cpl and click on OK.
3. In the Playback tab, choose the device which is causing the issues then right-click on it and choose Properties.

4. In the Speakers Properties window, switch to the Enhancements tab.

5. Now, check on Disable all enhancements box.

6. Click Apply and then OK to save your changes.

7. Restart your PC and check to see whether the issue has now been rectified.
Method 2: Disable Automatic Volume Adjustment
Another probable reason for an uncalled-for increase or decrease in the sound levels is the Windows feature that automatically adjusts the volume level whenever you use your PC to make or receive phone calls. This is how to disable this feature to fix volume goes up/down automatically issue on Windows 10:
1. Press Windows key + R then type mmsys.cpl and hit Enter.
2. Switch to the Communications tab inside the Sound window.

3. Set the toggle to Do nothing under ‘When Windows detects communications activity.’

4. Click on Apply followed OK to save these changes.

The automatic volume adjustment issue should be resolved by now. If not, then proceed to the next solution.
Method 3: Tackle Physical Triggers
If you’re using a USB mouse with a wheel for adjusting the volume, a physical or driver issue may cause the mouse to become stuck between reducing or increasing the volume. So just to be sure, make sure to unplug the mouse and restart your PC to check if this resolves the volume automatically goes down or up issue.

Since we are talking about physical triggers, most modern-day keyboards have a physical volume key using which you can adjust the volume of your system. This physical volume key might be stuck causing the automatic volume increase or decrease on your system. Therefore, make sure your volume key is not stuck before proceeding software related troubleshooting.
Also Read: Fix Computer Sound Too Low on Windows 10
Method 4: Disable Attenuation
In rare situations, the Discord Attenuation feature might cause this issue. To fix volume automatically goes down or up in Windows 10, you need to either uninstall Discord or disable this feature:
1. Start Discord and click on the Settings cog.
2. From the left-hand side menu, click on Voice & Video option.
3. Under Voice & Video section, scroll down till you find the Attenuation section.
4. Under this section, you will find a slider.
5. Reduce this slider to 0% and save your adjustments.

If none of the above methods work, there might be an issue with the audio drivers, as explained in the next method.
Method 5: Turn OFF Dolby Audio
If you’re utilizing Dolby Digital Plus-compatible audio equipment, then the device drivers or the program that controls the volume might be causing the volume to automatically go up or down in Windows 10. To resolve this issue, you need to disable the Dolby Audio on Windows 10:
1. Press Windows Key + R then type mmsys.cpl and hit Enter.
2. Now, under the Playback tab select the Speakers that are automatically adjusting.
3. Right-click on the Speakers and choose Properties.

4. Switch to the Dolby Audio tab then click on the Turn OFF button.

5. Reboot your PC to save changes and see if you’re able to fix volume automatically goes down/up in Windows 10.
Also Read: Fix Volume icon missing from Taskbar in Windows 10
Method 6: Reinstall Audio Drivers
Corrupt or outdated audio drivers might cause the automatic volume adjustment or no sound in games issue on your Windows 10 PC. To resolve this issue, you can uninstall the currently installed drivers on your PC and let Windows automatically install the default audio drivers.
1. Press Windows Key + R then type devmgmt.msc and click OK to open Device Manager.
2. Expand Sound, video, and game controllers in the Device Manager window.

3. Right-click on the default Audio device such as Realtek High Definition Audio(SST) and select Uninstall device.

4. Reboot your PC to save changes.
5. Once the system start, Windows will automatically install the default audio drivers.
Frequently Asked Questions (FAQs)
Q1. Why does the volume go up automatically on Windows 10?
When the volume on a Windows 10 device raises automatically, the reason may be software or hardware-related, like microphone/headset settings or sound/audio drivers.
Q2. What is Dolby Digital Plus?
Dolby Digital Plus is an audio technology built on the foundation of Dolby Digital 5.1, the industry-standard surround sound format for cinema, television, and home theatre. It is an integral element of a broader ecosystem that encompasses content development, program delivery, device manufacturing, and consumer experience.
Recommended:
- How to get back your Volume Icon in Windows Taskbar?
- System icons do not appear when you start Windows 10
- How to Block or Unblock Programs In Windows Defender Firewall
- How to Link Facebook to Twitter
We hope this guide was helpful, and you were able to fix volume automatically goes down or up in Windows 10. If you have any queries/comments regarding this article, then feel free to drop them in the comments section.
Download Windows Speedup Tool to fix errors and make PC run faster
Microsoft and third-party vendors have shipped audio enhancement packages designed to make your system’s specific hardware sound absolutely perfect. These are referred to as Audio Enhancements in Windows 11/10.
But sometimes, these very ‘enhancements’ can cause problems with audio and sound. If you face issues with your audio in Windows 11/10, you may want to disable Audio Enhancements and see if it helps.
If you see a message Windows has detected that audio enhancements for the following device are causing problems and you’re sure that your audio driver is up to date and you still experiencing the problem, and no audio works on your machine or you can’t play music, hear system sounds, or play any audio from the internet, try disabling the audio enhancement.
Windows 11 user? Read how to use Enhance audio feature on Windows 11.
In the taskbar search, type ‘Sound’ and select Sound Control Panel item from the list of results.
The Sound properties box will open. Under the Playback tab, right-click the Default Device – Speakers/Headphones and select Properties.
In the Speakers Properties box which opens, switch to the Enhancements tab, select the Disable all enhancements check box.
In Windows 11, you will see the setting here now:

Now try to play your audio device. Does it work? If so great!
If the method fails, select Cancel to go back to the Sound Properties box again. Now on the Playback tab, select another default device (if you have one), select the Disable all enhancements check box, and try to play audio again.
Do this for each default device.
This is how you can completely disable or turn off Audio Enhancements in Windows 11/10.
Read: How to disable or enable Loudness Equalization in Windows
Remember, you can always enable any enhancements disabled earlier if you feel the sound quality is not up to the mark. The enhancements enabled under the “Enhancements” tab are artificial software enhancements. If you prefer to use enhancements, you should select those that are included with your sound card software instead, as they provide more settings to adjust the sound quality.
Related reads that you may like to see:
- Repair audio problems on Windows PC
- No sound on Windows computer
- Windows sound not working properly.
Anand Khanse is the Admin of TheWindowsClub.com, a 10-year Microsoft MVP (2006-16) & a Windows Insider MVP (2016-2022). Please read the entire post & the comments first, create a System Restore Point before making any changes to your system & be careful about any 3rd-party offers while installing freeware.
Knowing how to disable audio enhancements in Windows 10 can become useful if the audio enhancements cause a spike in CPU usage – usually audiodg.exe causing high CPU usage in Windows 10. There could be a variety of reasons why, such as incompatible drivers, corrupted files, or you just don’t want Windows to apply its own enhancements to the audio.
If you would like to disable the audio enhancements in Windows 10, you can use the following steps:
Disable Audio Enhancements in Windows 10
Disabling the audio enhancements in Windows 10 is very similar to Windows 7, so if you have done so in the past, then you should have no issue following these steps. If you haven’t you should still be able to easily follow the steps as it isn’t difficult to disable the audio enhancements.
- Click the Windows 10 start button and then type Sound. Click the Sound option from the search results.
- In the Playback tab, right-click the audio device you would like to disable the audio enhancements for, and then select Properties.
- Click on the Enhancements tab to display all the available audio enhancements
- Click the Disable all enhancements checkbox. The enhancements list should now become greyed out.
- Click the OK button to close the Properties window.
- You can use steps 2 – 5 for any other audio device you wish to disable audio enhancements for. When done, click the OK button to close the Sound window.


If audiodg.exe in Windows 10 causing issues with Windows audio enhancements, using the above steps should help alleviate the issue until a solution is found. You can also just leave the enhancements disabled and use the enhancements that come with your audio device instead.