
17 января 2025 г. 12:02
746
Содержание:
- Откуда берётся вирус Dinoraptzor.org
- Удаление записей из реестра
- Удаление через «Планировщик заданий»
Вредоносные программы, такие как Dinoraptzor.org, часто проникают на компьютер скрытно, вызывая неудобства и сбои в работе системы. Этот вирус автоматически открывает браузер и перенаправляет пользователя на рекламный сайт при каждом запуске устройства. Чтобы защитить свою систему, важно знать, откуда берутся подобные угрозы и как их избежать. Для надежной защиты системы и предотвращения подобных угроз приобретайте лицензии для качественных антивирусных программ В НАШЕМ МАГАЗИНЕ.
Этот вирус обычно появляется на компьютере после установки программ или игр, скачанных с непроверенных источников. Часто он интегрируется в установочные файлы или скрывается в дополнительных компонентах программ, которые пользователи не замечают во время инсталляции. Также вирус может проникнуть через вредоносные вложения в электронной почте или рекламные баннеры на сомнительных сайтах. Здесь вы узнаете, как удалить www.dinoraptzor.org на Виндовс 11 и устранить проблему самостоятельно.
Удаление записей из реестра
Первым шагом в удалении вируса является очистка реестра Windows. Это устранит скрытые команды, запускающие вирус:
1. Нажмите сочетание клавиш WIN+R и в появившемся окне введите regedit.
2. Откроется редактор реестра. Нажмите CTRL+F, чтобы открыть окно поиска.
3. Введите dinoraptzor и дождитесь завершения поиска.
4. Удалите найденные записи, связанные с вирусом, предварительно убедившись, что они точно относятся к вредоносному ПО.
5. Проверьте вручную путь: Компьютер → HKEY_CURRENT_USER → Software → Microsoft → Windows → CurrentVersion → Run.
6. Если найдете упоминания о сайте dinoraptzor.org, удалите их.
Работайте с реестром осторожно, чтобы случайно не удалить системные файлы.
Удаление через «Планировщик заданий»
Следующим этапом будет устранение задач, созданных вредоносным ПО в Планировщике:
- Зажмите комбинацию клавиш WIN+R и впишите команду taskschd.msc, после чего подтвердите действие клавишей Enter.
- В появившемся интерфейсе откройте раздел «Библиотека задач планировщика», расположенный в левой панели.
- Ознакомьтесь с перечнем активных заданий, уделив особое внимание тем, которые запускаются при старте системы.
- Найдите сомнительное задание и перейдите на секцию «Действия». Если там указано автоматическое открытие сайта dinoraptzor.org, это свидетельствует о наличии вируса.
- Щёлкните по задаче правой кнопкой мыши и выберите опцию «Удалить».
Теперь вы знаете, как удалить www.dinoraptzor.org и предотвратить автоматический запуск вируса при каждом включении компьютера.
If your browser is constantly being redirected to the Dinoraptzor.org site, then you likely have an unwanted browser extension or a malicious program installed on your device.

What is Dinoraptzor.org?
Dinoraptzor.org is a site that redirects the browser to ads for unwanted browser extensions, surveys, adult sites, online web games, fake software updates, and unwanted programs.
The Dinoraptzor.org website may be displayed to you through websites that redirect you to the site, push notifications, or by malware that opens the site without your consent.
These advertisements will be shown often enough that they will become intrusive and potentially harmful to the computer if the wrong program is downloaded.
Why am I seeing the Dinoraptzor.org ads?
Your browser may be redirected to Dinoraptzor.org due to malware infection on your device, push notifications from malicious sites, or by being redirected from another website you visited.
Less reputable sites may display malicious ads that redirect your browser to Dinoraptzor.org in order to generate advertising revenue. If this happens, you should close the page and consider installing an ad blocker like AdGuard to block these types of ads. If you continue to see pop-ups from Dinoraptzor.org, it is possible that your computer is infected with a malicious program, and you should scan your device for adware and remove it.
Here are a few typical signs that you have a malicious program installed on your computer or phone:
- Advertisements appear in places they shouldn’t be.
- Your web browser’s homepage has mysteriously changed without your permission.
- Web pages that you typically visit are not displaying properly.
- Website links redirect to sites different from what you expected.
- Browser popups appear which recommend fake updates or other software.
- Other unwanted programs might get installed without your knowledge.
If your computer starts redirecting you to Dinoraptzor.org for no reason then you most likely have malware installed on the computer. To check your device for adware, browser hijackers, or other malicious programs and remove them for free, please use the guide below.
Removal Instructions for Dinoraptzor.org Ads
This malware removal guide may appear overwhelming due to the number of steps and numerous programs that are being used. We have only written it this way to provide clear, detailed, and easy-to-understand instructions that anyone can use to remove malware for free.
Please perform all the steps in the correct order. If you have any questions or doubts at any point, stop and ask for our assistance.
Browser hijackers and adware can infect Windows, Mac, or Android devices, so we’ve covered below all these operating systems. Depending on which operating system is installed on the device you’re seeing the Dinoraptzor.org pop-up ads, please click on the operating system icon below and follow the displayed steps to remove it.
- Remove Dinoraptzor.org from Windows
- Remove Dinoraptzor.org from Mac
- Remove Dinoraptzor.org from Android
Removal Instructions for Windows
Remove Dinoraptzor.org from Windows
To remove Dinoraptzor.org ads from your computer, follow these steps:
- STEP 1: Uninstall malicious programs from Windows
- STEP 2: Reset browsers back to default settings
- STEP 3: Use Malwarebytes Anti-Malware to remove malware and unwanted programs
- STEP 4: Use HitmanPro to scan your computer for badware
- STEP 5: Use AdwCleaner to remove adware and malicious browser policies
STEP 1: Uninstall malicious programs from Windows
In this first step, we will manually check if any unknown or malicious programs are installed on the computer. Sometimes adware and browser hijackers can have a usable Uninstall entry that can be used to remove them.
Windows 11Windows 10Windows 8Windows 7
-
Press the Windows key + I on your keyboard to open the Settings app.
First, open Windows Settings by pressing Windows+I on your keyboard. You can also right-click your Start button and select “Settings” from the list.

-
In the Settings app, click on “Apps” and then “Apps & features”.
When Settings opens, click “Apps” in the sidebar, then select “Apps & Features”.

-
Find the malicious program in the list of installed apps and uninstall it.
In Apps & Features settings, scroll down to the app list and search for unknown or suspicious programs. To make things easier, you can sort all installed programs by their installation date. To do this, click “Sort by” and select “Install date”.
Look out for any suspicious program that could be behind all the drama – anything you don’t remember downloading or that doesn’t sound like a genuine program. When you find a malicious program, click the three dots button beside it and select “Uninstall” in the menu that appears.
If you have checked your computer for malicious programs and did not find any, you can proceed with the next step in this guide.
-
Follow the prompts to uninstall the program.
In the next message box, confirm the uninstall process by clicking on Uninstall, then follow the prompts to uninstall the malicious program.
Make sure to read all of the prompts carefully, because some malicious programs try to sneak things in hoping that you won’t read them closely.


-
Press the Windows key + I on your keyboard to open the Settings app.
Press the Windows key + I on your keyboard to open the Settings app. You can also ope the Settings app by clicking the Start button on the taskbar, then select “Settings” (gear icon).

-
In the Settings app, click on “Apps”.
When the “Windows Settings” window opens, click on “Apps“. By default, it should open “Apps and Features” but if it doesn’t, select it from the list on the left.

-
Find the malicious program in the list of installed apps and uninstall it.
In Apps & Features settings, scroll down to the app list and search for unknown or suspicious programs. To make things easier, you can sort all installed programs by their installation date. To do this, click “Sort by” and select “Install date”.
Look out for any suspicious program that could be behind all the drama – anything you don’t remember downloading or that doesn’t sound like a genuine program. When you find a malicious program, click on it and select “Uninstall” in the menu that appears.
If you have checked your computer for malicious programs and did not find any, you can proceed with the next step in this guide.
-
Follow the prompts to uninstall the program.
In the next message box, confirm the uninstall process by clicking on Uninstall, then follow the prompts to uninstall the malicious program.
Make sure to read all of the prompts carefully, because some malicious programs try to sneak things in hoping that you won’t read closely.


-
Go to “Program and Features”.
Right-click on the Start button in the taskbar, then select “Programs and Features”. This will take you directly to your list of installed programs.

-
Search for malicious program and uninstall it.
The “Programs and Features” screen will be displayed with a list of all the programs installed on your computer. Scroll through the list until you find any unknown or suspicious program, then click to highlight it, then click the “Uninstall” button.
Look out for any suspicious program that could be behind all the drama – anything you don’t remember downloading or that doesn’t sound like a genuine program.
If you have checked your computer for malicious programs and did not find any, you can proceed with the next step in this guide.

-
Follow the on-screen prompts to uninstall malicious program.
In the next message box, confirm the uninstall process by clicking on Yes, then follow the prompts to uninstall malicious program. Make sure to read all of the prompts carefully, because some malicious programs try to sneak things in hoping that you won’t read closely.


-
Open the “Control Panel”.
Click on the “Start” button, then click on “Control Panel“.
-
Click on “Uninstall a Program”.
When the “Control Panel” appears, click on “Uninstall a Program” from the Programs category.

-
Search for malicious programs and uninstall them.
The “Programs and Features” screen will be displayed with a list of all the programs installed on your computer. Scroll through the list until you find any suspicious or unknown program, then click to highlight it, then click the “Uninstall” button.
Look out for any suspicious program that could be behind all the drama – anything you don’t remember downloading or that doesn’t sound like a genuine program.If you have checked your computer for malicious programs and did not find any, you can proceed with the next step in this guide.

-
Follow the on-screen prompts to uninstall malicious program.
In the next message box, confirm the uninstall process by clicking on Yes, then follow the prompts to uninstall malicious program. Make sure to read all of the prompts carefully, because some malicious programs try to sneak things in hoping that you won’t read closely.


If you are experiencing difficulty while attempting to uninstall a program, you can use Revo Uninstaller to completely remove the unwanted program from your computer.
Now that the malicious programs have been removed from your computer, we can proceed with the next step in this guide.
STEP 2: Reset browsers back to default settings
In this step, we will remove spam notifications, malicious extensions, and change to default any settings that might have been changed by malware.
Please note that this method will remove all extensions, toolbars, and other customizations but will leave your bookmarks and favorites intact. For each browser that you have installed on your computer, please click on the browsers tab below and follow the displayed steps to reset that browser.
ChromeFirefoxMicrosoft EdgeInternet Explorer
Reset Chrome for Windows to default settings
We will now reset your Chrome browser settings to their original defaults. This will reset your startup page, new tab page, search engine, and pinned tabs. It will also disable all extensions and clear temporary data like cookies. Your favorites, history, and saved passwords will not be cleared.
-
Click the three dots in the top-right corner and then click on “Settings”.
Open Chrome and click on the menu button (represented by three vertical dots) in the top right corner of the window. In the dropdown menu that opens, click “Settings“.

-
Click “Advanced”.
Chrome’s “Settings” should now be displayed in a new tab or window, depending on your configuration. In the left sidebar, click on the “Advanced” link.

-
Click “Reset and clean up”.
In the left sidebar, under the “Advanced” section, click on “Reset and clean up“.

-
Click “Reset settings to their original defaults”.
In the main window, the “Reset and clean up” section is visible, as shown in the screenshot below. Click on “Reset settings to their original defaults“.
-
Click “Reset settings”.
A confirmation dialog will now be displayed, detailing the components that will be restored to their default state should you continue with the reset process. To complete the restoration process, click on the “Reset settings” button.

-
(Optional) Reset Chrome Data Sync.
In case a malicious extension reinstalls itself even after performing a browser reset, you have an additional option to reset the data sync for your browser. To do this, navigate to chrome.google.com/sync and click on the Clear Data button.


Reset Firefox for Windows to default settings
We will now reset your Firefox browser settings to their default. The reset feature fixes many issues by restoring Firefox to its factory default state while saving your essential information like bookmarks, passwords, web form auto-fill information, browsing history, and open tabs.
-
Click the three horizontal lines in the top-right corner and then click on “Help”.
Click on Firefox’s main menu button, represented by three horizontal lines. When the drop-down menu appears, select the option labeled “Help“.

-
Click “More troubleshooting information”.
From the Help menu, click on “More troubleshooting information“.

-
Click on “Refresh Firefox”
When the “Troubleshooting Information” page opens, click on the “Refresh Firefox” button.

-
Confirm that you want to reset your browser settings.
To finish the reset process, click on the “Refresh Firefox” button in the new confirmation window that opens.
-
Click “Finish”.
Firefox will now close itself and will revert to its default settings. When it’s done, a window will list the information that was imported. Click on “Finish“.
Your old Firefox profile will be placed on your desktop in a folder named “Old Firefox Data“. If the reset didn’t fix your problem you can restore some of the information not saved by copying files to the new profile that was created. If you don’t need this folder any longer, you should delete it as it contains sensitive information.


Reset Microsoft Edge to default settings
We will now reset your Microsoft Edge browser settings to their default. This will reset your startup page, new tab page, search engine, and pinned tabs. It will also disable all extensions and clear temporary data like cookies. Your favorites, history, and saved passwords will not be cleared.
-
Click the three dots in the top-right corner and then click on “Settings”.
In the top right corner, click on Microsoft Edge’s main menu button, represented by three horizontal dots. When the drop-down menu appears, click on “Settings“.

-
Click on “Reset Settings”.
On the left side of the window, click on “Reset Settings“.
-
Click on “Restore settings to their default values”.
In the main window, click on “Restore settings to their default values“.

-
Click “Reset”.
A confirmation dialog should now be displayed, detailing the components that will be restored to their default state should you continue with the reset process. To complete the restoration process, click on the “Reset” button.
Microsoft Edge will now erase all your personal data, browsing history, and disable all installed extensions. Your bookmarks, though, will remain intact and still be accessible.


Reset Internet Explorer to default settings
We will now reset your Internet Explorer browser settings to their default. You can reset Internet Explorer settings to return them to the state they were in when Internet Explorer was first installed on your computer.
-
Go to “Internet Options”.
Open Internet Explorer, click on the gear icon in the upper-right part of your browser, then select “Internet Options“.
-
Select the “Advanced” tab, then click “Reset”
In the “Internet Options” dialog box, select the “Advanced” tab, then click on the “Reset” button.
-
Click on “Reset”.
In the “Reset Internet Explorer settings” section, select the “Delete personal settings” checkbox, then click on the “Reset” button.
-
Click on “Close”.
When Internet Explorer has completed its task, click on the “Close” button in the confirmation dialogue box.
Close your browser and then you can open Internet Explorer again.
STEP 3: Use Malwarebytes Anti-Malware to remove malware and unwanted programs
In this third step, we will install Malwarebytes to scan and remove any infections, adware, or potentially unwanted programs that may be present on your computer.
Malwarebytes stands out as one of the leading and widely-used anti-malware solutions for Windows, and for good reason. It effectively eradicates various types of malware that other programs often overlook, all at no cost to you. When it comes to disinfecting an infected device, Malwarebytes has consistently been a free and indispensable tool in the battle against malware. We highly recommend it for maintaining a clean and secure system.
-
Download Malwarebytes for Windows
You can download Malwarebytes by clicking the link below.
-
Install Malwarebytes
After the download is complete, locate the MBSetup file, typically found in your Downloads folder. Double-click on the MBSetup file to begin the installation of Malwarebytes on your computer. If a User Account Control pop-up appears, click “Yes” to continue the Malwarebytes installation.

-
Follow the On-Screen Prompts to Install Malwarebytes
When the Malwarebytes installation begins, the setup wizard will guide you through the process.
-
You’ll first be prompted to choose the type of computer you’re installing the program on—select either “Personal Computer” or “Work Computer” as appropriate, then click on Next.

-
Malwarebytes will now begin the installation process on your device.

-
When the Malwarebytes installation is complete, the program will automatically open to the “Welcome to Malwarebytes” screen.

-
On the final screen, simply click on the Open Malwarebytes option to start the program.

-
-
Enable “Rootkit scanning”.
Malwarebytes Anti-Malware will now start, and you will see the main screen as shown below. To maximize Malwarebytes’ ability to detect malware and unwanted programs, we need to enable rootkit scanning. Click on the “Settings” gear icon located on the left of the screen to access the general settings section.

In the settings menu, enable the “Scan for rootkits” option by clicking the toggle switch until it turns blue.

Now that you have enabled rootkit scanning, click on the “Dashboard” button in the left pane to get back to the main screen.
-
Perform a Scan with Malwarebytes.
To start a scan, click the Scan button. Malwarebytes will automatically update its antivirus database and begin scanning your computer for malicious programs.

-
Wait for the Malwarebytes scan to complete.
Malwarebytes will now scan your computer for browser hijackers and other malicious programs. This process can take a few minutes, so we suggest you do something else and periodically check the status of the scan to see when it is finished.
-
Quarantine detected malware
Once the Malwarebytes scan is complete, it will display a list of detected malware, adware, and potentially unwanted programs. To effectively remove these threats, click the “Quarantine” button.

Malwarebytes will now delete all of the files and registry keys and add them to the program’s quarantine.
-
Restart your computer.
When removing files, Malwarebytes may require a reboot to fully eliminate some threats. If you see a message indicating that a reboot is needed, please allow it. Once your computer has restarted and you are logged back in, you can continue with the remaining steps.


STEP 4: Use HitmanPro to scan your computer for badware
In this next step, we will scan the computer with HitmanPro to ensure that no other malicious programs are installed on your device.
HitmanPro is a second-opinion scanner that takes a unique cloud-based approach to malware scanning. HitmanPro scans the behavior of active files and also files in locations where malware normally resides for suspicious activity. If it finds a suspicious file that’s not already known, HitmanPro sends it to its clouds to be scanned by two of the best antivirus engines today, which are Bitdefender and Kaspersky.
Although HitmanPro is shareware and costs $24.95 for 1 year on 1 PC, there is no limit on scanning. The limitation only kicks in when there is a need to remove or quarantine detected malware by HitmanPro on your system and by then, you can activate the one-time 30-days trial to enable the cleanup.
-
Download HitmanPro.
You can download HitmanPro by clicking the link below.
HITMANPRO DOWNLOAD LINK
(The above link will open a new web page from where you can download HitmanPro) -
Install HitmanPro.
When HitmanPro has finished downloading, double-click on “hitmanpro.exe” (for 32-bit versions of Windows) or “hitmanpro_x64.exe” (for 64-bit versions of Windows) to install this program on your computer. In most cases, downloaded files are saved to the Downloads folder.

You may be presented with a User Account Control pop-up asking if you want to allow HitmanPro to make changes to your device. If this happens, you should click “Yes” to continue with the installation.

-
Follow the on-screen prompts.
When HitmanPro starts you will be presented with the start screen as shown below. Click on the “Next” button to perform a system scan.


-
Wait for the HitmanPro scan to complete.
HitmanPro will now begin to scan your computer for malicious programs.
-
Click on “Next”.
When HitmanPro has finished the scan, it will display a list of all the malware that it has found. Click on the “Next” button to have HitmanPro remove the detected items.

-
Click on “Activate free license”.
HitmanPro may now require to activate the free 30-days trial to remove the malicious files. To do this, click on the “Activate free license” button to begin the free 30 days trial and remove all the malicious files from your computer.

When the malware removal process is complete, it will display a screen that shows the status of the various programs that were removed. At this screen, you should click on the Next button and then if prompted you should click on the Reboot button. If HitmanPro does not prompt you to reboot, please just click on the Close button.


STEP 5: Use AdwCleaner to remove adware and malicious browser policies
In this final step, we will use AdwCleaner to remove the malicious browser policies that were set by browser hijackers on your computer and delete malicious browser extensions.
AdwCleaner is a free popular on-demand scanner that can detect and remove malware that even the most well-known anti-virus and anti-malware applications fail to find. This on-demand scanner includes a lot of tools that can be used to fix the side effects of adware. browser hijackers and other malware.
-
Download AdwCleaner.
You can download AdwCleaner by clicking the link below.
-
Double-click on the setup file.
Double-click on the file named “adwcleaner_x.x.x.exe” to start AdwCleaner. In most cases, downloaded files are saved to the Downloads folder.

AdwCleaner program will now open and you will be presented with the program’s license agreement. After you read it, click on the I agree button if you wish to continue. If Windows prompts you as to whether or not you wish to run AdwCleaner, please allow it to run.

-
Enable “Reset Chrome policies” to remove malicious browser policies.
When AdwCleaner starts, on the left side of the window, click on “Settings” and then enable “Reset Chrome policies“.

-
Click on the “Scan” button.
On the left side of the AdwCleaner window, click on “Dashboard” and then click “Scan” to perform a computer scan.

-
Wait for the AdwCleaner scan to finish.
AdwCleaner will now scan your computer for malware. This process can take a few minutes.
-
Click on “Quarantine” to remove malware.
When the AdwCleaner scan is completed it will display all of the items it has found. Click on the “Quarantine” button to remove the malicious programs from your computer.

-
Click on “Continue” to remove the malicious programs.
AdwCleaner will now prompt you to save any open files or data as the program will need to close any open programs before it starts to clean. Click on the “Continue” button to finish the removal process.

AdwCleaner will now delete all detected malware from your computer. When the malware removal process is complete, you may be asked to restart your computer.


Your computer should now be free of the Dinoraptzor.org pop-up ads and other malware.
If your current antivirus allowed this malicious program on your computer, you may want to consider purchasing Malwarebytes Premium to protect against these types of threats in the future.
If you are still having problems with your computer after completing these instructions, then please follow one of the steps:
- Run a computer scan with ESET Online Scanner
- Ask for help in our Windows Malware Removal Help & Support forum.
Removal Instructions for Mac
Remove Dinoraptzor.org from Mac
To remove Dinoraptzor.org ads from your Mac, follow these steps:
- STEP 1: Remove malicious profiles
- STEP 2: Delete malicious apps
- STEP 3: Reset browsers back to default settings
- STEP 4: Run a scan with Malwarebytes for Mac to remove malware
STEP 1: Remove malicious profiles
Profiles are used by IT admins in businesses to control the behavior of their Macs. These profiles can configure a Mac to do many different things, some of which are not otherwise possible.
When it comes to home users, adware and browser hijackers are using the configuration profile to prevent users from removing malicious programs from the computer. This also prevents the user from changing that behavior in the browser’s settings.
In this first step, we will check your computer to see if any configuration profiles are installed. To do this, follow the below steps:
-
Open “System Preferences”
From the Apple menu, select System Preferences.
-
Search for “Profiles”
When the System Preferences window opens, search for the Profiles icon.

If there isn’t a Profiles icon, you don’t have any profiles installed, which is normal and you can continue with the next steps.
-
Remove the malicious profiles
If there’s a Profile icon, click on it and select any suspicious profile that you want to remove, and then press the – (minus) button. Click Remove to remove the profile.


STEP 2: Delete malicious apps
In this second step, we will try to identify and remove any malicious apps and files that might be installed on your computer. Sometimes redirects or adware programs can have usable Uninstall entries that can be used to remove these programs.
-
Quit the malicious programs
On the Apple menu bar, in the top-right corner, if you see any unknown or suspicious icon, click on it and then select Quit.
-
Open “Finder”
Click the Finder application on your dock.

-
Click on “Applications”
In the Finder left pane, click on “Applications“.

-
Find and remove the malicious app.
The “Applications” screen will be displayed with a list of all the apps installed on your device. Scroll through the list until you find the malicious app, right-click it, and then click “Move to Trash”.
Look out for any suspicious program that could be behind all the drama – anything you don’t remember downloading or that doesn’t sound like a genuine program. Here are some known malicious programs: SearchMine, TakeFresh, TopResults, FeedBack, ApplicationEvents, GeneralOpen, PowerLog, MessengerNow, ImagePrime, GeneralNetSearch, Reading Cursors, GlobalTechSearch, PDFOnline-express, See Scenic Elf, MatchKnowledge, Easy Speedtest, or WebDiscover.

-
Click “Empty Trash”
On the dock, right-click on the trash icon and select “Empty Trash”. Doing so deletes the Trash’s contents, including the program that you just sent to the Trash.

-
Find and remove the malicious files
- Click the desktop to make sure you’re in the Finder, choose “Go” then click on “Go to Folder“.

- Type or copy/paste each of the below paths into the window that opens, then click Go.
- /Library/LaunchAgents
- ~/Library/LaunchAgents
- /Library/Application Support
- /Library/LaunchDaemons

- Look out for any suspicious files that could be behind all the drama – anything you don’t remember downloading or that doesn’t sound like a genuine program. These are some known malicious files: “com.adobe.fpsaud.plist” “installmac.AppRemoval.plist”, “myppes.download.plist”, “mykotlerino.ltvbit.plist”, or “com.myppes.net-preferences.plist”. When you find a malicious file move it to the Trash.
- Click the desktop to make sure you’re in the Finder, choose “Go” then click on “Go to Folder“.


STEP 3: Reset browsers back to default settings
In this third step, we will remove spam push notifications and malicious extensions, and change to default any settings that might have been changed by malware.
For each browser that you have installed on your computer, please click on the tab below and follow the displayed steps to reset that browser.
Safari BrowserChrome for Mac BrowserFirefox for Mac Browser
Remove malicious extensions and settings from Safari
To remove malware from Safari we will check if there are any malicious extensions installed on your browser and what settings have been changed by this malicious program.
-
Go to Safari’s “Preferences”.
On the menu bar, click the “Safari” menu and select “Preferences”.

-
Check Homepage.
This will open a new window with your Safari preferences, opened to the “General” tab. Some browser hijackers may change your default homepage, so in the Homepage field make sure it’s a web page you want to use as your start-up page.

-
Click “Extensions”
Next, click on the “Extensions” tab.
-
Find and uninstall malicious extensions.
The “Extensions” screen will be displayed with a list of all the extensions installed on Safari. Look out for any suspicious browser extension that could be behind all the drama – anything you don’t remember downloading or that doesn’t sound like a genuine extension. By default, there are no extensions installed on Safari so it’s safe to remove an extension

-
Remove spam notifications ads
Click Preferences, click Websites, then click Notifications. Deselect “Allow websites to ask for permission to send push notifications”.

-
Remove all data stored by websites on your computer.
In the Safari menu, choose “Preferences…”, select “Privacy” at the top of the new window that appears, and then click the “Manage Website Data” button.

In the next dialog box, click “Remove All“. It will ask you if you are sure you want to remove all data stored by websites on your computer. Select “Remove Now” to clear data that could be used to track your browsing.

-
Empty Safari Caches.
From your Safari menu bar, click Safari and select Preferences, then select the Advanced tab. Enable the checkbox to “Show Develop menu in menu bar“.

From the menu bar select Develop, then click on Empty Caches as seen in the image below.


Remove malware from Chrome for Mac
To remove malware from Chrome for Mac we will reset the browser settings to their default. Doing these steps will erase all configuration information from Chrome such as your home page, tab settings, saved form information, browsing history, and cookies. This process will also disable any installed extensions. All of your bookmarks, though, will be preserved.
-
Click on the three dots at the top right and go to Settings.
Click on Chrome’s main menu button, represented by three dots at the top right corner. Now click on the menu option labeled Settings as shown by the arrow in the picture below, which will open the basic settings screen.
-
In the left sidebar, click on the “Reset and Cleanup” option.
In the left sidebar, click on “Reset and clean up“.
-
Click “Reset settings to their original defaults”.
Now click on the “Reset settings to their original defaults”. link as shown in the image below.
-
Click “Reset Settings” button.
A confirmation dialog should now be displayed, detailing the components that will be restored to their default state should you continue with the reset process. To complete the restoration process, click on the “Reset Settings” button.
-
(Optional) Reset Chrome Data Sync.
In case a malicious extension reinstalls itself even after performing a browser reset, you have an additional option to reset the data sync for your browser. To do this, navigate to chrome.google.com/sync and click on the Clear Data button.


Remove malware from Firefox for Mac
To remove malware from Firefox for Mac we will reset the browser settings to its default. The reset feature fixes many issues by restoring Firefox to its factory default state while saving your essential information like bookmarks, passwords, web form auto-fill information, browsing history, and open tabs.
-
Go to the “Help” menu.
Click on Firefox’s main menu button, represented by three horizontal lines. When the drop-down menu appears, select the option labeled “Help“.
-
Click “Troubleshooting Information”.
Next click on the “Troubleshooting Information” option as indicated by the arrow in the image below. This will bring you to a Troubleshooting page.
-
Click on “Refresh Firefox”
Click the “Refresh Firefox” button in the upper-right corner of the “Troubleshooting Information” page.
-
Confirm.
To continue, click on the “Refresh Firefox” button in the new confirmation window that opens.
-
Click on “Finish”.
Firefox will close itself and will revert to its default settings. When it’s done, a window will list the information that was imported. Click on the “Finish“.


Your old Firefox profile will be placed on your desktop in a folder named “Old Firefox Data“. If the reset didn’t fix your problem you can restore some of the information not saved by copying files to the new profile that was created. If you don’t need this folder any longer, you should delete it as it contains sensitive information.
STEP 4: Run a scan with Malwarebytes for Mac to remove malware
In this final step, we will scan the computer with Malwarebytes for Mac to find and remove any malicious programs that might be installed on your Mac.
Malwarebytes for Mac is an on-demand scanner that can destroy many types of malware that other software tends to miss without costing you absolutely anything. When it comes to cleaning up an infected device, Malwarebytes has always been free, and we recommend it as an essential tool in the fight against malware.
-
Download Malwarebytes for Mac.
You can download Malwarebytes for Mac by clicking the link below.
-
Double-click on the Malwarebytes setup file.
When Malwarebytes has finished downloading, double-click on the setup file to install Malwarebytes on your computer. In most cases, downloaded files are saved to the Downloads folder.

-
Follow the on-screen prompts to install Malwarebytes.
When the Malwarebytes installation begins, you will see the Malwarebytes for Mac Installer which will guide you through the installation process. Click “Continue“, then keep following the prompts to continue with the installation process.


When your Malwarebytes installation completes, the program opens to the Welcome to Malwarebytes screen. Click the “Get started” button.
-
Select “Personal Computer” or “Work Computer”.
The Malwarebytes Welcome screen will first ask you what type of computer are you installing this program, click either Personal Computer or Work Computer.

-
Click on “Scan”.
To scan your computer with Malwarebytes, click on the “Scan” button. Malwarebytes for Mac will automatically update the antivirus database and start scanning your computer for malware.

-
Wait for the Malwarebytes scan to complete.
Malwarebytes will scan your computer for adware, browser hijackers, and other malicious programs. This process can take a few minutes, so we suggest you do something else and periodically check on the status of the scan to see when it is finished.

-
Click on “Quarantine”.
When the scan has been completed, you will be presented with a screen showing the malware infections that Malwarebytes has detected. To remove the malware that Malwarebytes has found, click on the “Quarantine” button.
-
Restart computer.
Malwarebytes will now remove all the malicious files that it has found. To complete the malware removal process, Malwarebytes may ask you to restart your computer.


Your computer should now be free of the Dinoraptzor.org pop-up ads and other malware.
If your current antivirus allowed a malicious program on your computer, you might want to consider purchasing the full-featured version of Malwarebytes Anti-Malware to protect against these types of threats in the future.
If you are still experiencing problems while trying to remove a malicious program from your computer, please ask for help in our Mac Malware Removal Help & Support forum.
Removal Instructions for Android
Remove Dinoraptzor.org from Android
To remove Dinoraptzor.org ads from your phone or tablet, follow these steps:
- STEP 1: Uninstall malicious apps
- STEP 2: Reset browsers back to default settings
- STEP 3: Use Malwarebytes for Android to remove malicious apps
STEP 1: Uninstall malicious apps
In this first step, we will check if any malicious apps are installed on your phone. Sometimes browser hijackers or adware apps can have usable Uninstall entries that can be used to remove these apps.
-
Open the “Settings” menu.
Tap on the “Settings” app from your phone menu or home screen.
-
Tap on “Apps”.
When the “Settings” menu opens, tap on “Apps” (or “App Manager”) to see all the installed applications on your phone.
-
Find the malicious app.
The “Apps” screen will be displayed with a list of all the applications that are installed on your phone. Scroll through the list and look out for any suspicious app that could be behind all the drama – anything you don’t remember downloading or that doesn’t sound like a genuine program.
Most often, cyber criminals hide malware inside video or photo editing apps, weather apps, and camera apps. -
Uninstall the malicious app
When you find a suspicious or malicious app, tap on it to uninstall it. This won’t start the app but will open up the app details screen. If the app is currently running press the “Force stop” button, then tap on “Uninstall”.
A confirmation dialog should be displayed to confirm you want to uninstall the app, tap on “OK” to remove the malicious app from your phone.
STEP 2: Reset browsers back to default settings
In this second step, we will reset your browser to its default settings to remove spam notifications, unwated search redirects, and restore its factory settings
Resetting the browser settings to their default it’s an easy task on Windows or Mac computers; however, when it comes to Android, this can’t be done directly because it’s not an option built-in into the browser settings. Restoring the browser settings on Android can be done by clearing the application data. This will remove all the cookies, cache, and other site settings that may have been saved. So let’s see how we can restore your browser to its factory settings.
Chrome for AndroidFirefoxOperaSamsung Internet BrowserMicrosoft Edge
Remove malware from Chrome for Android
To reset Chrome for Android to its default settings, follow the below steps:
-
Open the “Settings” menu.
Tap on the “Settings” app from your phone menu or home screen.
-
Tap on “Apps”.
When the “Settings” menu opens, tap on “Apps” (or “App Manager”) to see all the installed applications on your phone.
-
Find and tap on Chrome.
The “Apps” screen will be displayed with a list of all the apps installed on your phone. Scroll through the list until you find the Chrome app, then tap on it to open the app’s details.
-
Tap “Storage”.
When Chrome’s app info menu is displayed, tap on “Storage“.
-
Tap “Manage Space”.
Under the storage settings, you will get two options — Manage Space and Clear Cache. Tap on “Manage Space“.
-
Tap “Clear all data”.
Tap “Clear all data” to delete all Chrome’s data including accounts, bookmarks, and your settings to reset the default settings.
-
Confirm by tapping “Ok”.
A confirmation dialog should now be displayed, detailing the components that will be restored to their default state should you continue with the reset process. To complete the restoration process, tap “Ok“.
Remove malware from Firefox for Android
To reset Firefox for Android to its default settings, follow the below steps:
-
Open the “Settings” menu.
Tap on the “Settings” app from your phone menu or home screen.
-
Tap on “Apps”.
When the “Settings” menu opens, tap on “Apps” (or “App Manager”) to see all the installed applications on your phone.
-
Find and tap on Firefox.
The “Apps” screen will be displayed with a list of all the apps installed on your phone. Scroll through the list until you find the Firefox app, then tap on it to open the app’s details.
-
Tap “Storage”.
When Firefox’s app info menu is displayed, tap on “Storage“.
-
Tap “Manage Space”.
Under the storage settings, you will get two options — Manage Space and Clear Cache. Tap on “Manage Space“.
-
Tap “Clear all data”.
Tap “Clear all data” to delete all Firefox data including accounts, bookmarks, and your settings to reset the default settings.
-
Confirm by tapping “Ok”.
A confirmation dialog should now be displayed, detailing the components that will be restored to their default state should you continue with the reset process. To complete the restoration process, tap “Ok“.
Remove malware from the Opera browser
To reset the Opera browser to its default settings, follow the below steps:
-
Open the “Settings” menu.
Tap on the “Settings” app from your phone menu or home screen.
-
Tap on “Apps”.
When the “Settings” menu opens, tap on “Apps” (or “App Manager”) to see all the installed applications on your phone.
-
Find and tap on Opera.
The “Apps” screen will be displayed with a list of all the apps installed on your phone. Scroll through the list until you find the Opera app, then tap on it to open the app’s details.
-
Tap “Storage”.
When Opera’s app info menu is displayed, tap on “Storage“.
-
Tap “Manage Space”.
Under the storage settings, you will get two options — Manage Space and Clear Cache. Tap on “Manage Space“.
-
Tap “Clear all data”.
Tap “Clear all data” to delete all Opera’s data including accounts, bookmarks, and your settings to reset the default settings.
-
Confirm by tapping “Ok”.
A confirmation dialog should now be displayed, detailing the components that will be restored to their default state should you continue with the reset process. To complete the restoration process, tap “Ok“.
Remove malware from Samsung Internet Browser
To reset the Samsung Internet Browser to its default settings, follow the below steps:
-
Open the “Settings” menu.
Tap on the “Settings” app from your phone menu or home screen.
-
Tap on “Apps”.
When the “Settings” menu opens, tap on “Apps” (or “App Manager”) to see all the installed applications on your phone.
-
Find and tap on Samsung Internet Browser.
The “Apps” screen will be displayed with a list of all the apps installed on your phone. Scroll through the list until you find the Samsung Internet Browser app, then tap on it to open the app’s details.
-
Tap “Storage”.
When the Samsung Internet Browser’s app info menu is displayed, tap on “Storage“.
-
Tap “Manage Space”.
Under the storage settings, you will get two options — Manage Space and Clear Cache. Tap on “Manage Space“.
-
Tap “Clear all data”.
Tap “Clear all data” to delete all Samsung Internet Browser’s data including accounts, bookmarks, and your settings to reset the default settings.
-
Confirm by tapping “Ok”.
A confirmation dialog should now be displayed, detailing the components that will be restored to their default state should you continue with the reset process. To complete the restoration process, tap “Ok“.
Remove malware from Microsoft Edge for Android
To reset the Microsoft Edge for Android to its default settings, follow the below steps:
-
Open the “Settings” menu.
Tap on the “Settings” app from your phone menu or home screen.
-
Tap on “Apps”.
When the “Settings” menu opens, tap on “Apps” (or “App Manager”) to see all the installed applications on your phone.
-
Find and tap on Microsoft Edge.
The “Apps” screen will be displayed with a list of all the apps installed on your phone. Scroll through the list until you find the Microsoft Edge app, then tap on it to open the app’s details.
-
Tap “Storage”.
When the Microsoft Edge’s app info menu is displayed, tap on “Storage“.
-
Tap “Manage Space”.
Under the storage settings, you will get two options — Manage Space and Clear Cache. Tap on “Manage Space“.
-
Tap “Clear all data”.
Tap “Clear all data” to delete all Microsoft Edge’s data including accounts, bookmarks, and your settings to reset the default settings.
-
Confirm by tapping “Ok”.
A confirmation dialog should now be displayed, detailing the components that will be restored to their default state should you continue with the reset process. To complete the restoration process, tap “Ok“.
STEP 3: Use Malwarebytes for Android to remove malicious apps
In this final step, we will install Malwarebytes for Android to scan and remove malicious apps from your phone or tablet.
Malwarebytes for Android automatically detects and removes dangerous threats like malware and ransomware so you don’t have to worry about your most-used device being compromised. Aggressive detection of adware and potentially unwanted programs keeps your Android phone or tablet running smooth.
-
Download Malwarebytes for Android.
You can download Malwarebytes for Android by clicking the link below.
-
Install Malwarebytes for Android on your phone.
In the Google Play Store, tap “Install” to install Malwarebytes for Android on your device.
When the installation process has finished, tap “Open” to begin using Malwarebytes for Android. You can also open Malwarebytes by tapping on its icon in your phone menu or home screen.
-
Follow the on-screen prompts to complete the setup process
When Malwarebytes will open, you will see the Malwarebytes Setup Wizard which will guide you through a series of permissions and other setup options.
This is the first of two screens that explain the difference between the Premium and Free versions. Swipe this screen to continue.Tap on “Got it” to proceed to the next step.
Malwarebytes for Android will now ask for a set of permissions that are required to scan your device and protect it from malware. Tap on “Give permission” to continue.
Tap on “Allow” to permit Malwarebytes to access the files on your phone.
-
Update database and run a scan with Malwarebytes for Android
You will now be prompted to update the Malwarebytes database and run a full system scan.
Click on “Update database” to update the Malwarebytes for Android definitions to the latest version, then click on “Run full scan” to perform a system scan.
-
Wait for the Malwarebytes scan to complete.
Malwarebytes will now start scanning your phone for adware and other malicious apps. This process can take a few minutes, so we suggest you do something else and periodically check on the status of the scan to see when it is finished.
-
Click on “Remove Selected”.
When the scan has been completed, you will be presented with a screen showing the malware infections that Malwarebytes for Android has detected. To remove the malicious apps that Malwarebytes has found, tap on the “Remove Selected” button.

-
Restart your phone.
Malwarebytes for Android will now remove all the malicious apps that it has found. To complete the malware removal process, Malwarebytes may ask you to restart your device.

Your phone should now be free of the Dinoraptzor.org pop-up ads and other malware.
If your current antivirus allowed a malicious app on your phone, you may want to consider purchasing the full-featured version of Malwarebytes to protect against these types of threats in the future.
If you are still having problems with your phone after completing these instructions, then please follow one of the steps:
- Restore your phone to factory settings by going to Settings > General management > Reset > Factory data reset.
- Ask for help in our Mobile Malware Removal Help & Support forum.
Here are 10 basic security tips to help you avoid malware and protect your device:
Use a good antivirus and keep it up-to-date.
It’s essential to use a good quality antivirus and keep it up-to-date to stay ahead of the latest cyber threats. We are huge fans of Malwarebytes Premium and use it on all of our devices, including Windows and Mac computers as well as our mobile devices. Malwarebytes sits beside your traditional antivirus, filling in any gaps in its defenses, and providing extra protection against sneakier security threats.
Keep software and operating systems up-to-date.
Keep your operating system and apps up to date. Whenever an update is released for your device, download and install it right away. These updates often include security fixes, vulnerability patches, and other necessary maintenance.
Be careful when installing programs and apps.
Pay close attention to installation screens and license agreements when installing software. Custom or advanced installation options will often disclose any third-party software that is also being installed. Take great care in every stage of the process and make sure you know what it is you’re agreeing to before you click «Next.»
Install an ad blocker.
Use a browser-based content blocker, like AdGuard. Content blockers help stop malicious ads, Trojans, phishing, and other undesirable content that an antivirus product alone may not stop.
Be careful what you download.
A top goal of cybercriminals is to trick you into downloading malware—programs or apps that carry malware or try to steal information. This malware can be disguised as an app: anything from a popular game to something that checks traffic or the weather.
Be alert for people trying to trick you.
Whether it’s your email, phone, messenger, or other applications, always be alert and on guard for someone trying to trick you into clicking on links or replying to messages. Remember that it’s easy to spoof phone numbers, so a familiar name or number doesn’t make messages more trustworthy.
Back up your data.
Back up your data frequently and check that your backup data can be restored. You can do this manually on an external HDD/USB stick, or automatically using backup software. This is also the best way to counter ransomware. Never connect the backup drive to a computer if you suspect that the computer is infected with malware.
Choose strong passwords.
Use strong and unique passwords for each of your accounts. Avoid using personal information or easily guessable words in your passwords. Enable two-factor authentication (2FA) on your accounts whenever possible.
Be careful where you click.
Be cautious when clicking on links or downloading attachments from unknown sources. These could potentially contain malware or phishing scams.
Don’t use pirated software.
Avoid using Peer-to-Peer (P2P) file-sharing programs, keygens, cracks, and other pirated software that can often compromise your data, privacy, or both.
To avoid potential dangers on the internet, it’s important to follow these 10 basic safety rules. By doing so, you can protect yourself from many of the unpleasant surprises that can arise when using the web.
This page aims to help you remove the Dinoraptzor.org Virus. Our removal instructions work for Chrome, Firefox and Safari, as well as every version of Windows and Mac OS.

After a few seconds, the redirect proceeds to another website (note that this can change in a few days), currently metagmae.org/page/. The pages Dinoraptzor.org redirects to seem to be language and location specific:

Hijacking or Browser Hijacking is a type of aggressive online advertising practice where specific software elements called Browser Hijackers are able to modify the redirection of DNS servers. This means that when a user wants to enter a specific domain, the DNS returns a different IP address, thereby loading another webpage. These are usually sponsored pages filled with ads, banners, pop-ups and different promotional messages that prompt you to click on them for profits. However, sometimes, malware and questionable offers may also be encountered.
If you have recently been experiencing automatic page-redirects to certain sites, or you have noticed some changes in the homepage or the search engine of your main browser, the chances are that your Chrome, Safari, Firefox (or whatever your main browser is) has been invaded by a representative of the Browser Hijacker category. On this page, we will discuss one particular hijacker that can change your homepage to Dinoraptzor.org Virus, and it is the likely source of your browsing disturbance. That’s why we suggest you stay with us and carefully read the information that follows. In the next lines, you will find a detailed Removal Guide which explains the steps to safely remove the unwanted homepage and search engine from your browser and stop the intrusive ads.
The first thing that you will most probably notice in case you are infected with a Hijacker like Dinoraptzor.org will be the change of the homepage URL or the main search engine of your browser since the hijackers usually change those elements of the browser. Another thing you may notice will be the constant generation of different ads that are usually hard to remove – your browser may start to automatically open pages that are normally related to some form of online advertisement campaign.
With the help of all these changes, the Browser Hijacker basically tries to position certain sponsored pages directly on the users’ screen and make the people click on them. At the same time, the hijacker earns money for its developers from companies that try to get visits and clicks on their sites via pay-per-click methods. Many web users may mistake the intrusive pay-per-click ads for some sort of a strange virus infection. Therefore, it is not uncommon for applications like Dinoraptzor.org to be mistakenly referred to as viruses. To your relief, though, browser hijackers like this one are not a major system threat and don’t have the harmful abilities of real computer threats such as Ransomware, Spyware or Trojans, for example. However, the changes they impose without the users’ approval leave an open door in your system for security hazards to sneak in or for sketchy messages to mislead you during your web browsing. An example would be the prompts that appear inside the Internet browser that emit false alarms about dangerous threats or different hot offers, “you won a prize” messages, and similar sketchy content, developed exclusively to land you on certain web locations with questionable reputation, and to make you buy the advertised products or services. For this reason, most Browser Hijackers are considered as potentially unwanted.
To deal with Dinoraptzor.org, we suggest you follow the instructions from the removal guide below. Once again, this is not a harmful Ransomware, a Trojan or some fatal virus infection and if you repeat the steps shown below, you should be able to easily uninstall it without facing any negative consequences.
SUMMARY:
Remove Dinoraptzor.org “Virus”
You are dealing with a malware infection that can restore itself unless you remove its core files. We are sending you to another page with a removal guide that gets regularly updated. It covers in-depth instructions on how to:
1. Locate and scan malicious processes in your task manager.
2. Identify in your Control panel any programs installed with the malware, and how to remove them. Search Marquis is a high-profile hijacker that gets installed with a lot of malware.
3. How to clean up and reset your browser to its original settings without the malware returning. You can find the removal guide here.
For mobile devices refer to these guides instead: Android, iPhone
Распределенное обучение с TensorFlow и Python
AI_Generated 05.05.2025
В машинном обучении размер имеет значение. С ростом сложности моделей и объема данных одиночный процессор или даже мощная видеокарта уже не справляются с задачей обучения за разумное время. Когда. . .
CRUD API на C# и GraphQL
stackOverflow 05.05.2025
В бэкенд-разработке постоянно возникают новые технологии, призванные решить актуальные проблемы и упростить жизнь программистам. Одной из таких технологий стал GraphQL — язык запросов для API,. . .
Распознавание голоса и речи на C#
UnmanagedCoder 05.05.2025
Интеграция голосового управления в приложения на C# стала намного доступнее благодаря развитию специализированных библиотек и API. При этом многие разработчики до сих пор считают голосовое управление. . .
Реализация своих итераторов в C++
NullReferenced 05.05.2025
Итераторы в C++ — это абстракция, которая связывает весь экосистему Стандартной Библиотеки Шаблонов (STL) в единое целое, позволяя алгоритмам работать с разнородными структурами данных без знания их. . .
Разработка собственного фреймворка для тестирования в C#
UnmanagedCoder 04.05.2025
C# довольно богат готовыми решениями – NUnit, xUnit, MSTest уже давно стали своеобразными динозаврами индустрии. Однако, как и любой динозавр, они не всегда могут протиснуться в узкие коридоры. . .
Распределенная трассировка в Java с помощью OpenTelemetry
Javaican 04.05.2025
Микросервисная архитектура стала краеугольным камнем современной разработки, но вместе с ней пришла и головная боль, знакомая многим — отслеживание прохождения запросов через лабиринт взаимосвязанных. . .
Шаблоны обнаружения сервисов в Kubernetes
Mr. Docker 04.05.2025
Современные Kubernetes-инфраструктуры сталкиваются с серьёзными вызовами. Развертывание в нескольких регионах и облаках одновременно, необходимость обеспечения низкой задержки для глобально. . .
Создаем SPA на C# и Blazor
stackOverflow 04.05.2025
Мир веб-разработки за последние десять лет претерпел коллосальные изменения. Переход от традиционных многостраничных сайтов к одностраничным приложениям (Single Page Applications, SPA) — это. . .
Реализация шаблонов проектирования GoF на C++
NullReferenced 04.05.2025
«Банда четырёх» (Gang of Four или GoF) — Эрих Гамма, Ричард Хелм, Ральф Джонсон и Джон Влиссидес — в 1994 году сформировали канон шаблонов, который выдержал проверку временем. И хотя C++ претерпел. . .
C# и сети: Сокеты, gRPC и SignalR
UnmanagedCoder 04.05.2025
Сетевые технологии не стоят на месте, а вместе с ними эволюционируют и инструменты разработки. В . NET появилось множество решений — от низкоуровневых сокетов, позволяющих управлять каждым байтом. . .
У вас стал постоянно открываться сайт Dinoraptzor.org вместо домашней страницы или при включении компьютера? Похоже ваш компьютер заражён и его настройки были изменены. Вам нужно как можно скорее выполнить шаги описанные ниже, чтобы удалить этот компьютерный вирус и заблокировать возможность проникновения на компьютер более опасного вредоносного ПО, шпионов и троянов.
Dinoraptzor.org вирус перенаправляет браузер зараженного компьютер на разные сайты:
Вредоносное ПО которое установило Dinoraptzor.org в качестве вашей домашней страницы, может так же изменить вашу поисковую систему. Это приведет к тому, что поиск в Интернете будут практически заблокирован, так как результаты поиска будут состоять из огромного количества рекламных ссылок, ссылок на вредоносные и вводящие в заблуждения сайты и небольшого количества правильных ссылок, которые получены из настоящих поисковых системах.
Dinoraptzor.org активно распространяется вместе с бесплатными программами, так как входит в состав инсталлятора этих программ. Поэтому очень важно при установке неизвестных программ, даже скачанных с известных файлообменных сайтов, читать Пользовательское соглашение и лицензию, а так же выбирать всегда ручной режим установки. Именно в этом режиме вы сможете отключить установку ненужных вам модулей и программ и защитить свой компьютер от инфекций подобных Dinoraptzor.org. Так же перед установкой обязательно проверяйте скачанный файл на наличие вирусов, ищите отзывы на фпубличных форумах и в сети Интернет.
Как удалить Dinoraptzor.org из Хрома, Файрфокса и Интернет эксплорера (пошаговая инструкция)
Чтобы удалить Dinoraptzor.org вирус и восстановить нлормальные настройки браузеров Google Chrome, Internet Explorer, Mozilla Firefox, нужно выполнить инструкцию приведённую ниже. Вам понадобиться использовать стандартные возможности Windows и несколько проверенных бесплатных программ. Эта инструкция — пошаговое руководство, которое требуется выполнять шаг за шагом. Если у вас что-либо не получается, то ОСТАНОВИТЕСЬ, запросите помощь написав комментарий к этой статье или создав новую тему на нашем форуме.
- Деинсталлировать программу, которая была причиной появления Dinoraptzor.org
- Удалить Dinoraptzor.org из Chrome, Firefox и Internet Explorer, используя AdwCleaner
- Удалить Dinoraptzor.org с помощью Zemana Anti-malware
- Удалить Dinoraptzor.org, используя Malwarebytes Anti-malware
- Удалить Dinoraptzor.org в Chrome, сбросив настройки браузера
- Удалить Dinoraptzor.org в Firefox, сбросив настройки браузера
- Удалить Dinoraptzor.org в Internet Explorer, сбросив настройки браузера
- Удалить Dinoraptzor.org из Хрома, Файрфокса и Интернет Эксплорера, очистив их ярлыки
- Защитить компьютер от сайтов подобных Dinoraptzor.org и заблокировать показ рекламы
- Проверить планировщик заданий
Деинсталлировать программу, которая была причиной появления Dinoraptzor.org
Очень важно на первом этапе определить программу, которая являлась первоисточником появления паразита и удалить её.
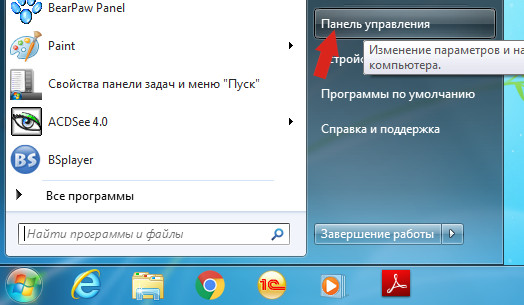
Windows 95, 98, XP, Vista, 7
Кликните Пуск или нажмите кнопку Windows на клавиатуре. В меню, которое откроется, выберите Панель управления.
Windows 8
Кликните по кнопке Windows.
В правом верхнем углу найдите и кликните по иконке Поиск.
В поле ввода наберите Панель управления.
Нажмите Enter.
Windows 10
Кликните по кнопке поиска
В поле ввода наберите Панель управления.
Нажмите Enter.
Откроется Панель управления, в ней выберите пункт Удаление программы.

Вам будет показан список всех программ инсталлированных на вашем компьютере. Внимательно его просмотрите и деинсталлируйте программу, которую вы подозреваете в качестве причины заражения. Вероятно это последняя установленная вами программа. Так же внимательно приглядитесь к остальным программам и удалите все, которые кажутся вам подозрительными или вы уверены, что сами их не устанавливали. Для удаления, выберите программу из списка и нажмите кнопку Удалить/Изменить.
Далее следуйте указаниям Windows.
Удалить Dinoraptzor.org из Chrome, Firefox и Internet Explorer, используя AdwCleaner
AdwCleaner это небольшая программа, которая не требует установки на компьютер и создана специально для того, чтобы находить и удалять рекламные и потенциально ненужные программы. Эта утилита не конфликтует с антивирусом, так что можете её смело использовать. Деинсталлировать вашу антивирусную программу не нужно.
Скачайте программу AdwCleaner кликнув по следующей ссылке.
Скачать AdwCleaner
Скачано 1169881 раз(а)
Версия: 8.3.2
Автор: Malwarebytes, Xplode
Категория: Безопасность
Дата обновления: 25 мая, 2022
После окончания загрузки программы, запустите её. Откроется главное окно AdwCleaner.
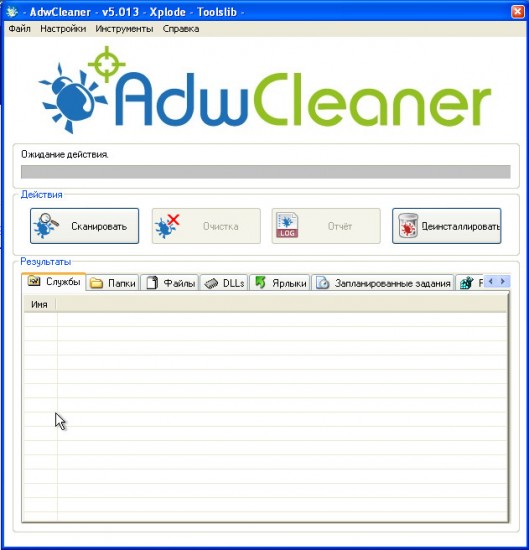
Кликните по кнопке Сканировать. Программа начнёт проверять ваш компьютер. Когда проверка будет завершена, перед вами откроется список найденных компонентов Dinoraptzor.org и других найденных паразитов.
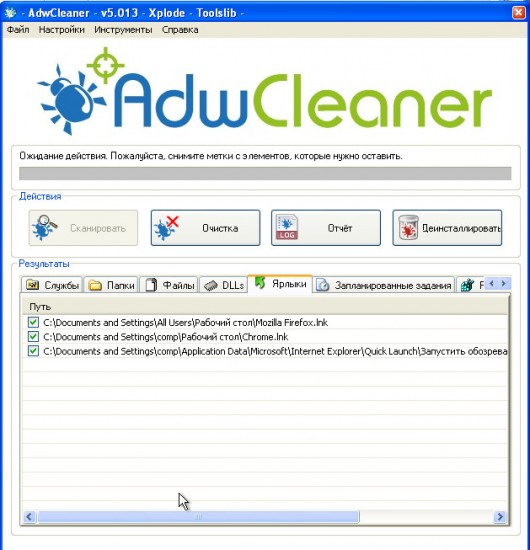
Кликните по кнопке Очистка. AdwCleaner приступ к лечению вашего компьютера и удалит все найденные компоненты зловредов. По-окончании лечения, перезагрузите свой компьютер.
Удалить Dinoraptzor.org с помощью Zemana Anti-malware
Zemana Anti-malware это инструмент, который позволит вам легко найти и удалить вредоносные программы изменяющие настройки веб браузеров или показывающих большое количество всплывающей рекламы. В отличии от других утилит созданных для обнаружения и удаления вредоносных программ, Zemana Anti-malware кроме классического сканирования файлов, так же использует облачные технологии. Это позволяет обнаружить паразитов, которых не могут обнаружить другие антивирусные программы.
Скачайте Zemana AntiMalware с помощью следующей ссылки. Сохраните программу на ваш Рабочий стол.
Когда загрузка завершится, запустите файл который скачали. Перед вами откроется окно Мастера установки, как показано на примере ниже.
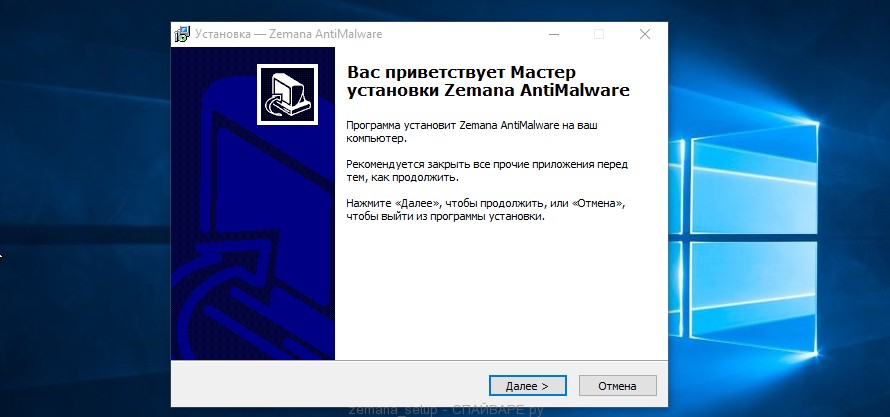
Следуйте указаниям, которые будут появляться на экране. Можете в настройках ничего не изменять. Когда установка Zemana Anti-Malware закончится, откроете главное окно программы.
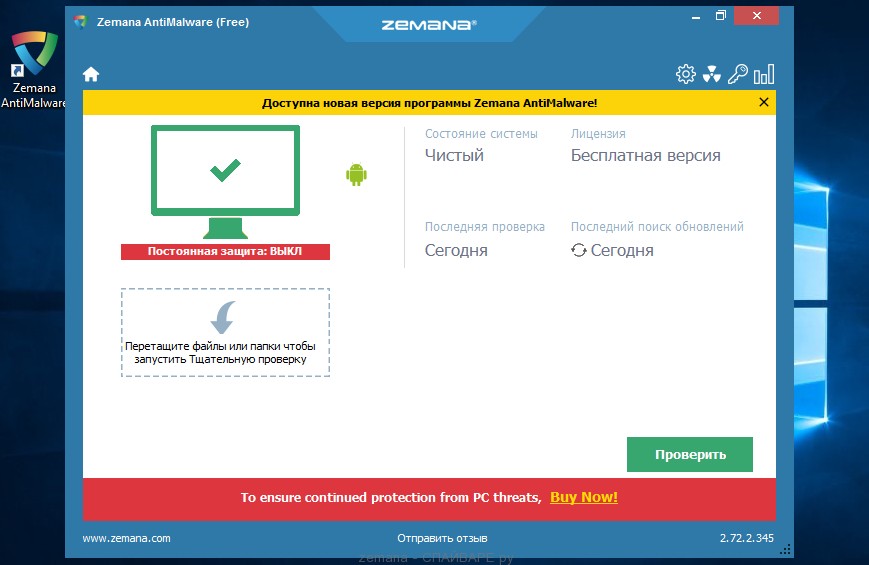
Кликните по кнопке «Проверить», чтобы запустить процесс поиска вредоносной программы, которая изменила домашнюю страницу или поисковик вашего браузера на Dinoraptzor.org. Процесс сканирования происходит достаточно быстро, но может затянутся в случае большого количества файлов на вашем компьютере или в случае медленной работы системы.
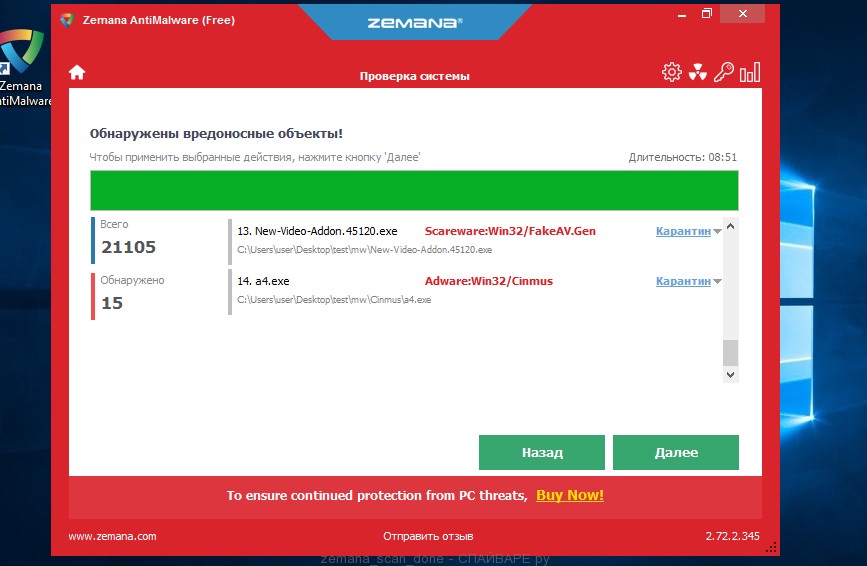
Когда сканирование будет завершено, вы увидите список найденных компонентов вредоносных программ. Здесь просто кликните кнопку «Далее», чтобы удалить найденных зловредов и переместить их в карантин.
Удалить Dinoraptzor.org, используя Malwarebytes Anti-malware
Malwarebytes Anti-malware это широко известная программа, созданная для борьбы с разнообразными рекламными и вредоносными программами. Она не конфликтует с антивирусом, так что можете её смело использовать. Деинсталлировать вашу антивирусную программу не нужно.
Скачайте программу Malwarebytes Anti-malware используя следующую ссылку.
Когда программа загрузится, запустите её. Перед вами откроется окно Мастера установки программы. Следуйте его указаниям.
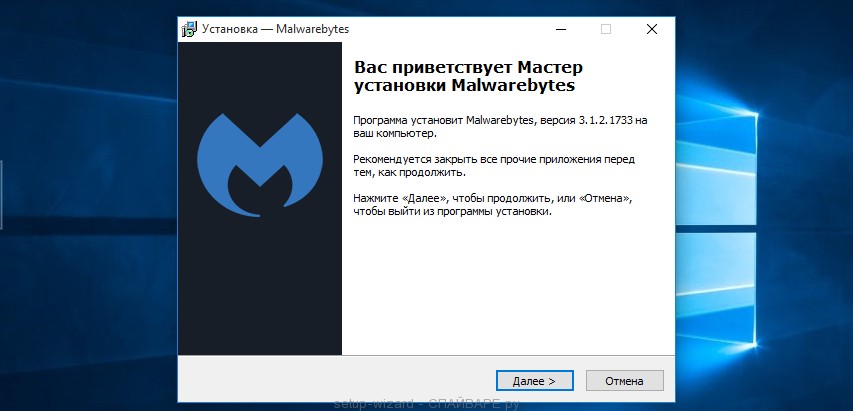
Когда инсталляция будет завершена, вы увидите главное окно программы.
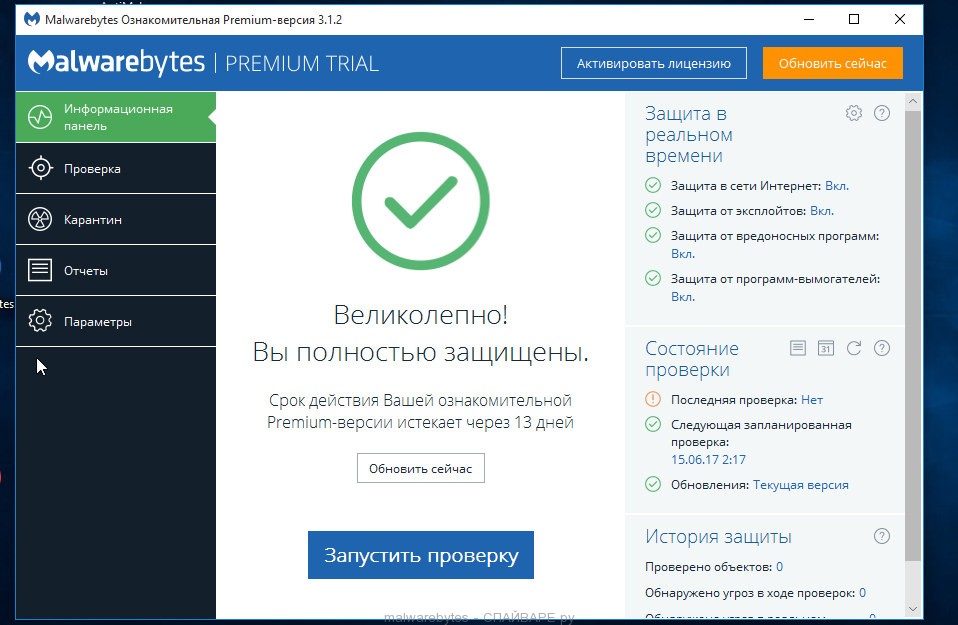
Автоматически запуститься процедура обновления программы. Когда она будет завершена, кликните по кнопке «Запустить проверку». Malwarebytes Anti-malware начнёт проверку вашего компьютера.
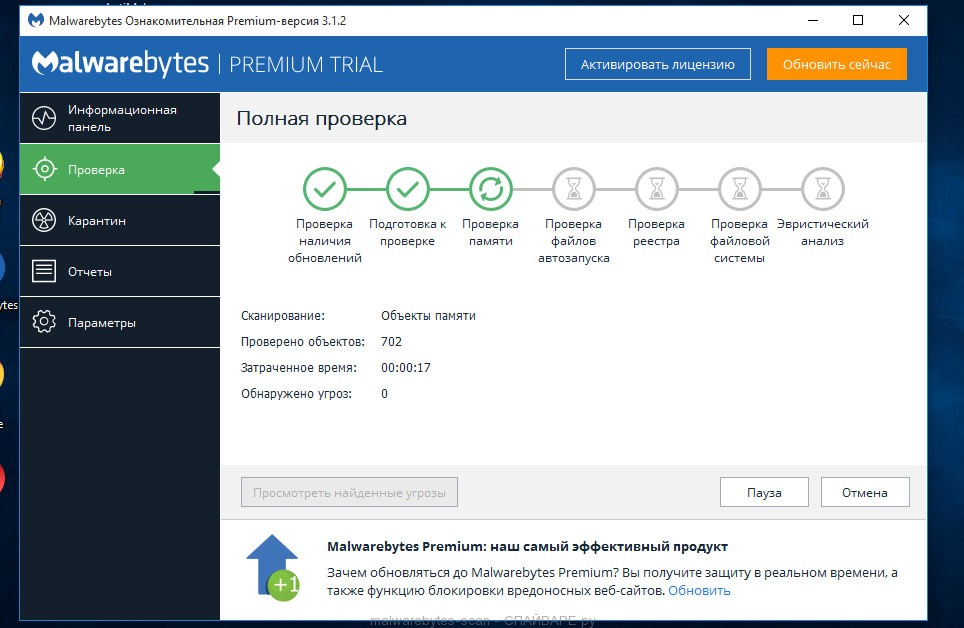
Когда проверка компьютера закончится, Malwarebytes Anti-malware покажет вам список найденных частей вредоносных и рекламных программ.
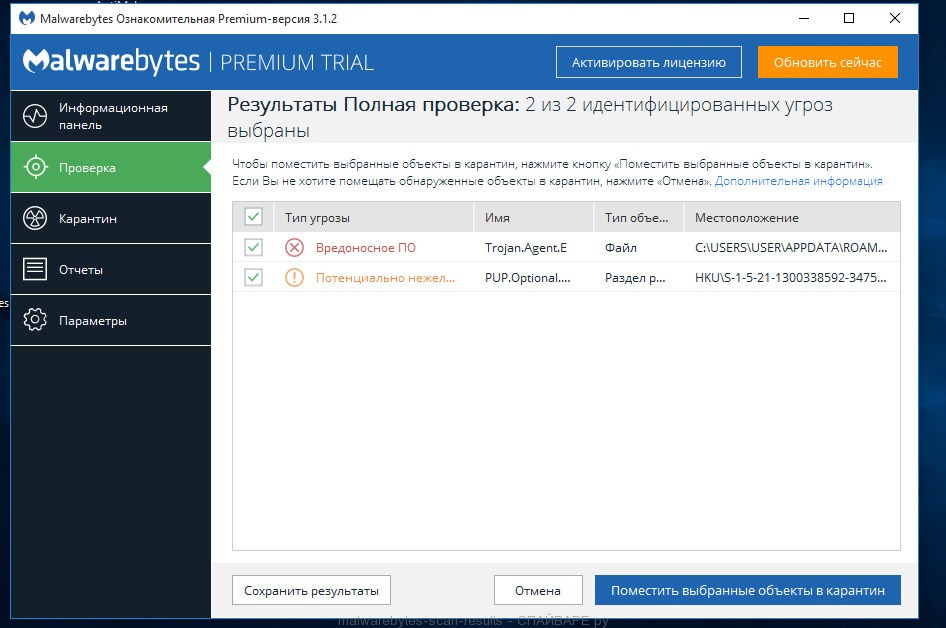
Для продолжения лечения и удаления зловредов вам достаточно нажать кнопку «Поместить выбранные объекты в карантин». Этим вы запустите процедуру удаления Dinoraptzor.org паразита.
Удалить Dinoraptzor.org в Chrome, сбросив настройки браузера
Сброс настроек Хрома позволит удалить вредоносные расширения и восстановить настройки браузера к значениям принятым по-умолчанию. При этом, ваши личные данные, такие как закладки и пароли, будут сохранены.
Откройте главное меню Хрома, кликнув по кнопке в виде трёх горизонтальных полосок (). Появится меню как на нижеследующей картинке.
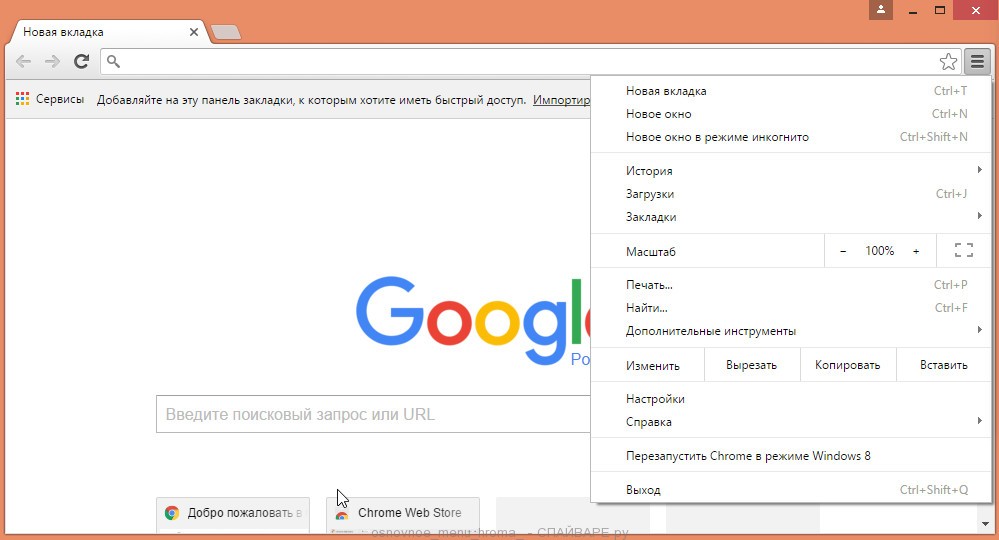
Выберите пункт Настройки. Открывшуюся страницу прокрутите вниз и найдите ссылку Показать дополнительные настройки. Кликните по ней. Ниже откроется список дополнительных настроек. Тут вам нужно найти кнопку Сброс настроек и кликнуть по ней. Гугл Хром попросит вас подтвердить свои действия.
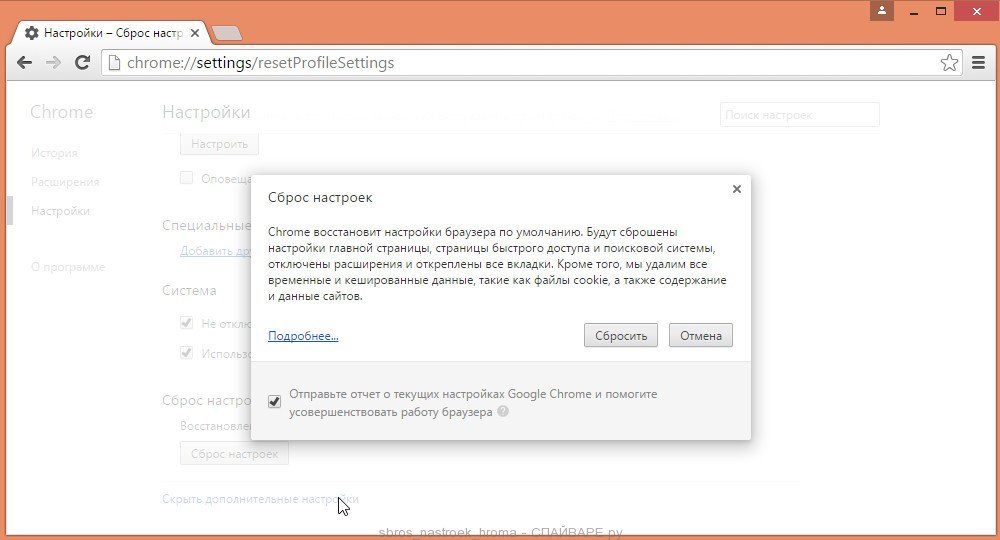
Нажмите кнопку Сбросить. После этого, настройки браузера будут сброшены к первоначальным и перенаправление на Dinoraptzor.org будет удалено.
Удалить Dinoraptzor.org в Firefox, сбросив настройки браузера
Сброс настроек Файрфокса позволит удалить вредоносные расширения и восстановить настройки браузера к значениям принятым по-умолчанию. При этом, ваши личные данные, такие как закладки и пароли, будут сохранены.
Откройте главное меню Firefox, кликнув по кнопке в виде трёх горизонтальных полосок (). В появившемся меню кликните по иконке в виде знака вопроса (). Это вызовет меню Справка, как показано на рисунке ниже.

Здесь вам нужно найти пункт Информация для решения проблем. Кликните по нему. В открывшейся странице, в разделе Наладка Firefox нажмите кнопку Очистить Firefox. Программа попросит вас подтвердить свои действия.
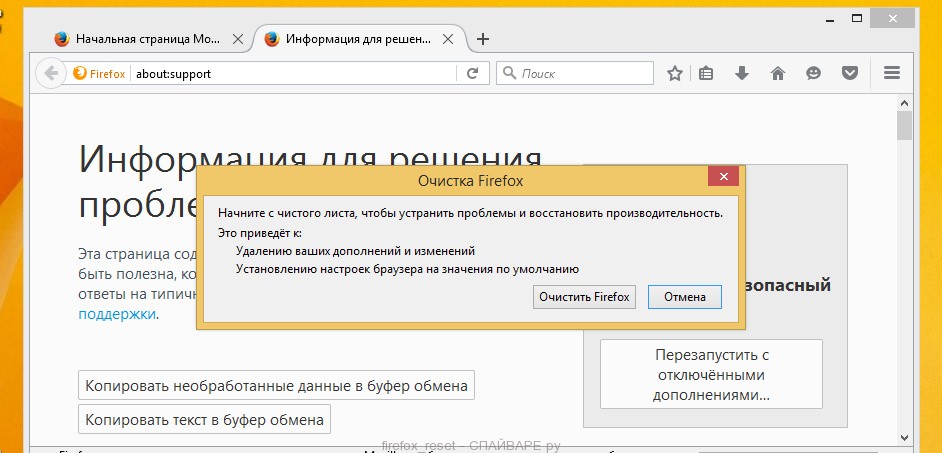
Нажмите кнопку Очистить Firefox. В результате этих действий, настройки браузера будут сброшены к первоначальным. Этим вы удалите Dinoraptzor.org и сможете восстановить вашу домашнюю страницу и поисковую машину.
Удалить Dinoraptzor.org в Internet Explorer, сбросив настройки браузера
Сброс настроек Интернет Эксплорера и Эджа позволит удалить вредоносные расширения и восстановить настройки браузера к значениям принятым по-умолчанию.
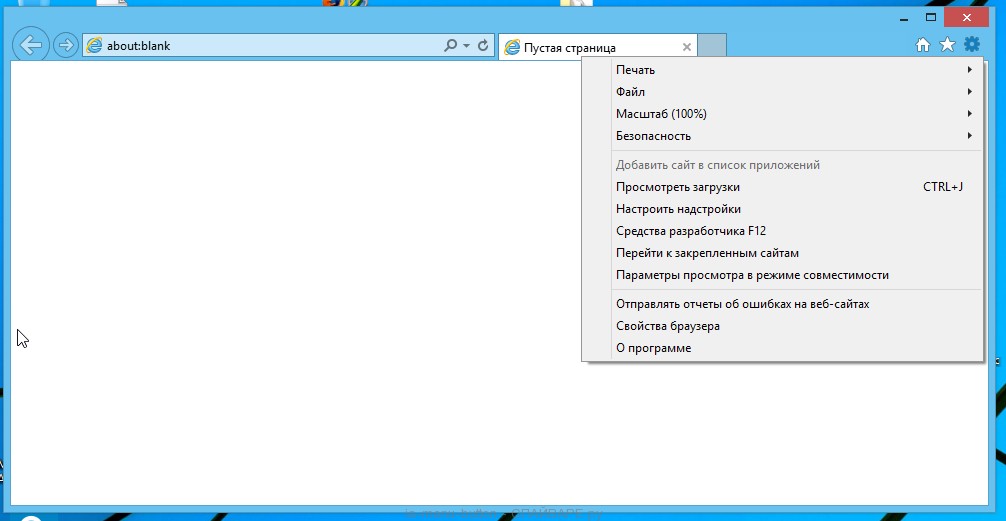
Откройте главное браузера, кликнув по кнопке в виде шестерёнки (). В появившемся меню выберите пункт Свойства браузера.
Здесь откройте вкладку Дополнительно, а в ней нажмите кнопку Сброс. Откроется окно Сброс параметров настройки Internet Explorer. Поставьте галочку в пункте Удалить личные настройки, после чего кликните кнопку Сброс.
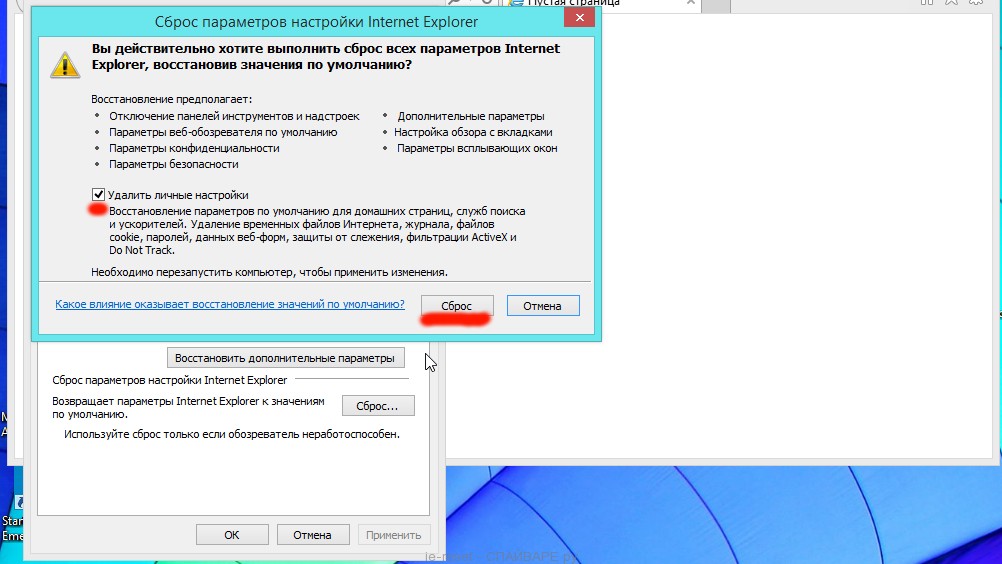
Когда процесс сброса настроек завершиться, нажмите кнопку Закрыть. Чтобы изменения вступили в силу вам нужно перезагрузить компьютер. Таким образом вы сможете избавиться от использования Dinoraptzor.org в качестве вашей домашней страницы и поисковика.
Удалить Dinoraptzor.org из Хрома, Файрфокса и Интернет Эксплорера, очистив их ярлыки
При проникновении на компьютер Dinoraptzor.org инфекция может изменить не только настройки ваших браузеров, но и их ярлыки, дописав в поле Объект аргумент следущего вида «http://адрес.сайта/». Благодаря чему, при каждом запуске браузера будет открываться этот сайт.
Для очистки ярлыка браузера, кликните по нему правой клавишей и выберите пункт Свойства.

На вкладке Ярлык найдите поле Объект. Щелкните внутри него левой клавишей мыши, появится вертикальная линия — указатель курсора, клавишами перемещения курсора (стрелка -> на клавиатуре) переместите его максимально вправо. Вы увидите там добавлен текст похожий на «http://адрес.сайта/». Его и нужно удалить.
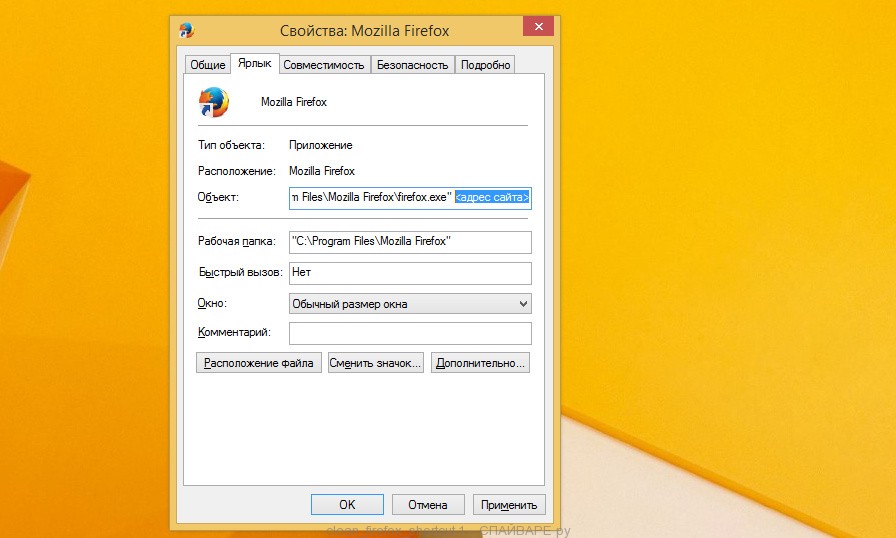
Удалив этот текст нажмите кнопку OK. Таким образом очистите ярлыки всех ваших браузеров, так как все они могут быть заражены.
Защитить компьютер от сайтов подобных Dinoraptzor.org и заблокировать показ рекламы
Чтобы повысить защиту своего компьютера, кроме антивирусной и антиспайварной программы, нужно использовать приложение блокирующее доступ к разннобразным опасным и вводящим в заблуждение веб-сайтам. Кроме этого, такое приложение может блокировать показ навязчивой рекламы, что так же приведёт к ускорению загрузки веб-сайтов и уменьшению потребления веб траффика.
Скачайте программу AdGuard используя следующую ссылку.
Скачать Adguard
Скачано 207465 раз(а)
Автор: © Adguard
Категория: Безопасность
Дата обновления: 17 июля, 2018
После окончания загрузки запустите скачанный файл. Перед вами откроется окно Мастера установки программы.
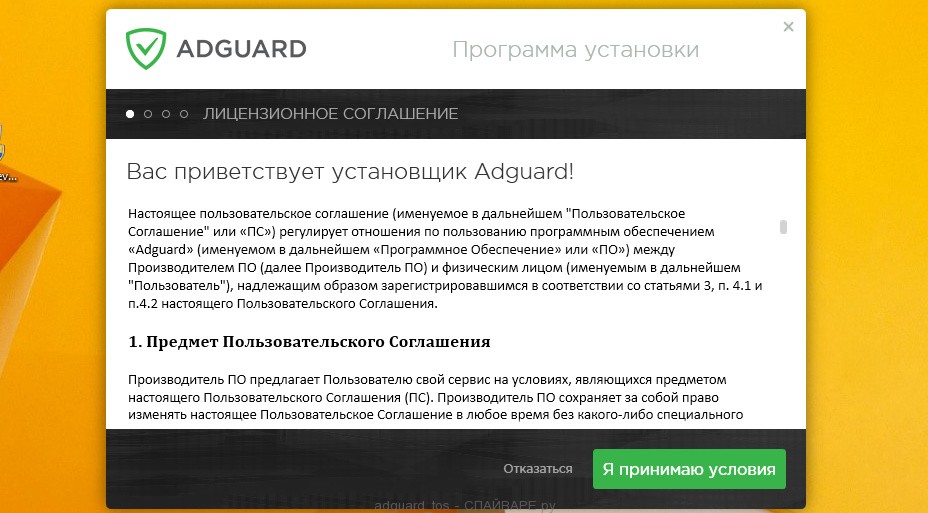
Кликните по кнопке Я принимаю условия и и следуйте указаниям программы. После окончания установки вы увидите окно, как показано на рисунке ниже.
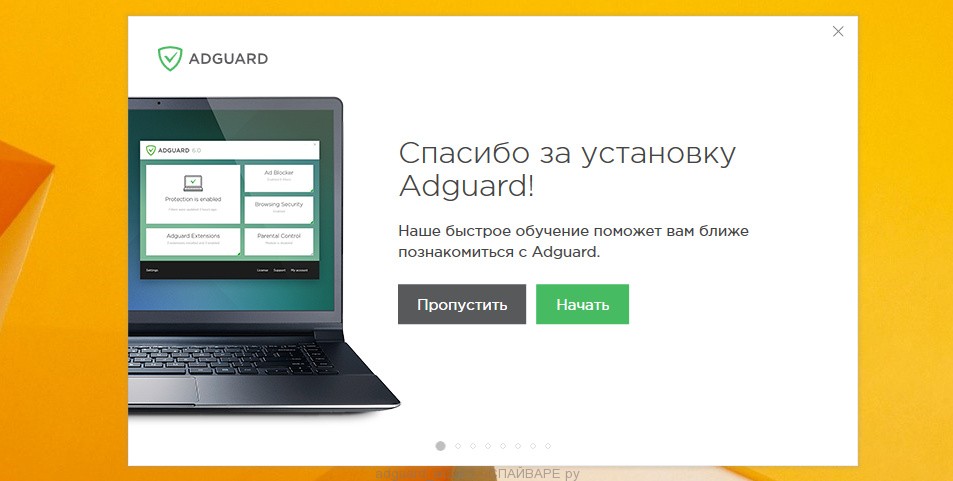
Вы можете нажать Пропустить, чтобы закрыть программу установки и использовать стандартные настройки, или кнопку Начать, чтобы ознакомиться с возможностями программы AdGuard и внести изменения в настройки, принятые по-умолчанию.
В большинстве случаев стандартных настроек достаточно и менять ничего не нужно. При каждом запуске компьютера AdGuard будет стартовать автоматически и блокировать всплывающую рекламу, сайты подобные Dinoraptzor.org, а так же другие вредоносные или вводящие в заблуждения веб странички. Для ознакомления со всеми возможностями программы или чтобы изменить её настройки вам достаточно дважды кликнуть по иконке AdGuard, которая находиться на вашем рабочем столе.
Проверить планировщик заданий
Мы рекомендуем, на последнем этапе очистки компьютера, проверить Библиотеку планировщика заданий и удалить все задания, которые были созданы вредоносными программами, так как именно они могут являться причиной автоматического открытия Dinoraptzor.org сайта при включении компьютера или через равные промежутки времени.
Нажмите на клавиатуре одновременно Windows и R (русская К). Откроется небольшое окно с заголовком Выполнить. В строке ввода введите «taskschd.msc» (без кавычек) и нажмите Enter. Откроется окно Планировщика заданий. В левой его части выберите пункт «Библиотека планировщика заданий», как показано на следующем примере.
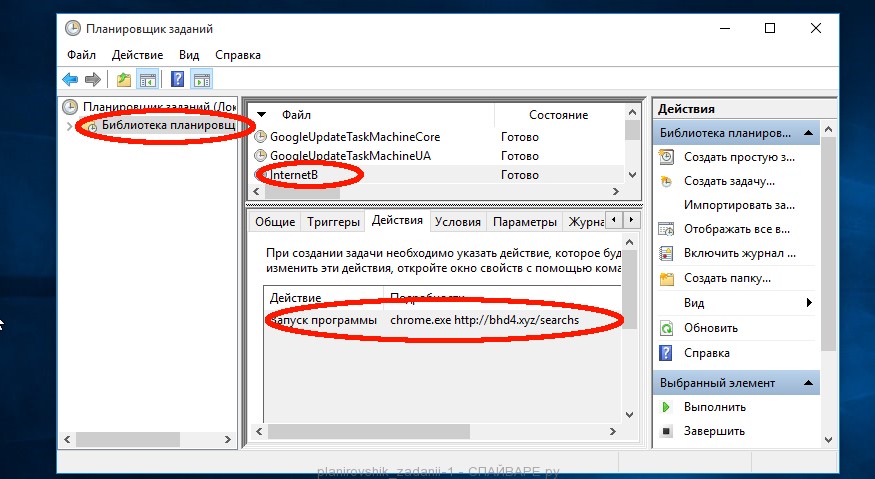
В средней части вы увидите список установленных заданий. Выберите первое заданий, а в его свойствах, которые откроются чуть ниже выберите вкладку Действия. По очереди просматривайте все задания, обращайте внимание на то, что оно запускает на вашем компьютере. Нашли что-то подобное «explorer.exe http://www.dipladoks.org/», то это задание можно смело удалять. Если вы не уверены, что запускает задание, то проверьте его через наш сайт или в поисковой системе, по названию запускаемого файла. Если файл — компонент вируса или вредоносной программы, то это задание тоже смело можно удалять.
Определившись с заданием, которое нужно удалить, кликните по нему правой клавишей мыши и выберите пункт Удалить. Этот шаг выполните несколько раз, если вы нашли несколько заданий, которые были созданы вредоносными программами. Пример удаления задания, созданого рекламным вирусом показан на рисунке ниже.

Удалив все задания, закройте окно Планировщика заданий.
Выполнив эту инструкцию, перенаправление и автоматическое открытие Dinoraptzor.org в Google Chrome, Mozilla Firefox, Internet Explorer и Microsoft Edge будет полностью удалено. Восстановиться ваша домашнаяя страница и поисковик. К сожалению, авторы подобных приложений постоянно их обновляют, затрудняя лечение компьютера. Поэтому, в случае если эта инструкция вам не помогла, значит вы заразились новой версией Dinoraptzor.org и тогда лучший вариант — обратиться на наш форум.
Для того чтобы в будущем больше не заразить компьютер, пожалуйста следуйте трём небольшим советам
- При установке новых программ на свой компьютер, всегда читайте правила их использования, а так же все сообщения, которые программа будет вам показывать. Старайтесь не производить инсталляцию с настройками по-умолчанию!
- Держите антивирусные и антиспайварные программы обновлёнными до последних версий. Так же обратите внимание на то, что у вас включено автоматическое обновление Windows и все доступные обновления уже установлены. Если вы не уверены, то вам необходимо посетить сайт Windows Update, где вам подскажут как и что нужно обновить в Windows.
- Если вы используете Java, Adobe Acrobat Reader, Adobe Flash Player, то обязательно их обновляйте вовремя.