
Skip to content
Navigation Menu
Provide feedback
Saved searches
Use saved searches to filter your results more quickly
Sign up
Appearance settings
Description
Environment
Windows build number: 10.0.18362.0
Windows Terminal version (if applicable): 0.4.2382.0

Any other software? wsl + emacs
Steps to reproduce
- Open emacs within wsl in Windows Terminal.
- Type either of the following:
- M-> (alt + greater than) to move to the end of the file
- M-< (alt + less than) to move to the beginning of the file
- Verify the key emacs is seeing, by typing C-h k (Ctrl+h, k) for describe key — then type either of the above key combinations.
Expected behavior
M-> moves to the end of the file.
M-< moves to the beginning of the file.
C-h k M-> displays M-> as the command run.
C-h k M-< displays M-< as the command run.
Actual behavior
M-> does not move to the end of the file.
M-< does not move to the beginning of the file.
C-h k M-> displays M-. as the command run.
C-h k M-< displays M-, as the command run.
Впервые новая оболочка для команд Windows 11 и Windows 10 была представлена в мае 2020, а уже осенью была выпущена первая стабильная версия. С тех пор Windows Terminal продолжает обновляться, но уже сейчас более чем пригоден к работе как с командной строкой или PowerShell, так и другими оболочками, например, Ubuntu, установленной в рамках WSL (Подсистема Windows для Linux).
В этом обзоре — базовые сведения о том, где скачать и как настроить Windows Terminal, о некоторых его возможностях и дополнительная информация, которая может оказаться полезной.
Где скачать Windows Terminal
Прежде чем приступить, два важных примечания: в Windows 11 Терминал Windows уже встроен (нажмите правой кнопкой мыши по кнопке Пуск и вы сможете его запустить), а для работы нового терминала в Windows 10 требуется версия 1903 или новее.
Бесплатно скачать Windows Terminal можно из двух официальных источников:
- Microsoft Store — достаточно ввести Windows Terminal в поиске магазина или перейти на страницу приложения https://www.microsoft.com/ru-ru/p/windows-terminal/9n0dx20hk701

- Загрузить последний релиз из GitHub, скачиваем файл .msixbundle из раздела Assets и устанавливаем его как обычное приложение — https://github.com/microsoft/terminal/releases/

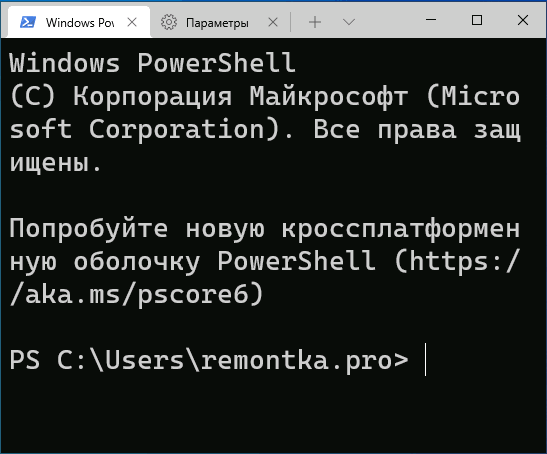
После установки Windows Terminal готов к работе — можно запускать. При первом старте по умолчанию будет открыта вкладка с PowerShell.

Использование Windows Terminal, возможности управления
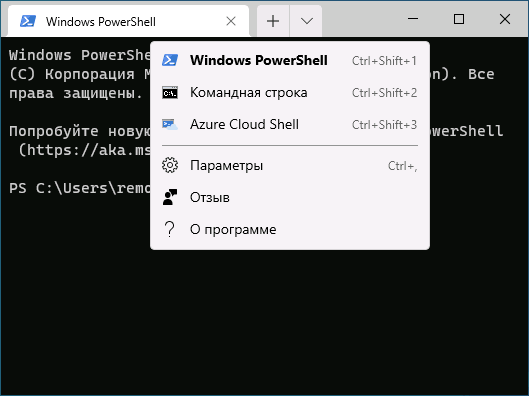
Скорее всего, с открытием новых вкладок с командной строкой, PowerShell и другими оболочками проблем не возникнет, достаточно нажать «+» если требуется открыть новую вкладку с консолью по умолчанию, либо по стрелке и выбрать нужную оболочку, там же можно увидеть и сочетания клавиш для быстрого открытия соответствующих новых вкладок.
Не будем торопиться с переходом к настройкам Windows Terminal, для начала некоторые вещи, которые вы можете сделать, не переходя к ним:
- Сочетания клавиш Ctrl + «+» и аналогичное сочетание с клавишей «минус» позволяет изменить размер текста в текущей вкладке.

- Нажмите клавиши Alt+Shift+D, чтобы разделить текущую вкладку на две панели. Действие можно повторять: выделенная панель будет разделяться при нажатии этих клавиш. Если вместо D использовать клавишу «минус» или «плюс», разделение будет происходить горизонтально и вертикально соответственно.

- Для панелей доступны и другие клавиши: Ctrl+Shift+W — закрыть текущую, Alt+Shift+стрелки — изменение размеров, Alt+стрелки — переключение между панелями.
- Если в Windows включены эффекты прозрачности, удержание клавиш Ctrl+Shift и вращение колеса мыши вниз позволяет сделать активное окно Windows Terminal более прозрачным.
- Windows Terminal добавляет пункт в контекстное меню Windows, позволяющий быстро запустить оболочку по умолчанию в текущей вкладке.

- «Стандартные» сочетания клавиш, такие как копирование и вставка, отмена (Ctrl+Z) и другие здесь также исправно работают.
- Если вам нужно запустить Windows Terminal от имени администратора, можно использовать правый клик по нему в меню «Пуск» и выбор нужного пункта в разделе «Дополнительно» или, поиск в панели задач, как на изображении ниже.


Настройки
Зайти в настройки Windows Terminal можно, нажав по кнопке со стрелкой или же с помощью сочетания клавиш Ctrl + «запятая». Параметры меняются от версии к версии и на момент написания этого обзора выглядят следующим образом:

Большинство вкладок вполне понятны и на русском языке:
- На вкладке «Запуск» можно выбрать оболочку по умолчанию, например, выбрать «Командная строка» вместо «Windows PowerShell», включить автозапуск, изменить режим запуска.
- Вкладки «Оформление» и «Цветовые схемы» позволяют изменить общие параметры оформления приложения, а также отредактировать цветовые схемы (их мы можем указать отдельно для каждой консоли в разделе «Профили»), при необходимости — создать собственную цветовую схему.
- В разделе «Действия» — базовые сочетания клавиш для работы в Windows Terminal. Эти сочетания подлежат редактированию в файле конфигурации.
- Если перейти в подраздел «Профили», мы можем настроить отдельные параметры оформления, запуска, значка, папки запуска, прозрачности и другие для каждой «командной строки». В оформлении можно не только выбрать цветовую схему и настроить прозрачность (акриловый эффект), но и задать обои для соответствующих вкладок.

- Настройки в достаточной мере гибкие и скриншот ниже — далеко не всё, чего можно добиться.

- При нажатии кнопки «Добавить», вы можете добавить собственную консоль в Windows Terminal (или использовать системную — тот же PowerShell или Командную строку, но с другим профилем настроек).
- Кнопка «Открытие файла JSON» позволяет открыть файл конфигурации для редактирования.


Если после проделанных экспериментов с настройками вам потребуется сбросить все параметры Windows Terminal на настройки по умолчанию, достаточно проделать следующие шаги:
- Запустите Windows Terminal и перейдите в его параметры.
- Нажмите «Открытие файла JSON» и откройте его в текстовом редакторе.
- Удалите всё содержимое файла и сохраните файл.
- Закройте и снова запустите Windows Terminal — он будет запущен с настройками по умолчанию.
How to Use Windows Terminal in Windows 11/10: A Beginner’s Guide
Windows Terminal is a powerful and versatile application that provides a modern interface for command-line tools such as Command Prompt, PowerShell, and Windows Subsystem for Linux (WSL). If you’re a beginner looking to navigate this robust environment, this guide will walk you through everything you need to know—from installation to advanced features.
Understanding Windows Terminal
Windows Terminal is more than just a command line interface; it is a multi-tabbed terminal emulator that can run various shells concurrently. Its design emphasizes performance, customization, and usability. Users can choose from various shells and profiles, change appearance settings, and leverage features like tabs, panes, and split views.
Installing Windows Terminal
-
Check for Windows Version: Windows Terminal is available for Windows 10 (version 1903 and later) and Windows 11. Ensure your system meets these requirements.
-
Via Microsoft Store:
- Open the Microsoft Store from your Start menu.
- In the search bar, type «Windows Terminal».
- Click on the «Get» button to install the application.
-
Via GitHub Releases:
- Navigate to the Windows Terminal GitHub releases page.
- Download the latest
.msixor.msixbundlefile. - Open the downloaded file to install it on your system.
Launching Windows Terminal
Once installed, you can find Windows Terminal by typing «Windows Terminal» in the Start menu search bar. Click on the application to open it. You will be greeted by a sleek interface with a default profile.
Navigating the Interface
Basic Layout
The default layout of Windows Terminal includes:
- Title Bar: Displays the title of the current shell session.
- Tab Bar: Where you can see all the open tabs, switch between them, and add or close tabs.
- Command Line Interface: The area where you can type commands and view outputs.
Creating New Tabs
To open a new tab, you can either:
- Click the «+» icon in the tab bar.
- Use the keyboard shortcut
Ctrl + Shift + T.
Switching Between Tabs
To navigate between tabs, use:
Ctrl + Tab(to move right)Ctrl + Shift + Tab(to move left)
You can also click on any tab directly.
Customizing Your Terminal
One of the standout features of Windows Terminal is its customization options. These allow you to personalize the appearance and behavior of your terminal.
Change the Background and Text Colors
-
Access Settings:
- Click on the dropdown arrow next to the tabs and select “Settings”.
- Alternatively, you can press
Ctrl + ,.
-
Modify Profiles:
- In the settings, you’ll see a list of profiles (e.g., Windows PowerShell, Command Prompt).
- Click on the profile you want to modify.
-
Change Appearance:
- You can adjust the following settings:
- Color Scheme: Select from the pre-defined color schemes or create your own.
- Font face: Choose your preferred font.
- Cursor shape: Select from different cursor styles.
- You can adjust the following settings:
-
Save Changes: After customizing, ensure you save your changes at the bottom.
Keybindings
Windows Terminal allows users to create custom keybindings. This means you can set your own keyboard shortcuts for common actions.
-
Access Keybindings:
- Within the settings window, navigate to the “Key bindings” section.
-
Add or Edit Keybindings:
- You can define new shortcuts or modify existing ones. For example, you might want to create a shortcut to split the terminal window.
-
Save Your Keybindings: As always, ensure to save changes once you are satisfied with your configurations.
Using Multiple Shells
Windows Terminal supports multiple shell environments. Here’s how to use them:
Using Command Prompt
- To open Command Prompt, click the dropdown arrow in the tab bar.
- Select “Command Prompt” from the list.
Using PowerShell
For PowerShell:
- Open a new tab through the dropdown or by the keyboard shortcut.
- Select “Windows PowerShell”.
Using Windows Subsystem for Linux (WSL)
If you have WSL installed, you can easily access your Linux distributions:
- Click the dropdown arrow.
- Select your installed Linux distribution (e.g., Ubuntu).
Basics of Command Line Operations
Understanding basic command line operations is crucial for effective use of Windows Terminal. Here are some fundamental commands:
Navigating the Filesystem
cd: Change the current working directory.dirorls: List files and folders in the current directory.mkdir: Create a new directory.rmdir: Remove an empty directory.del: Delete a specific file.
Running Scripts
Windows Terminal allows you to execute scripts directly. For example:
-
Use PowerShell to run a
.ps1script.- Navigate to the script’s directory.
- Type
.yourscript.ps1and press Enter.
-
To run a bash script in WSL, simply navigate to the script file and use
bash yourscript.sh.
Advanced Features
Split Panes
Splitting panes allows you to view multiple terminal sessions side by side.
- Split Horizontally: Press
Alt + Shift + -to split the terminal into two horizontal panes. - Split Vertically: Press
Alt + Shift + +to split the terminal into vertical panes.
Each pane can run a different shell or environment, making it easier to multitask.
Working with Tabs
Windows Terminal supports multiple tabs, helping you keep your tasks organized. Each tab can be a separate shell or even a different instance of the same shell.
- Rename Tabs: Right-click on a tab and select «Rename Tab».
- Reorder Tabs: Simply drag and drop to reorder your tabs.
Command Palette
The Command Palette is an essential feature that allows you to quickly access commands without needing to memorize keyboard shortcuts.
- Open it with
Ctrl + Shift + P. - Start typing the command you want, and suggestions will appear.
Profiles Configuration
Profiles in Windows Terminal allow you to set up different configurations based on your needs:
- Create a New Profile: You can create a profile for a specific shell or tool.
- Edit the Profile: Use the settings UI to adjust the starting directory, color scheme, font, and more.
Importing and Exporting Settings
Windows Terminal allows you to back up or share your settings:
- Locate the Settings JSON file: In the settings UI, there is an option to open the settings file in JSON format.
- Edit the JSON file: You can manually adjust settings in this file.
- Import/Export: Copy the file to another machine to replicate your Terminal setup.
Frequently Asked Questions
Can I use Windows Terminal without Windows 10/11?
Windows Terminal is exclusive to Windows 10 (version 1903 and higher) and Windows 11. Other versions of Windows do not support it.
Is Windows Terminal the same as Command Prompt?
No, Windows Terminal is a terminal emulator that can host several types of command-line interfaces, including Command Prompt, PowerShell, and WSL. It provides advanced features and customization that the individual command-line tools do not offer.
Can I run GUI applications in Windows Terminal?
While Windows Terminal primarily deals with command-line interfaces, you can run GUI applications from within it if the applications are installed and accessible via the appropriate commands.
Conclusion
Windows Terminal is an incredibly powerful tool for anyone who spends time working with command-line interfaces. Whether you’re managing files, executing scripts, or working on development tasks, Windows Terminal’s features enhance productivity and efficiency. From installation through to advanced usage, this guide is intended to help beginners feel confident in navigating and customizing their terminal environment.
As you become more familiar with Windows Terminal, you’ll likely uncover more of its potential, transforming the way you interact with your computer’s operating system. Happy terminal-ing!
Summary
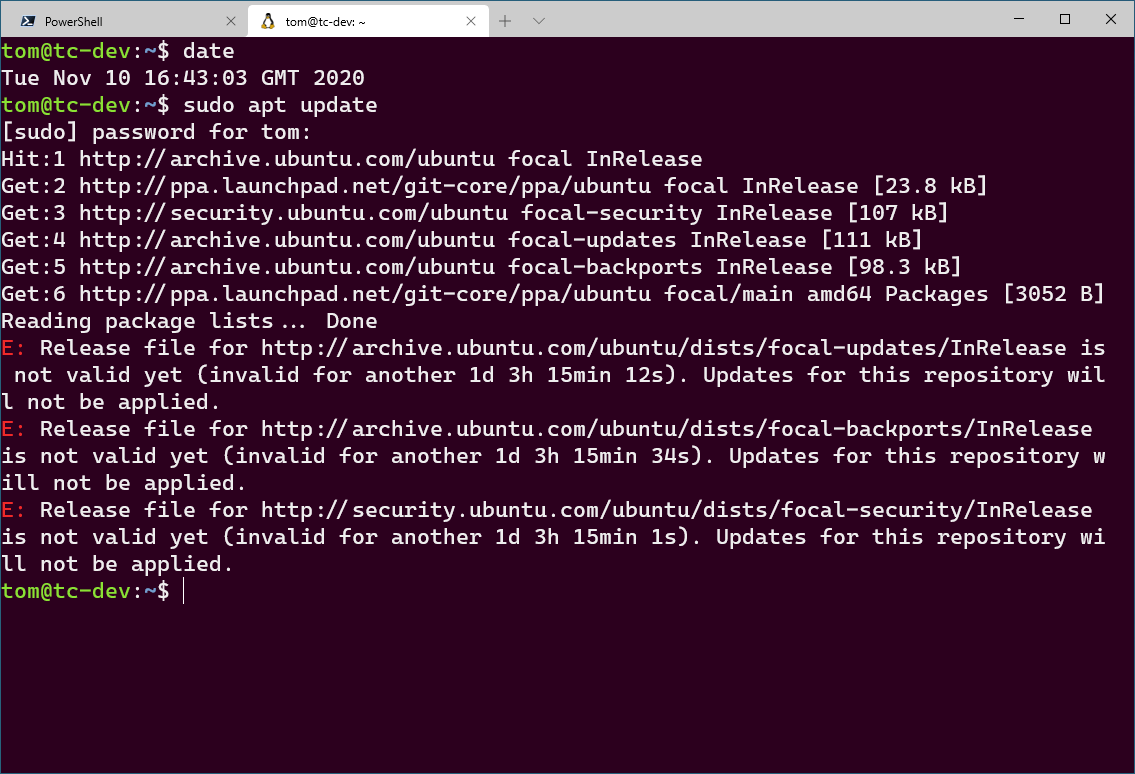
When you try to update your Linux installation using commands like apt update then, if your system clock is wrong, you may encounter errors like this:
E: Release file for http://archive.ubuntu.com/ubuntu/dists/focal-updates/InRelease is not valid yet (invalid for another 1d 3h 15min 12s). Updates for this repository will not be applied.
E: Release file for http://archive.ubuntu.com/ubuntu/dists/focal-backports/InRelease is not valid yet (invalid for another 1d 3h 15min 34s). Updates for this repository will not be applied.
E: Release file for http://security.ubuntu.com/ubuntu/dists/focal-security/InRelease is not valid yet (invalid for another 1d 3h 15min 1s). Updates for this repository will not be applied.
It’s pretty easy to realise what’s gone wrong here. My system clock is just over a day behind the timestamp of the latest update files, so it thinks that those files are not yet valid.
This is not a big problem, just update the system clock and the command will work. However, if the Linux system in question is running inside WSL2 on Windows, then it’s not quite as straightforward to fix as it ought to be and you’re likely to encounter this error more often than you might expect, especially if you’re using nested virtualisation.
However, if you’re running Windows Terminal, then you can use a simple menu item I’ve created to fix it for you. You can also run the fix manually, but I find it significantly easier to use Windows Terminal.
Since running any command doesn’t take zero time, rather than making it run by magic every time you try to use your WSL2 environment, I’ve deliberately made it be something that you have to instigate manually (albeit with a single menu command which can be run with a keyboard shortcut). I considered doing something clever, but this fix feels better and it’s very lightweight and also more portable as it should work on any machine running WSL2.
Background
Hyper-V is a great virtualisation environment and I’ve got it running on an old Dell PowerEdge R720xd in my home lab. One of the nice things about Hyper-V is that I can shut down the physical host server (e.g. through the web interface of Windows Admin Center) and it will save the state of any virtual machines which are running. When I start the server again, those same virtual machines will automatically start running again (this is all configurable, of course, but this is how my system is configured). And their system clocks are synchronised with the host machine, which is something that most hypervisors do.
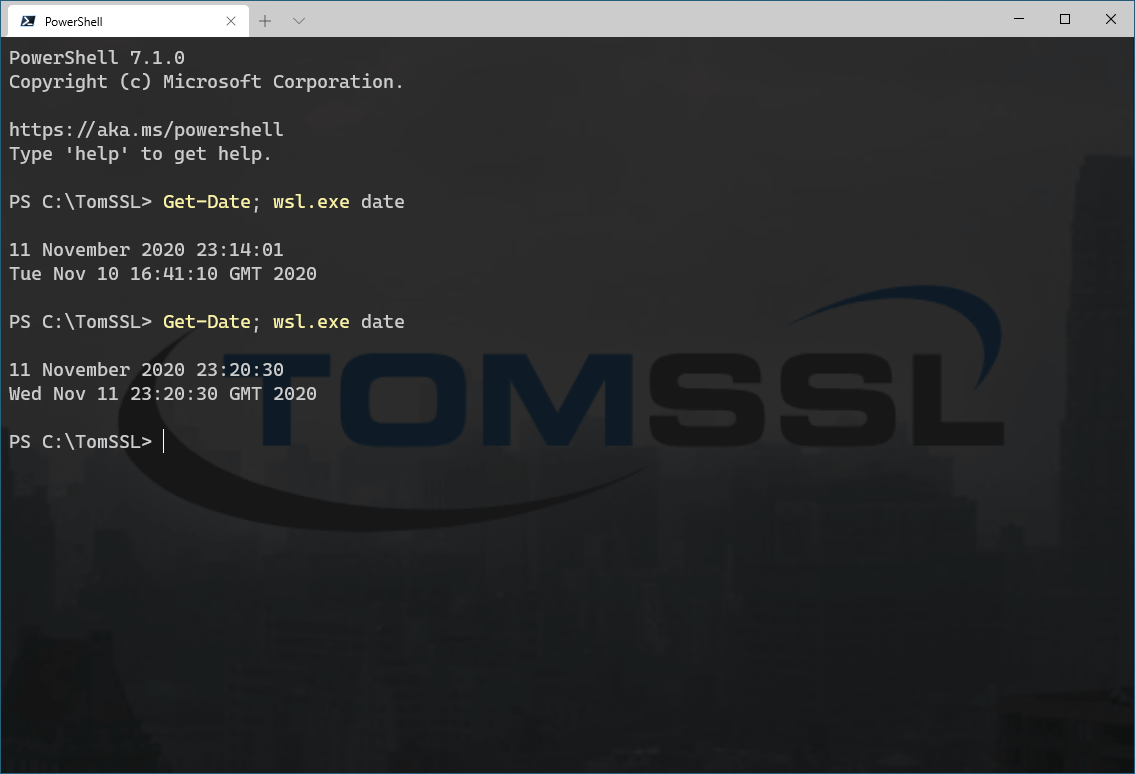
Cutting a long story (slightly) short, I have a Windows 10 virtual machine running inside Hyper-V server. Then I’m running WSL2 inside Docker inside that virtual machine, so we’re talking nested virtualisation (I can’t be the only one who’s thinking, «It’s turtles all the way down»). If I turn off my Hyper-V server for any reason then, when I switch it back on and the virtual machines start running again, my Windows 10 VM has the correct system time, but my WSL2 environment (in my case Ubuntu 20.04) doesn’t. The clock restarts from whenever I shut it down. To illustrate this point, I powered off my server just over a day ago. When I switched it back on and logged in to my dev machine, I opened Windows Terminal and ran the following command:
Get-Date; wsl.exe dateThis is a simple way of displaying the system date for Windows (by using the PowerShell Get-Date command) and also for WSL2 (by using wsl.exe date to run the date command inside the default WSL environment, which in my case is Ubuntu running inside WSL2).
This is what I saw:

11 November 2020 23:14:01
Tue Nov 10 16:41:10 GMT 2020
As you can see, there’s over thirty hours of clock drift, which translates precisely to the amount of time my server was not running. That all makes sense.
To prove that this is a problem, I tried to update my WSL2 environment and got the error I mentioned in the summary at the top of this article:
The Method
In order to fix this without having to enter the correct date and time manually, you need to install the ntpdate command in your WSL2 environment (e.g. via sudo apt install ntpdate). I tried various ways of setting the system clock automatically and this was the only one that I found worked reliably (I was unable to synchronise it to the host machine). As you might realise, the ntp in the command refers to Network Time Protocol and it means we’re going to set the system time from a network time server. I’m using time.windows.com, but you can use any ntp server you like.
Now, whenever your clock is wrong, you need to run the following command:
sudo ntpdate time.windows.com
However, since I use Windows Terminal and I’ve already created a menu item to update my PowerShell Core installation, I think it’s better to build this into a menu item as well.
In order to preserve the look and feel, I copied my existing Ubuntu WSL2 profile and changed the command it runs, but you don’t necessarily need to do that; the only important bit is the commandline value, which needs to look like this (although you can use a different time server if you like, of course):
"commandline": "wsl.exe -u root -- ntpdate time.windows.com"It’s basically saying: run the command ntpdate time.windows.com inside my default WSL environment as the root user and then exit.
So your whole profile entry might look like this:
{
    "closeOnExit": false, // keep this if you want to see the result
    "commandline": "wsl.exe -u root -- ntpdate time.windows.com", // use any time server you want here
    "guid": "{1d4de342-38b7-51cf-b940-2309a097f518}", // needs to be unique
    "icon": "ms-appx:///ProfileIcons/{9acb9455-ca41-5af7-950f-6bca1bc9722f}.png", // keep this to have Tux, the Linux penguin as your icon
    "name": "Update Ubuntu - WSL 2 - Update system clock",
}
Now, after you’ve hibernated your system, or if your clock has drifted for other reasons (which it might well do, annoyingly), you can fix it simply by selecting that menu item.

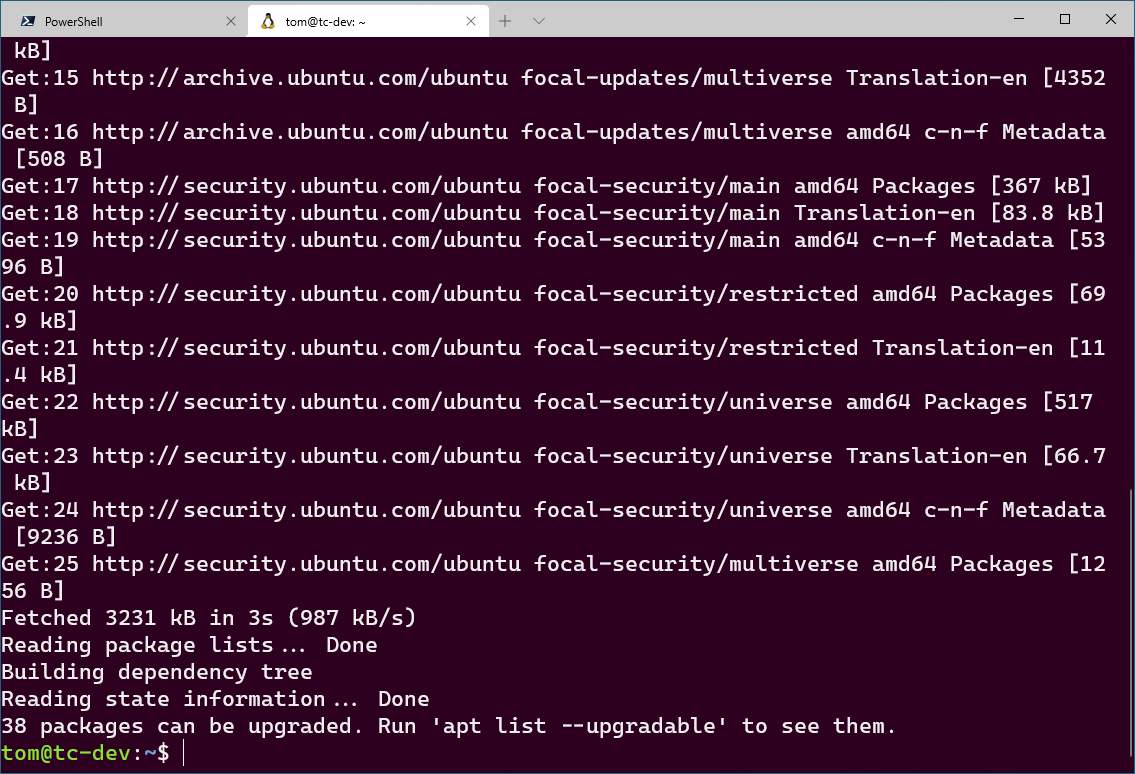
And, since we told it not to close the window afterwards, you can see the result:

And now you’ll be able to update your environment using sudo apt update again.
And if you run the original Get-Date; wsl.exe date command again, you’ll see everything is fixed.
Conclusion
Hypervisors are great, but nested virtualisation can have some unexpected challenges. If you’re running WSL2 inside a virtual machine then, if you hibernate that parent virtual machine, your WSL2 system clock will not update automatically when you restart your system. This will cause all sorts of problems and can be painful to fix. By creating a simple menu command for Windows Terminal you can correct your WSL2 system clock with almost no effort and also see how far it had drifted (in my case, this shows me how long I’d had my system switched off).
Overview
If your users are having trouble clocking in from a time clock terminal on a desktop or laptop computer, follow the steps in this article to troubleshoot and resolve the issue.
If your time clock terminal is running on a tablet or phone, check out our troubleshooting article on the subject.
Considerations
You must have manager or admin access privileges to perform some troubleshooting steps in this article. If you have employee or supervisor level access, you’ll have to ask for help when you get to those steps.
A no shift message appears
If a user sees a “You don’t have a shift scheduled” message at clock in, it could be because no shift is scheduled or it’s too early to clock in for a scheduled shift.
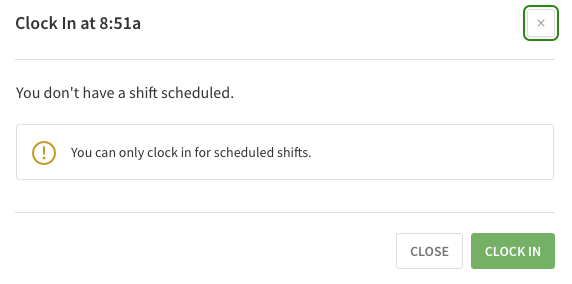
Possible Cause: No shift is scheduled
The employee might be trying to clock in when no shift is scheduled.
Solutions:
- If the employee is supposed to be working, add a shift for the employee.
- If you want to allow employees to clock in without a scheduled shift, set How Early Can Employees Clock In for a Shift to Anytime in attendance settings. You must have manager or admin access privileges to make this change.
Possible Cause: Employee trying to clock in too early
The attendance settings allow you prevent employees from clocking in more than 0, 5, 15, or 30 minutes early. This can prevent employees from clocking in.
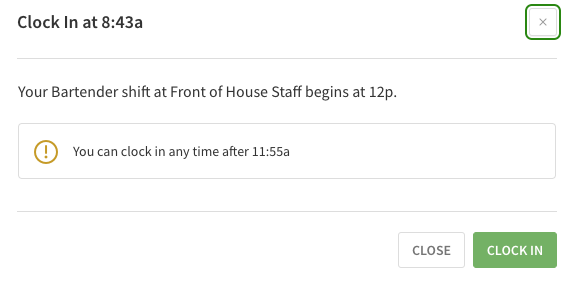
Solutions:
- Tell the employee to wait until their shift starts to clock in.
- If you want to change how early employees can clock in, set How Early Can Employees Clock In for a Shift to 0, 5, 15, or 30 minutes before in attendance settings. You must have manager or admin access privileges to make this change.
- If you want to allow employees to clock in without a scheduled shift, set How Early Can Employees Clock In for a Shift to Anytime in attendance settings. You must have manager or admin access privileges to make this change.
Terminal stuck on a specific user
If the time clock terminal only gives the option to clock in as a specific user, that user is probably signed in to the When I Work web app in another browser tab.
Solution:
- Find the browser tab where the user is signed in to When I Work.
- Sign the user out.
- Refresh the time clock terminal page. If that doesn’t fix the issue, reauthorize the terminal.
Nothing happens when users clock in or out
If the time clock terminal doesn’t respond when users try to clock in and out, the computer might have lost its connection to When I Work, the supervisor, manager, or admin that originally authorized the terminal has been demoted to employee-level access privileges, or persistent loading happens.
Solution:
- Make sure the computer is connected to a Wi-Fi network or wired network.
- Verify that the Internet connection is working.
- Refresh the time clock terminal page.
A “user ID does not exist” message appears
Solutions:
- Reauthorize the time clock terminal as a different supervisor, manager, or admin.
- If the user that originally authorized the terminal was demoted by accident, restore the user’s original access privileges. You must have manager or admin access privileges to make this change.
Persistent loading message appears

Solutions:
- Reauthorize the time clock terminal as a different supervisor, manager, or admin.
- If the user that originally authorized the terminal was deleted by accident, reactivate the deleted user. You must have manager or admin access privileges to reactivate any user. If you’re a supervisor, you can reactivate employees that belong to your schedules.