
,
If you cannot connect to the Internet using the WiFi, or LAN network, because the DHCP Client service cannot start and you get the «Error 5: Access is Denied» in the Event log, then read this tutorial to fix the issue.
The problem «Could not start the DHCP Client service on Local Computer. Error 5: Access is denied» can happen on any Windows based computer (with Windows 7, 8 or 10 OS) after upgrading Windows or after a malware infection that has compromised permissions on the DCHP Client service or on any other service that is required from the system to access the Network and the Internet or to operate smoothly.
When the DHCP service is stopped (or cannot be started), you face the following symptoms/problems on your device:
1. You receive the error message «Windows could not start the DHCP server service on local computer Error 5: Access is denied» in Event Viewer.
2. Your Network Connection (WiFi or LAN) doesn’t work.
3. You get a red X on the network icon which indicates that your network connection is not working.
4. You get a yellow exclamation mark on the network icon, that you have Limited Access on the Network.
5. You cannot access the Local Network or the Internet («No Internet Access» or «Limited Access»).
How to FIX: DHCP Service Cannot Start: Access is Denied (Windows 10/8/7)
Step 1. Scan for Viruses/Malware.
Viruses or malicious programs can cause your PC to work abnormally. So, before you continue to troubleshoot your problems, use this Malware Scan and Removal Guide to check and remove viruses or/and malicious programs that may be running on your computer.
Step 2. Modify DHCP and TCPIP Registry Permissions.
The first method to resolve the «DHCP Cannot Start – Access Denied» problem, is to grant full control permissions to «NETWORKSERVICE» and to «NT SERVICE\DHCP» objects, at the following keys: DHCP & TCP/IP/. To do that:
1. Simultaneously press the Windows + R keys to open run command box.
2. Type regedit and press Enter.

3. At the left pane, navigate to this key:
- HKEY_LOCAL_MACHINE\SYSTEM\CurrentControlSet\Services\Dhcp
4. Right click on the DHCP key and select Permissions.

5. Click Add, type network service and click OK.

6. Click Add again, type nt service\dhcp and click OK.

7. Select the ‘NETWORK SERVICE’ and check the Full control box to grant NETWORK SERVICE full control permissions on the DHCP key and click OK.
8. Select the ‘Dhcp’ and check the Full control box to grant «Dchp» full control permissions on the DHCP key and click OK.
9. Then navigate to the following key:
- HKEY_LOCAL_MACHINE\SYSTEM\CurrentControlSet\Services\TcpIp
10. Perform the same steps (4-8) and give full permissions to «NETWORKSERVICE» and to «NT SERVICE\DHCP» on the TCPIP key.
11. When done, close registry editor and restart your PC.
12. After the restart, check if the «DHCP Client cannot start» error is resolved. If not, then continue to next step.
Step 3. FIX «DHCP Client: Access Denied» error from command line.
1. Open an elevated command prompt {Command Prompt(Admin)}. To do that:
a. In the Search box type: cmd or command prompt
b. Right click on the command prompt (result) and select Run as Administrator.

2. In command prompt, type the following command to add the «NT Authority\Local Service» to Administrators group and press Enter:
-
NET LOCALGROUP administrators «NT Authority\Local Service» /add
3. When done, give this command to reset Winsock Catalog to a clean state and press Enter:
-
netsh winsock reset catalog

4. Reboot your computer, as instructed and then test your Internet connection.
That it! Let me know if this guide has helped you by leaving your comment about your experience. Please like and share this guide to help others.
If this article was useful for you, please consider supporting us by making a donation. Even $1 can a make a huge difference for us in our effort to continue to help others while keeping this site free:
- Author
- Recent Posts
Konstantinos is the founder and administrator of Wintips.org. Since 1995 he works and provides IT support as a computer and network expert to individuals and large companies. He is specialized in solving problems related to Windows or other Microsoft products (Windows Server, Office, Microsoft 365, etc.).
При подключении к своей сети с винды модем(dir-300nru) выдаёт локальный ip ноуту, но в таблицу dhcp не вносит и так с каждой сетью. Попытался сбросить заводские настройки. Ничего не поменялось. При том что если с того же ноута загрузится, например с линукса то там все работает, отсюда вывод что проблемы в настройках винды . В настройки вифи адаптера в ipv4 все стоит на автоматическое получение ip и dns. Другие девайсы работают нормально.
P.s до этого хотел настроить статический dhcp
UPD проблема оказалась в фаерволе который блочил все соединения из за сбоя при восстановлении винды
-
Вопрос задан
-
1673 просмотра
|
5337 / 2205 / 470 Регистрация: 17.10.2015 Сообщений: 9,356 |
|
|
10.04.2018, 21:55 |
|
|
Сообщение от romsan Не знаю на сколько это верно — пока не делал. предоставил полный доступ — не помогло Добавлено через 43 минуты Обновление — это установка поверх существующей системы. При этом сохраняются ваши настройки и данные, а также установленные программы. Все системные параметры ( например, конфигурация служб ) сбрасываются — приводятся к стандартным, как при новой установке Windows. Как думаете, поможет ли? Добавлено через 58 минут Добавлено через 5 часов 9 минут HKEY_LOCAL_MACHINE\SYSTEM\CurrentControl Set\Services\NlaSvc\Parameters помимо прочего сделал еще и вот это: От имени администратора запустить командную строку и ввести следующие команды: Перезагрузка и ….. УРА!!! Все службы запустились, ПК получает адрес. Добавлено через 54 минуты там на подраздел Дал полные права. Служба запустилась, и соответственно брендмауэр тоже запустился.
1 |
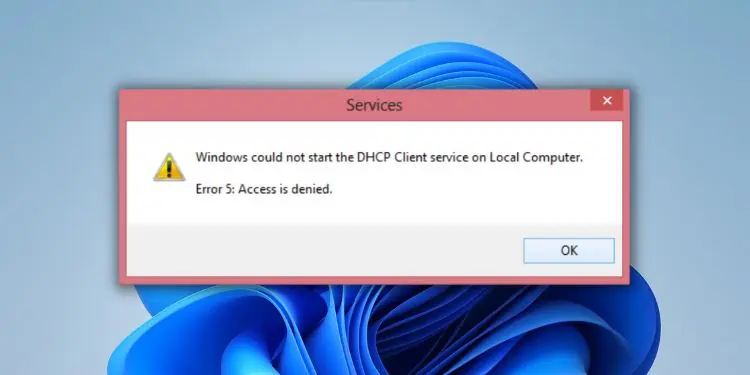
The ‘Windows Could Not Start the DHCP Client Service on Local Computer’ error prevents you from accessing the internet as the server won’t be able to assign an IP address to your PC.
Generally, this happens when there are DHCP and TCPIP permission issues that prevent you from running the DHCP Client service. Moreover, this could also occur due to malware infection or firewall issues.
Along with the error, you’ll also encounter Error 5: Access Denied message in the dialogue box. Moreover, the network icon in the system tray has a cross or exclamation symbol notifying that your device isn’t connected to the internet.
Thus, if you’re getting any of these symptoms, the below guide should help you fix the ‘Windows Could Not Start the DHCP Client Service on Local Computer’ error.
Causes: Windows Could Not Start the DHCP Client Service on Local Computer
Basically, the DHCP (Dynamic Host Configuration Protocol) Client is one of the Windows services that manages the IP addresses of a computer over a TCP/IP network. Hence, you’ll likely get the ‘Windows Could Not Start the DHCP Client Service on Local Computer’ error due to problems with the TCP/IP protocol.
Moreover, some other reasons could also have triggered this Windows error:
- The router isn’t able to adjust the computer’s IP address
- Malware has affected your PC’s network
- Outdated network drivers or OS
- Denied DHCP and TCPIP permissions
- Issues within the Windows Sockets API
- Windows Defender Firewall is blocking the DHCP Client Service
How to Fix Windows Could Not Start the DHCP Client Service on Local Computer?
Reportedly, several Windows users have encountered the ‘Windows Could Not Start the DHCP Client Service on Local Computer’ error as soon as the startup or after an update.
No matter the cause, we first recommend restarting your PC to fix any temporary glitches with the network drivers. Also, rebooting Windows will fresh start the DHCP Client service and might get started this time.
Once you have restarted the system, you can also try manually refreshing and restarting the service. Here’s how you can do it:
- Press Windows + R to launch the Run utility. Here, type
services.mscto launch the Services application. - Find DHCP Client and check its status. You’ll probably see it’s blank, meaning the service isn’t running.
 44")
- Now, right-click on it and choose Refresh.
 45")
- If this didn’t run the DHCP Client service, right-click on it again and select Restart.
- Finally, click on the Yes button to confirm your action.
 47")
 44")
 45")
 46")
 47")
If rebooting Windows and restarting the DHCP Client service didn’t fix the error, we also recommend updating your PC. This will fix any bugs or security vulnerabilities that might have prevented from starting the service.
However, if these general fixes don’t work, we recommend trying out the below-mentioned solutions.
Restart Your Router
 48")
A router is a networking device where multiple packet-switched computer networks communicate and share information. Generally, most routers used today use a DHCP server by default and are responsible for providing unique IP addresses.
However, if multiple devices are connected to the same network, the device may be unable to do that. Thus, we recommend restarting your router to clear or reset any underlying task that might have prevented Windows from starting the DHCP service.
Scan for Possible Malware
Malware can harm network drivers, essential system files, or even the operating system services. Thus, they could be causing issues with the DHCP Client service as well.
Hence, it’s best to use one or more reliable anti-virus programs to eliminate such malware. Below, we have provided the necessary steps to perform a full scan using the built-in Windows Security application to scan for viruses:
- Navigate to the start menu and launch the Windows Security application.
- Here, go to Virus & threat protection.
 49")
- Next, choose Scan options.
- Then, mark the Full Scan choice and press the Scan now button.
- Wait until the scan is complete, and try running the DHCP manually.
 49")
 50")
 51")
Change DHCP Permissions
Undoubtedly, if you haven’t provided full DHCP permission to your computer, Windows may not be able to start the service on the device. Hence, we highly recommend changing the permissions using the below guide:
- Press Windows + R and run the
regeditcommand to launch Registry Editor on your PC. - Here, copy and paste the below path in the address bar:
HKEY_LOCAL_MACHINE\SYSTEM\CurrentControlSet\Services\Dhcp\Configurations 52")
- Right-click on the selected item and choose Permissions.
- Once a new dialogue box pops up, select your username from the list.
- Then, move to the Permissions section, where you can find three options – Full Control, Read, and Special permissions. Simply check the first two under the Allow row and hit Ok.
 54")
- If you do not find your computer’s name in the list, click on the Add button.
 55")
- Under the Enter the names to select field, type your username and press Ok. This should add your details to the ‘Group or usernames’ section.
 56")
- Now, select it and mark the Allow button next to the Full Control option.
- Click on Ok to save the permissions.
- Next, right-click on the Dhcp directory in the Registry Editor Windows tool and select Permissions.
- Here, press the Advanced button, which will open the Advanced Security Settings for DHCP.
- Next, press the Add button.
 59")
- In the new window, choose the Select a principal option.
 60")
- Here, type
NT SERVICE\mpssvcand press the Check Names button. This should showmpssvc. 61")
- Hit Ok and move to the ‘Basic permissions’ section. Here, check the Full control option and click on Ok again.
- Press Ok in the following three dialogue boxes to save your permission settings. This will provide full permission to your account, and the ‘Windows Could Not Start the DHCP Client Service on Local Computer’ won’t be displayed again.
 52")
 53")
 54")
 55")
 56")
 57")
 58")
 59")
 60")
 61")
 62")
Change TCPIP Permissions
Just like the DHCP, it’s crucial that you provide full permission to the TCP/IP registers as well. Since DHCP is a vital protocol in the TCP/IP application layer, it’s evident that it could trigger the Windows error 5 message.
Here’s a complete guide on how you can change the TCP/IP permissions on Windows 11:
- In the Registry Editor you had opened earlier, move to the below path:
Computer\HKEY_LOCAL_MACHINE\SYSTEM\CurrentControlSet\Services\Tcpip - Right-click on it and select Permissions.
 63")
- From the list, select your username, and under the Permissions section, check the Allow option beside Full Control. If you do not find your name, add it, as explained earlier.
 64")
- Once the full permission is set, hit the Apply button to save the changes.
- Next, tap the Advanced button and add the
mpssvcprincipal as earlier. Also, set full permission and hit Ok on each dialogue box to save the changes.
 63")
 64")
Set DHCP Startup Type to Automatic
If you have disabled the DHCP startup, Windows won’t run the DHCP Client service when it boots. Thus, it’s essential to set this option to Automatic:
- Launch the Services application using the run command
services.msc. - Double-click the DHCP Client service to open its properties.
- Expand the Startup type drop-down and select Automatic.
 65")
- Finally, hit the Ok button, which should fix the error message.
 65")
While at it, ensure that the DHCP is not logged on as the local system account. If so, the service won’t recognize your account and might trigger the ‘Windows Could Not Start the DHCP Client Service on Local Computer’ error.
To do this, directly move to the Log On tab and select This account instead of Local system account. Then, hit the Ok button, and this might do the trick.
Update Network Drivers
Indeed, network drivers could be the other reason you see the Error 5 message. Hence, you can check and update these device drivers to see if this helps:
- Launch Device Manager using the
devmgmt.msccommand in the Run application. - Next, expand the Network Adapters to find your network driver.
- Right-click on the corrupted device driver, and choose Update driver.
 66")
- Now, tap on the Search automatically for drivers option.
 67")
- Wait until the latest network adapters get installed on your PC.
- Close the dialogue box and run the DHCP Client service manually to see if this has worked.
 66")
 67")
Refresh and Restart Dependent Services
Basically, the DHCP Client Service doesn’t just work all by itself. Indeed, it depends on a few other services. Well, you can check this yourself too:
- Open the DHCP Client properties from Windows Services.
- Switch to the Dependencies tab. Here, you can see that the Ancillary Function Driver for Winsock and Network Store Interface Service depends on the DHCP Client service.
- Next, expand the Network Store Interface Service. Here, you’ll see that NSI Proxy Driver and Remote Procedure Call (RPC) depend on it as well.
- Further, expand the RPC service, and this lets you know that DCOM Server Process Launcher and RPC Endpoint Mapper also depend on the DHCP Client service.
 68")
Now that you know the services dependent on it, you can start restarting each of these services. Unfortunately, not all of them can be reset due to security concerns. Hence, we recommend refreshing them and checking whether this solves your problem.
Try Resetting Winsock
Indeed, Winsock is one of the Windows APIs that the DHCP Client service depends on. Basically, this interface deals with TCP/IP and also handles I/O requests for Windows network application software.
Thus, any vulnerabilities within this program can bring several networking problems and can also trigger errors, like ‘Windows Could Not Start the DHCP Client Service on Local Computer’. So, we recommend resetting the API that should possibly fix this error:
- Launch Command Prompt or Windows Powershell from the start menu as administrator.
- Now, paste the below command to add the NT Authority\Local Service to the Administrators group:
NET LOCALGROUP administrators "NT Authority\Local Service" /add 69")
- Then, use the below command line to reset Winsock or the Windows Sockets API:
netsh winsock reset catalog
- Now, close the terminal and restart your PC. Once you enter the Windows screen, you should no longer get the error dialogue box again.
 69")
 70")
Open Port For DHCP Client on Windows Firewall
Well, the Windows Defender Firewall is meant to protect your PC from network threats. Thus, there’s a possibility it could be stopping the DHCP Client service for security reasons. Hence, you can check this by temporarily disabling the firewall:
- Go to the instant search from the Windows taskbar to search and launch Control Panel.
- Here, choose System and Security.
 71")
- Next, switch to the Windows Defender Firewall option.
- From the left pane, select Turn Windows Defender Firewall on or off.
- Under both ‘Private network settings’ and ‘Public network settings’, choose the Turn off Windows Defender Firewall option.
- Now, press Ok and try running the DHCP Client service manually.
 71")
 72")
 73")
 74")
Caution: Disabling Windows Firewall will make your computer susceptible to network threats. Hence, we recommend turning it on whether or not it fixes the error.
If disabling doesn’t fix the issue, you might want to open the ports on Windows Firewall to eliminate this problem. Here’s how you can do it correctly:
- Select Advanced Settings from the left pane in the Windows Defender Firewall window.
- Once a new window appears, choose Inbound Rules from the left side.
- Now, move to the right pane and select New Rule.
 76")
- After a new dialogue box opens, choose Port to control connections for your TCP port, and hit Next.
 77")
- Under ‘Does this rule apply to TCP or UDP?’, select TCP.
- Then, select Specific local ports under ‘Does this rule apply to all local ports or specific local ports?’. Here, type 67 and hit Next. Basically, this is the port where the DHCP client broadcasts a DHCPDISCOVER message.
 78")
- Next, mark the Allow the connection choice and press Next.
 79")
- Then, check all three options – Domain, Private, and Public. Once done, tap the Next button.
 80")
- Finally, you can name the rule, add a description, and hit Finish.
 81")
- Now, restart your PC and check if this solves your problem. If it doesn’t, repeat the same process and try port number 68.
 75")
 76")
 77")
 78")
 79")
 80")
 81")
Perform Clean Boot
Sometimes, a startup or background app might tamper with the Windows services. Hence, we recommend performing a clean boot to identify the problem:
- Press the Windows key to open the start menu. Here, search for System Configuration and launch it.
- Move to the Service tab and check the Hide all Microsoft services option.
- Next, find and press the Disable all button. This will disable all the services temporarily.
 82")
- Then, go to the Startup tab and press the Open Task Manager link.
- Here, start disabling every application and restart your system.
- Now, run the DHCP Client service manually, and if it runs, know that there are issues with the third-party app or services.
- So, start enabling each app and service to see what might be the problem. Once you identify the root cause, you can disable or delete it permanently.
 82")
 83")
Enter Safe Mode With Networking
If you cannot identify the problem using the clean boot method, there are probably other underlying OS issues causing the ‘Windows Could Not Start the DHCP Client Service on Local Computer’ error. Hence, we recommend entering the safe mode to check the cause:
- Close all your running applications and navigate to the start menu. Here, press the power icon.
- Next, hold shift and tap the Restart icon. This will take you to Windows RE.
- Here, move to the Troubleshoot > Advanced options > Startup Settings.
 84")
- Now, hit either 5 or F5 to enable the safe mode with networking.
 85")
- Once the computer restarts, manually try to run the DHCP Client service.
- If the service doesn’t trigger the error message, know there are issues within the OS.
 84")
 85")
Perform System Restore
If none of the above methods work, you might want to restore your system to the state when you never faced the ‘Windows Could Not Start the DHCP Client Service on Local Computer’ error.
Moreover, some Windows users have also experienced the problem after an update. So, if you have also recently updated your computer, you can try the System Restore technique to fix this error:
- In the Instant Search option, search for Create a restore point and click on it.
- Once the System Properties window pops up, tap the System Restore button.
 86")
- Then, select the Recommended restore option and press Next.
 87")
- Finally, click on the Finish button to start the system restore.
- Once Windows restarts, run the DHCP Client service, which should resolve the problem.
 86")
 87")