
Readers help support Windows Report. We may get a commission if you buy through our links.
Read our disclosure page to find out how can you help Windows Report sustain the editorial team. Read more
If you own a Dell device you know how the SupportAssist comes in handy when diagnosing and troubleshooting common problems so if it’s not working, you’re now facing twice the hassle.
The Dell SupportAssist tool can freeze, fail to launch or be extremely slow when you try to use it. Common causes include outdated software or drivers. Your internet connection also needs to be fast and stable and no conflicting programs are installed.
What can I do if Dell SupportAssist is not working?
1. Restart Dell services
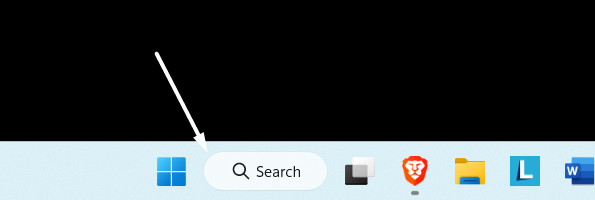
- Press Windows + S to open the Search menu, type Services in the text field, and click on the relevant search result.

- Locate all the Dell services here (listed together in alphabetical order), and double-click on one.

- Select Disabled from the Startup type dropdown menu, and then click on the Stop button.

- If a confirmation prompt pops up saying that another linked Dell service(s) will stop, click Yes to proceed since we anyway are disabling these later.

- Finally, click Apply and OK to save the changes.
- Similarly, disable the other Dell services that are currently running.
- Now repeat the same process but this time, click on Automatic as the Startup type.


Restarting critical services can also help re-establish the connection if Dell SupportAssist is not connecting to the internet.
2. Clear corrupt/cached files
- Hit the Windows + E keys to open File Explorer.
- Navigate to the following locations and delete the contents from each folder:
C:/ Program Data/ PCDRC:/ Program Data/SupportassistC:/ Program Data/Dell/Dell data voltC:/ Program Files/ Dell/SupportassistC:/ Program Files/ Dell/ Dell data VoltC:/ windows/Temp - Restart your computer and relaunch SupportAssist to recreate the folders and their contents afresh.
3. Temporarily disable Windows Firewall and run as admin
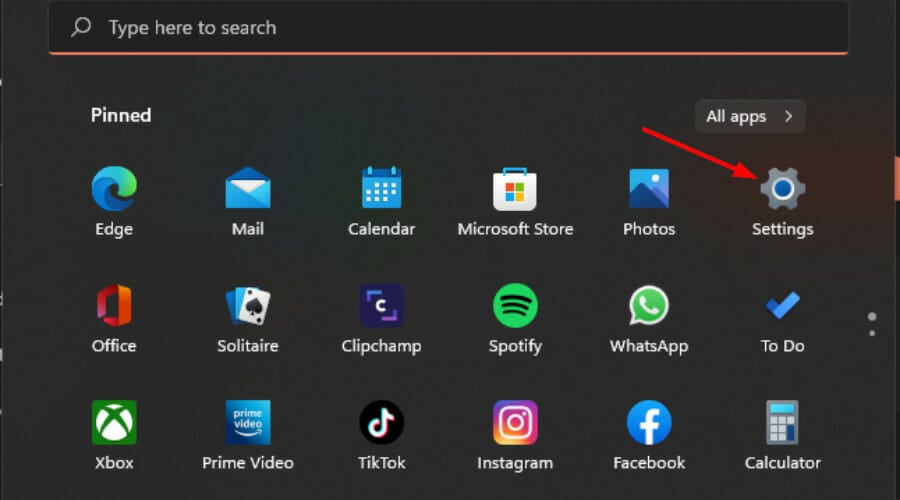
- Hit the Windows key and click on Settings.

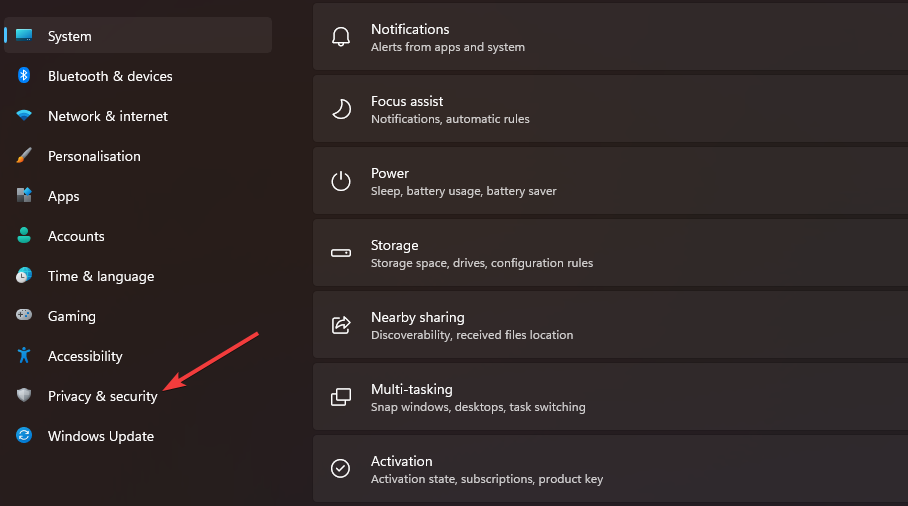
- Select Privacy & security.

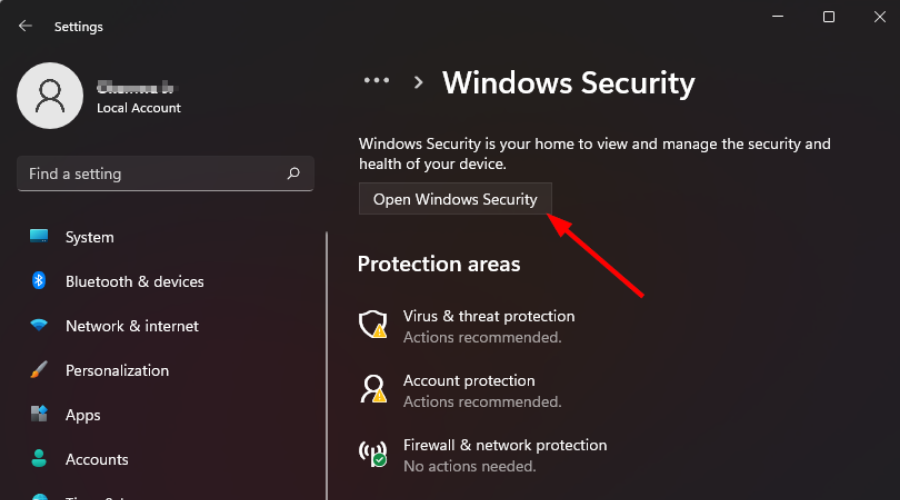
- Click on Open Windows Security.
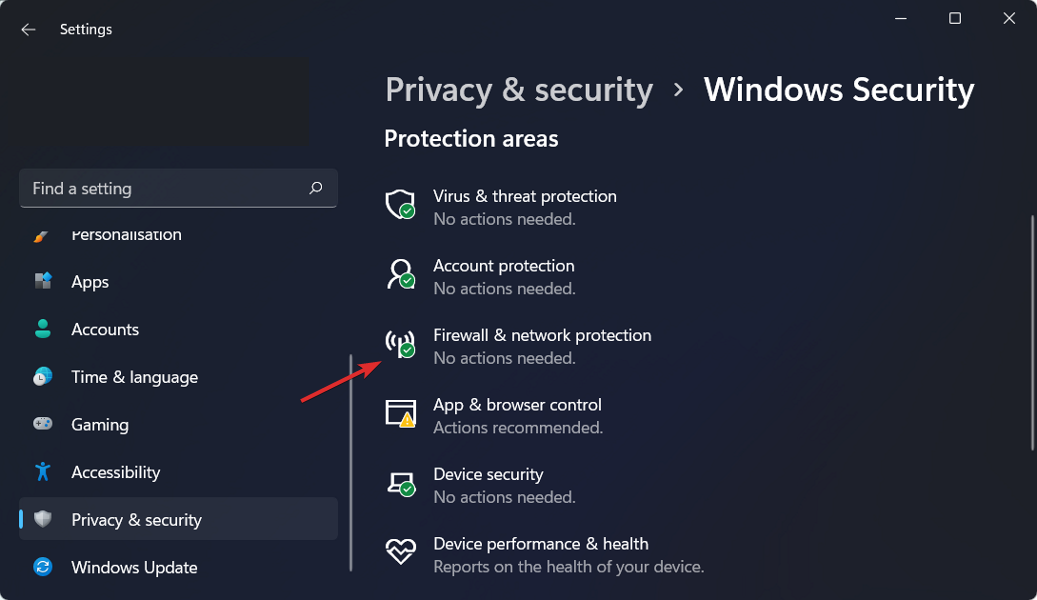
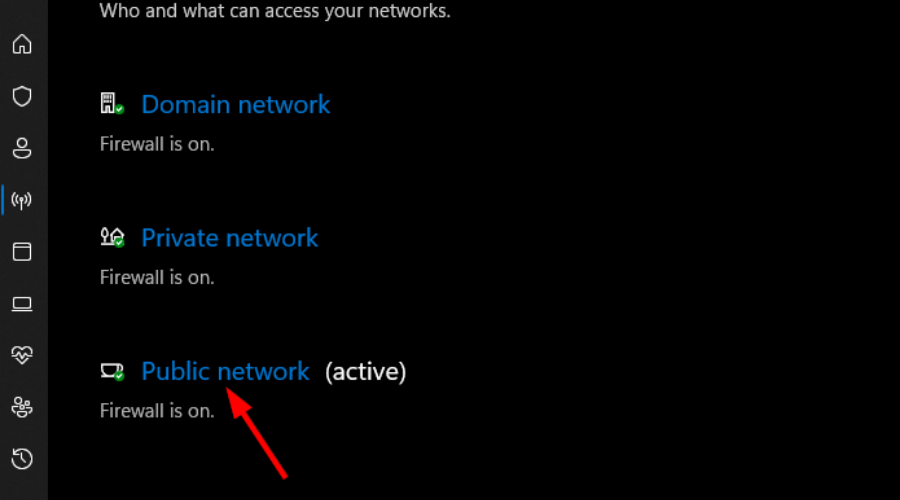
- Select Firewall & network protection.

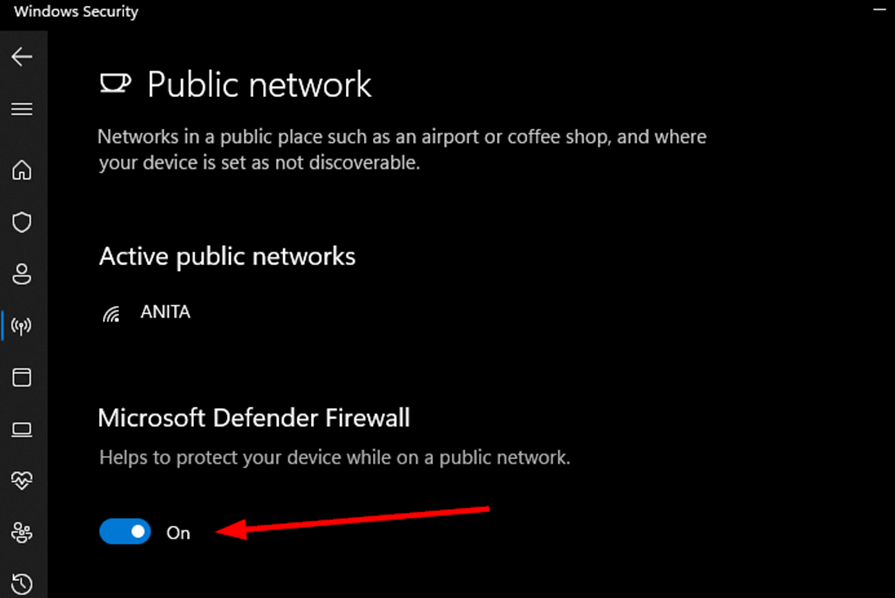
- Click on Public network.
- Next, toggle Microsoft Defender Firewall off.

- Navigate to Dell SupportAssist, right-click on the program’s icon, select Properties on the menu and click on Shortcut.
- Next, click on Advanced.
- Select the box that says Run As Administrator and click on Apply.
- Try launching Dell SupportAssist and see if it is working.
- How to Fix Errors Related to the LibGLESv2.dll File
- What is wltrysvc.exe & How to Fix its Errors
- Omen Gaming Hub Crashing PC: 6 Ways to Fix it
4. Delete Registry keys
- Before you edit the registry, ensure you have a backup or create a restore point to cushion your device from any catastrophic failures.
- Hit the Windows + R keys to open the Run command.
- Type regedit in the dialog box and hit Enter to open the Registry Editor.
- Navigate to the following location depending on your Office version:
HKEY_LOCAL_MACHINE\SYSTEM\CurrentControlSet\Services - Find the following keys and delete them:
Dell hardware serviceDell client management serviceDell updates - Close the Registry Editor and restart your PC. When you open SupportAssist, it should be working.
5. Reinstall the Dell SupportAssist app
- Press Windows + R to open Run, type appwiz.cpl in the text field, and hit Enter.

- Select Dell SupportAssist from the list of apps, and then click Uninstall.

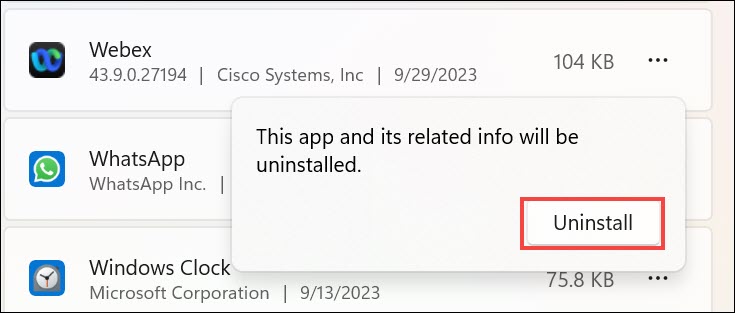
- Click Yes in the confirmation prompt and follow the on-screen instructions to complete the uninstall process.

- Similarly, uninstall the Dell SupportAssist Remediation and Dell Power Manager Service apps as well.
- Go to Dell’s official website, and click on SupportAssist for Home PCs if your computer is not a part of any organization.

- Click on the Download Now button to get Dell SupportAssist 64-bit for Windows 11.
- Head to the Downloads folder and run the SupportAssistInstaller.exe file then click Yes in the UAC prompt.
- Follow the on-screen instructions to complete the process.


In case you experience other issues like Dell SupportAssist blank screen and don’t want to deal with this software anymore, we have a great guide on how to uninstall Dell SupportAssist.
Similarly, Dell is not the only manufacturer whose diagnostics tool has mishaps from time to time. HP also has its own share of these issues when the HP Support Assistant fails to open but this is a problem we’ve already tackled in our guide.
You can also try other PC hardware diagnostic tools that do the same job as Dell SupportAssist or find other ways to optimize your Windows PC and make it faster.
That’s it from us but do let us know if you’ve managed to get your diagnostic tool working again. To learn more about this tool, don’t miss our latest article on Dell SupportAssist OS Recovery.
Claire Moraa
Windows Software Expert
Claire has a knack for solving problems and improving the quality of life for those around her. She’s driven by rationality, curiosity, and simplicity, and always eager to learn more about Microsoft’s products.
With a background in teaching and reviewing, she breaks down complex topics into easily understandable articles, focusing mostly on Windows 11, errors, and software.
Dell SupportAssist is a useful utility that helps Dell users to booster their systems, protect their system from threats, and more. However, you might find Dell SupportAssist installation failed at times. To help you get rid of this issue, we will show you some applicable methods in this post on MiniTool Website.
Dell comes with a utility called Dell SupportAssist to help you in many ways, for example, get required updates, protect your Dell computer from virus & malware, booster your system and more. Usually, this program is preinstalled on your computer and you can uninstall it at any time.
Some of you might fail to reinstall Dell SupportAssist and receive the error message below:
Installation failed.
We were unable to complete the installation. Please reboot your PC and try again.
Luckily, the solutions below will help you to fix the Dell SupportAssit installation failed error for you. You can try them one by one until your problem gets fixed.
Tips:
Since you fail to install Dell SupportAssist, your system will be vulnerable. In this case, it is highly recommended to create a backup of your data before taking any measures. Here, a piece of free PC backup software – MiniTool ShadowMaker might be the best choice to you. This free tool is compatible with almost all the Windows versions and it is pretty easy to follow. Get the free trial and give it a shot!
MiniTool ShadowMaker TrialClick to Download100%Clean & Safe
How to Fix Dell SupportAssist Installation Failed?
Fix 1: Restart Your Computer
Any incomplete installation of this application might lead to issues like installation failed error on Dell SupportAssist. At first, check if Dell SupportAssist is still listed in Control Panel or in the Windows installed app list. If yes, uninstall it and then reboot your computer. After restarting your computer, you can run the installer file to see if the same error crops up.
Fix 2: Install Microsoft .NET Runtime 6.0.9
Dell SupportAssist requires .NET Runtime 6.0.9. If the .NET runtime version you have is higher than 6.0.9, you will also be likely to encounter Dell SupportAssist installation failure. Therefore, you can uninstall the higher version of .NET Runtime and download it from the official website of Microsoft.
Fix 3: Remove All Other Programs Related to Dell
It is reported that other Dell programs also have this installation issue. So, you can remove all these programs. After deleting all the contents inside the Dell and Dell Inc folders, you will find these files in the ProgramData folder on your C drive. Follow these steps:
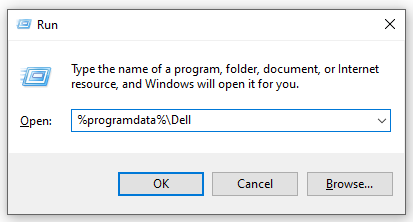
Step 1. Press Win + R to open the Run box.
Step 2. Type the following command in the Run dialog and hit Enter after each command:
%programdata%\Dell
%programdata%\Dell Inc
Step 3. Once the process is complete, restart your computer and run the installer file to see if Dell SupportAssist installation failed appears again.
Fix 4: Clean Install Dell SupportAssist
Before you are about to reinstall Dell SupportAssist, make sure to completely remove it from your system. When we uninstall a program or application, some traces are left behind in the system’s registry. In consequence, you should follow the following steps to remove these traces:
Step 1. Go to Windows Settings > Apps > Apps & features.
Step 2. Now, you can see all the installed programs on your computer. Click on Dell SupportAssist, hit Uninstall, and then follow the on-screen wizard to complete the process.
Step 3. After uninstalling it, run Command Prompt with administrative rights and run the following command one by one.
SC DELETE “SupportAssistAgent”
SC DELETE “DDVDataCollector”
SC DELETE “DDVRulesProcessor”
SC DELETE “DDVCollectorSvcApi”
Step 4. Now, open the ProgramData folder on your C drive and delete the folders below (if exist):
PCDR
Supportassist
Dell > Dell data vault
Dell > Supportassist
Step 5. Clean the Temp folder, restart your computer and then reinstall Dell SupportAssist.
Fix 5: Create a New User Account
Another way to address the Dell SupportAssist installation failed error is to install it by logging into a new account. Here’s how to create a new user account:
Step 1. Type netplwiz in the Run dialog and hit Enter to open User Account.
Step 2. Hit Add > Sign in without a Microsoft account > Local Account.
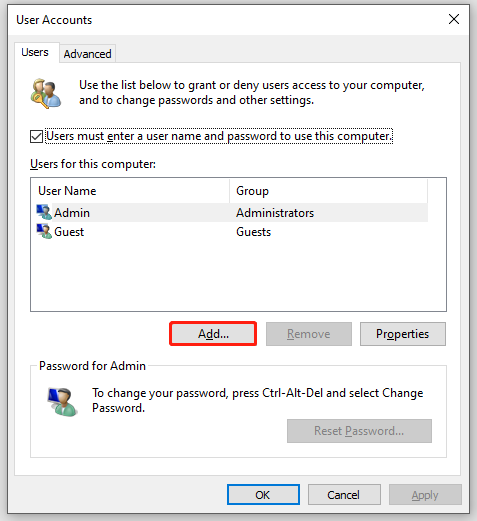
Step 3. Enter your user name, password, password hint and hit Next to continue.
Step 4. After creating the profile, select it, and tap on Properties.
Step 5. In the Group membership tab, tick Administrator and hit OK to save the changes.
Final Words
That’s all solutions for Dell SupportAssist installation failure. Hope you can succeed in installing this program to protect your computer again.
Dell SupportAssist is a utility familiar to most Dell laptop users. It automatically scans their devices to find new updates available for the installed drivers and the built-in Dell utilities. But at the same time, most users also know that it never works perfectly on Windows 11. It keeps getting new and new issues.
For instance, it shows the “Installation failed – We were unable to complete the installation. Please reboot your PC and try again” when running on the laptop. If that’s the case with you, keep following us until the end of the guide. Here in this guide, we’ll share some potential workarounds you can try to fix Dell SupportAssist not working in Windows 11. So, without any further delay, let’s resolve it.
Why Is Dell SupportAssist Not Working in Windows 11?
There could be several reasons for the non-functioning of Dell SupportAssist in Windows 11. In this section, we’ll list all the common reasons for Dell SupportAssist not working in Windows 11. So read ahead and know what could cause this issue on your Windows 11 laptop:
- Temporary Glitches
- Outdated BIOS
- Problematic Windows 11 Update
- Laptop Lacks Minimum Installation Requirements
- Net 5.0 Runtime Isn’t Installed
- Third-Party Security App
- Outdated Laptop Drivers
- Malware or Virus
- Outdated Windows 11
Fix Dell SupportAssist Not Working in Windows 11
Luckily, the Dell SupportAssist utility on Windows 11 can easily be worked again with ease. To fix it, implement all the fixes to fix Dell SupportAssist not working in Windows 11:
1. Ensure Your PC Meets the Minimum Installation Requirements
The Dell SupportAssist app only works on Dell laptops that meets minimum installation requirements. It may be possible that your Windows 11 Dell laptop isn’t compatible to run the app, which is why it isn’t working well. You can check the minimum PC requirements here.
2. Make Sure the .NET 8.0 Runtime Is Installed On the Device
To run and use the Dell SupportAssist app on your Windows 11 Dell laptop, .NET 8.0 Runtime must be installed on it. So, make sure it’s installed on your Dell laptop. In case it isn’t installed, follow the below-mentioned prompts to install it on your Windows Dell laptop:
1. To run the .NET 8.0 Runtime on your Windows Dell laptop, you need to first download its exe file.
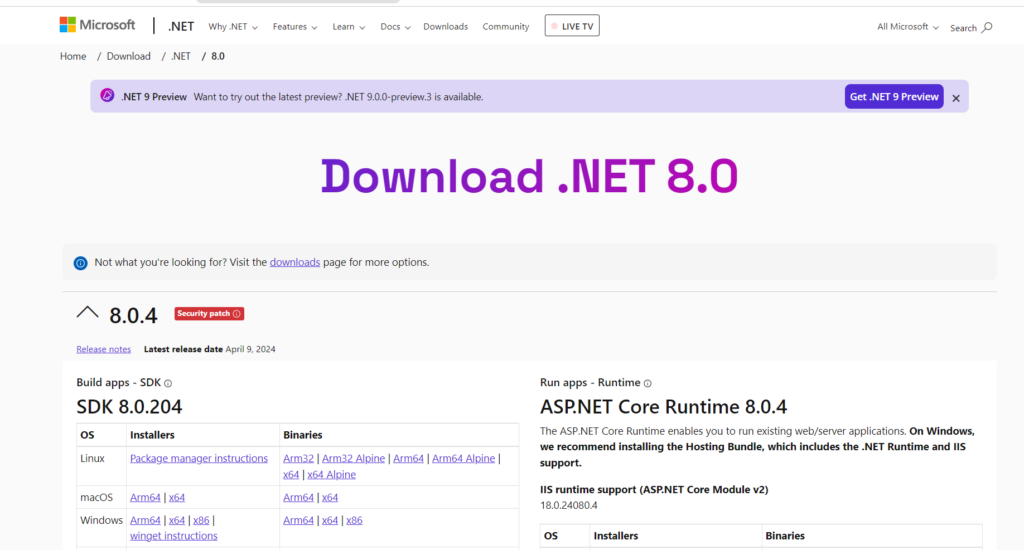
2. Once the .NET 8.0 Runtime’s exe file is downloaded, open it and follow the on-screen steps to install it.
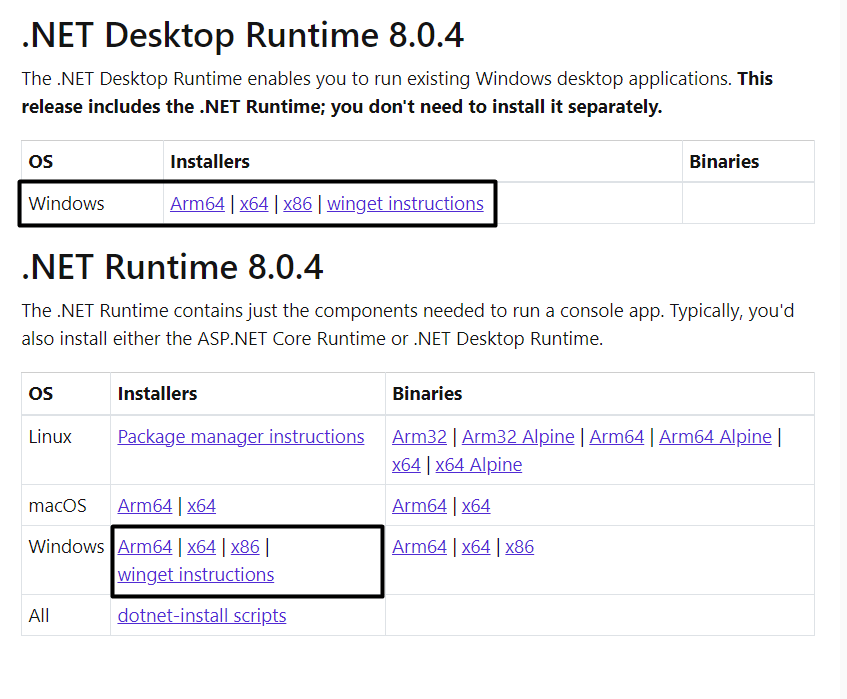
3. Once it’s installed, check if the Dell SupportAssist program works well on your Dell laptop.
3. Restart Your Dell Laptop
The first thing you can try to fix the Dell SupportAssist not working issue in Windows 11 is to restart the laptop. This will eliminate all the temporary bugs and glitches that may be causing this issue. To learn how to restart the Dell laptop, follow the below-mentioned steps:
1. To restart your Windows 11 Dell laptop, press the Windows key to open Windows Search Box.
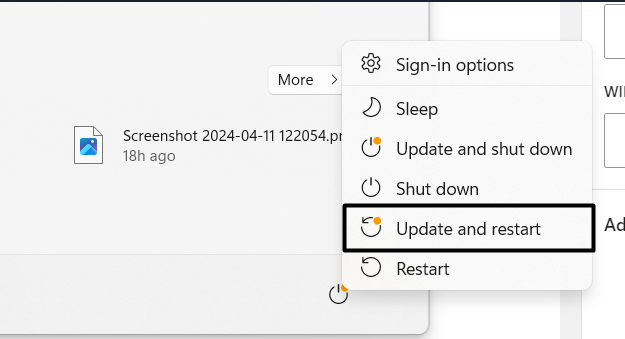
2. In the new prompt, right-click the Power icon and choose the Restart option from the menu.
3. Once your laptop is rebooted, confirm whether Dell SupportAssist not working is fixed now.
4. Force End & Restart the Dell SupportAssist Utility
You can also consider force closing and restarting the Dell SupportAssist app on your Windows 11 PC. This will resolve all the minor bugs and glitches with it’s functioning and fix this issue. Follow the below-mentioned steps to force close and restart the particular app:
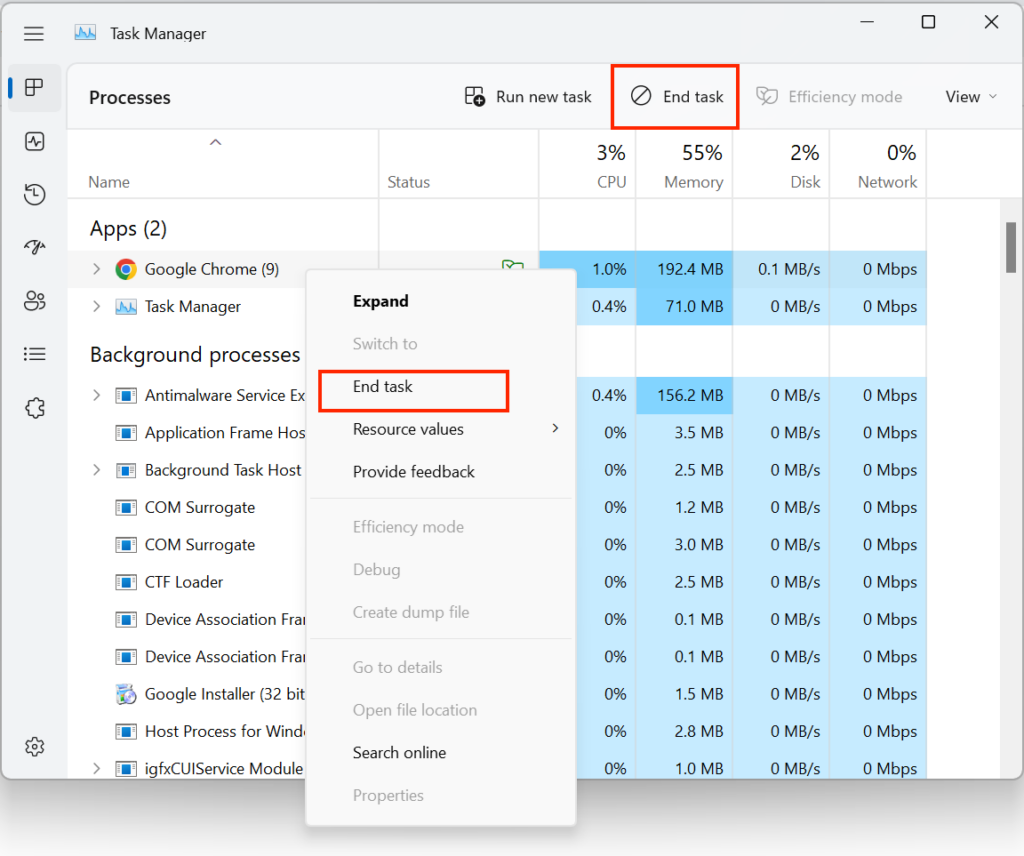
1. Open the Task Manager program on your Dell laptop using the Ctrl + Shift + Esc shortcut.

2. Under Processes in Task Manager, simply right-click the Dell SupportAssist process in it.
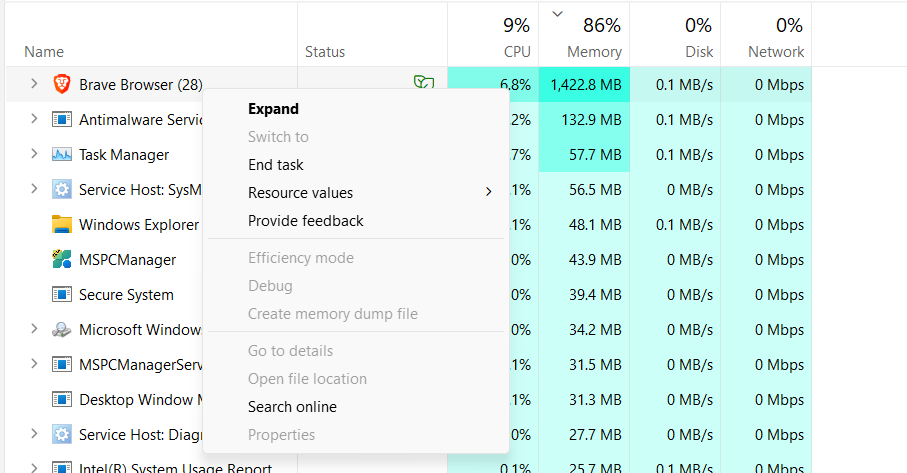
3. From the menu, choose the End task option to force close the Dell SupportAssist program.
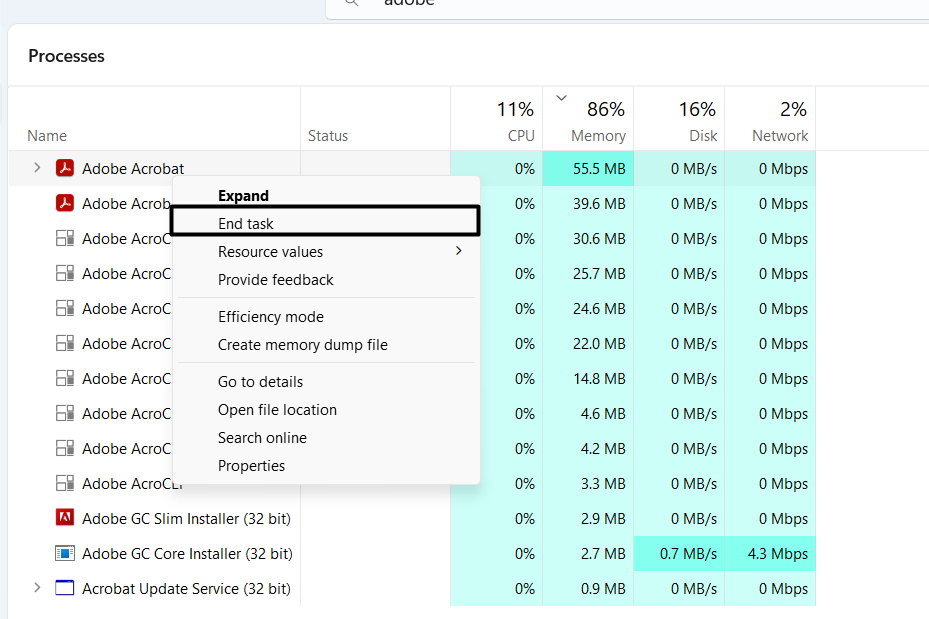
4. Finally, open Dell SupportAssist and confirm whether the program works well on your Dell laptop.
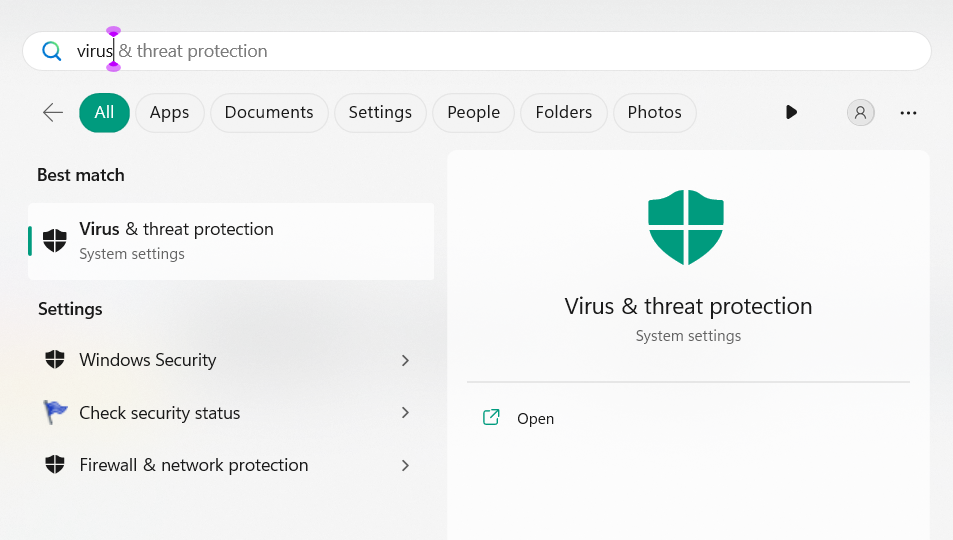
5. Check for Malware or Virus
Your computer may have some infected files, which is why the Dell SupportAssist app isn’t working. Therefore, we suggest you scan for malware and viruses on your laptop using the Windows 11’ built-in virus facility. So follow the below-mentioned steps to run it:
1. Open the Virus & threat protection app on your laptop and click the Quick scan button.
2. Once done, wait for the virus scan to complete on your Dell laptop and then check the issue’s status.
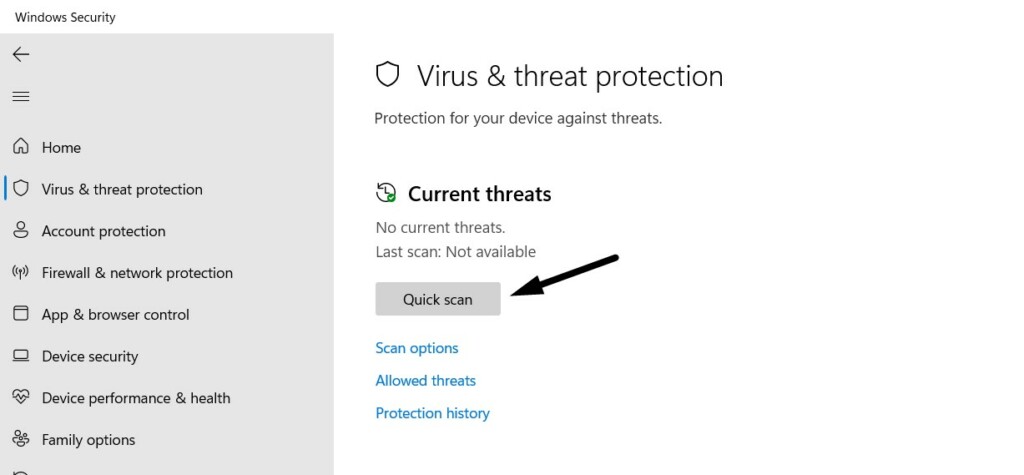
3. Hopefully, the Dell SupportAssist not working problem is fixed now on your Windows 11 Dell laptop.
6. Disable Security Software Temporarily
If you have third-party security or antivirus software on your PC, then we suggest you disable it for a while and then check whether it helps resolve this issue. Implementing this solution has resolved the Dell SupportAssist not working problem for many Windows 11 users.
7. Reinstall the SupportAssist App
Some users in the Dell forum mentioned they fixed the Dell SupportAssist not working in Windows 11 by reinstalling the app. You first need to uninstalling the program, remove all its data from the device, and pause all its related services. You can check the below-mentioned prompts to know what exactly you need to do to fix this issue on your Dell laptop:
1. Open the Settings app on your Windows laptop and go to the Apps section from the left.

2. In the Apps window, expand Installed apps, and then find the Dell SupportAssist app.

3. Click three dots (…) next to Dell SupportAssist, and choose the Uninstall option from the menu.
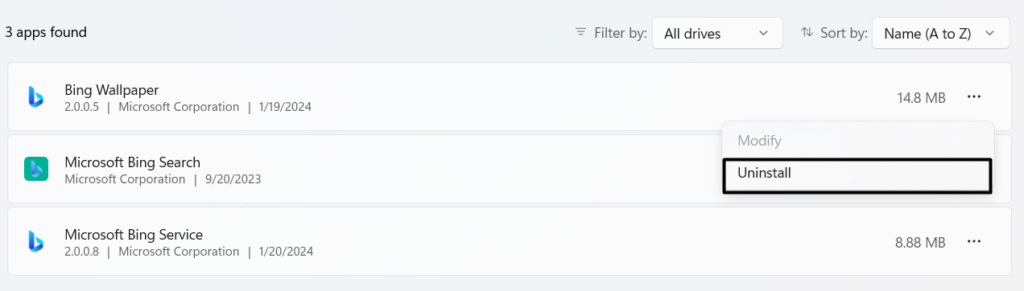
4. In the new window, click the Uninstall button to delete the program from your Dell laptop.
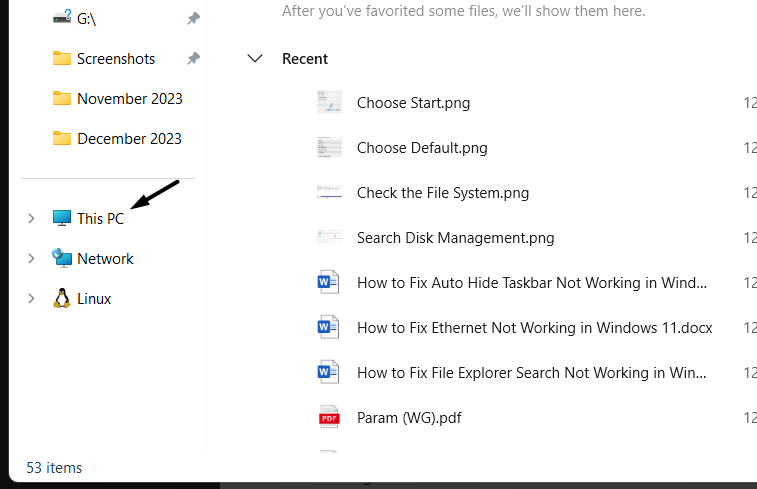
5. Proceed to the This PC section from the left, select the main storage, and click View at the top.
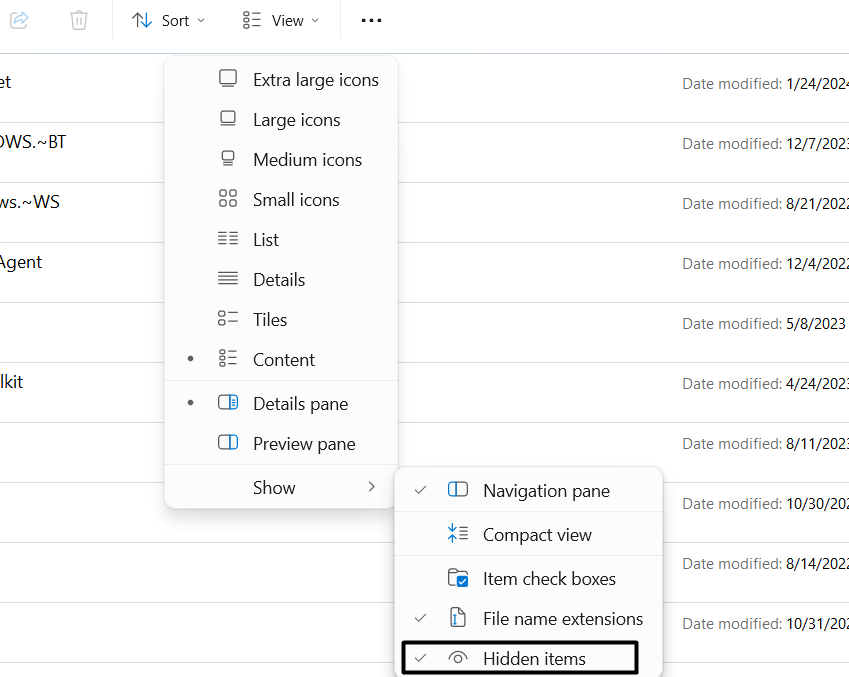
6. Hover the arrow on Show, and from the Show drop-down, choose Hidden items to enable.
7. Once done, go to the below-mentioned locations one by one and delete all the files in them:
C:\ProgramData\PCDr\C:\ProgramData\PC-Doctor, Inc%AppData%\PCDr\C:\Program Files\Dell\SupportAssistAgentC:\Program Files\Dell\SupportAssist8. After deleting the files in the above paths, restart all the mentioned services one by one:
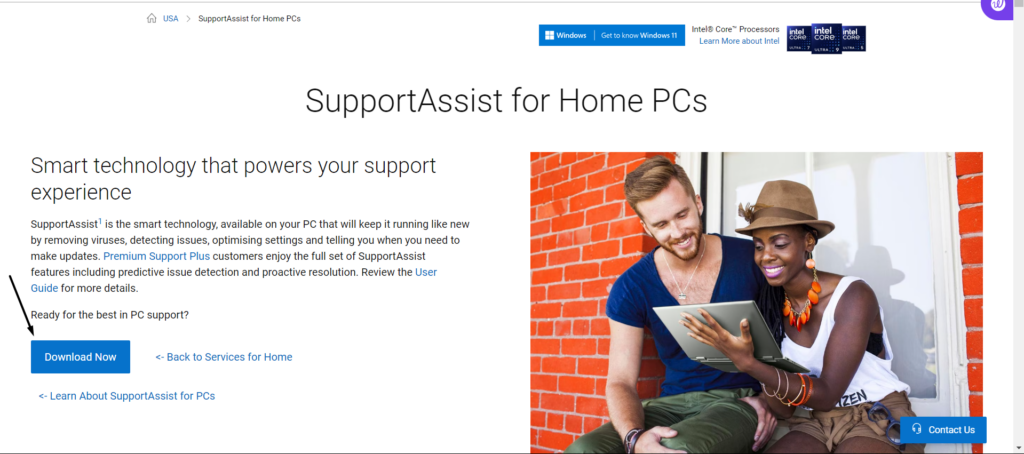
Dell Data Vault CollectorDell Data Vault ProcessorDell Data Vault Service APIDell SupportAssist Agent9. Once all the services have been reinstated, click here to go to Dell SupportAssist’s download page.
10. Choose the Download Now button to download its executable file and see if it works now.
8. Clean Boot Your Windows 11 PC
Some users tried clean booting their Windows 11 PC, and they were able to find the culprit for this issue. Therefore, we also suggest you boot your PC into Safe mode to see if it finds the culprit and help you eliminate the issue. Below are prompts to do the same:
1. Open the Run search box using the Windows + R shortcut and then type msconfig in it.
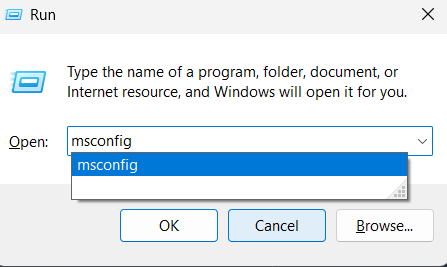
2. Hit Enter to open the System Configuration window and go to the Boot tab from the top.
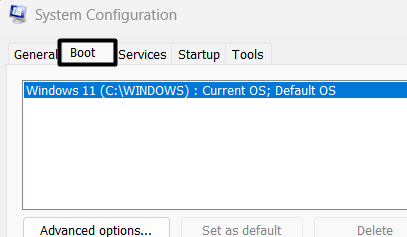
3. In the Boot tab, under the Boot options section, checkmark the Safe boot box to enable it.

4. Once done, click the Apply button at the bottom and then OK to save the recent changes.

5. Jump to the Services tab of the System Configuration window and tick Hide all Microsoft services.
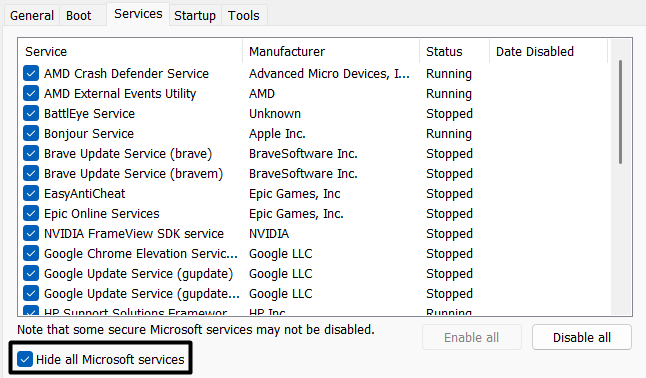
6. Click Disable all to turn off all the third-party services that could be the reason for this issue.

7. Proceed to the Startup tab, choose the Open Task Manager text, and end all the tasks.

8. Lastly, minimize the window and check whether the Dell SupportAssist app works well now.
If it works properly, it means a third-party program is causing this issue on your Dell laptop.
9. Update the Dell Laptop Drivers
One reason for the Dell SupportAssist not working issue in Windows 11 could be outdated Dell PC drivers. In that case, search for new updates for your Dell laptop’s drivers and install them to fix all the inconsistencies in the drivers that may be causing this issue. So follow the mentioned steps to know how to update drivers in Windows 11 Dell laptop:
1. Open the Windows Update section of the Settings app and expand the Advanced options section.
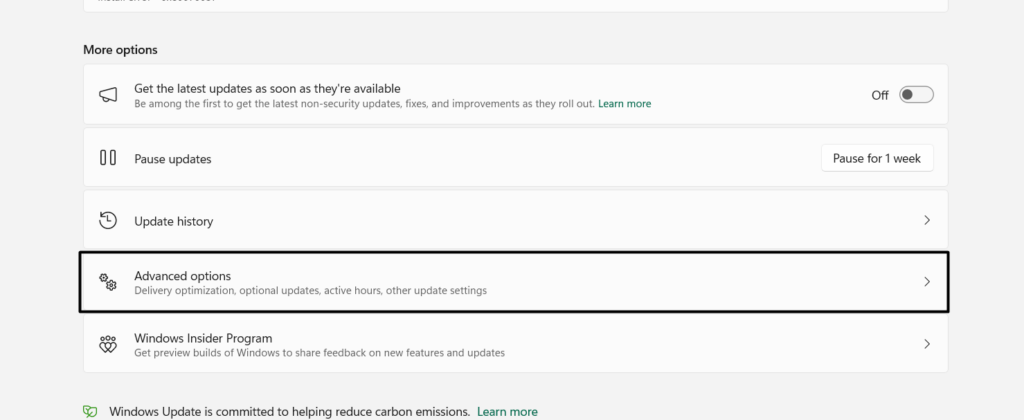
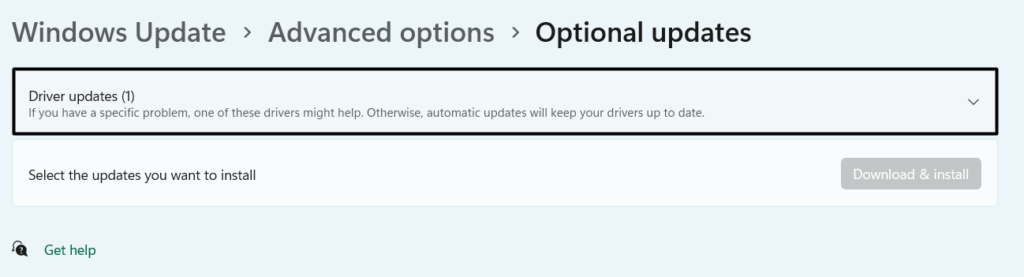
2. In the Advanced options section, open Optional updates and look for the driver-related updates.

3. Select all the driver-related updates and click Download & install all to download and install them.
10. Update Your Windows 11 Dell Laptop
Some users in the online forums said the issue could also be with Windows 11. It could be possible that the OS has some minor glitches, which is why the SupportAssist isn’t working. In that case, we suggest you look for the new Windows updates and install them. You can check the mentioned steps to know how to update the Windows 11 Dell laptop:
1. To update your Dell laptop, proceed to the Windows Update section of the Settings app.
2. In the Windows Update window, click the Check for updates button to search for new updates for the operating system. If you already see new Windows 11 updates, click the Download & install button to download and install all the available Windows updates. Once done, restart your Dell Windows 11 PC and check whether the issue is gone.

11. Uninstall the Faulty Windows 11 Update
For a set of users, the issue started appearing after installing the W11 22H2 build. If that’s the case with you, uninstall the conflicting update and move to the 21H2 build 22000.739. You can implement the same by following the below-mentioned steps on your PC:
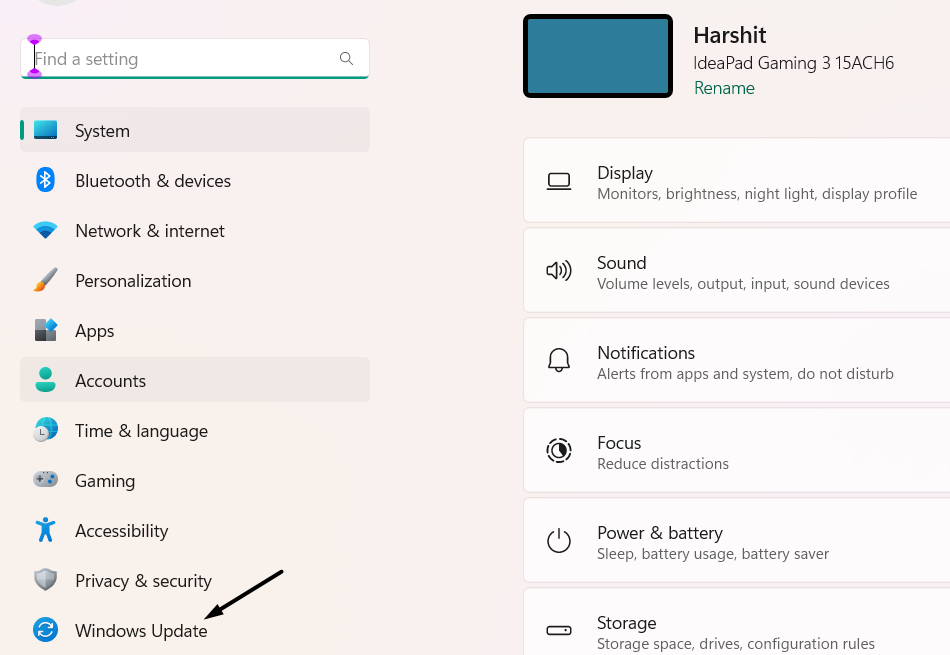
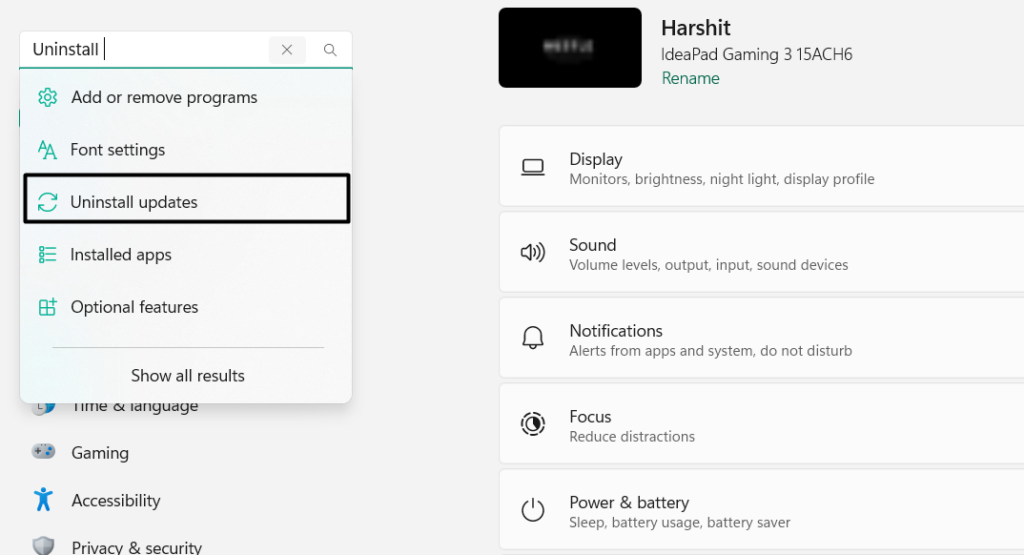
1. To uninstall the conflicting update, open the Settings app and search for Uninstall updates.
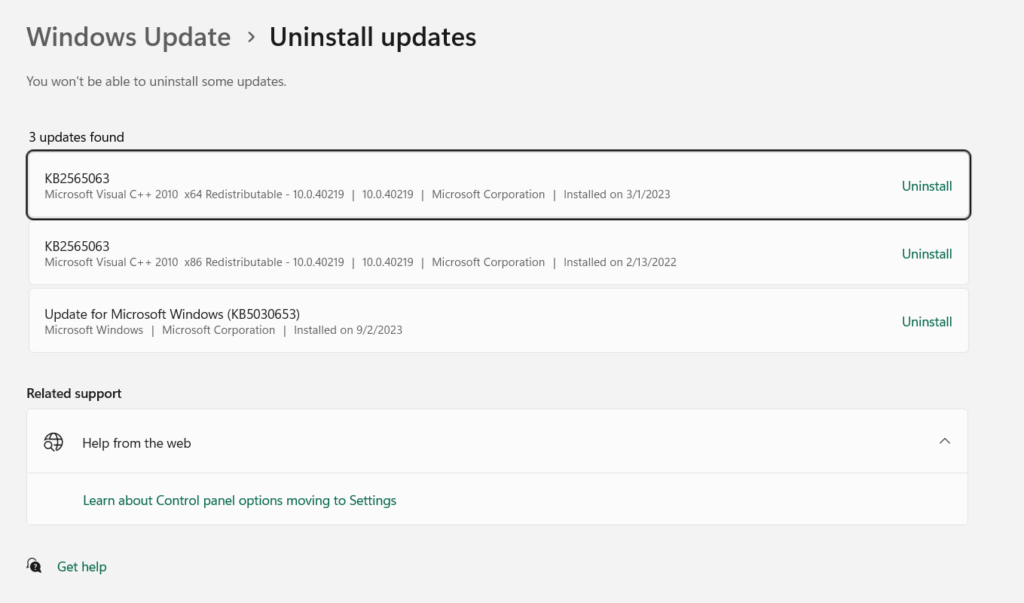
2. In the Uninstall updates window, find the W11 22H2 build update and click Uninstall next to it.
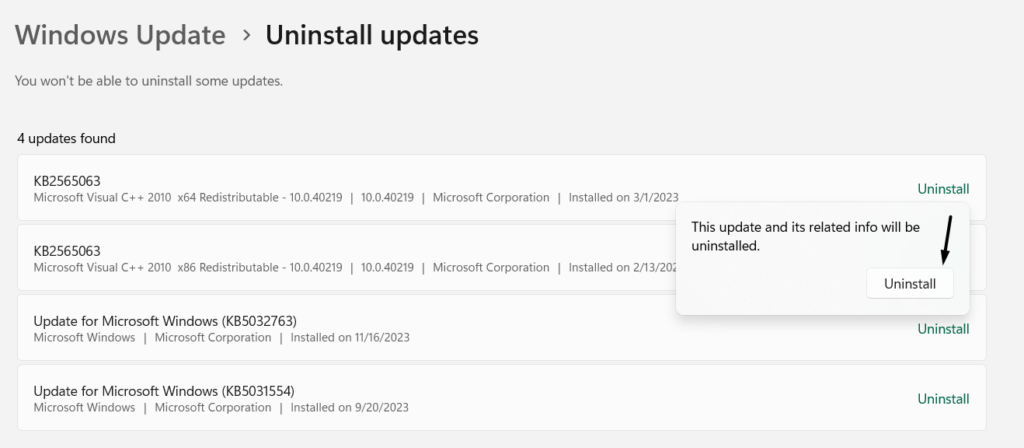
3. In the next window, choose Uninstall to uninstall the selected Windows update from the PC.
12. Leave the Windows 11 Preview Build
Some users in the Dell forum blamed the Windows 11 Preview build for this issue on their laptops. They said that the preview updates aren’t completely compatible with SupportAssist. If you’re also a part of the Windows 11 Preview build, leave it and see if it helps. You can check the below-mentioned prompts to leave the Windows 11 Insider program:
1. To leave the Windows 11 Insider program, open the Settings program on your Dell laptop.

2. In the app, choose the Windows Update option and choose Windows Insider Program.
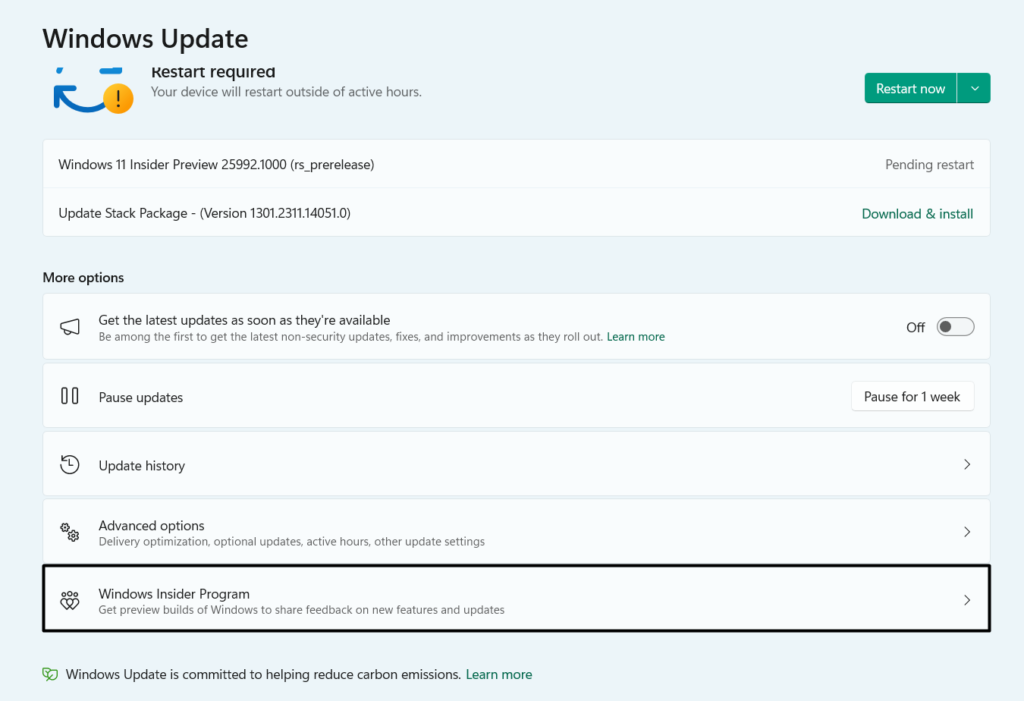
3. Expand the Stop getting preview builds section and click Unenroll this device immediately.
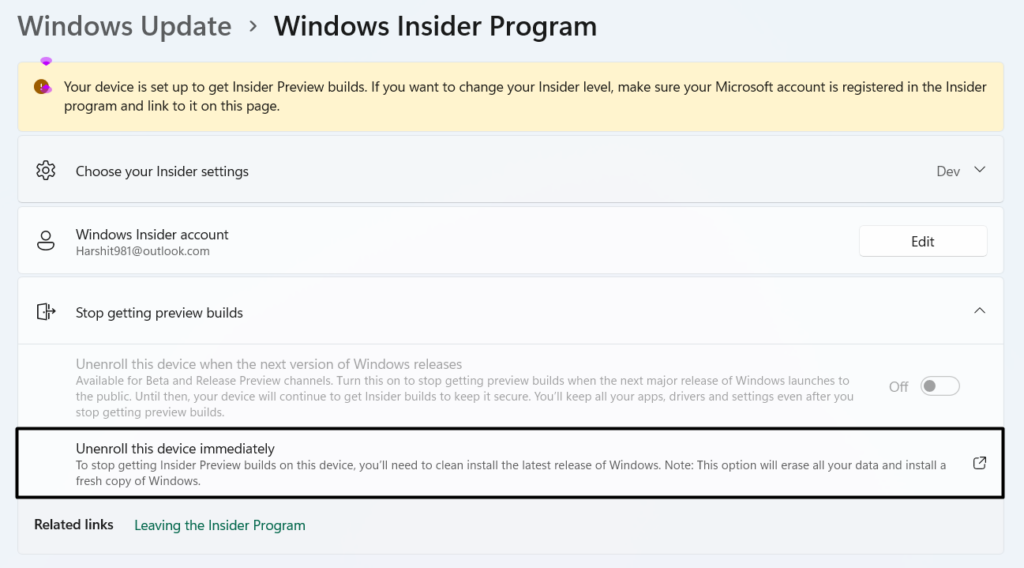
4. Follow the on-screen instructions to get out of the insider program to resolve this problem.
13. Go Back to Windows 10
Some users in the online forums mentioned they fixed the issue by reverting the PC to Windows 11. Thus, we also suggest you do the same using the PC’s integrated Go back function and check if it helps. To know how to do this, implement the mentioned steps on it:
1. To move back to Windows 10, open Settings on your laptop and go to the Recovery section.

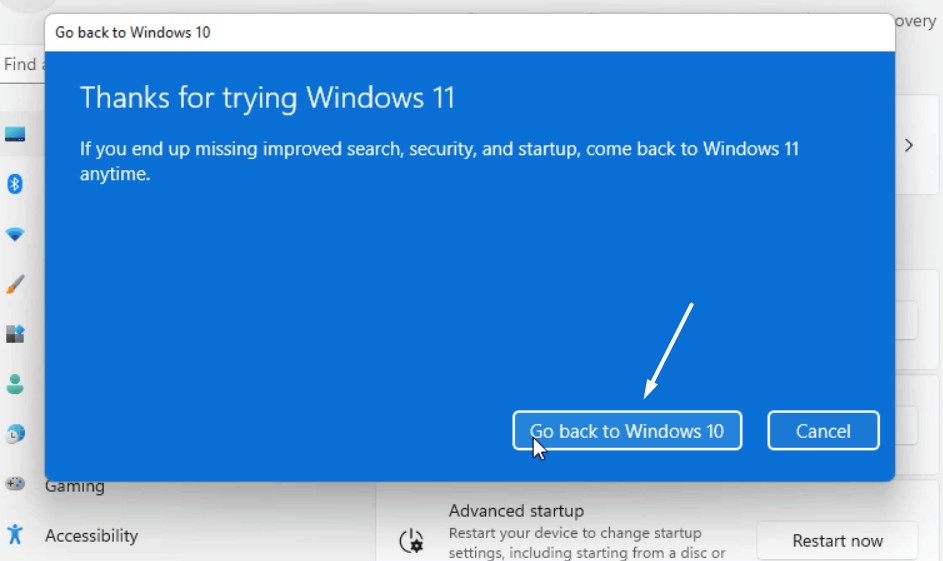
2. In the Recovery window, choose the Go back button next to the Go back text to go ahead.
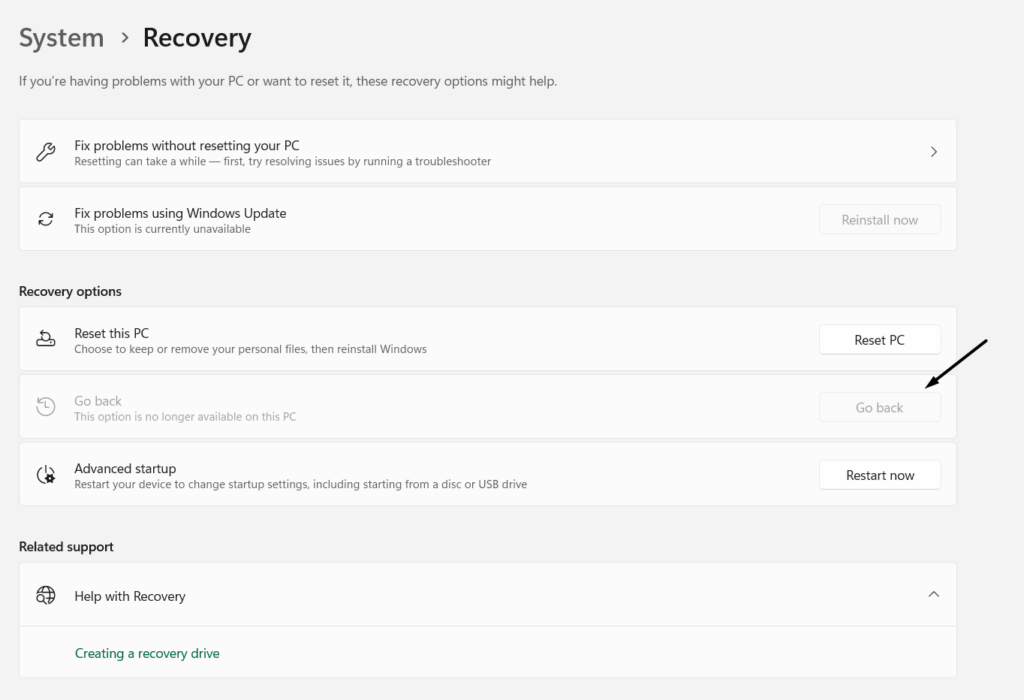
3. In the end, follow the on-screen instructions to go back to Windows 10 and check the issue’s status.
14. Post to DELL’s SupportAssist Community
Dell has a community for Dell SupportAssist, where people ask about issues related to it. So, we suggest you share your issue there and let users share some working fixes to fix the Dell SupportAssist not working issue. You can check the below prompts to do the same:
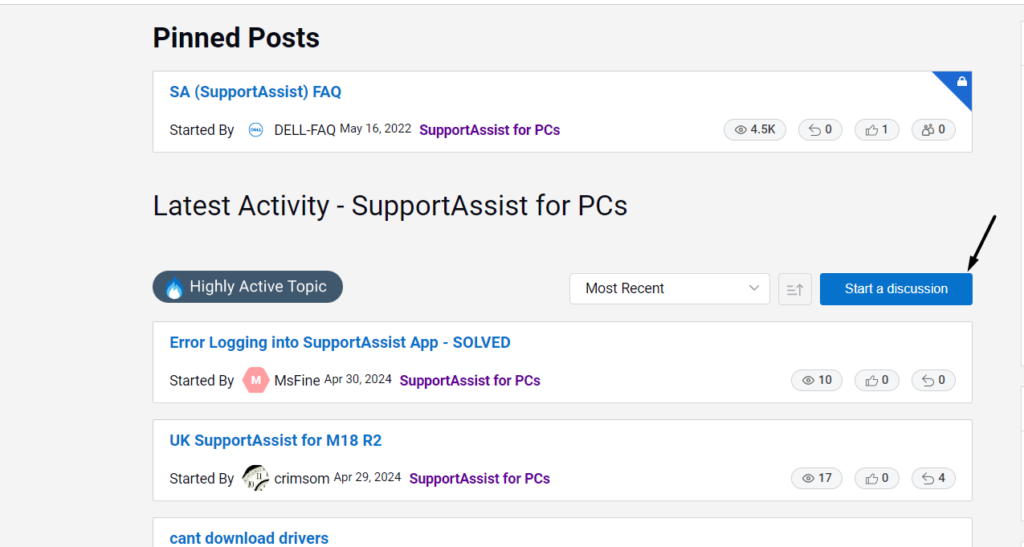
1. Go to the SupportAssist for PC community and choose Start a discussion on the next page.
2. On the next screen, sign in to your Dell account and type in your problem in short in the Title box.
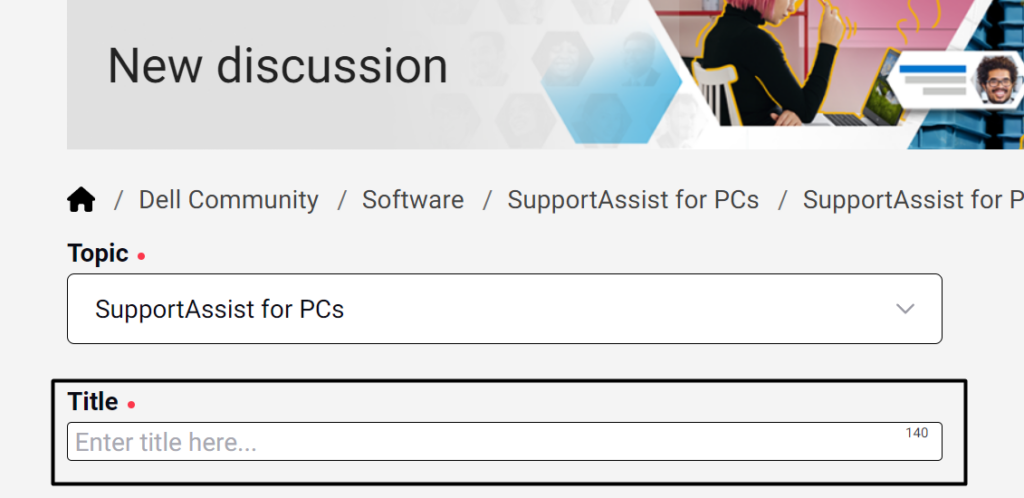
3. If available, simply attach a screenshot in the Select the product you need help with (optional) box.
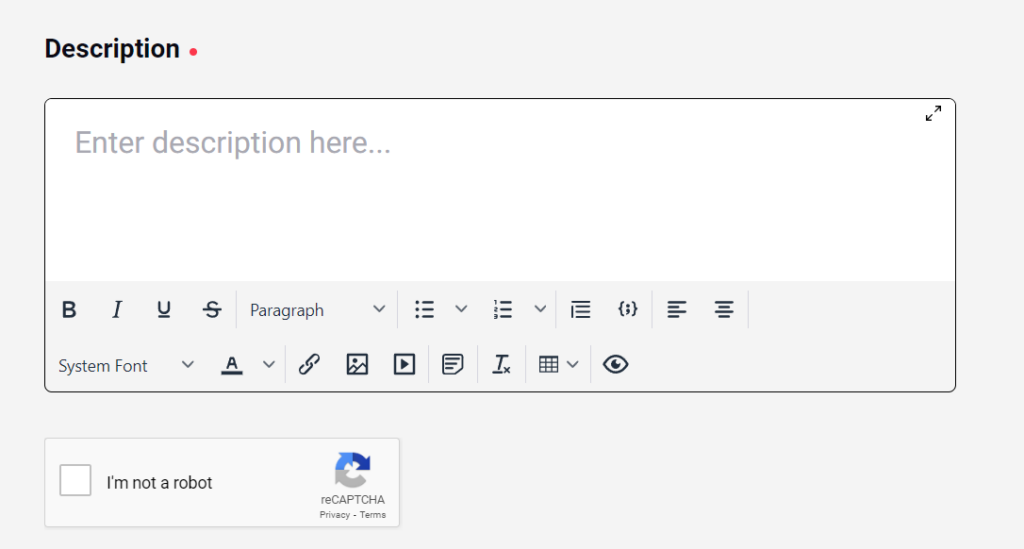
4. Explain your issue in the Description box, verify you’re not a robot, and click the Post button.
5. Wait for the community members to come across your issue and provide fixes if they know.
15. Contact the DELL After Sales
If you don’t get some working fixes from the SupportAssist community users, contact the Dell After Sales support team and see if they can help you fix the Dell SupportAssist not working issue. You can find the Dell after sales team contact details at the attached page.
FAQs
Does Dell SupportAssist Work With Windows 11?
Yes, the Dell SupportAssist utility works on Windows 11. However, at times, it faces issues in working.
Why My Dell Support Assistant Is Not Working?
It may be possible that DellAssistant is outdated and has some bugs, which is why it isn’t working. Other reasons for the issue with DellAssistant could be outdated BIOS, Windows 11, etc.
How To Repair Dell SupportAssist?
The only easiest way to repair DellAssistant is to uninstall it from the device and then clean install it.
How Do I Reinstall Dell SupportAssist?
You can uninstall the DellAssistant program from your PC and then reinstall it from the Dell official site.
How Do I Open Dell SupportAssist in Windows 11?
There are several ways to open the Dell SupportAssistant program in Windows 11 and one such way is from the search box. You can also launch the app from the Installed apps section of the Settings app.
Final Words
Dell SupportAssistant is a great utility that helps us keep our Dell laptop up to the mark. But, at times, it also faces problems when working on the PC. For instance, it shows different errors when running or when trying to open on the Dell laptop.
If you were also experiencing issues with the Dell SupportAssistant app on your Dell Windows laptop, we hope the fixes we mentioned in this guide helped you get rid of it. Before leaving, let us know which mentioned fixes helped you fix Dell SupportAssist not working in Windows 11.
An important resource for identifying and fixing problems with Dell PCs is Dell SupportAssist. On the other hand, users could occasionally experience problems where Dell SupportAssist fails or stops working. This tutorial will examine the typical reasons why Dell SupportAssist isn’t working and offer detailed fixes to fix the problem.
Typical Reasons Why Dell SupportAssist Doesn’t Work:
Outdated Software: Compatibility and functionality difficulties can arise when using an outdated version of Dell SupportAssist.
Corrupted Installation: The software may malfunction if the Dell SupportAssist installation files are damaged or missing.
Software Conflict: Dell SupportAssist’s correct operation may be hampered by conflicts with other installed applications or antivirus software.
System difficulties: Dell SupportAssist may not function properly due to underlying system difficulties or problems with system files.
Steps to Fix the Dell SupportAssist Not Working Issue:
- Update Dell SupportAssist:
- Launch Dell SupportAssist and check for updates. If an update is available, download it and install it.
- Alternatively, visit the Dell Support website and manually download the latest version of Dell SupportAssist. Install it on your system to ensure you have the most up-to-date version.
- Repair Installation:
- Open the Control Panel on your Windows computer and navigate to “Programs” > “Programs and Features.”
- Locate Dell SupportAssist in the list of installed programs, right-click on it, and select “Repair” to fix any issues with the installation files.
- Disable antivirus software temporarily.
- Sometimes, antivirus software can mistakenly flag Dell SupportAssist as a potential threat. Temporarily disable your antivirus software and check if Dell SupportAssist starts working properly. Remember to re-enable your antivirus after troubleshooting.
- Perform a system file check.
- Open Command Prompt as an administrator by searching for “cmd” in the Start menu, right-clicking on Command Prompt, and selecting “Run as administrator.”
- In the Command Prompt window, type the command “sfc/scannow” (without quotes) and press Enter. This command will scan and repair any corrupted system files that may be affecting Dell SupportAssist.
In conclusion, an essential device for preserving and troubleshooting Dell PCs is Dell SupportAssist. You can make certain that your Dell PC remains most effective and powerful by following the instructions supplied on this tutorial to restore issues with Dell SupportAssist no longer working. Please don’t hesitate to touch Dell Support for expert support and steerage in case you run into any ongoing issues or need extra aid.
Dell Support Assist Not Working or Responding
A lot of users come across this problem of Dell support assistance not responding or not working error. This error can take place when the files related to the Dell support center are corrupted, the latest version of the OS is not able to run any Dell driver, installing a wrong update, and bugs and viruses could also interrupt the service and stop the support center. Here, you can perform some Technical solutions to get out of this problem.
You can try uninstalling the Dell support and deleting all the files, reinstalling the windows, updating the Dell support, and another thing that you can do is try to rename the files.
Why is Dell Support Assist Not Working or Responding?
Some reasons that could stop Dell SupportAssist from running on Windows are listed in the points below.
- This problem can occur if Dell Support Assist or Dell Support Center-related files have become corrupted.
- Somehow, if the latest version of the OS is not reliable for running any Dell driver, Support Assist can cause this problem.
- Because of installing a defective update, if the Dell Support Center software is temporarily disabled, Dell SupportAssist can be stopped while functioning.
- Any potential bug or virus on your Dell laptop will interrupt the service and stop the Support Center.
How to Fix Dell Support Assist Not Working or Responding?
You need to take a few troubleshooting steps if you don’t want to get interrupted with continuous notification messages about Dell Support Assist not working. So, let’s look at the fixes below, which can fix SupportAssist errors on Dell devices.
Method 1: Uninstall Dell Support and delete the files
Uninstall the Dell Support Service through Programs and Features using this tool.
- Hold the logo for Windows and click R.
- Type appwiz.cpl, and click Enter to open Programs and Functions,
- Access to the Support Center for Dell or Support Assist
- Right-click Dell Support Center or Dell Support Assist, then select Uninstall
- Wait for Windows to complete the removal of the Dell Support Center or Dell Support Assist.
- To open File Explorer or Windows Explorer, hold down the Windows logo and click E.
- Click This Desktop or My Computer on the right of the screen.
- Move to the C:\Program Files location and delete the Dell Support Center or Dell Support Assist folder.
- Now, delete everything from the Temp folder.
- Delete the PCDR folder.
- Restart your device
Method 2: Reinstallation Windows
Few users have reinstalled Windows and the Dell Support Center or Dell SupportAssist to fix their problems. You will first need to back up the data to an external hard disk, shared storage, or cloud storage, and then reinstall your operating system and update drivers and applications after that.
Method 3: Update Your Dell Support Assist
Dell Support Assist is a smart technology that allows your PC to work under optimal circumstances. To fix the ‘Dell Support Center Has Stopped Working’ error, you should try upgrading Dell Support Assist to its latest update.
- Start your browser starting and navigate to this site.
- Click on the Download Support Assist button to enable the application download.
- After installing, run the executable and then follow the on-screen instructions to install your computer with the new Dell Help Assist edition.
- Check to see if the problem is fixed after doing so.
Method 4: Rename Your File
We’ll access this file’s location in this step and then rename it by removing «small» from its name.
- Navigate to your computer’s root partition and open the ‘Program Files’ folder.
- Then, choose the Dell folder and open the icon for SupportAssistAgent.
- Identify the bin folder here, and to open the Resources folder, double-click it.
- Find a file called New-Dell-Logo-White-Small by opening the Resources folder.
- Now, right-click to rename this file. Just remove the word small from the name of this folder.
- Exit from the window of the resources.
- Run the Dell Support Assist now and check if the problem has been solved.
If Dell Support Assist does not continue to function even after applying the above methods, technicians will need advanced solutions.
FAQ for Fix Dell Support Assist Not Working or Reponding
Q1. Why is my Dell SupportAssist not working or opening?
Ans: If your Dell SupportAssist is not working or opening, it could be due to outdated software, corrupted files, or internet issues. Try updating SupportAssist, restarting your PC, or reinstalling the tool. If you’re on an Alienware device and SupportAssist isn’t working, the same fixes should help.
Q2. How do I fix Dell SupportAssist if it cannot connect to the internet?
Ans: If Dell SupportAssist cannot connect to internet, check your network connection first. Restart your router, disable VPNs or proxies, and try again. If the issue persists, reinstall SupportAssist to refresh its settings.