
Cannot delete files on Windows? How to delete undeletable locked files and folders on Microsoft Windows? Sometimes there is another program ‘locking’ down the file because it is accessing it, for example Photoshop will lock a file when it is running in Adobe Photoshop. More often than not, a simple restart will solve this problem.
Continue ➤ 15 Freeware To Securely Erase All Data From HDD Hard Drive Preventing Recovery
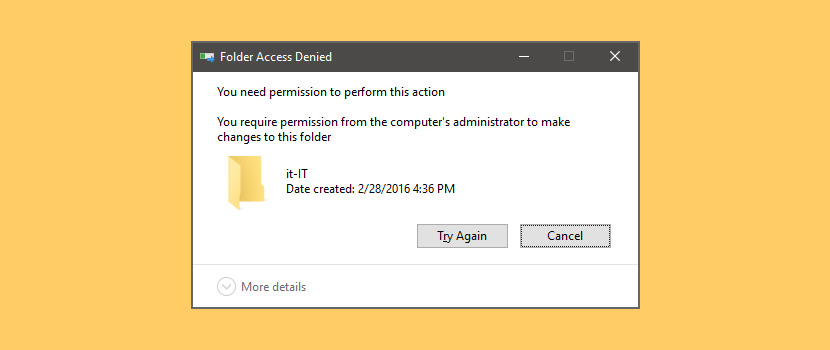
When to use these files and folder unlocker? Only when a restart of Windows fails to enable access do you use these special tools when you’re getting the following messages.
- Cannot delete file: Access is denied
- There has been a sharing violation
- The source or destination file may be in use
- The file is in use by another program or user
- Make sure the disk is not full or write-protected and that the file is not currently in use
1. LockHunter
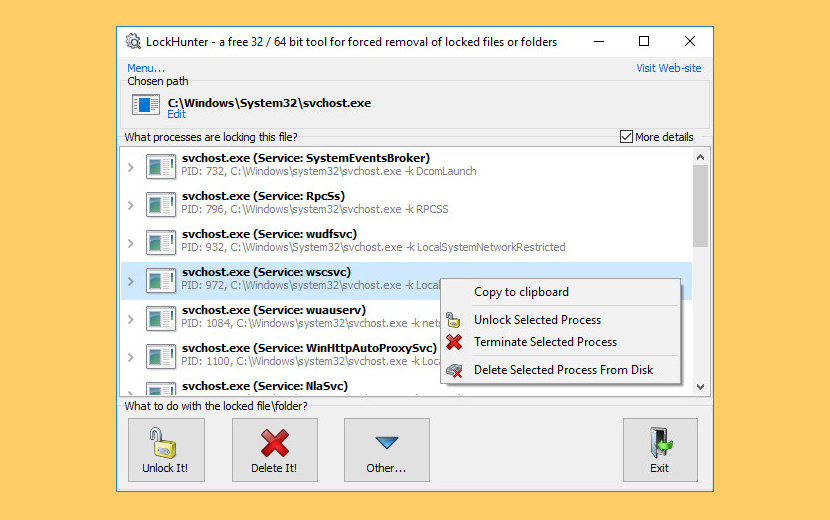
LockHunter is a Foolproof File Unlocker tool to delete files blocked by something you do not know. LockHunter is useful for fighting against malware, and other programs that are blocking files without a reason. Unlike other similar tools it deletes files into the recycle bin so you may restore them if deleted by mistake.
- Shows processes locking a file or folder
- Delete empty folders
- Gives you detailed information on the process
- Allows to unlock, delete, copy or rename a locked file
- Can delete a file at next OS restart
- Allows to kill locking process
- Allows to remove locking processes from hard drive
- Can unload DLLs from processes
- Integrates in to Explorer menu
- It deletes files into the recycle bin, so you may restore them if deleted by mistake
- Supports both 32 and 64 bit Windows
2. Malwarebytes FileASSASSIN
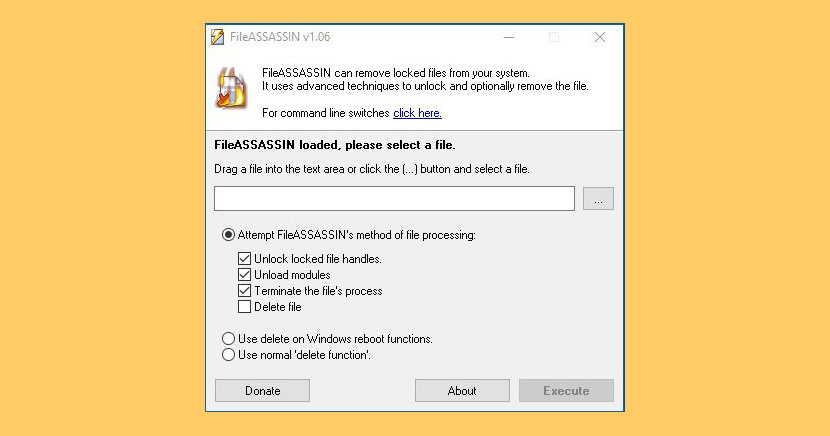
FileASSASSIN can eradicate any type of locked files from your computer. These ‘locked’ messages commonly appear when you’re trying to delete files deposited by a malware infection, though occasionally a file just goes on lockdown. Whatever the reason for the file, FileASSASSIN can remove it. Advanced programming techniques unload modules, close remote handles, and terminate processes in order to remove the particular locked file.
3. IObit Unlocker
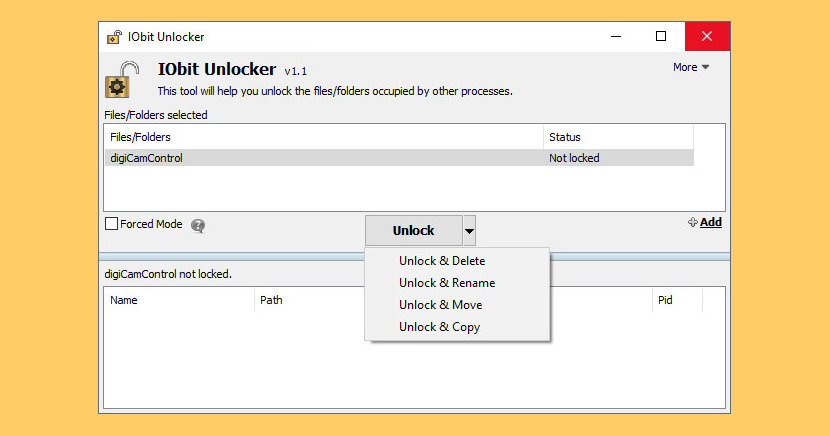
IObit Unlocker is a light-weighted yet powerful tool designed to fix the “Cannot Delete” or “Access Denied” problems. It can “Force” terminate all related processes that prevent you from deleting or accessing files / folders that you need to. IObit Unlocker also provides several useful options to make your work easier, like “Unlock & Delete”, “Unlock & Rename”, “Unlock & Move”, and “Unlock & Copy”.
You wouldn’t be annoyed any more by messages like “Cannot delete file: Access is denied”, “undeleted files”, “The file is in use by another program or user”, or “There has been a sharing violation”! Solution for “Cannot Delete” Problems on Windows.
- No More “Cannot Delete” or “Access Denied” Problems
- Useful Post-Unlock Options
- Guaranteed Data Safety and Disk Stability
- Light, Easy, and FREE to Use
4. DeadLock
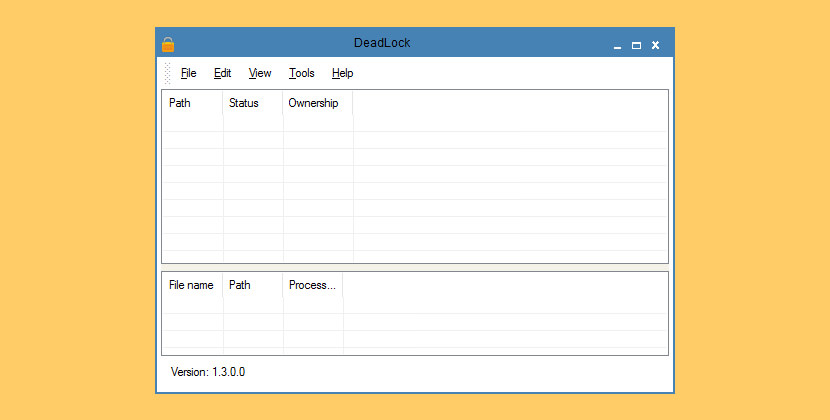
DeadLock is a free file and folder unlocking utility brought to you by CodeDead. It can help you unlock files or folders that you’re unable to delete, copy, rename or move. As of version 1.3, DeadLock can also take ownership of files and folders! It can help you unlock files or folders that you’re unable to delete, copy, rename or move.
- Unlock files / folders
- Take ownership of files / folders
- Remove files / folders
- Move ‘locked’ files / folders
- Copy ‘locked’ files / folders
- Command-line arguments
- Automatic updates
- Windows Explorer integration
5. EMCO UnLock IT
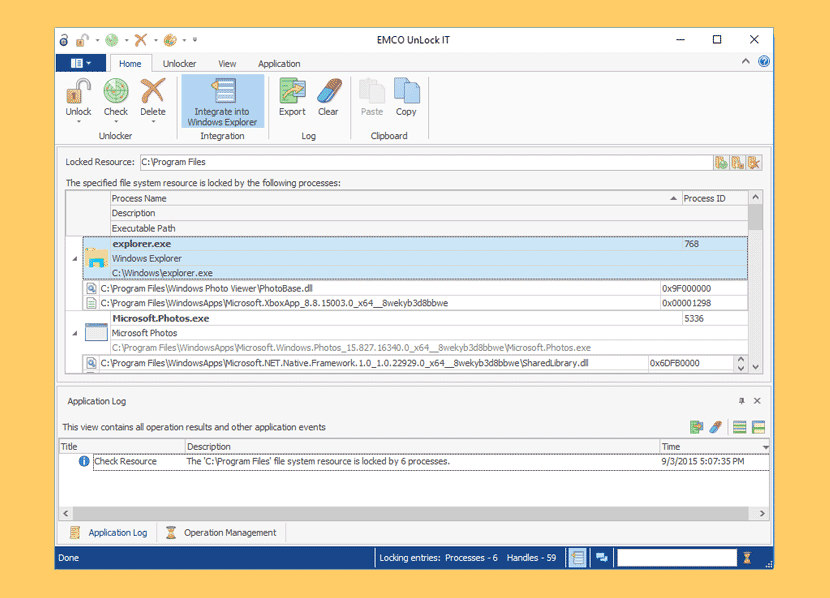
A neat free utility that helps you to unlock files and folders. It allows you to take control on resources locked by a system, applications and services. For a locked resource the application detects a list of locking processes and allows to unlock the resource by closing file and library handles or terminating locking processes. The application offers Windows Explorer integration that makes possible folders and files unlocking by just a single click in the context menu.
- Force Closing File Handles – The application allows you to unlock a file by closing file handles to this file. This unlocking approach can be used to release a lock for files that are opened for modification. This approach is safe to use in most cases, because it doesn’t require termination of a process that hold a lock.
- Force Closing Library Handles – The application makes it possible to unlock the DLL file currently using by running processes. In this case opened handles to the DLL are forced to close in order to release locks. This approach also doesn’t require termination of the process that uses DLL. In most cases can continue to work successfully.
- Termination of Protected Processes – If a file can’t be unlocked by closing file and library handles, the application can unlock it by terminating processes that hold locks. Even processes that are protected from termination can be terminated successfully, so approach can be used when you need to remove resources locked by viruses.
6. ThisIsMyFile
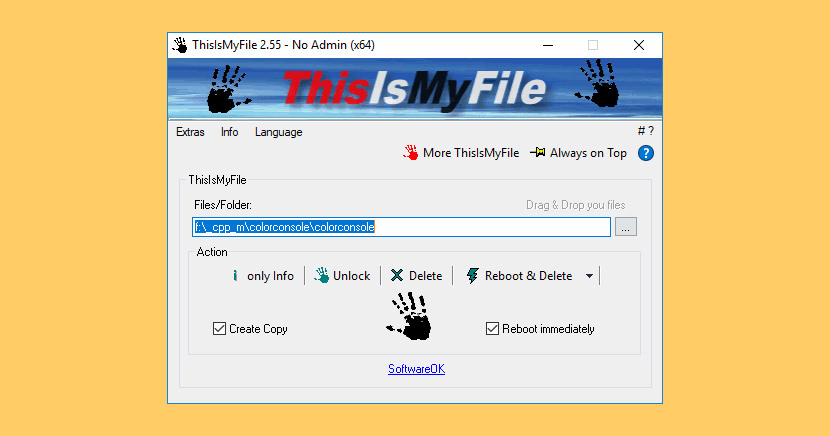
ThisIsMyFile is a small, fast tool for quickly unlocking and deleting locked or protected files on Windows. It’s helpful for those times Windows locks up a file and makes it so that you can’t remove it. Sometimes a simple reboot resolves the issue but this small app takes care of it quickly without reboot and with no installation needed.
7. Wise Force Deleter
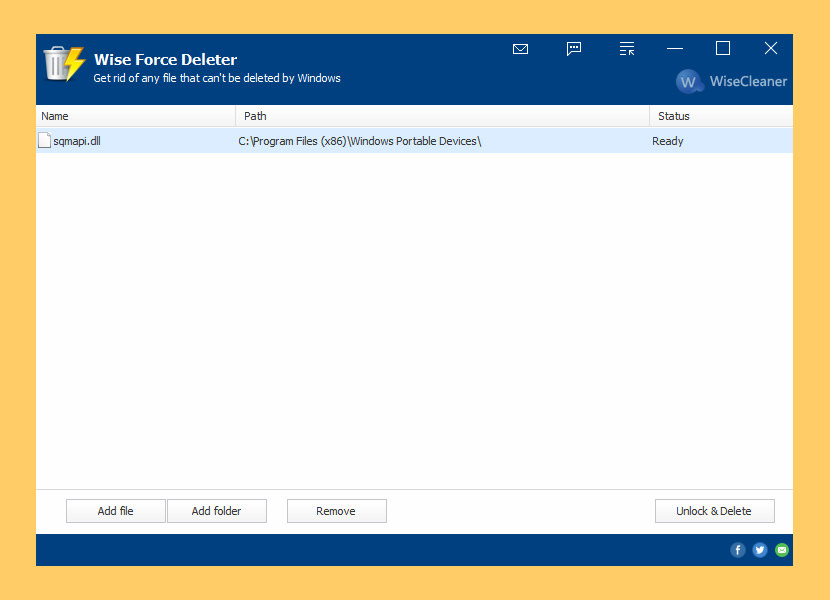
Wise Force Deleter is freeware that allows you to delete any file in your Windows system(64 and 32-bit). It has been developed and fully tested to work great on Windows 10 and other Windows operating systems, from Windows XP and up. No matter what you own – a desktop or a laptop.
Wise Force Deleter is designed to fix all the issues of ‘file locking’ by terminating the processes using the file or removing file-access restrictions that prevent you from deleting a file. With Wise Force Deleter, you can unlock and delete any file without frustration in Windows.
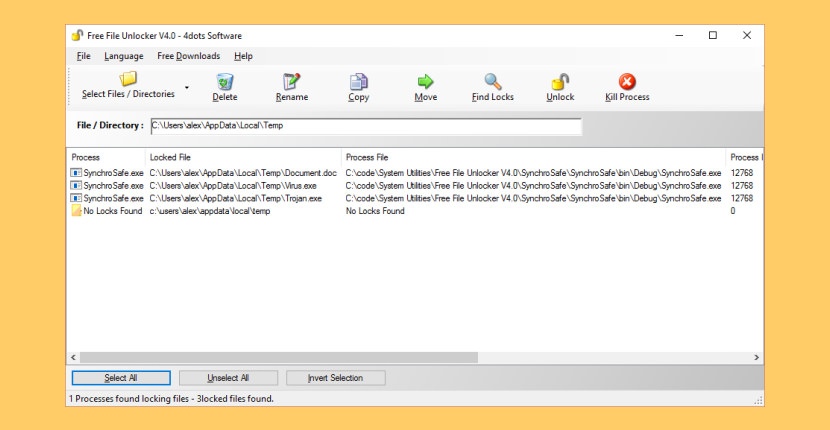
Delete Currently Used, Locked, Undeletable, Busy Files. Free File Unlocker is a free essential utility to delete currently used, locked, undeletable, busy files. Works with all 32bit and 64bit versions of Windows and Windows Server. It unlocks files or folders and stops error messages from appearing when trying to delete, move and rename them. It can also be used to terminate malware that is difficult to be removed and kill viruses and trojans. It is fully integrated with Windows Explorer.
9. NoVirusThanks File Governor
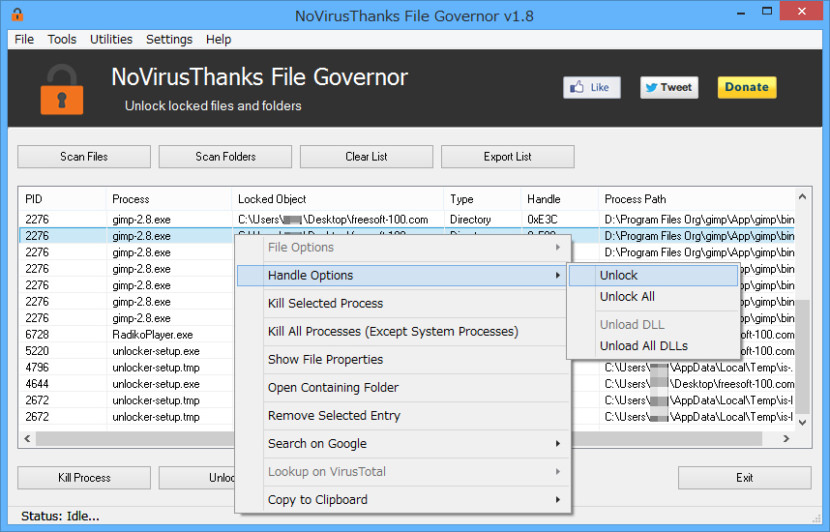
NoVirusThanks File Governor is an advanced program which allows for files and folders within the system to be unlocked so that normal file I/O operations can be completed when normally they would not be able to due to operating system restrictions for files currently in use. Once a file or folder is unlocked you will be able to force-close the file’s handle, rename, delete, etc. In this case you should know these messages:
- Unlock Locked Files – Safely unlock files that cannot be delete or are in use by other programs.
- Unlock Locked Folders – Safely unlock all files inside a folder so that you can delete the folder.
- Search Locked Files – You can scan files and folders for locked files from the program interface.
- Terminate Processes – You can terminate processes that are using the locked file or folder.
- Unlocker Alternative – This is a great free alternative to Unlocker, the popular file unlocker.
- Close Open Handles – Safely close all opened handles and unload loaded DLL modules.
Sometimes, you may encounter a situation where a file is protected or locked, preventing you from deleting it in Windows 10/11. These printed files can be a hassle due to system restrictions, malware protection, or file permissions. We will show you effective methods to force delete a protected file in Windows 10/11.
Why Can’t I Delete a Locked File on Windows 10/11?
You might be unable to delete a file in Windows 10 or 11 for several reasons. These reasons range from file permission issues, lack of short file names, encryption, and write protection to files locked by running processes. Understanding the cause will help you determine the best way to force delete the file.
Ways to Force Delete a Protected File in Windows 10/11
Adjust File Permissions to Gain Full Access
Insufficient permissions are the most common reasons you cannot delete a file. If you don’t have administrative rights, Windows will block you from making changes to the file. Changing the file permissions can resolve this issue and allow you to delete it.
Step-by-step:
- Right-click the protected file and select Properties.
- Under the Security tab, click Edit to modify permissions.
- Select your user account and check the box next to Full Control.
- Click Apply and then OK. Now, try deleting the file again.
Unlock Write Protection on SD Card or USB Drive
If the file is on an SD card or USB drive, the device may have write protection enabled, preventing you from deleting files. Unlocking the device or removing the write protection will allow you to delete stored files.

Step-by-step:
- If you have an SD card or USB drive, locate the physical write protection switch on the device (if applicable).
- Slide the switch to the unlocked position.
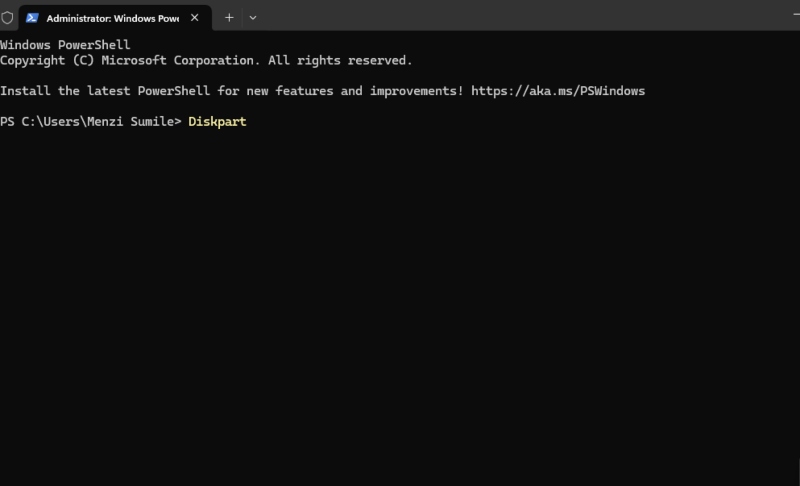
- If there is a switch, you can turn off write protection through the Diskpart command in CMD
- Try deleting the file after unlocking the device.
Decrypt Encrypted Files Using Windows Tools
If the file is encrypted using WindoWindows’ built-in BitLocker or EFS (Encrypting File System), you’ll need to decrypt it before you can delete it. Encrypted files are protected by encryption keys, making them inaccessible unless decrypted.
Step-by-step:
- Right-click the encrypted file and select Properties.
- Go to the General tab and click Advanced.
- Uncheck the box labeled Encrypt contents to secure data.
- Click OK and then try deleting the file again once it’s decrypted.
Release Locked Files with File Unlocking Software
Some files, especially executable (.exe) files, are protected because other processes use them. File lock software can help unlock and release these files so that they can be deleted.
Step-by-step:
- Download and install file lock software such as LockHunter or Unlocker.
- Launch the software and navigate to the locked file.
- The software will show which process is locking the file. You can then choose to unlock or delete it directly.
- After releasing the file, try deleting it again.
Remove Write Protection Using Command Prompt (CMD)
If the file is protected by write protection, it can prevent deletion. Using the Command Prompt (CMD) with the Diskpart utility allows you to remove write protection and force delete the file.
Step-by-step:
- Press Windows + X and select Command Prompt (Admin).
- Type Diskpart and press Enter to open the Disk Partition tool.
- Type list disk to display all connected disks.
- Type select disk X (replace X with your disk number) and press Enter.
- Type attributes disk clear read-only and press Enter to remove write protection.
- Close CMD and try deleting the file again.
Delete Files After Removing File Protection
Once you have any protection or restrictions preventing file deletion, the next step is to delete the file. If you followed the methods above and have successfully unlocked or decrypted the file, deleting it should be straightforward.
Step-by-step:
- Right-click the file and select Delete.
- If the file still refuses to delete, you can try using Shift + Delete to permanently remove it without moving it to the Recycle Bin.
- Alternatively, you can use a file cleaner tool like CCleaner to force delete stubborn files that refuse to go.
Conclusion
Dealing with protected files in Windows 10/11 can be frustrating, but following the abovementioned methods can force delete files quickly. There are many ways to resolve file protection issues, whether resolving file permissions, unlocking a storage device, decrypting files, or using specialized software.
If you encounter persistent problems or other file system issues, consider using a reliable tool like Fortect to scan and fix underlying system errors automatically. This can help optimize your PC and ensure smooth file management.
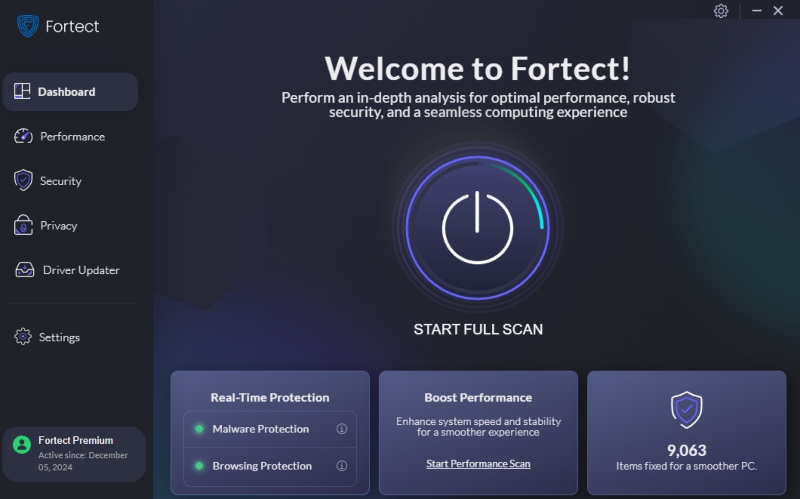
Download and install Fortect now.
How to Delete Locked Files and Folders on Windows 10
Locked files can be annoying since you can’t delete, edit or move them, and it is often unclear why they are locked. This article outlines several methods to remove locked files and folders.
A locked file or folder is a computer file that can be used only by a single program or process concurrently. The purpose of locking a file is to ensure that it cannot be moved, edited, or deleted while in use.
There are several reasons why your file or folder might be locked. Another user could have opened it on the same network because the file is part of a shared folder on your system.
Alternatively, the file might be opened and locked by an application still active in the background, even though it has been closed. Consequently, you will not be able to edit, move, or delete a file if it is locked (encrypted) or opened in another program.
If you get the error message «The action cannot be completed because the file is open in another program,» read this article, which includes several methods to resolve the problem.
The instructions below will show you how to unlock locked files so you can delete, edit or move them.
Video Showing How to Remove Locked Files and Folders
Table of Contents:
- Introduction
- Restart Your Computer
- Unlock Files Using Process Explorer
- Remove Files Using Safe Mode
- Unlock Files Using IObit Unlocker
- Video Showing How to Remove Locked Files and Folders
Download Computer Malware Repair Tool
It is recommended to run a free scan with Combo Cleaner — a tool to detect viruses and malware on your device. You will need to purchase the full version to remove infections. Free trial available. Combo Cleaner is owned and operated by Rcs Lt, the parent company of PCRisk.com read more.
Restart Your Computer
A locked file can be unlocked after you restart your computer. Restarting your computer will not help if the program that locked the file is a startup program (that locks files as soon as you log into Windows). If you have a locked file or folder and do not want to use the more complex methods described below, you can simply try to restart your computer. You should then be able to delete, move, or rename the file. If this does not help, try the following solutions.
[Back to Table of Contents]
Unlock Files Using Process Explorer
Process Explorer is a freeware task manager and system monitor for Microsoft Windows created by Winternals Software, which has been acquired by Microsoft. It provides the functionality of Windows Task Manager with a rich set of features for collecting information about processes running on the system.
Process Explorer can be used to track down problems. For example, it provides a means to list or search for named resources held by a process or all processes. This can be used to track reasons for keeping files open and preventing use by other programs. It also can show the command lines used to start a program, allowing otherwise identical processes to be distinguished. You can download Process Explorer from the Microsoft website here.
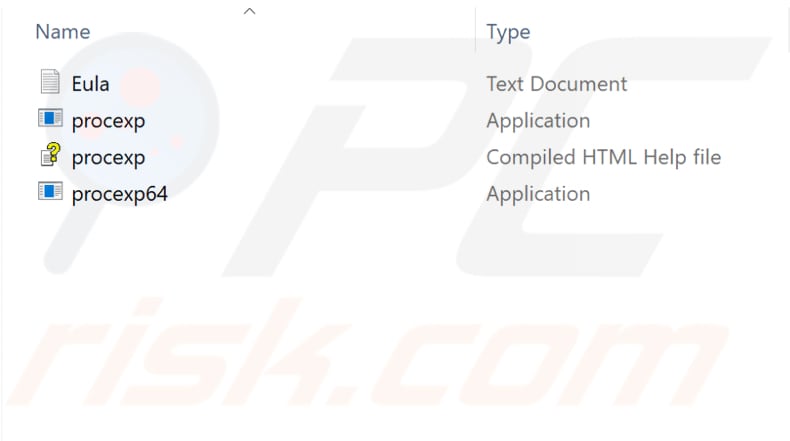
Once you have downloaded Process Explorer installation files, you will see two types of .exe files: «procexp.exe» and «procexp64.exe». One is for users running the 32-bit version of Windows, and the other is for 64-bit. If you are not sure of your Windows type, read this article.
Double-click the right version of the .exe file to launch Process Explorer.
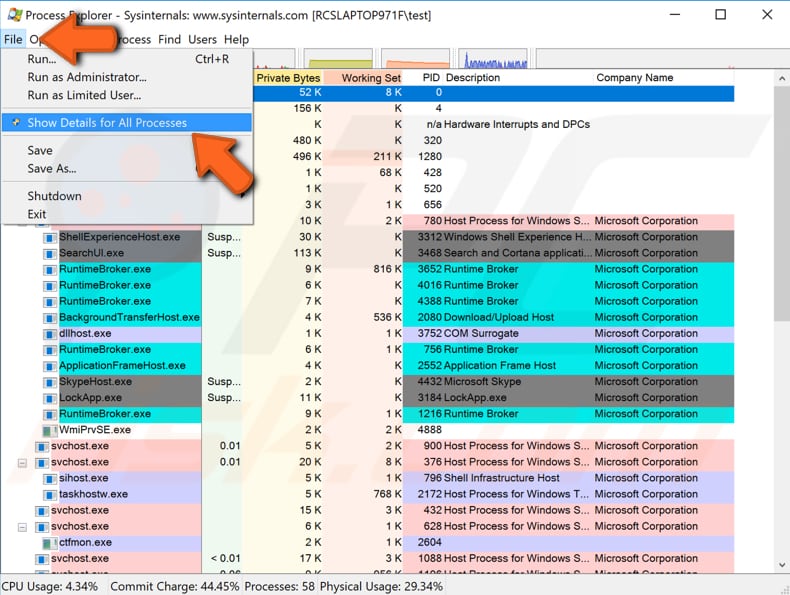
In Process Explorer, click «File» and select «Show Details for All Processes» from the drop-down menu.
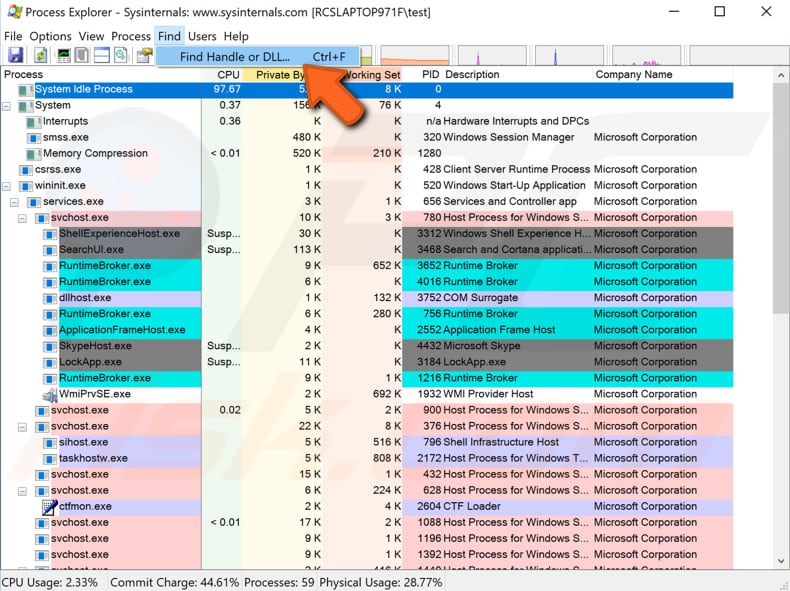
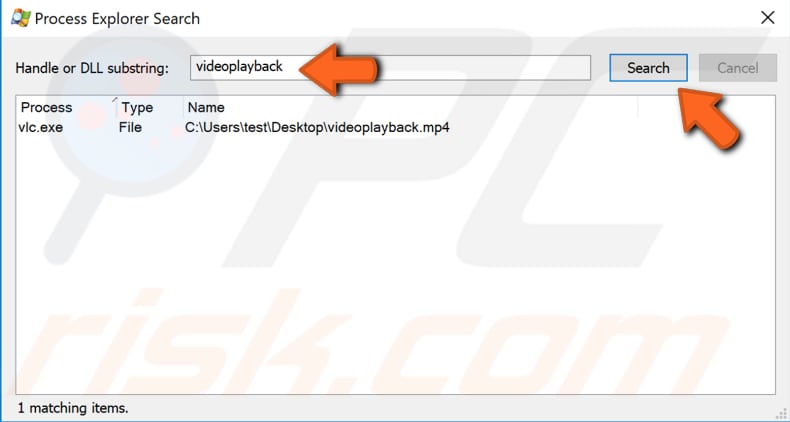
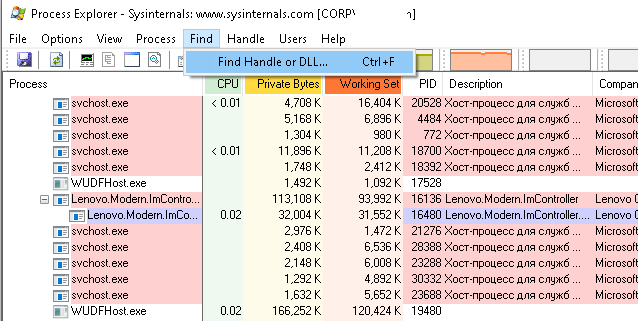
Now, click «Find» and select «Find Handle or DLL…» from the drop-down menu.
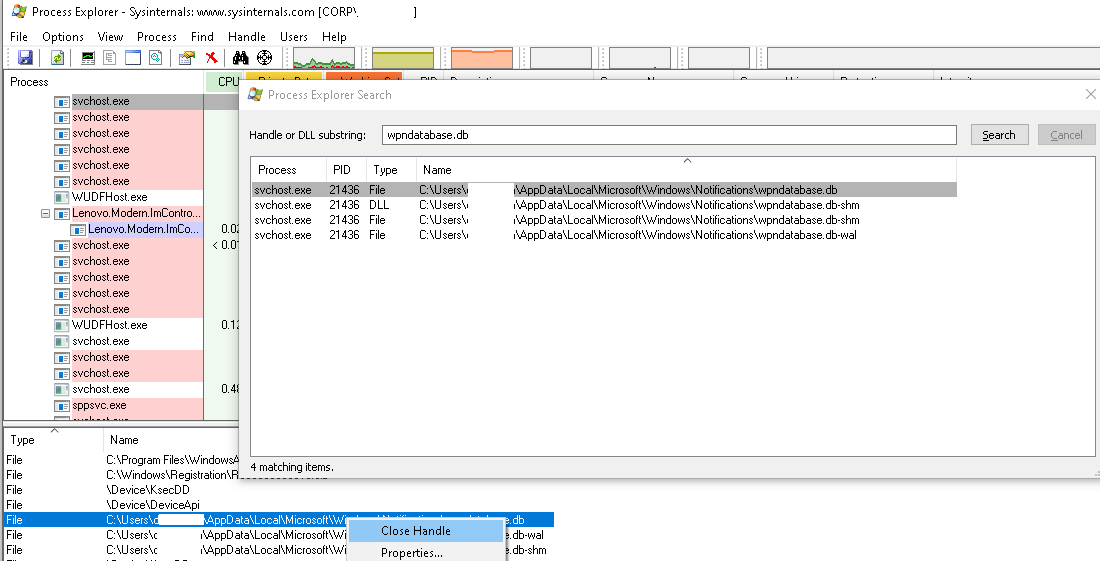
Type the name of the locked file and click «Search». It will find the process holding your file.
Select the result in the Search window and right-click on it in Process Explorer. Select «Close Handle» from the drop-down menu. It will mark it in red, and your file will be unlocked. If the file is being used by more than one process, repeat the steps with all programs to close all handles.
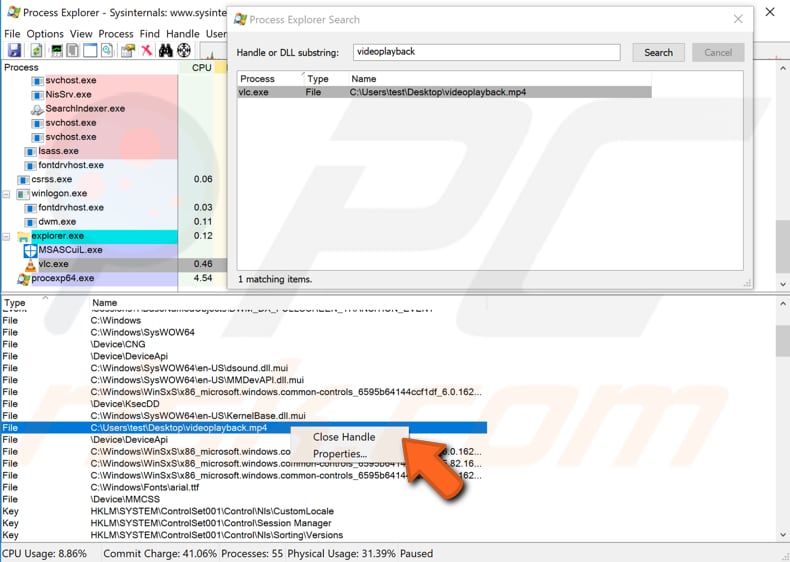
Now you can delete, remove or edit your file since it is no longer locked.
[Back to Table of Contents]
Remove Files Using Safe Mode
Safe Mode is a diagnostic startup mode in Windows operating systems used to obtain limited access to Windows when the operating system does not start or function normally. It is the opposite of Normal Mode, which starts Windows in the usual manner. Safe Mode is available on Windows XP, Windows Vista, Windows 7, Windows 8, Windows 10, and most older versions of Windows.
One of the most common steps when troubleshooting a computer is to boot into Safe Mode. Safe Mode starts Windows in a basic state, using a limited set of files and drivers. It can help to troubleshoot problems on your computer. If, for example, the problem does not occur in Safe Mode, this will confirm that the default settings and basic device drivers are not causing the issue.
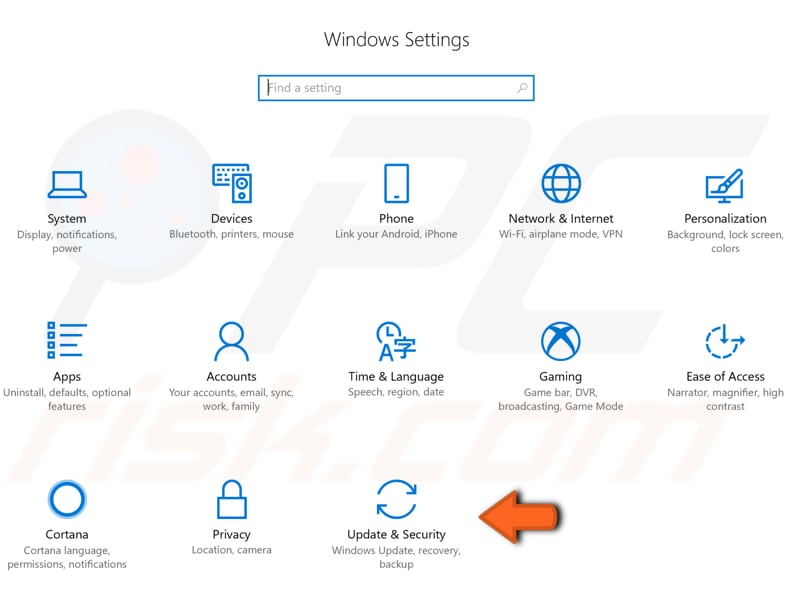
If you have issues with your computer, or there are reasons you wish to load windows in Safe Mode, there are a number of ways to achieve this. One of them is to use the Recovery Option in Settings. Open Settings and then click «Update & Security».
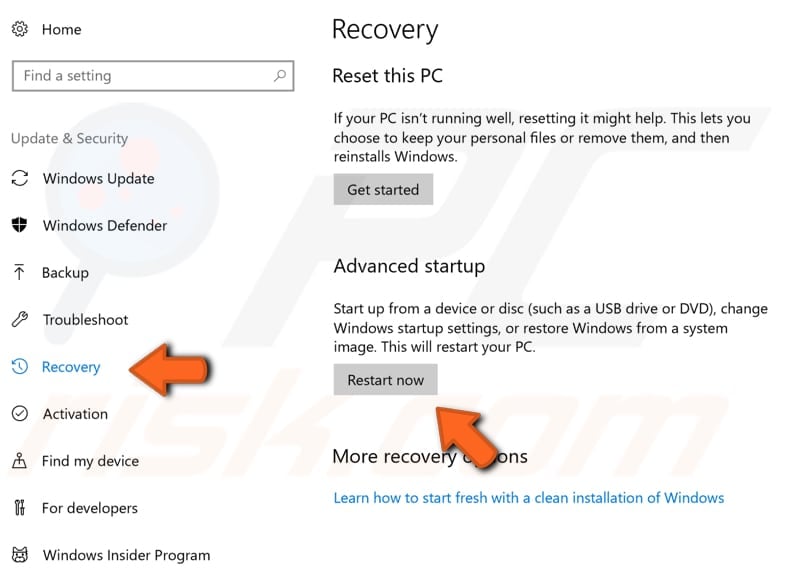
Then click «Recovery» on the left pane. Find the «Restart now» button under «Advanced startup» and click on it.
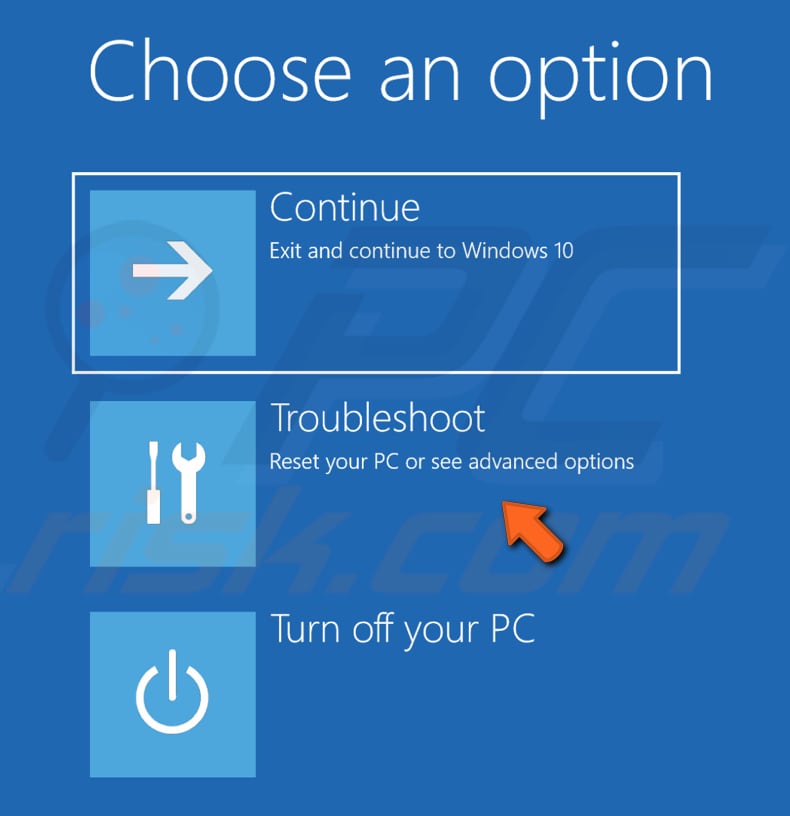
Your computer will restart, and you will see a menu on a blue screen. You will be given three options. Select «Troubleshoot».
In Troubleshoot, click «Advanced options».

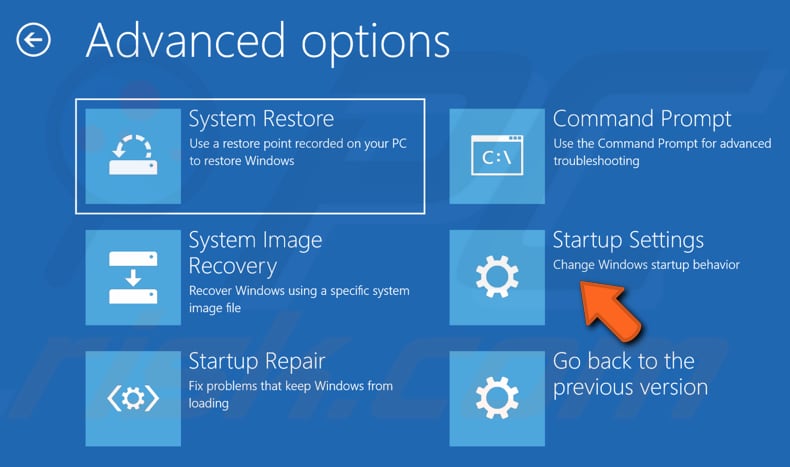
In Advanced options, click «Startup Settings».
In Startup Settings, click «Restart». After restart, you will be able to enable low-resolution video mode, debugging mode, boot logging, Safe Mode, disable early-launch anti-malware protection, and automatic restart on system failure.

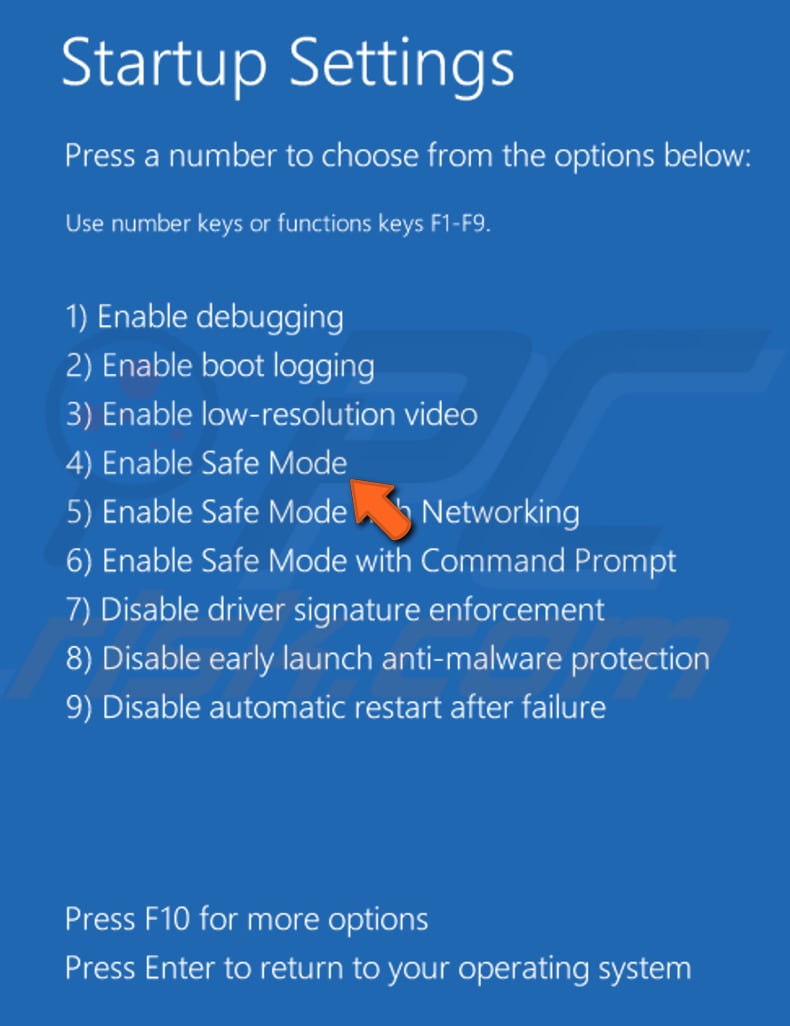
You will be given a list of options. To choose an option, press its number on your keyboard or use function keys from F1 to F9. Press 4 or F4 to enable Safe Mode. If you need to enable Safe Mode with Networking, press 5. If you need to enable Safe Mode with Command Prompt, press 6. If you change your mind and no longer wish to start Windows in Safe Mode, press Enter to exit Startup Settings.
Your PC will boot into Safe Mode. Locate the relevant file and delete it. Restart your computer to exit Safe Mode. If you cannot boot into Safe mode in this way, read this article for more ways to boot into Safe Mode on Windows 10.
[Back to Table of Contents]
Unlock Files Using IObit Unlocker
There are many tools available on the Internet to deal with locked files, including IObit Unlocker. If you feel comfortable using third-party software, this one might be worth considering.
IObit Unlocker unlocks files and folders that Windows will not let you delete because they are locked or open in another program. IObit Unlocker unlocks files and folders from Windows context menus by drag-and-drop or by browsing and adding. You can download IObit Unlocker here.
Open IObit Unlocker, simply drag-and-drop the locked file into the IObit Unlocker window, and then click «Unlock». Your file will be unlocked, and you will be able to delete, move, or edit it.
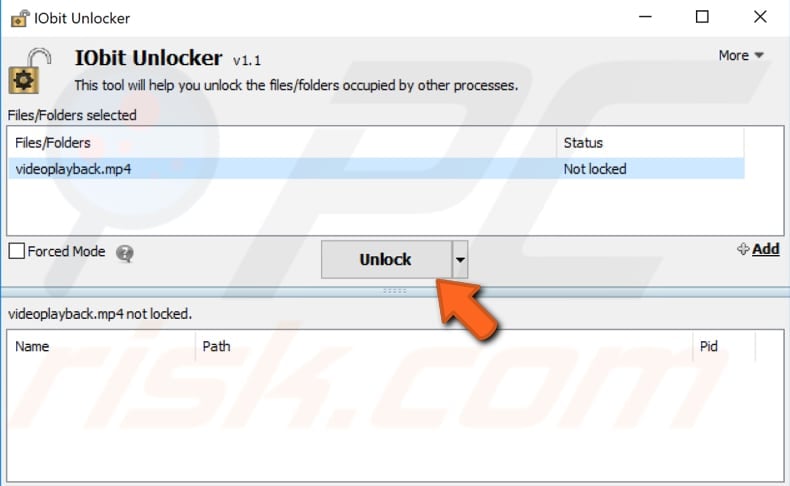
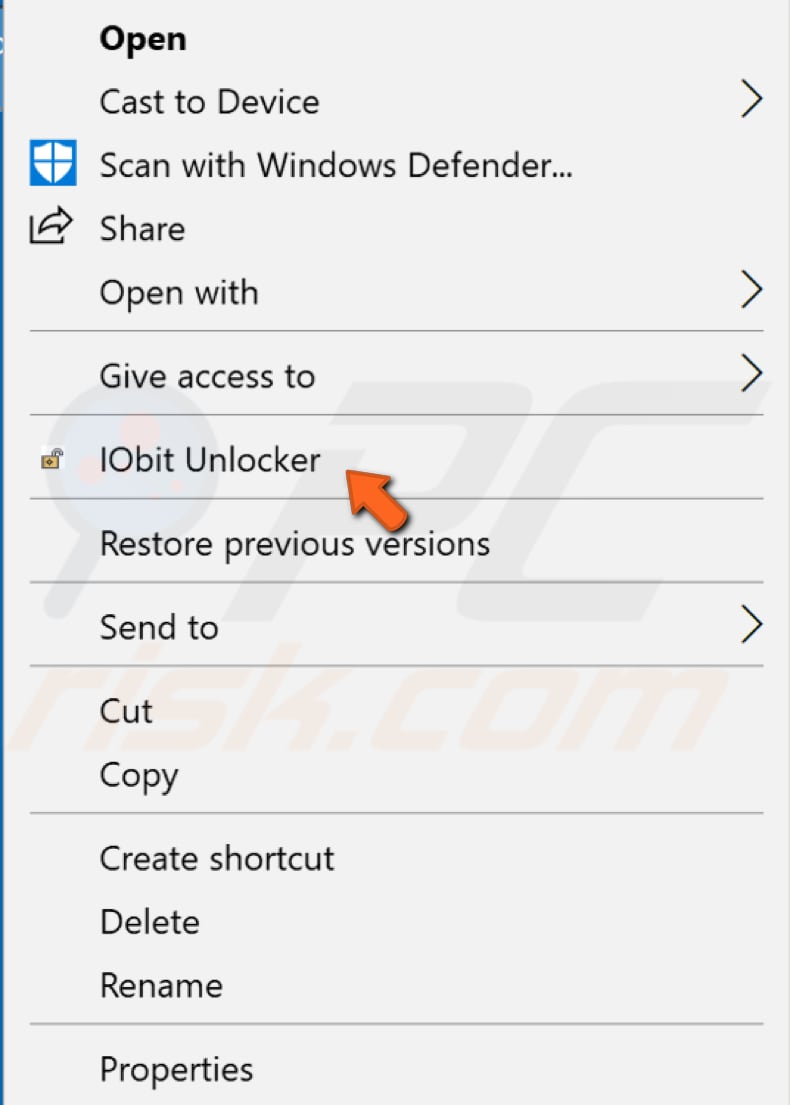
Alternatively, you can right-click on the file you want to unlock and select «IObit Unlocker» from the drop-down menu. This will add the locked file into the IObit Unlocker window, and you can unlock it by clicking «Unlock», as in the method described above.
We hope that these methods help you unlock locked files and remove, edit, and move them without problems.
[Back to Top]
When you try and delete a file or a folder that is being used by another app, program, or process in Windows 11 or Windows 10, it is likely that you will be prompted and will be asked to either close the process and try again or cancel the command.
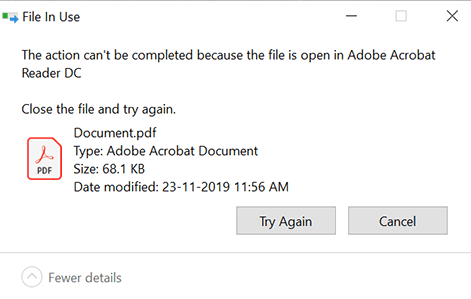
If you’re using Windows 10, then you may see a prompt stating “The action can’t be completed because the folder or file in it is open in another program.” If you are using Windows 11, then the prompt may also state the program the file/folder is being used by, as in the image below.

This article discusses various ways to force a file or folder to be deleted that is being stubborn. Before we look at the solution, we should highlight the common reasons why a file or folder simply does not delete it.
Table of Contents
Why Windows Won’t Let You Delete Locked Items
When a file or folder is in use by another process, Windows locks it in place. These are then automatically unlocked when they are no longer in use. However, occasionally, a file or folder may not unlock successfully, making you incapable of deleting it using conventional methods.
An item may be prone to deletion if an active program is currently using it, or a task running in the background. Other reasons may include file corruption, preventing it from being unlocked, or a virus may infect the folder/file.
If that is the case, you may need to apply a few tricks to delete a file or folder that is not going away.
How to Fix “The Action Can’t Be Completed Because The File Is Open In Another Program”
Occasional misfunctioning of Windows can become a thing if you play around with it a tad too much. This can lead to abnormal behavior of the operating system, rendering it incapable of temporarily or permanently removing a file or folder.
For this, we can apply a few Windows tricks, or use certain applications to unlock a file/folder and then delete it.
End Process using Task Manager
If you have already closed the program suspected of using the file/folder you are trying to delete, you may want to double-check it through the Task Manager. Check if the alleged process is still running, and end it if it is.
Open the Task Manager using the CTRL + Shift + Esc shortcut keys, and switch to the Details tab. From there, right-click on the process using the file/folder you want to remove, and click End Process Tree from the context menu.

Now try to delete the file/folder again.
Disconnect Remote Access to Local Files
It may be possible that another system on your network has access to the file/folder you are about to remove, without you knowing it. This also makes an item incapable of deletion since it is being used.
To do this, you must disconnect all open files and then retry to delete the item. To do so, open the Computer Management Console by typing in compmgmt.msc in Run, and navigate to the following using the pane on the left of the console:
Computer Management (Local) >> System Tools >> Shared Folders >> Open Files
Here, you will see the files/folders currently being accessed on your local computer remotely. Right-click on the blank space in the middle pane and click Disconnect All Open Files from the context menu.

In the confirmation box, click Yes. Once done, try to delete the stubborn item. If it still refuses to go, continue with the fixing methods listed below in this post.
Restart File Explorer
Sometimes it is the Explorer.exe process that does not behave as it should. It is the process that runs the desktop, taskbar, notification tray, start menu, all dialog boxes, prompts, and controller interfaces.
It may be possible that malfunctioning of File Explorer is preventing you from deleting an item. If so, restarting it might just solve the problem.
There are 3 ways to restart explorer.exe. Perform any and then try to delete the file/folder.
Disable Thumbnail Caching
By default, Windows is configured to store thumbnail data in a thumbs.db file, so it loads images faster the next time you access it. This feature sometimes malfunctions, and the operating system thinks the thumbnail data is still in use, even when the associated file is closed.
This feature can be disabled in 2 ways in Windows 11/10. Disabling it would not affect your system in any way except that the images take a few milliseconds longer to load.
You can disable thumbnail caching through the Group Policy Editor or through the Windows Registry Editor if you are using the Home edition of Windows.
Learn how to enable Group Policy Editor in Windows 11 Home or Windows 10 Home.
Through Group Policy
Follow the steps below to disable thumbnail caching in Windows:
- Launch the Group Policy Editor by typing in gpedit.msc in Run.
- Now navigate to the following using the left pane:
Local Computer Policy >> User Configuration >> Administrative Templates >> Windows Components >> File Explorer - Now double-click “Turn off the caching of thumbnails in hidden thumbs.db files.”

- Now select the Enabled radio button from the Properties window, and then click Apply and Ok.
- For the changes to take effect, launch the Command prompt with administrative privileges and type in gpupdate /force.


Now retry deleting the stubborn file. if it has been removed, you re-instate thumbnail caching by opening the same Group Policy and selecting the Not Configured radio button. Rerun the same command in Command Prompt for the changes to occur.
Through Registry Editor
The same can be achieved through the Registry Editor. Here is how:
Misconfiguration of critical values in the system’s registry could be fatal for your operating system. Therefore, we insist that you create a system restore point before proceeding forward with the process. This will help you restore your OS in case any issues are discovered or fail entirely.
- Launch the Registry Editor by typing in regedit in Run.
- Paste the following in the address bar at the top of the Editor for quick navigation:
Computer\HKEY_CURRENT_USER\Software\Policies\Microsoft\Windows
- Right-click Windows in the left pane, expand New from the context menu, and then click Key.
- Name this new key “Explorer.” – (Skip steps 3 and 4 if the “Explorer” key already exists).
- Now right-click the Explorer key, expand New from the context menu, and click DWORD (32-bit) Value.
- Name this new DWORD “DisableThumbsDBOnNetworkFolders.”
- Double-click DisableThumbsDBOnNetworkFolders and set its Value Data to 1, then click OK.
- Now restart your computer for the changes to take place.


Thumbnail caching will now be disabled. Try to delete the item you want to remove again. If successful, you can re-enable thumbnail caching simply by deleting the DisableThumbsDBOnNetworkFolders value in Windows Registry and rebooting the computer.

If your goal is not achieved using this method, we still have a few tricks up our sleeve.
Delete Temporary Files
Windows creates temporary files while performing certain tasks, most of which are automatically deleted once the task is completed. However, these files can impact the availability of your files and folders, which need to be deleted to remove the actual file/folder.
These files need to be deleted manually using the following steps:
- First, log into your PC from and administrator account.
- Now open the temporary files folder by typing in %temp% in Run.
- Now select all the items using the Ctrl + A shortcut keys and hit Del on your keyboard.
- If prompted with a UAC, click Continue.

- If any items cannot be deleted or require special permissions, check the box next to “Do this for all current items” in the dialog box, and then click Skip.


Once the possible temp files have been deleted, try deleting the file/folder that was throwing the error in the first place.
Disable Controlled Folder Access
Controlled Folder Access is part of Windows Security, which protects your critical system files from malicious content and accidental deletion. This can restrict your access to a file or folder, preventing you from making any changes, including removing it. The feature must then be disabled to delete the item.
We strongly recommend you do not disable Controlled Folder Access, as it protects critical system files, and deleting one could be harmful to your operating system. If you decide to proceed with this, it would be wise to create a system restore point.
- Navigate to the following:
Settings app >> Privacy and Security >> <a href="https://itechtics.com/enable-windows-security-updates-over-metered-connections/">Windows Security</a> >> Virus and threat protection - Windows Security will now open. Scroll down and click Manage settings under Virus and threat protection settings.

- Now scroll down and click Manage Controlled folder access.
- On the next page, toggle the slider below Controlled folder access to the Off position.


Once disabled, try to delete the item you want to and check if successful.
Boot into Safe Mode
In Safe Mode, no unnecessary apps, programs, or hardware are enabled by default, which eliminates the possibility of another program using the item you are trying to delete.
Follow the steps below to boot Windows into Safe Mode:
- Open the Start Menu. From there, click on the Power button while holding down the Shift Key on the keyboard.
- Click Restart still while holding the Shift Key and hold it until the computer reboots. Once it reboots, let go of the press key.
- The system will now boot into recovery mode. From there, click Troubleshoot.

- Then click Advanced options.

- Then click Startup Settings.

- On the next screen, click Restart.

- Now press the F5 function key to Enable Safe Mode with networking.


Your device will now boot into Safe Mode. When it does, the desktop will look something like this:

Now use File Explorer to delete the file / folder you have not been able to use in regular mode.
Using Process Explorer
Process Explorer is Microsoft’s software designed for you to know which programs have which files or directories open. Thus, it can be used to close any handles running in the background that is preventing a file from being deleted.
Process Explorer is a portable tool. Follow the steps below to download and use it:
- Download Process Explorer through this Microsoft Page.
- Once downloaded, extract the content and run the tool. Run prosexp if you have a 32-bit operating system, or prosexp64 for a 64-bit OS.
- From the Process Explorer tool, click File from the top menu, and then click Show details for all processes.

- Now click Find from the top menu and then click Find Handle or DLL.
- On the popup, enter the name of the locked file you are trying to delete, and click Search. When the search results show up, click on the file.
- Now, back on the Process Explorer tool, right-click on the locked file and click Close Handle from the context menu.
- Repeat step 6 for all processes using this particular file.


Once all the associated process Handles have been closed, you can now safely delete the locked file, which should now be unlocked.
Third-party Applications
If you want a quick and convenient solution to delete locked files in Windows, and want to avoid all the fixes discussed above, then you could use third-party freeware applications that unlock and delete the files that are too stubborn to delete using the conventional methods.
We have tried and tested the following 5 freeware tools for you to unlock and force-delete files and folders on Windows 11 or 10. Click on the respective link to download the tool. Installing them is pretty much conventional – simply go through with the installation wizard.
Once installed, provide the app with the locked file/folder and you should be able to permanently delete it using the tool.
- EMCO UnLock IT
- Wise Force Deleter
- Lock Hunter (Temporary Deletion – Stored in Recycle Bin)
- IObit Unlocker
- Unlocker
Final Thoughts
We prefer not to use third-party applications on our PCs. This is because some of them are from untrusted sources and may contain malicious data that could infect your PC. That said, this is one of the reasons we have tested out the third-party applications mentioned above before recommending them to you.
These apps allow you to avoid the hassle of unlocking and deleting a file or folder.
Иногда при попытке удалить, переименовать или переместить какой-то файл в Windows вы можете получить сообщение, что файл занят/заблокирован/используется) другим процессом. Чаще всего имя программы, которая держит файл открытым указывается прямо в окне сообщения File Explorer. Чтобы снять блокировку файла достаточно просто закрыть эту программу. Но бывает ситуации, когда какой-то файл и библиотека используется неизвестным или системным процессом. В этом случае снять блокировку с файла немного сложнее.
Многие приложения открывают файлы в монопольном (эксклюзивном) режиме. При этом файл блокируется файловой системой от операций ввода вывода других приложений. Если вы закрываете приложение, блокировка с файла снимается.
Сообщение о блокировке файла может выглядеть по-разному. Например в следующем примере указан тип файла и с каким приложением он ассоциирован:
File/Folder in Use. The action can’t be completed because the file is open in another program. Close the folder or file and try again.
Файл уже используется. Операция не может быть завершена, так как файл или папка открыта в другой программе. Закройте файл и повторите попытку.
В этом случае вы можете легко понять какое приложение заблокировало файл и закрыть его.
Однако иногда можно увидеть более интересное сообщение, о том, что файл заблокирован неизвестным или системным процессом Windows. Это может быть, как процесс самой ОС Windows, так и другие процессе, работающий с правами System, например, антивирус, агент резервного копирования, база данных mssql и т.д.):
The action can’t be completed because the file is open in SYSTEM.
Файл уже используется. Действие не может быть выполнено, так как этот файл открыт в System.
Попробуем разобраться, как понять какой программой, службой или системным процессом Windows занят файл, как разблокировать файл и можно ли разблокировать файл не закрывая родительский процесс.
Самый простой вариант разблокировать файл – завершить процесс, которые его заблокировал. Но это не всегда возможно, особенно на серверах.
Чаще всего для поиска процесса, который заблокировал файл рекомендуют использовать утилиту Unlocker. Лично я
Unlocker
не использую, т.к. она не позволяет получить подробную информацию о процессе или цепочке процессов, которые заблокировали файл. Также нельзя освободить конкретный файл, занятый процессом – приходится завершать приложение целиком.
Кроме того, это сторонняя утилита, при установке которой нужно быть внимательным, т.к. в процессе она предлагает установить пачку ненужные программы в нагрузку.
Когда процесс в Windows открывает файл, этому потоку ввода/вывода назначается файловый дескриптор (handler). Процесс и его дочерние процессы получают доступ к файлу по этому дескриптору. Через Window API вы можете послать сигнал файловой системе на освобождение данного дескриптора и снятие блокировки с файла.
Принудительное закрытие файловых дескрипторов может вызвать нестабильную работу приложения или компьютера. Если вы не знаете, к чему приведет закрытие дескриптора файла для конкретного приложения, то не пытайтесь выполнить это на продуктивном сервере без предварительного теста.
Как разблокировать файл с помощью Process Explorer?
ProcessExplorer это бесплатная утилита из набора системных утилит Sysinternals, которую можно скачать на сайте Microsoft (https://docs.microsoft.com/en-us/sysinternals/downloads/process-explorer). Попробуем с помощью Process Explorer найти, какой процесс заблокировал определенный файл и освободить этот файл, сбросив файловый дескриптор процесса.
- ProcessExplorer не требует установки, просто скачайте распакуйте и запустите с правами администратора
procexp.exe
; - Выберите меню Find -> Find Handle or DLL (или нажмите
Ctrl-F
);
- Укажите имя файла, который нужно разблокировать и нажмите Search;
- Выберите нужный файл. Процесс, который открыл файлы будет выделен в дереве процессов. Можно завершить этот процесс, щелкнув по нему правой кнопкой и выбрав Kill Process Tree. Но можно попробовать закрыть дескриптор файла, не завершая процесс целиком. Дескриптор файла, который вы искали, автоматически выделяется в нижней панели Process Explorer. Щелкните по дескриптору правой кнопкой и выберите Close handle. Подтвердите закрытие файла.
Если у вас в Process Explorer не отображается нижняя панель со списком открытых дескрипторов процесса, включите пункт меню View -> Lower Pane View -> Handles
Итак, вы закрыли дескриптор файла, не завершая родительский процесс. Теперь вы можете спокойно удалить или переименовать файл.
Сброс дескриптора файла с помощью утилиты Handle
Handle – это еще одна утилита командной строки из комплекта инструментов Sysinternals (доступна для скачивания на сайте Microsoft (https://docs.microsoft.com/en-us/sysinternals/downloads/handle. Она позволяет найти процесс, который заблокировал ваш файл и снять блокировку, освободив дескриптор.
- Скачайте и распакуйте архив с утилитой Handle;
- Запустите командную строку с правами администратора и выполните команду:
handle64.exe > listproc.txt
Данная команда сохранит список открытых дескрипторов в файл. Можно вывести дескрипторы для каталога, в котором находится файл, который вы хотите изменить:
Handle64.exe -a C:\Some\Path
или конкретного процесса:
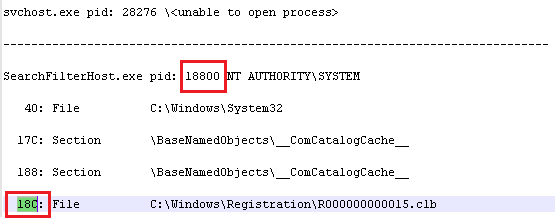
handle64.exe -p winword.exe - Откройте файл listproc.txt в любом текстовом редакторе и найдите строку, в которой указано имя заблокированного файла. Скопируйте ID дескриптора файла (значение в hex формате). Затем поднимитесь немного выше к разделу, в котором указан процесс, являющийся владельцем данного дескриптора и запишите его ID. Для процесса запущенного от имени системы скорее всего будет PID 4.
Для некоторых системных процессов handle.exe вернет следующий текст:
wininit.exe pid: 732 \<unable to open process>
. Это означает, что вы не может получить информацию об этих системных процессах (даже с правами администратора). Для получения дескрипторов файлов, открытых такими процессами, запустите командную строку с правами System и попробуйте получить список дескрипторов еще раз. - Теперь вернитесь в командную строку и сбросьте дескриптор файла по полученным HandleID и ProcessID. Формат команды следующий:
handl64e.exe -c HandleID -p ProcessID
Например:
handl64e.exe -c 18C -p 18800
- Утилита запросит подтвердить закрытие файла для указанного процесса. Подтвердите, нажав y -> enter

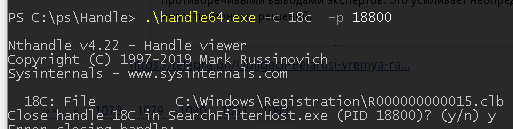
Если система отреагирует на закрытие файла корректно, вы разблокируете ваш файл без необходимости завершать процесс или перезагружать сервер/компьютер.