
Public Wi-Fi are pretty common in hotels and eateries and have been present for quite some time. But it will be a bummer if you’re limited to accessing the Wi-Fi on only one of your devices and you use multiple devices at once. To sort this out, you can use a Windows PC as a router which can be then used to connect multiple devices both wirelessly or using a wire.
1. Enabling Hotspot on Windows Devices
Starting with Windows 10 version 1607 and on Windows 11 as well, Microsoft introduced the native functionality to share your Windows PC’s internet connection using Wi-Fi hotspot with other devices. Here is how you can do it.
Also Read: How to Find Out Your Build and Version of Windows
This method is with the understanding that you have access to the Internet via Wi-Fi or ethernet and your Windows PC can connect to a Wi-Fi network. Most modern PCs have Wi-Fi enabled so this should not be a problem. With this out of the way, let’s get started.
Though we’ve showcased it in effect with an Android, connecting with Wi-Fi is similar in other devices like iOS, Android TVs among others, so it should not pose any problems.
On Windows PC
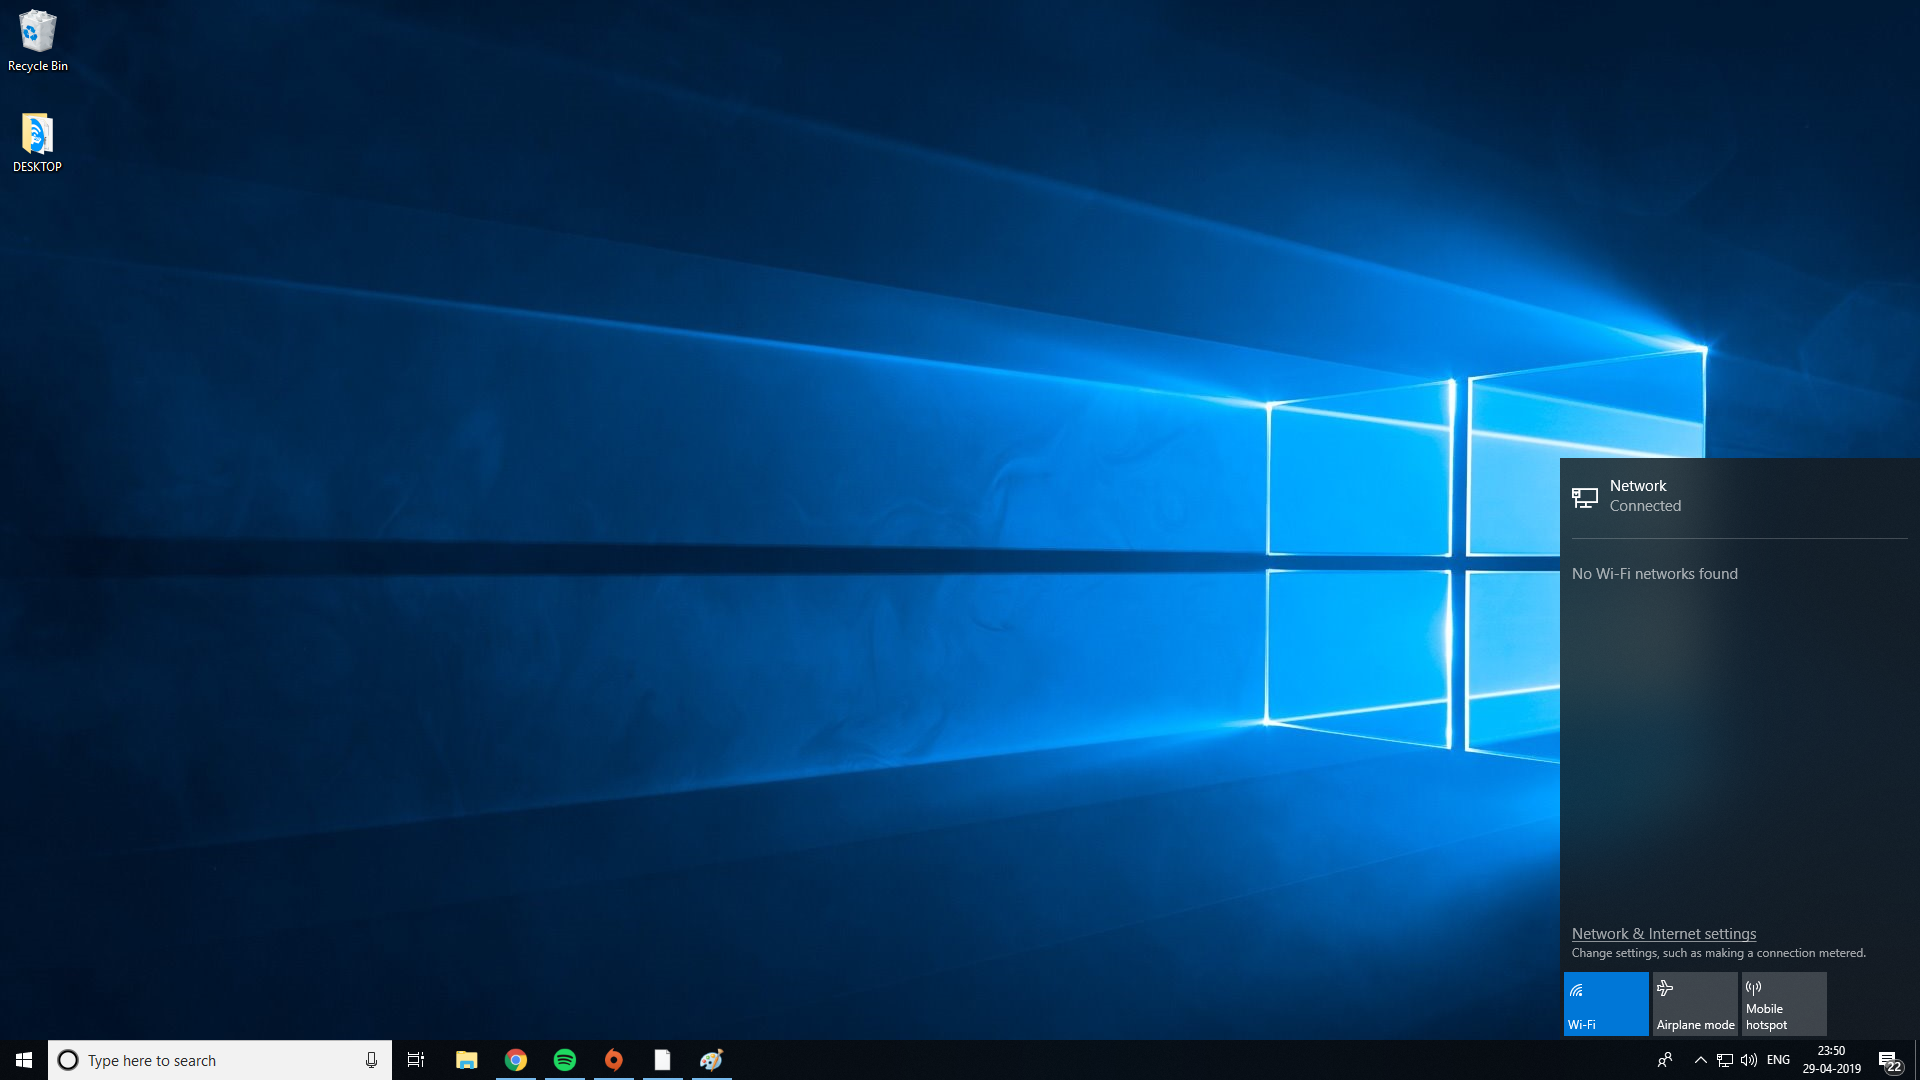
1. Search for Mobile hotspot from the search icon on the taskbar and click on the Mobile hotspot.

Note: If you don’t see the above option then update to the latest version of Windows or use the wired method mentioned in the later part.
2. Mobile hotspot is off by default. Click on Share my internet connection from option to change the source of sharing Internet.

For example, if you select Wi-Fi in the dropdown menu, your Windows PC will share the Wi-Fi network it is connected to with other nearby devices. If you select Ethernet then Windows PC will share that with other devices.
3. Now, click on Share over and select if you’d like to share the Internet using Wi-Fi or Bluetooth. By default, it is set as Wi-Fi and you should leave it as is since Wi-Fi offers faster data transfer speed and better connectivity over longer durations.

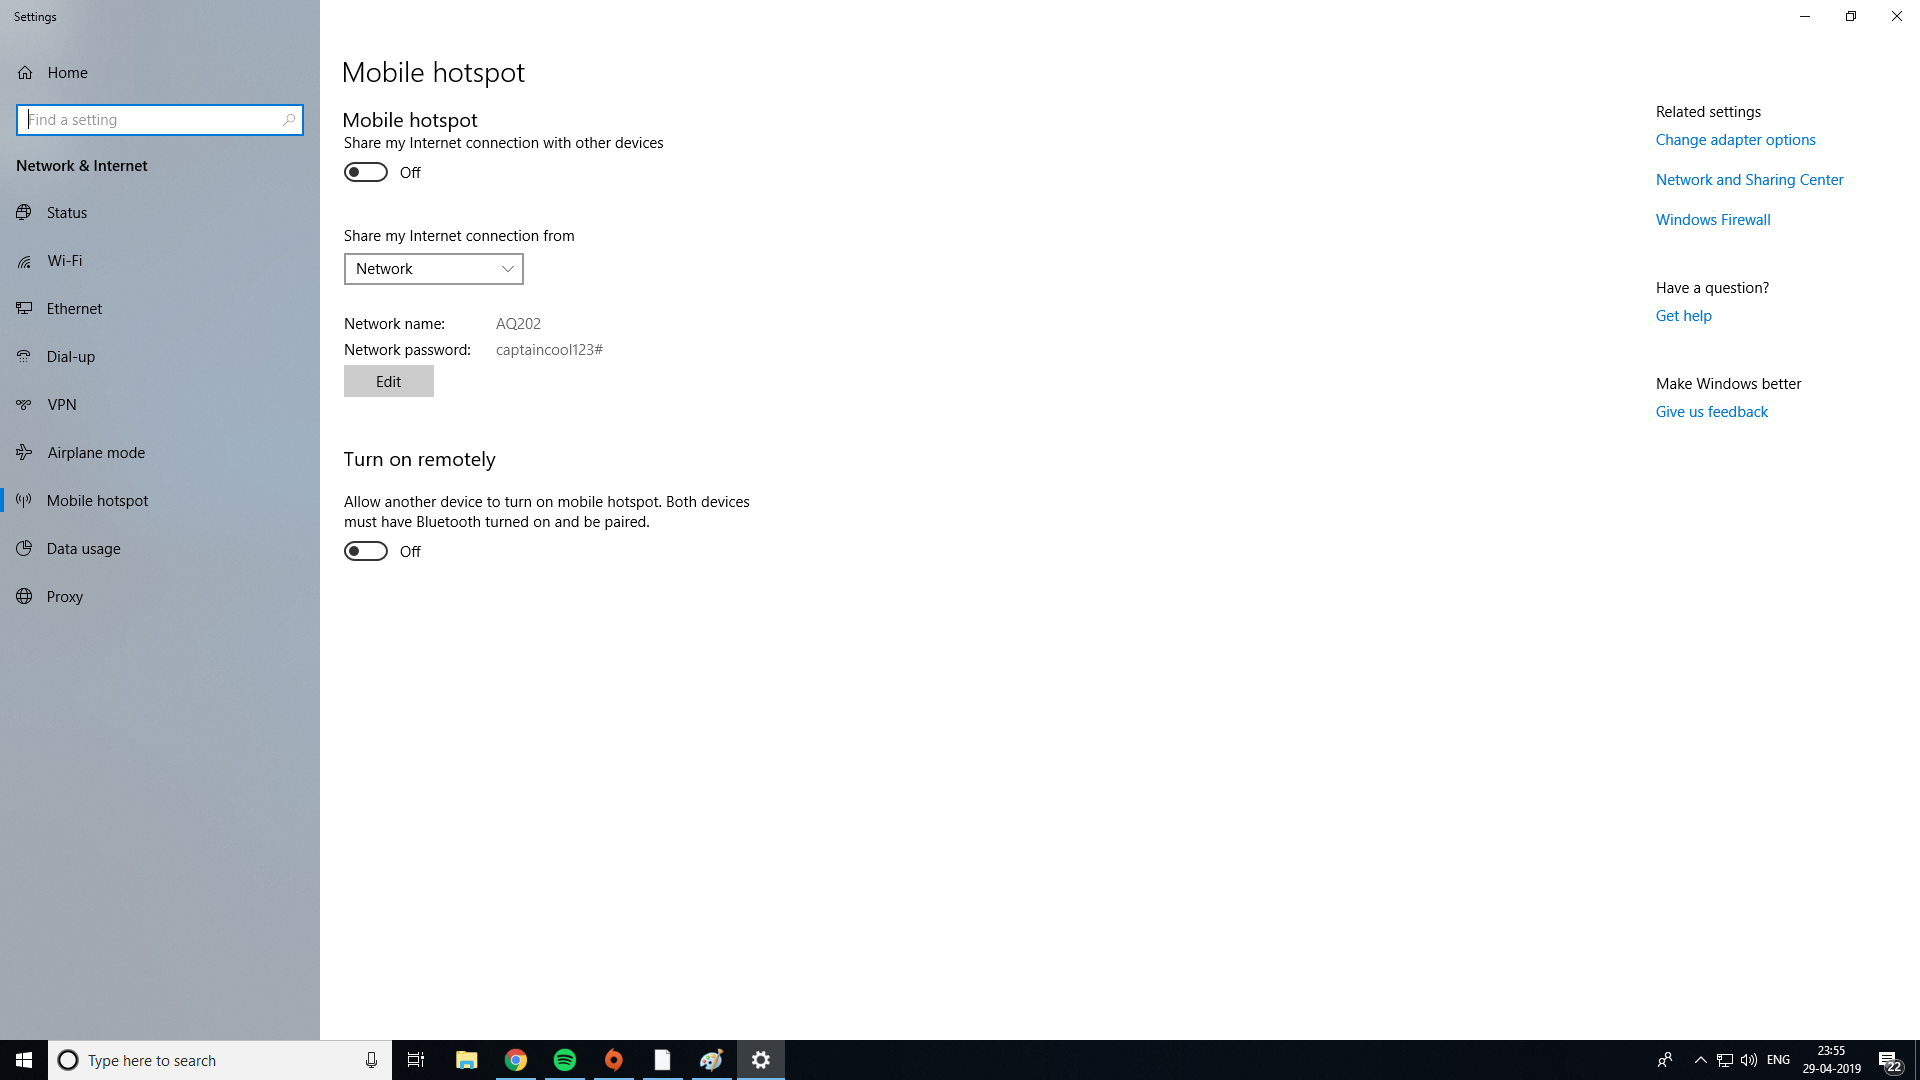
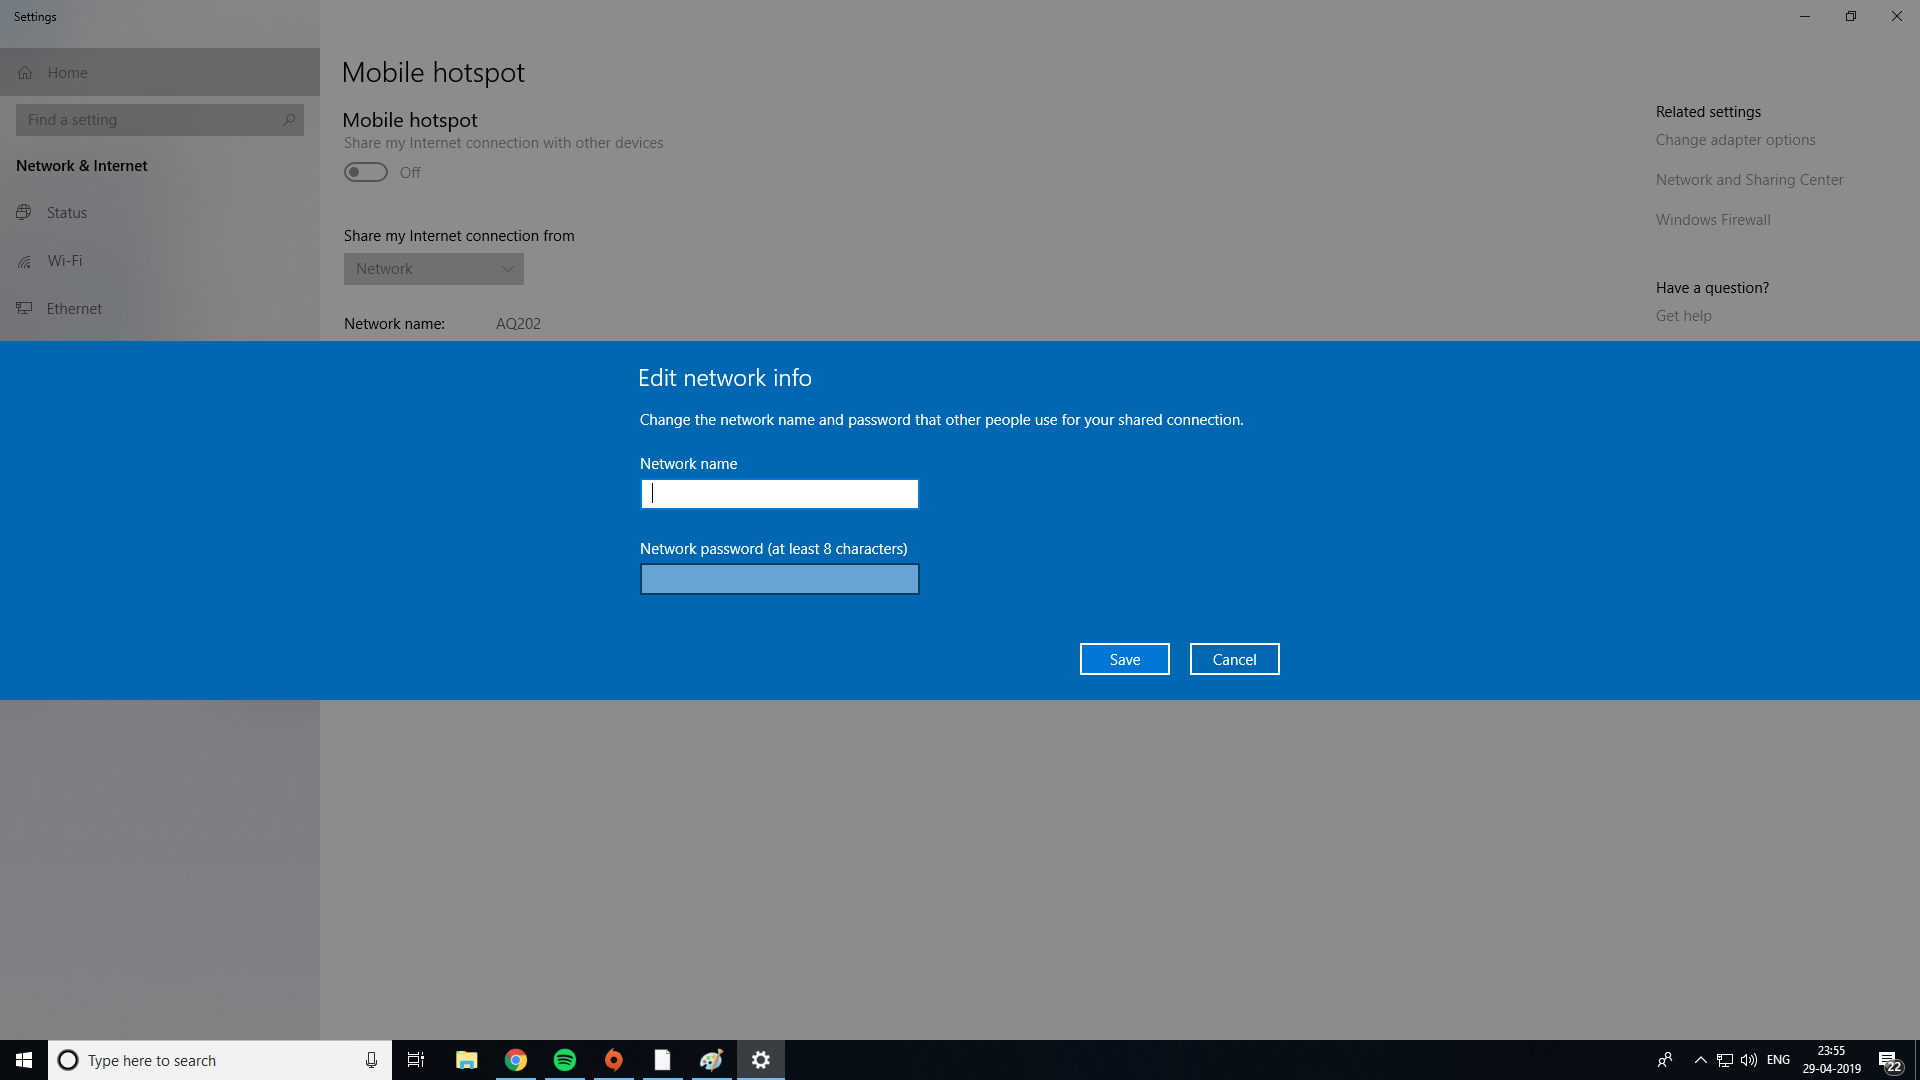
4. In the Properties section click on Edit.

5. Enter the Network Name and Network Password as per your choice and click on Save. These credentials need to be entered in the secondary device when connecting to this shared Wi-Fi network.

6. We’ve left the Network Band option as Any available but you should set it to 5 GHz if you’re also going to use a Bluetooth device alongside the device that is to be connected with this shared Wi-Fi network. And if not then you can leave it as is or set it to 2.4 GHz for a longer range.

7. Enable Mobile hotspot to turn on the shared Wi-Fi network.

Your Windows PC is not ready to be used as a hotspot. Now let’s move to the secondary device that you want to connect to the newly formed Windows hotspot.
On Secondary Device
1. Open Wi-Fi Settings and the device will detect the network created by the Windows PC. Enter the Network Password as set in Windows PC, press on Connect and your device will now connect to the Wi-Fi network created by Windows desktop.

Using this method, you can connect up to 8 devices with your Windows PC hotspot simultaneously.
2. Sharing Internet via Wired Connection
Most users would be able to connect any device to Windows acting as a hotspot using the wireless method above. But if your Windows PC doesn’t have a Wi-Fi adapter or you don’t want to update to the latest version of Windows, you can refer to the wired method using a USB charging cable.
We’ve tested the method on Windows 10 and 11 but it should also work on Windows 7. The caveat is that it only works with Android and Android subsidiary devices like Android TVs, tablets, etc.
The feature is available for quite some time. It is completely open-source, and safe to use which was made possible by the developers of Genymobile on GitHub. We noticed no ads or anything out of order during our testing at the time of writing this article.
On Android
1. On your Android, open Settings, scroll down to the end and tap on About phone.
2. Now select Software Information and tap 7 times on Build Number to enable Developer’s options (you might have to enter your lock screen PIN afterward).

3. Now go back twice to the Settings menu, scroll down, and tap on Developer’s options (sometimes listed under the System tab in some Android phones). From here, scroll down to find USB Debugging and turn it on (there might be a prompt, just tap on OK).

On Windows Device
1. Download the latest version of gnirehtet tool on the Windows PC. It is open source and generally considered safe since it is available on GitHub.
2. In the Releases section on the bottom right, click on the latest release. In our case it is v2.5.1.

3. Click on gnirehtet-rust-win64-v2.5.1.zip to download the tool.

4. Right-click on the downloaded file, then Extract All and press Enter.

5. Download the Android Platform Tools by Google and extract it the same way as well.
6. Move all the files from the folder platform-tools to the folder gnirehtet-rust-win64.

7. Now, type cmd in the address bar of the folder and press Enter to open the command window on your PC.

Connecting Devices
1. Connect your Android with your Windows PC using the USB Charging cable. Then type adb devices in the command window on Windows and press Enter to check for connection.

2. When you press Enter, there will be a prompt on your Android. Mark the option Always allow from this computer and tap on Allow.
3. Now in the command window type adb install -r gnirehtet.apk and press Enter. This would install the gnirehtet app on the Android but it won’t be visible in the app drawer.

4. From the folder containing all the tool files on Windows, locate and open gnirehtet-run executable file.

5. You will get a prompt on the Android to allow for a VPN connection, tap on OK. The phone will now be connected to the web and you can continue browsing.
6. On the command window in PC you will see some IP addresses running with Open and Close, this is the Android accessing the internet for multiple core services. You should keep the command window open in Windows to continue browsing.

7. To end your wired connection press Ctrl+C in the command window.

After the initial set-up is done, all steps are not required every time. You can only run the gnirehtet-run executable file on your PC with your Android connected with it to access the internet the wired way.
Accio Internet!
With this detailed comprehensive guide, now you can connect multiple devices to the Internet even if you forgot to pay your phone bill or the public Wi-Fi allows only one device. Converting your Windows PC into a router will also come in handy when your router is not working properly.
Read this guide if your Wi-Fi is not working but ethernet is.
Nitin Singh
A tech writer during the day and an anime aficionado by the night. When not in front of a screen, he can be seen playing Badminton. Appreciating the beauty of nature is a habit that has been developed since early on. Have views on tech, cars or life? Drop a text!
Readers help support Windows Report. We may get a commission if you buy through our links.
Read our disclosure page to find out how can you help Windows Report sustain the editorial team. Read more
Making the best of your connection was always imperative. If you’re, say, stuck with an outdated modem that lacks Wi-Fi support, you’ll be able to use nothing but the wired connection.
However, no one said that you can’t turn your PC into a wireless router that spreads the joy of the internet to all surrounding Wi-Fi-capable devices (read: every modern device out there).
Because of that, we offer a few ways to take the full potential of your PC and use it as a virtual router. The router that we all need and deserve.
If you’re not accustomed to creating and configuring virtual wireless routers, the steps we provided below should show you how to do it in no time.
How to turn your PC into a Wi-Fi router
- Use Windows Resources
- Use Virtual Router Manager
- Use Connectify Hotspot
1. Use Windows resources
-
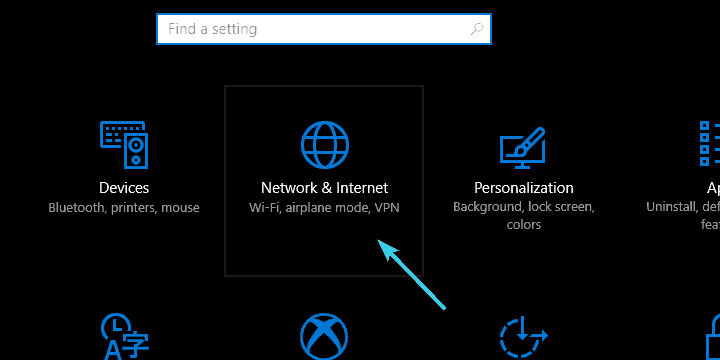
1. Right-click on the Start button and open the Settings app from the options.
-
2. Select Network & internet from the menu that opened.

-
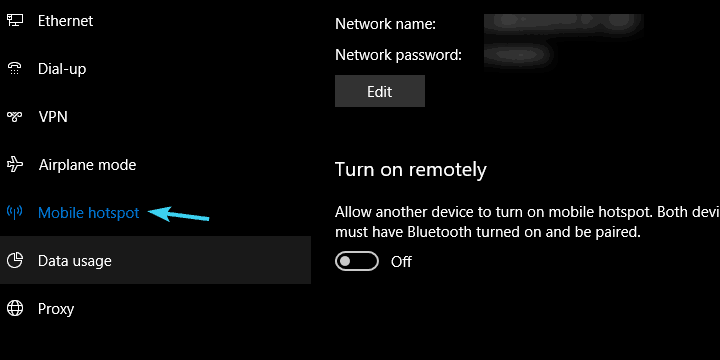
3. From the left pane, select Mobile Hotspot.
-
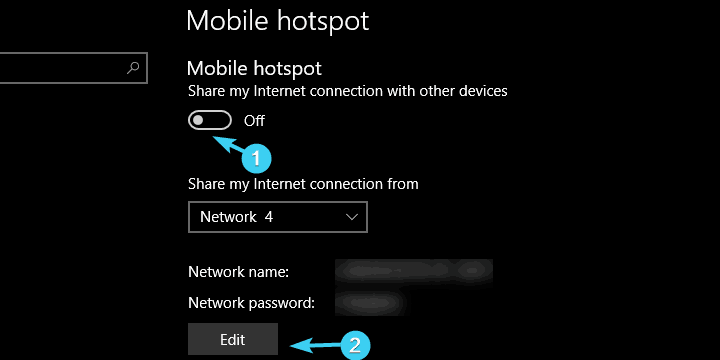
4. Toggle ON the Share my internet connection with other devices setting.
-
5. Click on Edit.
-
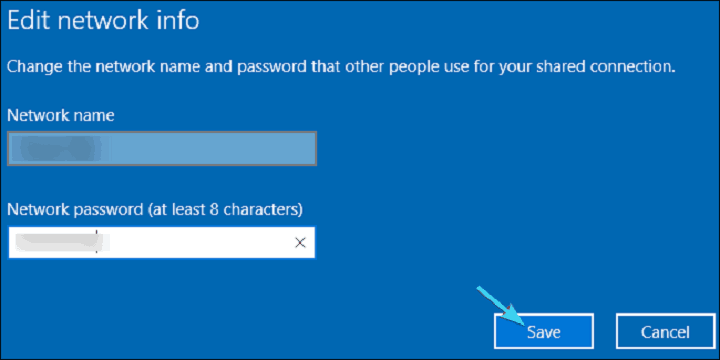
6. Give your newly-created Hotspot a name and set a password, then click on Save.
-
7. Now that your Wi-Fi is set-up, all you need to do is try to connect to it using another device.
After the Windows 10 Anniversary Update, Windows 10 users are able to create a Wi-Fi hotspot with nothing else but system resources. This feature comes in handy in many scenarios and eliminates the need to install various third-party programs in order to share the Wi-Fi or wired connection to other devices.
Basically, everything you need is a Wi-Fi adapter and a few tweaks and you’re good to go.
The procedure is as simple as they come, but we made sure to walk you through in the steps above.
2. Try Virtual Router Manager
If for some reason you’re unable to utilize the built-in mobile hotspot, there are also third-party programs (or rather tools) that should correct that injustice.
There’s a multitude of tools, some better some worse, so we curated them and brought to you the most reliable ones.
The first tool is widely regarded as the best virtual router manager and it’s called, expectedly, Virtual Router Manager.
The tool is completely free and it’s easy to set up.
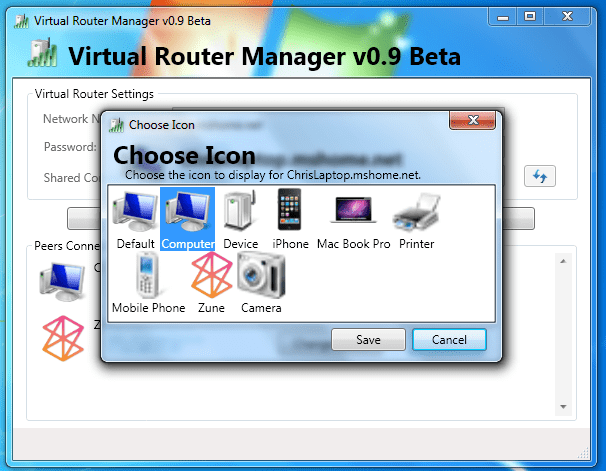
Besides that, it comes with quite a simple and intuitive interface, and it’s light on resources. Here’s how to use it on Windows 10 (or any other Windows version, for that matter):
- Download Virtual Router Manager, here.
- Right-click on the installer and run it as administrator.
- After the installation completes, restart your PC.
- Now, open Virtual Router Manager, name your connection, set the password, and select the shared connection source.
- Click on Start Virtual Router and that should do it.
- In case you’re unable to start the connection, navigate to Network and Sharing center > Change adapter settings.
- Right-click on the connection you want to share and open Properties.
- Under the Sharing tab, check the ”Allow other network users to connect through this computer’s internet connection” box and save changes.
- Try again and it should work like a charm.
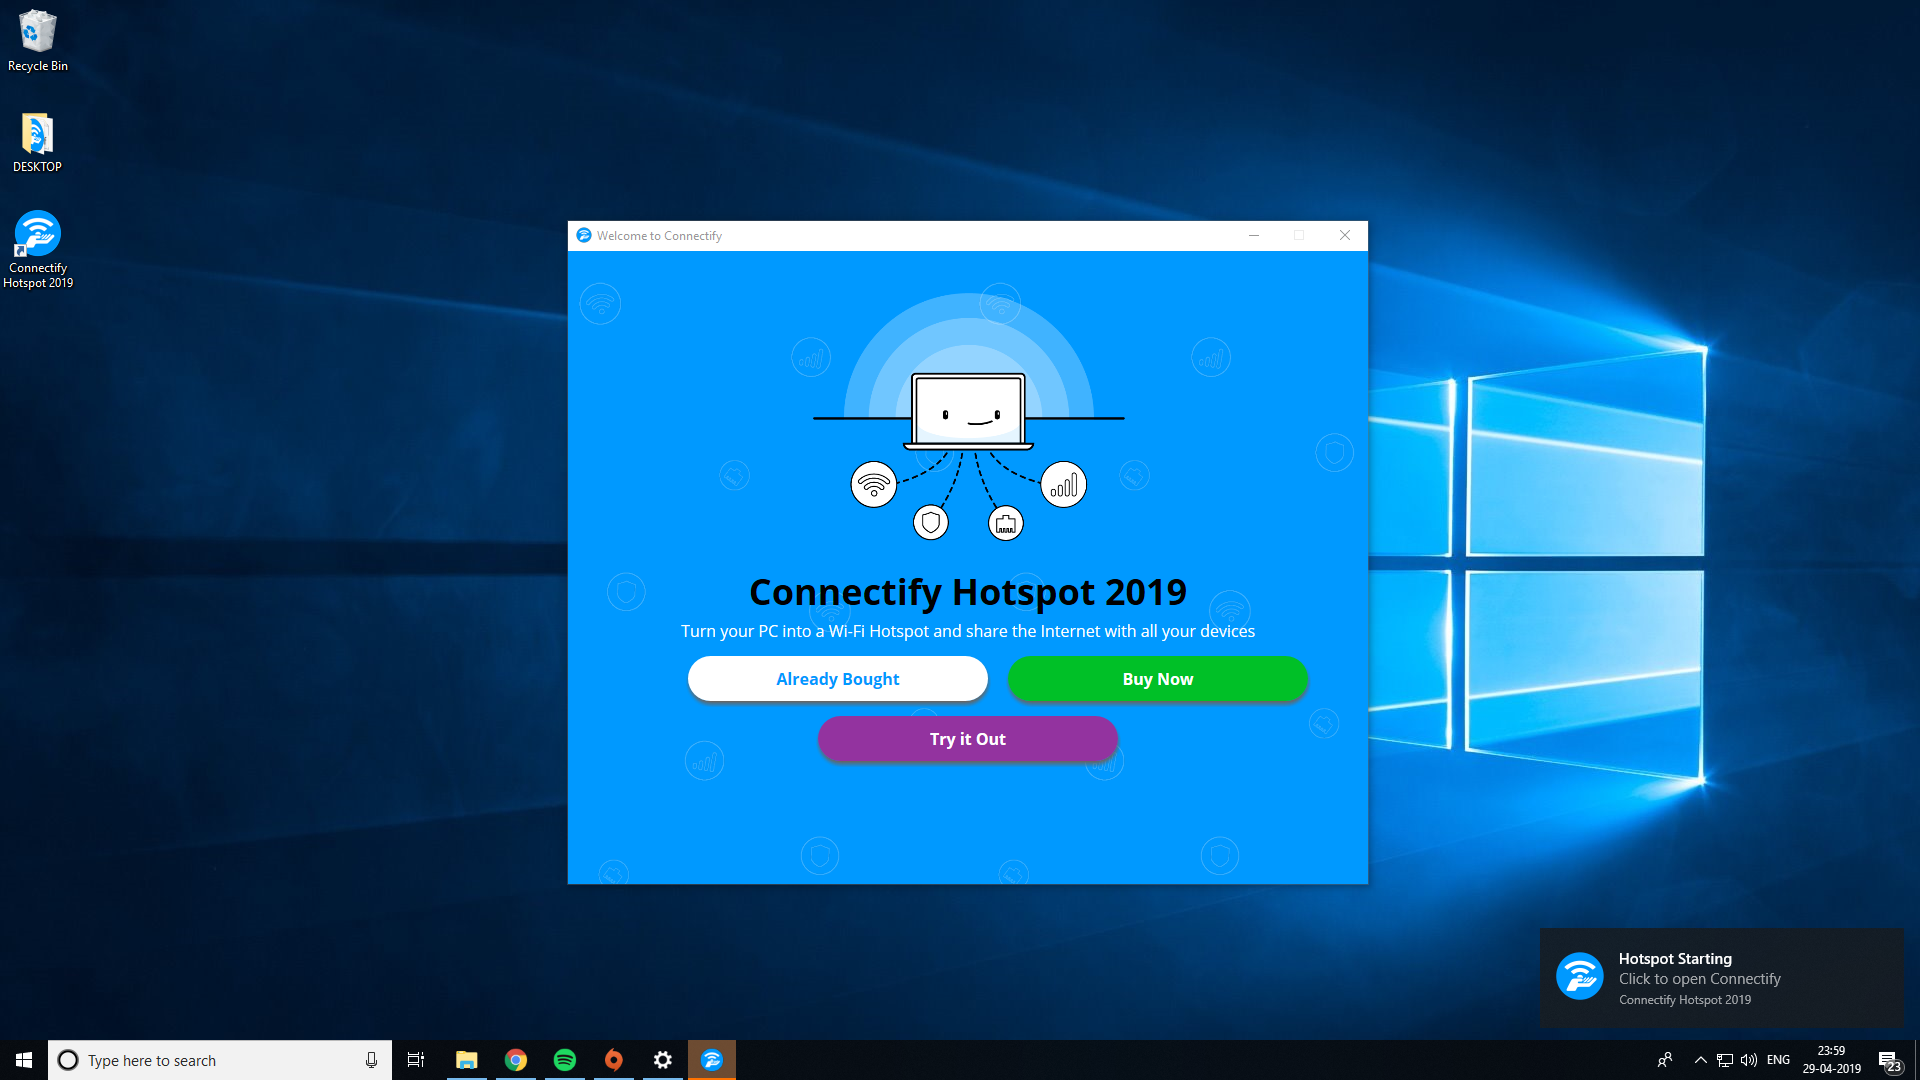
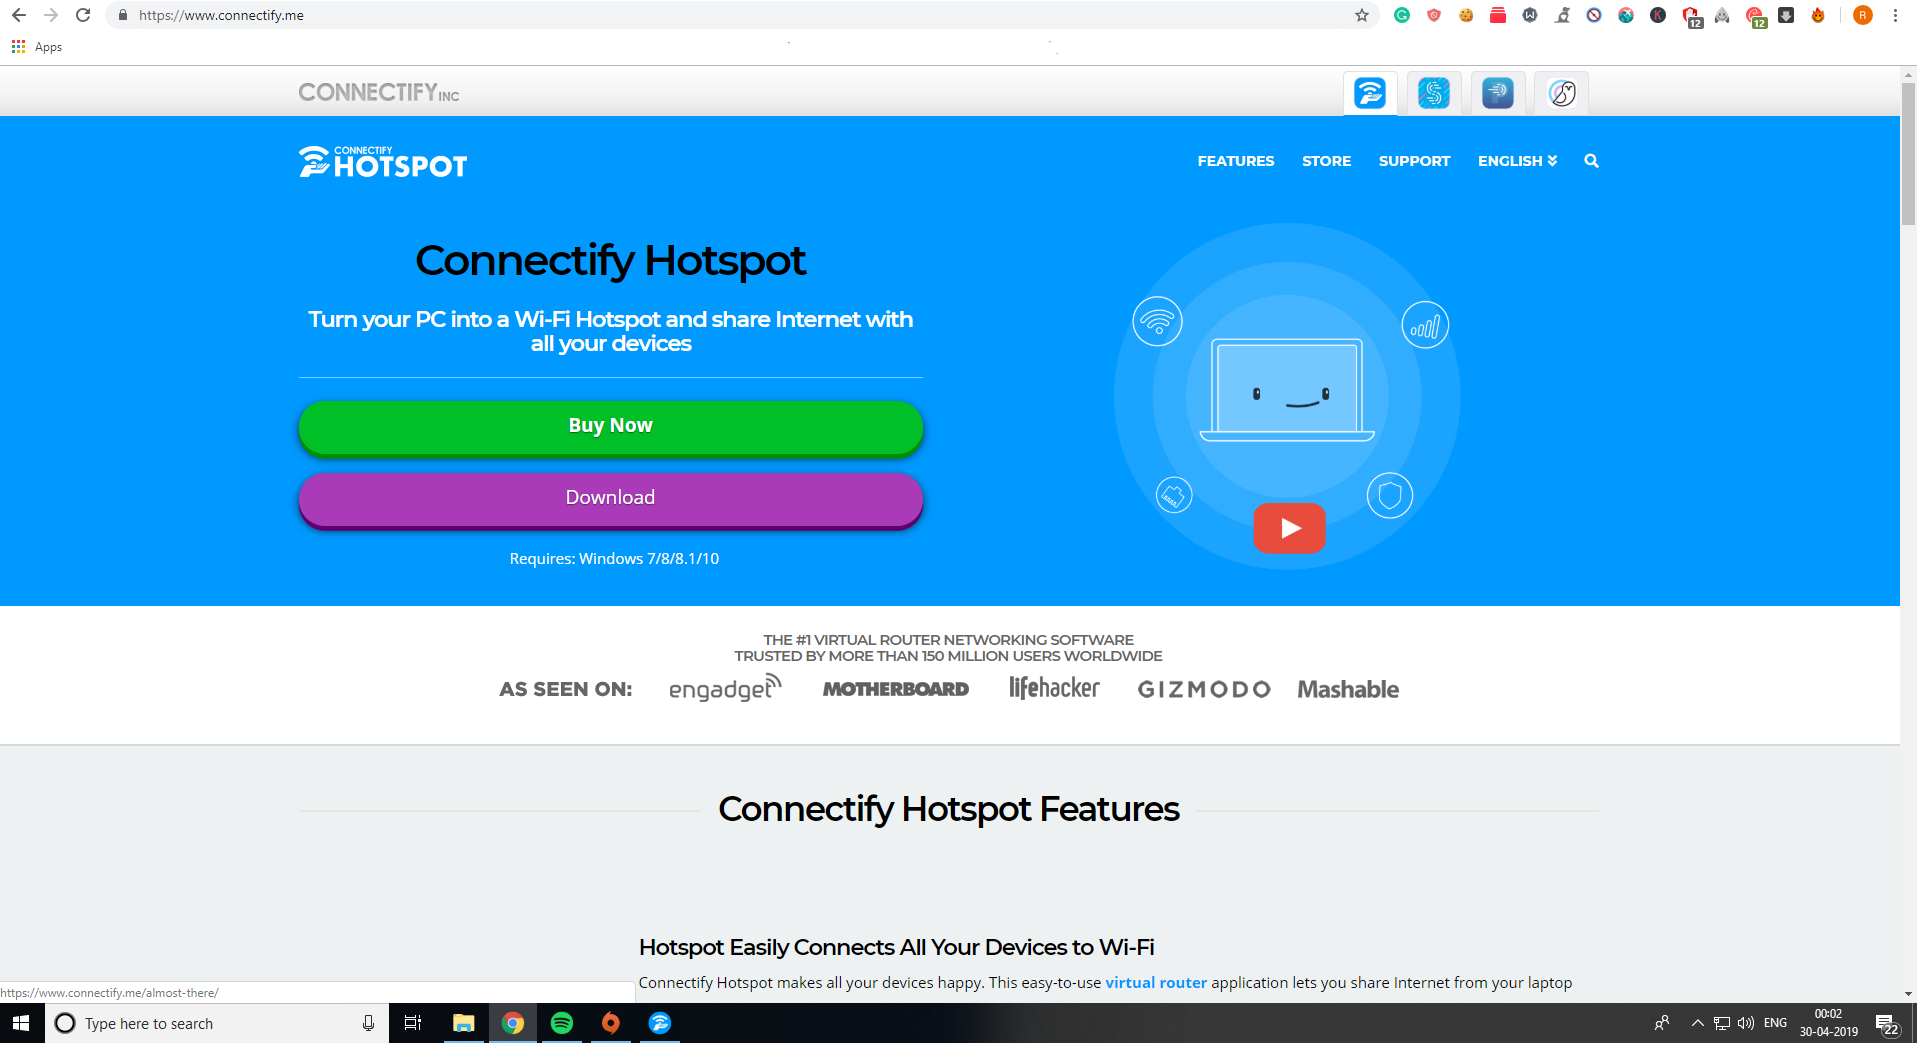
3. Use Connectify Hotspot
The second tool is also quite popular in the virtual routers niche, it’s a freemium tool, and it’s called Connectify Hotspot.
In comparison to Virtual Router Manager, Connectify is a ted more feature-rich and it holds the overall simplicity and intuitive design. However, it can get on your nerves with frequent ads and pop-ups reminding you to buy the premium version.
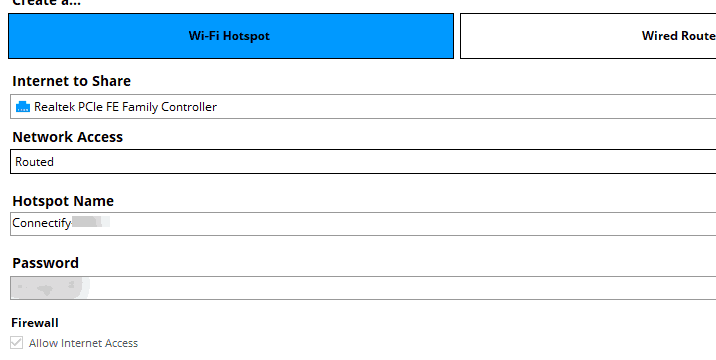
The setup is quite similar, but, just in case you’ve run into trouble, make sure to check the steps below:
- Download Connectify Hotspot
- Right-click on the installer and run it as an administrator
- After the installation ends, restart your PC
- Follow the detailed instructions to configure Connectify Hotspot
- These include naming the hotspot, setting a password, and choosing the default sharing device.
- Click on the ”Start Hotspot” and you should be good to go
The steps listed above should be enough to allow you to use your Windows 10 computer as a router. Now, if your hardware configuration does not allow you to follow the steps mentioned earlier, you can simply install one of these hotspot software solutions on your machine.
Download your software of choice, install and simply follow the on-screen instructions to get the job done.
That should conclude it. Now you should be able to use your PC as a virtual router and spread the Wi-Fi joy to a whole household. Finally, don’t forget to share your questions and suggestions below. We’ll be happy to hear from you.
Aleksandar Ognjanovic
Aleksandar’s main passion is technology. With a solid writing background, he is determined to bring the bleeding edge to the common user. With a keen eye, he always spots the next big thing surrounding Microsoft and the Windows OS.
Focused on Windows errors and how to solve them, he also writes about the OS’s latest features as well as its interface.
In his free time, he likes to read, listen to music, and enjoy the nature. Hiking is one of his newly found passions.
We all know that Windows 10 is one of the most prominent operating system that has been in place for long time. Windows 10 has amassed a large user base because of its amazing features that it offers to the people. One such feature that you are going to be talking about today is how one can use their Windows 10 PC as a makeshift Internet router so that they can share their wired connection of the internet as a Wi-Fi. This way you can save money and spend it elsewhere for upgrade on your PC instead of buying a router. A Windows 10 PC comes with the ability to create a mobile hotspot right off the box.
This way one can easily share the wired Ethernet Internet connection that has been added to their Windows 10 PC for free of cost without having to download any external paid software. The only requirement it or prerequisite to being able to make a mobile hotspot from your Windows 10 PC is that you need to have wireless LAN card.
This wireless LAN card can be in the form of of a simple external USB plug in device or an internal PCI Express Card installed on your motherboard. Most retail personal computers come with a wireless LAN card installed in there PCI Express bay but if that is not the case with your PC you can simply add a Wi-Fi card which can be plugged into any of your USB ports.
Contents
- EXTERNAL SOFTWARE FOR WIFI HOTSPOT FROM PC
- FEATURES OF CONNECTIFY ME
- CONS OF CONNECTIFY ME (FREE)
- HOW TO TURN YOUR PC TO A ROUTER FOR MOBILE HOTSPOT
- Here are the steps to use connectify –
EXTERNAL SOFTWARE FOR WIFI HOTSPOT FROM PC
Sometimes the the inbuilt software for making a mobile hotspot does not work to its fullest extent and you are left without Wi-Fi connection for your other devices. In order to combat that problem we are also going to be having a look at an external software that can act as a backup plan in case the inbuilt software does not work to its maximum productivity. The backup application that we are going to be talking about today Goes by the name of connectify-me. The connectify me application is free of cost to use only for wired connection but if you want to use all of its features then you would have to pay for it services. In my opinion the connectify me services are a full proof solution to creating a hotspot from your PC at all time. Thus if you are a business service who wish to spend less on Wi-Fi routers and Wi-Fi repeaters then the connectify me service is for you. For personal uses the free connectify me service is absolutely efficient.
FEATURES OF CONNECTIFY ME
Here are the features that you are going to be getting once you download and install the connectify me software –
- With connectify me free version you can easily add your own password to your wireless connection.
- Creating a mobile hotspot from your PC is made easier with connectify me.
- At the same time 8 devices can be connected to the mobile hotspot that you create through your PC.
- Even if 8 devices are connected together on the connectify-me Hotspot you can still get adequate speed on each of the devices.
- The connectify-me application comes with an ad blocker of its own so that you don’t have to you see any advertisements on the devices that are running internet through the mobile hotspot.
- With paid version of the application you can easily hide your IP address as well as your location and be anonymous on the internet.
CONS OF CONNECTIFY ME (FREE)
The free version of connectify me obviously doesn’t offer all of its features. Here are some of the cons that we could find out in the free version of the application –
- Users can’t select the name of the mobile hotspot using the connectify me free version.
- You can’t use connectify me as Wi-Fi repeater as it’s a pro only feature.
- One can’t change the network access type while setting up the mobile hotspot connection using the free version of connectify me.
HOW TO TURN YOUR PC TO A ROUTER FOR MOBILE HOTSPOT
Here are the steps for the inbuilt software feature –
- Make sure wired internet connection is working.
- Click on the network icon on your PC.
- Click on the mobile hotspot icon.
- On the first time you would be required to setup your SSID and password.
- After doing so your mobile hotspot would be up and running.
Here are the steps to use connectify –
- Download connectify me from the given link – http://downloads.connectify.me/
- After installing the application you would be required to restart your computer for adding network changes.
- Select the network that you want to share and change your connectify me Hotspot password.
Many of us are unaware that our laptops, like our smartphones, can broadcast Wi-Fi. We are not likely to concern ourselves with the feature when we are at home and using our Wi-Fi routers. However, it can come in handy when trying to get our devices online when we are on the go.
This article will look at creating a virtual router in Windows 10 and Windows 11. You will learn how to use your laptop to generate a Wi-Fi hotspot and share your internet connection with other devices.
Why Create a Virtual Wireless Router?
Turning your laptop into a virtual router is helpful in several scenarios. They include:
- Extending the range of your internet signal
- Staying in a hotel room or at an airport
- Locations that only have a wired Ethernet connection
Can My Windows Computer Be Turned Into a Virtual Router?
Before initiating the process, it’s important to make sure that your device can broadcast Wi-Fi signals. It’s easy to verify this. Simply follow the steps below:
- Press the Win+S shortcut keys.

- Type in “cmd” in the search bar.
- Scroll to “Command Prompt” and click on that.
- Type netsh wlan show drivers into Command Prompt.

- Click “Enter.” Your network drivers will be displayed.

- Ensure that “Yes” follows “Hosted network supported.”


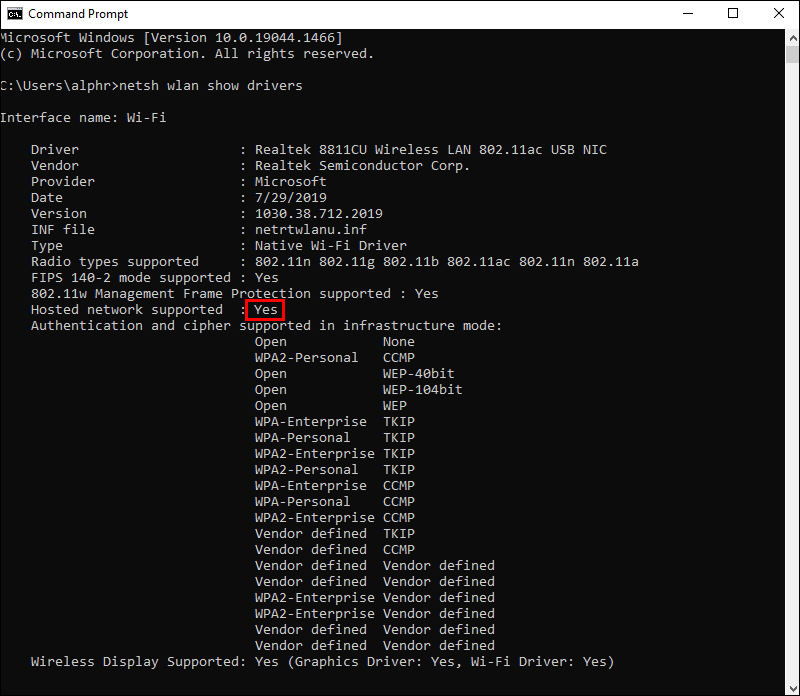
This means that you’re good to go and can broadcast a Wi-Fi signal in Windows 10. If the statement is followed by “No,” however, you will unfortunately not be able to create a virtual router using your device.
Microsoft Windows has a virtual Wi-Fi tool to create and manage a virtual wireless network. You, therefore, will not need to buy additional software to activate the Wi-Fi hotspot feature.
However, you may find it easier to use software to set up your virtual router in Windows 10. Here, we will show you two methods you can use to turn your laptop into a Wi-Fi hotspot.
Setting Up Virtual Router Using Software
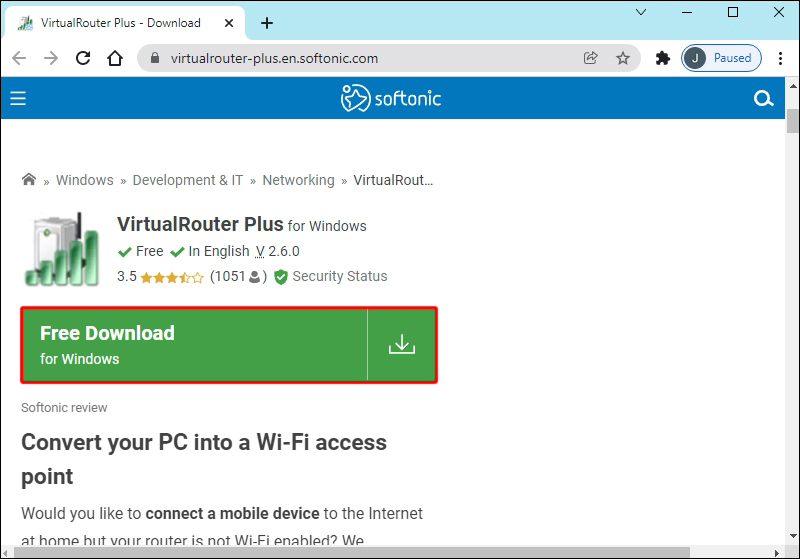
One of the easiest ways to create a hotspot on Windows 10 is using third-party software. Programs like Virtual Router Plus can be downloaded onto your computer and utilized to automate the process.
Follow the steps below to set up your virtual router using software:
- Download your preferred virtual router software.

- Install and open the program.

- Most programs will give you a menu where all you need to do is input the name of the network and the password.

- Launch the program.


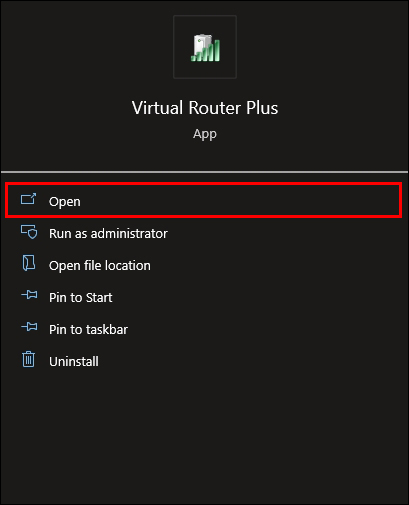
Your network should now be visible to other devices.
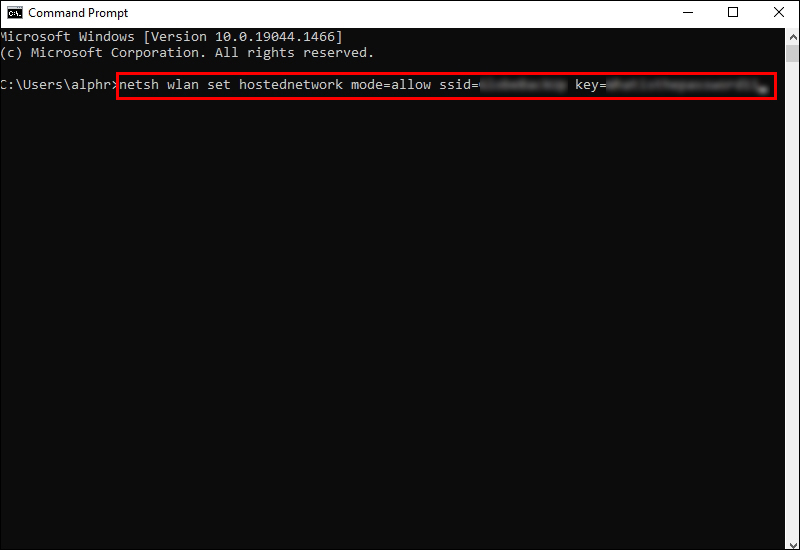
Setting Up Virtual Router Using the Command Prompt
If you would like to manually create a virtual router for Windows 10, you can do this using the Command Prompt. Follow the below steps:
- Type in “cmd” in the Windows search bar.
- Open Command Prompt as “admin” by right-clicking on it.
- To input the settings of your virtual router, type out the command below:
netsh wlan set hostednetwork mode=allow ssid=XXXXX key=YYYYY
In place of XXXXX, type in the name of your network.
In place of YYYYY, type in your password.
- Press “Enter.”
- You can now launch your virtual router using the command below:
netsh wlan start hostednetwork
- You can disable the virtual router using the command below:
netsh wlan stop hostednetwork


You have now successfully set up your virtual router on Windows 10.
Troubleshooting
If you encounter problems starting the network, your drivers might require an update.
To update your drivers, follow the guidelines below:
- Press Win+X and select “Device Manager.”

- Click the arrow pointing to “Network Adapters.” It will display a list of the network adapters available.
- Find your primary network adapter and right-click on it.

- Select “Update Driver Software” to check if any updates are available.

- Update the software if that is required.


How to Setup a Virtual Router in Windows 11
You can use two different methods to turn your Windows 11 device into a virtual router.
The first is through “Settings.”
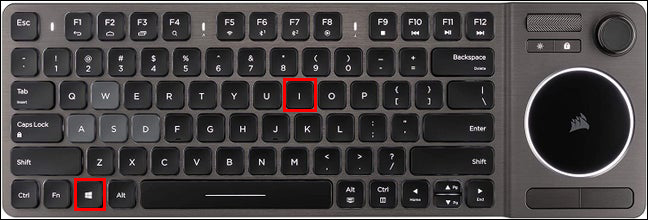
- Press Win+I to open “Settings.”

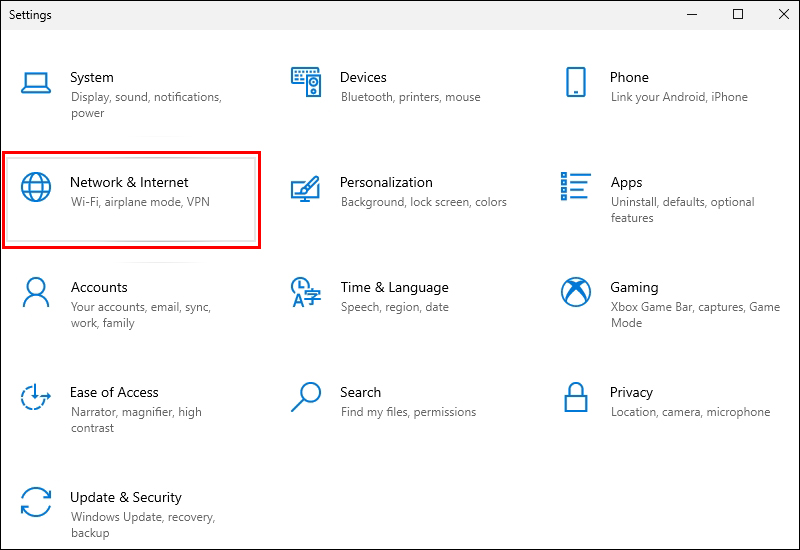
- Click on “Network & Internet.”
- Toggle to turn on the “Mobile Hotspot” option on the right pane.
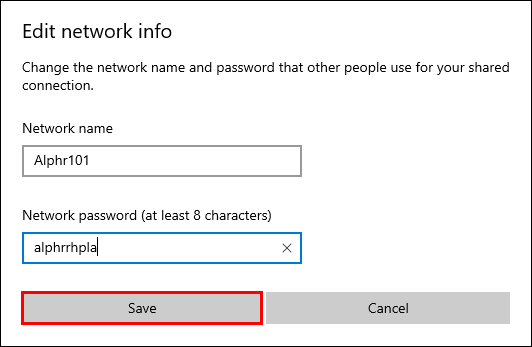
- Within the “Mobile Hotspot” category, click “Edit” to configure the network name and password.
- Input the name and password of your choice and then click on “Save.”


You have now successfully set up a virtual router in Windows 11.
If you would prefer to use a third-party app to set up your virtual router, then these are the steps to follow:
- Download and install your third-party app.
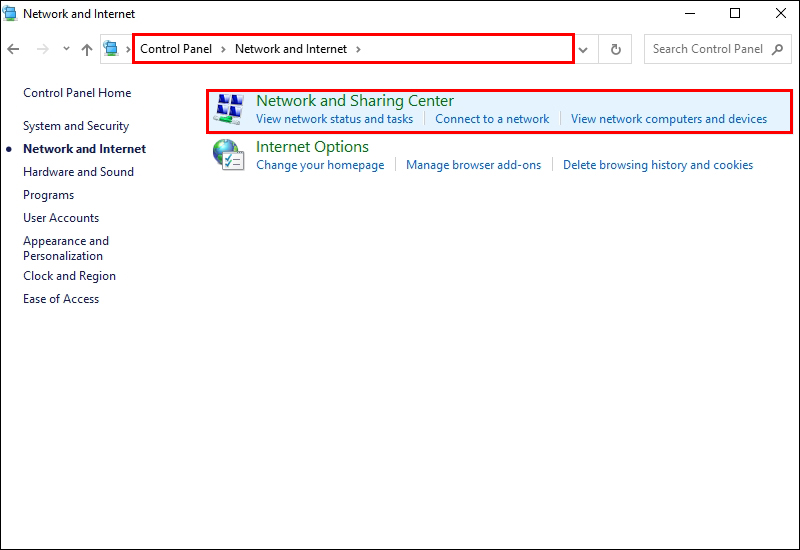
- Go to your control panel and navigate to “Network & Internet” and then “Network & Sharing Center.”
- Click on “Change Adapter Settings.”
- Right-click on the network you are connected to and then click on “Properties.”
- Click on the “Sharing” tab and select “Allow other network users to connect using this computer’s internet connection.”
- Click on the “Apply” button. Your computer’s network can now be shared.
- On your Windows 11 computer, open the third-party app.

- Select the network for which you enabled sharing.
- Launch the app.


Your device should now be able to work as a virtual router in Windows 11.
Setting Up VPN Connection on a Virtual Router in Windows
Some devices don’t have the built-in software required to set up Virtual Private Network (VPN) connections. These include gaming devices, TV players, etc. You can, however, use a virtual router to connect them to VPN networks. If this is why you want to create a virtual router in Windows, follow the guidelines below to connect your devices.
- Download and install your VPN software. Make sure that it’s not connected.

- Go to “Settings” and select “Mobile Hotspot.”
- Click on “Share my internet.”
- Select a suitable name and password for your network.

- Scroll to “Related Settings” and click on the “Change Adapter” option.
- Make a note of the “Wi-Fi” and “Local Area Connections” that have the green bars indicating they are connected.

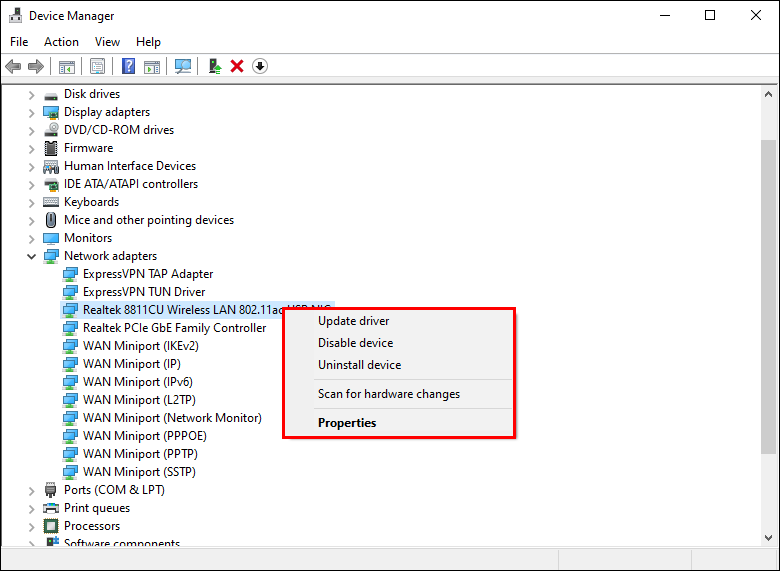
- Right-click on the option that says “XXXX TAP Adapter.” The XXXX will be the name of your preferred VPN software.
- Click on the “Sharing” tab and go to “Allow other users to connect.”
- From the dropdown menu, select the “Local Area Connection” noted down earlier.
- Click on “OK.”
- Now, you can open your VPN program and connect to your desired server. Your virtual router will now work only when the VPN is connected and turned on.

- On your device, you can now connect to the virtual router.


Creating a Virtual Router in Windows
Turning your laptop or PC into a virtual router can come in very handy, especially when you are in a pinch. Learning how to set up a virtual router in Windows means you no longer have to worry about finding a wireless router when looking to extend the range of your internet signal. You can also easily connect one or more devices to one internet source while traveling.
Have you encountered problems connecting to the internet while on the road? Let us know in the comments section below.
Устройство A (Windows 10 Pro) с 192.168.1.10/24 (локальная сеть) и 172.16.3.37 (VPN-подключение к устройству B).
Устройство B — Кинетик (192.168.43.1/24) c VPN-сервером.
Необходимо организовать доступ с Устройства B к сети Устройства A (192.168.1.0/24).
На Устройстве А:
- прописал маршрут до сети Устройства B:
route add 192.168.43.0 MASK 255.255.255.0 172.16.3.37 if 33, где 33 — интерфейс VPN-подключения
Устройство B c Устройства А доступно:>tracert 192.168.43.1 Трассировка маршрута к 192.168.43.1 с максимальным числом прыжков 30 1 10 ms 10 ms 15 ms keen.home [192.168.43.1] Трассировка завершена. - отключил Сетевой экран Касперского; системный фаервол отключен
- включил через реестр
IpEnableRouter - включил службу «Маршрутизация и удаленный доступ»:
Set-Service RemoteAccess -StartupType Automatic; Start-Service RemoteAccess - включил форвардинг:
Set-NetIPInterface -Forwarding Enabled
На Устройстве B прописал маршрут до сети Устройства А через VPN-интерфейс:
192.168.1.0/24 via 172.16.3.37 dev sstp1
Трассируюсь с Утройства B до Устройства A по его локальному адресу:
traceroute to 192.168.1.10 (192.168.1.10), 30 hops max, 38 byte packets
 1  172.16.3.37 (172.16.3.37)  11.659 ms  13.345 ms  *
 2  *  *  *
 3  *  *  *
— дальше VPN-интерфейса (172.16.3.37) не проходит…
Пожалуйста, подскажите, в рамках использования клиентского Windows задача не выполнима?
Спасибо!
—
UPD
включил форвардинг:
Set-NetIPInterface -Forwarding Enabled
Не очень правильно для всех интерфейсов включать форвардинг, поэтому поправился и включил на Устройстве А форвардинг только для VPN’а:
Set-NetIPInterface -Forwarding Disabled
Set-NetIPInterface -ifIndex 33 -Forwarding Enabled
После этого включил на Устройстве А Wireshark и начал отслеживать icmp для локальной сети Устройства А.
Далее с Устройства B (192.168.43.1) пингую Устройство А (192.168.1.10).
sending ICMP ECHO request to 192.168.1.10...
PING 192.168.1.10 (192.168.1.10) 56 (84) bytes of data.
--- 192.168.1.10 ping statistics ---
5 packets transmitted, 0 packets received, 100% packet loss,
0 duplicate(s), time 5002.70 ms.
Пинг не проходит, но при этом на Устройстве А по захвату icmp вот такая картинка:

Т.е. локальный интерфейс Устройства А отвечает Устройству B, но Устройство B ответ этот почему-то не получает, хотя соответствующий маршрут на Устройстве А имеется.
При этом с Устройства А прямой пинг на Устройство B проходит:
>ping 192.168.43.1

Обмен пакетами с 192.168.43.1 по с 32 байтами данных:
Ответ от 192.168.43.1: число байт=32 время=13мс TTL=64
Ответ от 192.168.43.1: число байт=32 время=11мс TTL=64
Что я не докрутил или перекрутил?..
—
UPD2
В общем, поменял SSTP на WG и включил форвардинг:
Set-NetIPInterface -ifIndex 33 -Forwarding Enabled // форвардинг для VPN’а
Set-NetIPInterface -ifIndex 9 -Forwarding Enabled // форвардинг для физического интерфейса локальной сети
Проблема решилась. Всем спасибо!