
Что такое синхронизация и как она работает
При включении компьютера запускается Центр синхронизации Windows. При работе синхронизация всегда выполняется в фоновом режиме для сохранения копий сетевых файлов и папок для последующего их использования в автономном режиме.
Эта функция полезна, если вам нужен доступ к сетевым файлам, даже если вы не подключены к сети. Центр синхронизации может нагружать память устройства, а при повсеместном распространении Интернета функция может быть не актуальной.
Если синхронизация более не нужна, ее можно отключить. Описанные методы могут работать только для определенных версий Windows.
Как отключить синхронизацию на Windows
Через панель управления
В Windows 10 можно отключить Центр синхронизации за несколько шагов:
-
Через системный поиск найдите Панель управления и запустите её.
-
Нажмите на выпадающее меню у строки «Просмотр» => Центр синхронизации.
-
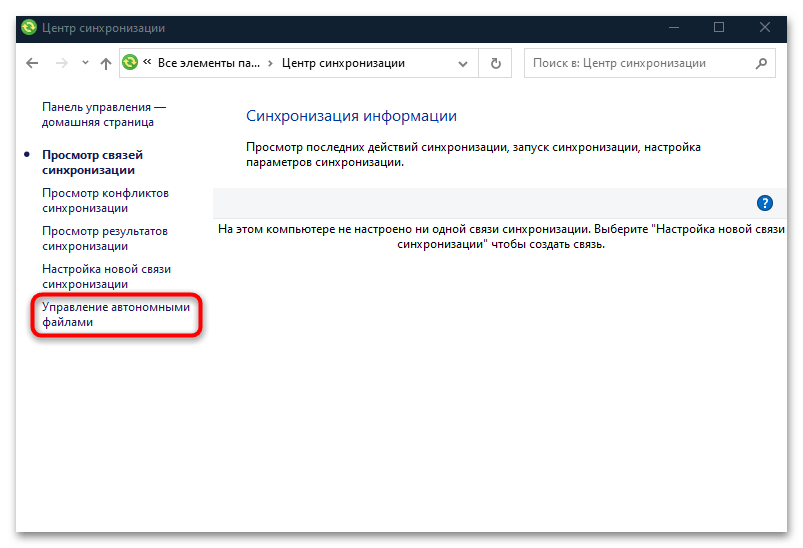
В новом окне на панели слева кликните по строке Управление автономными файлами.
-
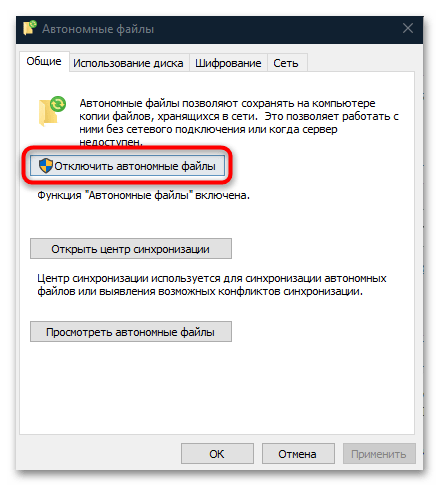
Нажмите на «Отключить автономные файлы», затем подтвердите настройки, нажав на «ОК» внизу. Перезагрузите компьютер.
Через редактор групповой политики
-
Нажмите на сочетание клавиш Win + R, чтобы вызвать диалоговое окно Выполнить. Потом в строке Открыть выполните команду
gpedit.msc, нажав на кнопку ОК. -
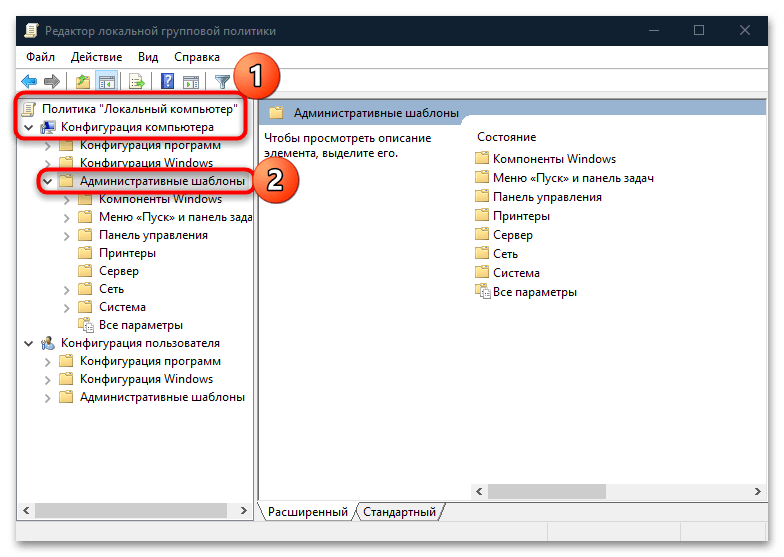
На панели слева в разделе Политика «Локальный компьютер» => Конфигурация компьютера => Административные шаблоны.
-
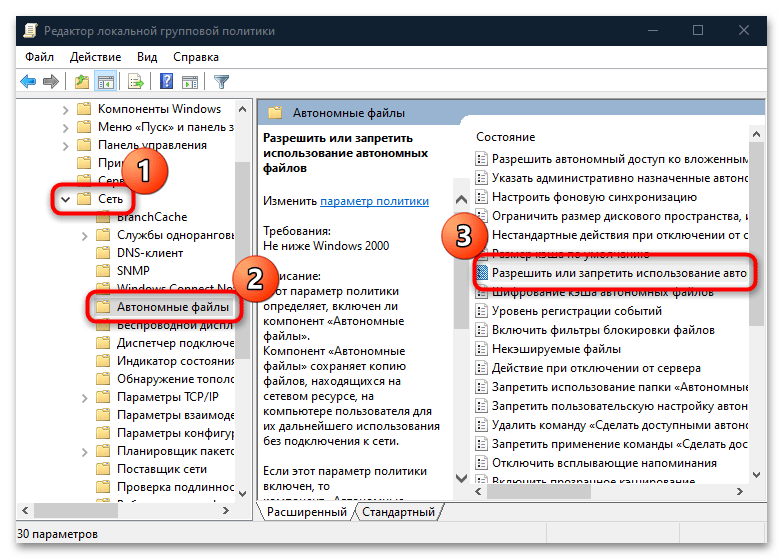
В папке Сеть нажмите на Автономные файлы, а в центральной части окна в списке найдите строку Разрешить или запретить использование автономных файлов и дважды кликните по ней.
-
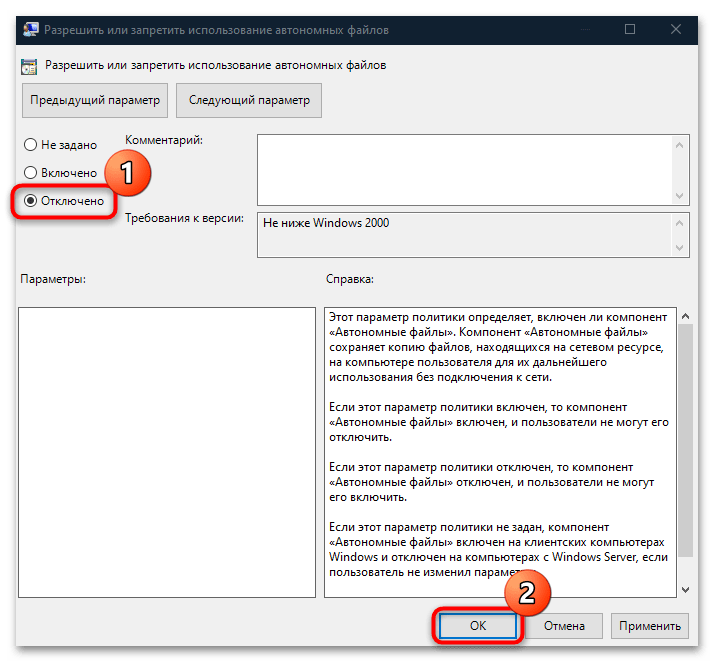
Отметьте пункт Отключено в новом окне, затем примените и сохраните настройки.
-
После редактирования параметров локальной политики закройте редактор и перезагрузите систему.

Источник фото: freepik.com
What is Sync Center? How to use Sync Center Windows 10? How to use Sync Center to sync files or folders? This post written by MiniTool shows you the answers. In addition, a Sync Center alternative – MiniTool ShadowMaker will be introduced.
What Is Sync Center?
Nowadays, data security is becoming more and more important, so more and more people choose to back up their files. To back up files, people can choose to create a backup image, save files to another location like an external hard drive, sync files to OneDrive or other locations, etc. To sync files, there is a built-in file sync program provided in Windows 10 and it is Sync Center.
Sync Center is a feature that was introduced in Windows Vista, and it has been supported in all modern versions of Windows. Sync Center is mainly used to copy network files and folders always in sync between the local computer and network servers, and to keep these files offline available on your computer, even when your server is slow, not connected or unavailable
With Sync Center, you are able to access a replica of the network files on your local computer even when the system is not linked to any network. That is to say, you can see all data made offline at anytime. Sync Center also allows you to maintain information accessible when syncing between your system & those files located in your network servers or cloud drives. By default, if the computer is not connected to the network drive, the network folder online is empty.
So, in this article, we will show you how to use Sync Center Windows 10.
How to Use Sync Center Windows 10?
In this part, we will show you how to access and use the Windows 10 Sync Center to manage offline files.
Now, here is the tutorial.
Open Sync Center Windows 10
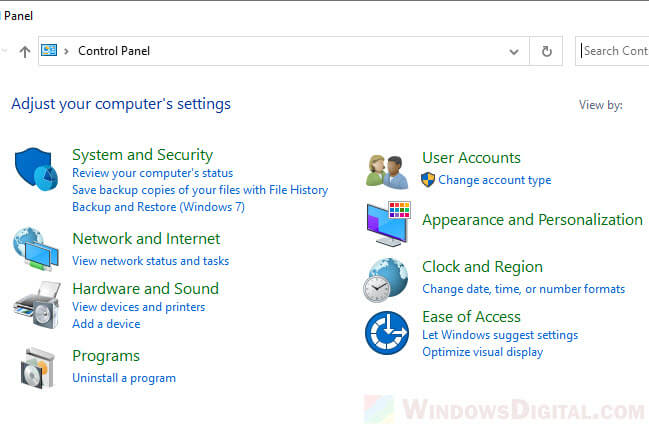
- Open Control Panel.
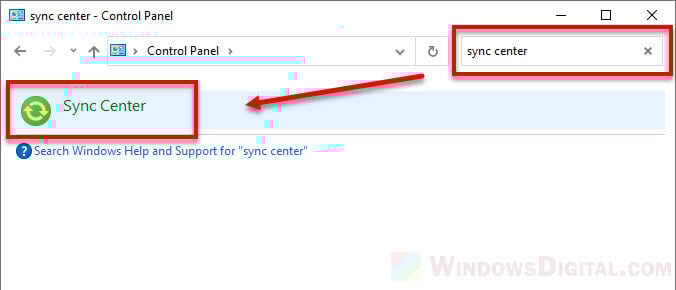
- Click Sync Center to continue.
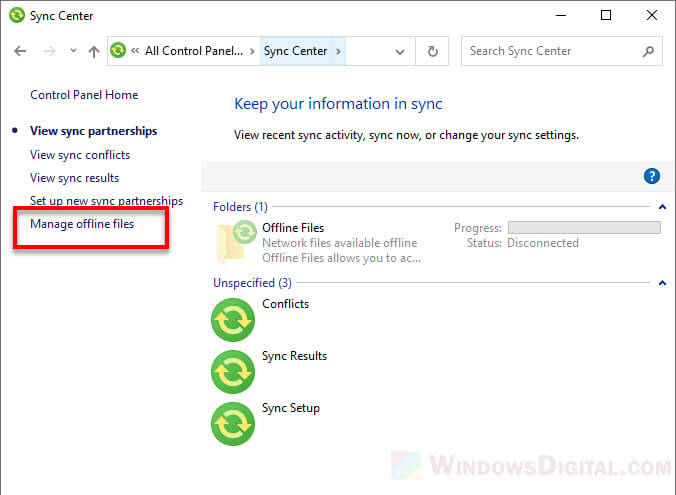
- In the pop-up window, click Manage offline files from the left panel to continue.
- Then click Enable offline files to open Windows 10 Sync Center.
Then it may require you to reboot your computer to take the changes into effect. If not, do it manually.
If you want to sync folders Windows 10 or manage offline files on your local hard drive, the shared folder on a network server is required. So, here is the tutorial on how to create the shared folder on a network server.
Create a Shared Folder
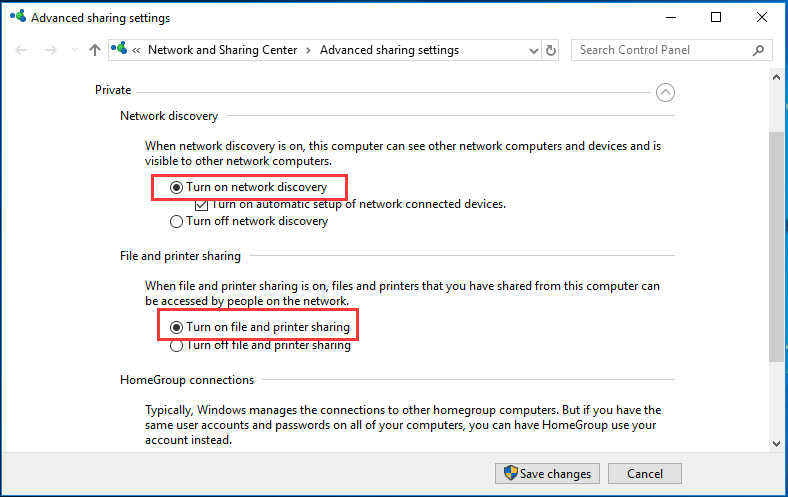
1. Go to Network and Sharing Center and click Sharing Options.
2. Check the three options: Turn on network discovery, Turn on file and printer sharing and Turn off password protected sharing.
3. Then click Save changes to continue.
Once all steps are finished, you can begin to create a shared folder on the network server.
4. Right-click the folder you want to share and choose Properties.
5. Switch to the Sharing tab and choose Share….
6. Add Everyone to share with and give it Read/Write control.
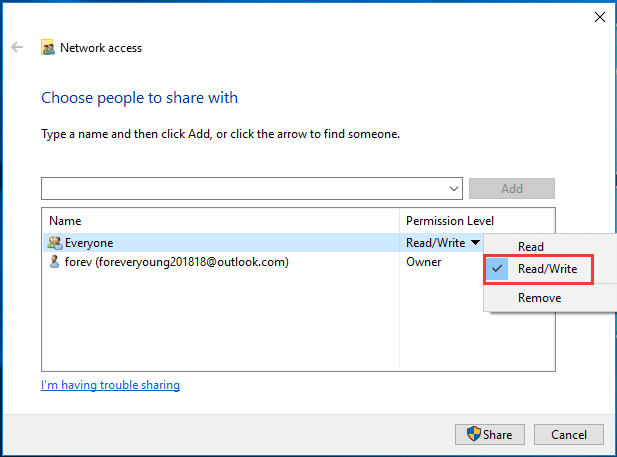
7. Then click the Share button to continue.
8. Then go back to the Sharing tab and choose Advanced Sharing to continue.
9. Next, check the option Share this folder.
10. At last, click Apply and OK to save the changes.
Once all steps are finished, you have created the shared folder on the network server.
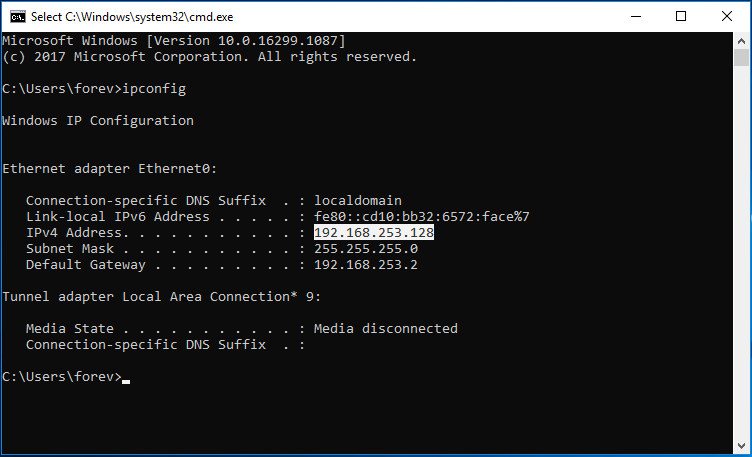
To sync files from the network drive or sync files to it, you also need to know the IP address of the network server.
Get the IP Address of Network Server
Now, we will show you how to get the IP address of the network server.
1. Open Command Prompt.
2. Type ipconfig in the command line window and hit Enter to continue.
3. Next, find your IPv4 address.
Sync the Network Drive to Local Computer
Now, we will show you how to sync the network drive to the local computer so as to manage your offline files.
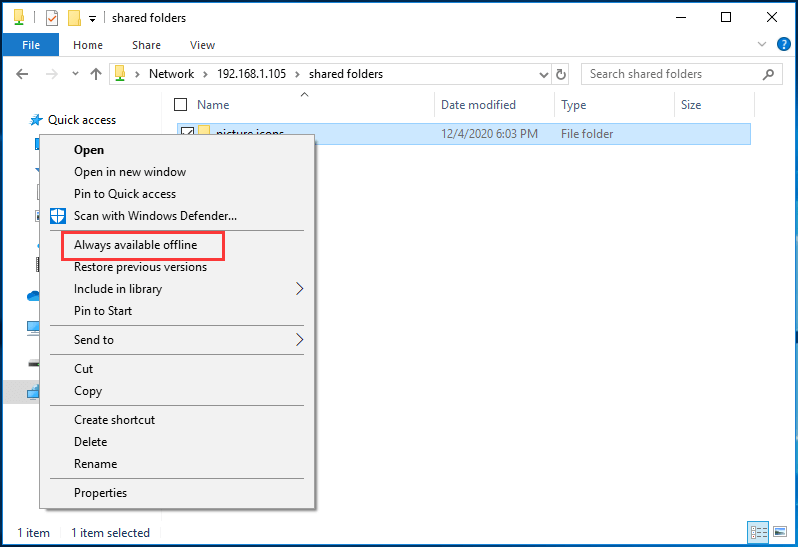
- Press the Windows key and R key together to open the Run dialog.
- Type \\ plus the IP address of the network server and click OK to continue.
- Then access the shared folder.
- Select the files or folders you want to access at the local computer, right-click it and choose Always available offline.
- Then wait for the process to be finished.
After that, you can access the files or folders on your local computer even though the network server is not connected. If you change either the source file or the synced files, both will keep the pace and display the same. After making it offline, you can edit it on your computer and then the source file will be synced.
How to Configure Files in Windows 10 Sync Center?
In this part, we will show you how to configure files in Windows 10 Sync Center.
How to Sync Schedule for Offline Files
In order to sync your files automatically, you can set scheduled sync for offline files.
Now, here is the tutorial.
1. Open Sync Center.
2. Right-click the offline task and choose Schedule for Offline Files.
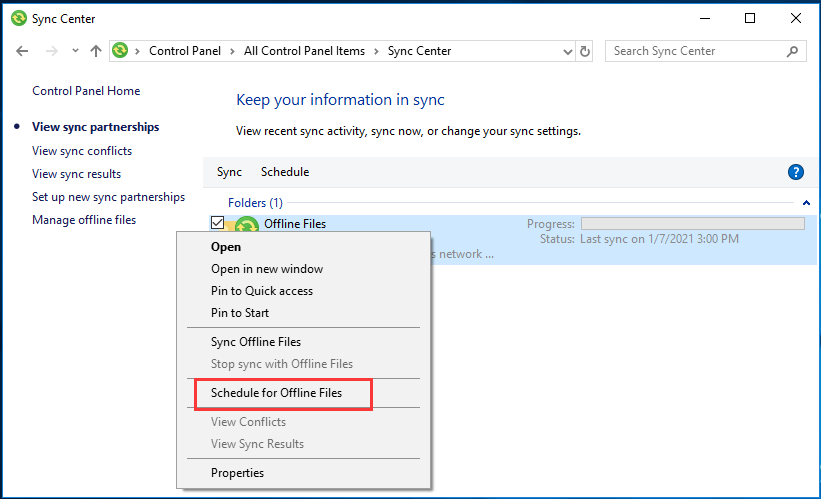
3. Next, choose which items you want to sync on this schedule and click Next.
4. Decide when you want this sync task to begin. You can choose At a scheduled time or When an event occurs. Here, we choose a scheduled time.
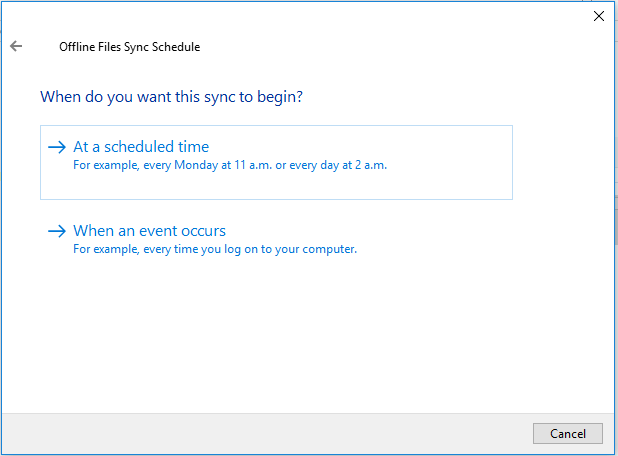
5. Then set the time and click Next.
6. Name the scheduled sync and click Save changes to continue.
After all steps are finished, you have set the scheduled sync and it will begin to sync your files regularly as long as you do not remove it.
Change Windows Offline Files Disk Usage
The Disk Usage will show you the available disk space on your system as well as the disk space used for keeping the offline files. You can also modify it.
Now, here is the tutorial.
- Open Sync Center.
- Click Manage offline files on the left pane.
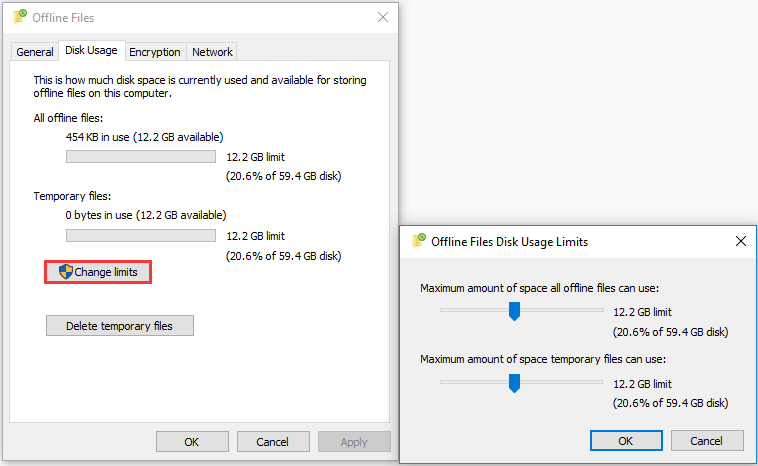
- In the pop-up window, switch to the Disk Usage tab.
- You can see the available storage space on your system, the used space for the offline files, and the disk space for the temporary files.
- You can also click Change limits to change it.
Encrypt Offline Files
In Windows 10 Sync Center, you can also encrypt it.
Now, here is the tutorial.
- Open Sync Center.
- Click Manage offline files.
- Go to the Encryption tab.
- Click the Encrypt button to continue.
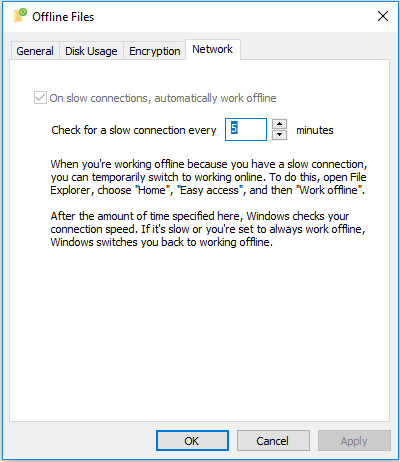
Configure Windows Offline Files Network Settings
You can set your preferred time to check for slow connectivity and once a slow connection occurs. Windows will start working offline automatically.
How to Disable Sync Center?
If you do not want to use Sync Center, you can choose to disable it. To do that, you can choose to end the mobysync.exe in the Task Manager. After that, it will be disabled.
To disable it, you can also choose to do that in Sync Center itself. Open Sync Center, click Manage offline files and click Disable offline links. After that, the Sync Center will be disabled.
The above content is all about the Sync Center and shows how to use Sync Center to sync files from the network server to the local hard drive and manage the offline files. However, if you want to sync files to the network drive, how can you do it?
In the following part, we will show you the Sync Center alternative – MiniTool ShadowMaker. It enables you to sync files from a local computer to the external hard drive, internal hard drive or network drive. So, keep on your reading to find more detailed information.
What is Sync Center? How to enable Sync Center? How to disable Sync Center? After reading this post, I knew all the answers. Click to Tweet
How to Sync Files to Network Drive?
MiniTool ShadowMaker is a piece of professional Windows 10 backup software and it is designed to back up the files, folders, disks, partitions and the operating system. It also comes with the Sync feature, ensuring the files are in two or more locations and kept in pace.
Now, we will show you how to use the Sync feature to sync files.
1. Download MiniTool ShadowMaker from the following button, install it and launch it.
MiniTool ShadowMaker TrialClick to Download100%Clean & Safe
2. Click Keep Trial.
3. Then you enter the main interface of MiniTool ShadowMaker, and go to the Sync page.
4. Click the SOURCE module to choose the files or folders you want to sync.
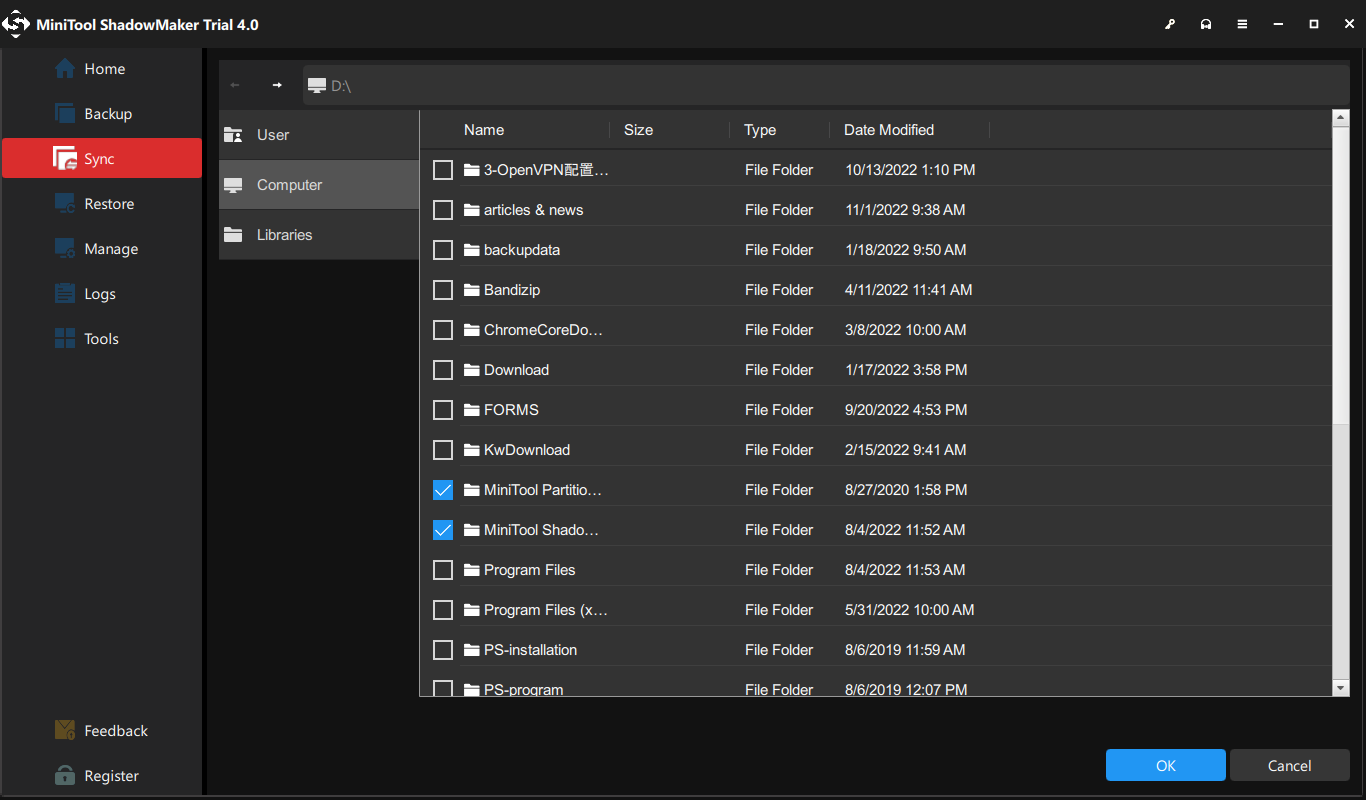
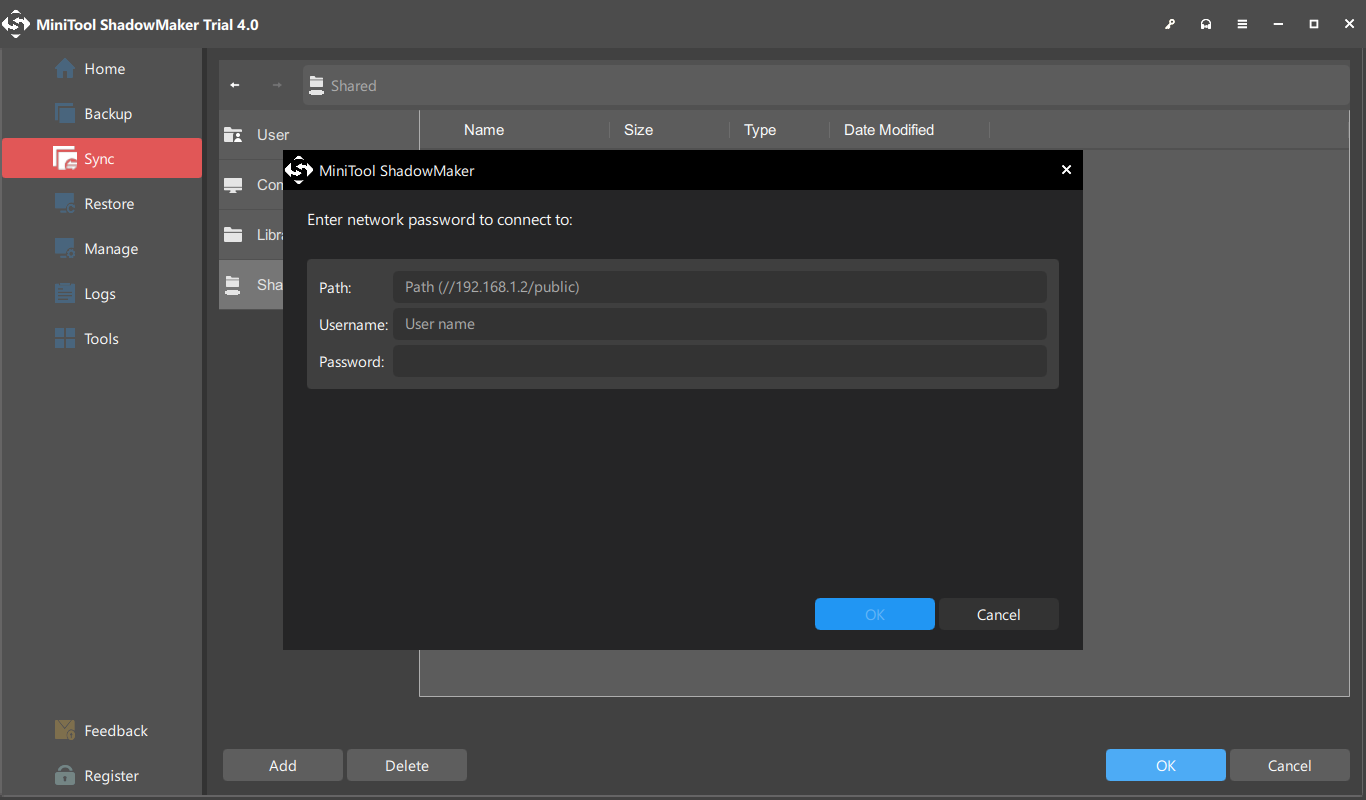
5. Then click the DESTINATION module to choose the target disk. If you want to sync them to the network drive, choose Shared.
6. Then click Add New and input the path, name and password of the internet server.
7. MiniTool ShadowMaker also enables you to set the automatic file. You can go to Options > Schedule Settings to do that.
8. After the sync source and destination are selected, click Sync Now to start syncing files to the network drive.
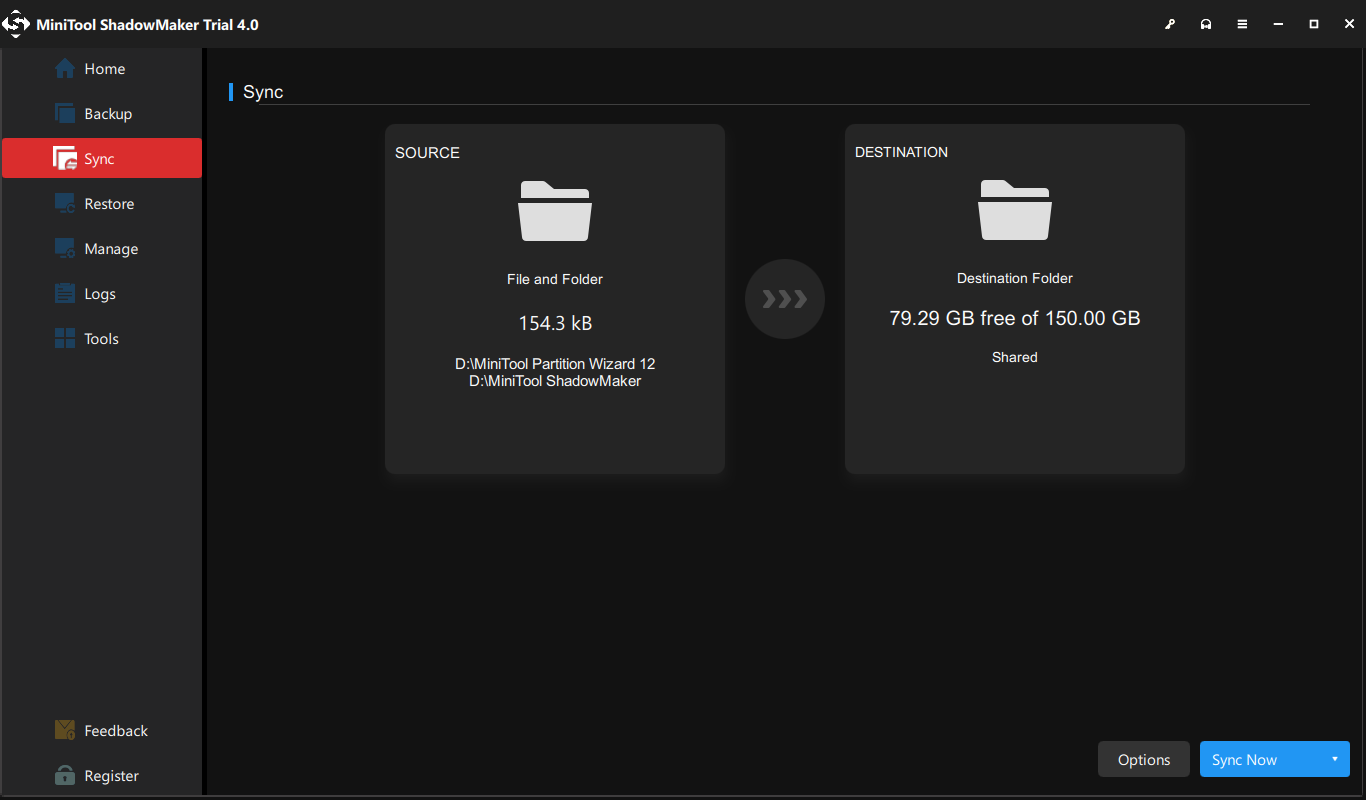
After all steps are finished, you have synced files from the local computer to the network drive. So, if you want to sync files, try MiniTool ShadowMaker.
Apart from the file backup and sync feature, MiniTool ShadowMaker also allows you to perform some recovery solutions. If your computer is crashed, you can restore it to a previous state with the system image created before.
In addition, MiniTool ShadowMaker is also a hard drive clone tool that helps you to clone OS from HDD to SSD without data loss.
Bottom Line
To sum up, this post shows what the Sync Center is and how to enable and disable Sync Center Windows 10. If you have any different ideas for Windows 10 Sync Center, you can share them in the comment zone.
If you have any problem with MiniTool ShadowMaker, please feel free to contact us via the email [email protected] and we will reply to you as soon as possible.
Sync Center FAQ
How Does Sync Center Work?
The Sync Center is a Windows 10 built-in tool that is used to sync files from the network server to the local computer. A prerequisite is that there are files on the network drive. You can manage offline files on your local drive even though the network server is not connected.
How do I turn off Sync Center?
To disable Sync Center, you can open Sync Center, click Manage offline files and choose Disable offline files.
Where is Sync Center?
The Sync Center is a Windows 10 built-in tool and you can open Control Panel to find it. If it is enabled, you can also access it in the system tray. If there is a sync conflict, you will see a yellow triangle with and an exclamation in front of the Sync Center icon.
There is one feature in Windows 10 (though it was present in the previous version also) called Sync Center and Offline Files. Many users are still unaware of this feature. But nothing to worry about, we will share this piece of information with you. In this tutorial, we will drop down the details of Sync Center and Offline Files.
You may like to Read:
- Windows 10 – How to Customize Sync Settings with OneDrive
- How to Customize Sync Settings on Windows 10
What is Sync Center in Windows 10?
Sync Center is the feature of Windows 10 which allows you to sync the information between your PC and offline files which are saved in the folders of the network servers. You can obtain them even when your server or your PC is not linked with the network and thus they are termed as Offline Files. Here, it does not permit you to sync the information between your PC and other supportable gadgets.
How to Access Sync Center in Windows 10
Launch the Control Panel of Windows 10 on your screen. Make the items into small icons because the Sync Center is not obtainable via Categories view. Look for the Sync Center icon. Open it.
This is how Sync Center looks when opened for the first time.
How to Enable Offline Files in Windows 10 Sync Center
Configure Sync Settings over Metered Connection on Windows 10
The first thing that you have to carry out before syncing the folders over the network is to Enable the Offline Files. And to make it happen, click on the Manage offline files link on the left side column.
You will see an Offline Files window on your screen. In the General tab, see if it is enabled or not. In any case, it is not, click Enable Offline Files and click Ok. You will be asked to restart the computer.
After restarting the computer, navigate to the Offline Files as described above. Now you will have other tabs available on the Offline Files window.
How to Configure Offline Files in Windows 10 Sync Center
You can easily configure the Offline Files on your Windows 10 computer. The Disk Usage, Encryption, and Network tabs will help you in configuring the Offline Files.
Disk Usage
The Disk Usage tab will display you the amount of disk space that is presently being used and available for keeping the offline files on your PC.
To change the data limit, click on Change limits buttons.
An Offline Files Disk Usage Limits window will pop up in front of you. You will see two options: one for offline files and the other for temporary files. Use the slider and set your required limit. After changing the limits, click Ok.
Encryption
To provide more security to your offline files, you can encrypt them. Click on Encrypt option to encrypt your files.
You can also read our article on encryption by following this link:
Windows 10: How to Encrypt Drive Partition using Bitlocker
Network
The description of this tab is clearly explained in the tab. You can choose and set your preferred time for checking the slow connectivity. If a slow connection occurs, Windows will start working offline by itself and on the same hand saves the copies that you are using in network files.
Conclusion
This tutorial will help you when you wish to work with the files and the network. If there are any queries disturbing you, free to share with us.
Способ 1: «Панель управления»
Через классическую «Панель управления» в Windows 10 можно отключить «Центр синхронизации» всего за несколько шагов:
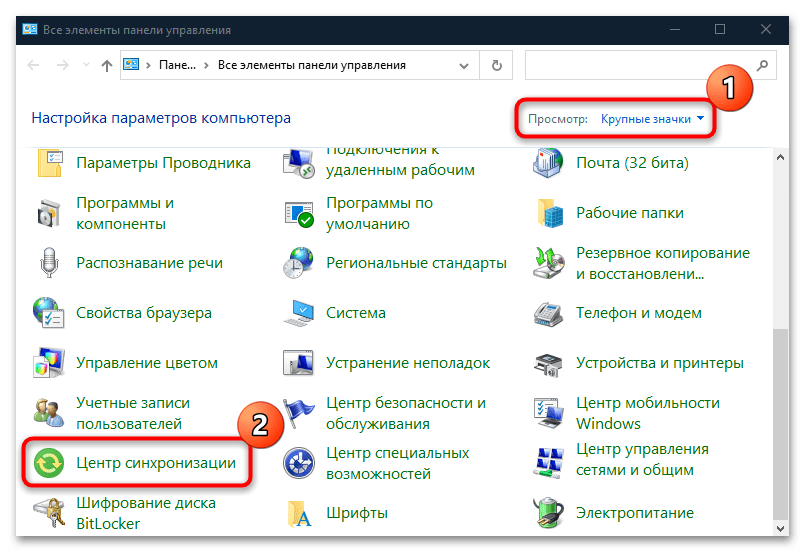
- Через системный поиск отыщите средство «Панель управления» и запустите его.
- Нажмите на выпадающее меню у строки «Просмотр» и для удобства установите «Крупные значки». Нажмите на раздел «Центр синхронизации».
- В новом окне на панели слева кликните по строке «Управление автономными файлами».
- Нажмите на кнопку «Отключить автономные файлы», затем подтвердите настройки, нажав на «ОК» внизу. Затем может быть предложено перезагрузить компьютер для вступления новых параметров в силу. Нажмите на «Да», чтобы осуществить это сразу.

После того как Windows запустится, «Центр синхронизации» перестанет работать в фоновом режиме, а автономная синхронизация файлов будет полностью отключена.
Этот способ больше подойдет для владельцев редакции Home, потому что следующий метод предполагает работу с «Редактором локальной групповой политики», которого нет в этой версии операционки.
Способ 2: «Редактор локальной групповой политики»
Как уже говорилось, работа с локальной групповой политикой доступна только в Windows 10 Pro и Enterprise. Если предыдущий метод вам не подошел, следуйте инструкции ниже:
- Нажмите на клавиши «Win + R», чтобы вызвать диалоговое окно «Выполнить», затем в строке «Открыть» выполните команду
gpedit.msc, нажав на кнопку «ОК». - На панели слева в разделе «Политика «Локальный компьютер»» выберите «Конфигурация компьютера», затем — «Административные шаблоны».
- В папке «Сеть» нажмите на «Автономные файлы», а в центральной части окна в списке найдите строку «Разрешить или запретить использование автономных файлов» и дважды кликните по ней левой кнопкой мыши.
- Отметьте пункт «Отключено» в новом окне, затем примените и сохраните настройки.

После редактирования параметров локальной политики закройте редактор и перезагрузите Windows 10. В отличие от предыдущего способа, настройки применяются не к конкретной учетной записи, с которой осуществлялись изменения, а к системе в целом.
Активировать работоспособность «Центра синхронизации» можно аналогичным способом, но при этом нужно выбрать пункт «Не задано» или «Включено».
Наша группа в TelegramПолезные советы и помощь
If you see a little green icon that says “Sync Center” when you hover your mouse over it in the system tray, it indicates a Windows synchronization feature called Sync Center is currently active and running on your Windows. If you don’t need the feature or you simply want to remove the Sync Center icon from the taskbar, you can disable Sync Center in Windows 10 by following the steps below.
What is Sync Center?
Sync Center is a feature in Windows 10 that allows synchronization of files between different devices or computers in the same network. With Sync Center, you can sync offline files so that they are always available to you even when your computer or the source server is offline from the network.
If you’ve ever enabled the Sync Center (or Offline Files) feature, the Sync Center icon will appear in the system tray on the taskbar on every startup, and stay active until you disable the feature.
Sync Center doesn’t use much PC resources. It certainly won’t affect the performance of your PC if there is no huge sync job it needs to run. You can leave it on if it doesn’t cause noticeable issue.
If you are not using the feature at all or you simply want to remove the Sync Center icon from the system tray on the taskbar, here’s how to quickly disable Sync Center in Windows 10.
Windows 10: Disable or Turn Off Sync Center
Sync Center will be enabled if you ever “map a network drive” for a shared folder and set it to “always available offline”. These are actually the basic steps to activate Sync Center to allow it to sync and keep copies of offline files even when you are not connected to the network or the server is unavailable. To disable Sync Center, you need to turn off the “Offline Files” feature.
Enabling or disabling this feature requires administrative rights. You will have to be on an administrator account on Windows 10 to be able to change the settings for Sync Center / Offline Files.
Since there is no quit or exit button when you right-click on the Sync Center icon in the system tray, we will have to manually turn it off from the Control Panel.
Step 1: Search for and open Control Panel from the Windows 10 search bar.
Step 2: In the Control Panel window, search for and open “Sync Center” using the search bar at the top right corner of the window.
Step 3: While in the Sync Center settings window, in the left pane, click on “Manage offline files“.
Step 4: In the “Offline Files” window, click on “Disable offline files“. Click Apply then OK to save the changes.
Step 5: You will then be prompted to restart your computer for the new settings to take effect. After restarting your PC, the Sync Center feature will be disabled and its icon will no longer show up in the system tray on the taskbar.
To re-enable Sync Center, simply repeat the steps above to enable “Offline Files” again.