
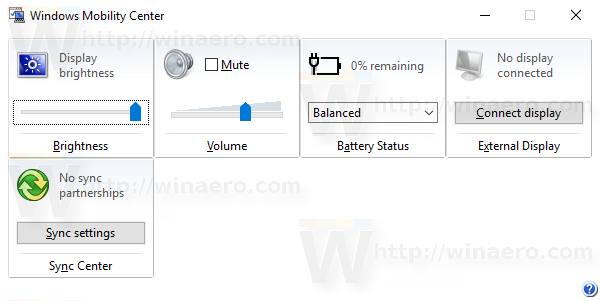
Привет друзья! В комплекте с Windows 7, 8.1 и 10 поставляется специальное приложение, именуемое Центром мобильности. Используется оно в основном на портативных устройствах для быстрого доступа к базовым настройкам яркости, громкости, синхронизации, электропитания, управления ориентацией экрана, параметрами презентации и некоторыми другими компонентами.

Центр мобильности Windows штука полезная, но вы можете столкнуться с ситуацией, когда его нужно будет отключить. В Windows 10 он, к примеру, вообще не особо нужен, так как управлять некоторыми из перечисленных выше настроек можно из Центра действий. Отключить Центр мобильности нетрудно.
Как в Windows 10 включить или отключить Центр мобильности
Откройте командой regedit редактор реестра и разверните этот ключ:
HKEY_LOCAL_MACHINE/SOFTWARE/Microsoft/Windows/CurrentVersion/Policies/MobilityCenter
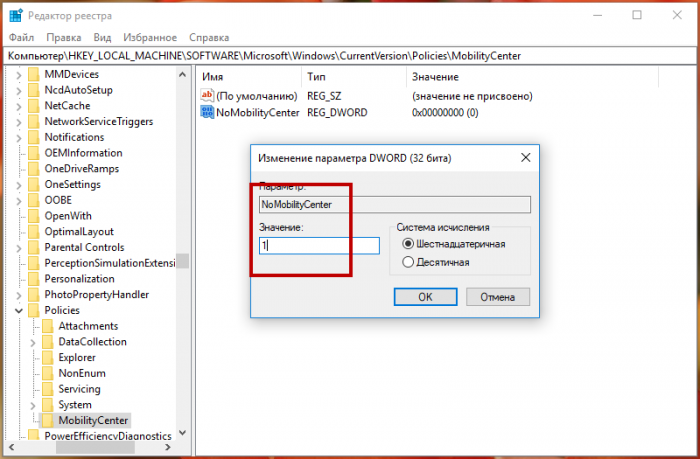
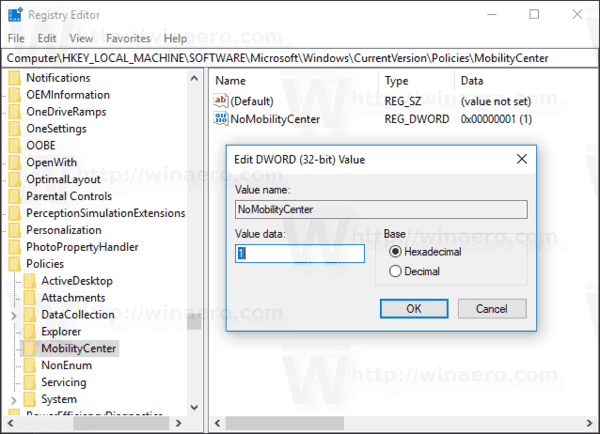
Может статься, что подраздела MobilityCenter у вас не окажется, в этом случае его нужно будет создать вручную. В свою очередь в нем необходимо создать 32-битный параметр типа DWORD с именем NoMobilityCenter и установить в качестве его значения 1.
Это действие отключит Центр мобильности для всех пользователей. Если же вы захотите деактивировать приложение для конкретного юзера, то же самое нужно сделать в ключе HKEY_CURRENT_USER/Software/Microsoft/Windows/CurrentVersion/Policies/MobilityCenter.
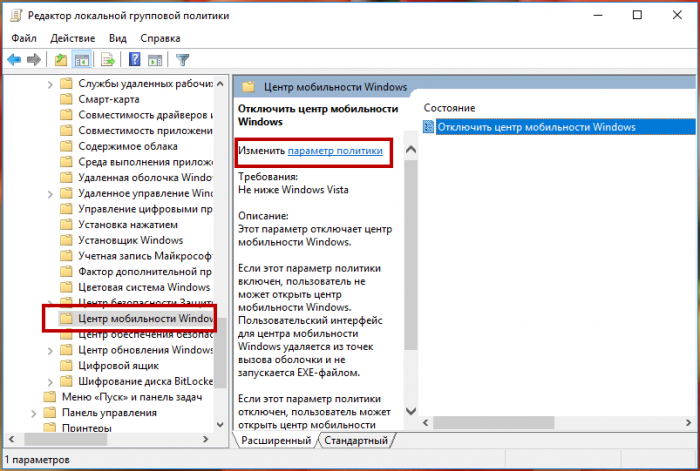
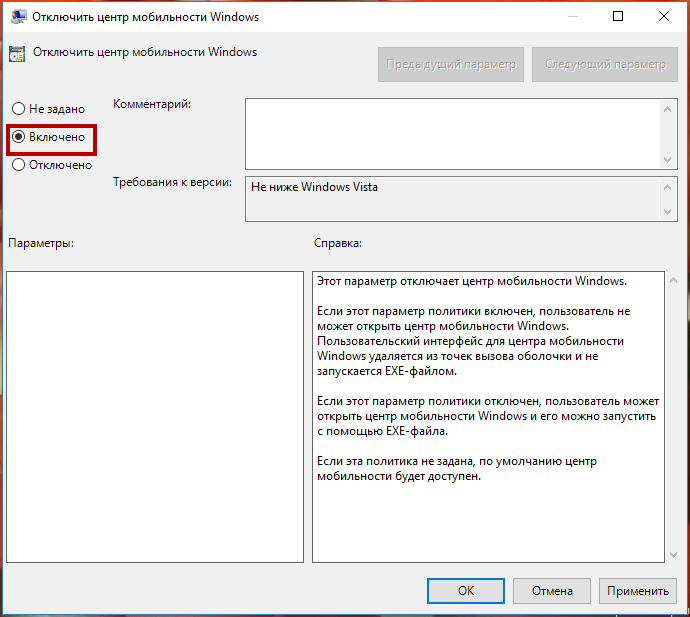
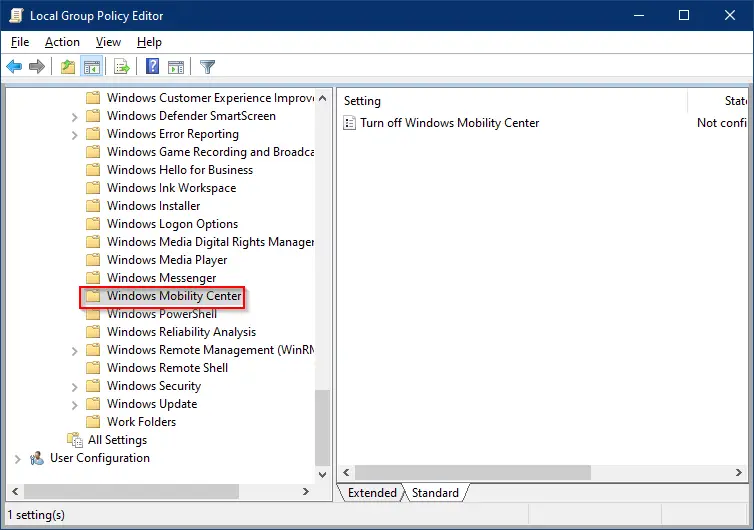
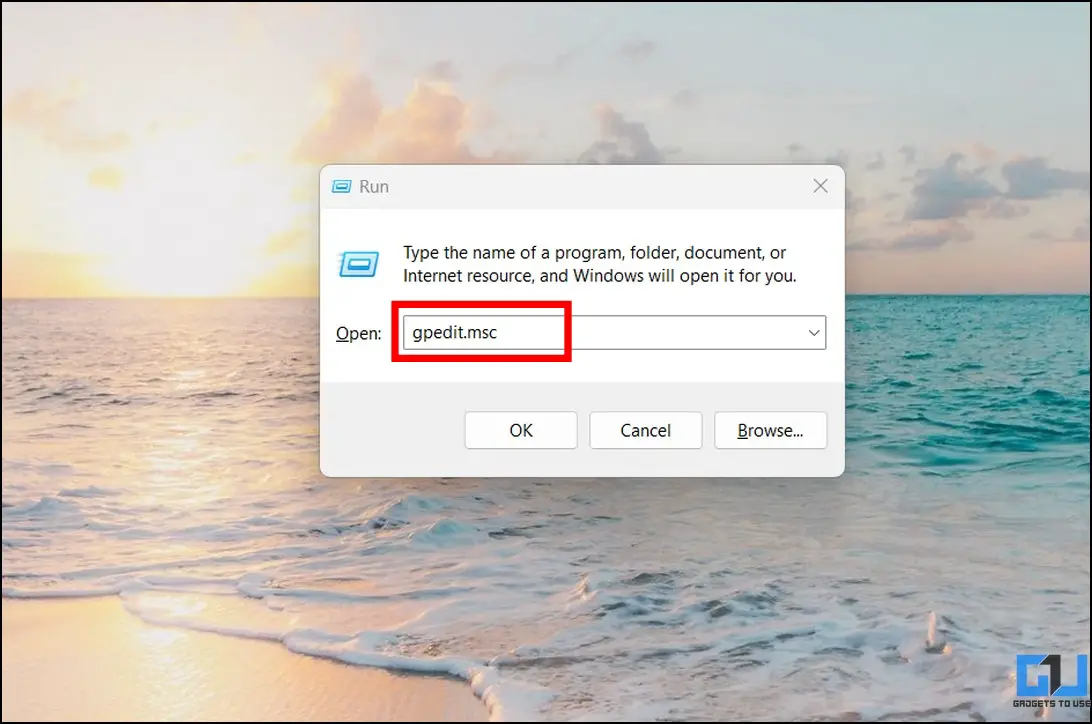
В обоих случаях изменения вступят в силу после перезагрузки компьютера. Для отключения Центра мобильности также можно использовать редактор локальной групповой политики. Открыв его командой gpedit.msc, перейдите по цепочке Конфигурация компьютера → Административные шаблоны → Компоненты Windows → Центр мобильности Windows. Справа нажмите ссылку «»Изменить параметры политики» и установите в открывшемся окошке радиокнопку в положение «»Включено».
А как вот быть, если нужно как раз наоборот, включить Центр мобильности на десктопном компьютере? По умолчанию это приложение работает только на мобильных ПК и планшетах, если вы хотите пользоваться им на обычном настольном компьютере, нужно применить соответствующий твик реестра. Открыв редактор реестра, разверните ключ HKEY_CURRENT_USER/Software/Microsoft, создайте в последнем подразделе сначала каталог MobilePC, а затем MobilityCenter так, чтобы последний был вложен в предыдущий (см. скриншот).
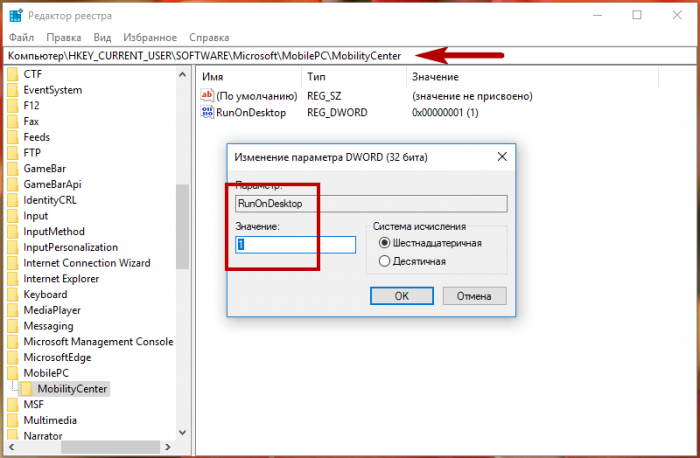
В подразделе MobilityCenter создайте 32-битный DWORD-параметр с именем RunOnDesktop и установите в качестве его значения 1. После перезагрузки вы сможете запускать Центр мобильности командой mblctr из окошка «Выполнить».
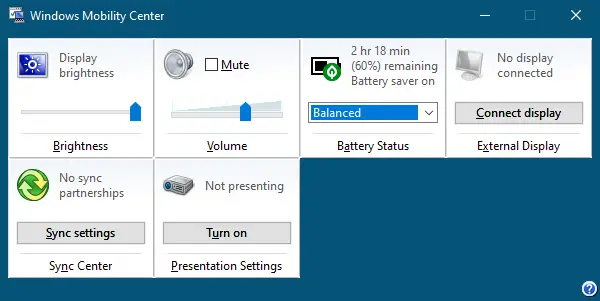
Windows 11/10 comes with a built-in feature for laptops that is called Windows Mobility Center. It allows you to instantly access or adjust the display brightness, mute or adjust volume, view and change Power Plans, view the remaining battery percentage, set Sync Settings, and connect to an external display. For some reason, if you wish to disable or remove it from your Windows PC altogether, Microsoft offers a built-in option to do the same. This means there is no need to use a third-party tool to remove the Windows Mobility Center in Windows 11/10.
This post will share at least two ways to prevent access to Windows Mobility Center on Windows 11 or 10 for all users. These are the following:-
- Enable or Disable Windows Mobility Center using Group Policy Editor
- Turn On or Off Windows Mobility Center via Windows Registry
How to Enable or Disable Windows Mobility Center in Windows 11 or 10 using Group Policy Editor?
Gentle Reminder: Local Group Policy Editor is not a part of the Windows 10 Home edition; if you are still using the Windows 10 Home edition operating system, you need to enable gpedit.msc.
To turn on or off Windows Mobility Center in Windows 11/10 using Group Policy Editor, perform the following recommended steps:-
Step 1. Press the Windows logo + R keys simultaneously to open the Run dialog box.
Step 2. In the Run box, type the following and hit Enter from the keyboard to open Local Group Policy Editor windows:-
gpedit.msc
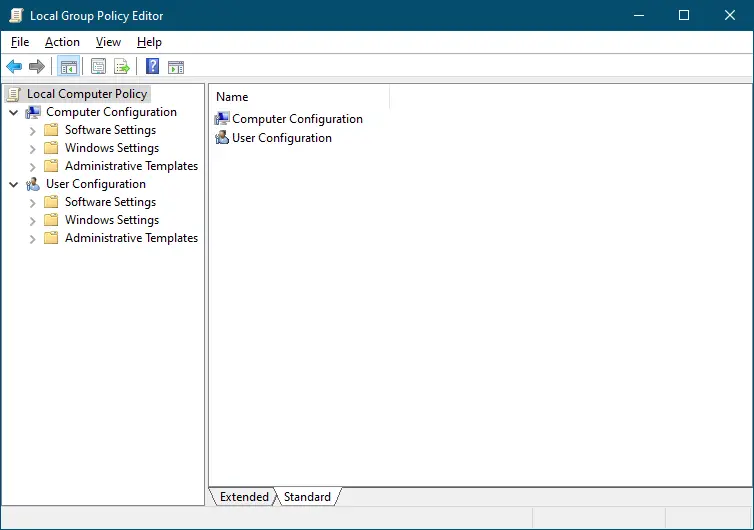
Step 3. In the Local Group Policy Editor, navigate or browse for the following path from the left side pane:-
Computer Configuration > Administrative Templates > Windows Components > Windows Mobility Center
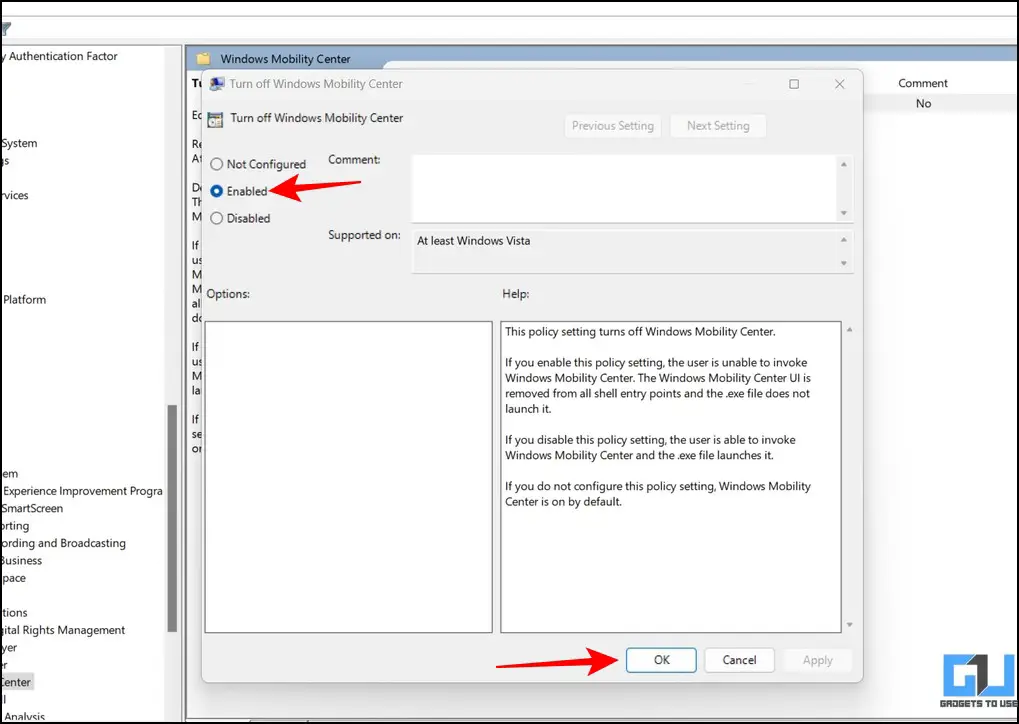
Step 4. On the right-hand section of Windows Mobility Center, double-click on the policy “Turn off Windows Mobility Center.”
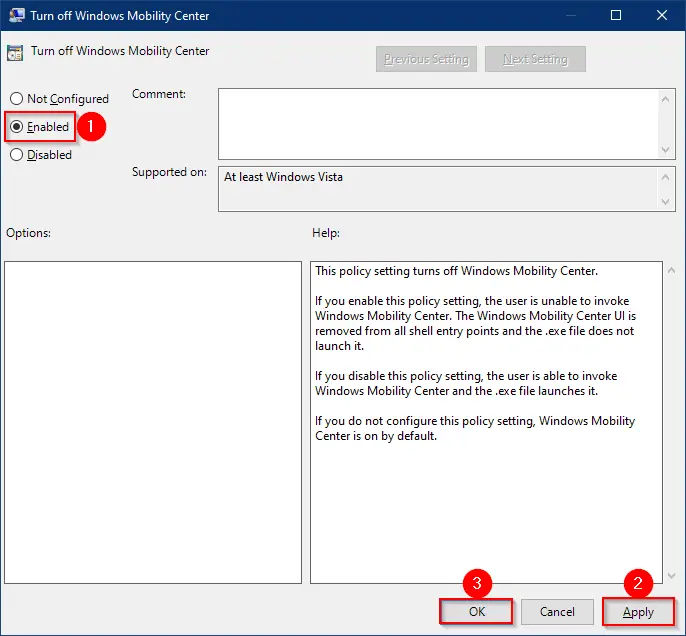
Step 5. Select Enabled.
Step 6. Click Apply.
Step 7. Click OK.
The policy will be applied immediately, which means there is no need to restart your PC.
If you change your mind and want to enable Windows Mobility Center, repeat the above steps and, in step 5, select the Not Configured option.
How to Turn On or Off Windows Mobility Center in Windows 11 or 10 via Windows Registry?
Gentle Reminder: Editing Windows Registry may damage your Windows installation; hence we recommend taking a full backup of the Registry and creating a system restore point. If something goes wrong, you can revert your PC to a previous working state.
To enable or disable Windows Mobility Center in Windows 11 or 10 via Windows Registry, use these steps:-
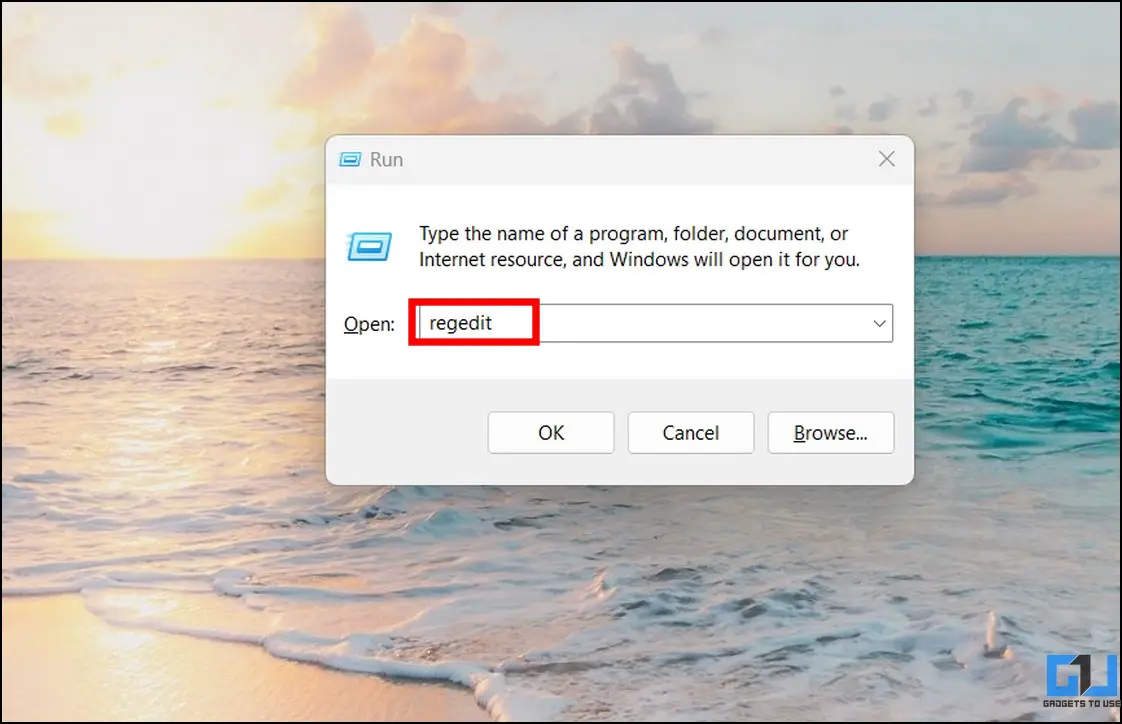
Step 1. Click on the Start button and type regedit.

Step 2. In the top search results, click on the Registry Editor entry to open the Registry Editor window.

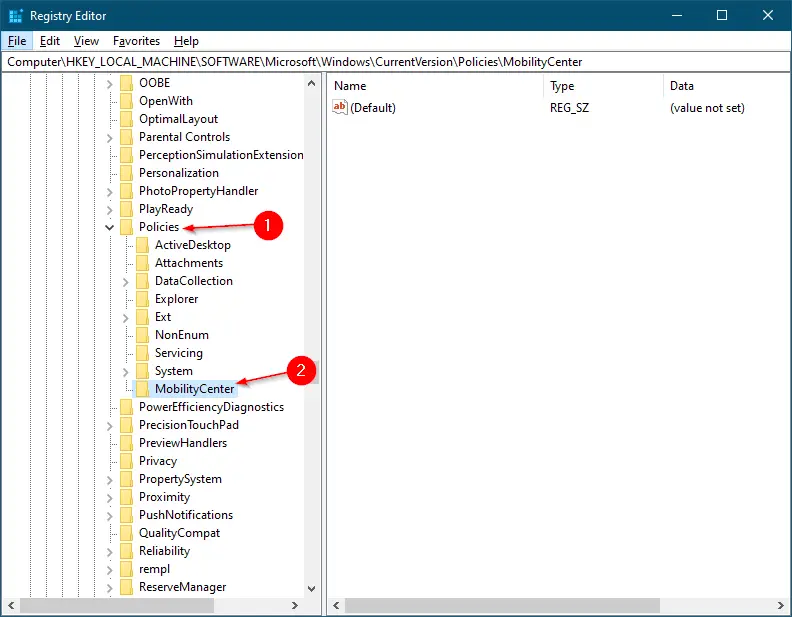
Step 3. In the Registry Editor window that opens, navigate or browse for the following key:-
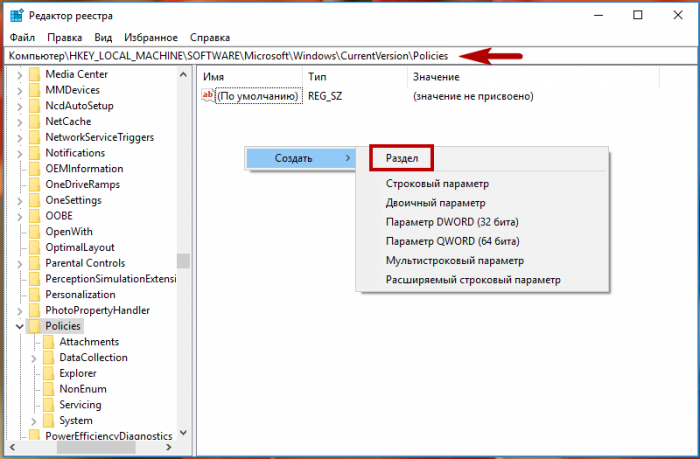
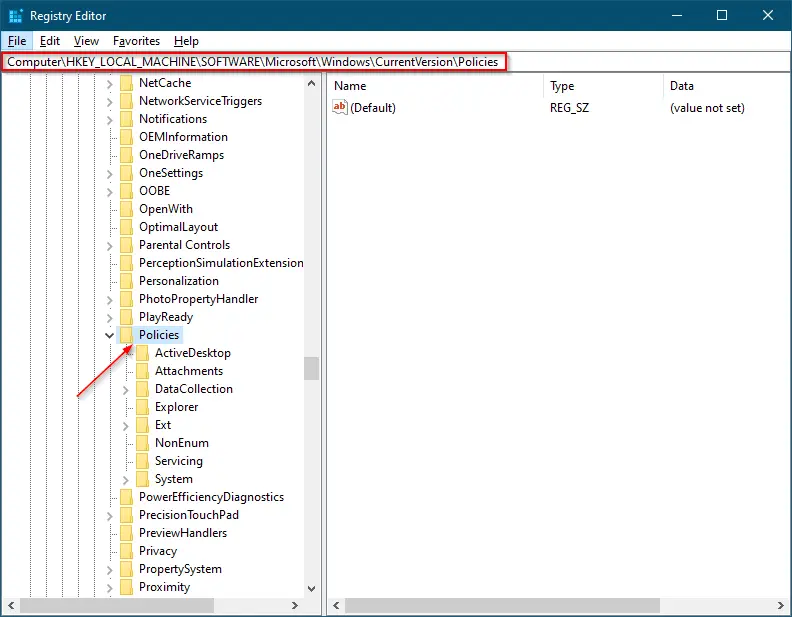
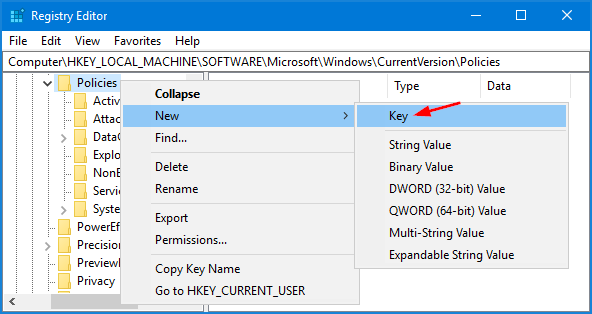
Computer\HKEY_LOCAL_MACHINE\SOFTWARE\Microsoft\Windows\CurrentVersion\Policies
Step 4. Right-click on the Policies folder, select New, and then Key.
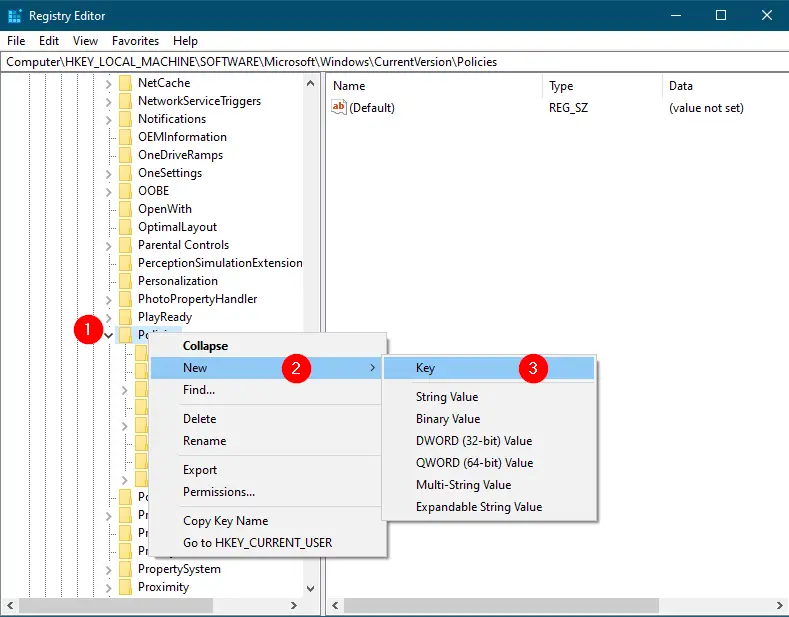
Step 5. Rename the newly created key as MobilityCenter.
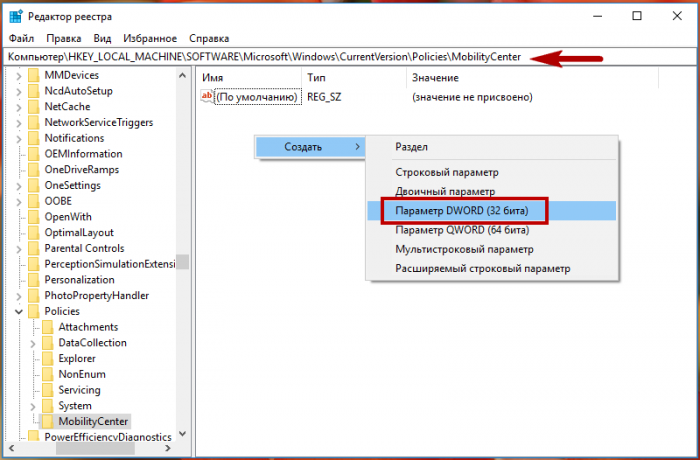
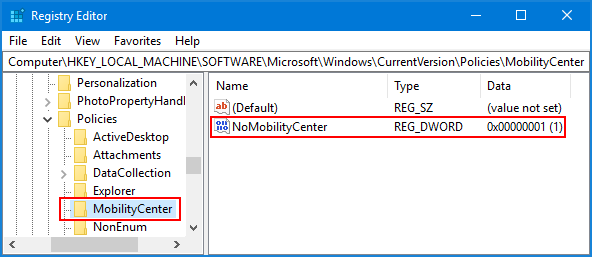
Step 6. Now, perform a right-click on the MobilityCenter folder, select New, and then DWORD (32-bit) Value.
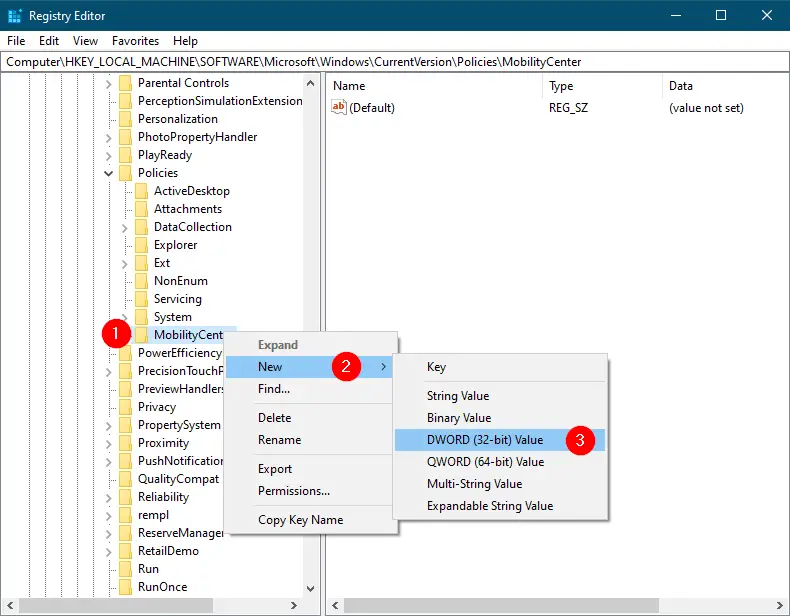
Step 7. Rename the newly created DWORD (32-bit) Value as NoMobilityCenter.
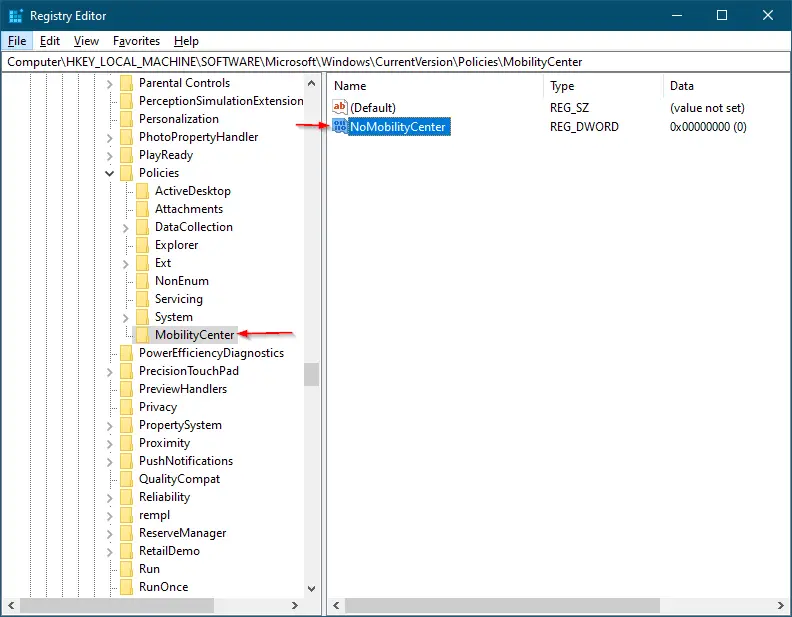
Step 8. On the right side pane of MobilityCenter, double-click on the NoMobilityCenter and change its Value data from 0 to 1.
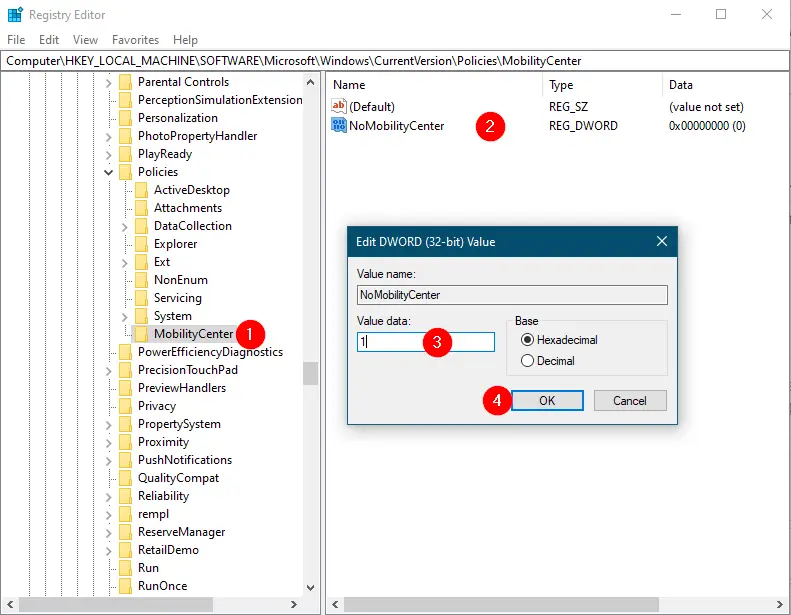
Step 9. Click OK.
Step 10. Reboot your computer or laptop.
Now, you will not be able to open the Windows Mobility Center in Windows 11 or 10. If you want to enable it again, navigate to the following key:-
Computer\HKEY_LOCAL_MACHINE\SOFTWARE\Microsoft\Windows\CurrentVersion\Policies\MobilityCenter
On the right side of MobilityCenter, double-click on NoMobilityCenter and change its Value data from 1 to 0. Restart your computer or laptop, and you have done it.
Conclusion
In conclusion, Windows Mobility Center is a useful built-in feature in Windows 11/10 that allows users to easily adjust settings related to display brightness, volume, power plans, battery percentage, sync settings, and external display connectivity. However, if you want to prevent access to this feature for all users, there are two methods to do so: using Group Policy Editor or Windows Registry. It is important to note that editing the Registry can potentially damage your Windows installation, so it is recommended to take a full backup and create a system restore point before making any changes. By following the steps outlined in this post, users can easily enable or disable Windows Mobility Center according to their preferences.
Windows Mobility Center (mblctr.exe) is a special app that comes bundled with Windows 10. It is present by default on mobile devices like laptops and tablets. It allows changing brightness, volume, power plans, display orientation, display projection, Sync Center settings, and presentation settings of your device. There are situations when you may need to disable Windows Mobility Center for all user accounts of your device. Here is how it can be done.
Windows Mobility Center was first introduced in Windows 7. Windows 8, Windows 8.1 and Windows 10 also include it, however it is mostly superseded by Action Center’s buttons for quickly toggling these above mentioned settings. Still if you prefer to use Mobility Center, you can activate it on a Desktop computer. It can still be useful because it can be extended by OEMs (your PC vendor) with additional tiles to toggle various system settings like Bluetooth or your monitor.
Here is how you can disable this feature for all users. You must be signed in with an administrative account to continue.
To disable Mobility Center in Windows 10, do the following.
- Open Registry Editor.
- Go to the following Registry key:
HKEY_LOCAL_MACHINE\SOFTWARE\Microsoft\Windows\CurrentVersion\Policies\MobilityCenter
Tip: See how to jump to the desired Registry key with one click.
If you do not have such a key, then just create it.
- Here, create a new 32-bit DWORD value NoMobilityCenter.
Note: Even if you are running 64-bit Windows, you still need to use a 32-bit DWORD as the value type.
Set it to 1 to disable the Windows Mobility Center app in Windows 10.
- To make the changes done by the Registry tweak take effect, you need to Restart Windows 10.
Later, you can delete the NoMobilityCenter value to allow the user to use both Control Panel and Settings.
Disable Windows Mobility Center for a Specific User
To disable the Windows Mobility Center for a specific user account, apply the same tweak under the HKEY_CURRENT_USER branch. Tip: You can switch between HKCU and HKLM in Windows 10 Registry Editor quickly.
- Open Registry Editor.
- Go to the following Registry key:
HKEY_CURRENT_USER\Software\Microsoft\Windows\CurrentVersion\Policies\MobilityCenter
Tip: See how to jump to the desired Registry key with one click.
If you do not have such a key, then just create it.
- Here, create a new 32-bit DWORD value NoMobilityCenter.
Note: Even if you are running 64-bit Windows, you still need to use a 32-bit DWORD as the value type.
Set it to 1 to disable the Windows Mobility Center app in Windows 10 for the current user. - To make the changes done by the Registry tweak take effect, you need to sign out and sign in to your user account.
To save your time, I made ready-to-use Registry files. You can download them here:
Download Registry Files
Disable Windows Mobility Center with Local Group Policy Editor
If you are running Windows 10 Pro, Enterprise, or Education edition, you can use the Local Group Policy Editor app to configure the options mentioned above with a GUI.
- Press Win + R keys together on your keyboard and type:
gpedit.msc
Press Enter.

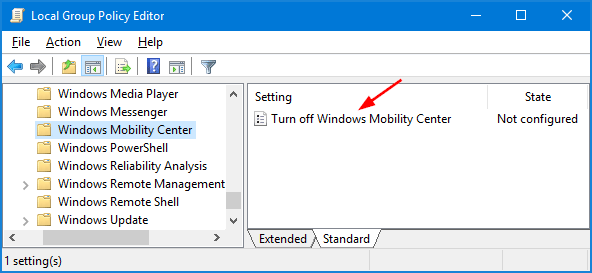
- Group Policy Editor will open. Go to Computer Configuration\Administrative Templates\Windows Components\Windows Mobility Center. Enable the policy option Turn off Windows Mobility Center as shown below.


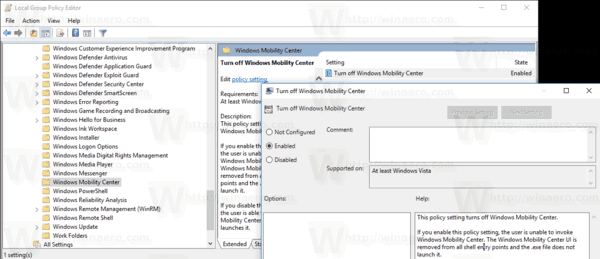
This policy setting turns off Windows Mobility Center. If you enable this policy setting, the user is unable to invoke Windows Mobility Center. The Windows Mobility Center UI is removed from all shell entry points and the .exe file does not launch it.
That’s it.
Support us
Winaero greatly relies on your support. You can help the site keep bringing you interesting and useful content and software by using these options:
If you like this article, please share it using the buttons below. It won’t take a lot from you, but it will help us grow. Thanks for your support!
Quick Answer
- If you don’t wish to edit your registry files manually, you can download and execute our quick registry file to disable the Mobility Center in Windows 11.
- Besides the local group policy editor, you can also use the Registry Editor administrative tool to disable the Windows Mobility Center.
- Let’s look at how you can access this tool to disable the Mobility Center in Windows 11.
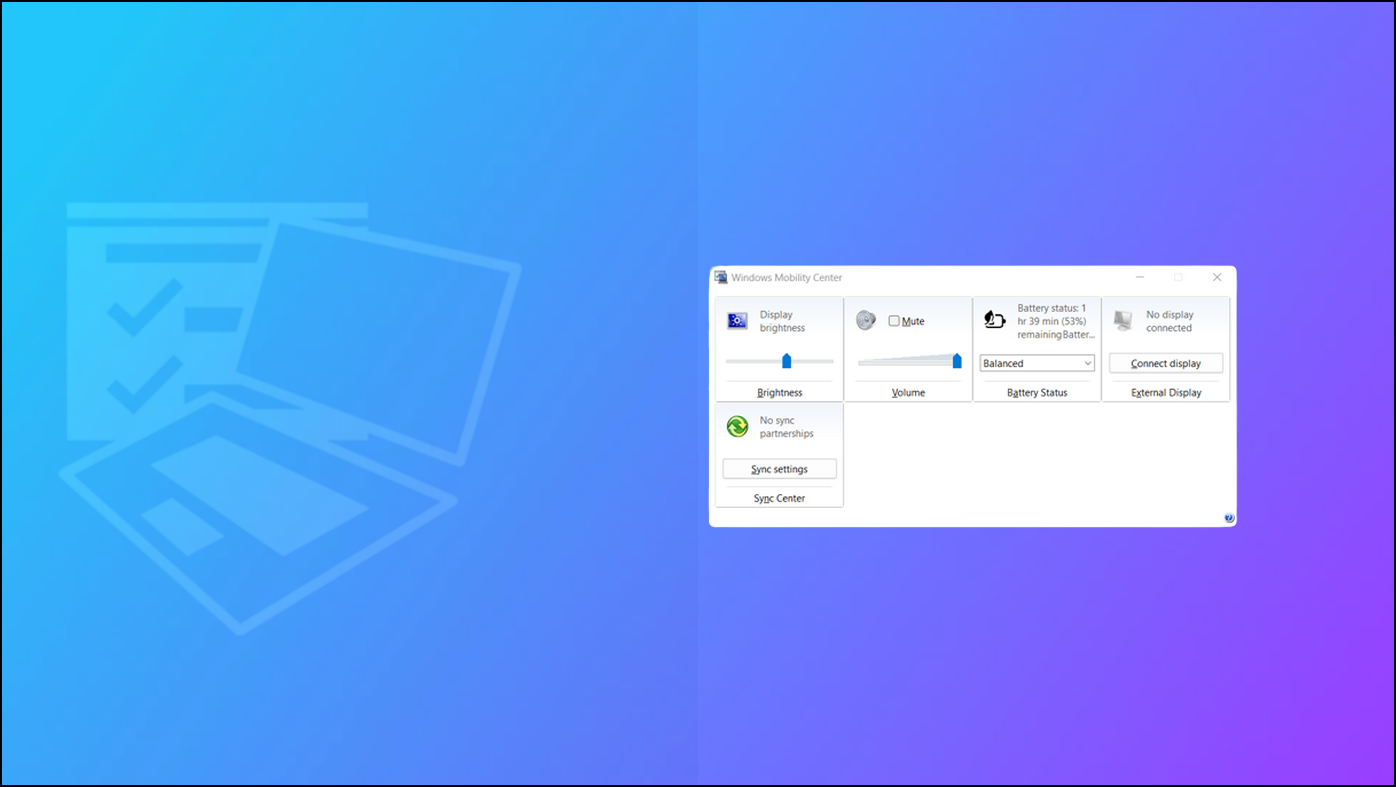
Released with Windows Vista, the Mobility Center was designed to help users control their system quickly with a central panel. However, users often get pestered by its random pop-up on the screen. Plus, it also consumes resources, causing lags and stutters. Today, we will discuss some easy methods to disable Windows Mobility Center in Windows 11. Furthermore, you can learn to disable OneDrive in Windows 11 or 10.
Disable Mobility Center Pop-up in Windows 11 or 10
The Windows Mobility Center tool offers a central location to control system parameters such as brightness, volume, power, display, sync, and presentation settings. However, users have often reported lags and stutters in Windows 11.
Fortunately, you can disable Windows Mobility Center on your Windows 11 machine by following the easy methods given below.
Method 1- Disable Windows Mobility Center Via Group Policy Editor
The Local Group Policy Editor in Windows is a management tool that helps to control group policy objects. This tool comes pre-installed on Windows 11 Professional and Enterprise editions. However, it remains absent on Home editions.
Worry not; let’s look at how you can access this tool to disable the Mobility Center in Windows 11:
1. Open the Run Window by pressing the Windows key + R simultaneously and type gpedit.msc to open it.
Note: If you are running Windows 11 Home Edition, you need to enable the Local Group Policy Editor tool by running this batch file.
2. Next, navigate to the following directory:
Computer Configuration> Administrative Templates> Windows Components> Windows Mobility Center
3. Double-click the ‘Turn Off Mobility Center‘ setting on the right sidebar to configure it.

4. Finally, adjust the Setting to Enabled and press the OK button to save changes.
5. Finally, estart your computer.
Method 2- Use Registry Editor to Turn Off Windows Mobility Center
Besides the local group policy editor, you can also use the Registry Editor administrative tool to disable the Windows Mobility Center. Here’s how:
1. Type regedit in the Run window by pressing the Windows + R key simultaneously.
2. Next, copy and paste the following path into the Registry Editor URL:
HKEY_LOCAL_MACHINE\SOFTWARE\Microsoft\Windows\CurrentVersion\Policies

3. Right-click on Policies and create a New DWORD (32-BIT) Value.
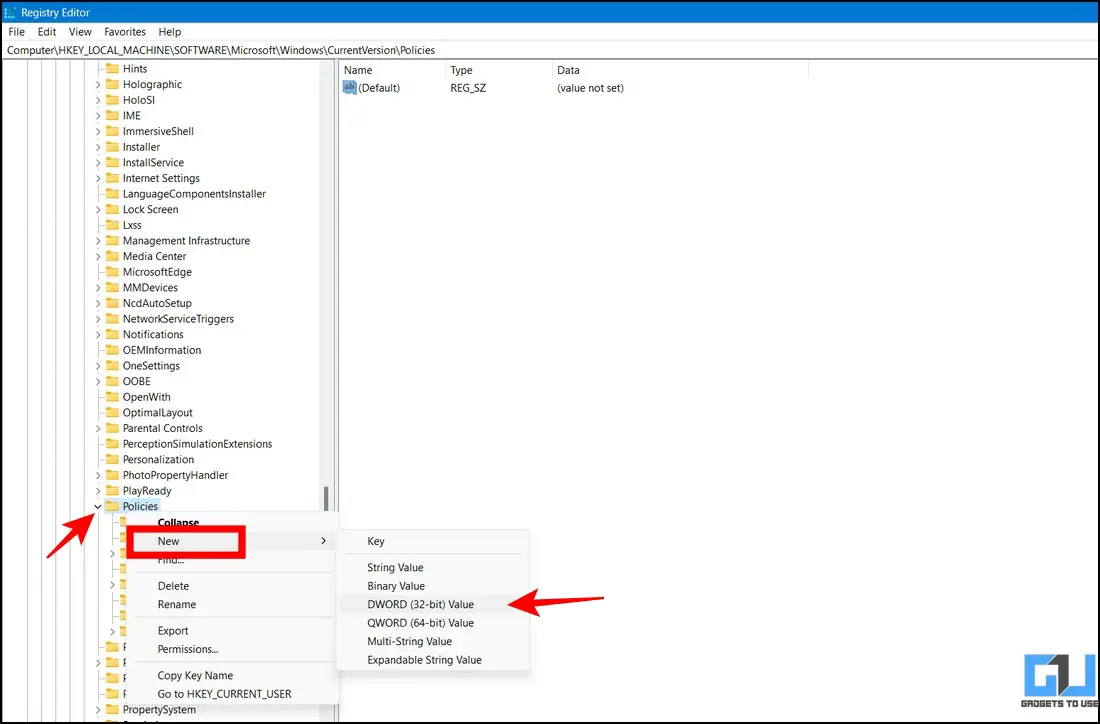
4. Name the value to ‘No Mobility Center‘ and set its value to 1. Click on the OK button to save changes.
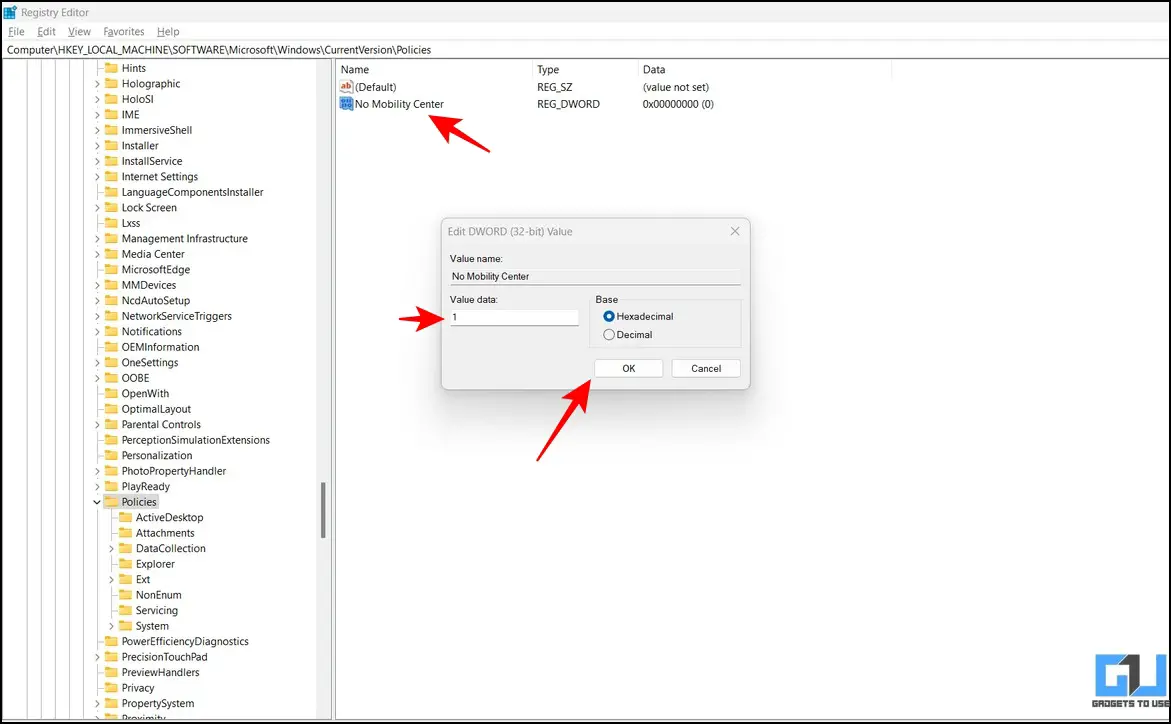
5. Restart your system to apply changes.
Method 3- Use Quick Registry Files to Disable Mobility Center
If you don’t wish to edit your registry files manually, you can download and execute our quick registry file to disable the Mobility Center in Windows 11. Here’s what you need to follow:
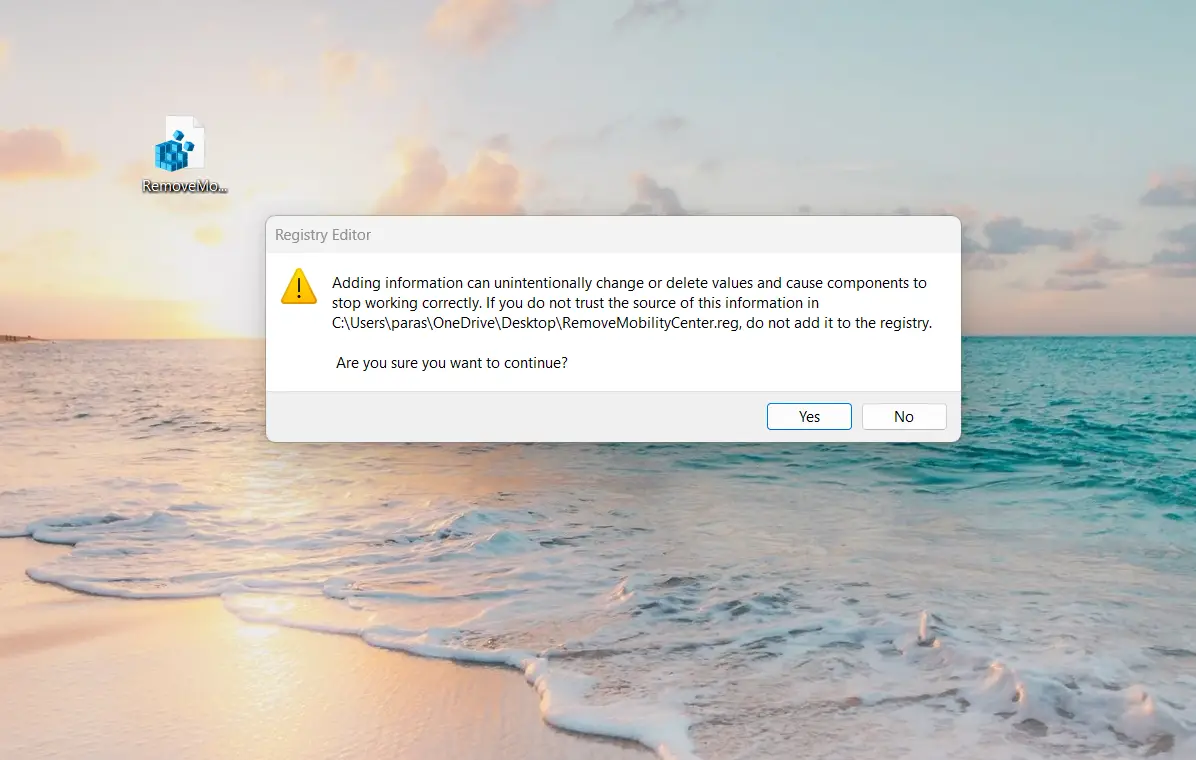
1. Download the Registry File from our Google Drive Link.
2. Double-click the RemoveMobilityCenter.reg file to install it.
3. Finally, click the Yes button to add the required values to your Windows registry.
4. Restart the system to see the applied changes.
Bonus: Disable All Background Apps in Windows 11
If your Windows 11 machine frequently lags and stutters, it might be due to multiple apps consuming precious system resources in the background. Don’t worry; we have crafted a comprehensive guide for you to disable all background apps in Windows 11.
Wrapping Up: No More Annoying Mobility Center Popups!
This article taught you several ways to eliminate the Mobility Center in Windows 11 and 10. If you find it helpful, share this read with your friends and check the below links for more Windows 11 troubleshooting walkthroughs.
You might be interested in the following:
- 3 Ways to Adjust Windows 11 Taskbar Size without Software
- 9 Ways to Fix Unable to Install Apps or Software on Windows 11
- 3 Ways to Use Focus Assist on Windows 11 to Block Apps and Sites
- Top 12 Ways to Clear Cache Files in Windows 11
You can also follow us for instant tech news at Google News or for tips and tricks, smartphones & gadgets reviews, join GadgetsToUse Telegram Group, or for the latest review videos subscribe GadgetsToUse Youtube Channel.
Was this article helpful?
YesNo
November 29, 2017 updated by
Leave a reply »
Windows Mobility Center keeps popping up? Is there a registry hack that could prevent Windows Mobility Center from popping up? The Windows Mobility Center is very convenient for laptop / tablet users, but it could also be annoying if it pops up uninvited. This tutorial will show you 2 different ways to disable Windows Mobility Center in Windows 10, 8, 7.
Method 1: Disable Windows Mobility Center Using Group Policy
- Press the Windows key + R to open the Run dialog box. Type gpedit.msc and press Enter.
- Once the Local Group Policy Editor opens, expand to: Computer Configuration -> Administrative Templates -> Windows Components -> Windows Mobility Center. In the right pane, double-click on the Turn off Windows Mobility Center policy to edit it.

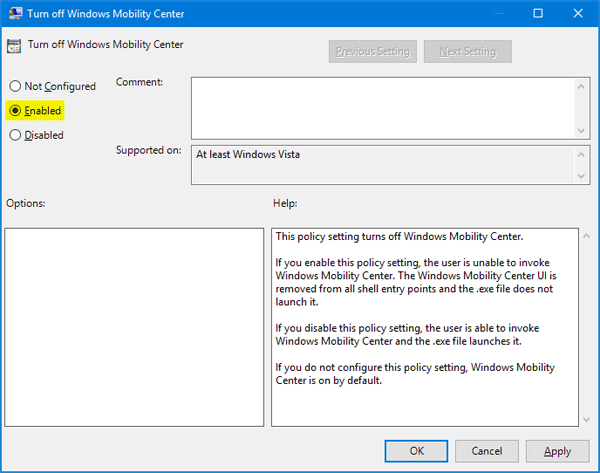
- Select the Enabled option and click OK.

- Reboot your computer and you’ll be unable to open Windows Mobility Center using any methods described in this tutorial: 5 Ways to Open Mobility Center in Windows 10.
Method 2: Disable Windows Mobility Center Using Registry Editor
- Press the Windows key + R to open the Run dialog box. Type regedit and press Enter.
- Once in the Registry Editor, navigate to the following key:
HKEY_LOCAL_MACHINE\SOFTWARE\Microsoft\Windows\CurrentVersion\Policies\MobilityCenterIf the MobilityCenter key doesn’t exist, right-click the Policies key in the left-hand pane and create a new key called MobilityCenter.

- Next, right-click blank area in the right-hand pane to create a DWORD (32-bit Value) entry called NoMobilityCenter and give it a value of 1.

- Close the Registry Editor window and restart your computer. The user can not invoke Windows Mobility Center any more. If you want to re-enable the Windows Mobility Center, just change the Value data of NoMobilityCenter to 0.
- Previous Post: 5 Ways to Open Mobility Center in Windows 10
- Next Post: How to Enable Windows Mobility Center on Desktop PC