
OVER 8M USERS TRUST CUSTOM CURSOR

Enjoy a short video presentation of our Custom Cursor for Windows app
Custom Cursor for Windows Video
Enjoy a short video presentation of our Custom Cursor for Windows app
Intuitive and Convenient
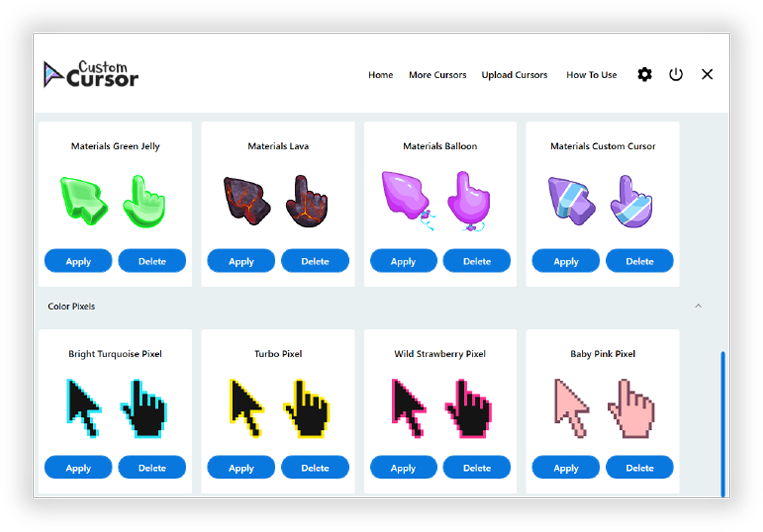
The program is very easy to use — you just need to select the cursor pack
from the preview list and press the «Apply» button to start using new mouse cursors on your
Windows desktop.
DOWNLOAD
Intuitive and Convenient
The program is very easy to use — you just need to select the cursor pack from
the preview list and press the «Apply» button to start using new mouse cursors on your Windows
desktop.
DOWNLOAD
ADD BRIGHTNESS TO YOUR LIFE
Native and easy control of your cursor
There is a possibility to set the size of the cursor. Thousands of
additional custom cursors packs are available for download from the custom-cursor.com site.
DOWNLOAD
Native and easy control of your cursor
There is a possibility to set the size of the cursor. Thousands of additional
custom cursors packs are available for download from the custom-cursor.com site.
DOWNLOAD

DOWNLOAD CUSTOM CURSOR FOR WINDOWS
Add brightness to your life.
Download Custom Cursor for Windows and use
it completely free of charge.
DOWNLOAD
DOWNLOAD CUSTOM CURSOR FOR WINDOWS
Add brightness to your life.
Download Custom Cursor for Windows and use it
completely free of charge.
DOWNLOAD
Customizing your mouse cursor can give your Windows experience a fresh look. In this guide, we’ll walk you through the simple steps to install a custom mouse cursor on both Windows 10 and Windows 11. Whether you’re using a paid cursor pack or a free one, the process is quick and easy.
Key Takeaways
- Free and Paid Options: You can choose from a variety of custom mouse cursors, with many available for free.
- Simple Installation: The installation process involves downloading, extracting, and installing the cursor files.
- Customizable Appearance: Your cursor will change appearance based on different tasks, adding a personalized touch to your system.
Step-by-Step Guide to Installing a Custom Mouse Cursor
1. Visit DeviantArt for Custom Cursors
- Create an Account: Go to DeviantArt and create a free account. Sign in once your account is set up.
- Search for Mouse Cursors: After logging in, use the search bar to look for “mouse cursor” options. You’ll find a wide range of cursors, some free and some paid.

2. Download Your Preferred Cursor Pack
- Select a Cursor Pack: For this guide, we’re using the Windows 11 Cursors Concept v2 by Jepri Creations. If you choose a different pack, the steps will remain the same.
- Download the Files: Scroll down to find the free version if available. Click the download link to get the cursor pack, which will be in a ZIP file format.

3. Extract the Cursor Files
- Locate the ZIP File: Open your downloads folder and find the ZIP file you just downloaded.
- Extract the Files: Right-click the ZIP file and select “Extract Here” or choose a specific folder to extract the files into.

4. Install the Custom Cursor
- Navigate to the Installation File: Inside the extracted folder, open the dark or light cursor folder, depending on your preference.
- Run the Setup: Locate the “Install” or “Setup Information” file. Right-click and select “Install.” Follow any prompts to complete the installation.

5. Apply the New Cursor
- Select the Cursor: After installation, go to your mouse settings, and choose the new cursor from the dropdown menu.
- Apply the Changes: Click “Apply” and then “OK” to finalize the changes. Your cursor should now be updated to the new custom design.

Conclusion
Installing a custom mouse cursor on Windows 10 or 11 is a straightforward process that can add a unique touch to your desktop. With the wide variety of options available, you can easily find a cursor that suits your style. Follow the steps above, and you’ll have your new cursor up and running in no time!
FAQs
What if the cursor doesn’t change after installation?
If the cursor doesn’t change, ensure you’ve selected it from the mouse settings menu and applied the changes. You may also need to restart your computer.
Are custom cursors safe to download?
Most cursors from reputable sources like DeviantArt are safe, but always ensure your antivirus software is up to date when downloading and installing files.
Can I revert back to the default Windows cursor?
Yes, you can easily revert back by selecting the default cursor scheme in your mouse settings.
Is it possible to install these cursors on older versions of Windows?
While this guide focuses on Windows 10 and 11, the process is similar for older versions like Windows 7 or 8.
Do I need to pay for custom cursors?
Many custom cursors are available for free, but some creators offer premium versions for a small fee.
Download Article
An in-depth guide to making a custom mouse cursor in Windows 10 or 11
Download Article
- Editing Your Cursor
- Converting Your Image
- Changing Your Cursor
- Video
- Q&A
|
|
|
|
Do you want to make and use your own unique cursor on your computer? While the default cursor on Windows does the job, it’s fairly plain. By customizing your cursor, you can choose something a lot more fun and personalized. You can use any photo or image you’d like to create this new cursor; you’ll just need to edit and convert it to a .CUR file first. This wikiHow will show you how to make and apply a custom cursor for your Windows 10 or 11 computer.
Things You Should Know
- Find a .PNG image with a transparent background. Paste it onto a transparent 45 W by 50 H canvas and save.
- Convert the .PNG file to .CUR with an online converter.
- Type «Mouse settings» into the Start menu. Click «Additional mouse options» → «Pointers» → «Browse» → select your image → «Apply».
-

This image must be in .PNG format, as this provides a transparent background. If you don’t have a transparent background, you’ll need to edit the image to make it transparent.
- Search Google for images or upload your own to your computer.
-

Go to https://ipiccy.com/ in a web browser. This is a free photo editor that works in your browser.
Advertisement
-

This will be at the top of the page.
- The photo editor will open.
-

You can find this at the very top center of the screen, next to Photo Library.
-

Enter 45 in the Width box and 50 in the Height box.
- Your canvas size should be 45 W x 50 H.
- Be sure to check the box next to Transparent.
-
This looks like three rectangles layered on top of each other. You can find this on the left panel.
-
This looks like a blue star in front of a mountain and sun picture.
-
Click Upload image in the left panel, and then select your photo from your computer. Once added, it will appear in the left panel.
-

Use the scroll wheel to zoom into your canvas if needed.
- If the image doesn’t take up most of the canvas space, click and drag a corner of the image to enlarge it. Make sure the image sits in the center of your canvas and all parts of it are visible.
-
You can find this at the top of the window. This will save your changes.
-
Your cursor image is all finished; you’ll just need to save it to your computer.
- Click Save at the top.
- Click My computer.
- Enter a name for your cursor and then set the file as .png.
- Click Save to my computer.
- Select a save location.


Advertisement
-
Go to https://convertio.co/png-cur/ in a web browser. This is a free image converter. You’ll need to convert your .png image into cursor format (.cur).
-
This is the large button at the center of the screen. Make sure to avoid clicking any surrounding ads.
-
Use the pop-up window to locate the image you created in the previous section. Select it, and click Open.
-
This will convert your image to .cur format. It should only take a few moments to convert.
-

This is the blue button to the left of your image file.
- The .cur file will be downloaded to your computer.
- In most cases, this will be found in your Downloads folder. If desired, move the file to another folder by clicking and dragging.


Advertisement
-
On Windows 10 and earlier, this will be at the bottom left corner of the screen. On Windows 11, this will be at the bottom center of the screen.
-
Results will load as you type.
-
A new window will open.
-
This will be underneath the Related settings header.
- A new window will open.
-
This is the top tab, to the right of Buttons.
-
This is below the Customize box. Make sure the Normal Select mouse option is highlighted.[1]
- Alternatively, double-click Normal Select to open the Browse window.
-
Find your saved .cur image from the previous section. Click it, and then click Open.
-
This is the button at the bottom-right corner. Your cursor will change into your new image.
- Click OK to close the window.
- If you want to change the cursor back to its default, return to the Pointers menu and click Use Default.


Advertisement
Add New Question
-
Question
Can I use Microsoft Photos or Paint instead of Gimp?
Of course, you can! Right-click on a photo in your computer. Click «Properties» in the drop-down menu. In the «General» tab, click the «Change» button. Then choose any program you want the photos to open with.
-
Question
How do I know if the files I download in this process are safe?
Paul Schofield
Community Answer
On most computers these days it will warn you beforehand if the download can cause problems with your computer. If this doesn’t show up, then you will be safe to initiate the download process.
-
Question
It doesn’t say download in the digitalcoding part. How do I do that?
You need to scroll down after converting the image on digitalcoding.com.
See more answers
Ask a Question
200 characters left
Include your email address to get a message when this question is answered.
Submit
Advertisement
Video
Thanks for submitting a tip for review!
About This Article
Thanks to all authors for creating a page that has been read 229,636 times.
Is this article up to date?
If you want to change the way your mouse cursors look, you have two options. The easy one is to install a mouse cursor scheme that changes all the pointers from Windows. The other one is to set a specific pointer for each mouse cursor manually. If you want to know how to install mouse cursors in Windows 10 and Windows 11, read this guide. It is easier than you might think:
NOTE: Installing a new mouse cursor scheme is very similar in Windows 11 and Windows 10. If you don’t know what Windows you’re using, here’s how to tell what Windows you have (11 ways). The method for Windows 10 should work on older Windows versions as well.
1. Download the custom scheme and extract it
The first thing you need to do is download the custom cursors that you want to use on your Windows PC or device. That usually means getting a custom mouse cursor scheme from somewhere on the internet. To get you started, here are some cool cursors that we like: Download the best mouse cursors for Windows.
Use a web browser to download and save your favorite mouse cursor scheme somewhere on your PC, like on your desktop or Downloads folder. Note that mouse cursor schemes usually come packed inside an archive to make it easier and faster to download.
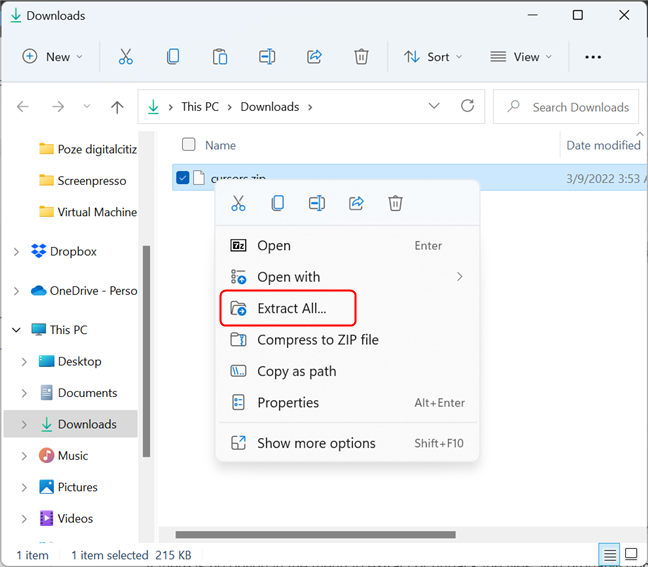
Once you have downloaded the mouse cursor scheme file on your Windows PC, you need to extract its contents. Right-click or press and hold on it and, in the contextual menu, click or tap the option that says “Extract all”.
Extract the mouse cursors (only works with certain archive types)
If there is no option in the menu to extract the files, the archive is in a different format, not supported by File Explorer. To solve this issue and unpack the archive, you need a file archiver app. Install one and then try again. One of the best is called 7-Zip, and you can download it from here: 7-Zip. Here are the next steps if you install 7-Zip.
In Windows 11, once you install the app, right-click or press and hold again on the archive that contains the cursors, then click or tap on Show more options, and you should see the classic right-click menu (this step is not needed in Windows 10, as right-clicking the archive displays the classic contextual menu directly). In the contextual menu, you should see a 7-Zip entry. Click or tap on it, then click or tap on Extract to “archive name\” (where archive name is the name of the actual archive — in our case, Cursors).
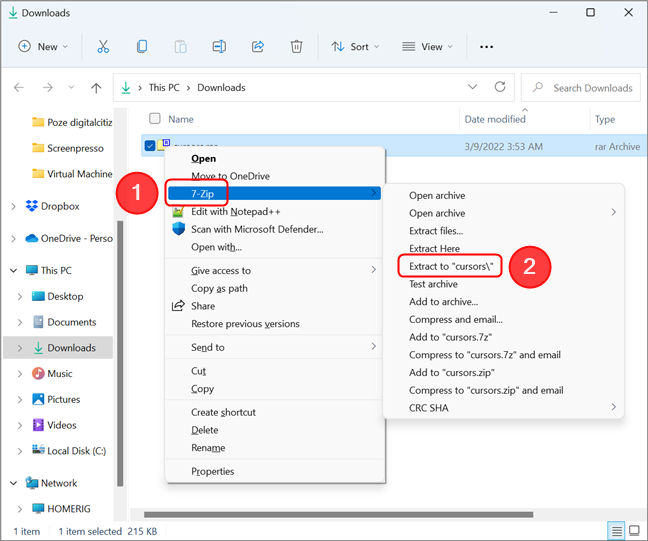
Use 7-Zip to extract the archive contents in the same folder
This action unpacks the archive contents in a folder with the same name as the archive, placed in the same location.
2. Install the cursor scheme
Next comes the most important step: finding and running the install file from inside the custom mouse cursors folder. Open the newly created folder. Inside, you should find many files that contain the pointers used by the mouse scheme. Among them, there should also be a file that ends with the INF file extension. It’s usually called install.inf, but the name can differ depending on the mouse cursor scheme that you want to install.
Right-click or press and hold on the INF file. Next, in Windows 11, click or tap on Show more options. As before, this step is not required in Windows 10. Finally, select Install in the contextual menu.
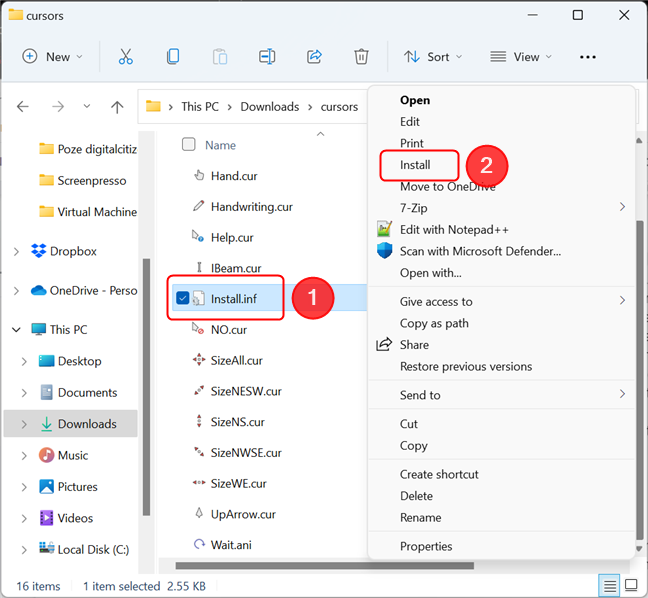
The Install option is found in the classic right-click menu
Windows then opens a UAC (User Account Control) prompt where it asks you to confirm that you want to install the new mouse cursors. To be able to continue, your account must have administrative rights on your PC. Press Yes or type the password used by an admin account.

UAC prompt to confirm the installation of the new custom mouse cursors
After Windows installs the custom mouse cursors, it automatically opens the Mouse Properties window and selects the Pointers tab. Click or tap on the Scheme field.
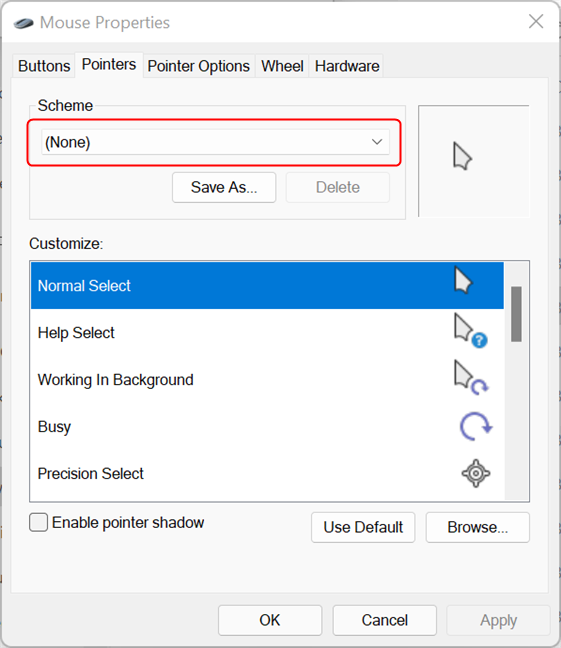
Open the Scheme drop-down menu
Select the new custom mouse cursor scheme from the drop-down list at the top. In the Customize cursors list, you can see a preview of all the pointers used by that mouse cursor scheme. If you like the preview and want to proceed with applying the mouse cursor scheme, click or tap on the OK button. Then, you can enjoy your new custom mouse cursors!
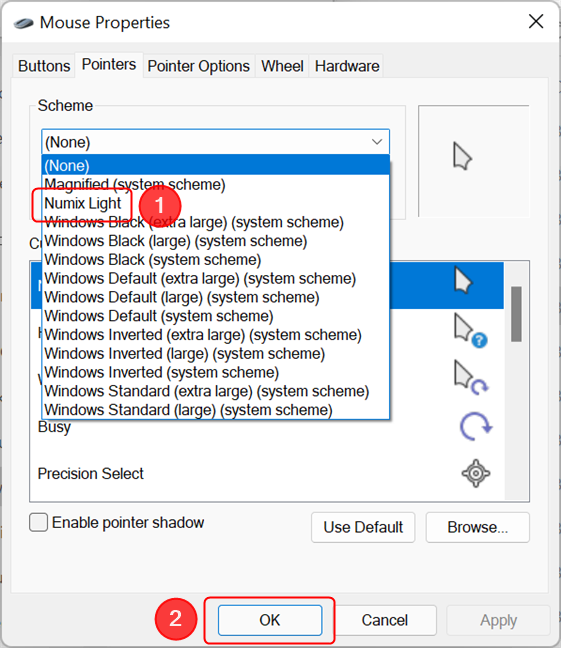
Select the new pointer scheme, then press OK
NOTE: In the example above, we used the excellent Numix Light scheme, available here: Numix Cursors by alexgal23 on DeviantArt.
What if there’s no INF file in the custom mouse cursors folder?
If the mouse cursor scheme you have downloaded does not have an installation INF file inside, then you have to install the mouse pointers manually. That means that you must assign a cursor for each mouse action, by hand. You can find instructions on how to do that in this guide: How to use custom mouse cursors and pointers in Windows.
What’s your favorite custom mouse cursors scheme for Windows?
Now you know how to install custom mouse cursors on your Windows computer or device. As you’ve seen, it is a relatively easy task for anyone, and there are only minor differences between installing custom mouse cursors on Windows 11 and doing it on Windows 10. We hope that this guide was concise and clear enough for you to know what to do. However, if there is something that you did not understand, leave a comment below, and we’ll try to help as best as we can.
Все способы:
- Изменение указателя в Windows 10
- Способ 1: CursorFX
- Способ 2: RealWorld Cursor Editor
- Способ 3: Daanav Mouse Cursor Changer
- Способ 4: «Панель управления»
- Способ 5: Параметры
- Вопросы и ответы: 1
Каждый пользователь ПК имеет свои персональные предпочтения относительно элементов операционной системы, в том числе и указателя мыши. Для кого-то он слишком маленький, кому-то не нравится его стандартное оформление. Поэтому довольно часто юзеры задаются вопросом, можно ли изменить дефолтные настройки курсора в Windows 10 на другие, которые будут более удобными в использовании.
Изменение указателя в Windows 10
Рассмотрим, как можно изменить цвет и размер указателя мыши в Виндовс 10 несколькими простыми способами.
Способ 1: CursorFX
CursorFX — русскоязычная программа, с помощью которой можно легко установить интересные, нестандартные формы для указателя. Она проста в использовании даже для начинающих пользователей, имеет интуитивно понятный интерфейс, но имеет платную лицензию (с возможностью использовать триальную версию продукта после регистрации).
Скачать приложение CursorFX
- Загрузите программу с официального сайта и установите ее на свой ПК, запустите ее.
- В главном меню нажмите раздел «Мои курсоры» и выберите желаемую форму для указателя.
- Нажмите кнопку «Применить».

Способ 2: RealWorld Cursor Editor
В отличии от CursorFX, RealWorld Cursor Editor позволяет не только устанавливать курсоры, но и создавать собственные. Это отличное приложение для тех, кто любит создавать что-то уникальное. Для изменения указателя мыши этим методом необходимо выполнить такие действия.
- Загрузите RealWorld Cursor Editor с официального сайта.
- Запустите приложение.
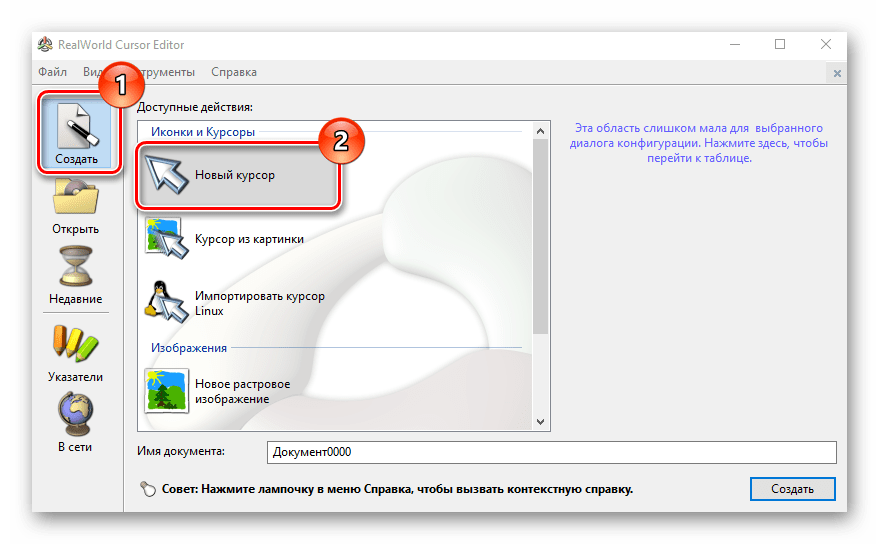
- В окне, которое откроется, нажмите на элемент «Создать», а потом «Новый курсор».
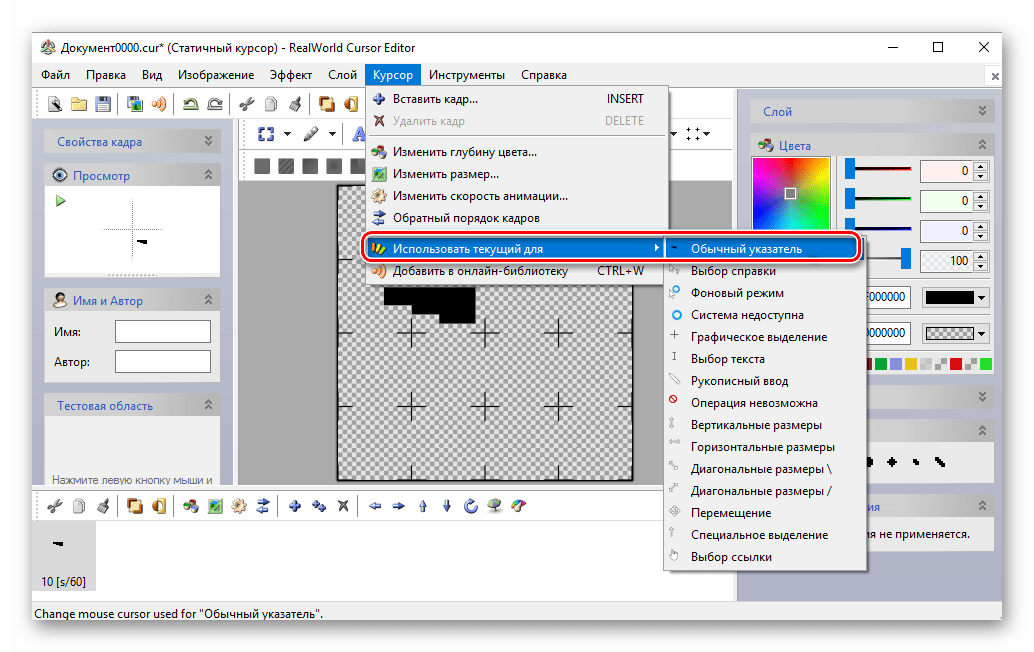
- Создайте собственный графический примитив в редакторе и в разделе «Курсор» кликните по пункту «Использовать текущий для -> Обычный указатель».
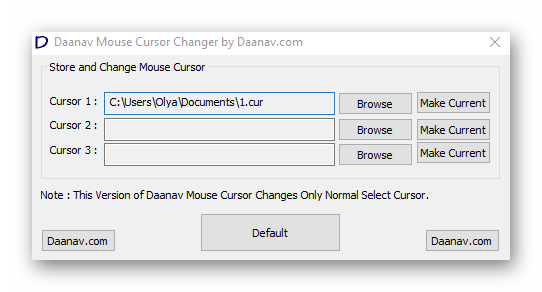
Способ 3: Daanav Mouse Cursor Changer
Это небольшая и компактная программа, которую можно загрузить с официального сайта разработчика. В отличии от ранее описанных программ, она предназначена для изменения курсора на основе ранее загруженных файлов из Интернета или собственных файлов.
Скачать программу Daanav Mouse Cursor Changer
- Скачайте программу.
- В окне Daanav Mouse Cursor Changer нажмите кнопку «Browse» и выберите файл с расширением .cur (скачанный из интернета или сделанный вами в программе для создания курсоров), в котором хранится вид нового указателя.
- Кликните по кнопке «Make Current», чтобы установить выбранный курсор новым указателем, который используется в системе по умолчанию.
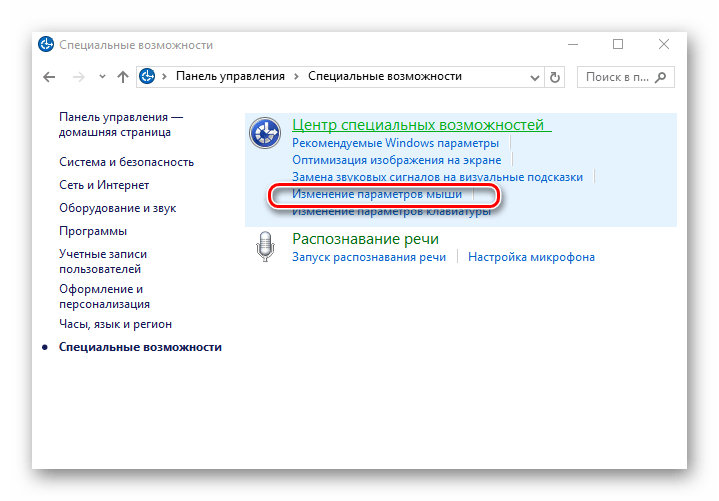
Способ 4: «Панель управления»
- Откройте «Панель управления». Это можно сделать, нажав правой кнопкой мыши по элементу «Пуск» или, использовав комбинацию клавиш «Win+X».
- Выберите раздел «Специальные возможности».
- Кликните на пункте «Изменение параметров мыши».
- Выберите размер и цвет курсора из стандартного набора и щелкните по кнопке «Применить».


Для изменения формы курсора необходимо выполнить такие действия:
- В «Панели управления» выберите режим просмотра «Крупные значки».
- Далее откройте элемент «Мышь».
- Перейдите на вкладку «Указатели».
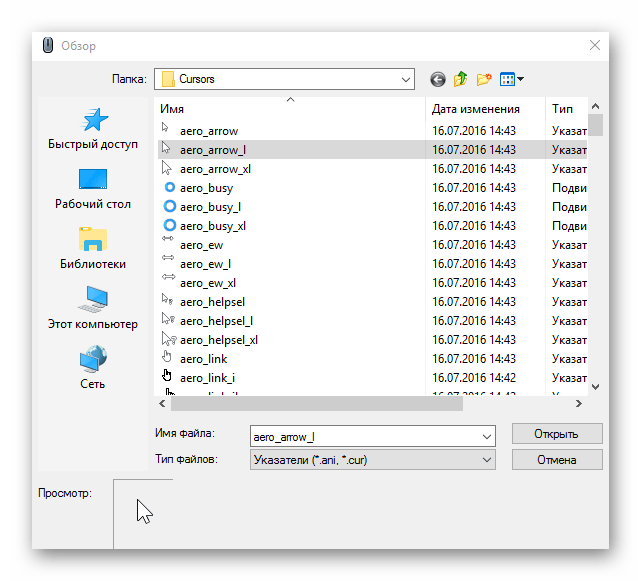
- Щелкните мышкой по графе «Основной режим» в группе «Настройка» и нажмите кнопку «Обзор». Это позволит Вам настроить вид указателя, когда он находится в основном режиме.
- Из стандартного набора курсоров, выберите тот, который Вам больше всего нравится, кликните кнопку «Открыть».


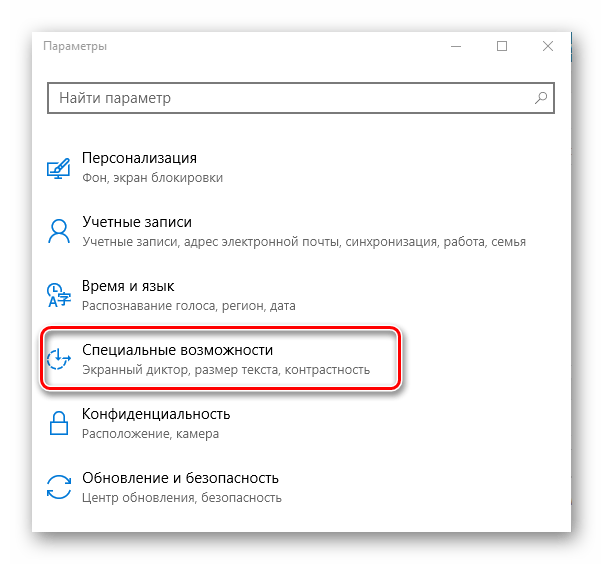
Способ 5: Параметры
Для замены размера и цвета указателя также можно использовать «Параметры».
- Щелкните по меню «Пуск» и выберите пункт «Параметры» (или просто нажмите «Win+I»).
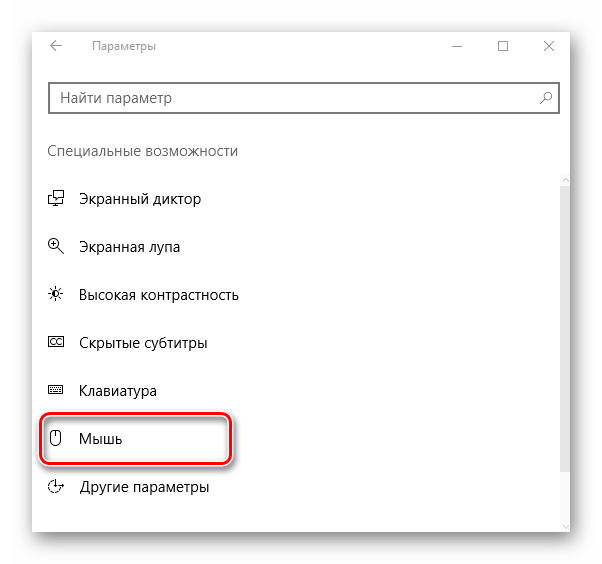
- Выберите пункт «Специальные возможности».
- Далее «Мышь».
- Установите размер и цвет курсора на свой вкус.

Такими способами можно всего за несколько минут придать указателю мыши желанную форму, размер и цвет. Экспериментируйте с разными наборами и Ваш персональный компьютер приобретет долгожданный вид!
Наша группа в TelegramПолезные советы и помощь