
Custom cursors are something that you don’t need to use very often, but when you do need them, they can make a huge difference in the usability of your program. So today we are going to take a look at how to use your own custom cursors in C#/WinForms applications (don’t worry, WPF aficionados, we will take care of you at a later date).
Changing the cursor on a WinForms control is extremely easy, as long as you are only trying to change it to one of the other standard cursors. To do that, all you need to do is set the Cursorproperty on your control to one of the cursors on the Cursorsobject. However, using a cursor of your own can be a little more difficult.
There are a couple ways to use your own cursors, and they all eventually create a new Cursor object. The simplest way is to just load a cursor file (you know, the ones with the “.cur” extension) that you created. The constructor for the Cursor can take a file path to do just that:
Cursor myCursor = new Cursor("myCursor.cur"); And you can then assign it as the cursor on any of your controls:
myControl.Cursor = myCursor; So that is easy enough. But say you don’t have a “.cur” file you want to use – maybe you are actually creating the cursor on the fly programmatically! Well, that gets a bit more difficult. This is because not everything we need is built into the wonderful world of .NET – we will need to interop in some other methods. In the end it is not a lot of code, it is just knowing what code to call.
The first thing we need to do is create the C# equivalent of the ICONINFOstructure. We will need this to define information about the cursor we will be creating:
public struct IconInfo
{
  public bool fIcon;
  public int xHotspot;
  public int yHotspot;
  public IntPtr hbmMask;
  public IntPtr hbmColor;
}
We care about the first three member variables (you can read about the last two on MSDN if you would like). The first one (fIcon) defines if the icon it talks about is a cursor or just a regular icon. Set to false, it means that the icon is a cursor. The xHotspot and yHotspotdefine the actual “click point” of the cursor. Cursors are obviously bigger than 1×1 pixel, but there is really only one pixel that matters – the one defined by the hotspot coordinate. For instance, the hotspot of the standard pointer cursor is the tip of the pointer.
There are also two native methods that we will need references to in order to create the cursor. These are GetIconInfoand CreateIconIndirect. We pull them into out C# program using the following code:
[DllImport("user32.dll")]
[return: MarshalAs(UnmanagedType.Bool)]
public static extern bool GetIconInfo(IntPtr hIcon, ref IconInfo pIconInfo);[DllImport("user32.dll")]
public static extern IntPtr CreateIconIndirect(ref IconInfo icon);
Now to write the cursor creation function:
public static Cursor CreateCursor(Bitmap bmp, int xHotSpot, int yHotSpot)
{
  IntPtr ptr = bmp.GetHicon();
  IconInfo tmp = new IconInfo();
  GetIconInfo(ptr, ref tmp);
  tmp.xHotspot = xHotSpot;
  tmp.yHotspot = yHotSpot;
  tmp.fIcon = false;
  ptr = CreateIconIndirect(ref tmp);
  return new Cursor(ptr);
}
This function takes in a bitmap that will be made into a cursor, and the hotspot for the cursor. We first create a new IconInfo struct, which we are going to populate with the icon info. We do this by calling the native method GetIconInfo. This function takes in a pointer to the icon (which we get by calling GetHicon() on the bitmap), and a reference to the IconInfo struct that we want populated with the information.
We then set the x and y hotspot coordinates the the values passed in, and we set fIcon to false (marking it as a cursor). Finally, we call CreateIconIndirect, which returns a pointer to the new cursor icon, and we use this pointer to create a new Cursor. The function CreateIconIndirect makes a copy of the icon to use as the cursor, so you don’t have to worry about the bitmap that was passed in being locked or anything of that nature. So now that we have this function, how do we use it? It is actually really simple:
Bitmap bitmap = new Bitmap(140, 25);
Graphics g = Graphics.FromImage(bitmap);
using (Font f = new Font(FontFamily.GenericSansSerif, 10))
g.DrawString("{ } Switch On The Code", f, Brushes.Green, 0, 0);myControl.Cursor = CreateCursor(bitmap, 3, 3);
bitmap.Dispose();
Here, we are creating a bitmap, and drawing the string “{ } Switch On The Code” on that bitmap. We pass that bitmap into the create cursor function with a hotspot of (3,3), and it spits out a new cursor, ready to use (in this case on the control myControl). And, of course, we dispose the original bitmap once the cursor is created. Here you can see a screenshot of that cursor in action:
And here is all the code put together:
using System;
using System.Drawing;
using System.Windows.Forms;
using System.Runtime.InteropServices;namespace CursorTest
{
  public struct IconInfo
  {
    public bool fIcon;
    public int xHotspot;
    public int yHotspot;
    public IntPtr hbmMask;
    public IntPtr hbmColor;
  }  public class CursorTest : Form
  {
    public CursorTest()
    {
      this.Text = "Cursor Test";      Bitmap bitmap = new Bitmap(140, 25);
      Graphics g = Graphics.FromImage(bitmap);
      using (Font f = new Font(FontFamily.GenericSansSerif, 10))
        g.DrawString("{ } Switch On The Code", f, Brushes.Green, 0, 0);      this.Cursor = CreateCursor(bitmap, 3, 3);      bitmap.Dispose();
    }    [DllImport("user32.dll")]
    public static extern IntPtr CreateIconIndirect(ref IconInfo icon);    [DllImport("user32.dll")]
    [return: MarshalAs(UnmanagedType.Bool)]
    public static extern bool GetIconInfo(IntPtr hIcon, ref IconInfo pIconInfo);    public static Cursor CreateCursor(Bitmap bmp, int xHotSpot, int yHotSpot)
    {
      IconInfo tmp = new IconInfo();
      GetIconInfo(bmp.GetHicon(), ref tmp);
      tmp.xHotspot = xHotSpot;
      tmp.yHotspot = yHotSpot;
      tmp.fIcon = false;
      return new Cursor(CreateIconIndirect(ref tmp));
    }
  }
}
Hopefully, this code is a help to anyone out there trying to use custom cursors of their own. The possibilities are endless when you can actually create and modify your cursors on the fly! If you would like the Visual Studio project for the simple form above as a starting point, here it is.
Source Files:
- CursorTest.zip
-
Method 1: Using Windows Forms
-
Method 2: Using WPF (Windows Presentation Foundation)
-
Method 3: Asynchronous Operations
-
Conclusion
-
FAQ
Changing the cursor in a C# application can enhance user experience significantly. Whether you are developing a desktop application or a web application, providing visual feedback through cursor changes is essential.
In this article, we will focus on how to change the cursor to a wait cursor using C#. This is particularly useful when performing long-running tasks, as it informs users that they should wait for the operation to complete. You will learn step-by-step methods to implement this, complete with code examples and detailed explanations. Let’s dive into the world of C# and see how easy it is to change the cursor!
Method 1: Using Windows Forms
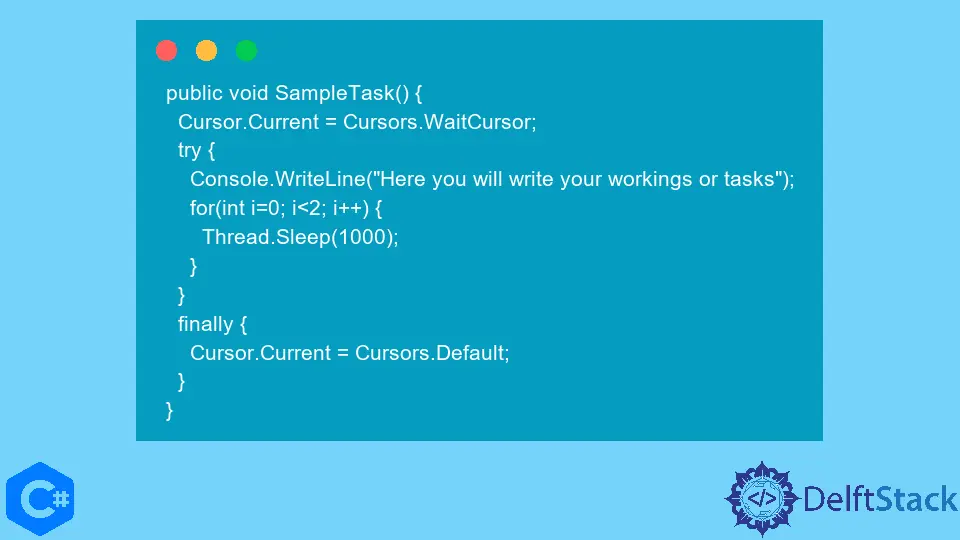
If you’re working with a Windows Forms application, changing the cursor is quite straightforward. The Cursor.Current property allows you to set the current cursor for the application. Here’s how you can implement this:
using System;
using System.Drawing;
using System.Windows.Forms;

public class CursorExample : Form
{
    public CursorExample()
    {
        this.Load += new EventHandler(Form_Load);
    }

    private void Form_Load(object sender, EventArgs e)
    {
        Cursor.Current = Cursors.WaitCursor;
        // Simulate a long-running task
        System.Threading.Thread.Sleep(5000);
        Cursor.Current = Cursors.Default;
    }

    [STAThread]
    public static void Main()
    {
        Application.EnableVisualStyles();
        Application.Run(new CursorExample());
    }
}
Output:
The cursor changes to a wait cursor for 5 seconds before reverting to the default cursor.
In this code snippet, we create a simple Windows Form application. When the form loads, we set the cursor to a wait cursor. The System.Threading.Thread.Sleep(5000) simulates a long-running task for 5 seconds. After this period, we revert the cursor back to the default. This method provides a clear indication to users that an operation is in progress, improving the overall user experience.
Method 2: Using WPF (Windows Presentation Foundation)
For those working with WPF applications, the approach is slightly different but equally effective. The Mouse.OverrideCursor property can be used to set a wait cursor. Here’s an example:
using System;
using System.Threading;
using System.Windows;

namespace CursorExampleWPF
{
    public partial class MainWindow : Window
    {
        public MainWindow()
        {
            InitializeComponent();
            Loaded += MainWindow_Loaded;
        }

        private void MainWindow_Loaded(object sender, RoutedEventArgs e)
        {
            Mouse.OverrideCursor = Cursors.Wait;
            // Simulate a long-running task
            Thread.Sleep(5000);
            Mouse.OverrideCursor = null;
        }
    }
}
Output:
The cursor changes to a wait cursor for 5 seconds before reverting to the default cursor.
In this WPF example, we utilize the Mouse.OverrideCursor property to change the cursor to a wait cursor. Similar to the Windows Forms example, we simulate a long-running task with Thread.Sleep(5000). After the task, we set the Mouse.OverrideCursor back to null, which restores the default cursor. This method is particularly useful in WPF applications, allowing for a seamless user experience during lengthy operations.
Method 3: Asynchronous Operations
If your application performs tasks asynchronously, you can combine cursor changes with asynchronous programming for a smoother experience. Here’s how you can implement this in a Windows Forms application:
using System;
using System.Threading.Tasks;
using System.Windows.Forms;

public class AsyncCursorExample : Form
{
    public AsyncCursorExample()
    {
        this.Load += new EventHandler(Form_Load);
    }

    private async void Form_Load(object sender, EventArgs e)
    {
        Cursor.Current = Cursors.WaitCursor;
        await Task.Delay(5000); // Simulate a long-running task
        Cursor.Current = Cursors.Default;
    }

    [STAThread]
    public static void Main()
    {
        Application.EnableVisualStyles();
        Application.Run(new AsyncCursorExample());
    }
}
Output:
The cursor changes to a wait cursor for 5 seconds before reverting to the default cursor.
In this asynchronous example, we use await Task.Delay(5000) instead of blocking the UI thread with Thread.Sleep. This allows the application to remain responsive while waiting. When the form loads, the cursor changes to a wait cursor, and after the delay, it reverts back to the default. This method is particularly advantageous in modern applications, as it keeps the user interface responsive and user-friendly.
Conclusion
Changing the cursor in C# applications is a simple yet effective way to enhance user experience. Whether you’re using Windows Forms or WPF, the methods outlined in this article provide straightforward solutions for implementing a wait cursor during long-running tasks. By giving users visual feedback, you can help them understand that an operation is in progress, reducing frustration and improving overall satisfaction. Remember to choose the method that best fits your application’s architecture, and happy coding!
FAQ
-
How do I change the cursor in a WPF application?
You can use the Mouse.OverrideCursor property to change the cursor in a WPF application. -
Can I change the cursor back to default after a task?
Yes, you can revert the cursor to its default state by setting the cursor property back to null or Cursors.Default. -
What is the purpose of using a wait cursor?
A wait cursor indicates to users that a task is in progress, helping to manage their expectations and improve user experience. -
Is it possible to change the cursor dynamically?
Yes, you can change the cursor dynamically based on application events or user actions. -
How can I ensure my application remains responsive while changing the cursor?
Using asynchronous programming, such as async/await, allows your application to remain responsive while performing long-running tasks.
#. You will learn effective methods for implementing this in both Windows Forms and WPF applications. Enhance user experience by providing visual feedback during long-running tasks. Discover code examples and detailed explanations that make it easy to implement cursor changes in your C# applications.
Enjoying our tutorials? Subscribe to DelftStack on YouTube to support us in creating more high-quality video guides. Subscribe
Анализ текста на Python с NLTK и Spacy
AI_Generated 14.05.2025
NLTK, старожил в мире обработки естественного языка на Python, содержит богатейшую коллекцию алгоритмов и готовых моделей. Эта библиотека отлично подходит для образовательных целей и. . .
Реализация DI в PHP
Jason-Webb 13.05.2025
Когда я начинал писать свой первый крупный PHP-проект, моя архитектура напоминала запутаный клубок спагетти. Классы создавали другие классы внутри себя, зависимости жостко прописывались в коде, а о. . .
Обработка изображений в реальном времени на C# с OpenCV
stackOverflow 13.05.2025
Объединение библиотеки компьютерного зрения OpenCV с современным языком программирования C# создаёт симбиоз, который открывает доступ к впечатляющему набору возможностей. Ключевое преимущество этого. . .
POCO, ACE, Loki и другие продвинутые C++ библиотеки
NullReferenced 13.05.2025
В C++ разработки существует такое обилие библиотек, что порой кажется, будто ты заблудился в дремучем лесу. И среди этого многообразия POCO (Portable Components) – как маяк для тех, кто ищет. . .
Паттерны проектирования GoF на C#
UnmanagedCoder 13.05.2025
Вы наверняка сталкивались с ситуациями, когда код разрастается до неприличных размеров, а его поддержка становится настоящим испытанием. Именно в такие моменты на помощь приходят паттерны Gang of. . .
Создаем CLI приложение на Python с Prompt Toolkit
py-thonny 13.05.2025
Современные командные интерфейсы давно перестали быть черно-белыми текстовыми программами, которые многие помнят по старым операционным системам. CLI сегодня – это мощные, интуитивные и даже. . .
Конвейеры ETL с Apache Airflow и Python
AI_Generated 13.05.2025
ETL-конвейеры – это набор процессов, отвечающих за извлечение данных из различных источников (Extract), их преобразование в нужный формат (Transform) и загрузку в целевое хранилище (Load). . . .
Выполнение асинхронных задач в Python с asyncio
py-thonny 12.05.2025
Современный мир программирования похож на оживлённый мегаполис – тысячи процессов одновременно требуют внимания, ресурсов и времени. В этих джунглях операций возникают ситуации, когда программа. . .
Работа с gRPC сервисами на C#
UnmanagedCoder 12.05.2025
gRPC (Google Remote Procedure Call) — открытый высокопроизводительный RPC-фреймворк, изначально разработанный компанией Google. Он отличается от традиционых REST-сервисов как минимум тем, что. . .
CQRS (Command Query Responsibility Segregation) на Java
Javaican 12.05.2025
CQRS — Command Query Responsibility Segregation, или разделение ответственности команд и запросов. Суть этого архитектурного паттерна проста: операции чтения данных (запросы) отделяются от операций. . .
You can use the Cursor.Position property in C# to set the position of the mouse cursor on the screen. Here’s an example of how you could use it:
using System.Windows.Forms;

// Set the position of the mouse cursor to (100, 200)
Cursor.Position = new Point(100, 200);
This will move the mouse cursor to the specified point on the screen. You can also use the Cursor.SetPosition method to set the position of the mouse cursor relative to the current position. For example:
using System.Windows.Forms;

// Move the mouse cursor 100 pixels to the right and 50 pixels down from its current position
Cursor.SetPosition(new Point(Cursor.Position.X + 100, Cursor.Position.Y + 50));
You can also use the SendInput function in Windows API to simulate mouse clicks and movements. Here’s an example of how you could use it:
using System.Runtime.InteropServices;

// Define a structure for the INPUT structure
[StructLayout(LayoutKind.Sequential)]
public struct Input
{
    public uint type;
    public uint mouseData;
    public int dx;
    public int dy;
}

// Define a function to simulate a mouse click at a specified position
[DllImport("user32.dll")]
public static extern bool SendInput(uint nInputs, ref Input pInputs, int cbSize);

// Set the position of the mouse cursor to (100, 200) and simulate a left click
Cursor.Position = new Point(100, 200);
SendInput(1, ref new Input { type = 0x0001, mouseData = 0x00000001 }, Marshal.SizeOf(typeof(Input)));
This will move the mouse cursor to the specified point on the screen and simulate a left click at that position. You can also use other values for the type field of the Input structure to simulate different types of input, such as right-clicks or drag-and-drop operations.