
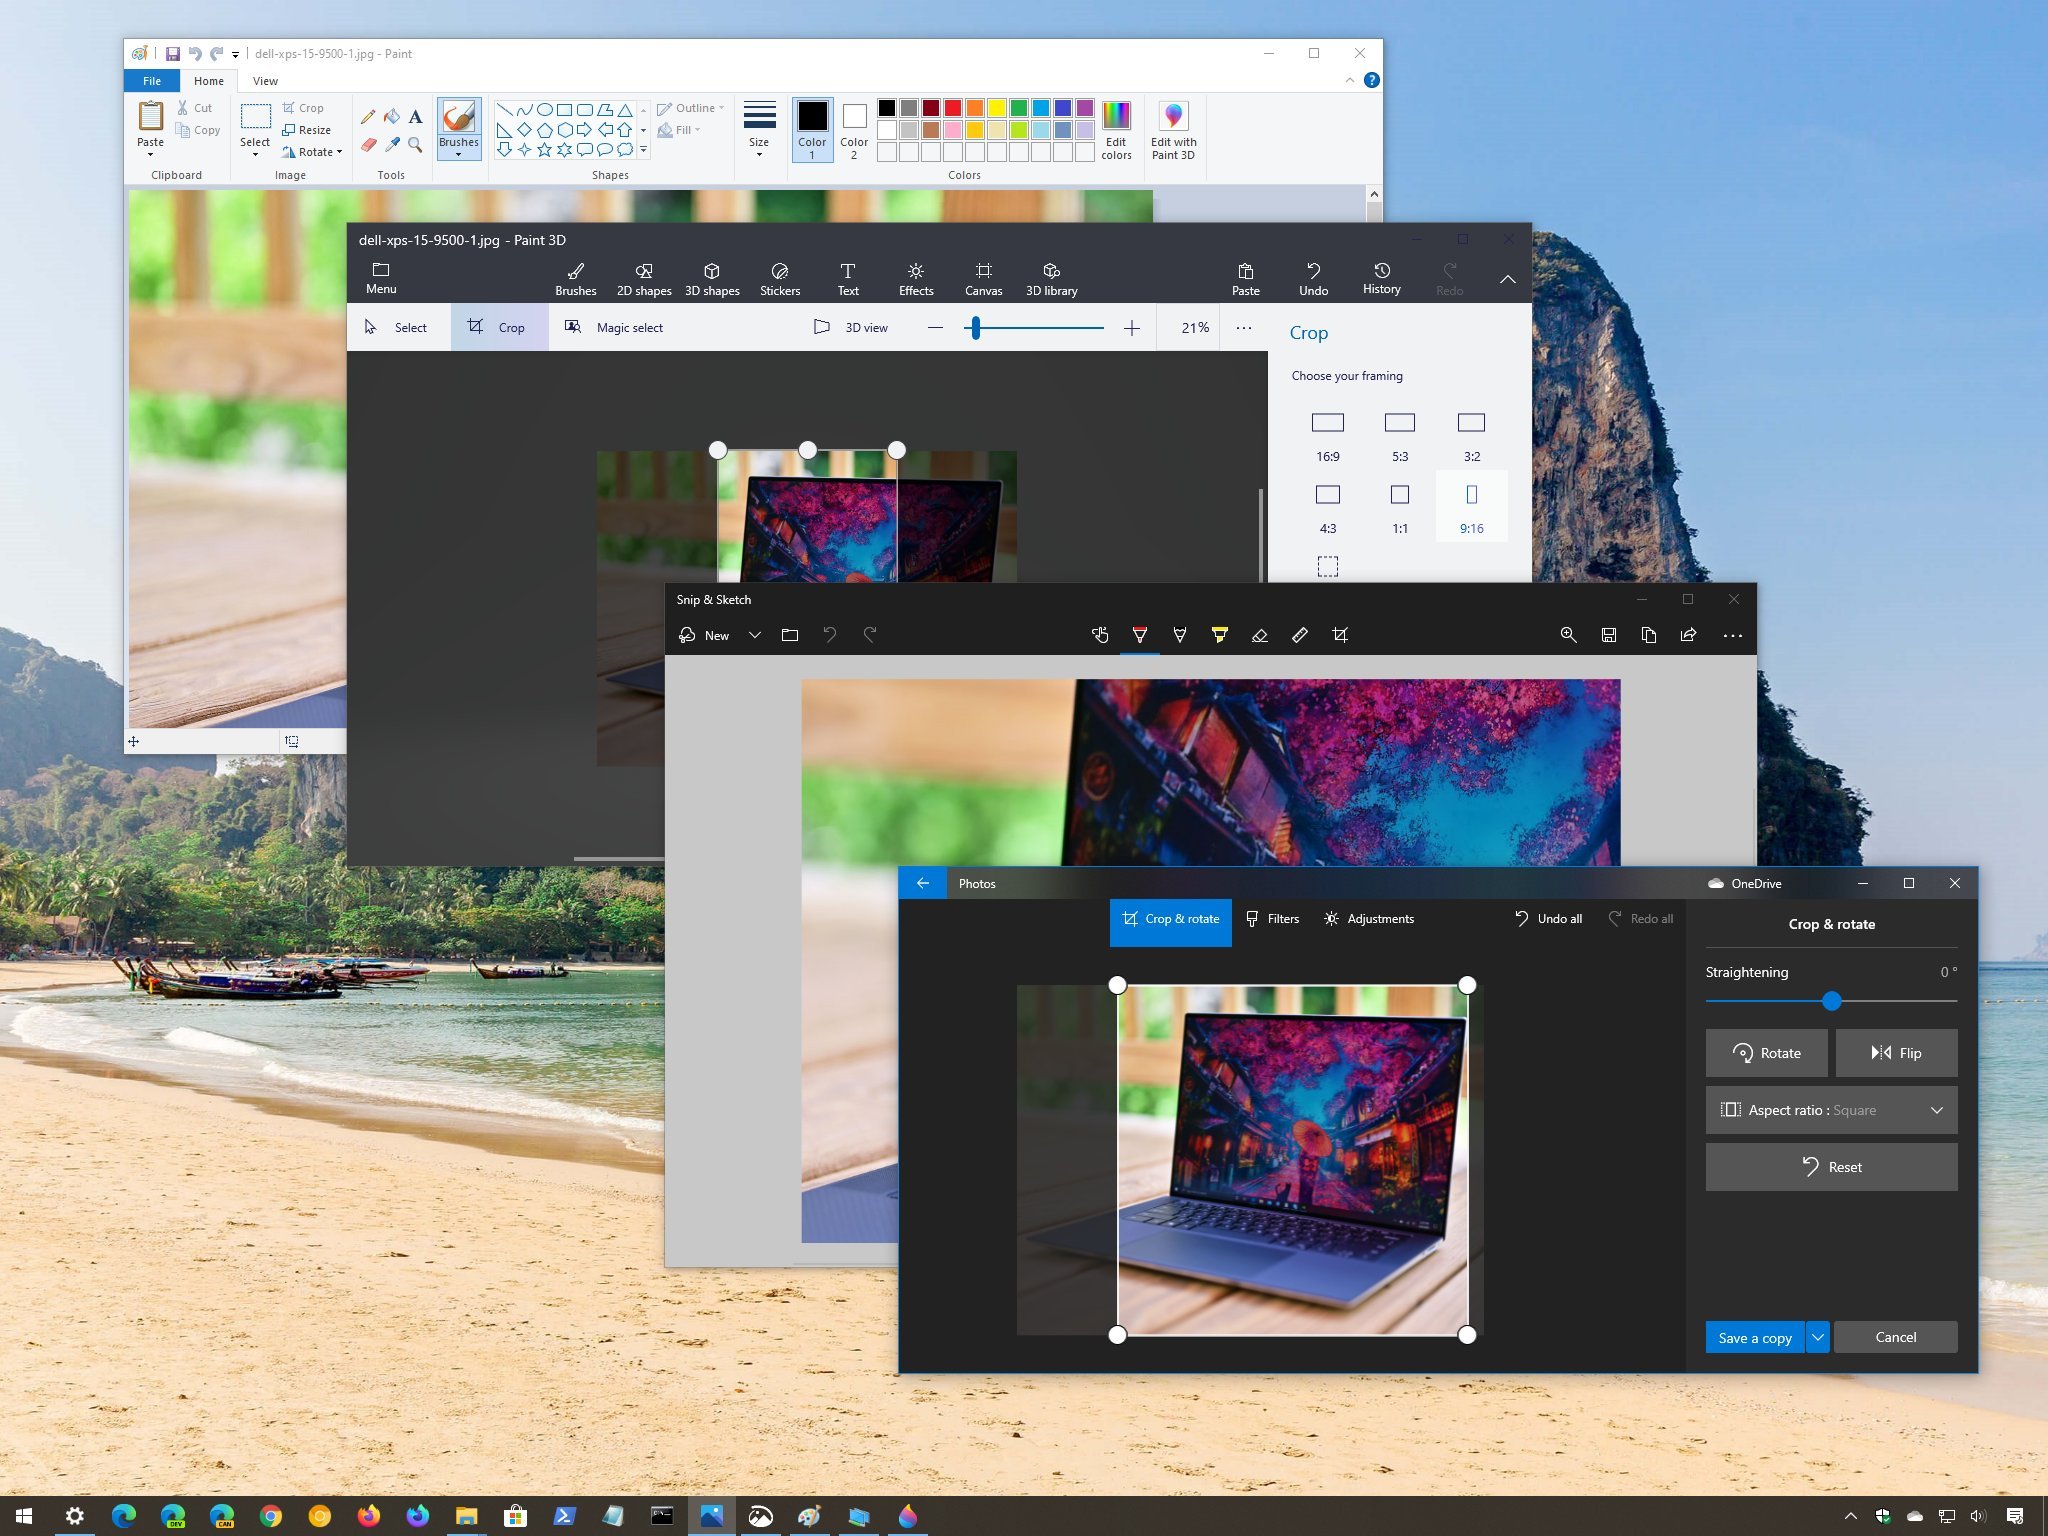
(Image credit: Windows Central)
If you ever need to crop an image to trim parts of the canvas, focus the image on a specific area, or change the aspect ratio for printing, Windows 10 includes at least four tools to complete the task, including Photos, Paint 3D, Snip & Sketch, and even using the legacy Paint app.
Although all these tools give you quick access to a cropping tool, the options and steps are slightly different.
In this Windows 10 guide, we’ll walk you through four different ways to crop images on Windows 10 without third-party tools.
- How to crop image using Photos on Windows 10
- How to crop image using Paint 3D on Windows 10
- How to crop image using Snip & Sketch on Windows 10
- How to crop image using Paint on Windows 10
How to crop image using Photos on Windows 10
To crop or resize an image using the Photos app on Windows 10, use these steps:
- Open Start.
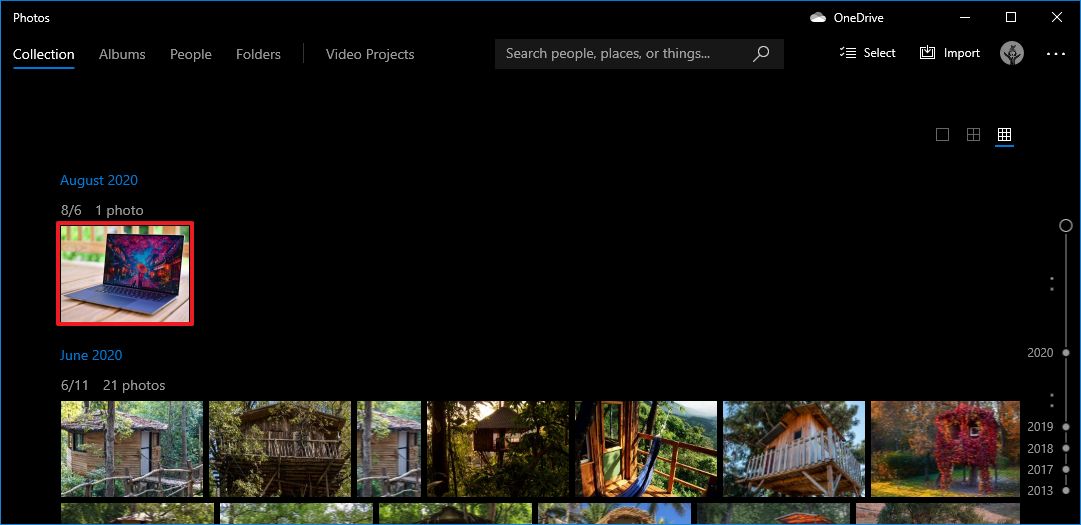
- Search for Photos and click the top result to open the app.
- Click on the picture.Quick tip: If the image is not available in the collection, using File Explorer, right-click the image, select the Open with option, and click the Photos option.
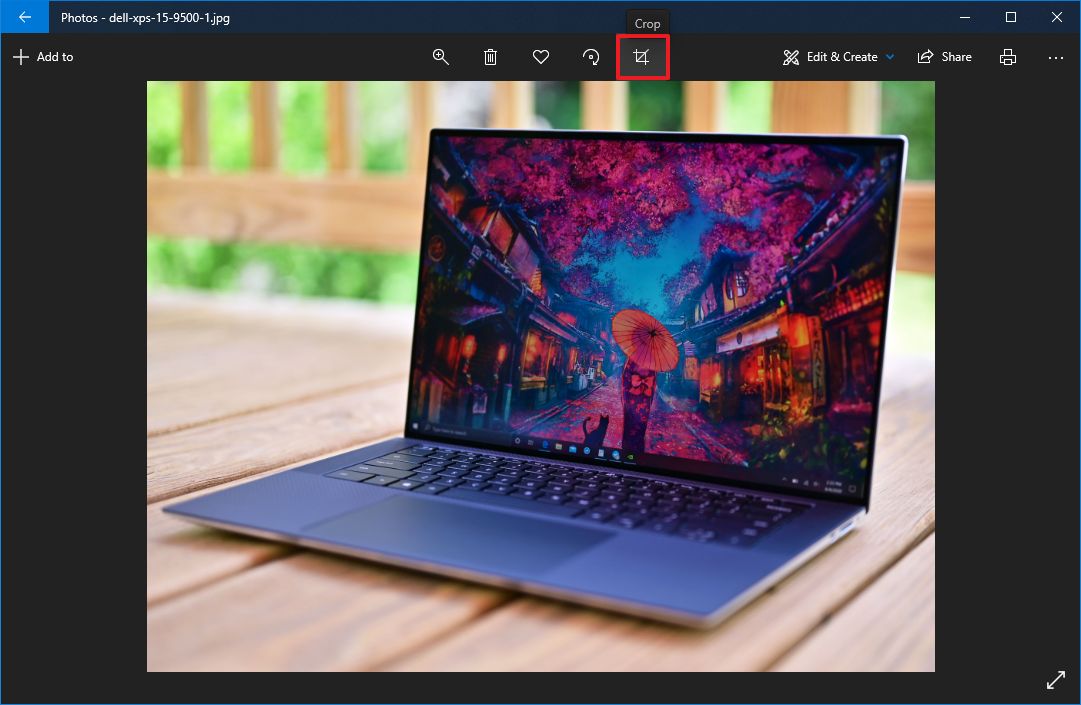
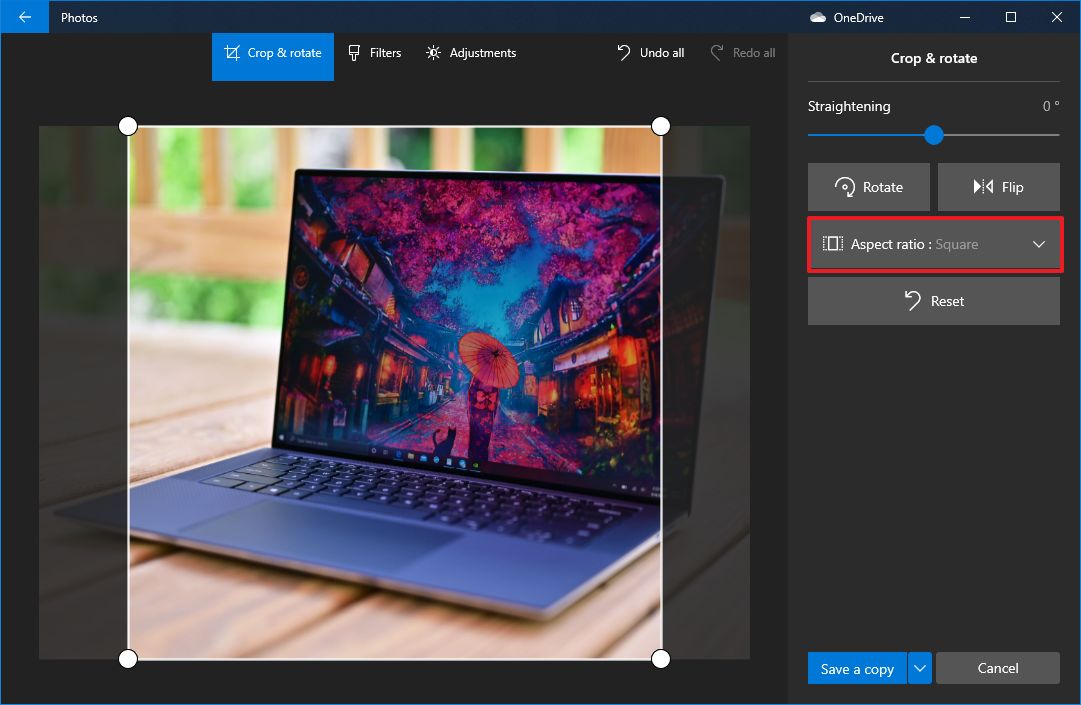
- Click the Crop button from the top-center toolbar.
- Use the pins in corners to select the area you want to crop.
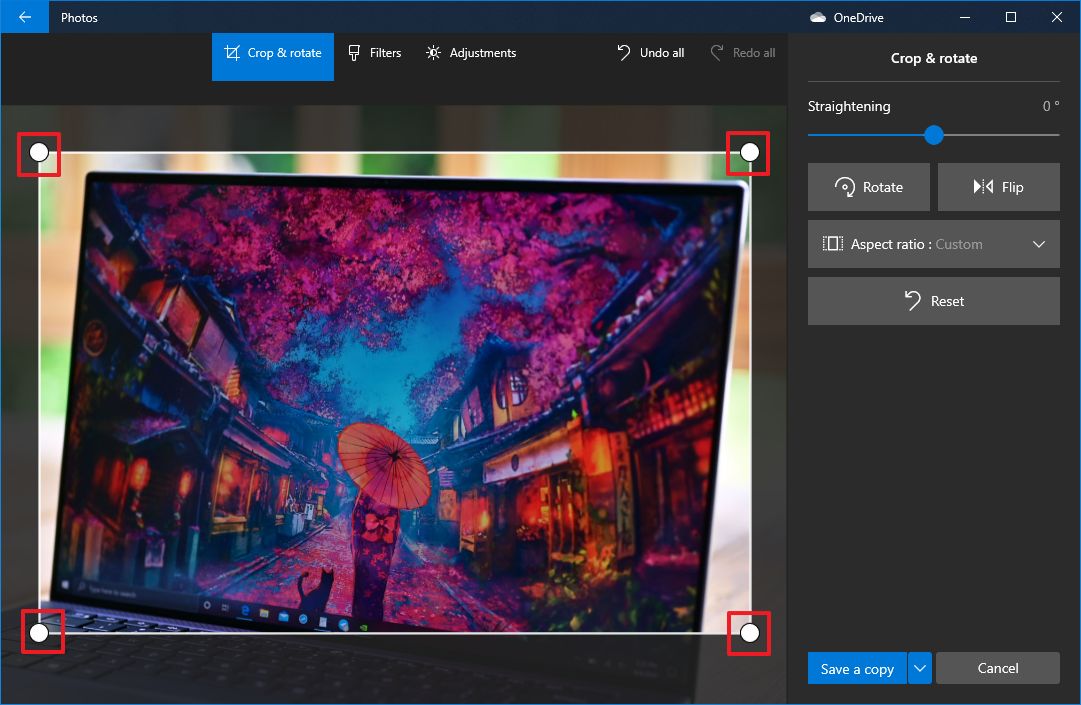
- Click and drag the image to center it in the cropping area.
- (Optional) Under the «Crop & rotate» pane, use the Aspect ratio drop-down menu and select one of the predefined cropping options using aspect ratio, including:
- Square.
- 3:2.
- 4:3.
- 10:8.
- Make a portrait.
- (Optional) Under the «Crop & rotate» pane, use the Straightening tool to use a small rotation to straighten the image.
- (Optional) Under the «Crop & rotate» pane, use the Rotate button to rotate the image 90, 180, or 360 degrees.
- Click the Save a copy button.
Once you complete the steps, the image will be cropped to the region you specified.
How to crop image using Paint 3D on Windows 10
To crop an image file with the Paint 3D app, use these steps:
- Open Start.
- Search for Paint 3D and click the top result to open the app.
- Click on Menu.
- Select the Open option.
- Click the Browse file option.
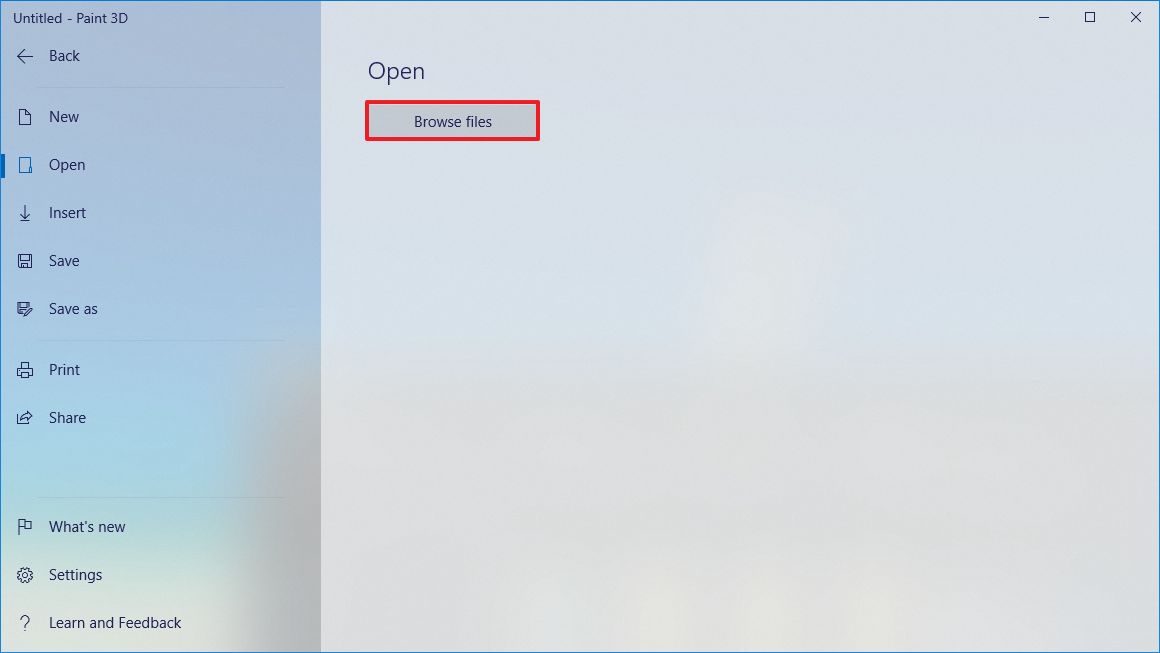
- Select the image you want to crop.
- Click the Open button.
- Click the Crop button from the top-left toolbar.

- Use the pins around the image to select the area you want to crop.
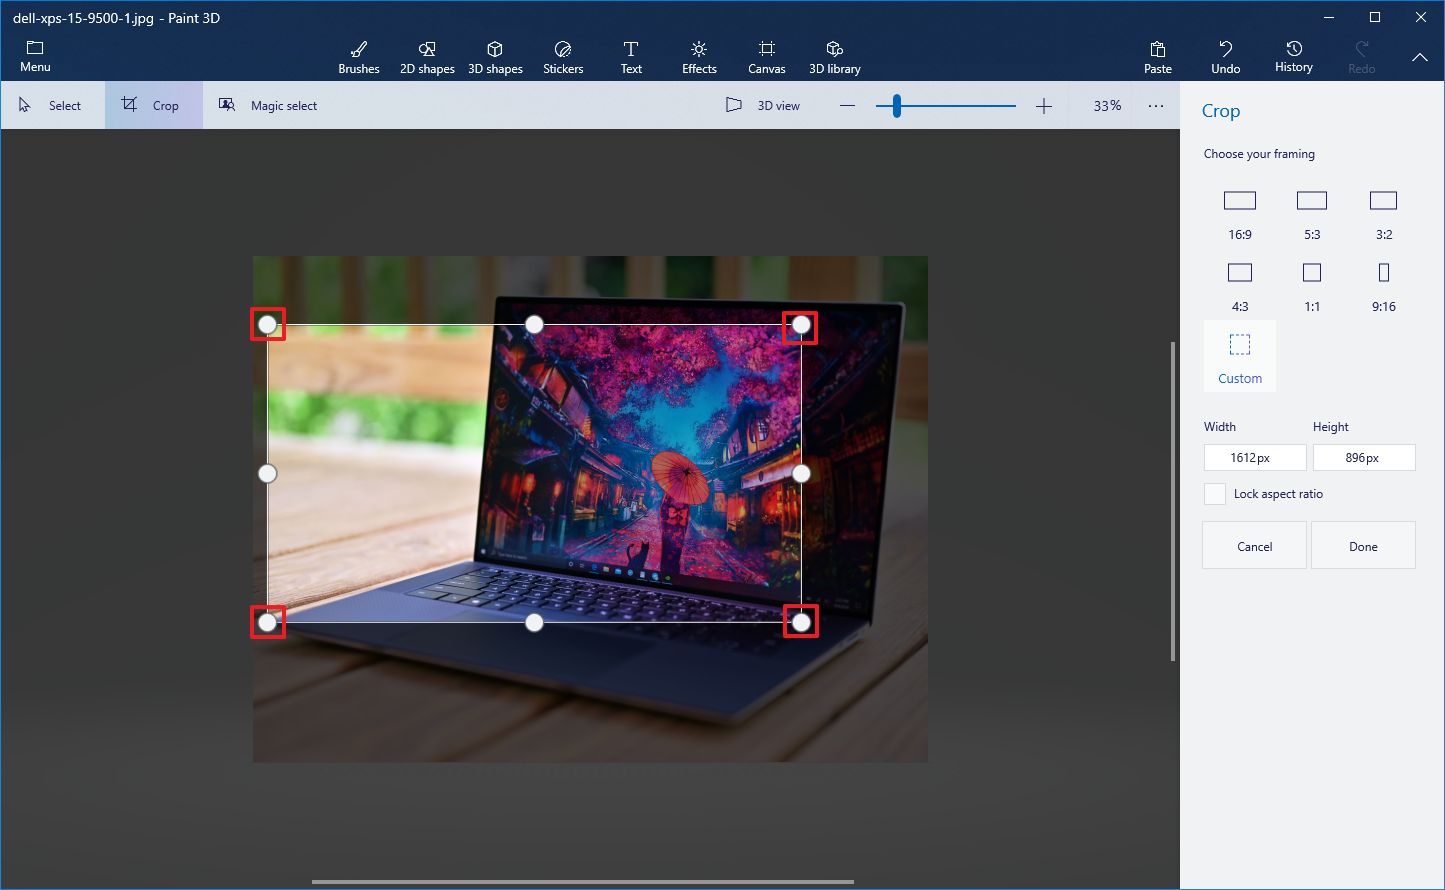
- Click and drag the cropping area to center the image.
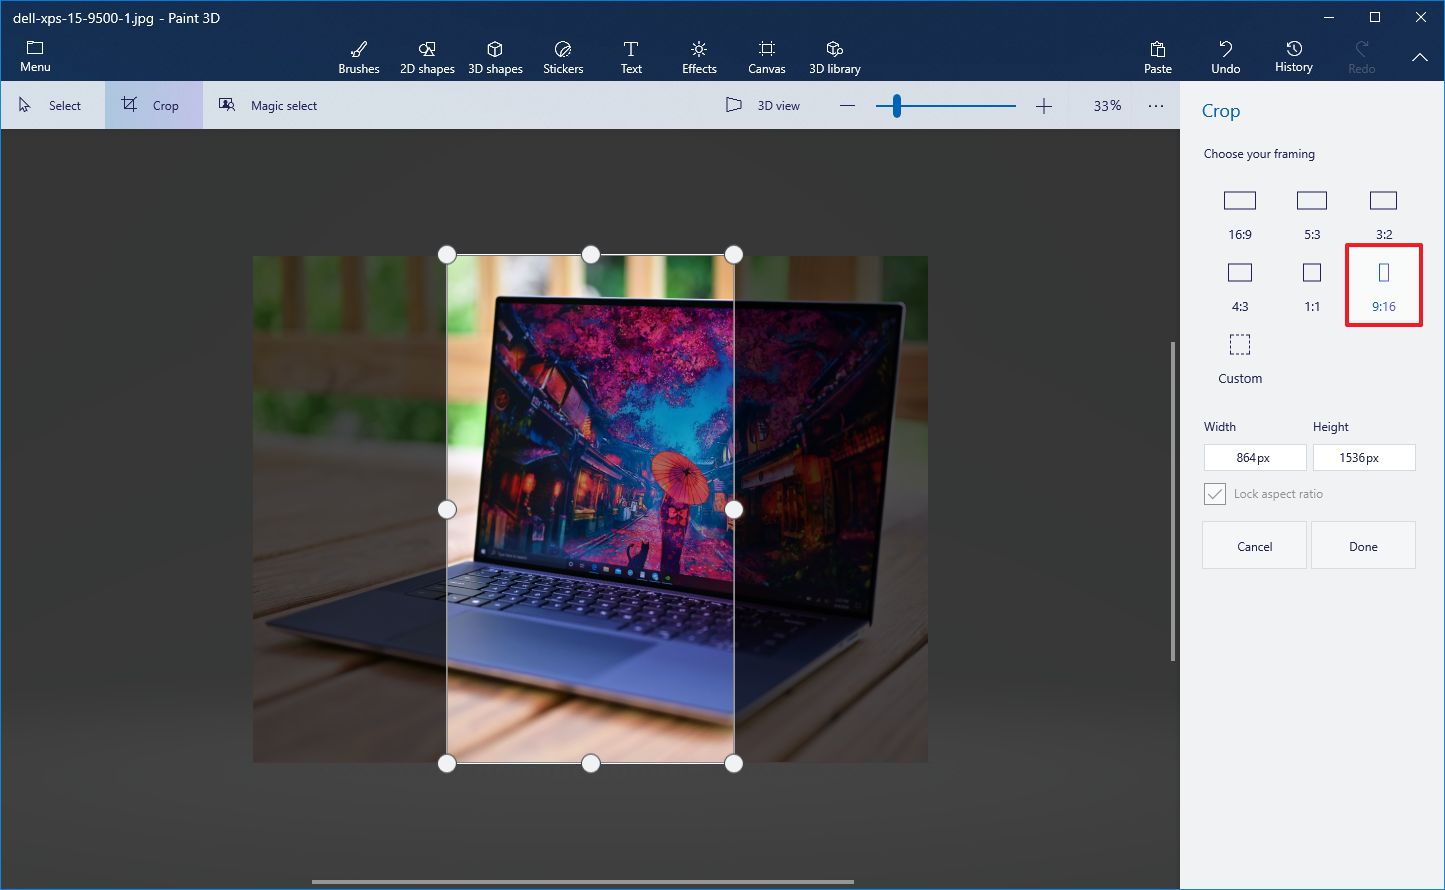
- (Optional) Use the framing options from the left pane to crop the image using the different aspect ratios:
- 16:9.
- 5:3.
- 3:2.
- 4:3.
- 1:1.
- 9:16.
- (Optional) Use the Width and Height options from the left pane to crop the image to an exact size.Quick tip: Checking the Lock aspect ratio option allows you to enlarge or reduce the size without affecting the aspect ratio.
- Click the Done button.
- Click on Menu.
- Select the Save as option.
- Select the Image option.
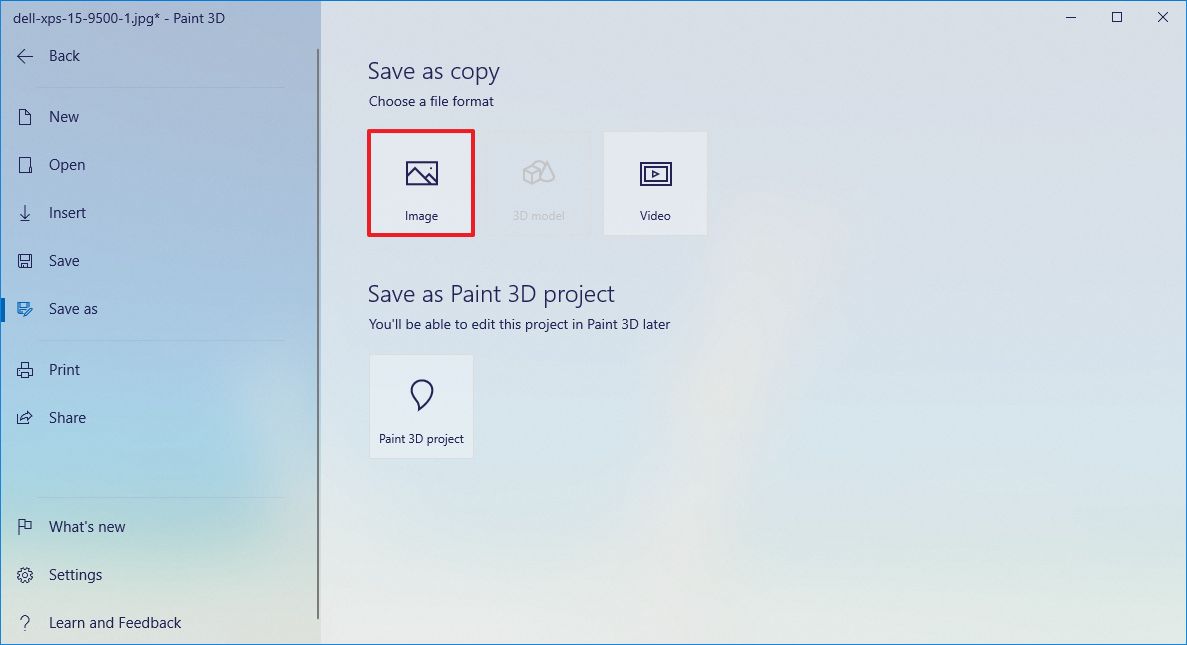
- Specify the name of the image.
- Click the Save button.
After you complete the steps, the tool will produce a new image with the region you cropped.
All the latest news, reviews, and guides for Windows and Xbox diehards.
How to crop image using Snip & Sketch on Windows 10
To crop pictures using the Snip & Sketch tool on Windows 10, use these steps:
- Open Start.
- Search for Snip & Sketch and click the top result to open the app.
- Click the Open (folder) button from the top-left.
- Select the image you want to crop.
- Click the Open button.
- Click the Crop button from the top-center toolbar.
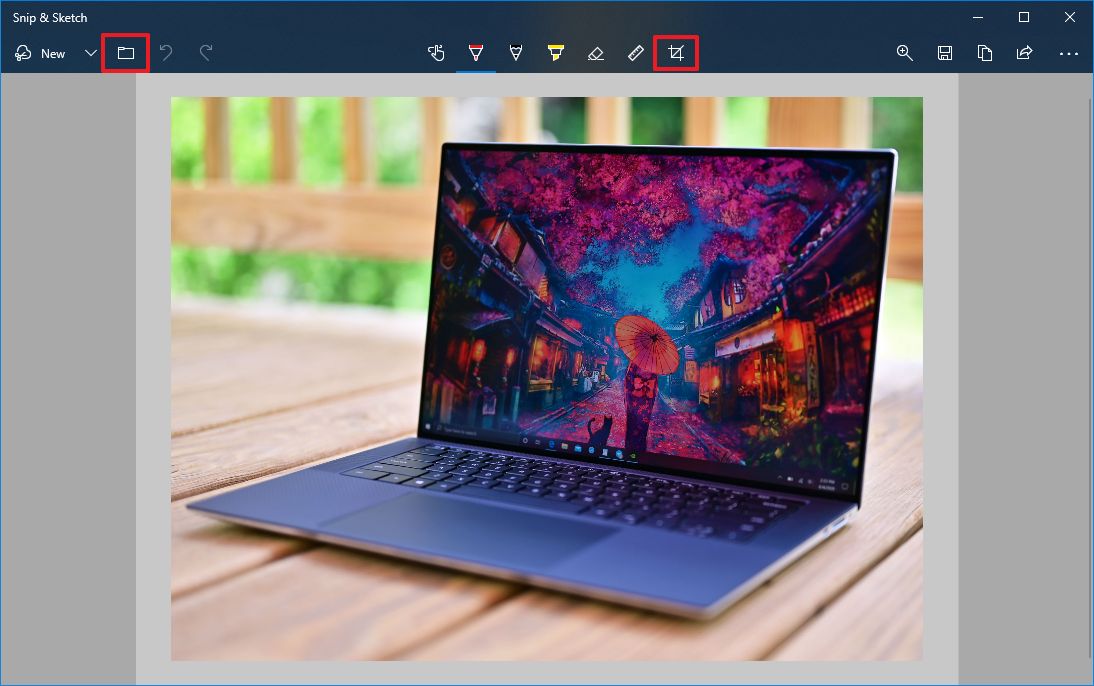
- Use the pins in corners to select the area you want to crop.

- Click the Apply (check) button from the top-right corner.
- Click the Save as (floppy) button from the top-right corner.
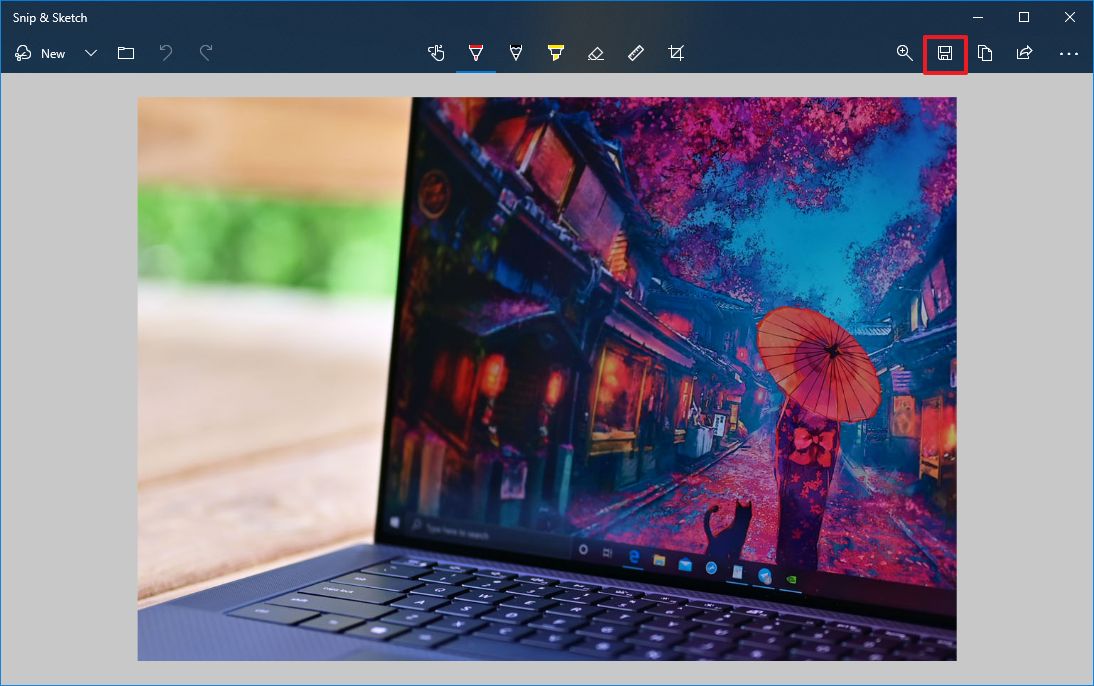
- Specify the name of the image.
- Click the Save button.
Once you complete the steps, the snipping tool will crop and save the picture as a copy.
How to crop image using Paint on Windows 10
Alternatively, you can still use the legacy Paint app to crop images on Windows 10.
To crop images with the legacy Paint app, use these steps:
- Open Start.
- Search for Paint and click the top result to open the app.
- Click on File.
- Select the Open option.
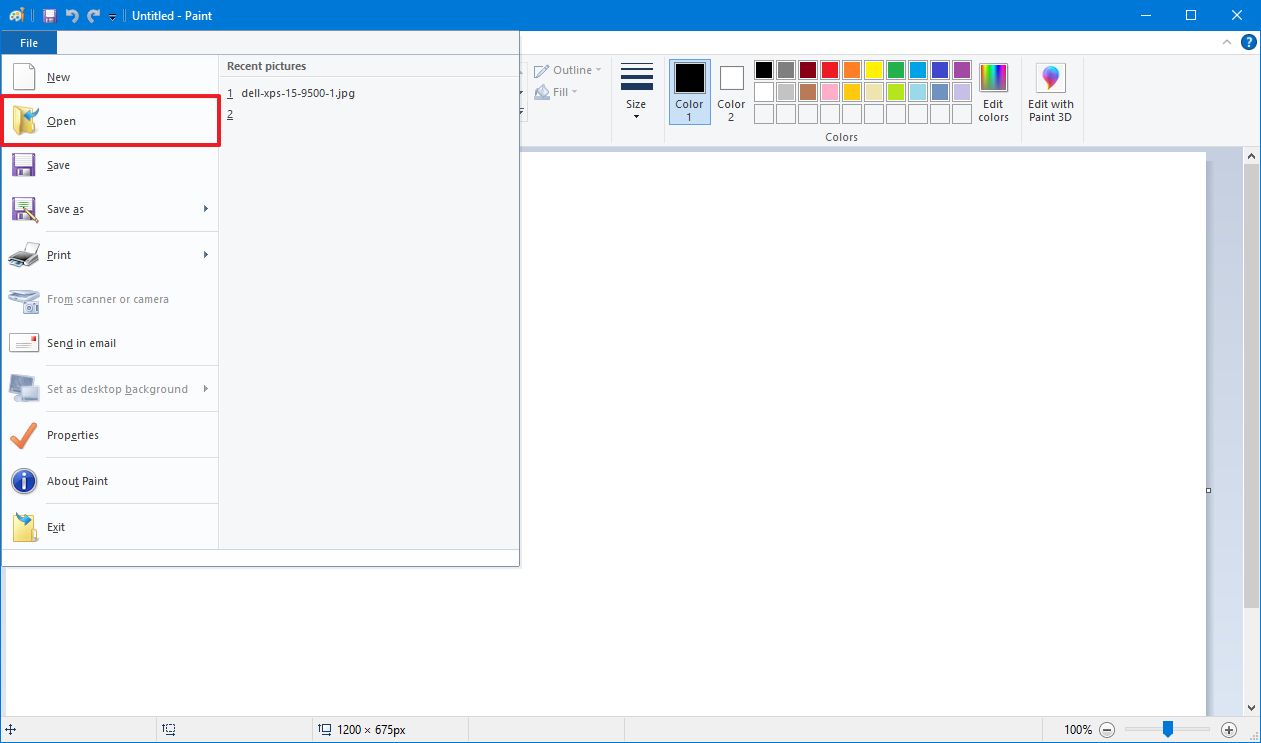
- Select the image you wish to crop.
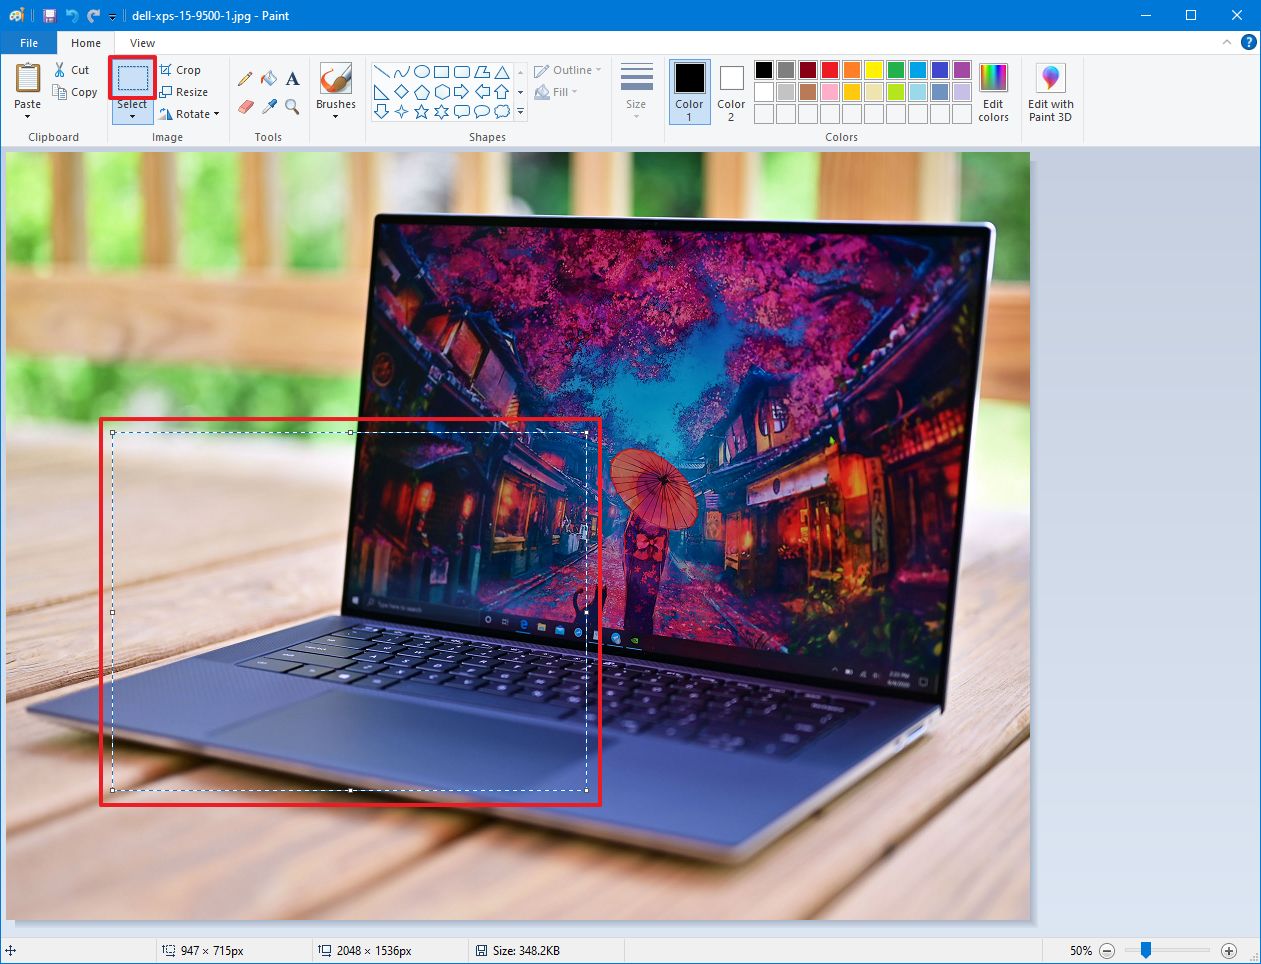
- Click the Select option from the Home tab.
- Select the region of the image you want to crop.
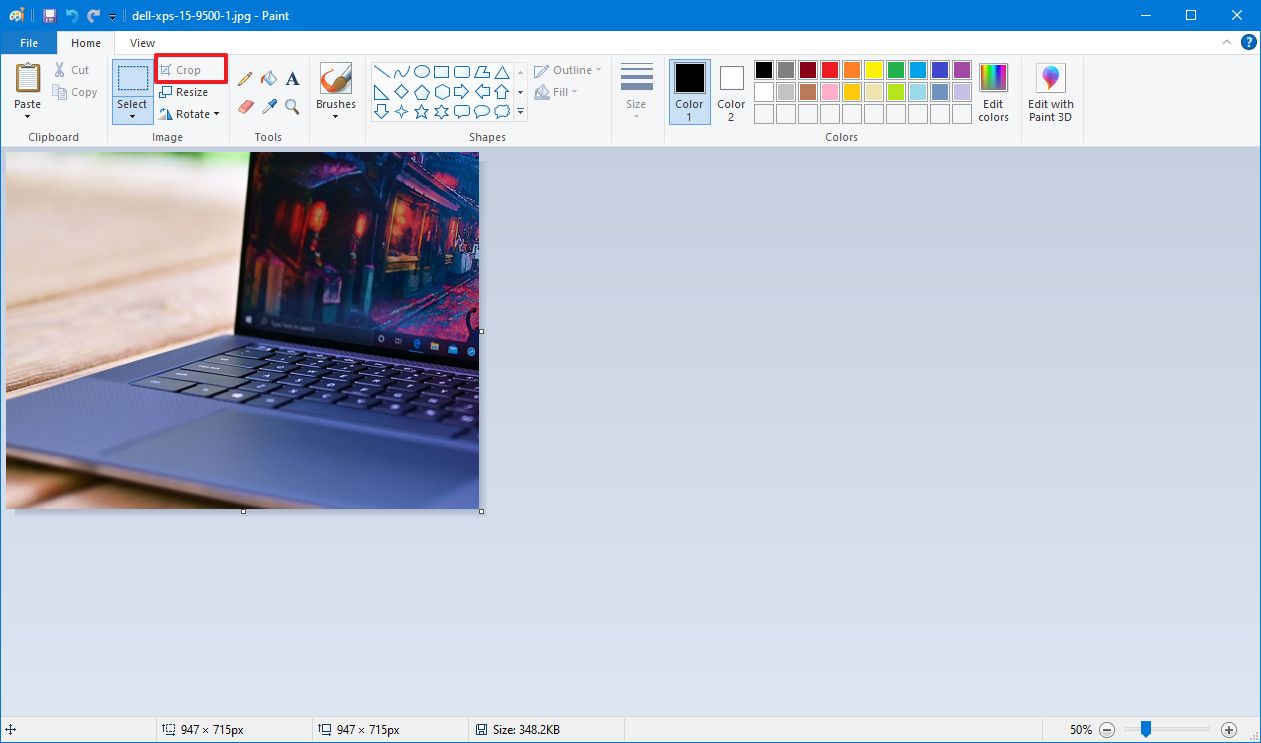
- Click the Crop button from the Home tab.
- Click on File.
- Click the Save as option.
- Specify the name of the image.
- Click the Save button.
After you complete the steps, the Paint app will crop the image depending on your selection.
Mauro Huculak has been a Windows How-To Expert contributor for WindowsCentral.com for nearly a decade and has over 15 years of experience writing comprehensive guides. He also has an IT background and has achieved different professional certifications from Microsoft, Cisco, VMware, and CompTIA. He has been recognized as a Microsoft MVP for many years.
Readers help support Windows Report. We may get a commission if you buy through our links.
Read our disclosure page to find out how can you help Windows Report sustain the editorial team. Read more
There are a lot of tools that may help you crop an image on Windows 10, including Paint, Paint 3D, Snip & Sketch, or Microsoft Photos. In this article, we will cover all the ways on how to crop images on Windows 10.
What is the shortcut key for crop in Windows 10? Windows 10 doesn’t have a shortcut for cropping an image. However, there are individual shortcuts when you’re using a certain software. For instance, the crop shortcut key for Snip & Sketch is Ctrl + R or Alt + R.
How do I crop an image on Windows 10?
1. Crop an image using Paint
- Open your image in Microsoft Paint.
- Click on the Select tool and draw a rectangle on the area you want to crop the image.

- Now, just click the Crop button.
- You will immediately see the cropped image that you may now save using the File menu.


Although Microsoft Paint is a pretty old tool, it still has a lot of tricks under its sleeve. For instance, you can fit it with the latest AI-Cocreator tool and generate interesting artwork.
2. Crop an image using Photos
- Open your image using Microsoft Photos.
- Click on the Edit image icon from the top.

- Now, drag the corners or sides of the image with your mouse until you have the right crop selection.
- Now, you can save the image as a copy or click on the drop-down menu to overwrite your selection.


When you drag the corners, you will see the exact resulting resolution of the cropped image so you can adjust it as you need.
With Microsoft Photos, you may also retouch your image and change the brightness, contrast, exposure, color saturation and more.
If you have trouble with the app, our guide on how to fix Microsoft Photos issues will come in handy.
- Microsoft Office Lens: A Powerful Tool for Capturing and Organizing Information
- Swap Left/Right Speaker in Realtek Audio Console [How to]
3. Crop images using online tools or third-party software
We won’t be able to list here all the software you may use, but you may crop images using Adobe Photoshop, for example.
It is one of the most popular editing apps with which you can crop, edit, erase objects, or even adjust your subject’s features and poses automatically.
⇒ Get Adobe Photoshop
We also have a selection of the best image editing tools that you should check if you want something more than cropping your photos.
4. Crop an image using Snip & Sketch
- Open your image using Snip & Sketch.
- Click on the Crop icon from the top.

- Use the mouse to drag the corners of the image to get your crop selection and hit the checkmark from the top to acknowledge it.
- Now, you can save the result in the format you like.


You can do a lot more with this tool. We have a complete article on how to use Snip & Sketch to capture, edit and share images.
5. Crop an image using Paint 3D
- Open your image using Paint 3D.
- Click the Crop icon from the top left, adjust your selection by dragging the corners with your mouse, and click Done when you’re finished.

- Now, you can save the result by using the Menu > Save or Save as options.

As you have probably noticed, Paint 3D also has options to choose from a selection of aspect ratios or simply input the resulting resolution in the Custom setting. Make sure you check the Lock aspect ratio option so that your image doesn’t get distorted when you change the resolution.
You may also be interested in reading our guide on how to add and edit text into a Paint 3D project.
With all the tools above you can crop images for free and we hope that our guide helped you do that quickly.
For any other questions or suggestions, feel free to use the comments section below.
Claudiu Andone
Windows Toubleshooting Expert
Oldtimer in the tech and science press, Claudiu is focused on whatever comes new from Microsoft.
His abrupt interest in computers started when he saw the first Home Computer as a kid. However, his passion for Windows and everything related became obvious when he became a sys admin in a computer science high school.
With 14 years of experience in writing about everything there is to know about science and technology, Claudiu also likes rock music, chilling in the garden, and Star Wars. May the force be with you, always!
Cropping images is an essential skill for anyone working with photographs or digital graphics. Whether you want to enhance a personal photo, prepare graphics for social media, or create professional presentations, cropping can significantly improve your visuals. Windows 10 offers several tools and methods for cropping images, making it accessible for users of all skill levels. In this comprehensive guide, I will explore five different ways to crop an image on Windows 10, delving into each method, step-by-step instructions, and tips to optimize your results.
Method 1: Using the Photos App
The Photos app is the default image viewer and editor for Windows 10. It provides basic editing functions, including cropping.
Step-by-Step Instructions:
-
Open the Photos App:
- Locate the image you want to crop. You can do this by navigating through File Explorer or by simply finding the image in the Start menu.
- Double-click the image to open it in the Photos app.
-
Access the Editing Tools:
- Once the image is open, click on the Edit Image icon which looks like a pencil or press the
Ctrl + Eshortcut.
- Once the image is open, click on the Edit Image icon which looks like a pencil or press the
-
Select the Crop Tool:
- In the editing menu, you will see several options. Click on Crop & Rotate to access the cropping features.
-
Adjust the Crop Area:
- A grid overlay will appear on your image. You can click and drag the corners of the grid to define the area you want to keep.
- If you want to maintain the original aspect ratio, ensure the Aspect Ratio option is set accordingly, or use the freeform crop option.
-
Apply the Crop:
- Once satisfied with the crop area, click on the Save a copy option. This allows you to keep the original image while saving the cropped version.
- You can also just hit the Save button if you want to overwrite the original image.
-
Close the App:
- After saving, you can close the Photos app and navigate to the saved file in its destination folder.
Tips for Using Photos App:
- Use the Undo Function: If you accidentally crop too much, use the undo button or re-open the image to try again.
- Experiment with Filters: After cropping, the Photos app also has filters and adjustments that can enhance your image further.
Method 2: Microsoft Paint
While Paint is a simple program, it is surprisingly effective for quick tasks like cropping images.
Step-by-Step Instructions:
-
Open Paint:
- Search for «Paint» in the Start menu and launch the application.
-
Load the Image:
- Click on File > Open and navigate to the image you want to crop. Select it and hit Open.
-
Select the Area to Crop:
- Use the Select tool from the toolbar. Choose either the rectangular or freeform selection.
- Click and drag over the area of the image you wish to keep.
-
Crop the Image:
- With your area selected, click on the Crop button in the toolbar. This will remove everything outside your selected area.
-
Save the Cropped Image:
- Click File > Save As to save the cropped image. Choose your desired format, name the file, and select your saving location.
-
Close Paint:
- Once the image is saved, you can close Paint.
Tips for Using Paint:
- Use Zoom: If you’re cropping fine details, use the zoom function to make your selection more precise.
- Stay Organized: It’s best to save under a new name so you can always return to the original.
Method 3: Snipping Tool
The Snipping Tool is a convenient utility for capturing screenshots, but it can also be used to crop images.
Step-by-Step Instructions:
-
Open Snipping Tool:
- Search for «Snipping Tool» in the Start menu and launch it.
-
Select New Snip:
- Click on New to start a new snip. You will see the screen overlay.
-
Select the Area to Snip:
- Click and drag your mouse over the area of the image you wish to crop. Release the mouse button to capture the selection.
-
Adjust and Save:
- After capturing, the snipped area opens in a new window. You can make further adjustments if needed.
- Click on File > Save As to save your cropped image. Select the format and location.
-
Close Snipping Tool:
- You can now close the Snipping Tool.
Tips for Using Snipping Tool:
- Use Different Modes: Snipping Tool has options like rectangular snip, free-form, or full-screen which you can choose based on your needs.
- Use Annotations: You can annotate your image in the Snipping Tool with a pen or highlighter if desired.
Method 4: Photos App with Image Preview
Windows 10 also allows you to crop images through the File Explorer’s image preview feature.
Step-by-Step Instructions:
-
Open File Explorer:
- Navigate to the folder containing the image you want to crop.
-
Preview the Image:
- Click on the image once to highlight it. Then, look to the right pane of the File Explorer, where a preview should appear.
-
Edit the Image:
- In the Preview pane, you should see an Open with option. Click on it and select Photos to open the image in the Photos app.
-
Follow the Cropping Instructions:
- Like in Method 1, click on the Edit Image icon, select Crop & Rotate, and adjust your cropping selection.
-
Save the Cropped Version:
- After adjustments, click Save a copy or Save based on your preference.
-
Close the Photos App:
- Close the app once you have saved your changes.
Tips for Using Image Preview:
- Faster Access: Using the preview option provides a quicker way to open images directly without navigating through the Photos app.
- Check Compatibility: This method works best for common image formats such as JPEG, PNG, and BMP.
Method 5: Third-party Image Editors
For users who frequently crop and edit images, third-party software can provide advanced features. Popular options include Adobe Photoshop, GIMP, and Paint.NET.
Step-by-Step Instructions for GIMP (as an example):
-
Download and Install GIMP:
- Visit the GIMP website and download the latest version. Install the application following the provided instructions.
-
Open GIMP:
- Launch GIMP and open the image you wish to crop by clicking on File > Open.
-
Select the Crop Tool:
- In the toolbox, select the Crop Tool (it looks like a knife).
- You can also access it through the menu: Image > Crop to Selection.
-
Draw the Crop Area:
- Click and drag on the image to select the area you wish to keep. Adjust the selected area as needed.
-
Crop the Image:
- Once satisfied with your selection, press the Enter key to crop the image.
-
Save Your Work:
- Save the cropped image by going to File > Export As. Choose your desired format and location.
-
Close GIMP:
- After saving, you can close GIMP.
Tips for Using Third-party Software:
- Explore Advanced Features: Third-party editors often have more advanced editing capabilities, including layers, masks, and advanced filters.
- Take Advantage of Shortcuts: Familiarize yourself with keyboard shortcuts to speed up your workflow.
Conclusion
Cropping images on Windows 10 is a straightforward process, thanks to the variety of tools available. From the built-in Photos app, the simplicity of Paint, the versatility of the Snipping Tool, to the robust features of third-party applications like GIMP, there’s an option for every user and every need.
Whichever method you choose, remember to experiment and practice your skills. Cropping can not only help improve the aesthetics of your images but also allow you to convey your intended message more effectively. So, go ahead, try out these methods, and see how they can enhance your digital images!
If you’re looking to crop a picture on Windows 10, the Photos app makes it a breeze. Open your photo, select the crop tool, adjust the crop box, and save your changes. Easy, right? Let’s dive into the step-by-step guide to make sure you get it done perfectly.
Ready to make your photo look just right? These steps will guide you through cropping a picture using the Photos app on Windows 10, ensuring you get the desired result in no time.
Step 1: Open the Photos App
Locate and open the Photos app from the Start menu or taskbar.
The Photos app is a built-in application on Windows 10, so you don’t need to download any additional software. Just click on the Start menu, type «Photos,» and select the app from the list.
Step 2: Open the Picture
Open the picture you want to crop by double-clicking it within the Photos app.
You can browse through your collection within the Photos app or go to the folder where your photo is stored. Double-clicking the image will display it in the app.
Step 3: Click the Edit & Create Button
Select the «Edit & Create» button located at the top right of the screen.
The «Edit & Create» button will give you access to various editing tools, including cropping. Click on it to reveal a dropdown menu with multiple options.
Step 4: Select the Crop & Rotate Option
From the dropdown menu, choose the «Crop & Rotate» option to start cropping your picture.
When you select «Crop & Rotate,» a new set of tools will appear that allow you to adjust the crop box and rotate the image if needed.
Step 5: Adjust the Crop Box
Drag the edges or corners of the crop box to frame the part of the picture you want to keep.
You can resize and move the crop box to include just the area you want. Take your time to get the perfect frame for your picture.
Step 6: Apply and Save Your Changes
Click the «Done» button and then select «Save a copy» to keep your original picture.
After adjusting the crop, click «Done» to apply the changes. Make sure to choose «Save a copy» to avoid overwriting the original file, giving you a new version with the cropped area.
Once you’ve cropped your photo, you’ll have a new version saved in your Photos app. You can share it, print it, or use it for any other purpose.
Tips for Cropping a Picture on Windows 10
- Aspect Ratios: Use preset aspect ratios for common sizes, like 4:3 or 16:9, to make sure your photo fits specific dimensions.
- Zoom In: Zoom in on your photo before cropping to ensure you get precise edges.
- Undo Mistakes: Don’t worry about making mistakes; you can always undo and redo your cropping until it looks right.
- Use Gridlines: Turn on gridlines for better alignment and composition.
- Experiment: Try different crops to see which one best suits your needs before finalizing.
Frequently Asked Questions
Can I crop multiple pictures at once?
No, you have to crop each picture individually in the Photos app.
Does cropping a photo reduce its quality?
Cropping itself doesn’t reduce quality, but significant cropping may result in a lower resolution for the remaining image.
Can I undo a crop after saving?
If you saved a copy, you could always revert to the original image. If you overwrote the original, you can’t undo the crop.
Is there a way to crop to a specific size?
Yes, you can manually adjust the crop box to the exact dimensions you need, or use preset aspect ratios.
Can I rotate while cropping?
Yes, the «Crop & Rotate» tool allows you to rotate your image as well as crop it.
Summary
- Open the Photos App.
- Open the Picture.
- Click the Edit & Create Button.
- Select the Crop & Rotate Option.
- Adjust the Crop Box.
- Apply and Save Your Changes.
Conclusion
So, there you have it—a simple guide on how to crop a picture on Windows 10. Cropping photos might seem like a small task, but it can make a big difference in how your images look. Whether you’re touching up a family photo or preparing images for a presentation, knowing how to crop efficiently can save you time and hassle.
Ready to dive deeper? Explore other features of the Photos app, like filters and adjustments, to enhance your pictures even more. Cropping is just the beginning of what you can do to make your photos shine. So go ahead, open the Photos app, and start experimenting!
Matthew Burleigh is the head writer at solveyourtech.com, where he covers topics like the iPhone, Microsoft Office, and Google apps. He has a Bachelor’s and Master’s degree in Computer Science and has over 15 years of IT experience.
He has been writing online since 2008 and has published thousands of articles that have been read millions of times.
You can read his full bio here.
How to Crop Pictures on Windows 10: A Step-by-Step Guide
Introduction
Cropping pictures is an essential skill for any photographer or digital artist. It allows you to edit and enhance your images to fit your desired dimensions, style, or theme. In this article, we will walk you through the process of cropping pictures on Windows 10, covering the basics and advanced techniques.
Why Crop Pictures on Windows 10?
Before we dive into the process, let’s consider why cropping pictures on Windows 10 is important:
- Customize your images: Cropping allows you to adjust the aspect ratio, resolution, and size of your images to fit your needs.
- Enhance your photos: By cropping your images, you can remove unwanted objects, add text or graphics, or create a more professional-looking photo.
- Save time: Cropping pictures can save you time and effort in post-processing and editing.
Tools and Software
To crop pictures on Windows 10, you’ll need the following tools and software:
- Windows Photos: This is the built-in photo editing software on Windows 10. It offers a range of tools and features for editing and enhancing your images.
- Adobe Photoshop: This is a popular image editing software that offers advanced features and tools for cropping, resizing, and manipulating images.
- Online photo editors: Websites like Canva, Pixlr, and GIMP offer a range of free and paid photo editing tools that can be used to crop and edit images.
Step-by-Step Guide to Cropping Pictures on Windows 10
Here’s a step-by-step guide to cropping pictures on Windows 10:
Step 1: Open Windows Photos
- Open Windows Photos: You can find Windows Photos in the Start menu or by searching for it in the search bar.
- Select the image you want to crop: Choose the picture you want to crop from your computer or from a cloud storage service like OneDrive or Google Drive.
Step 2: Crop the Image
- Select the crop tool: In Windows Photos, you can select the crop tool by clicking on the Crop button in the toolbar or by pressing the Ctrl + C keys on your keyboard.
- Drag the crop handles: Use the crop handles to select the area of the image you want to crop. You can drag the handles to adjust the size and position of the crop area.
- Use the Crop tool: Once you’ve selected the crop area, you can use the Crop tool to adjust the size and position of the crop area.
Step 3: Adjust the Crop Area
- Adjust the crop area: You can adjust the crop area by using the Crop tool or by selecting the Crop button in the toolbar.
- Use the Crop tool: You can use the Crop tool to adjust the size and position of the crop area. For example, you can use the Crop tool to crop a picture to a specific width or height.
- Use the Crop tool: You can use the Crop tool to adjust the size and position of the crop area. For example, you can use the Crop tool to crop a picture to a specific width or height.
Step 4: Save the Cropped Image
- Save the cropped image: Once you’ve adjusted the crop area, you can save the cropped image by clicking on the File button in the toolbar or by pressing the Ctrl + S keys on your keyboard.
- Save the cropped image: You can save the cropped image to your computer or to a cloud storage service like OneDrive or Google Drive.
Advanced Techniques
Here are some advanced techniques you can use to crop pictures on Windows 10:
- Use the Crop tool with multiple handles: You can use the Crop tool with multiple handles to crop a picture to a specific width or height.
- Use the Crop tool with the Transform tool: You can use the Crop tool with the Transform tool to adjust the size and position of the crop area.
- Use the Crop tool with the Perspective tool: You can use the Crop tool with the Perspective tool to adjust the perspective of the crop area.
Tips and Tricks
Here are some tips and tricks to help you crop pictures on Windows 10:
- Use the Crop tool with the Undo button: You can use the Crop tool with the Undo button to undo any changes you make to the crop area.
- Use the Crop tool with the Redo button: You can use the Crop tool with the Redo button to redo any changes you make to the crop area.
- Use the Crop tool with the Zoom button: You can use the Crop tool with the Zoom button to zoom in or out of the image while cropping.
Conclusion
Cropping pictures on Windows 10 is a simple and effective way to edit and enhance your images. By following the steps outlined in this article, you can crop pictures to fit your desired dimensions, style, or theme. Remember to use the Crop tool with multiple handles, the Crop tool with the Transform tool, and the Crop tool with the Perspective tool to get the most out of your cropping experience.