
Время на прочтение2 мин
Количество просмотров76K
Стандартный планировщик Windows штука мощная, но столкнулся с проблемой, которая не позволила мне легко им пользоваться в «домашнем» выпуске Windows. Пришлось установить в систему настоящий cron. Ни капли не пожалел!
Как к этому пришёл, и что из этого поучилось под катом.
Пользователь без прав
Всё началось с того, что я хотел запланировать задание. Нужно было каждую минуту выполнять простой cmd-скрипт, который подготавливал окружение и запускал некий скрипт на Python.
Так как машина, на которой выполняется задание не основная рабочая, то нужно было выполнять задание, даже когда пользователь не зашёл в систему. Для этого был выбран режим:

При сохранении задания планировщик предупредил, что для указанного пользователя нужно разрешить «Вход в качестве пакетного задания». Для этого предлагается изменить политику безопасности. Однако сделать это не удалось, так как в «домашней» версии Windows нет оснастки для управления политикой безопасности (буду благодарен за подсказку альтернативного решения).
От запутанного конфигурирования стало как-то совсем грустно и захотелось мне иметь такой же простой и понятный инструмент как cron…
Cronизация Windows
Установка cron на Windows оказалась вполне реализуемой затеей. Я не стал искать специальной версии cron для Windows (поделитесь, если кто знает), а обратился сразу к Cygwin. Кроме стандартного пакета, я выбрал:

С пакетом cron всё понятно. Пакет cygrunsrv позволяет запускать разные программы как службы. После установки Cygwin можно переходить к конфигурированию cron.
Конфигурирование службы сron в Windows
Теперь переходим к самому ответственному шагу. Запускаем «Cygwin Terminal» с правами администратора и набираем команду:
> cron-config
Cron is already installed as a service under account LocalSystem.
Do you want to install the cron daemon as a service? (yes/no) yes
Enter the value of CYGWIN for the daemon: [ ] ntsec
Do you want to start the cron daemon as a service now? (yes/no) yes
Про ntsec можно подробнее почитать здесь.
Готово. Можно давать задания. Если служба не пошла, попробуйте её стартануть вручную:
> net start cron
Теперь открываете crontab и записываете задания (по умолчанию vi):
> crontab.exe -e
Можно «залить» задание через echo:
> echo "*/5 * * * * /cygdrive/c/crons/task.bat" >> C:\cygwin\var\cron\tabs\[Username]
Теперь перегрузите компьютер и посмотрите, как замечательно выполняются задания без входа в систему.
Cron is the standard Unix/Linux scheduler enabling you to execute commands at recurring intervals. Windows offers its own alternative scheduler with the Windows Task Scheduler.
Although there is no drop-in cron available in vanilla Windows, there are a number of options in addition to Windows’ Task Scheduler to execute jobs on a recurring schedule with the installation of additional software and/or subsystems. Some of them may be more appropriate than others depending on the use case.
Let us review how to setup the Windows equivalent of cron with Scheduled Tasks. Then we will explore of some of the other options to have cron-like functionality in Windows. They are: Windows Subsystem for Linux and Cygwin, other Windows scheduling software, and two of the GUI-based server management software (Plesk and WHM cPanel),
How do I set up scheduled tasks on a Windows server?
Windows offers its standard Task Scheduler to execute commands and scripts on a recurring schedule. Creating scheduled tasks can be done calling “Schtasks.exe” directly from the command line or using the GUI. One can also use the Powershell cmdlet Register-ScheduledJob to create scheduled jobs that will be executed by the Windows Task Scheduler.
We will expand on running a PHP script an a recurring schedule using the command line although the instructions can be applied to run any arbitrary programs.
Note: Create a batch file (optional). There are a number of advantages to creating a batch file and adding the command and parameter to be executed in the file. For example: You don’t need to edit the scheduled task unless the schedule needs to be updated, which require administrative privileges depending. If you are using a batch file to schedule the task, you can just edit the batch file to reflect the new command line.
If you are using XAMP for PHP, a batch file could look something like:
@echo off
D:\xampp\php\php.exe -f D:\www\yoursite.com\iem\admin\cron\cron.php > NUL
In the admin\cron directory, there is a file called “cron.php”. This is the file that you reference to execute Interspire meta scheduler. You will need the full path to this file, for example:
D:\www\yoursite.com\iem\admin\cron\cron.php. Note that this path may be different on your web server and needs to be adjusted accordingly.
Task Scheduler Command Line
Scheduling Tasks using the command line is a matter of invoking “schtasks.exe” with the appropriate parameters. In its simplest form, to create a scheduled task that would run every 5 minutes invoking the hypothetical batch file above could be done by issuing:
C:\Users\demouser>schtasks.exe /Create /SC minute /MO "5" /TN "Interspire Cron" /TR "D:\bin\cron.cmd
The details of the syntax are well documented and can be consulted for more complex scenarios.
Task Scheduler GUI
The Task Scheduler GUI can be invoked by using the built-in search and either typing “Task Scheduler”, pressing “command R” and typing “taskschd.msc”, or by navigating to /Start/Windows Administrative Tools/Task Scheduler.
The Microsoft Management Console will open in a new window.
You can click on Create Task… which will give you access to set all the parameter of a scheduled task. Or you can click on Create Basic Task… which will start a wizard that will guide you through the creation process.
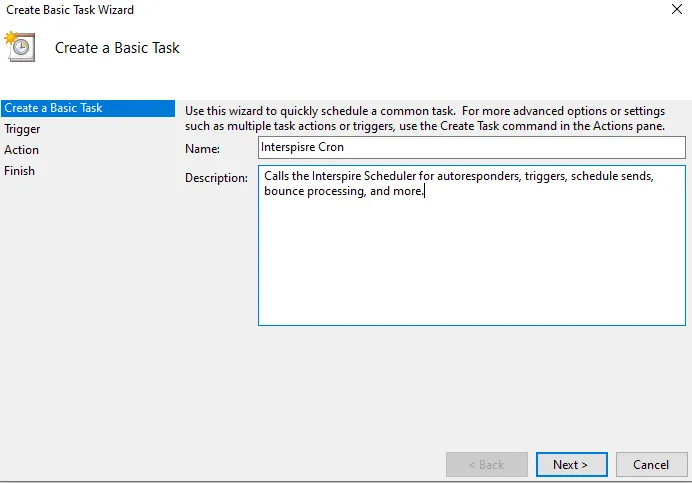
If you started the wizard with the Create Basic Task… the first step of the wizard is to enter a name and description for the task:
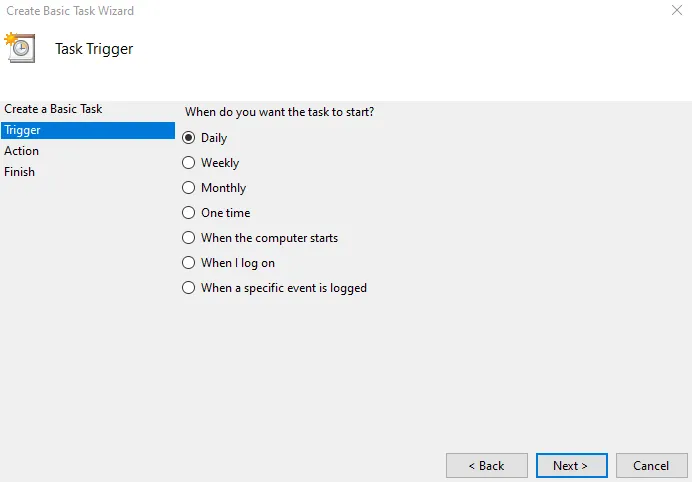
Enter them then click on Next. The next screen is going to ask about what will trigger the task. Let’s select daily for this scenario:
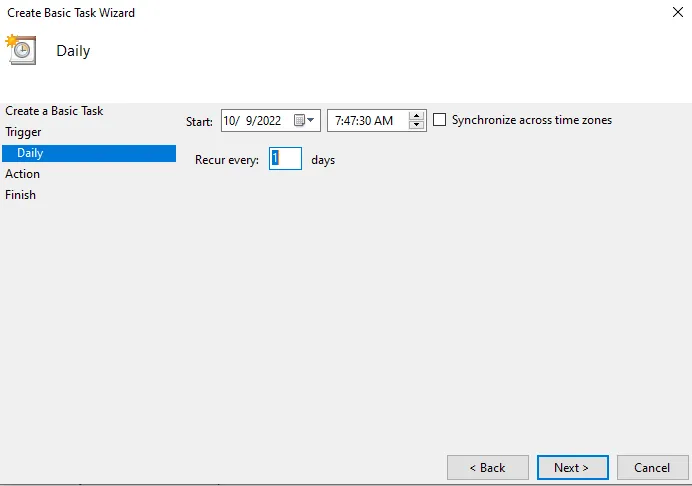
Click on Next. The next screen will allow you to set the recurrence. Let’s set it at Recur every day:
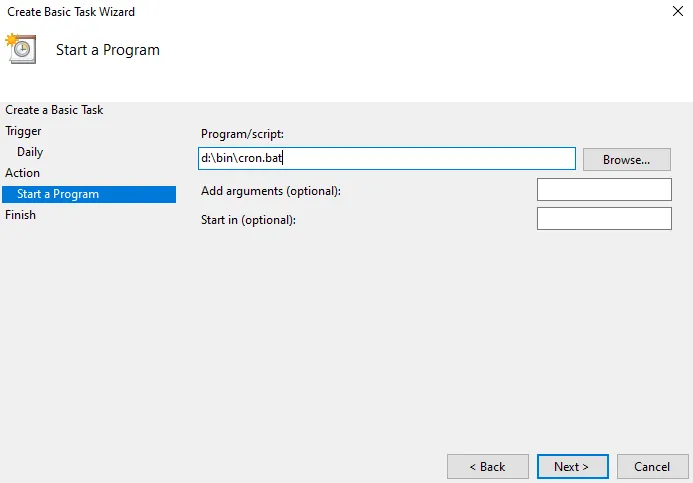
Click on Next. And now you can select which command or script you can execute. Let’s re-use the hypothetical batch file from above:
The last step of the wizard will present a summary of the scheduled task you just created:
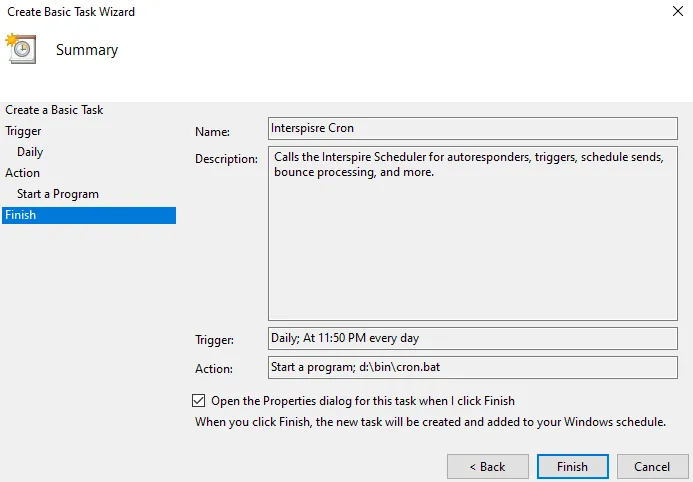
Click on Finish.
Note that the wizard does not offer to run a task more than once a day and the Trigger properties would have to be amended to run a task more than once a day. Find the task in the Task Scheduled list, right-click and edit the task, go to the Triggers tab and click on Edit…. Let’s set this task to run every 5 minutes for example:
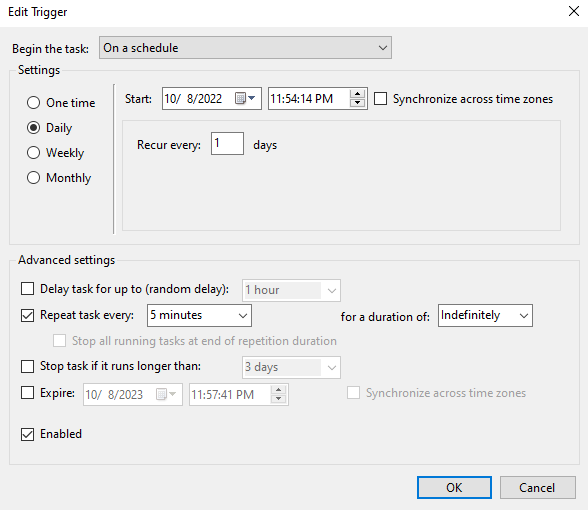
Click on OK to save your changes.
Powershell Register-ScheduledJob
You can also create scheduled jobs using Powershell and the Register-ScheduledTask cmdlet. A typical format is to call the cmdlet and pass the Action, Trigger, and TaskName to be created. To create our quintessential example of running a batch file every 5 minutes, open Powershell and issue the following:
PS C:\Users\demouser> $jobname="Interspire Tasks Every 5mn"
PS C:\Users\demouser> $action=New-ScheduledTaskAction -Execute 'c:\bin\cron.bat'
PS C:\Users\demouser> $schedule=New-JobTrigger -Once -At (Get-Date).Date -RepeatIndefinitely -RepetitionInterval (New-TimeSpan -Minutes 5)
PS C:\Users\demouser> Register-ScheduledTask -TaskName $jobname -Action $action -Trigger $schedule
Some will notice the schedule uses “New-JobTrigger” and not “New-ScheduledTaskTrigger”. I could not find a recurring interface below daily execution for “New-ScheduledTaskTrigger”. It seems that “Register-ScheduledTask” will take a New-JobTrigger argument for its schedule.
Alternatives to the Task Scheduler
Depending on your needs or preferences, using the native Windows Task Scheduler may not be the ideal choice. Let’s explore next two options which essentially install a Unix look alike (I know the two approaches are very different and neither are actually Unix look-alike).
Windows Subsytem for Linux
Microsoft offers Windows Subsystem for Linux. WSL basically allows you to install a Linux distribution of choice on top of Windows. The subsystem is completely integrated within windows allowing for seamless use of Windows programs and Linux tools along side each other within the same environment. The corollary is that the Linux cron system now becomes available for use within Windows.
There are many guides on installing WSL and will instead focus on some caveats to use cron in WSL.
The three main caveats of using cron from WSL are:
- WSL does not start by default on boot
- The cron services does not start by default with WSL
- WSL needs a privileged password to start the cron service.
Shout out to Ian Paul for his wonderful article “How to Launch Cron Automatically in WSL on Windows 10 and 11“, which provides a step-by-step way address the caveats above.
Let’s tackle the last one by allowing all to start the cron service without a password using sudo.
Edit the sudoers file
sudo visudo
Towards the end of the file right before the “includes” if you have any, add the following entry:
%sudo ALL=NOPASSWD: /usr/sbin/service cron start
Save the sudoers file. Next, let’s add a scheduled task using the Windows Task Scheduler to ask WSL start the cron service at boot time:
You can use the wizard as oulined above or do it from a privileged command line:
C:\users\demouser> schtasks.exe /Create /SC ONSTART /TN "Start WSL Cron Service at Boot Time" /TR "wsl.exe sudo /usr/sbin/service cron start”
One final note would be select that the service “Runs whether user is logged in or not”. Now the WSL cron service will start at every boot and Unix style crontabs can be used.
Cygwin
Cywin takes a totally different approach. Paraphrasing cygwin.com, Cygwin is a large collection of GNU and other open source tools that provide functionality similar to Linux in Windows. One of these tools is crontab.
Again, we will assume that Cygwin is already installed by running setup-x86_64.exe as detailed on the Cygwin web site. Cron is not part of the default installation set of Cygwin and must be added if it was not added already.
Start a Cygwin Terminal as an Administrator. Then instrall cron as a service on cygwin:
cygrunsrv --install cron --path /usr/sbin/cron --args -n
Another shout out this time to David J Nice for https://www.davidjnice.com/cygwin_cron_service.html regarding in particular what arguments to pass to cron on startup.
Once this is done, you can use the usual GNU/Linux commands to manage cron such as crontab -e to edit your crontab. You can review our article “Setting Up Scheduled Sending Using Cron“ to get more details on the crontab file format.
Other Windows Scheduling Software
In addition to using the vanilla Task Scheduler or installing Linux tools alongside / on top Windows, there are also a number of Windows scheduling apps. Some are:
- Z-cron https://z-dbackup.de/en/z-cron-scheduler/
- Visual Cron https://www.visualcron.com
The internet also has a number of sites compiling lists of windows scheduling software
Web Control Panel
The last category we will mention are for servers that are managed via a web-based control panel such as Plesk. Although Plesk is mostly used to managed GNU/Linux servers, it can also be installed on Windows server as well.
Plesk calls their cron / scheduling “Scheduled Tasks”.
If you have multiple domains, select the domain you want to add a scheduled task for.
Navigate to the Scheduled Tasks/Add Task to schedule a new task.
Choose “Run a command” the the task type.
Enter the command you want schedule.
Select the frequency for recurring tasks or the specific date and time as appropriate.
If possible, click “Run Now” to verify the setup, then on “OK” to save the new schedule task.
Refer to the Plesk Documentation for more details.
Final Thoughts
Although Windows does not have a drop-in cron like system, it offers the Windows Task Scheduler which provides equivalent scheduling services. With a little bit of legwork, one can also have access to more cron-looking scheduling using Windows Services for Linux and Cygwin. Also, there are native Windows Task Scheduler alternatives, and lastly, it is possible to have access to a Windows server that is managed by a web based control panel.
The best approach to use will depend on your use case and personal preferences. Happy Windows scheduling.
Setting up services like Cron are not the way you are used to. In Linux and Unix its pretty straight forward since you are running in your own OS instance. With Cygwin it is tightly coupled with Windows so services like SSHD and CRON actually run in Windows and not Cygwin. The steps below are what needs to be done in order to get it working properly.
Getting Started
Firs things first, make sure Cygwin is updated. Just find the folder with the “setup-x86_64.exe” file is. It should be in the folder where you obtained the mirror base from: “http%3a%2f%2fcygwin.mirror.constant.com%2f”. Mine was located in the Desktop. When you open this you will go through similar steps that you did when you installed in. The difference is it will default to “pending” which will be any available updates.
If you run into any issues installing even when the cygwin windows are closed, its because services are actually still running in Windows. You need to go to task manager and stop the services associated with Cygwin. See this Post for more information: https://coolperspective.com/2020/02/21/cygwin-unable-to-update/
Here is a screenshot of the Cygwin setup and Cron package:

Okay assuming everything went well we need to make sure cron is installed. The easiest way is to open a Cygwin window and enter: “cron-config”. If it pops up and runs then your good its installed. Now lets configure it. Its pretty self explanatory but we will go through it.
If you start it as yourself you will see this message [WinLaptopAndy ~] : is the Cygwin prompt.
[WinLaptopAndy ~]: cron-config

WARNING: You are not currently in the Local Administrators group.
This script will fail to set file ownership and permissions, to create users,
and to create or start services.
It is recommended that you execute the script from a shell running as Administrator

Do you want to continue? (yes/no) no
Easy fix just right click on your Cygwin64 Terminal executable and run as Administrator:
OK lets try it again, in my example I had it installed already so it will ask if I want to reinstall. Yours will be different if you don’t have in configured yet. The setup is the same:
[WinLaptopAndy ~]: cron-config

The cron daemon can run as a service or as a job. The latter is not recommended.
Cron is already installed as a service under account HOME\Andy.
Do you want to remove or reinstall it? (yes/no) yes
OK. The cron service was removed.
Do you want to install the cron daemon as a service? (yes/no) yes
Enter the value of CYGWIN for the daemon: [ ] cron
You must decide under what account the cron daemon will run.
If you are the only user on this machine, the daemon can run as yourself.
This gives access to all network drives but only allows you as user.
To run multiple users, cron must change user context without knowing
the passwords. There are three methods to do that, as explained in
http://cygwin.com/cygwin-ug-net/ntsec.html#ntsec-nopasswd1
If all the cron users have executed "passwd -R" (see man passwd),
which provides access to network drives, or if you are using the
cyglsa package, then cron should run under the local system account.
Otherwise you need to have or to create a privileged account.
This script will help you do so.
Do you want the cron daemon to run as yourself? (yes/no) yes
Please enter the password for user 'Andy':
Please enter the password for user 'Andy':
Reenter:
Running cron_diagnose …
… no problem found.
Do you want to start the cron daemon as a service now? (yes/no) yes
OK. The cron daemon is now running.
In case of problem, examine the log file for cron,
/var/log/cron.log, and the Windows event log (using /usr/bin/cronevents)
for information about the problem cron is having.
Examine also any cron.log file in the HOME directory
(or the file specified in MAILTO) and cron related files in /tmp.
If you cannot fix the problem, then report it to cygwin@cygwin.com.
Please run the script /usr/bin/cronbug and ATTACH its output
(the file cronbug.txt) to your e-mail.
WARNING: PATH may be set differently under cron than in interactive shells.
Names such as "find" and "date" may refer to Windows programs.
Lets check if its running. In Cygwin enter:
ps -ef |grep cron
ad752h 1073 1072 ? 07:56:12 /usr/sbin/cron
OK its running if it isn’t check the service on Windows side it may be stopped. Below you see mine is running if yours is Stopped then try and start it.

Assuming everything is running we can now create a cron job. Below is mine that I use to backup my Cygwin directories. It runs a backup.sh script that has rsync commands within it:
[WinLaptopAndy ~]: crontab -e
00 12,4 * * 1-5 /home/Andy/backup.sh
I’m not going to get into the crontab specifics there is allot of information on the Web, but in a nutshell here is what my entry isbelow. If you want more info on crontab go here: https://www.geeksforgeeks.org/crontab-in-linux-with-examples/
00 = Minutes
12,16 = Hours (24hr clock) in which they will run.  I have 12pm & 4pm
* = Day of Month (* means every)
* = Month
1-5 = Day of Week (1-5 is weekdays)
/home/Andy/backup.sh
Enter your path to your script or command and save. To check if its in the cron:
[WinLaptopAndy ~]: crontab -l
00 12,4 * * 1-5 /home/ad752h/backup.sh
That’s it, thanks for playing.
Published
Setting up cron jobs in Windows is a powerful way to automate tasks and enhance system efficiency. There are three ways to easily create, edit, and delete cron jobs.
This article will explain the process of setting up and managing cron jobs in a Windows environment using each of the three methods.

Requirements
- A Windows system (this tutorial uses Windows 10).
- Windows Task Scheduler installed (for some examples).
- Access to the Command Prompt or Windows PowerShell (for some examples).
What Is a Cron Job
Cron jobs are scheduled tasks that automate repetitive processes. Users configure them to execute specific commands or scripts at predetermined intervals without manual intervention.
The cron daemon, a background process, manages the scheduling and execution of these tasks. Users set the frequency of cron jobs, specifying exact times, dates, or recurring patterns. Cron jobs are widely used for automating routine system maintenance, file backups, and other repetitive tasks in a streamlined and efficient manner.
While primarily used in Linux, creating a cron job in Windows is possible using three different methods.
How to Create and Configure a Cron Job in Windows
There are several ways to create and run a cron job in Windows. The methods include using the Windows Task Scheduler, the Command Prompt, or PowerShell.
The following text elaborates on every method for creating a cron job in this operating system.
Create a Cron Job via Task Scheduler
Utilizing the Windows Task Scheduler on a Windows machine enables users to automate tasks whenever specified conditions are met. The following steps elaborate on how to create a cron job by executing a script via Windows Task Scheduler.
Note: This tutorial is based on Windows 10, and there may be slight variations in using Task Scheduler on other Windows versions.
Step 1: Create an Example Script
To create a basic script for demonstration purposes, write a simple batch file. A batch file is a plain text file with a series of commands executed sequentially. To make a simple one, follow these steps:
1. Open a text editor, like Notepad, on your Windows machine.
2. Type the following into the text editor:
echo Hello. This is a basic batch file > "C:\Scripts\backup_script.bat"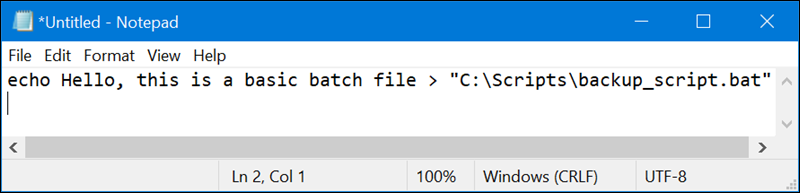
The echo command writes the text Hello, this is a basic batch file to a file named backup_script.bat in the C:\Scripts directory.
3. Save the file with a .bat extension. In Notepad, do this by selecting Save As, providing the file name as backup_script.bat, and ensuring the Save as type is set to All Files.

The process creates a batch file named backup_script.bat in the C:\Scripts directory. Use this file as an example to set up a scheduled task with the Windows Task Scheduler.
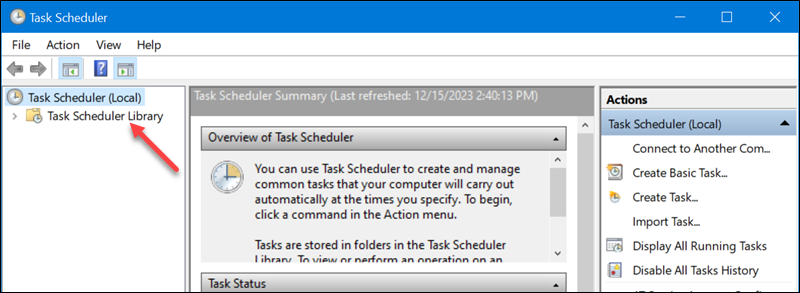
Step 2: Access the Task Scheduler.
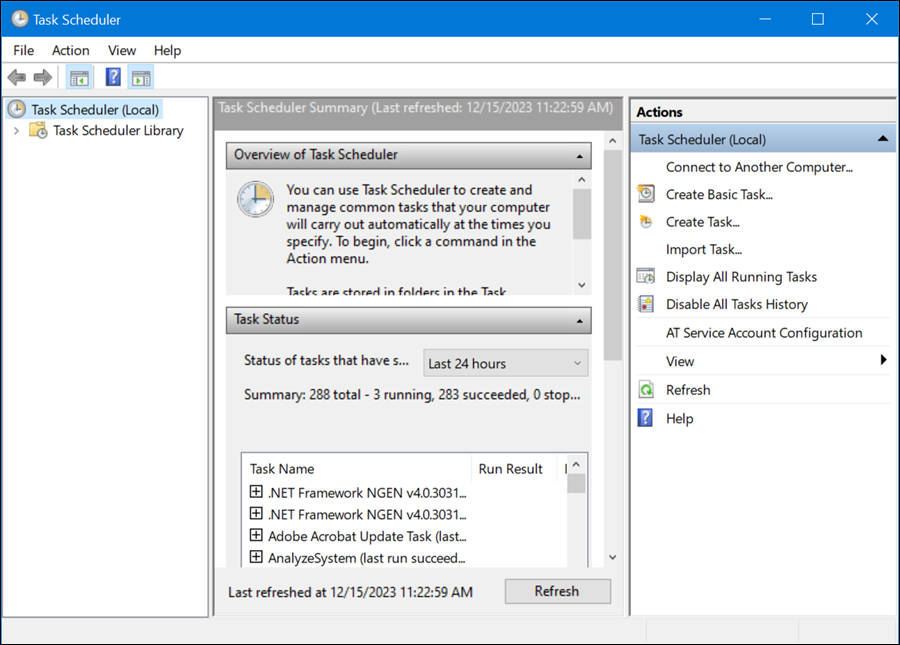
To create a cron job in Windows, type task scheduler in the search bar and launch the Task Scheduler.
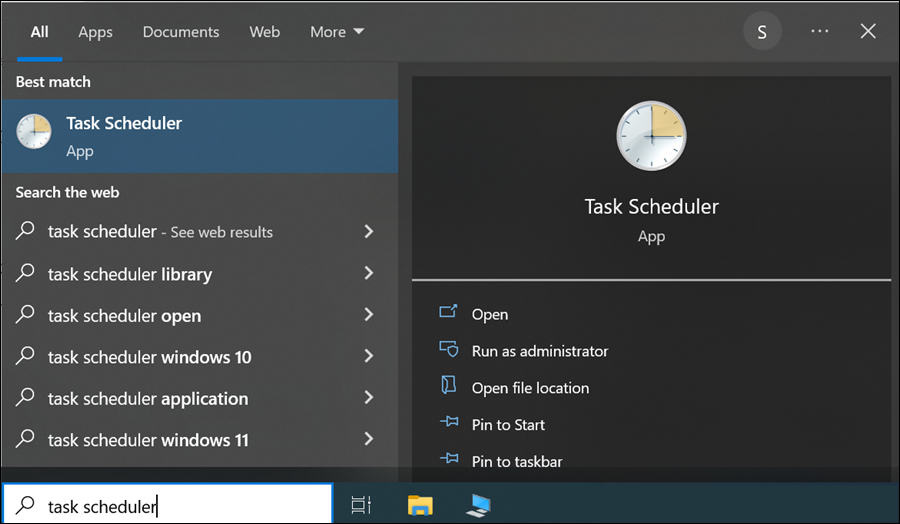
Once you access the program, the Task Scheduler interface opens.
Step 3: Create a Basic Task.
The next step is to create a basic task. This initiates a wizard to guide you through setting up a straightforward task. To do this, follow these steps.
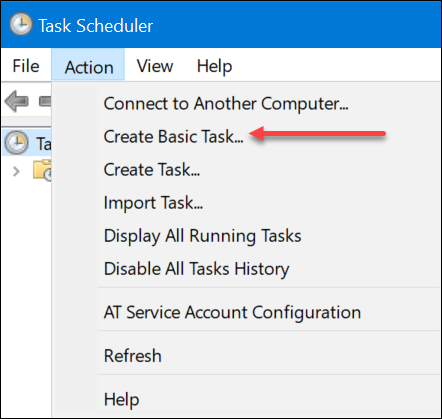
1. Click the Action tab in the menu.
2. Select Create Basic Task.
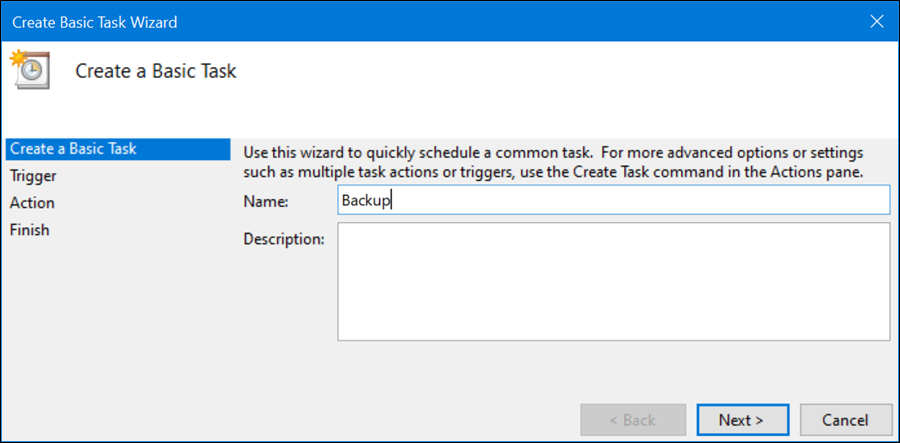
3. Name the task and click Next. In this tutorial, we will name the task Backup. The description is optional.
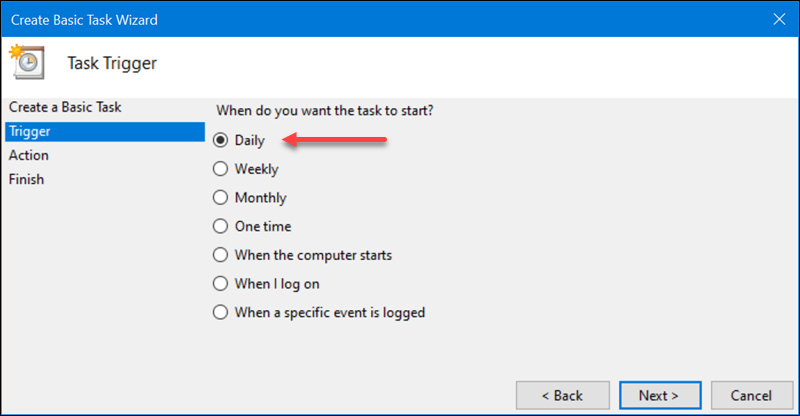
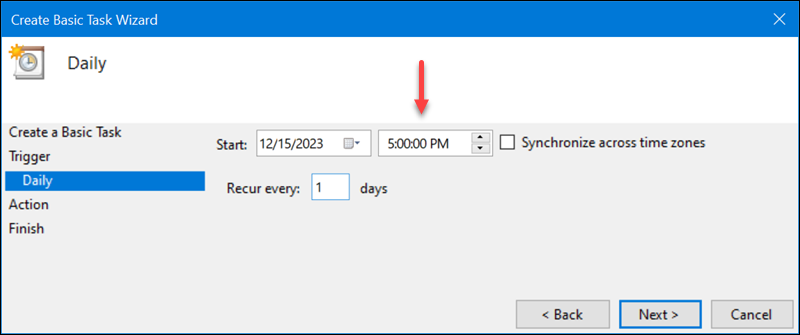
4. Set the trigger. Choose the frequency for the cron job. For example, select Daily and click Next.
5. Choose a specific time for the task to run and click Next. In this example, the time is 5:00 p.m.
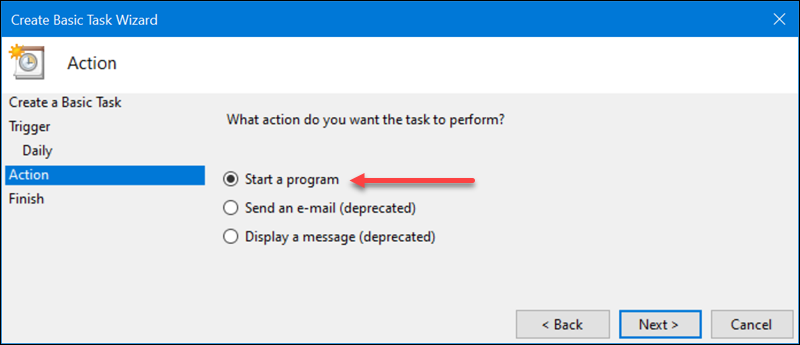
6. The wizard prompts you to select the action for the task. To execute a script, choose Start a Program and click Next.
7. Provide the path to the script you want to run. For our example, the script is backup_script.bat, located in the C:\Scripts directory. Make sure to enter the full path to the script.
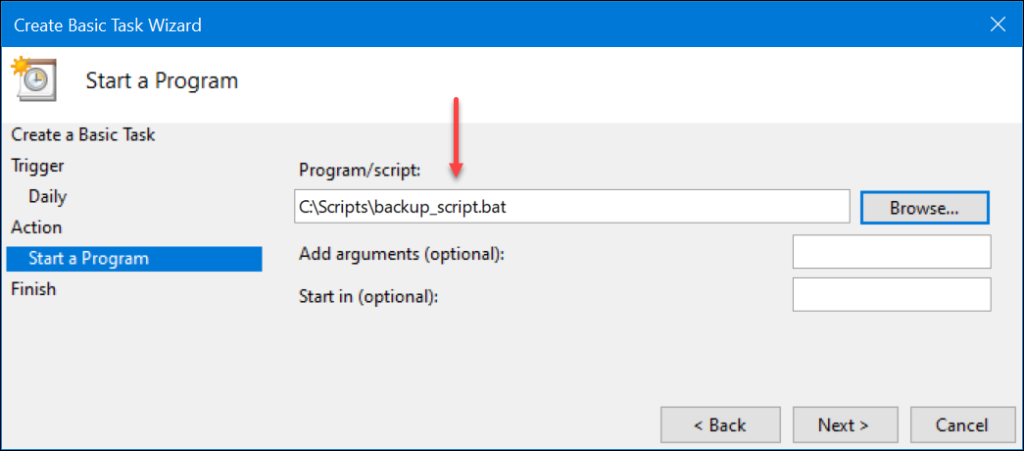
8. Leave the Add arguments and Start in fields empty. The Add arguments field is used when the script needs command line arguments. The Start in field is used when the script depends on a specific directory. However, that is not the case in this example.
9. Click Next and Finish.
Now, the task is set up to run the backup_script.bat script daily at 5:00 p.m. The Windows Task Scheduler handles the script execution based on the defined schedule.
How to Create Cron Jobs in PowerShell
Windows PowerShell is a less user-friendly method for creating cron jobs on Windows than Task Scheduler. However, it is still a quick way to set up a cron job.
The following text elaborates on creating the same cron job as with the Task Scheduler using the same script.
Step 1: Find the Script Path
Locate the script path and copy it. In our case, it is C:\Scripts\backup_script.bat.
Step 2: Define the Script Path
Once the path to the script is known, define it in the PowerShell using the following:
$scriptPath = "C:\Scripts\backup_script.bat"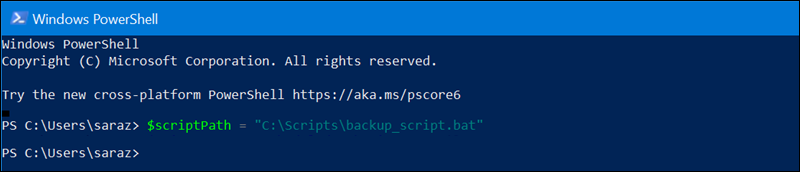
The command has no output but assigns a file path to a variable in PowerShell. In this case, it sets the variable $scriptPath to the file path C:\Scripts\backup_script.bat.
Step 3: Set up a Trigger
The cmdlet used to create a new trigger for a scheduled task is called New-ScheduledTaskTrigger. This cmdlet allows users to define various trigger settings, such as the start time, end time, repetition interval, and more.
Run the following command to set the script to execute every day at 5 p.m.:
$trigger = New-ScheduledTaskTrigger -Daily -At 5:00PM
Step 4: Set an Action
Create a new scheduled task action with:
$action = New-ScheduledTaskAction -Execute "cmd.exe" -Argument "/c $scriptPath"
The command:
- Utilizes the
New-ScheduledTaskActioncmdlet. - Configures the task to execute Command Prompt (
cmd.exe). - Uses the
-Argumentparameter to set input for Command Prompt. - Incorporates
/c $scriptPathto instruct Command Prompt to run a specific command from the variable$scriptPathand then exit.
The $scriptPath contains the complete path for executing the designated script. It creates a scheduled task action for executing the specified script using Command Prompt.
Step 5: Register the Scheduled Task
Run the following to register the task:
Register-ScheduledTask -Action $action -Trigger $trigger -TaskName "DailyBackupTask"
The command creates a new scheduled task named DailyBackupTask with the specified action ($action) and trigger conditions ($trigger). The task is now registered with the Windows Task Scheduler and runs based on the defined schedule and actions.
How to Create Cron Jobs in Command Prompt
To create a cron job in the Command Prompt, use this command but replace the path with your own path:
set "scriptPath=C:\Scripts\backup_script.bat"
The command sets a variable (scriptPath) that holds the full path to the batch script file.
Then, run this command:
schtasks /create /tn "DailyBackup" /tr "\"%SystemRoot%\System32\cmd.exe\" /c \"%scriptPath%\"" /sc daily /st 17:00
When you run this command, it creates a scheduled task named DailyBackup that runs the Command Prompt, which, in turn, executes the script specified by %scriptPath%. The task is scheduled to run daily at 5:00 p.m.
Potential Issues When Running Cron Jobs
Sometimes, Windows cron jobs run differently than expected. If users can identify causes, it’s easier for them to troubleshoot the issue. To address potential problems, make sure that:
- The task has been scheduled accurately.
- The environment variables are configured correctly.
- Time settings, frequency, and the command used are configured correctly.
- Enough system memory and disk space are available for successful job execution.
- You have the necessary permissions.
- The application or script is up-to-date and compatible with the operating system.
How to Edit Cron Jobs
As with creating a cron job, there are three methods for editing it. The following text elaborates on how to edit a cron job using Task Scheduler, Windows PowerShell, and Command Prompt.
Edit a Cron Job in the Task Scheduler
To edit a Cron Job in the Task Scheduler, follow these steps:
1. Open the Task Scheduler.
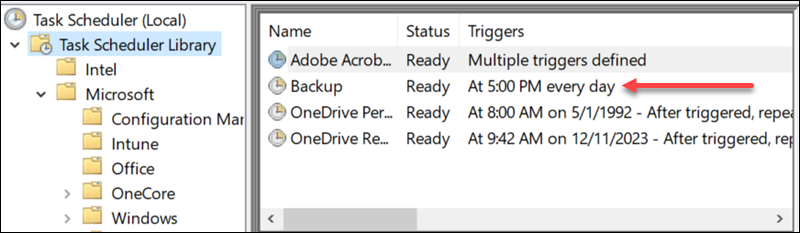
2. Find the Task Library in the left-hand pane.
3. Expand the Task Scheduler Library and find the desired task. For example, the Backup text created for this tutorial is in the library’s root.
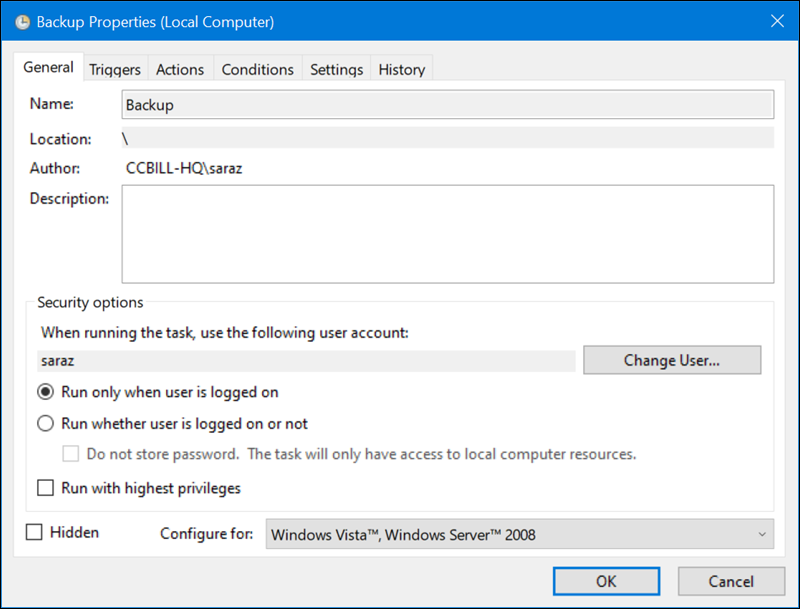
4. Double-click the selected task to open it in a new window.
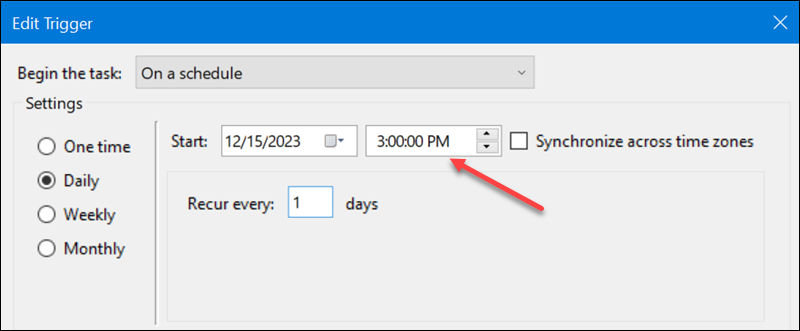
5. Edit the desired task. For instance, to change the trigger, go to the tab Triggers and click Edit.
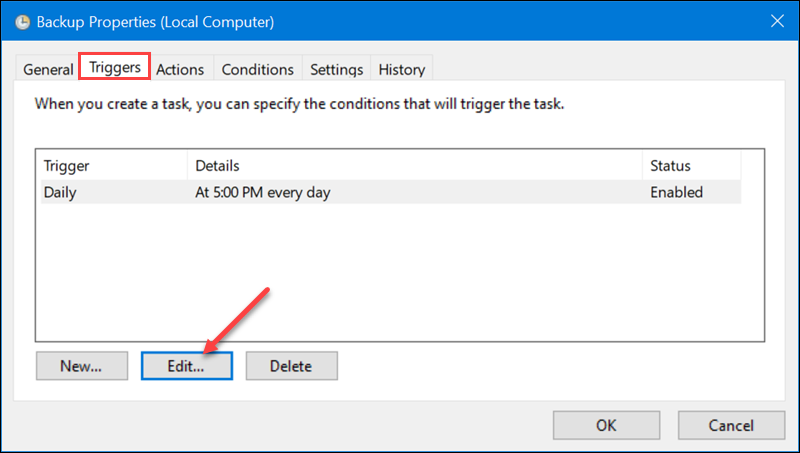
The following window allows users to change the trigger time.
Click OK on both windows to complete the change.
Edit a Cron Job in PowerShell
To edit a cron job in Powershell, run the same cmdlet used to set it up. For example, to change the time the script runs to 6 p.m., run:
$trigger = New-ScheduledTaskTrigger -Daily -At (Get-Date '18:00')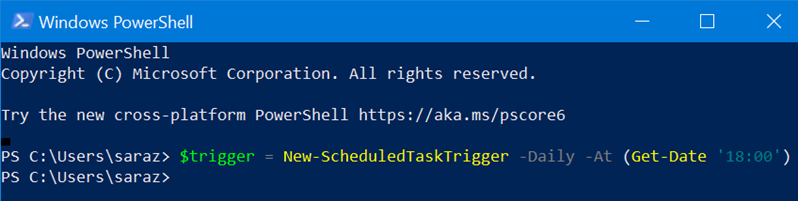
The command has no output but creates a new trigger for the daily scheduled task, setting it to run at 6:00 p.m.
Next, run the following command to apply the new trigger to the existing task named DailyBackupTask and update the trigger settings for the specified task:
Set-ScheduledTaskTrigger -TaskName "DailyBackupTask" -Trigger $trigger
Edit a Cron Job in Command Prompt
To edit the scheduled task in Command Prompt, use the schtasks command again with the changed parameters.
For instance, change the run time from 5:00 p.m. to a 6:00 p.m. with:
schtasks /change /tn "DailyBackup" /tr "\"%SystemRoot%\System32\cmd.exe\" /c \"%scriptPath%\"" /st 18:00
If asked, type in the password and hit Enter. The command prints a confirmation output.
How to Delete Cron Jobs
Cron jobs can be deleted using the Task Scheduler, Windows PowerShell, or Command Prompt. The methods differ, but are all straightforward and quick.
The following text elaborates on each method.
Delete a Cron Job Using the Task Scheduler
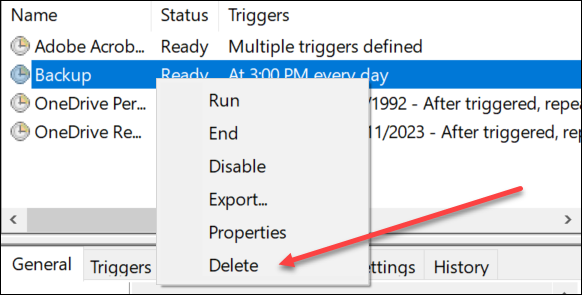
The Task Scheduler offers ways to delete cron jobs as well. Access the Task Scheduler and:
1. Locate the Task Library.
2. Right-click the desired task.
3. Select Delete.
Delete a Cron Job Using the Windows PowerShell
To delete a task using Windows PowerShell, run:
Unregister-ScheduledTask -TaskName "DailyBackupTask" -Confirm:$false
Replace the cron job name with your own. The command has no output.
Delete a Cron Job Using the Command Prompt
To delete a cron job in Windows via the Command Prompt, use the schtasks command with the <strong>/delete</strong> and /tn parameters:
schtasks /delete /tn "DailyBackup" /f
Replace the cron job name with your own. The output confirms the scheduled task has been deleted.
Benefits of Cron Jobs in Windows
Leveraging cron jobs in Windows contributes to increased efficiency, reliability, and overall system management. Cron jobs allow better resource utilization and a more streamlined workflow.
Using cron jobs in Windows offers several benefits:
- Automation. Cron jobs allow for repetitive task automation, saving time and reducing the need for manual intervention.
- Reduced human error. Automating tasks with cron jobs minimizes the risk of human error associated with manual execution. This is especially crucial for critical processes that require precision and consistency.
- Workflow optimization. Windows cron jobs enable workflow streamlining by automating routine processes.
- Efficient system administration. Task scheduling enhances system administration efficiency by automating maintenance tasks, updates, and backups.
- Timely script execution. Cron jobs provide a reliable way to schedule and execute scripts automatically. This benefits tasks like data synchronization, report generation, or system monitoring.
- Resource management. Scheduled jobs can run during off-peak hours, minimizing the impact on system resources during regular business hours. This is particularly important for resource-intensive tasks such as system backups or updates.
- Task scheduling. Windows cron jobs allow users to schedule tasks based on various criteria, including specific times, intervals, or predefined schedules.
- Email notifications. Cron jobs can send email notifications upon completion or in case of errors.
- Maintenance and cleanup. Cron jobs help schedule routine maintenance tasks, such as deleting old files, archiving data, or performing system cleanup.
- Versatility. Cron jobs in Windows are versatile and applicable to a wide range of tasks, making a cron job a powerful tool for system administrators and developers.
Conclusion
After reading this article, you know how to create, edit, and delete cron jobs in Windows using three different methods.
Next, learn how to execute a cron job automatically at boot.
Was this article helpful?
YesNo
Installing & Configuring the Cygwin Cron Service in Windows.
To set up cron on Cygwin, you’ll need to install two additional cygwin packages using the cygwin setup.exe:
- cron: Vixie’s Cron
- cygrunsrv: NT/W2K service initiator
Both programs are in the «Admin» category. Cron is the cron-daemon and Cygrunsrv is the program used to install & manage Cygwin programs as Windows services.
You’ll also need vi(m) installed if you haven’t already as it’s the default editor for the crontab command. (It is possible to use another editor such as nano provided you set it as your default editor in your bash profile.)
Once you have the packages installed you can install cron as a Windows Service using Cygrunsrv.
cygrunsrv —install cron —path /usr/sbin/cron —args -n
There are a lot of web posts that say you should use cygrunsrv -I cron -p /usr/sbin/cron -a -D (See Errors #1 & #2).
By default, cron will install as a service that uses the Local System account. If you test cron at this point — for Windows 2003 at least — the windows event log will show Windows Application Event Log: (CRON) error (can’t switch user context) — See error #3. This is because your test crontab is set up as the local administrator but the service is running as the ‘Local System’ account and does not have permission to create a token object.
To finish off the install, create a new user called cygrunsrv and use the Local Security Policy snap-in to allow that user to ‘Create a token object’, ‘Logon as a service’ & ‘Replace a process level token’ using the local group policy.
You will also need to add the user to the Local Administrators Group. I’ve added this as a note because I’m currently checking what permissions are really required. If it’s possible, it would be better to not have this account added to the Local Administrators Group.
Set the service to run as .\cygrunsrv, set the password and restart the cron service.
You can start and stop the cron service by using:
- Using the Windows Services Snap-in
- From a cmd window or run dialogue; ‘net start cron’ & ‘net stop cron’
- Or, since you are setting this up in Cygwin; ‘cygrunsrv —start cron’ & ‘cygrunsrv —start cron’
To test the service, set up a crontab as the local administrator and check that it runs. A good test is to open a cygwin bash shell and run
$crontab -e
This will open the crontab in vi(m). Add the following line:
* * * * * echo «Cron test at $(date +\%k:\%M)» >> /cygdrive/c/crontest.txt 2>&1
(A little tip here; if you use the date command in a cron job, you need to escape the % characters will a backslash otherwise it won’t work…)
If everything is running correctly this will generate a file called c:\crontest.log and add a new line every minute.
Common errors and their solutions.
#1 cygrunsrv: Error starting a service: QueryServiceStatus: Win32 error 1062: The service has not been started.
This error appears in the Cygwin shell windows when you try to start the service. It is accompanied by error #2 in /var/log/cron.log. The resolution is the same as error #2.
You may find that although it appears that the service didn’t start, it did start but just stopped again. When this happens you may find that you have a cron process running that will lead to error #4 the next time you try to start the service.
#2 cygwin cron «unknown option — D» appears in /var/log/cron.log
To fix this use -n instead of -D: ie cygrunsrv —install cron —path /usr/sbin/cron —args -n
From the Man Page
Cron should be started from /etc/rc or /etc/rc.local. It will return immediately, so you don’t need to start it with ‘&’. The -n option changes this default behavior causing it to run in the foreground. This can be useful when starting it out of init.
#3 Windows Application Event Log: (CRON) error (can’t switch user context)
This error appears in the Windows Application Event Log and occurs because the account running the service can’t switch user context. In other words, the cron service is running using one account — e.g. Local System — and can’t switch to run as the account to whom the crontab being run belongs to. This can be resolved by using an account especially created for the job of running the cron server — in this how-to that account is ‘cygrunsrv’.
#4 /usr/sbin/cron: can’t lock /var/run/cron.pid, otherpid may be nnnn: Resource temporarily unavailable
Cron is already running a process. When you are having issues setting up cron, you may find that although the service stopped, cron is left running as an orphan process in the background. Use ps -a to find the process and then use kill -9 to finish it off!
Appendices.
What the switches mean in the cygrunsrv command.
cygrunsrv —install cron —path /usr/sbin/cron —args -n
The switches are:
- —install (-I) Installs the service on Windows.
- —path (-p) Gives the full path to the executable as Cygwin sees it.
- —args (-a) Passes any arguments to the executable that you might need. You can add more than one by surrounding them in double quotes.
Cron Commands.
- ‘cygrunsrv —start cron’ from a Cygwin shell: Starts the Cron Service
- ‘net start cron’ from a Windows command prompt: Starts the Cron Service
- ‘cygrunsrv —stop cron’ from a Cygwin shell: Stops the Cron Service
- ‘net stop cron’ from a Windows command prompt: Stops the Cron Service
- crontab -e: Edit a crontab
- crontab -l: List a crontab
For additional information in /var/log/cron.log you can use debug flags by adding the switch ‘-x’
e.g. cygrunsrv —install cron —path /usr/sbin/cron —args «-n -x sch,proc,pars,load,misc»
- sch :be verbose when iterating through the scheduling algorithms
- proc :be verbose about the state of the process, including all of its offspring
- pars :be verbose about parsing individual crontab lines
- load :be verbose when loading crontab files
- misc :be verbose about miscellaneous one-off events
- bit :currently not used
- ext :make the other debug flags more verbose
- test :trace through the execution, but do not perform any actions
Local Security Policy.
When you add the user to the service, Windows will automatically enable that user to run as a service. You can put this back to the default setting in your Local Security Policy settings.
From the openssh.README.txt (in regards to cygrunsrv).
Important note for Windows 2003 Server users:
———————————————
2003 Server has a funny new feature. When starting services under SYSTEM account, these services have nearly all user rights which SYSTEM holds…
except for the «Create a token object» right, which is needed to allow public key authentication 
There’s no way around this, except for creating a substitute account which has the appropriate privileges. Basically, this account should be member
of the administrators group, plus it should have the following user rights:
Create a token object
Logon as a service
Replace a process level token
Increase Quota
Useful Links.
- Using Windows security in Cygwin.
- cygrunsrv.README.
- Understanding and Configuring User Account Control in Windows Vista.