
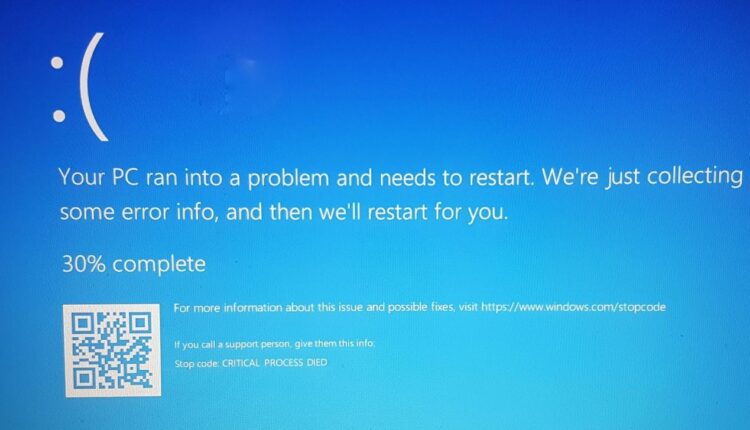
Одна из распространенных ошибок на компьютерах и ноутбуках с Windows 10 — синий экран с сообщением «На вашем ПК возникла проблема, и его необходимо перезагрузить» с кодом остановки (ошибки) CRITICAL PROCESS DIED — после ошибки, обычно происходит автоматическая перезагрузка компьютера, а затем, в зависимости от конкретных обстоятельств — либо снова появление того же окна с ошибкой или обычная работа системы до повторного возникновения ошибки.
В этой инструкции — подробно о том, что может являться причиной появления проблемы и как исправить ошибку CRITICAL PROCESS DIED в Windows 10 (также ошибка может отображаться как CRITICAL_PROCESS_DIED на синем экране в версиях Windows 10 до 1703).
Причины ошибки
В большинстве случаев причиной ошибки CRITICAL PROCESS DIED бывают драйверы устройств — в случаях, когда Windows 10 использует драйверы из Центра обновлений, а требуются оригинальные драйверы производителя, а также другие неправильно работающие драйверы.
Случаются и другие варианты — например, с синим экраном CRITICAL_PROCESS_DIED можно столкнуться после работы программ для очистки от ненужных файлов и реестра Windows, при наличии вредоносных программ на компьютере и в случае повреждения системных файлов ОС.
Как исправить ошибку CRITICAL_PROCESS_DIED
В случае, если вы получаете сообщение об ошибке сразу при включении компьютера или входе в Windows 10, для начала зайдите в безопасный режим. Сделать это можно различными способами, в том числе, когда система не загружается, подробно об этом в инструкции Безопасный режим Windows 10. Также использование чистой загрузки Windows 10 может временно помочь избавиться от ошибки CRITICAL PROCESS DIED и выполнить действия для полного ее устранения.

Способы исправления, если удается войти в Windows 10 в обычном или безопасном режиме
В первую очередь рассмотрим способы, которые могут помочь в ситуации, когда вход в Windows возможен. Начать рекомендую с просмотра сохраненных дампов памяти, которые создаются системой автоматически при критических сбоях (к сожалению, не всегда, иногда автоматическое создание дампов памяти отключено. См. Как включить создание дампов памяти при сбоях).
Для анализа удобно использовать бесплатную программу BlueScreenView, доступную для загрузки на странице разработчика https://www.nirsoft.net/utils/blue_screen_view.html (ссылки на загрузки находятся внизу страницы).
В очень упрощенном варианте для начинающих пользователей анализ может выглядеть следующим образом:
- Запустите программу BlueScreenView
- Просмотрите файлы .sys (обычно нужны именно они, хотя в списке часть могут присутствовать hal.dll и ntoskrnl.exe), которые отобразятся в верхней части таблицы в нижней панели программы с не пустым вторым столбцом «Address In Stack».

- Используя поиск в Интернете, выясните, что это за файл .sys и какой драйвер он представляет.

Примечание: также можно попробовать использовать бесплатную программу WhoCrashed, которая может сообщить точное наименование драйвера, вызвавшего ошибку.
Если шаги 1-3 удались, то далее останется лишь решить проблему с идентифицированным драйвером, обычно это один из следующих вариантов:
- Загрузить файл драйвера с официального сайта производителя ноутбука или материнской платы (для ПК) и установить его.
- Откатить драйвер, если он недавно обновлялся (в диспетчере устройств правый клик по устройству — «Свойства» — вкладка «Драйвер» — кнопка «Откатить»).
- Отключить устройство в диспетчере устройств, если оно не является критичным для работы.
Дополнительные методы исправления, которые могут помочь в данном сценарии:
- Ручная установка всех официальных драйверов (важно: некоторые пользователи ошибочно считают, что если диспетчер устройств сообщает, что драйвер не нуждается в обновлении и «устройство работает нормально», то все в порядке. Это часто не так. Официальные драйверы берем с сайта производителя вашего оборудования: например, аудио драйверы Realtek скачиваем не с Realtek, а сайта производителя материнской платы для вашей модели или с сайта производителя ноутбука, если у вас ноутбук).
- Использование точек восстановления, если они есть в наличии и если недавно ошибка не давала о себе знать. См. точки восстановления Windows 10.
- Проверка компьютера на наличие вредоносных программ (даже если у вас есть хороший антивирус), например, с помощью AdwCleaner или других средств удаления вредоносных программ.
- Выполните проверку целостности системных файлов Windows 10.
Как исправить ошибку CRITICAL PROCESS DIED, если Windows 10 не запускается
Более сложный вариант — когда синий экран с ошибкой появляется еще до входа в Windows 10 без возможности запустить особые варианты загрузки и безопасный режим (если такая возможность есть, то можно использовать предыдущие методы решения в безопасном режиме).
Примечание: если после нескольких неудачных загрузок у вас открывается меню среды восстановления, то создавать загрузочную флешку или диск, как описано далее, не нужно. Вы можете использовать средства восстановления из этого меню, в том числе — сброс системы в разделе «Дополнительные параметры».
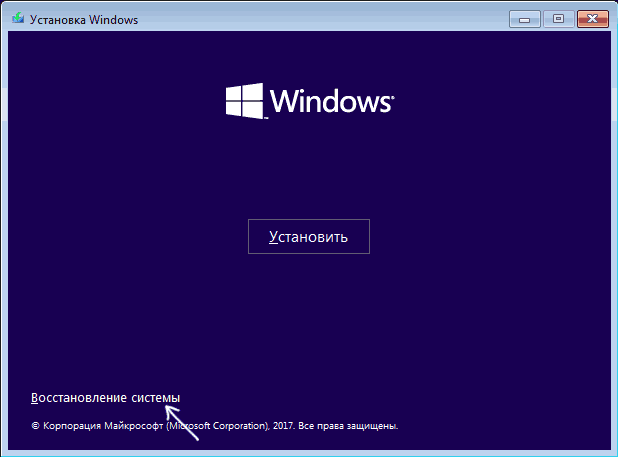
Здесь потребуется создать загрузочную флешку с Windows 10 (или диск восстановления) на другом компьютере (разрядность системы на накопителе должна совпадать с разрядность установленной системы на проблемном компьютере) и загрузиться с нее, например, используя Boot Menu. Далее порядок действий будет следующим (пример для загрузки с установочной флешки):
- На первом экране программы установки нажмите «Далее», а на втором, внизу слева — «Восстановление системы».

- В появившемся меню «Выбор действия» зайдите в «Поиск и устранение неисправностей» (может называться «Дополнительные параметры»).

- При наличии, попробуйте использовать точки восстановления системы (пункт «Восстановление системы»).
- При их отсутствии, попробуйте открыть командную строку и выполнить проверку целостности системных файлов с помощью sfc /scannow (как это сделать из среды восстановления, подробно в статье Как проверить целостность системных файлов Windows 10).

Дополнительные варианты решения проблемы
Если к текущему моменту никакие способы не помогают исправить ошибку, среди остающихся вариантов:
- Выполнить сброс Windows 10 (можно с сохранением данных). Если ошибка появляется после входа в систему, то сброс можно выполнить, нажав по кнопке питания, изображенной на экране блокировки, затем, удерживая Shift — Перезагрузка. Откроется меню среды восстановления, выберите «Поиск и устранение неисправностей» — «Вернуть компьютер в исходное состояние». Дополнительные варианты — Как сбросить Windows 10 или автоматическая переустановка ОС.
- Если проблема возникла после использования программ для очистки реестра или подобных, попробуйте восстановить реестр Windows 10.
При отсутствии решения могу рекомендовать лишь попробовать вспомнить, что предшествовало появлению ошибки, выявить закономерности и попробовать как-то отменить действия, которые привели к проблеме, а если это невозможно — выполнить установку системы повторно. Тут может помочь инструкция Установка Windows 10 с флешки.
Last Updated :
28 May, 2024
Windows OS is more dependent upon the execution of the background activities. You can term such activities as the Critical Process of Windows. You will be surprised to know that you can get Errors on Critical Windows Processes as well.
In such cases, you get the Windows Blue Screen Error along with the Stop Code Critical Process Died Error on Windows. This article will discuss the methods needed to resolve the CRITICAL_PROCESS_DIED Error Stop Code on Windows.
Methods to Fix «Critical Process Died» in Windows 10
- Method 1: Fix «Critical Process Died» by Restarting Device
- Method 2: Fix «Critical Process Died» by Fixing Corrupt System Files
- Method 3: Fix «Critical Process Died» in Windows by Scanning System
- Method 4: Fix «Critical Process Died» in Windows by Scanning Virus & Malware
- Method 5: Fix «Critical Process Died» in Windows by Updating Driver
- Method 6: Fix «Critical Process Died» in Windows by Removing Latest Installed App
- Method 7: Fix «Critical Process Died» in Windows Using System Restore
What is the Error Code 0x000000EF?
The Error Code 0x000000EF denotes the issue that the Windows OS is now encountering the Critical Process Died Error. You will get the Windows Error Message as well as the Windows Error Code on the screen. Also, you will face the windows Blue Screen Death if the Windows Critical Process Died.
The simple reason for this problem is the Background Windows Application stopped working on which the Windows Execution was dependent. Either, the application becomes corrupted or it is modified somehow.
How to Fix «Critical Process Died» Error in Windows 10?
To Resolve CRITICAL_PROCESS_DIED error in Windows, the following steps are worthful to be executed one by one. We will start Simple Windows Restarting.
Method 1: Fix «Critical Process Died» by Restarting Device
The first & very simple method is to perform a Windows Restart Operation. You have to check whether the problem originally exists or if it is a simple problem that can be resolved with a quick Windows Restarting.
After the restart, if the problem still exists, then it is time to move ahead with the more complex & complicated steps that will surely fix critical process died error.
Method 2: Fix «Critical Process Died» by Fixing Corrupt System Files
To Fix Critical Process Died by fixing Corrupted System files, You’ve to follow the given steps —
Step 1: Search for the Command Prompt on the Search Bar. And go with it.

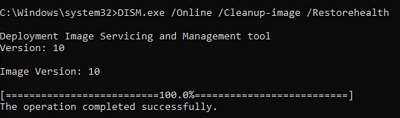
Step 2: Execute the following command there. It will find all the Corrupted Files on Windows & if anything is present, it will be resolved.
Command: DISM /Online /Cleanup-Image /RestoreHealth
Method 3: Fix «Critical Process Died» in Windows by Scanning System
To Fix Critical Process Died using the Scanning System, You’ve to follow the given steps —
Step 1: Again, search for the Command Prompt on the Windows Search Bar & go with the CMD Option.
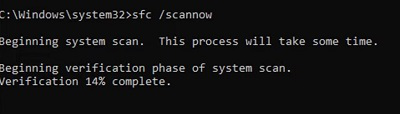
Step 2: Now, scan all the device drivers & disks whether any problem is there or not using the following command.
Command: sfc /scannow
Method 4: Fix «Critical Process Died» in Windows by Scanning Virus & Malware
To Fix Critical Process Died by scanning viruses and malware, You’ve to follow the given steps —
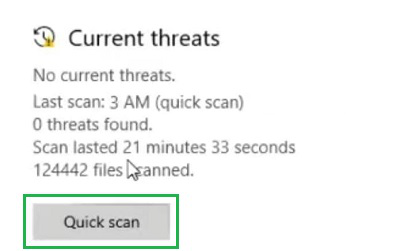
Step 1: Open Windows Settings & click on the Update & Security option.
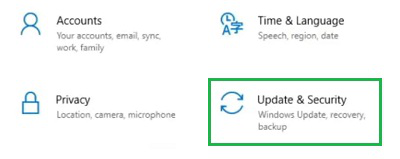
Step 2: Then, under the Protection Area, click on Virus & Threat Protection.
Step 3: Click on the Quick Scan to get the details of the Virus Infection.
Method 5: Fix «Critical Process Died» in Windows by Updating Driver
To Fix Critical Process Died by updating the driver, You’ve to follow the given steps —
Step 1: Open the Device Manager, by right-clicking on the Start Menu.
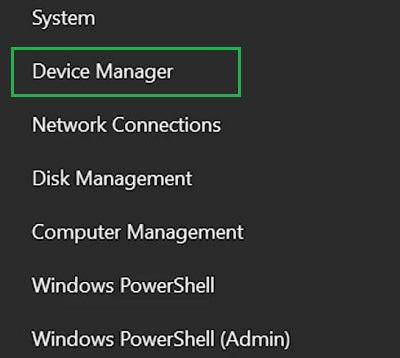
Step 2: After that, select the Display Driver & click on the Update Driver option.
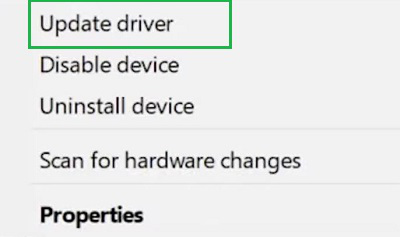
Step 3: Now, go for the Search Automatically for Driver Option.

Method 6: Fix «Critical Process Died» in Windows by Removing Latest Installed App
To Fix Critical Process Died by removing Programs, You’ve to follow the given steps —
Step 1: Search for the Remove Application on the Search Bar. And go with the option Add or Remove Application.
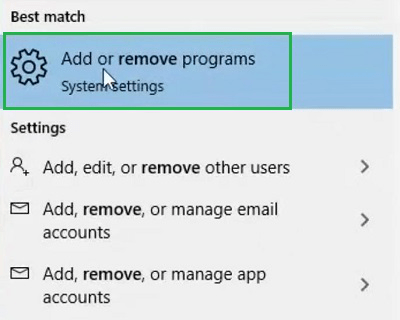
Step 2: After that, select the latest installed application & click on the Uninstall Option. Now, in the Popup Window, click again on Uninstall.

Method 7: Fix «Critical Process Died» in Windows Using System Restore
To Fix Critical Process Died using System Restore, You’ve to follow the given steps —
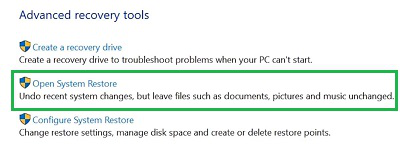
Step 1: Search For System Restore & from the opened window click on Open System Restore.
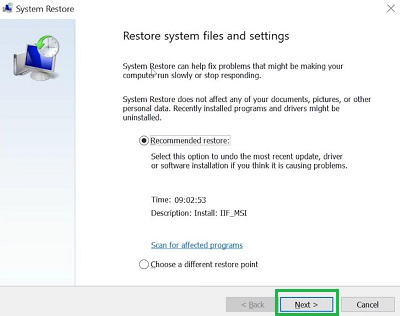
Step 2: Click on Next without making any changes on the Default Screen.
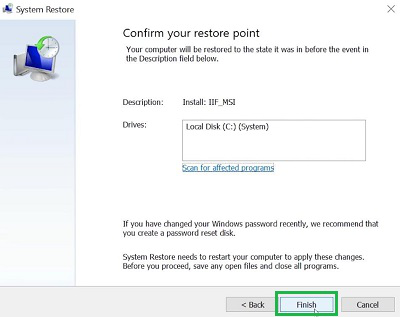
Step 3: After selecting the Restore Point, click on Finish to complete the process.
So, we can conclude that with the above-mentioned methods, you can resolve how to Fix the CRITICAL_PROCESS_DIED Stop Code on Windows. We will recommend executing each & every method discussed here. As then only, you can have a chance to permanently stop the issue. Otherwise, the issue might be stopped temporarily.
When starting up Windows 10, you would feel fairly bothered if a blue screen with the stop code «Critical Process Died» keeps appearing. Here in this article, you’ll find a brief introduction of the BSOD stop code, as well as solutions to the issue Critical Process Died Windows 10 won’t boot.
Windows 10 Stop Code Critical Process Died
Critical_Process_Died refers to when a critical system process dies while showing its bug check error code 0x000000EF or a blue screen error. If a critical system can’t run properly, the operating system will run into some troubles.
Consequently, it will crash and show you errors on your computer in Windows 10 like “Your PC ran into a problem and needs to restart. We’re just collecting some error info, and then we’ll restart for you. (n% complete)”, just like the following screenshot.
Some computers ever enter the loop of continuous rebooting due to “Critical Process Died” every time. The related topic – Critical Process Died keeps restarting is also can be found online.
This Windows 10 stop code occurs when the process required to boot the operating system ended accidentally for some unknown reasons. This error typically occurs after a Windows 10 system upgrade or the installation of a new Windows in PCs.
Due to Windows 10 advantages, most people choose to upgrade to the new system. However, this upgrade may cause some issues, for example, partition disappearance, slow startup speed, etc. Even during the process of Windows upgrade or after a successful upgrade, the 0x000000ef error or BSOD stop code could appear due to the compatibility issue, RAM issue, corrupted or modified system files, bad sectors, etc.
Well then, what should you do to fix Windows 10 when its critical process died after update? Get the solutions in the following sections now.
Related article: Windows 10 Blue Screen of Death – You Can Quickly Fix It
How to Fix Critical_Process_Died Windows 10
In fact, Windows 10 Critical Process Died on boot is a common issue talked about in many forums and articles, and we have found some useful solutions to fix it as follows.
Quick Video Guide:
Solution 1: Restart Computer in Safe Mode
In general, this error can make your desktop or laptop unable unusable and you have to restart your computer. You always get this issue every time you restart the computer. In this case, you can restart the computer in safe mode.
This is quite a quick way for turning on the computer Windows system, which may prevent you from getting this error in the process of computer startup.
- Restart Windows 10.
- Press Shift + F8 before Windows 10 starts loading so that you make it start the recovery mode, from where you can boot into Safe Mode.
- Then you need to go to Advanced Boot Options and set boot mode as Safe Mode to open your computer.
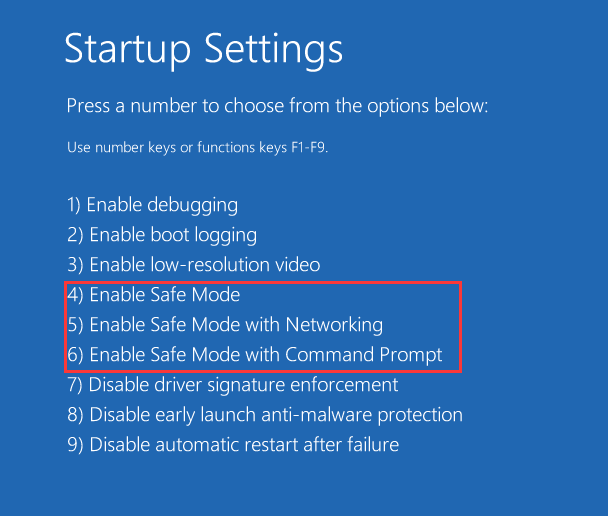
You can also enter into Safe Mode through another way. Please use an installation disc or restart your PC several times to boot to WinRE. Then click Troubleshoot → Advanced options → Startup Settings → Restart. You will get the following screenshot; press the corresponding key so as to enable Safe Mode.
Solution 2: Upgrade All Drivers
After you restart the computer in Safe Mode, you should check whether there are some errors in all your device drivers. Generally, many blue screen errors like 0x000000ef error could be caused by hardware or drivers. Please follow the guidance listed below:
- You can enter into Device Manager by pressing Win + X.
- Start checking all drivers. If you find a driver that shows a yellow exclamatory mark, it means the driver is faulty.
In this case, you need to uninstall and reinstall this driver.
In addition, it is possible that the hardware drivers are no longer compatible with your Windows system after an upgrade. Therefore, it is necessary to upgrade all drivers by right-clicking a driver and selecting Upgrade Driver Software. This is a useful Critical Process Died Windows 10 fix.
Solution 3: Use SFC /Scannow
When Windows 10 stop code Critical Process Died occurs, it is possible that it is caused by corrupted or missing system files. In this case, you can use the SFC /Scannow command to check the file system.
Tip: If you experience the issue of Windows 10 Critical Process Died no safe mode, you can still run this command to repair corrupted system files. Just prepare an installation disc to boot the PC and click Repair your computer to Windows Recovery Environment, then open Command Prompt.
If this System File Checker discovers that the protected files are overwritten by incorrect files, it will extract the correct system file from the system file backup (namely dllcache) and replace the incorrect file. This command is useful for repairing system files, and you can follow the steps below:
Step 1: Input command prompt in the Search box. Then right-click Command Prompt and select Run as administrator to open the command window.
Step 2: Type sfc /scannow and press Enter key. You need to wait for a few minutes until the system scan finishes.
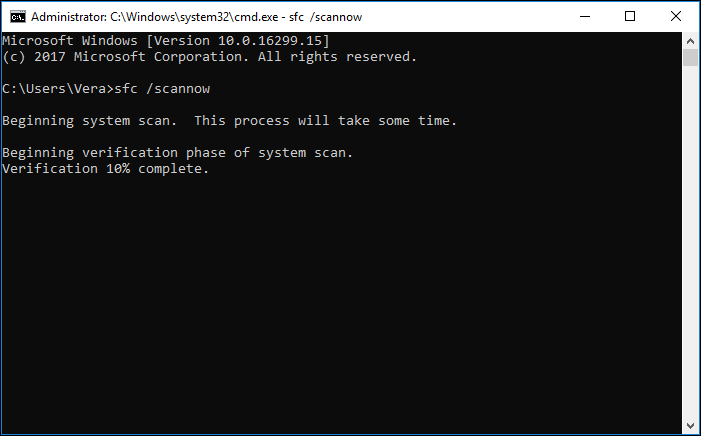
When Verification reaches 100%, if there are no corrupted system files, you can receive a note “Windows Resource Protection did not find any integrity violations”.
If there are some errors in system files, this tool can find and repair them; a message like “Windows Resource Protection found corrupt files and successfully repaired them. Details are included in the CBS.Log windirLogsCBSCBS.log. For example C:WindowsLogsCBSCBS.log. Note that logging is currently not supported in offline servicing scenarios” will be displayed.
At last, you need to restart your computer if this command prompt has repaired any file.
Solution 4: Run DISM to Repair Corrupted System Image
If sfc /scannow command is unable to fix Windows 10 blue screen Critical Process Died, you can run DISM to fix the Windows system image. In Windows 10, there is a command-line utility called Deployment Image Servicing and Management, also known as DISM. This method is recommended by many users.
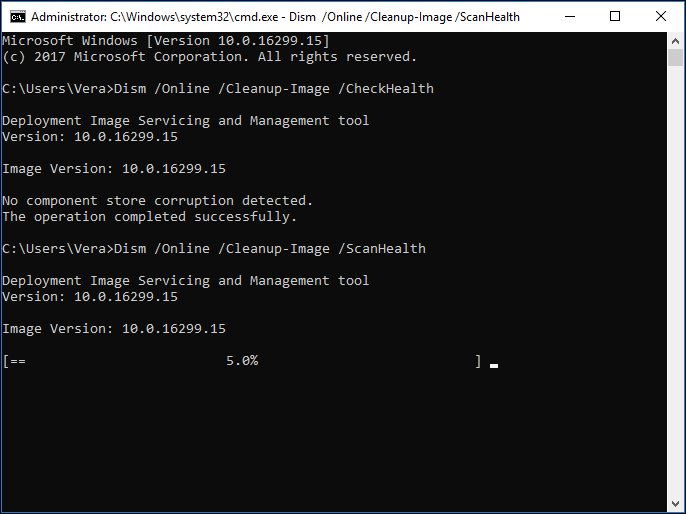
Similarly, run Command Prompt as administrator. Then, type following the command lines:
Dism /Online /Cleanup-Image /CheckHealth
Dism /Online /Cleanup-Image /ScanHealth
Dism /Online /Cleanup-Image /RestoreHealth
If you want to get more information, please click this article – Repair Windows 10 Image with DISM and Other Useful Tips for DISM to get help.
Solution 5: Perform a Clean Boot
If you experience BSOD Critical Process Died Windows 10, you can choose to perform a clean boot in Safe Mode. Just press Win+R to open the Run box and type msconfig to open the System Configuration window. Then choose Selective startup and Load system services in System Configuration window.
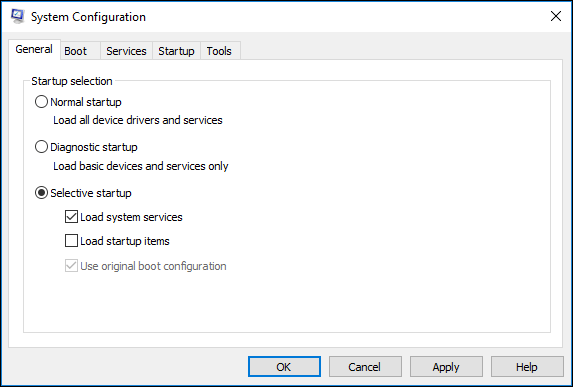
At last, check Hide all Microsoft services and click the Disable all button.
Solution 6: Uninstall the Latest Software
You might have installed some software with viruses on your computer. Perhaps the virus attack caused this error, so please uninstall the latest installed software.
Solution 7: Restore to the Previous Point
If the error has appeared only recently, you can use the created system restore point to restore to its previous status. Here, you can do this in Windows Recovery Environment and then choose System Restore under the Advanced Options window.
Solution 8: Use MiniTool Partition Wizard When There Are Bad Sectors
Move 1: Check Bad Errors in Hard Drive
Another common possible cause is that there could be bad disk blocks. If there are bad sectors in your hard drive, Windows stop code Critical Process Died on startup may happen. In this case, you need to check whether there are bad sectors in your disk.
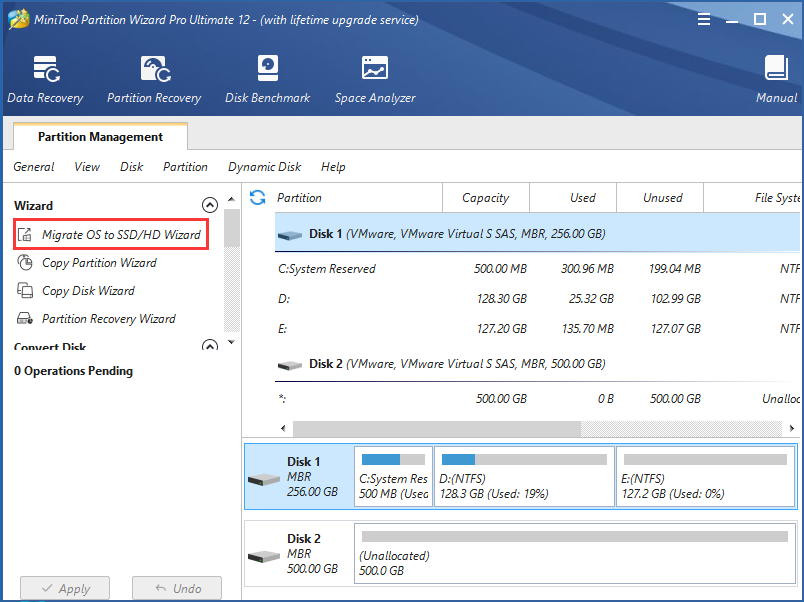
How to perform this operation? MiniTool highly recommends the professional partition and disk management software – MiniTool Partition Wizard to be used to check disk errors with simple steps. This partition manager provides you the Surface Test feature to scan all sectors in the disk by reading all data from each sector in Windows 10/8/7/XP/Vista.
When Critical Process Died 0x00000ef error appears, Windows 10 won’t boot. Thus, first you need to create a bootable disc or USB drive by installing MiniTool Partition Wizard Pro Edition in your computer and using its Bootable Media feature. Next, boot your PC from the bootable device to MiniTool Recovery Environment to check disk errors.
Step 1: After launching MiniTool Partition Wizard, select a target hard drive and right-click on this disk to select the Surface Test function. You can also click this feature from the Check Disk menu.
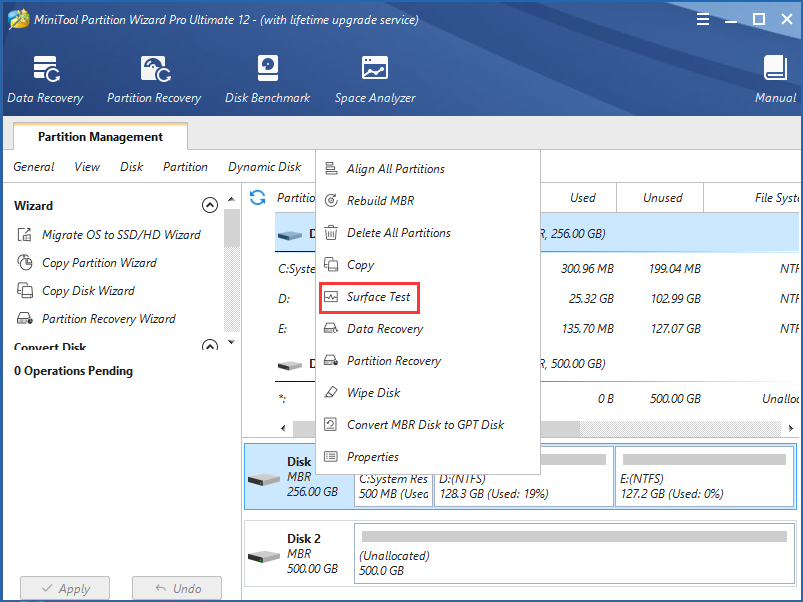
Step 2: Then please click Start Now to start the process. You need to wait for a few minutes during the process of disk scanning. MiniTool Partition Wizard will mark the disk block without any reading error in green and the ones with errors in red. Next, click OK to continue.
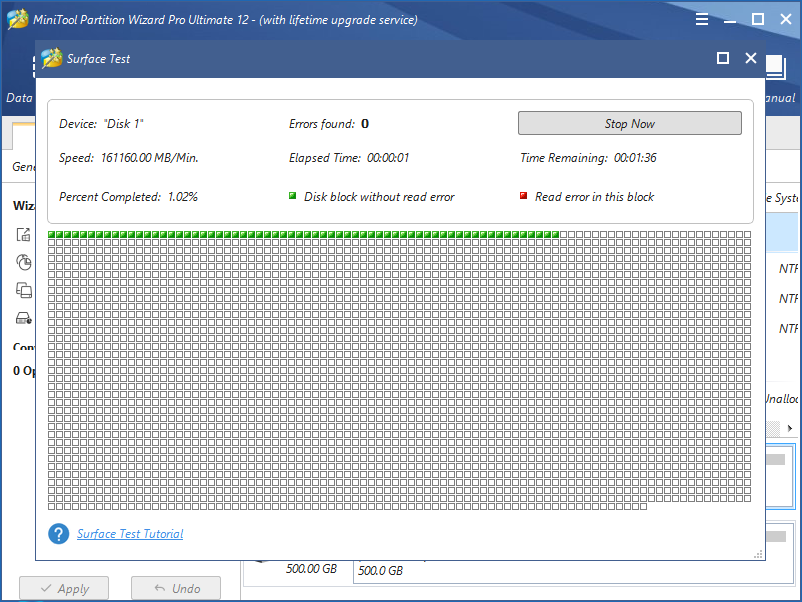
Step 3: At last, click Apply to perform all operations.
In addition, you can also do a partition surface test by checking each sector on all partitions. After finishing disk errors check, you can ensure whether there are bad sectors or not in your hard drive. And then please take measures according to the actual situation.
Move 2: Repair Bad Sectors
After finishing the disk test, if there are bad sectors, you need to shield them. When searching for “disk bad sector repair” on Google, you will find some useful ways or videos. Just follow them to shield the bad blocks.
Or you can refer to this related article: What to Do If I Find Bad Sectors on Hard Drive in Windows 10/8/7?
Note: Unfortunately, MiniTool Partition Wizard only support disk check, but it doesn’t provide a solution to fix disk errors. Nevertheless, this software can help you to do other operations, such as copy disk, migrate operating system to SSD/HD and so on.
Move 3: Make a Backup for Important Data on Disk in Windows 10
① Clone the Entire Disk for All Data
After finishing checking the disk, you might discover the bad errors in the disk. In this case, in order to reduce the risk of data loss, you should make a backup for all your important data on the hard drive after shielding the bad sectors.
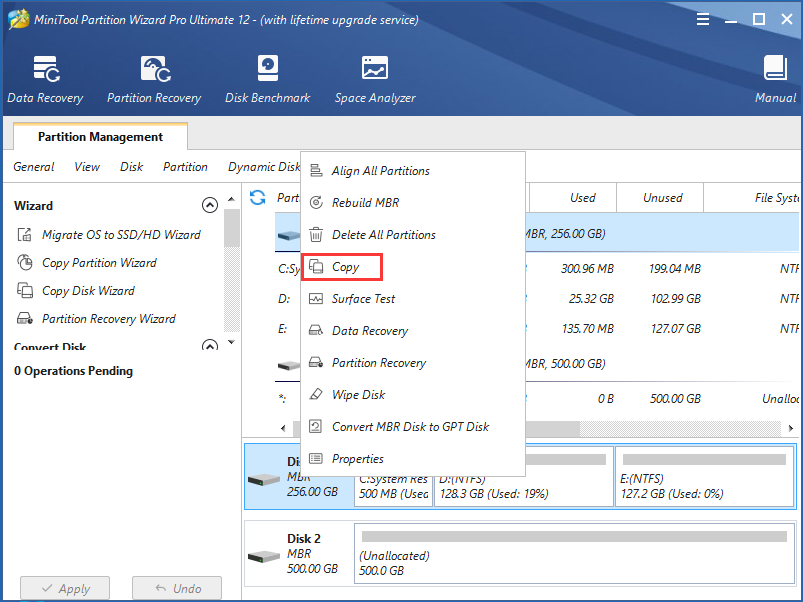
Step 1: Launch this application, right-click the source hard drive and select Copy. You can also click Copy Disk in the Convert Disk menu.
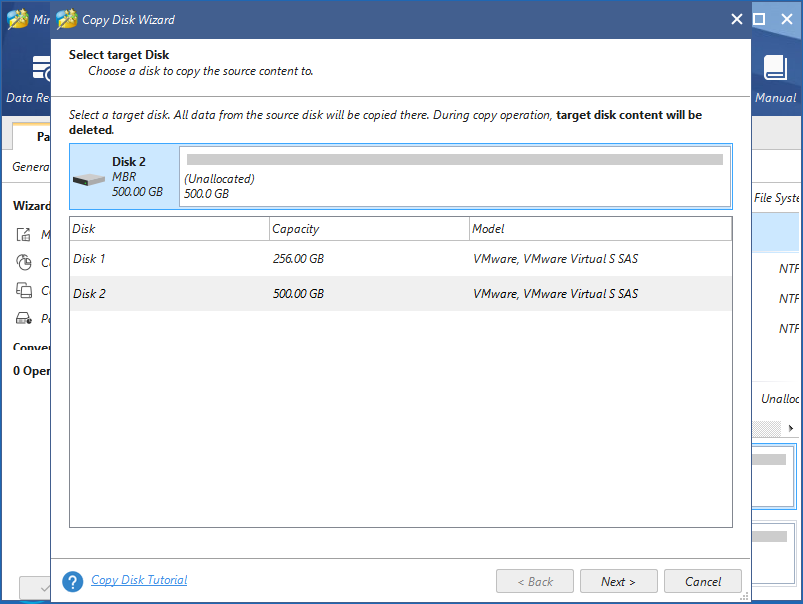
Step 2: Then you need to choose a disk to copy the source content to. All data from the source disk will be copied there. During copy operation, target disk content will be deleted, so you should make a backup for the data if there are important files saved on the source hard drive. Then click the Next button.
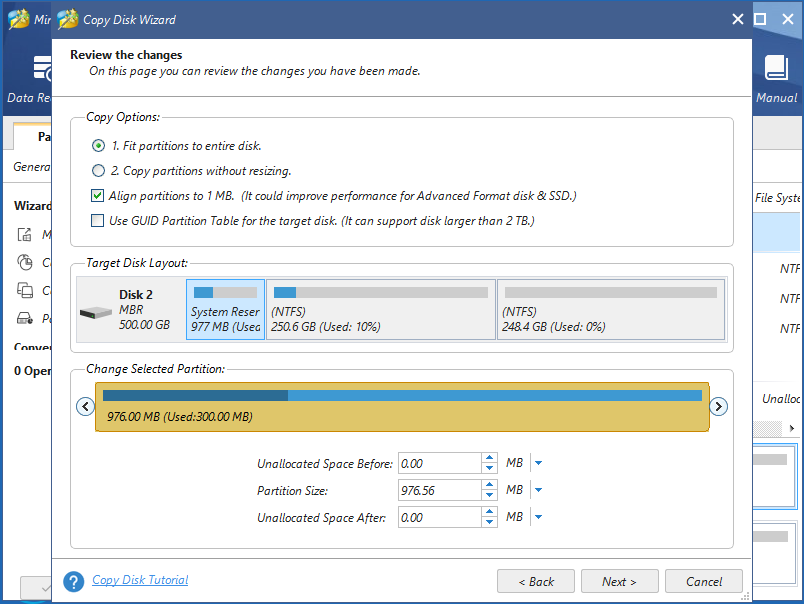
Step 3: Then you can review the changes. Moreover, there are two copy options you can choose: Fit partitions to entire disk or Copy partitions without resizing.
Tip:
1. If you copy the entire disk to SSD or an advanced format disk , it is suggested to choose Force to align to 1MB for a better performance.
2. If you choose to use GUID Partition Table, the target disk will become GPT disk.
Step 4: Then MiniTool Partition Wizard will tell you that if you want to boot from the new disk, you should enter into BIOS to change the boot order after finishing the copy. If you are only making a backup for the entire disk, it is not necessary to do this step.
Step 5: Finally, click Apply to execute all operations.
It is very easy to clone all data in the hard drive to another disk in Windows 10. In addition, you can use MiniTool Partition Wizard to copy partitions to keep data safe.
② Make a Backup for Windows 10 System
If you have fixed the Critical Process Died 0x000000ef error successfully, we suggest you should do a system backup so it can be used to restore the system when something goes wrong in Windows 10. This partition manager is very powerful helping with system migration. Just click this post – Easily Migrate Windows 10 to SSD without Reinstalling OS Now!
In addition to MiniTool Partition Wizard, you can also use another data backup software – MiniTool ShadowMaker to back up important files without booting Windows in the event of Windows 10 0x000000ef error. This freeware allows you not only to create an image but also clone disk for a backup.
MiniTool ShadowMaker TrialClick to Download100%Clean & Safe
Now, all solutions to Windows 10 blue screen Critical Process Died have been shown to you. If you are also bothered by this issue, just try them to see if they can fix it for you. If they did, you can share them to Twitter so more people will know.
Click to Tweet
Bottom Line
In conclusion, the above content introduces you the solutions to Windows 10 stop code Critical Process Died on startup. Now it’s your turn to take measures to solve this issue.
If you have any questions or suggestions, welcome to leave a message below. Or write your idea in an email and send it to [email protected].
Critical Process Died FAQ
How do I fix critical process died?
It is easy to fix the “critical process died” stop code in Windows 10 and the solutions are various, such as run an SFC scan, update your drivers, perform a clean boot, go for system restore, uninstall the latest software, check disk errors, etc.
What causes critical process died error Windows 10?
When Windows 10 stop code critical process died happens, it means the process which was needed to run the system ended suddenly for some reason. Simply put, this blue screen error appears because of the corrupted or missing system files, bad device drivers, virus attack, compatibility issues, bad sectors, etc.
Are you experiencing CRITICAL_PROCESS_DIED BSOD on Windows 10? Have you noticed decreased system performance or frequent blue screen errors after recent Windows updates? The Critical Process Died bug check has a value of 0x000000EF, indicating that a critical Windows system process fails to run properly.
Basically, the Windows operating system ensures that only authorized applications can access certain data and parts of the system. But when a critical component of Windows detects an unauthorized modification to its data, it immediately steps in, causing the Critical Process Died blue screen error.
Your PC ran into a problem and needs to restart. We’re just collecting some error info, and then we’ll restart for you. If you’d like to know more, you can search online later for this error: CRITICAL_PROCESS_DIED
Most of the time Windows 10 blue screen errors can be caused by buggy drivers. Again corrupted system files, Disk drive Errors, low-level software issues, or the default value in the Boot Loader section of the Boot.ini file are missing or invalid. Whatever the reason here is some solutions you may apply to get rid of this Windows 10 Blue screen error.
Post Contents :-
- 1 CRITICAL_PROCESS_DIED Windows 10
- 1.1 Uninstall Recently installed applications
- 1.2 Uninstall Windows update
- 1.3 Disable Fast startup
- 1.4 Reinstall problematic Device drivers
- 1.5 Run DISM and SFC utility
- 1.6 Perform System Restore
CRITICAL_PROCESS_DIED Windows 10
Whenever you face a blue screen error, the first thing you must try to remove all external devices include a printer, scanner, external HDD, etc, and start Windows normally. This will fix the problem if the device driver conflicts causing this BSOD error.
If you are using a Desktop computer check if the problem might be caused by a hardware issue, especially with the RAM. If you see this error then take out the RAM and make sure it is clean and doesn’t have any dust around it. Also, make sure the slots are clean as well. Put back the RAM and check if it is connected properly.
Hard drives can also be the culprit behind this issue. Make sure the hard drive is tightly connected to the board and doesn’t have any loose connections.
If due to this BSOD windows 10 frequently restarts at startup and didn’t allow to perform any troubleshooting steps, We recommend booting into safe mode where Windows starts with minimum system requirements and allow to Diagnose the problem.
Uninstall Recently installed applications
If the problem started after installing any third-party application or games, may this is not compatible with the current Windows version and causing a BSOD error. Also sometimes security software (Antivirus) also cause Windows 10 BSOD error. We recommend temporarily uninstall them and check this helps to fix Critical Process Died or not.
- Press Windows + R, type appwiz.cpl, and ok to open the programs and features window.
- Here look for recently installed third-party applications, Right-click, and select uninstall.
- Do the same with security software (Antivirus/Antimalware) if installed.
Uninstall Windows update
If your problem has only just started, a recent Windows update could be to blame. Thankfully, it’s easy to uninstall recent updates so you can see if your issue goes away.
To uninstall Windows 10 update:
- Open the Settings app
- Go to Update and Security then Windows Update
- Click on Update History then Uninstall Updates.
- Highlight the update you want to remove from your system,
- then hit the Uninstall button at the top of the window.
Disable Fast startup
Also, some users suggest disabling the Fast startup feature helps them to fix the Critical Process Died BSOD error.
- Open the control panel, from All Control Panel Items, click on Power Options
- On the left side of the window, click on Choose what the power button does
- If needed, click on Change settings that are currently unavailable, under the Define power buttons, and turn on password protection
- From the enabled options under the Shutdown settings section, uncheck the Turn on fast startup (recommended) checkbox to disable Hybrid Shutdown.
- Click the Save Changes button to save the modified settings.
- Close the Power Options window when done.
Reinstall problematic Device drivers
Again Bad, incompatible device drivers are one of the most common causes of the Windows 10 blue screen error. Therefore, it’s sensible to check that none of them require updates. Especially if the problem started after a recent Windows 10 upgrade, there is a chance the installed driver is not compatible with the current Windows 10 version.
- To check the status of your drivers, right-click on the Start menu, select Device Manager,
- This will display all installed device driver lists,
- Scan through the list to see whether any devices have a yellow exclamation point alongside them.
- If you find an exclamation point, right-click on the device in question and choose Update Driver Software from the context menu.
- select search for automatic driver update and let Windows download and install the latest available driver for you.
Or visit the device manufacturer’s website, Download the latest driver and install it on your device. We recommend updating and reinstall the Display (Graphics) driver, Network adapter, and Windows Audio driver to the latest version.
Especial recommendation: If the CRITICAL_PROCESS_DIED BSOD error occurs when you are playing games or when you wake up the PC from sleep, then it could be a video card driver issue. What you can do is update your video card driver to the latest available one.
Run DISM and SFC utility
DISM stands for Deployment Image Servicing and Management. This tool is specially designed to check and repair the system image. If any system corruption or system file missing while the Windows upgrade process causing the Critical Process Died blue screen error, Running the DISM restore health command with the System file checker utility is very helpful in fixing most of the Windows 10 problems include Different BSOD errors.
Type cmd on the start menu search, right-click on the command prompt, select run as administrator. Then type Dism Command :
Dism /Online /Cleanup-Image /RestoreHealth
Wait until 100% the scanning process, then type the command sfc /scannow and ok to run the system file checker utility which scans for missing or corrupted system files.
if found ay the sfc utility restores them from a compressed folder located on %WinDir%\System32\dllcache. Restart Windows after completing the scanning process and check There is no more BSOD on your Windows 10 system.
Perform System Restore
If the problem started recently and you think that it is caused by a program that you might have installed in the last few days or weeks then it’s time to utilize the System Restore option. If the problem was caused by a program or a virus then the system restore to an earlier point should be able to solve the issue for you. Check how to perform System restore on Windows 10,11.
Experiencing CRITICAL_PROCESS_DIED bug check value 0x000000EF after Windows Update? This BSOD error Critical Process Died indicates default value in the Boot Loader section of the Boot.ini file is missing or invalid. Also sometimes incompatible driver software and corrupted system file result this critical process died on windows 10. If you are also struggling from this Blue screen, here 3 effective solutions apply to fix CRITICAL_PROCESS_DIED Windows 10.
Quick Links
- 1 Windows 10 critical process died
- 1.1 Run DISM and SFC utility
- 1.2 Update Device driver
- 1.3 Disable Fast startup
Windows 10 critical process died
Let’s start with disconnecting all external devices connected to your PC and forcefully restart, check if windows 10 starts normally.
If you are getting this windows 10 BSOD frequently, We recommend boot into safe mode where windows start with minimum system requirements and allow to Diagnose the problem.
Run DISM and SFC utility
This is the very first thing you must do, whenever you face error 0x000000EF or Boot.ini file is missing. Running System file checker utility automatically detect and restore missing corrupted system files with correct one.
- Search for command prompt, Right-click and select run as administrator,
- First run the DISM restore health command: DISM /Online /Cleanup-Image /RestoreHealth
- This will verify the integrity of operating system files and repair files that are corrupt, damaged or changed.
- After that run the system file checker utility command: sfc /scannow and press enter key.
- Let the scanning process complete to 100%
- Restart windows after complete the scanning process, check if windows start normally. There is no more BSOD error at startup.

Update Device driver
As discussed before incompatible drivers are one of the most common causes of the stop code. Therefore, it’s sensible to check that none of them require updates.
- Press Windows Key + R then type devmgmt.msc and hit Enter to open Device Manager.
- Here check whether any devices have a yellow exclamation point alongside them.
- If you find an exclamation point, right-click on the device in question and choose Update Driver Software from the context menu.
- Otherwise right-click on such device(s) and select Uninstall.
- Restart your PC to apply changes and Windows will automatically install the default drivers for the above device.
Disable Fast startup
Also, some users suggest Disabling the Fast startup feature help them to fix the Critical Process Died BSOD error. You can try this
- Open control panel, from All Control Panel Items, click on Power Options
- On the left side of the window click on Choose what the power button does
- If needed, click on Change settings that are currently unavailable, under Define power buttons and turn on password protection
- From the enabled options under the Shutdown settings section, uncheck the Turn on fast startup (recommended) checkbox to disable Hybrid Shutdown.
- Click the Save changes button to save the modified settings.
- Close Power Options window when done.
- Check for the issue.

If the problem started after the recent change, we recommend to undo the changes, uninstall the application, which after install causing critical process died windows 10. Also, you may perform a system restore to revert back Windows 10 settings to the previous working state.
If none above solutions work for you, then you may try to refresh Windows 10 from Settings > Update & Security > Recovery > Reset this PC > Get Started > Keep Files and follow the on-screen instructions here.
Did these solutions help to critical process died windows 10? Let us know in the comments below.