

In this tutorial, I will show you how to enable the Raspberry Pi remote desktop facility to make things easier for you. This will be useful if you don’t have a screen with your Raspberry pi and want to make regular changes to it. In case you are working on something serious, making regular changes without a screen is a real headache. So, having remote desktop access on your Pi is gonna be a real lifesaver!
Here I will walk you through 5 different methods by which you can get your Pi connected to a remote desktop from another computer (Windows/ Mac/ Linux). So here goes the list of 5 ways you can use to run a remote desktop on your Raspberry Pi.
- Xrdp Server
- SSH & X11 Forwarding
- Team Viewer
- VNC
- NoMachine
Before you get started, you have to find your Raspberry Pi IP address and SSH into it. You can read my articles to know how to do these.
Contents
- #1. Raspberry Pi Remote Desktop with Xrdp Server
- Prerequisites
- Installation
- Connecting from Windows
- Connecting from Linux
- Connecting from Mac
- #2. Remote Desktop with SSH and X11 Forwarding
- Installation
- Connecting from Windows
- Connecting from Linux & Mac
- #3. Remote Desktop with Team Viewer
- Installation
- Connecting from Windows & Mac
- Connecting from Linux
- #4. Remote Desktop with VNC
- Installation
- Connecting from Windows
- Connecting from Linux
- Connecting from Mac
- #5. Remote Desktop with NoMachine
- Installation
- Connecting from Windows/ Linux/ Mac
- Conclusion
#1. Raspberry Pi Remote Desktop with Xrdp Server
For your knowledge – Xrdp is a free open-source remote desktop protocol server from Microsoft that enables operating systems other than Windows to provide a fully functional remote desktop experience.
Prerequisites
I assume that you have Raspbian installed on your Raspberry Pi.
The Raspbian OS comes with different versions out of which Raspbian Lite comes without a GUI. If you have installed the Lite version, then you need to install a desktop environment that will act as a backend for the Xrdp server software. If you have other versions of Raspbian on your device, Skip this section.
There are a plethora of desktop environments available in Raspbian repositories. Here I’ll be using the Pixel as it is the default environment on Raspbian desktop images. Also, it’s very stable, lightweight, and fast which makes it perfect for use on a remote server.
Firstly, log in to your Pi and run the following commands to install the pixel DE.
sudo apt update
sudo apt-get install raspberrypi-ui-mods xinit xserver-xorg
When you issue the commands, the downloading and installation will begin. It will take some time to complete the process depending on your system.
Once done with that, reboot your system by running this command. Rebooting is just to reflect the changes.
sudo rebootInstallation
1. Before we install the packages required, we have to verify everything is up to date. To do so, we have run the following 2 commands.
sudo apt-get update
sudo apt-get upgrade
2. Now we need to install the Xrdp package on your Pi. So do it by issuing the below-given command. Once done, the Xrdp software replicates Microsoft’s RDP protocol so that other desktop clients can also remotely connect to your Raspberry Pi.
sudo apt-get install xrdpNow the Xrdp server package will be installed on your Pi with the best possible configuration and will be ready to work.
Connecting from Windows
From Windows computer, open the start menu and select the Remote Desktop Connection application and type the IP address.
Now click on the Connect button and you will be taken to the Xrdp login screen.
Enter the username and password for the account already existing on your Pi. If you are using the default pi, then your username will be pi and the password will be raspberry. Once entered, click the OK button, and you are set.
At this point, you will be able to access your Raspberry Pi using the remote control desktop tool on Windows computer.
If you installed the Pixel DE then you will see the default Pixel desktop. It’ll look like this.
If you are interested you can read my article on installing Windows 10 on Raspberry Pi.
Connecting from Linux
For connecting with a Linux PC, I recommend using Remmina which is a remote control client for POSIX-based OSes. For installing it run the following command.
sudo apt-get install remminaOnce installation is complete, launch Remmina by issuing the following code.
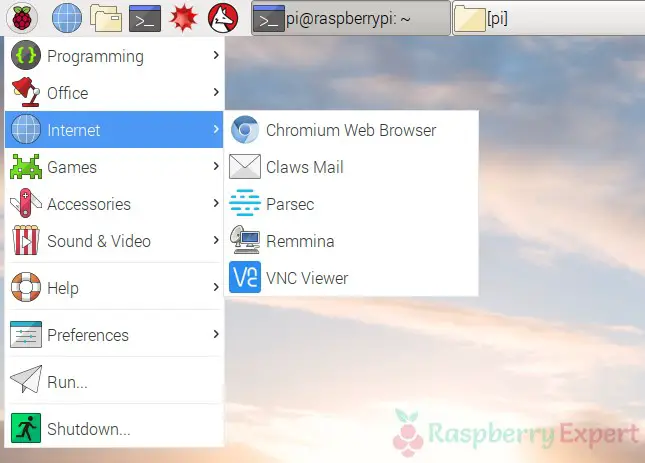
remminaYou can also launch from the internet menu like this.
Now, in the new window fill the IP address and connect it. Make sure that the RDP protocol is selected as in the screenshot below.
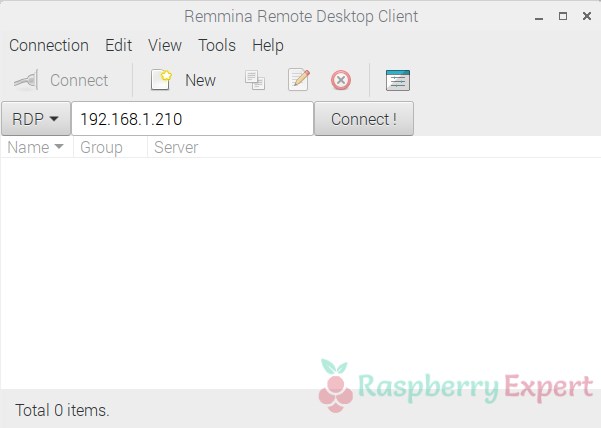
In case you encounter the color depth issue, just select the GFX RFX (32bpp) from the list.
Connecting from Mac
For Mac, there are several RDP clients available that you can use to enable a remote desktop connection on your Pi.
For example, you can download Microsoft Remote Desktop from the app store and connect it by filling in the IP address.
#2. Remote Desktop with SSH and X11 Forwarding
The X11 is the main Linux Graphical Window Manager. Here we use the technique of X11 forwarding for accessing your Raspberry Pi on a remote desktop.
X11 forwarding over SSH is a great way to launch an application from a server when it is connected via SSH.
This method also works from a remote location because it is more than enough to open the SSH port (22) from outside.
One thing you have to do is to limit the allowed IP addresses to avoid any security issues. You can also add an additional layer of protection by enabling stuff like fail2ban to prevent unauthorized access from outside.
Installation
In Raspbian, the X11 forwarding is enabled by default. So you don’t have to do anything special.
In case, it’s not working set the X11 forwarding to yes in /etc/ssh/sshd_config
This will enable the forwarding over SSH on your Raspberry Pi.
Connecting from Windows
For connecting from Windows you need 2 tools – Putty and Xming.
Putty may be already there with you for having an SSH connection.
Install Xming and follow the below steps.
- Launch Putty and fill in the hostname (for example [email protected]).
- Now fill the saved session with any name.
- Go to Connection > SSH in the menu at the left. Check “enable X11 forwarding”
- Return to session and save it.
- Double-click on the new saved session to connect.
This will enable the X11 forwarding over SHH on your Pi.
Now you can launch any Raspberry application on Windows by issuing the below command. It will launch the Raspberry Pi Disk Manager on your desktop.
nohup baobab &Connecting from Linux & Mac
For both Linux and Mac, enabling remote access to raspberry pi is almost the same. You have to log in to SSH by giving a parameter as shown here.
ssh -X [email protected]Now enter your password and launch your application with the below command.
nohup <app name> &Replace the <app name> with the name of your desired application. This will open your application on your desktop.
#3. Remote Desktop with Team Viewer
Team Viewer is a renowned application for remote desktop access mostly used by non-techies. One advantage with Team Viewer is that we don’t have to open any specific port for enabling access. Though by default, it connects on port 5938 you can also use ports like 443, 80, etc if the former is not working.
Installation
Here I will show you how to install the ARM package of Team Viewer without visiting their download page.
1.First get the ARM package:
wget https://download.teamviewer.com/download/linux/teamviewer-host_armhf.deb2. Install it:
sudo dpkg -i teamviewer-host_armhf.deb3. If you encounter any dependency errors, fix them by running these commands.
sudo apt-get update
sudo apt-get -f install
4. Now set up a password to connect.
sudo teamviewer passwd YOURPASSWORDReplace YOURPASSWORD with a password of your choice.
5. Then you will get a Team Viewer ID for your Raspberry Pi. So note it down and connect as usual with that ID.
Connecting from Windows & Mac
For Windows and Mac Oses the procedure is the same.
- Download the standalone software from their official website and install it.
- Now launch it and connect with the Team Viewer ID and Password that you set. That’s it.
Connecting from Linux
- From Linux, first, you have to download the Team Viewer client from their website.
- Install it with the package manager and start it from the start menu.
- Log in if you have an account and fill in the Team Viewer ID and Partner ID and click on Connect.
- Type the password once prompted.
#4. Remote Desktop with VNC
VNC stands for Virtual Network Computing which is a system to share a graphical desktop similar to Xrdp. The only difference is that this will connect to the current session directly, while Xrdp connects to a new session.
Installation
Here we are going to install the RealVNC server on Raspberry Pi. (You can also get different VNC packages like UltraVNC, TightVNC, etc.)
1.First of all you have to update your repository. Do this by running the command below.
sudo apt-get update2. Install the RealVNC server package.
sudo apt-get install realvnc-vnc-server3. Now for enabling the VNC server starts the Raspbian configuration.
sudo raspi-config4. Go to interfacing options and select VNC, give Yes, and Select Finish to close.
So you have installed the VNC server and now let’s see how to install it on various Oses.
Connecting from Windows
- Download and install the RealVNC software from their website.
- Open the application and type the IP address of your Raspberry Pi and you will be connected.
Connecting from Linux
- Download RealVNC Viewer from the official website.
- If you go with one-time usage, leave the default settings as such. Otherwise, select the .deb or the .rpm (according to your OS) to get the shortcuts placed in the programs.
- Once installed, give the IP address of your Pi and validate it. Then you will be connected and bookmarked for connections in the future.
Connecting from Mac
This is very similar to connecting in Windows. You can download the Mac version of the RealVNC from here. Install it and follow the same steps as those in Windows.
#5. Remote Desktop with NoMachine
NoMachine is another remote desktop tool that is very similar to RealVNC.
Installation
- You can download the NoMachine package for Raspberry Pi from this link.
- Download and install the same with the following command.
wget https://download.nomachine.com/download/7.0/Raspberry/nomachine_7.0.211_1_armhf.deb sudo dpkg -i nomachine_7.0.211_1_armhf.deb - Replace the version number with the last one you get.
- The installation will begin and it will take a while.
Connecting from Windows/ Linux/ Mac
For NoMachine, the connection is similar to any OS.
- At first, download the NoMachine client corresponding to your OS from here.
- Install the package and launch it.
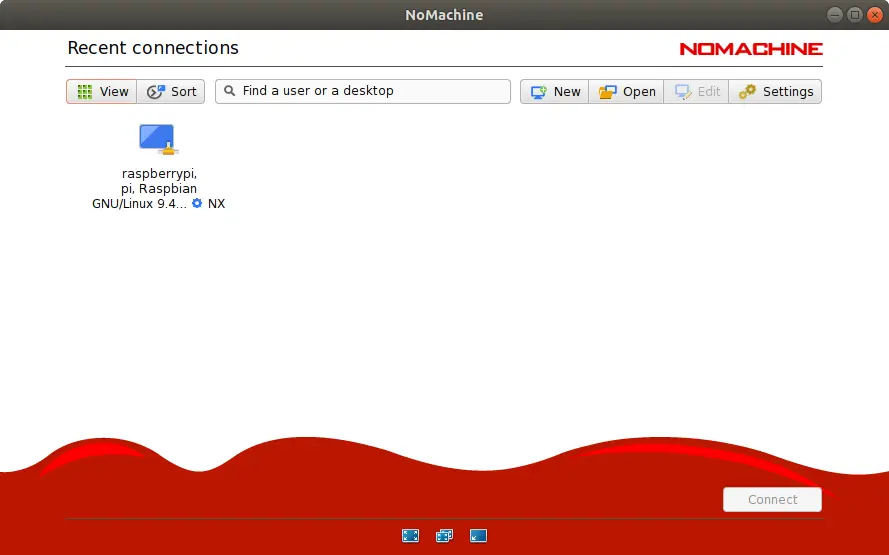
- NoMachine will automatically detect your Raspberry Pi on the network.

- Double click on the Raspberry Pi shown in NoMachine to connect.
- Give the credentials and you will be logged in.
Conclusion
I hope you learned to set up Raspberry Pi Remote Desktop using 5 different methods. Out of the 5 methods, my favorite is NoMachine.
So, which method is your favorite? Do comment below your thoughts and views.
Cheers..:)
Found an issue with this article? Report it here, so that I can resolve it.
This guide shows how to set up a Remote Desktop Connection with a Raspberry Pi using RDP on a Windows PC. The Remote Desktop Protocol (RDP) is the proprietary network protocol developed by Microsoft to connect to a remote desktop computer and access its graphical user interface. This allows you to connect your Windows PC to your Raspberry Pi and control its GUI remotely.

We have a similar guide for Mac OS computer: Raspberry Pi: Set Up Remote Desktop Connection (RDP)
Prerequisites
Before proceeding, make sure you check the following prerequisites.
- You need a Raspberry Pi board.
- Operating System: you should have a Raspberry Pi running Raspberry Pi OS (32-bit or 64-bit). The OS should have Desktop support (doesn’t work on Lite OS).
- SSH: You should be able to establish an SSH connection with your Raspberry Pi.
xrdp (open-source Remote Desktop Protocol Server)
xrdp provides a graphical login to remote machines using RDP (Microsoft’s proprietary Remote Desktop Protocol). xrdp accepts connections from a variety of RDP clients. We’ll be using Microsoft Remote Desktop Client for Windows (but it’s also compatible with Mac OS, iOS, and Android).
xrdp allows you to connect to your Raspberry Pi to control its desktop remotely.
Please note that your Raspberry Pi must be running a full Raspberry Pi OS – it will not work with a headless or Lite OS.
Installing xrdp on Raspberry Pi (Remote Desktop Protocol)
Having an SSH connection established with your Raspberry Pi, update and upgrade your Raspberry Pi, if any updates are available. Run the following command:
sudo apt update && sudo apt upgrade -yNext, we need to install the xrdp software on your Raspberry Pi:
sudo apt install -y xrdpThat’s it. You don’t need to change any configurations, everything will work out of the box with the default settings.
Finally, run the following command to get the Raspberry Pi IP address. You’ll need the IP address to establish the remote connection.
hostname -I
The Remote Desktop Connection software is installed on all Windows PCs by default. Click the search bar.
Search for “Remote Desktop Connection” and open the App:
Type the Raspberry Pi IP address in the computer field and press the Connect button:

Click the “Yes” button to establish the connection.
Next, type your Raspberry Pi username and password and click the “OK” button to login into your device.

You might be prompted one more time for the authentication if you just powered your Raspberry Pi, so enter again your username and password.

That’s it! You can now control your Raspberry Pi desktop computer remotely from a Windows PC.

Wrapping Up
In this tutorial, you learned a very convenient, practical, and easy way to establish a remote connection with your Raspberry Pi using xrdp. This is our favorite method to access the Raspberry Pi desktop because you don’t have to connect an additional screen, keyboard, and mouse. You can also use RDP on a Mac OS computer.
We hope you found this tutorial useful. You can check all our Raspberry Pi projects on the following link:
- Free Raspberry Pi Projects and Tutorials
Thanks for reading.
- 3 December 2024
- | Share on:
-
-
-
Contents
Introduction to Raspberry Pi Remote Access
This article applies to RealVNC Connect through version 7.
There’s nothing more frustrating than needing to desktop remotely to your Raspberry Pi when you’re away from your workbench. Whether you’re running a home automation system, managing a media server, or working on an exciting project, being tethered to your Pi’s physical location can really limit what you can accomplish. The solution is Raspberry Pi remote access Windows capabilities.
In this guide, we’re going to walk through everything you need to know about setting up a remote desktop connection to your Raspberry Pi using RealVNC Connect. Think of it as having a virtual presence right there at your Pi’s terminal, no matter where you are in the world. We’ll cover the installation process, security considerations, and some handy tips to make your remote experience as smooth as possible. By the time we’re done, you’ll be managing your Pi projects from anywhere with internet access.
What is Remote Access?
A remote desktop connection application lets you control your Raspberry Pi from another computer as if you were sitting right in front of it. This means you can access your Pi’s desktop, run commands, manage files, and even troubleshoot issues from anywhere in the world.
Why Choose RealVNC Connect for Raspberry Pi Remote Access?
RealVNC Connect stands out from the crowd by offering a complete package that’s perfect for Raspberry Pi users. The combination of RealVNC Server and RealVNC Viewer gives you seamless access that’s both secure and reliable. RealVNC Connect’s cloud features allow you to access your Pi from anywhere without dealing with complicated network setup or manual port configuration.
Prerequisites for Setting Up Raspberry Pi
Before we get into the remote desktop protocol and the setup process, let’s make sure you’ve got everything you need to get started. Having all your ducks in a row now will save you from headaches later on. Here’s your must-have checklist:
- Any Raspberry Pi model (Raspberry Pi 4 or 5 recommended for best performance)
- A modern Windows desktop
- A stable internet connection (the faster, the better)
- Power supply for your Raspberry Pi
- microSD card with Pi OS installed
What You’ll Need Before You Begin
Head over to RealVNC’s website (realvnc.com) and download both RealVNC Viewer for your Windows PC and RealVNC Server for your Pi. You’ll also want to make sure you’ve got:
- A keyboard and mouse (just for the initial setup)
- An HDMI cable to connect your Pi to a display
- Your Wi-Fi credentials or an ethernet cable
- About 30 minutes of free time for setup
Remember: you won’t need the keyboard, mouse, and display after setup, they’re essential for getting everything configured properly at first.
Step 1: Setting Up Raspberry Pi for Remote Access
Installing the Raspberry Pi Operating System
Let’s kick things and get your Pi ready for action. The easiest way to get Raspberry Pi Operating System installed is using the Raspberry Pi Imager – saves a lot of time. Here’s what you need to do:
- Download Raspberry Pi Imager from raspberrypi.com/software
- Insert your microSD card into your computer
- Launch the Imager and click ‘Choose OS’
- Select Raspberry Pi OS (32-bit or 64-bit depending on your needs)
- Click ‘Choose Storage’ and select your microSD card
- Hit ‘Write’ and let the imaging run
Enabling VNC on Raspberry Pi
We need to enable VNC on your Pi. It’s straightforward if you follow these steps:
- Once your Pi is booted up, click the Raspberry menu and select Preferences > Raspberry Pi Configuration (Or type sudo raspi-config in the terminal if you’re comfortable with the command line)
- Navigate to Interface Options
- Look for VNC and select Enable
- Click OK and restart your Pi when prompted
If you’re doing a headless setup (no monitor), there’s an extra step we need to follow:
- Open Terminal and type:
sudo nano /boot/config.txt
- Add these lines at the bottom:
hdmi_force_hotplug=1
hdmi_group=2
hdmi_mode=16
- Save with Ctrl+X, then Y, then Enter
This tells your Pi to create a virtual display even without a monitor connected.
To check if RealVNC Server is installed and up to date:
- Open Terminal
- Type: sudo apt-get update && sudo apt-get install realvnc-vnc-server
If it’s already installed, this will just update it to the latest version.
Remember: While RDP (Remote Desktop Protocol) is available, rather use VNC – it’s more reliable and offers better features for Raspberry Pi remote access.
Step 2: Installing RealVNC Connect on Windows
Downloading and Installing RealVNC Viewer
Time to get your Windows desktop ready. Head over to realvnc.com/connect/download/viewer/ and download the Windows version. The installation is very straightforward:
- Double-click the downloaded installer
- Click ‘Yes’ when Windows asks for permission
- Accept the license agreement
- Choose ‘Install for all users’ (recommended)
- Click ‘Install’ and wait for it to finish
At this point you are all done with the install – RealVNC keeps things simple and user-friendly.
Setting Up RealVNC Viewer to Connect to Raspberry Pi
Before we can connect, we need to find your Pi’s IP address. Here’s the easiest way:
- On your Pi, open Terminal and type:
hostname -I
The first number you see is your Pi’s IP address. (Something like 10.0.0.3 or 192.168.0.5)
Next, in RealVNC Viewer:
- Click ‘File > New connection’
- Enter your Pi’s IP address
- Give it a friendly name (like “My Pi”)
- Click ‘OK’
Pro tip: If you can’t find your Pi’s IP address, check your router’s connected devices list – it usually shows up as “raspberrypi” or whatever hostname you gave it.
Step 3: Connecting to Raspberry Pi from Windows with RealVNC Connect
Connecting Locally via RealVNC Connect
Let’s connect via remote desktop tool to your Pi. Now that we’ve got everything set up, connecting locally to your raspberry Pi’s desktop is pretty straightforward. Double-click your saved connection in VNC Viewer, and you’ll be prompted for credentials. Here’s what you need to know:
- Username: Your Pi’s username (default is ‘pi’)
- Password: Your Pi’s password
If you run into issues with your remote desktop access, here’s what to check:
- Make sure your Windows firewall isn’t blocking RealVNC Viewer
- Verify both devices are on the same network
- Double-check your Pi’s IP address hasn’t changed
Pro tip: If Windows Defender pops up, make sure to click ‘Allow access’ on both private and public networks – this’ll save you headaches later.
Cloud-Based Remote Access Using RealVNC Connect
RealVNC Connect’s cloud access make remote connections much more simple. Instead of messing around with port forwarding or static IPs, you can access your Pi from anywhere in the world.
To set it up:
- Create a RealVNC account at realvnc.com
- Sign in to RealVNC Server on your Pi
- Sign in to RealVNC Viewer on Windows
- That’s it! Your Pi will show up automatically in your computer list
RealVNC tries to establish a direct peer-to-peer remote desktop session first, which gives you the best performance. If that’s not possible, it’ll seamlessly switch to using their secure cloud servers as a relay.
Remember: Once you’re set up with cloud, you can forget about IP addresses completely. Just log in to RealVNC Viewer on any device, and your Pi will be right there waiting for you.
Step 4: Accessing Raspberry Pi Terminal and Desktop from Windows
Using RealVNC Connect to Access the Raspberry Pi Desktop
Once you’re connected, you’ll see your Pi’s desktop just like you were sitting in front of it. Here’s where RealVNC Connect simplifies remote connectivity:
- Use your mouse and keyboard just like normal
- Transfer files by dragging and dropping them between windows
- Access all your Pi’s applications and tools
- Adjust the display quality in RealVNC Viewer settings for better performance
Pro tip: Press F8 to bring up the RealVNC Viewer quick controls – you’ll find options for sending special key combinations and adjusting your view.
Step 5: Securing Your Raspberry Pi Remote Connection
Why Security Matters for Remotely Accessing Your Systems
Security is not something that most people find interesting, but it’s very important when you’re setting up remote desktop connection. Cyber threats are real, and the last thing you want is unauthorized access to your Pi and potentially your entire home network.
Built-in Security Features of RealVNC Connect
RealVNC Connect protects your systems from unauthorized access. It comes with impressive security features right out of the box that are configurable in the system’s remote settings:
- End-to-end encryption for all connections
- Multi-factor authentication support
- Session permissions and access controls
- Automatic connection encryption
To enable 2FA (and you really should):
- Log into your RealVNC account online
- Go to Security Settings
- Enable Two-Factor Authentication
- Follow the prompts to set up with your mobile device
Pro tip: Use a password manager to generate and store strong, unique passwords for both your Pi and RealVNC account.
Should I Use a VPN for Additional Security?
VPNs are great for many things, but you don’t need one when using RealVNC Connect for remote desktop connection. The service already provides end-to-end encryption and secure cloud access that handles all the heavy lifting for you. RealVNC’s cloud service establishes secure connections that are just as safe as using a VPN. You avoid the potential performance hit and extra complexity that comes with running a VPN connection on top of an already encrypted remote control service.
Remember: RealVNC Connect’s built-in security features are more than enough to keep your connection secure and responsive.
Step 6: Troubleshooting Common Issues with RealVNC Connect
Connection Issues
If you are running into connection problems then here are the most common issues and how to fix them:
Can’t Connect at All
- Check if your Pi is powered on and connected to the network
- Verify your IP address hasn’t changed (type hostname -I on your Pi)
- Make sure Windows Firewall isn’t blocking RealVNC Viewer
- Try rebooting both your Pi and router
Connection Keeps Dropping
- Test your internet access and the connection’s speed
- Check if your router’s firmware is up to date
- Ensure your Pi isn’t overheating (type vcgencmd measure_temp to check)
Performance Optimization
If things are running a bit sluggish, try these performance adjustments:
- Tweak RealVNC Viewer settings:
- Lower the picture quality (press F8 > Options > Picture)
- Reduce color depth to 256 colors
- Enable “Adjust to network conditions” option
- On your Pi:
- Close unused applications
- Consider overclocking if you’re comfortable with it and have sufficient cooling
- Use a wired connection instead of Wi-Fi where possible
Pro tip: If you’re connecting over the internet, try RealVNC Connect’s “Optimize for WAN” setting – it makes a world of difference for remote connections.
Advanced Tips and Tricks for RealVNC Connect
Using RealVNC Connect on Multiple Devices
RealVNC Connect remote control works everywhere. Just install RealVNC Viewer on your devices and sign in with your RealVNC account. Your Pi will show up automatically on all your devices. Perfect for checking on your projects with remote desktop from your phone while you’re away from your computer or Pi.
Accessing Windows Files from Raspberry Pi
File transfers are simple with RealVNC Connect. Enable file transfer in RealVNC Viewer (press F8 > File Transfer), and you can drag and drop files between Windows and your Pi. You can also copy-paste text and files directly between systems like they share a clipboard.
Controlling Raspberry Pi from Anywhere in the World
Once you’ve set up cloud connections, you can access your Pi via remote desktop from anywhere with a internet access. No need to struggle with port forwarding or the need to remember IP addresses. Just sign in to your RealVNC account and you’re good to go.
Pro tip: RealVNC’s cloud service automatically handles the connection security and routing, so you don’t have to worry about dynamic IPs or network configurations. Plus, it’ll automatically choose the fastest connection method available – either direct peer-to-peer or through their secure cloud relay if needed.
Comparing RealVNC Connect vs. RDP for Raspberry Pi
RDP vs. VNC: Which is Better for Raspberry Pi?
Both RDP and RealVNC can get you connected to your Pi but there are differences. Here’s some comparisons about their features:
Performance:
- RDP is usually better for Windows-to-Windows connections
- RealVNC Connect has optimizations for Raspberry Pi
- RealVNC handles graphics and animations more smoothly on Pi
Compatibility:
- RDP requires additional setup and can be tricky on Raspberry Pi
- RealVNC Connect works right out of the box
- RealVNC is built into the Raspberry Pi Operating System – no extra installations needed
Security Features:
- RDP relies on basic Windows authentication
- RealVNC Connect offers enterprise-grade encryption
- Cloud connections are automatically secured without port forwarding
The Real Difference: What really sets RealVNC Connect apart is its cloud features. Remote desktop connections usually requires you to configure port forwarding and static IPs. If your internet doesn’t use static IP addresses then you will also need a dynamic DNS service to continuously update your details.
RealVNC Connect remote desktop just works. Sign in to your account, and you’re connected from anywhere in the world.
Pro tip: If you’re serious about remote Pi access, then RealVNC Connect is the easiest and most secure way to go. It’s designed specifically for remote connections, and the cloud features alone make it worth choosing over Microsoft remote desktop.
Conclusion
That covers all the basics about everything you need to know about setting up connectivity to your Raspberry Pi using RealVNC Connect. Once you’ve experienced the convenience of managing your Pi from anywhere, you’ll wonder how you ever lived without it. Being able to remotely control your system is a convenience that you wont be able to live without once you have tried it.
Head over to realvnc.com/connect to download RealVNC Connect and get started. The free version gives you plenty to work with, but if you’re serious about installing a remote desktop app, the premium features like connecting via the cloud and file transfer are worth checking out.
Remember: RealVNC Connect is more than just a remote desktop connection app. When you use it for your systems, you’re getting peace of mind knowing your connection is secure and reliable.
RealVNC
You may also like…
Learn more on this topic

Secure remote access bridges your product functionality and the trust of your customer. Today we start a new series of…
-
James Brierly

RealVNC Connect version 8 is the latest and greatest iteration of our remote access software. Its new features, look and…
-
Bogdan Bele

High-quality remote support is as much about convenience as it is about security, so IT teams can perform at their…
-
Bogdan Bele
Try VNC Connect® today for free
We don’t require credit card data. 14 days of free, secure and fast access to your devices. Upgrade or cancel anytime
Raspberry Pi является полноценным компьютером, хоть и небольшого размера. Говоря про полноценность, имеется ввиду не только его мощность и перечень выполнимых им задач, но еще и необходимую для его работы периферию. Для работы с его визуальной оболочкой требуется монитор, клавиатура и мышь. Не всегда есть возможность выделить отдельную периферию, а постоянно переключать монитор, клавиатуру и мышь с настольного компьютера быстро надоедает. На помощь нам придет RDP (Remote Desktop Protocol)
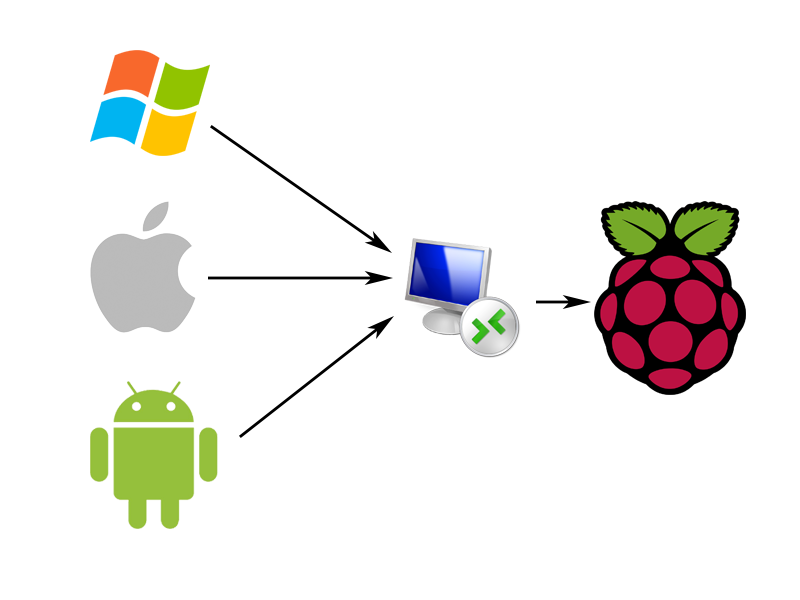
RDP легок в использовании, требует минимальной конфигурации со стороны Raspberry и, что немаловажно, мультиплатформенный. То есть подключаться к Raspberry можно будет практически с любой платформы, будь то Windows, Mac, Android или iOS (iPhone, iPad, iPod Touch).
В данной статье будет рассмотрен пример настройки дистрибутива Raspbian.
Первым делом необходимо настроить нашу Raspberry для работы с протоколом RDP. Сводится это к выполнению одной единственной команды:
sudo apt-get install xrdp
Эту команду можно выполнить либо подключившись к raspberry по SSH, либо загрузить визуальную оболочку и выполнить эту команду в терминале.
Все, подготовка Raspberry закончена! Приступим к настройке нашего RDP клиента.
Windows
В операционную систему Windows от компании Microsoft уже встроен RDP клиент. Запустить его можно командой MSTSC через Пуск — Выполнить.
Откроется такое окно:
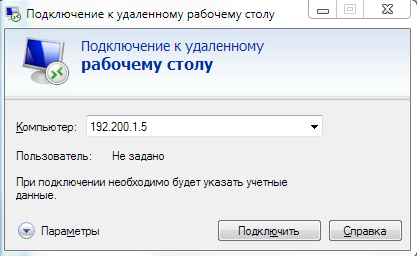
В поле «Компьютер» надо будет указать IP адрес Raspberry. Узнать IP адрес можно на самой raspberry командой ifconfig, либо посмотреть присвоенный IP адрес на роутере.
Нажимаем «Подключить». Windows предупредит нас, что ей не удается установить подлинность удаленного компьютера
Можем смело нажимать Да, так как это наша Raspberry и мы ей доверяем. Перед нами откроется окно авторизации
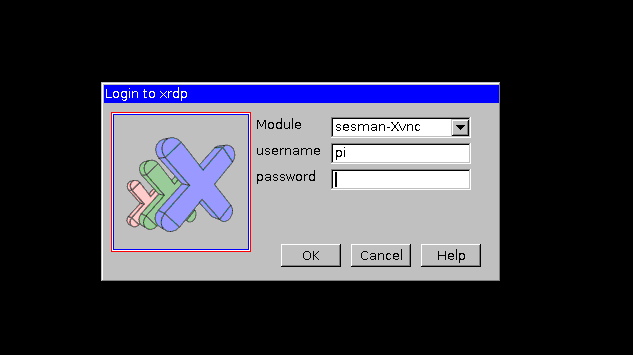
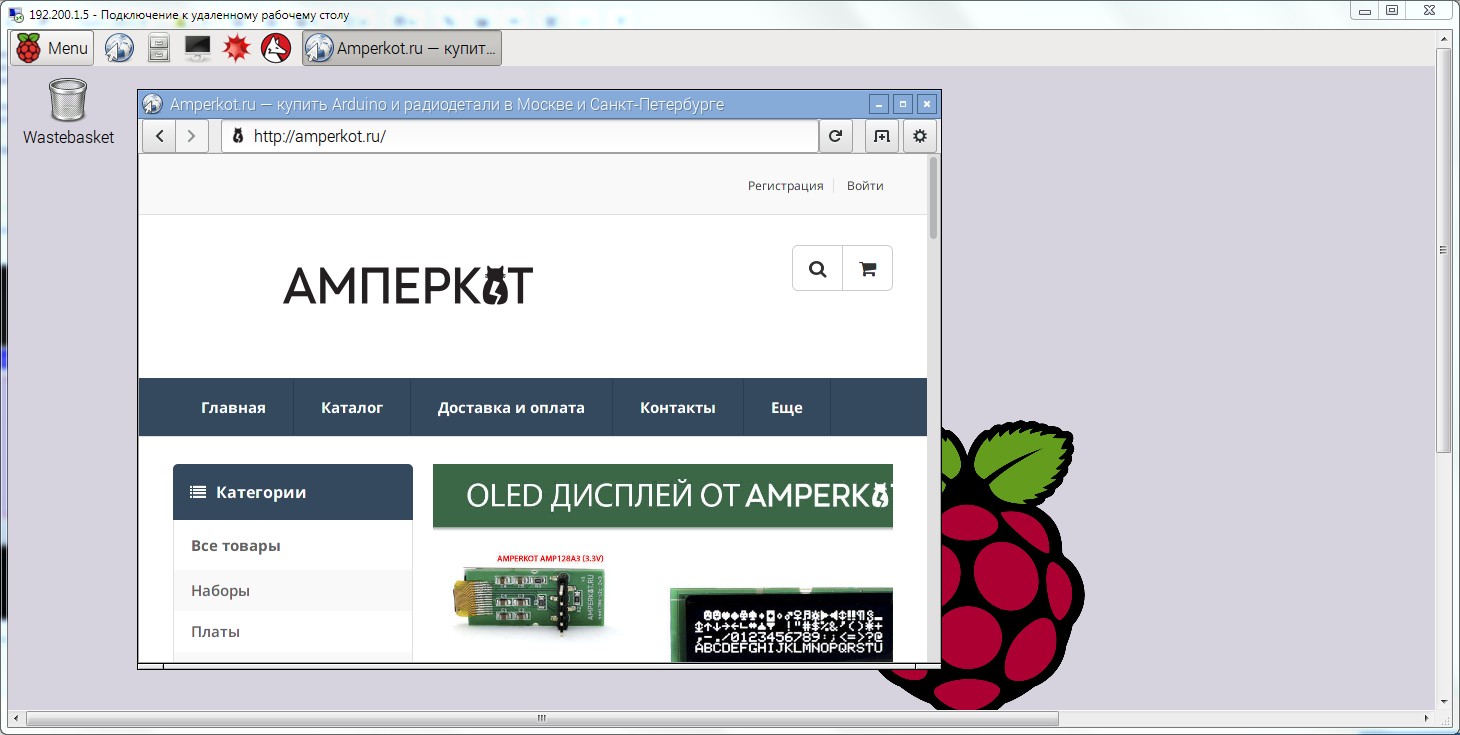
Указывайте логин, пароль (по-умолчанию в Raspbian он установлен raspberry), нажимаем на OK и подключение осуществлено!
MacOS
Под Mac необходимо скачать официальный RDP client https://itunes.apple.com/ru/app/microsoft-remote-desktop/id715768417?mt=12
Процесс настройки подключения почти ничем не отличается от Windows
iOS
Для яблочных устройств под управлением iOS качаем https://itunes.apple.com/ru/app/udalennyj-rabocij-stol-majkrosoft/id714464092?mt=8
На главном экране приложения нажимаем на иконку + и «Добавить ПК или сервер».

Вбиваем IP адрес, пользователя, пароль и подключаемся:

Управление курсором мыши производится с помощью тапов по экрану.
Android
Для андроида качаем https://play.google.com/store/apps/details?id=com.microsoft.rdc.android&hl=ru
Настройка подключения идентична с предыдущими способами.
Данная статья является собственностью Amperkot.ru. При перепечатке данного материала активная ссылка на первоисточник, не закрытая для индексации поисковыми системами, обязательна.
Raspberry Pi is a tiny computer that costs less than $35. It has become very popular because of its low price and ease of use. If you want to control your Raspberry Pi remotely from another device, then you should read this article.
Raspbian (see also ‘What Version Of Raspbian Do I Have?‘) is the operating system for Raspberry Pi. This OS comes preinstalled with several useful tools such as SSH client, VNC viewer, etc.
In this article, we will show you how to install these tools on Windows, Linux, or macOS.
By using remote desktop software you will be able to access your Raspberry Pi remotely. There are two types of remote desktop software: local and cloud-based.
Local means you need to download and install the software on your PC. Cloud-based means you don’t need to download anything. Instead, you connect to the server via the Internet.
So, are you ready to take a look at how to set up your Raspberry Pi remotely? Let’s get started!
")
What Is Raspberry Pi?
The Raspberry Pi is a credit-card-sized computer that plugs into your TV or monitor and turns it into an affordable, low power consumption desktop PC. It’s designed to be used as a learning tool for children and adults alike.
How Does Raspberry Pi work?
The Raspberry Pi was created by Eben Upton in 2010. He wanted to create a cheap, easy-to-build computer that could help people learn about computers and introduce them to information technology in a simple and easy way.
The Technical Bit…
The Raspberry Pi consists of a single-board computer called Raspberry Pi Model B. It uses Broadcom’s BCM2836 SoC which includes ARM1176JZFS CPU clocked at 700MHz, VideoCore IV GPU core clocked at 400 MHz, 512 MB DDR2 RAM, 4 GB eMMC flash memory, and Bluetooth 2.1 + EDR.
It also has 802.11 b/g Wi-Fi, USB 2.0 host port, HDMI 1.4 output, 40 GPIO pins, an RCA composite video out. Its dimensions are 65 x 35 mm and weigh just over half a kilogram.
Why Should You Buy A Raspberry Pi?
There are many reasons why you should buy a Raspberry Pi. As a first computer for children or those looking to familiarize themselves with computing, it is a worthwhile option. Here are some of the other reasons why Raspberry Pis is a great choice:
- It’s Inexpensive – A Raspberry Pi Model B can cost only around $35.
- Size – It’s small enough to fit in almost any space.
- Power – It’s powerful enough to run most home applications.
- Assembly – It’s easy to assemble and is super user-friendly.
- Compatibility – It’s compatible with other platforms like Android, iOS, and Windows.
- Performance – It’s secure and reliable.
How To Set Up Raspberry Pi Remote Desktop On Windows/ Linux/ Mac (5 Methods)
If you want to set up a remote desktop connection between a Raspberry Pi device and another computer, here are five methods for doing so. Let’s go through each one in detail:
- Install X11 Forwarding Software on Your Computer
- Enable SSH Server on Raspbian
- Connect Raspberry Pi to Your Network
- Use Putty to Access Raspberry Pi Remotely
- Use TeamViewer
1. Install X11 Forwarding Software On Your Computer
The first step is to install the X11 forwarding application on your computer.
Once you have downloaded the tool, run the.exe file. You will be prompted to enter an administrator password. Enter the password and click OK. The program will now start installing itself.
When the installation completes, you will see a message saying “X11Forwarding enabled”. Click Yes to confirm. Now you can open any window on your computer and view it on your Raspberry Pi.
2. Enable SSH Server on Raspian
Now we need to enable the SSH server on our Raspberry Pi. To do this, open the terminal on your Raspberry Pi and type and press ENTER. A new line will appear at the bottom of the screen. Type and press ENTER again. Press Y to continue.
Now, you have successfully installed the SSH server on your Raspberry Pi. Next, you need to configure it to allow connections from other devices. Open the config file located inside /etc/ssh/sshd_config using nano editor. Find the following lines and change them to look like this:
- Allow users of group ‘pi’ to log into ssh without a password
- AllowUsers [email protected]
- PasswordAuthentication – yes
Next, save the changes made to sshd_config using Ctrl+O and then hit Enter. Finally, restart the SSH service using sudo service ssh reload.
3. Connect Raspberry Pi To Your Wi-Fi Network
You can easily connect your Raspberry Pi to your home network using a wired Ethernet cable. However, if you wish to connect it wirelessly, you will need to buy a wireless dongle.
First, make sure both devices are connected to the same wireless network.
If they aren’t, you’ll need to change their settings. Select Wifi Settings in the top right corner of the screen. Then scroll down and select Advanced Settings.
In the Network Name field, enter the name of the wireless network you’d like to connect to. For example, I’m using a network named “Home.” Scroll down and click Save Changes. Now switch back to the Raspberry Pi’s main menu and select Connected Devices.
Make sure the checkbox next to Home is selected. Press OK. On the target device, open a web browser and go to 192.168.1.103:8080.
Enter your TeamViewer username and password and press Login. Once logged in, you’ll see a list of all available devices on the network. Find the Raspberry Pi and double-click it. A file manager window will pop up with all the folders stored on the Raspberry Pi.
Navigate to the folder containing the files you wish to transfer and drag them into the window.
4. Use Putty to Access Raspberry Pi Remotely
This tutorial will show you how to access your Raspberry Pi remotely using the Putty SSH client. This is a very useful tool for when you need to troubleshoot or debug issues with your Raspberry Pi, and it’s also great for testing out things before installing them on your Raspberry Pi.
First, download the latest version of putty. After downloading it, extract it somewhere safe so that you don’t lose any files.
Once extracted, launch putty and select SSH from the list. On the next screen, enter the IP address of your Raspberry Pi. For example, 192.168.0.10. The default port number is 22. Click OK.
Now, you will be prompted for a username and password. Type in the credentials for the user account you created earlier.
Now, you will be asked to confirm the connection details. Make sure you type the correct IP address of your RaspberryPi. And make sure you remember the password you chose.
If everything goes well, you will now be logged into your Raspberry Pi remotely.
To disconnect, simply press CTRL + C.
Note: If you want to change the settings of the Putty application, right-click on it and select Properties. In the General tab, you will find the following options:
- Host Name – Enter the hostname of your Raspberry Pi.
- Port Number – Enter the port number of your Raspberry Pi. By default, it is 22.
- Authentication Method – Select either Password or Public Key.
- Login Window Size – Change the size of the login window.
- Connection Timeout – Adjust the timeout period for connecting to the server.
- Use SSL – Enable or disable the use of secure sockets layer encryption.
- Socks Server – Specify the socks proxy server to use.
- Proxy Settings – Configure additional proxies if necessary.
- SSH Agent Forwarding – Allow the use of agent forwarding.
- SSH Tunnel – Create a tunnel through which data passes between the local system and the remote host.
- Local Echo – Turn on or off local echo mode.
- Telnet Encoding – Choose the encoding method used by telnet protocol.
- Escape Characters – Enter the characters to be interpreted as escape sequences.
- Terminal Emulation – Select whether to emulate a VT100 terminal or not.
- Scrollback Lines – Increase or decrease the number of lines remembered by the terminal emulator.
- Scrollbar – Display scrollbars or not.
5. Use TeamViewer To Access Raspberry Pi Remotely
Teamviewer is an easy-to-use remote control application that allows you to connect to your PC or Mac from anywhere in the world.
You can share your screen, control your mouse and keyboard, take screenshots, record video, and more.
Teamviewer works on any device running Windows, macOS, iOS, Android, Chrome OS, or Linux. Downloading the 32-bit version of the software…
To connect to your Raspberry Pi via TeamViewer, first, install the software by running the following command: sudo apt-get install Teamviewer.
Then run the following command to create a password for the Raspberry Pi user: sudo teamviewer setup.
Once you’ve created a password, you’ll be able to connect using the following command: sudo teamviewer raspi_ip_address You should now see the Raspberry Pi desktop appear.
")
Connecting From Linux
To enable remote access to Raspberry Pi, you need to use SSH and give the parameter “-X” when logging into the device. For example, to log into the Raspberry Pi with ssh [email protected] -X, enter the following commands:
- ssh [email protected] -X
- sudo su
- echo “pi ALLexit
Now, you can log into the Raspberry Pi using SSH without providing a password. To do this, just type the following command: ssh pi@192. 168. 1. 101 -X. If you want to disconnect, simply type exit.
Connecting From Windows
You can also connect to Raspberry Pi from Windows 10 using Putty. To do this, install Putty and open it. Click New Session and Type raspberrypi.local in the Host Name field and then click Add.
In the Port number field, type 22 and then click OK. In the Authentication tab, select RSA from the dropdown menu and then click Next.
In the User name field, type pi and then click Next. Type the same username and password you entered earlier in the Password text box. Click Test Connection and then click Open.
The connection will be successful and you can get started!
Connecting From iPhone/ iPad
If you have an Apple device, you can use Screen Sharing to connect to Raspberry Pi remotely. First, download the free app called Screen Sharing from the App Store. Connect your phone or tablet to your computer over Wi-Fi or Bluetooth.
On your computer, launch Screen Sharing and then click Settings. In the General section, make sure that allowing other users to view your screen is checked. Now, turn on the Raspberry Pi’s camera and microphone.
On your phone or tablet, go back to the Home screen and tap the Camera icon. Tap the Record button at the bottom right corner of the screen.
A red dot will appear next to the Record button. Tap the red dot to start recording. When you’re done recording, tap Stop Recording. Your screen will show up on the Raspberry Pi.
Connecting From Chromebook
Chromebooks are Google devices that run the Chrome operating system. They are very similar to laptops but they don’t have physical keyboards so you must use touch screens instead. To connect to Raspberry Pi from a Chromebook, follow these steps.
Click Devices.
Find the Raspberry Pi and double-click it. This will bring up a window where you can control the settings of the Raspberry Pi.
Click the Advanced Options link. Scroll down to Enable X11 forwarding. Check the checkbox and then click Apply.
Close the window.
Now, restart the Raspberry Pi by clicking Restart.
Go back to the Chromebook and sign in.
Click the gear icon in the top left corner of the browser. Under Network, find the option Use advanced networking options.
Make sure that ‘Automatically detect network connections’ is selected.
Click Save changes.
Open a web browser and navigate to 192.168.1.100. You should see a login prompt for Raspberry Pi.
Enter the username pi and then press Return. You’ll now be able to access the Raspberry Pi through the browser.
Connecting From Android Device
Android phones and tablets come with a built-in remote desktop client called VNC Viewer. Follow these steps to set up your Android device as a remote desktop client:
Launch VNC Viewer. Select Raspberry Pi from the list of available servers.
Then, enter the IP address of the Raspberry Pi (see also ‘How to Find Raspberry Pi IP‘) into the hostname field.
Finally, enter port number 22 into the port field. If you want to log in automatically when the Raspberry Pi boots, check the Auto Login box.
Press Connect.
That’s all there is to set up a remote desktop client on your Android device!
Connecting From Mac
For Mac Os, download the standalone software from the Apple website and install it. Then launch it and connect with your Team Viewer ID and password that you set.
Install it with the Package Manager and start it from the Start Menu. Log in if you have an account, type in your Team Viewer ID & Password, and click on Connect. You’ll now be logged into your desktop remotely.
")
How to Copy Data From a Raspberry Pi to a PC
The Raspberry Pi is an amazing little computer that is perfect for kids and adults who want to learn about computers. However, it also has some great uses in the home or office. One of those uses is copying data from one computer to another using a Raspberry Pi.
There are several ways to do this, including using a USB flash drive, connecting via Wi-Fi, or even using a microSD card.
Here we’ll look at how to copy files from a Raspberry Pi to a Windows or macOS computer. We’ll also take a quick look at what happens when you try to copy data from a Raspberry Pi to an SD card.
Copy Files With a USB Flash Drive
If you already own a USB flash drive, you can easily transfer files between your Raspberry Pi and any other computer. Plug the USB flash drive into both the Raspberry Pi and the target computer.
The Raspberry Pi should recognize the drive and allow you to browse its contents. To copy files from the Raspberry Pi to the computer, simply select them and drag them onto the USB flash drive icon on the desktop.
When finished, remove the USB flash drive from the Raspberry Pi and plug it into the target computer. Now open File Explorer and navigate to the location where you copied the files.
They will appear in the same folder on the target computer.
Transfer Files From the MicroSD Card
You may be wondering why we didn’t mention this as a way to transfer files. That’s because there isn’t an easy way to do it. However, if you want to try, you can extract the files from the microSD card and place them on another computer.
Insert the microSD card into a reader or card slot on the target computer. Open a text editor such as Notepad and paste the following lines into the document. Be careful not to overwrite anything important!
- !/bin/bash
- sudo dd bs1M if/dev/zero of/dev/sdX conv noerror status progress
- rm -rf /media/$USER/Downloads/*
Now save the file as something like “transfer_files.sh” and make sure it’s executable by right clicking on it and selecting Properties.
Now go back to the Raspberry Pi and run the script (see also ‘Can Raspberry Pi 4 Run PS2‘). It should ask for your Team Viewer ID. Once you’ve connected, you should see a progress bar indicating the transfer speed. When done, you’ll get a message saying that the files were successfully transferred.
Frequently Asked Questions
What Are The Benefits Of The Raspberry Pi?
The Raspberry Pi is a small, credit-card-sized computer that plugs into your TV and allows you to do all sorts of things. It’s cheap, it’s fun, and it can be used for many different projects.
It comes with a variety of preloaded software that makes it very easy to use. You don’t need to know much about programming to start doing cool stuff with it.
Why Should I Use A Raspberry Pi Over Other Small Computers?
A Raspberry Pi is cheaper than most computers. It costs $35 and includes everything you need to get started. If you have an old laptop lying around, you could probably turn it into a Raspberry Pi.
Raspberry Pis are smaller than most laptops. They fit in your pocket and they’re great for travel.
Raspberry Pi has more memory than most laptops. It has 512MB of RAM compared to 128MB found in most laptops. This means you can store lots of programs and data without worrying about running out of space.
Raspberry Pi has a faster processor than most laptops. Its 1GHz ARM Cortex A7 CPU is twice as fast as Intel Core i3 processors.
Raspberry Pi also has better graphic capabilities than most laptops. It supports OpenGL ES 2.0 which gives it a lot of power when it comes to 3D games.
How Do I Enable The Raspberry Pi Server?
To do this, open the Raspberry Pi configuration tool, go to the “Interfaces” tab and check the “Enabled” box on the VNC line.
What Is XRDP?
XRDP is an open-source remote desktop protocol server, which allows you to connect to the Linux desktop from any operating system.
How Do I Install XRDP?
All you have to do is run the following command: sudo apt-get install xrdp
XRDP is now installed on your Raspberry Pi, so you can manage it with the usual command: sudo service xrdp start | stop | restart | status.
Conclusion
As you can see from this article, Raspberry Pi is a very good, versatile, and reliable computer to use if your budget is tight. It is also a great option to introduce kids to computers, or for those who are not comfortable with computing software or systems.
Hopefully, we have armed you with the information necessary to get you started, along with some hints and tips to make your user experience even better.
If you are looking to get started with a small, user-friendly, and reliable computer, then we would highly recommend the Raspberry Pi. Similarly, as a gaming tool, or for educational uses, it really is a great option.
The fact that it can be carried in your pocket or purse is another added bonus! Happy computing!