
1C-Битрикс — это система управления содержимым (Content Management System — CMS) от компании 1С.Установить Битрикс на локальный компьютер или web-сервер достаточно просто. Настройка и управление CMS также не вызовет серьезных трудностей.
Для установки 1С-Битрикс необходимо скачать демо-версию для вашей платформы по ссылке. Также должны быть установлены MySQL, Apache и PHP.
После того как все настроено и архив скачан, необходимо развернуть Битрикс на нашем web-сервере. Распакуйте архив в корневую папку. Затем измените значение опций в файле /etc/php.ini.
date.timezone = Europe/Moscow mbstring.func_overload = 2
После раскомментируйте (уберите символ “;” в начале строки) опцию.
extension=php_openssl.dll
Дальше необходимо перезапустить web-сервер.
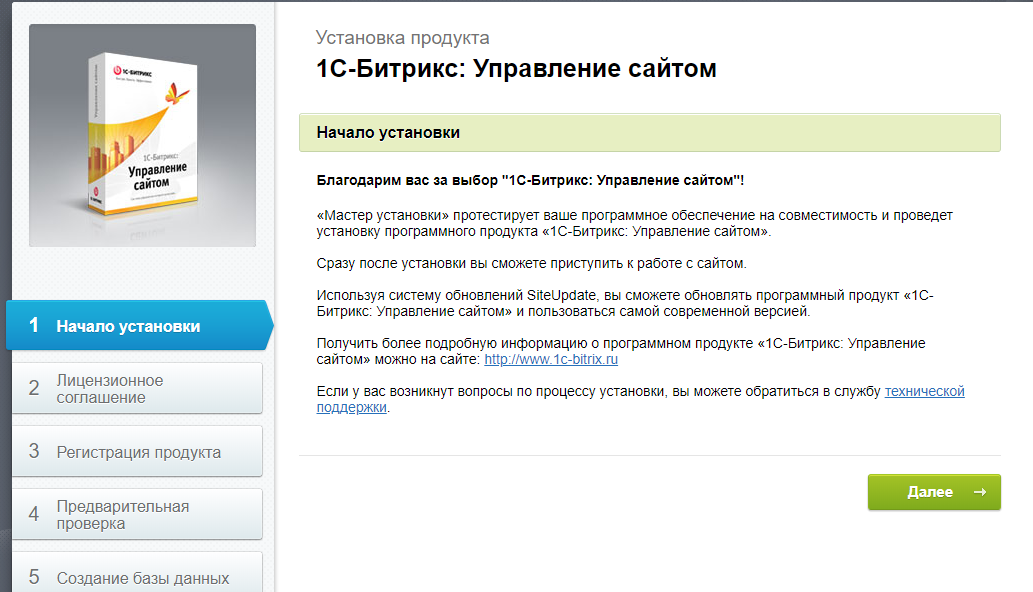
Теперь можно переходить к конфигурированию 1С-Битрикс. Для этого в браузере необходимо набрать http://<имя или ip сервера>. Должна выйти страница первоначального конфигурирования Битрикс выглядящая примерно так:
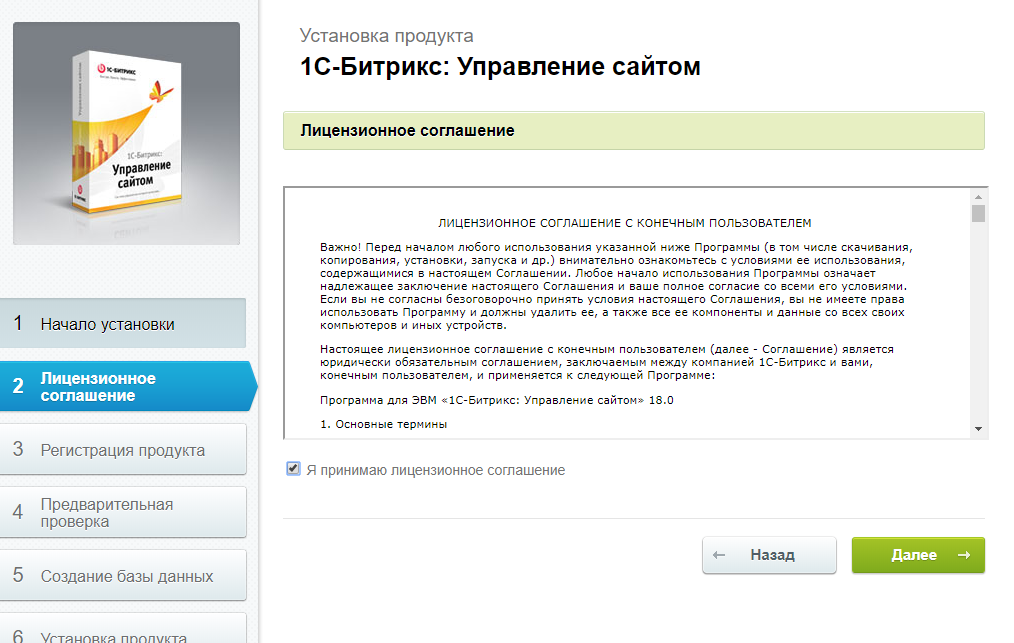
Нажимаем далее и принимаем лицензионное соглашение.
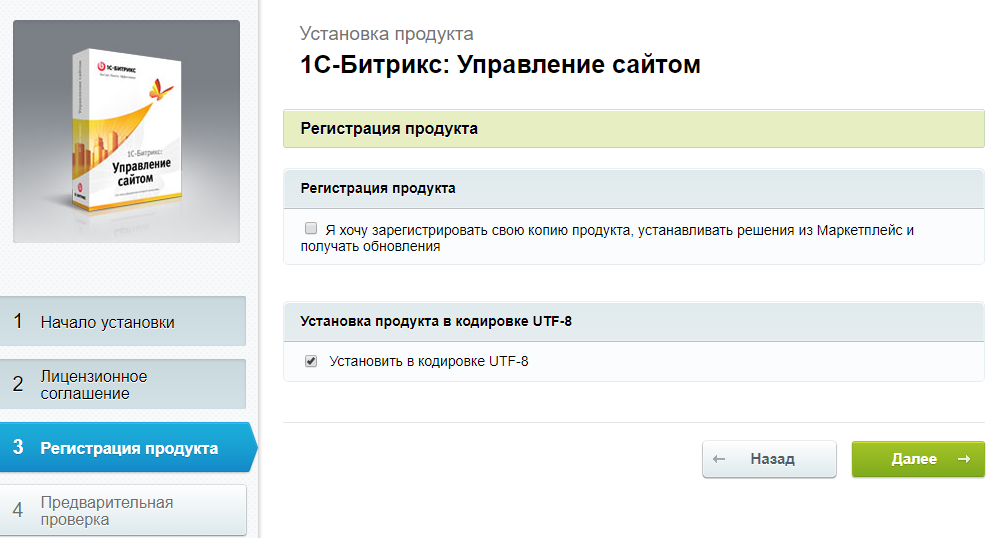
На этом этапе можно сразу зарегистрировать наш продукт, также поставим галочку “Установить в кодировке UTF-8” так как это современная кодировка с поддержкой национальных языков — потом будет меньше проблем с локализацией (региональными настройками).
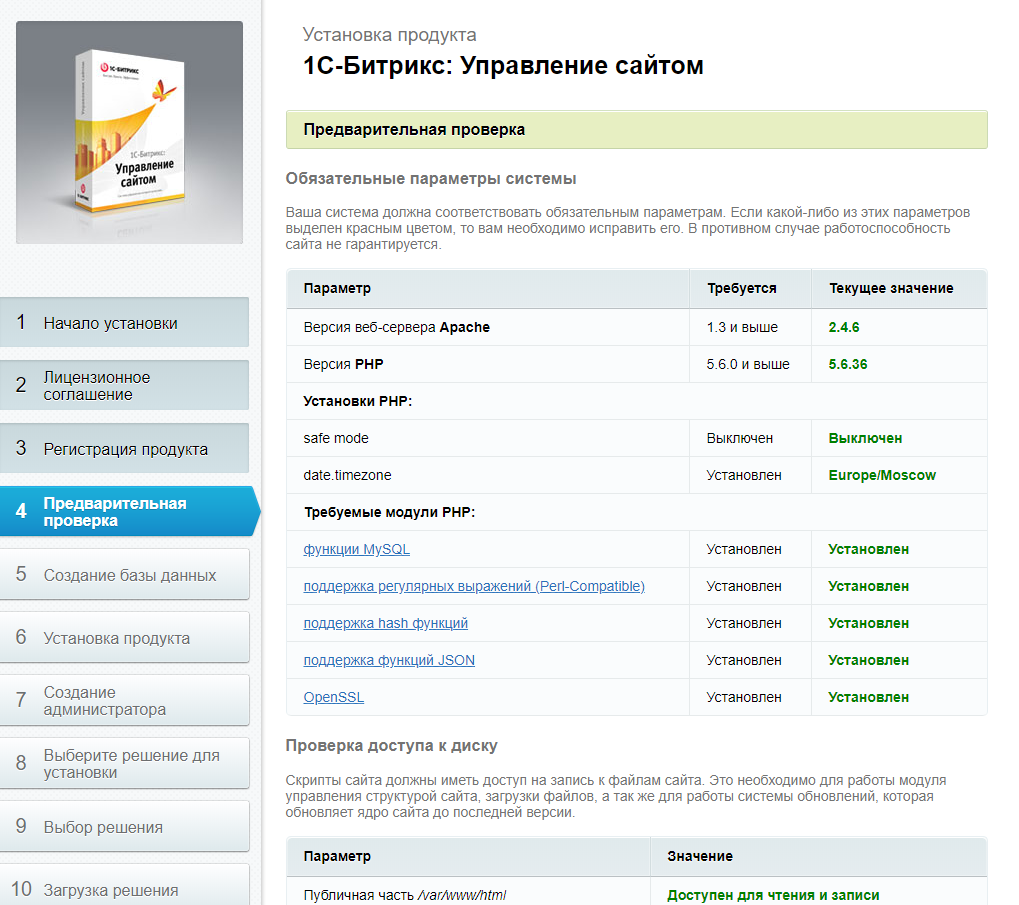
После нажатия кнопки “Далее” мы попадает на страницу предварительных проверок — они должны быть все пройдены, особенно те что обязательны.
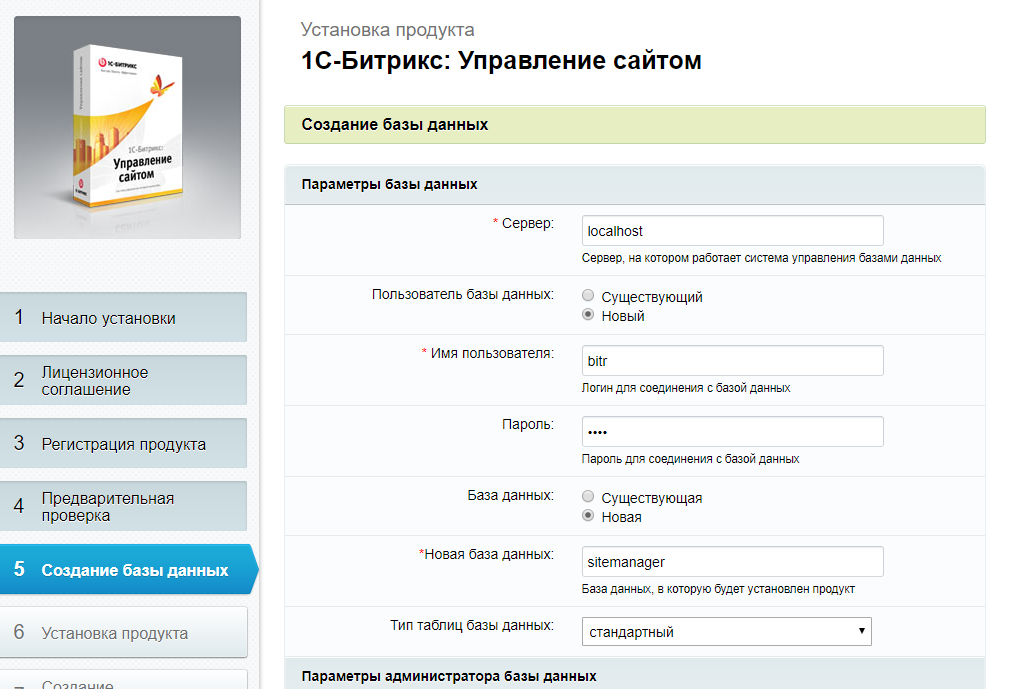
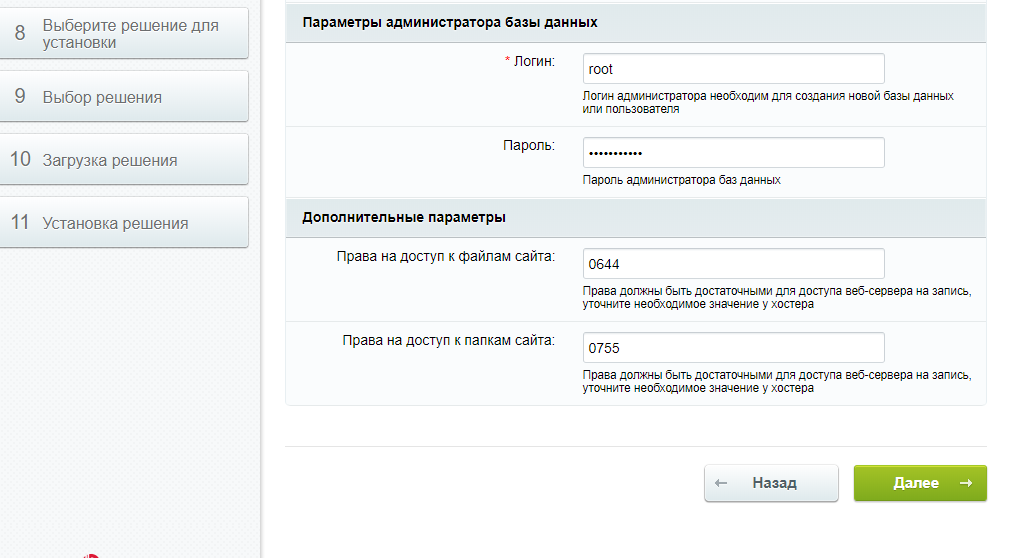
Задаем параметры для соединения с БД. В нашем случае создадим новую БД, А также имя пользователя с паролем для базы MySQL и вводим учетку (логин/пароль) администратора MySQL (обычно это root (не путать c системным пользователем root)). Дополнительные параметры можно не трогать.
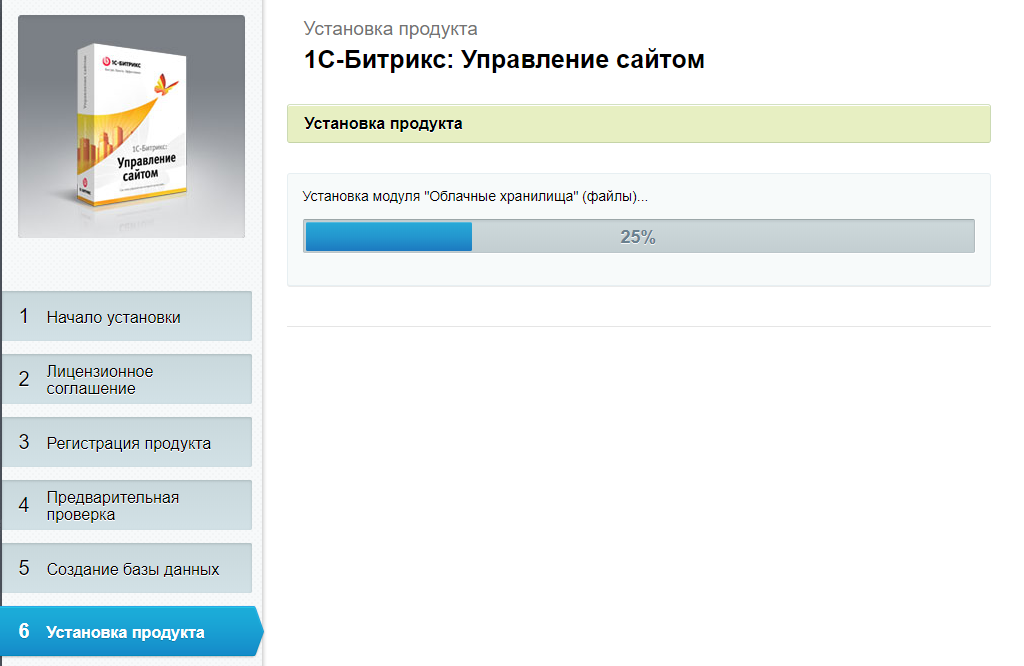
После этого запустится установка Битрикс.
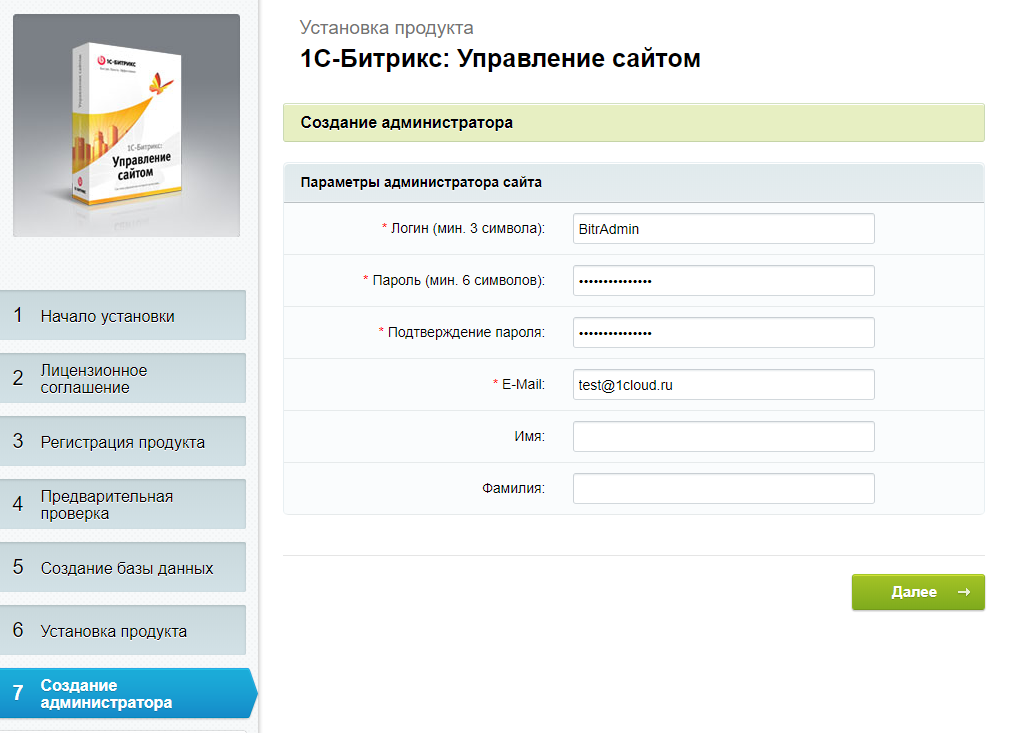
По окончании нам будет предложено создать учетную запись Администратора сайта Bitrix.
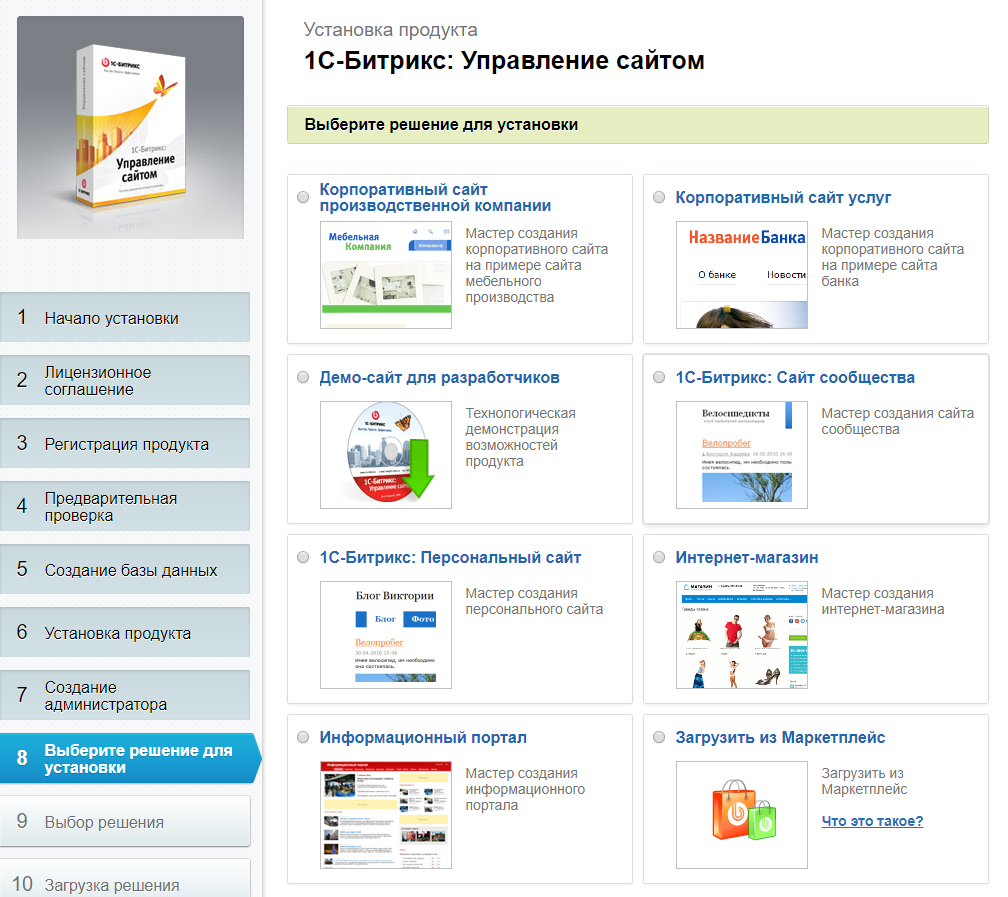
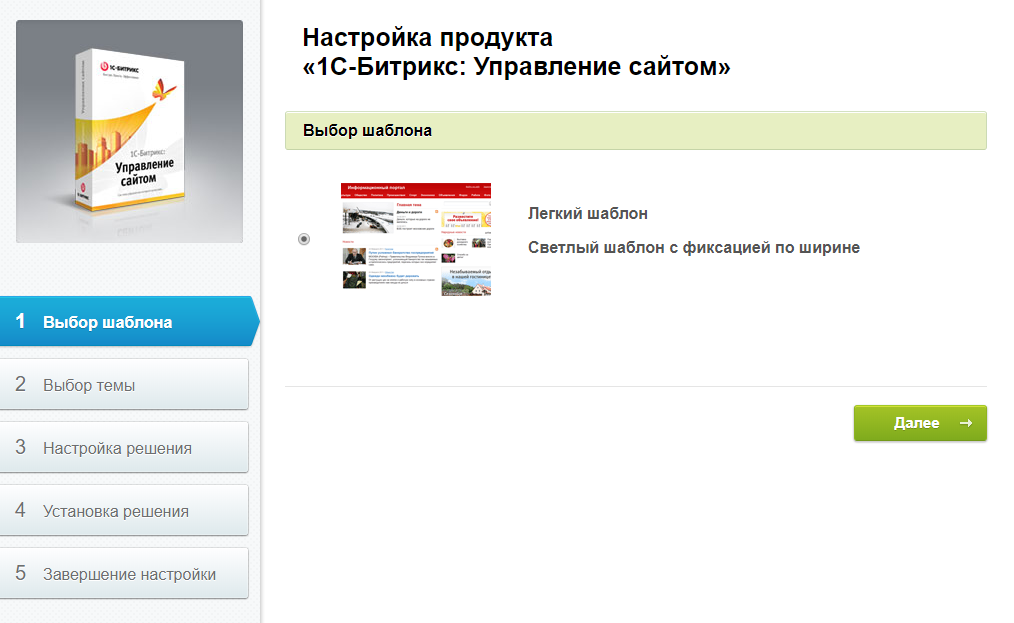
Далее предлагается выбрать наиболее подходящий для нашего сайта шаблон.
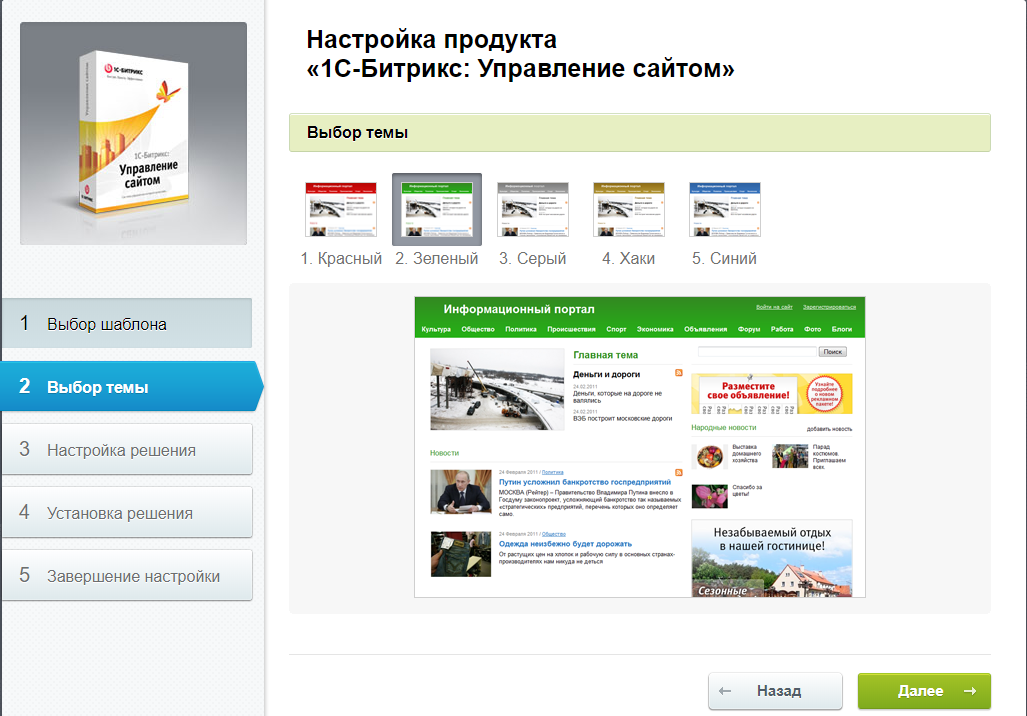
Затем его настроить.
Ввести название, подпись, метаданные и ключевые слова для индексации в поисковых системах.
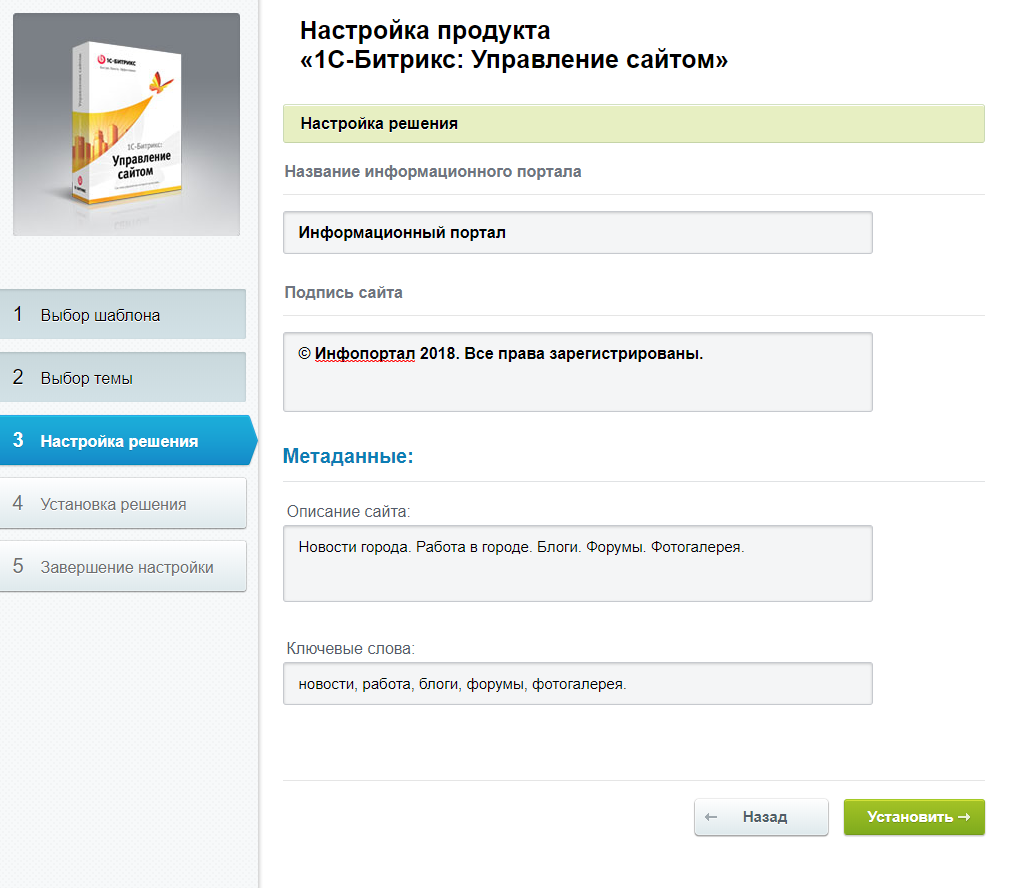
После нажатия кнопки “Установить” начнется установка шаблона.
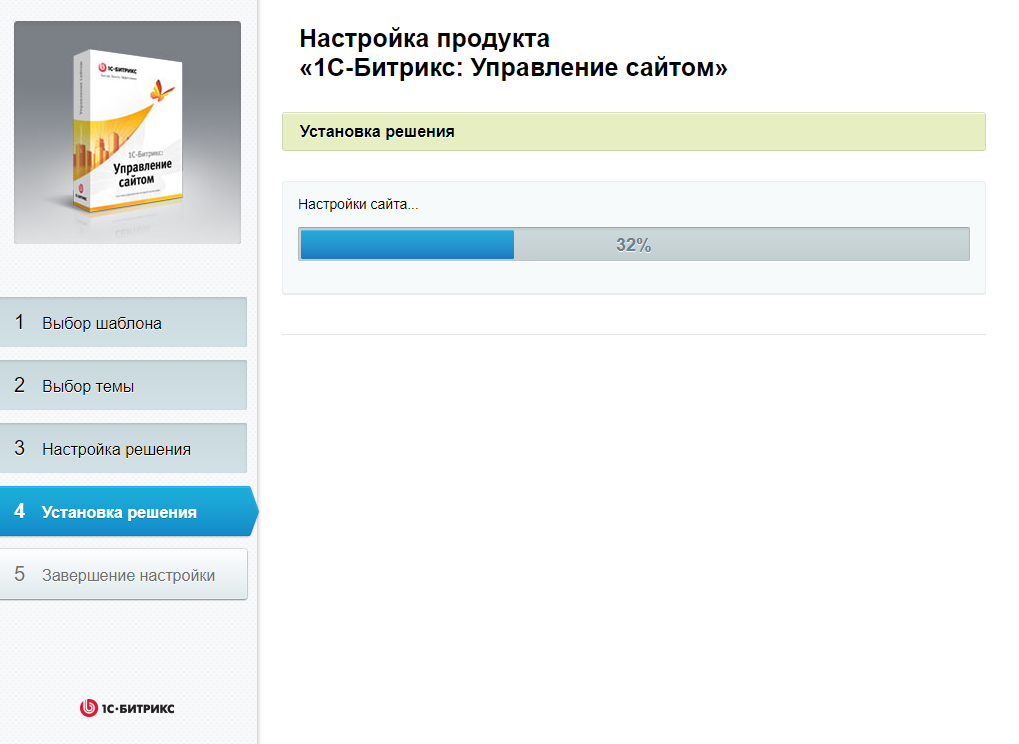
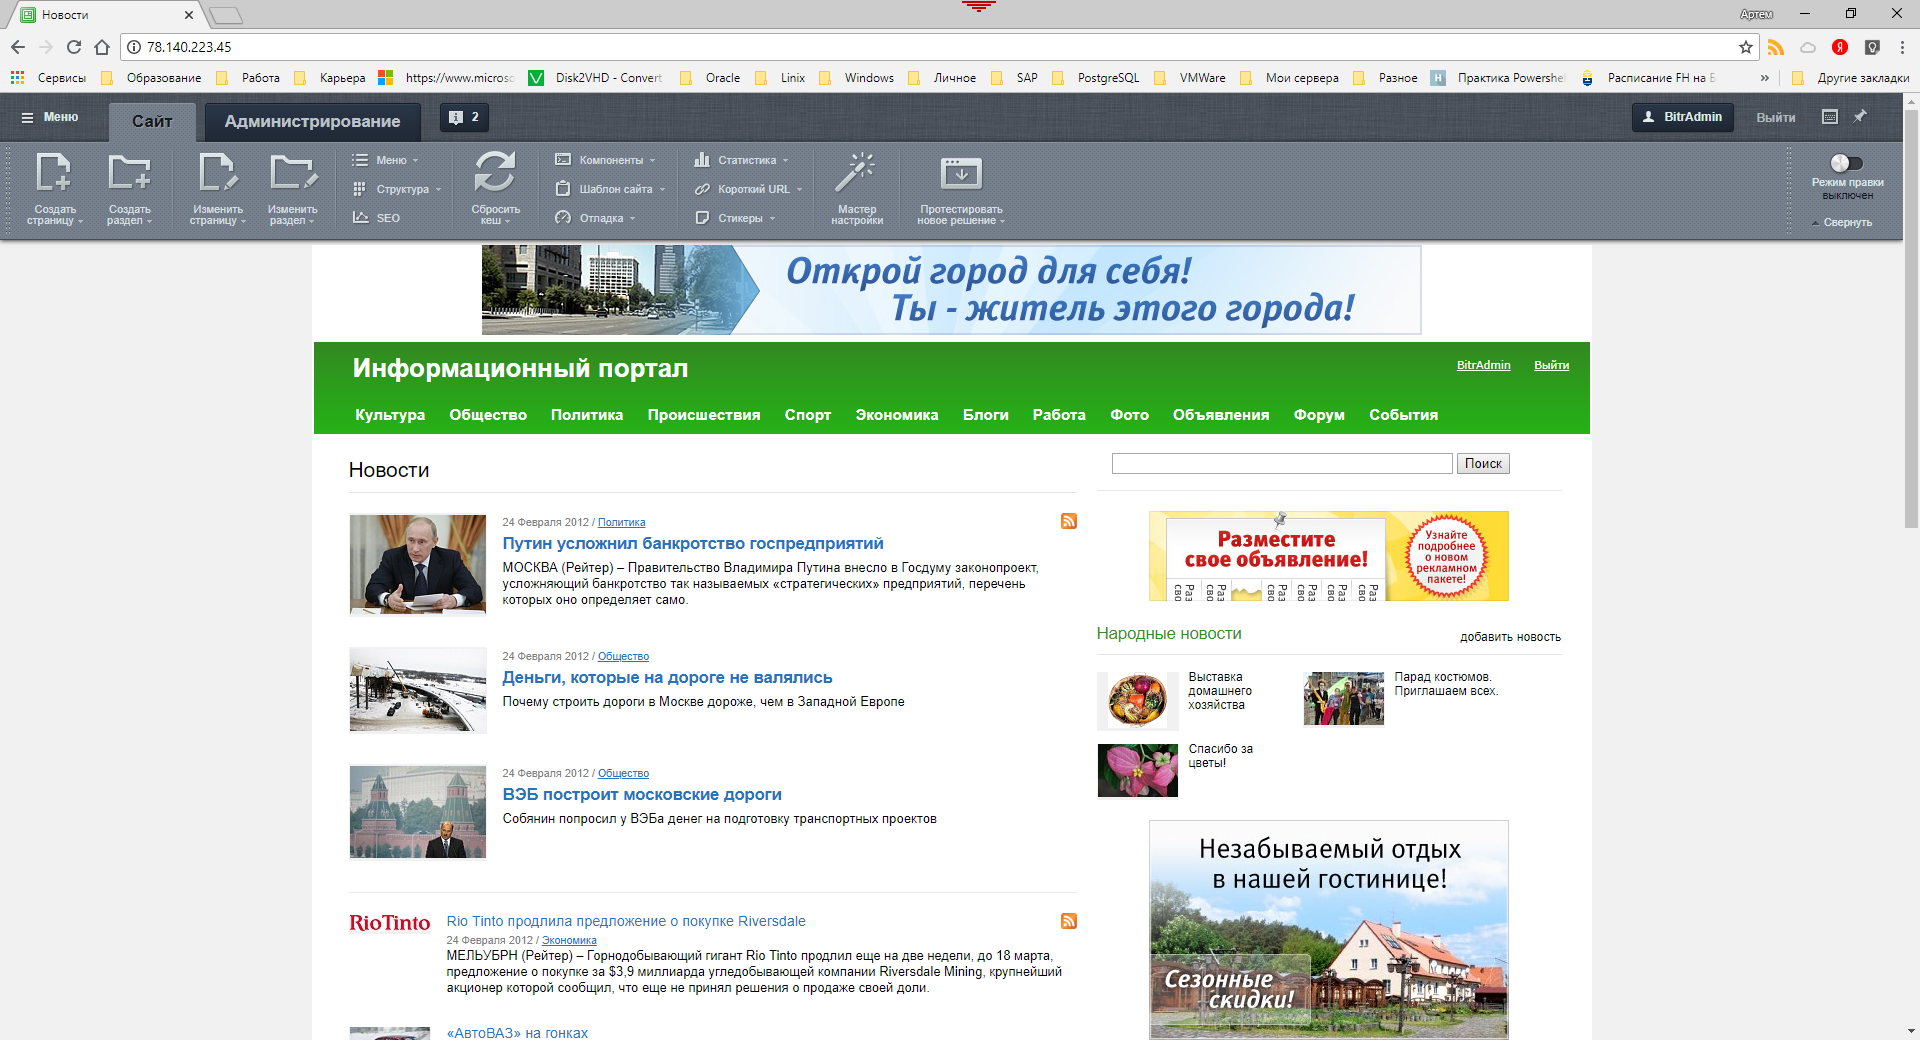
На этом установка завершена. Можно пользоваться. Теперь по ссылке http://<имя или ip сервера> мы попадаем на наш сайт.
На этом установка 1С-Битрикс на Windows окончена. В нашей базе знаний вы найдёте ещё множество статей посвящённых различным аспектам работы в Windows, а если вы ищете надежный виртуальный сервер под управлением Windows, обратите внимания на нашу услугу — Аренда виртуального сервера Windows.
Последнее обновление: 16.08.2023
Средняя оценка: 5,0, всего оценок: 1
Спасибо за Вашу оценку!
К сожалению, проголосовать не получилось. Попробуйте позже
QuickerSite — CMS for Windows Servers
Introduction
QuickerSite is an all-in-one CMS (Content Management System) built in ASP/VBScript. QuickerSite runs on both Windows Servers (IIS 5 and higher) and most other Windows OS versions through IIS Express (Visual Studio Code, Visual Studio, Webmatrix, etc). QuickerSite also requires ASP.NET (2.0) installed on your host.
Installation
Install this application in the root of an IIS website and make sure IUSR has full permissions to the entire folder.
Make sure «default.asp» is the default document. The default installation uses an Access database and therefore 32bits-support needs to be enabled for your IIS application pool.
When browsing to your site the first time, you will be prompted for a password. By default this is «admin». You have to change it to something else.
Before installing the Ingeniux CMS platform and configuring a CMS site instance, system
administrators must ensure that the following roles and features have been included on the
Windows Server 2019 host:
- .NET Framework 3.5.x
- .NET Framework 4.6 Features
- ASP.NET 4.6
-
Version Notes: CMS 10.1+
For Ingeniux CMS 10.1+, install Microsoft .NET Framework
4.7.2. - Windows Authentication
To configure Windows Server 2019 for Ingeniux CMS 10.x
installation:
- Log onto your server as an administrator, then access the
Server Manager. This application typically opens
automatically for administrators logging onto a Windows
Server-based operating system. - In the Server Manager dashboard, click .

- In the Add Roles and Features Wizard, on the
Before you begin page, click
Next. - On the Select installation type page, select
Role-based or feature-based installation. - Click Next.
- On the Select destination server page, select
the server where you will install roles and features from the
Server Pool area.
Note
This server is the machine you are logged
onto. - Click Next.
- On the Select server roles page, select Web
Server (IIS). The Add Roles and Feature Wizard
dialog displays. - Click the Add Features button. You are returned the
Select server roles page.
- Click Next.
- On the Features page, note that the .Net Framework
4.6 Features option has been selected by default.
- Click Next.
- On the Web Server Role (IIS) page, click
Next. - On the Select role services page, expand the
Application Development node, and then select
ASP.NET 4.6. - Click the Add Features button. You are returned the
Select server roles page.
- On the Select role services page, expand the
Security node, and then select Windows
Authentication. - Click Next.
- Compare the list of required Windows Server features against your Windows
Server configuration to ensure all the CMS installation prerequisites are selected. - Select the Restart the destination server automatically
if required option, and confirm your selection. - On the Confirm installation selections page, review that you have
selected all of the required roles and features, and then click
Install. - Close the wizard.
- When the installation completes, verify that IIS installed successfully by entering
the following into a web browser: http://localhost.The default IIS Welcome
page should display


Next Steps:
- If you’re installing CMS 10.5, see Installing the Ingeniux CMS 10.5 Software
Platform. - If you’re installing CMS 10.0–10.3, see Installing the Ingeniux CMS 10.0-10.3
Software Platform.
- Configuring Windows Server 2019
Describes how to deploy Optimizely Content Management System (CMS) sites through Visual Studio.
You can install Optimizely Content Management System (CMS) through XCOPY deployment by copying application files. An XCOPY-style file transfer simplifies the deployment and maintenance of Optimizely sites because no registry entries are created, and no shared components are registered.
The XCOPY architecture in CMS has no machine-specific or site-specific information stored in configuration files so you can use a shared folder for multiple servers. When you develop in a shared environment with source control, you can keep configuration files checked and create a site that you can duplicate in a multi-site deployment.
You can have one single IIS application with multiple sites, or multiple IIS applications pointing to the same physical directory. The machine to which you install additional sites does not need to have Optimizely installed.
To host ASP.NET Core on Windows with IIS, follow the instructions from Microsoft Host ASP.NET Core on Windows with IIS.
The following procedure shows how to deploy an Optimizely site from development to production. You can automate this using the dotnet command or other tools.
You need three artifacts to bring over to the production server:
- Site – the Optimizely platform and templates with dependencies and modules. These are normally the root of a Visual Studio project. (Output from dotnet publish on project)
- SQL Server database – stored content and so on.
- Application Data – media BLOBs, search index. These are files normally stored in
App_Datafor a Visual Studio project. (Versions before CMS 7.6 store these files parallel to the Visual Studio project by default.)
📘
Note
The following steps assume you have an existing site and good knowledge of using Visual Studio, Internet Information Services Manager and SQL Server Management Studio.
Create the deployment artifacts on the development machine to publish a package that can be installed on the target server.
- Open a Visual Studio project for the site you are deploying.
- Establish NuGet dependencies for the Optimizely products used. (This is done by default for CMS 7.6 and later.)
- Include all files in
modules,modulesbinandApp_Datafolders in the project. (You also can copy those folders manually to the output folder.) - Right-click the project in Visual Studio and click Publish or dotnet publish on the project. Specify a publish destination of type FileSystem.
- Under Settings, make sure Exclude files from the App_Data folder is not checked to restore those files on the destination.
- Publish the project.
📘
Note
If the database files are not stored in
App_Data, see Back Up and Restore of SQL Server Databases on MSDN for details about moving databases.
📘
Note
The following steps are performed on the target server and assumes you have moved the artifacts created in the previous section to the new server. The web server should have IIS and ASP.NET Core installed. You also need SQL Server Management Studio to connect to the database server.
-
Attach the database. See Attach a database on MSDN.
To complete this step, move the database files from the
App_Datafolder to the designated data folder for Microsoft SQL Server.You can also use backup or restore to attach a database. See Backup and restore of SQL server databases on MSDN.
-
Create a new SQL Login:
- Right-click on the Security node and select New > SQL Login.
- Select SQL Server Authentication.
- Unselect User must change password at next login.
- Under User Mapping, select the database and make sure the user is a member of the db_owner group.
-
On the web server, create a new folder for your site (for example
c:\inetpub\Site1), and copy the contents of the deployed site. -
Set access rights on the
App_Datafolder so that the group IIS_IUSRS have Change access. -
Open Internet Information Services Manager and connect to the web server.
-
Create a new IIS site:
- Right-click the Sites node.
- Select Add Website.
- Select the wwwroot subfolder as the Physical path for the new site.
-
Update the EPiServerDB connection string in the configuration file in the site root (such as
web.configorconnectionStrings.config, depending on setup) with connection details to the database (server, database, SQL login, and password).
Make sure your db connection string containsMultipleActiveResultsSet=true. It is enabled by default when you install a website from scratch, but not if you generate a connection string from the server explorer in Visual Studio.
📘
Note
For security and performance reasons always move media BLOBs to a folder outside the application root (as described in the next section), either on a fileshare or a local folder. Storing BLOBs in the App_Data folder is only designed for development purposes.
This section describes how to enable load-balancing, configure remote events, and external storage of BLOBs (files on a fileshare). The example uses the Azure service bus and the default provider for storage of BLOBs.
📘
Note
Use the dedicated Azure Service Bus provider.
-
Move the
Blobsubfolder of theApp_Datafolder to a shared server, such as the database server, and then share the folder. Give access rights for the share and the folder to the user running the Application Pool for the site in Windows. -
Edit
appsettings.jsonand add configuration for the file BLOB providers. Make sure the path attribute is valid:{ "EPiServer":{ "Cms":{ "BlobProvidersOptions": { "DefaultProvider": "fileShare", "Providers": { "fileShare": "EPiServer.Framework.Blobs.FileBlobProvider, EPiServer.Framework" }, } "FileBlobProvider":{ "Path": "\\dbserver\blobs" } } } } -
Clear the browser cache and test the setup by browsing the site. Images on the site should work as before but now are delivered from the shared location.
-
Configure the default provider for remote events by configuring the endpoints.
The site is ready to be load-balanced. -
Copy the site folder to a second server and create a site in IIS with the same settings as the previous server. No configuration changes are required.
-
Test remote events by logging in to one of the servers and publishing changes to a page. The published changes appear on the other server. Use the search functionality from both servers to verify it was configured correctly.
A hosting provider can help you load-balance incoming traffic between the servers. You also can use other software load-balancers such as HAProxy, Network Load Balancing (NLB), or Application Request Routing (ARR).
📘
Note
The core parts of CMS do not use Session State but some functionality does, such as some of the audience criteria. There are two approaches to enabling session state that depend on the sticky session feature (also known as session affinity) provided by a load-balancer that makes sure a user is reaching the same server combined with the default in-memory session state provider. You also can use an optimized provider for load-balancing, such as the built-in StateServer.
You should enable the ARR Affinity setting for applications in Optimizely Digital Experience Platform (DXP) to ensure proper functioning and saving of contents, with respect to cache invalidation by remote events. In Azure, go to the App Service where you want to make the change, select Configuration > General Settings, and enable ARR Affinity.
You can also set ARR Affinity in web.config as follows:
<system.webServer>
  <httpProtocol>
    <customHeaders>
      <add name="Arr-Disable-Session-Affinity" value="false" />
    </customHeaders>
  </httpProtocol>
</system.webServer>
Updated over 1 year ago
ПО под ОС Windows для работы с видеорегистраторами и IP видеокамерами.
Сведения о лицензии:
Если не указано иначе, то все программное обеспечение распространяется согласно с условиями Лицензии MIT https://opensource.org/licenses/MIT
Copyright (c) 2019 ООО «Бизнес Центр Алгоритм» г.Краснодар
Данная лицензия разрешает лицам, получившим копию данного программного обеспечения и сопутствующей документации (в дальнейшем именуемыми «Программное Обеспечение»), безвозмездно использовать Программное Обеспечение без ограничений, включая неограниченное право на использование, копирование, изменение, слияние, публикацию, распространение, сублицензирование и/или продажу копий Программного Обеспечения, а также лицам, которым предоставляется данное Программное Обеспечение, при соблюдении следующих условий:
Указанное выше уведомление об авторском праве и данные условия должны быть включены во все копии или значимые части данного Программного Обеспечения.
ДАННОЕ ПРОГРАММНОЕ ОБЕСПЕЧЕНИЕ ПРЕДОСТАВЛЯЕТСЯ «КАК ЕСТЬ», БЕЗ КАКИХ-ЛИБО ГАРАНТИЙ, ЯВНО ВЫРАЖЕННЫХ ИЛИ ПОДРАЗУМЕВАЕМЫХ, ВКЛЮЧАЯ ГАРАНТИИ ТОВАРНОЙ ПРИГОДНОСТИ, СООТВЕТСТВИЯ ПО ЕГО КОНКРЕТНОМУ НАЗНАЧЕНИЮ И ОТСУТСТВИЯ НАРУШЕНИЙ, НО НЕ ОГРАНИЧИВАЯСЬ ИМИ. НИ В КАКОМ СЛУЧАЕ АВТОРЫ ИЛИ ПРАВООБЛАДАТЕЛИ НЕ НЕСУТ ОТВЕТСТВЕННОСТИ ПО КАКИМ-ЛИБО ИСКАМ, ЗА УЩЕРБ ИЛИ ПО ИНЫМ ТРЕБОВАНИЯМ, В ТОМ ЧИСЛЕ, ПРИ ДЕЙСТВИИ КОНТРАКТА, ДЕЛИКТЕ ИЛИ ИНОЙ СИТУАЦИИ, ВОЗНИКШИМ ИЗ-ЗА ИСПОЛЬЗОВАНИЯ ПРОГРАММНОГО ОБЕСПЕЧЕНИЯ ИЛИ ИНЫХ ДЕЙСТВИЙ С ПРОГРАММНЫМ ОБЕСПЕЧЕНИЕМ.