
on May 24, 2009
We can use the below commands to delete a user account using windows command prompt.
To delete a user account of the local system:
net user username /DELETE
To delete a user account from domain:
net user username /DELETE /DOMAIN
You need to have domain administrator privileges to perform this operation. Note that we do not need to specify the domain name in this command.
The above commands work on Windows 7, Windows 8, XP and also on all Server editions.
Related Posts:
Add new user account
Get user names from command prompt
Download Article
Easily manage Windows user accounts using Command Prompt with this simple guide
Download Article
Command Prompt, which is essentially Windows’ version of Apple’s «Terminal» app, allows you to enter system-altering commands. While most user commands one might enter in Command Prompt are easier to carry out by simply performing the action itself (e.g., opening a folder), you can use Command Prompt to quickly create (or delete) user accounts right from your desktop!
How to Delete & Add Windows Users with Command Prompt
- Type “Command Prompt” into the Start menu’s search bar.
- Right click the “Command Prompt” icon and click “Run as administrator.”
- Click “Yes” on the pop-up, then click on the Command Prompt window.
- To add a user account, type net user (username) (password) /add and hit ↵ Enter.
- To delete a user account, type net user (username) /delete and hit ↵ Enter.
-

Open your PC’s Start menu. You can do this by clicking the Start button in the bottom left corner of your screen. Please note that, in order to add or delete users, you’ll need to be on an Administrator account.
- You can also tap the ⊞ Win button to do this.
-

The Command Prompt app should appear at the top of the relevant search results.
- You can also hold ⊞ Win and tap X to bring up the quick-access menu with Command Prompt in it.
Advertisement
-
This will prompt a drop-down menu.
-
You won’t be able to access Command Prompt in Administrator mode if you’re using a guest account.
- If you’re using the quick-access menu, just click the «Command Prompt (Admin)» option. Do not use the regular Command Prompt option.
-
This will allow you access to Command Prompt as an administrator.


Advertisement
-
This will make sure that your cursor is currently active on the Command line.[1]
-
To do this, type net user (username) (password) /add and tap ↵ Enter when you’re done. This will add a new user to your account!
- Replace the information in parentheses with an actual username and password; be sure to exclude the parentheses.
-
To do this, type net user (username) /delete and tap ↵ Enter when you’re done. Your selected user account should be gone!
- You will see a line that says «The command completed successfully» after successfully adding or removing an account.
-
Now you know how to add and delete users with the Command Prompt app!


Advertisement
Add New Question
-
Question
I forget my Lenovo laptop password. How can I delete the admin account?
If you are referring to the BIOS password then you need to reset the CMOS. You should be able to find that by searching how to reset the BIOS on whatever model laptop you have. Otherwise, if you are talking about a local administrator, you can boot to a live CD such as OPH Crack and find out what the password is.
-
Question
When I type «net username/add,» it returns «access denied.» What am I doing wrong?
You need to have administrator rights to execute this command. You need to run the command prompt as administrator.
-
Question
How can I resolve a syntyax error in a command?
Check your spelling and formatting. Command Prompt is very sensitive to both of these factors, so making a single error (e.g., missing a space or leaving a parenthesis in) will result in a syntax error.
See more answers
Ask a Question
200 characters left
Include your email address to get a message when this question is answered.
Submit
Advertisement
Video
-
If you don’t choose «Run as Administrator» when running Command Prompt, you will not be able to add or delete user accounts.
Thanks for submitting a tip for review!
Advertisement
-
Be careful when deleting user accounts; once gone, you won’t get them back.
Advertisement
References
About This Article
Article SummaryX
1. Type «cmd» into the Windows search bar.
2. Right-click Command Prompt.
3. Click Run as administrator.
4. Click Yes.
5. Type «net user NEWUSERNAME NEWPASSWORD /add» and press Enter.
6. Type «net user USERNAME /delete» and press Enter to delete.
Did this summary help you?
Thanks to all authors for creating a page that has been read 592,296 times.
Reader Success Stories
-
London Z’rath
Aug 4, 2017
«It was very easy to understand and to work with.»
Is this article up to date?
В этой пошаговой инструкции подробно о том, как удалить пользователя в Windows 10 в различных ситуациях — об удалении простой учетной записи, или того, пользователя, которые не отображается в списке пользователей в параметрах; о том, как выполнить удаление, если вы видите сообщение о том, что «Пользователь не может быть удален», а также о том, что делать, если при входе в систему отображается два одинаковых пользователя Windows 10, и нужно убрать одного лишнего. См. также: Как удалить учетную запись Майкрософт в Windows 10.
В общем случае, учетная запись из которой производится удаление пользователя, должна иметь права администратора на компьютере (особенно если удаляется существующий аккаунт администратора). Если в настоящий момент она имеет права простого пользователя, то для начала зайдите под имеющимся пользователем с правами администратора и дайте нужному пользователю (тому, под которым в дальнейшем планируете работать) права администратора, о том, как это сделать разными способами написано в руководстве «Как создать пользователя Windows 10».
Простое удаление пользователя в параметрах Windows 10
Если вам требуется удалить «простого» пользователя, т.е. созданного лично вами или заранее присутствовавшего в системе при покупке компьютера или ноутбука с Windows 10 и более не нужного, сделать это можно, используя параметры системы.
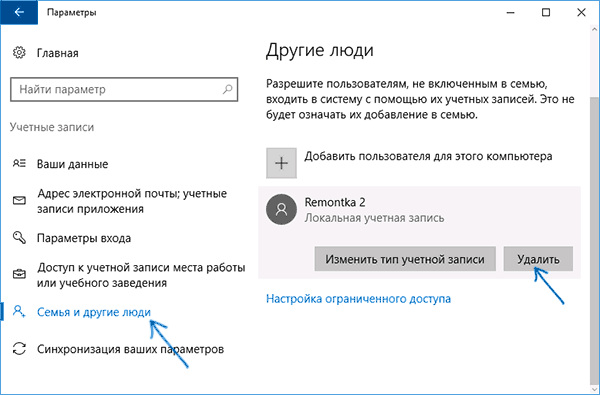
- Зайдите в Параметры (клавиши Win+I, или Пуск — значок шестеренки) — Учетные записи — Семья и другие люди.
- В разделе «Другие люди» кликните по пользователю, которого нужно удалить и нажмите соответствующую кнопку — «Удалить». Если нужный пользователь отсутствует в списке, о том, почему это может быть — далее в инструкции.

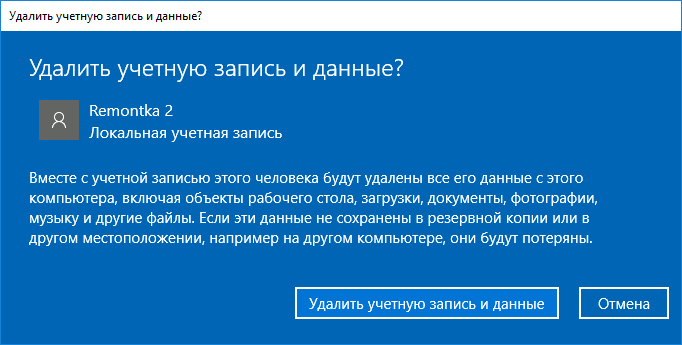
- Вы увидите предупреждение о том, что вместе с учетной записью будут удалены файлы этого пользователя, хранящиеся в его папках рабочего стола, документов и прочего. Если важных данных у этого пользователя нет, нажмите «Удалить учетную запись и данные».

Если все прошло успешно, то ненужный вам пользователь будет удален с компьютера.
Удаление в управлении учетными записями пользователей
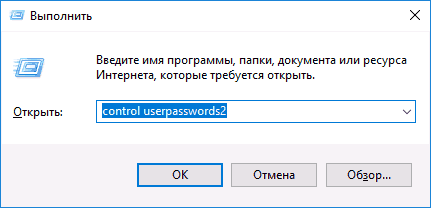
Второй способ — использовать окно управления учетными записями пользователей, открыть которое можно так: нажмите клавиши Win+R на клавиатуре и введите в него control userpasswords2 после чего нажмите Enter.
В открывшемся окне выберите пользователя, которого нужно удалить, а затем нажмите кнопку «Удалить».
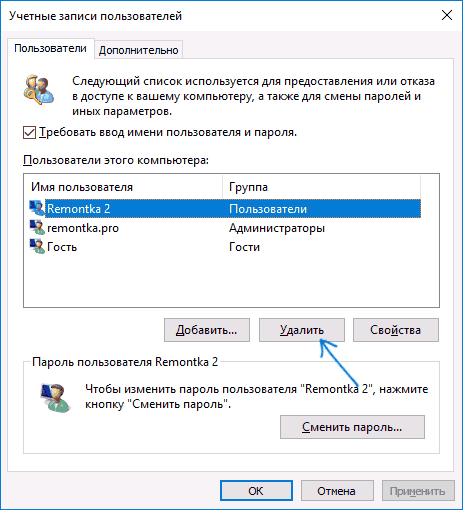
Если при этом вы получите сообщение об ошибке и о том, что пользователь не может быть удален, это обычно говорит о попытке удаления встроенной системной учетной записи, о которых — в соответствующем разделе этой статьи.
Как удалить пользователя с помощью командной строки
Следующий вариант: использовать командную строку, которую следует запустить от имени администратора (в Windows 10 это можно сделать через меню правого клика по кнопке «Пуск»), а затем использовать команды (нажимая Enter после каждой):
- net users (выдаст список имен пользователей, активных и нет. Вводим для проверки того, что правильно помним имя пользователя, которого нужно удалить). Внимание: не удаляйте таким образом встроенные учетные записи Администратор, Гость, DefaultAccount и defaultuser.
- net user Имя_пользователя /delete (команда удалит пользователя с указанным именем. Если имя содержит проблемы, используйте кавычки, как на скриншоте).

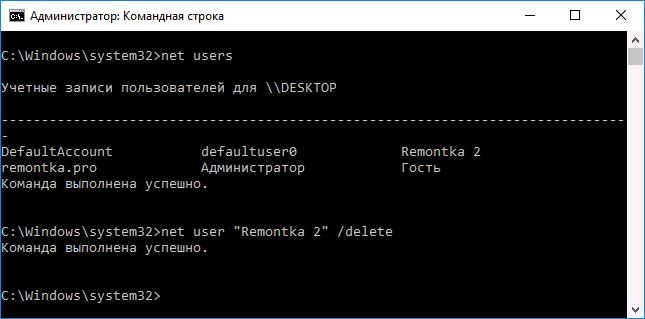
Если команда была выполнена успешно, пользователь будет удален из системы.
Как удалить встроенные учетные записи Администратор, Гость или другие
Если вам требуется убрать лишних пользователей Администратор, Гость, а возможно и какие-то другие, сделать этого так, как описывалось выше, не получится. Дело в том, что это встроенные системные учетные записи (см., например: Встроенная учетная запись Администратор в Windows 10) и их нельзя удалить, но можно отключить.
Для того, чтобы сделать это, выполните два простых шага:
- Запустите командную строку от имени администратора (клавиши Win+X, затем выбрать нужный пункт меню) и введите следующую команду
- net user Имя_пользователя /active:no


После выполнения команды, указанный пользователь будет отключен и исчезнет в окне входа в Windows 10 и из списка учетных записей.
Два одинаковых пользователя Windows 10
Один из распространенных багов в Windows 10, который заставляет искать способы удаления пользователей — отображение при входе в систему двух учетных записей с одинаковыми именами.
Обычно это происходит после каких-либо манипуляций с профилями, например, после такого: Как переименовать папку пользователя, при условии, что до этого вы отключили пароль при входе в Windows 10.
Чаще всего срабатывающее решение, позволяющее убрать дубликат пользователя, выглядит так:
- Нажать клавиши Win+R и ввести control userpasswords2
- Выбрать пользователя и включить запрос пароля для него, применить настройки.
- Перезагрузить компьютер.
После этого можно снова убрать запрос пароля, но второй пользователь с таким же именем снова появиться не должен.
Постарался учесть все возможные варианты и контексты необходимости удаления учетных записей Windows 10, но если вдруг решения для вашей проблемы здесь не нашлось — опишите ее в комментариях, возможно, мне удастся помочь.
Managing user accounts in Windows 10 is a vital skill, especially for system administrators or power users. While the graphical user interface (GUI) provides a user-friendly way to navigate and manage user accounts, the Command Prompt (CMD) offers an efficient, scriptable method to execute these tasks. This article will provide a comprehensive guide on how to delete users from Command Prompt in Windows 10, including important considerations and step-by-step instructions.
Understanding User Accounts in Windows 10
Before diving into the deletion process, it’s crucial to understand what user accounts are and why you might need to delete them. In Windows 10, users can have different account types:
- Administrator Accounts: These accounts have complete access and control over the operating system, allowing users to install software, change settings, and manage other user accounts.
- Standard User Accounts: These accounts can use most software and change system settings that do not affect other accounts or the security of the system.
- Guest Accounts: Managed by the operating system, guest accounts allow limited access for temporary users.
Deleting user accounts is necessary when a user no longer needs access to a computer, such as when an employee leaves a company, or when using a shared home PC.
Prerequisites for Deleting User Accounts
-
Administrator Access: To delete a user account, you need to have administrator privileges on the computer. If you are not logged in with an administrator account, Windows will not allow you to perform this action.
-
Backup Data: Always ensure any important files belonging to the user account are backed up. Deleting a user account generally removes all data associated with that account.
-
Command Prompt Access: You need to access the Command Prompt with elevated privileges (Run as Administrator) to execute the commands necessary for deleting a user account.
Accessing Command Prompt
To access Command Prompt as an administrator, follow these steps:
- Click on the Start menu or press the Windows key.
- Type
cmdinto the search bar. - Right-click on Command Prompt in the search results.
- Select Run as administrator.
You may be presented with a User Account Control (UAC) prompt asking if you want to allow this app to make changes to your device. Click Yes.
Listing All User Accounts
Before deleting a user account, you may want to view the list of all user accounts on your Windows 10 system. To do this:
- Open Command Prompt as an administrator.
-
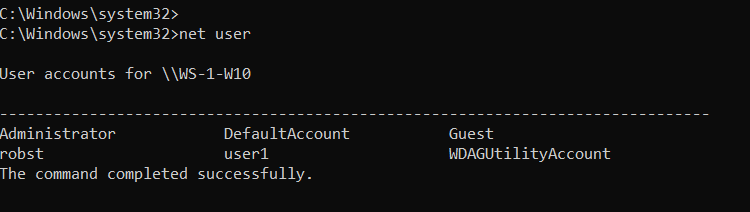
Type the following command and press Enter:
net user
This command will display a list of all user accounts on the system along with some details about them.
Deleting a User Account
Step-by-Step Procedure
To delete a user account, follow the steps outlined below:
-
Identify the Username: From the list generated by the
net usercommand, identify the username of the account you wish to delete. -
Execute the Delete Command:
- In the Command Prompt window, type the following command:
net user /deleteReplace
` with the actual username of the account you want to delete. For example, if the username isJohnDoe`, your command would look like this:net user JohnDoe /delete -
Confirmation: Once you press Enter, if the command executes successfully, you will see a confirmation message indicating that the command completed successfully.
Example
Assuming there’s a user named TestUser and you want to delete this account, you would run:
net user TestUser /deleteIf successful, the Command Prompt will output:
The user account has been successfully deleted.Error Handling
In some cases, you may encounter errors when trying to delete a user account. Here are some common issues and their solutions:
-
Error: «The specified user does not exist.»
This error occurs if you mistyped the username or if the user account has already been deleted. Double-check your spelling and ensure the account exists. -
Error: «Access Denied.»
Ensure that you are running the Command Prompt with administrative privileges. If you are not, re-open CMD as an administrator. -
Error: «System error 5.»
This is generally an indication of permission issues. Again, ensure that you have the necessary administrative rights.
Additional Considerations
Deleting a User vs. Disabling a User
Before deleting a user account, consider whether you might simply want to disable it instead. Disabling a user account preserves the user’s data and settings but prevents them from logging in. To disable a user account, use the following command:
net user /active:noTo enable it again, use:
net user /active:yesUsing disabling rather than deleting can be useful in environments where you might want to reinstate an account later without losing data.
Data Preservation
Remember that deleting a user account will also delete all associated data. If there are files or personal settings you want to keep, ensure they are transferred to another location before completing the deletion.
You can transfer files by logging into the user account and copying the files manually to another location (like an external drive) or using built-in backup tools in Windows.
Managing User Groups
If you are frequently managing accounts, consider delving into user groups. User groups allow you to set permissions and manage multiple users more easily. For example, if you often create users for a department, placing them all in a group can simplify access management.
You can create a new group with the following command:
net localgroup /addAnd you can add a user to a group using:
net localgroup /addPowerShell: An Alternative Method
While using CMD is a viable option for many users, PowerShell, which is Windows’ advanced command-line shell and scripting language, offers even more flexibility and features for user management.
Deleting a User with PowerShell
To delete a user account with PowerShell, follow these steps:
-
Open PowerShell as an administrator. Search for
PowerShellin the Start menu, right-click it, and select Run as administrator. -
Execute the following command:
Remove-LocalUser -Name ""Again, replace “ with the account name you wish to remove.
-
Confirm the deletion by checking if the user no longer appears in the list:
Get-LocalUser
Example of Deleting a User with PowerShell
Suppose you want to delete a user called SampleUser. The command you would execute is:
Remove-LocalUser -Name "SampleUser"Benefits of Using PowerShell
PowerShell provides greater capabilities for scripting and automation. It supports complex commands and allows for batch processing of several tasks at once. If you manage numerous users, PowerShell can save you significant time.
Conclusion
Deleting user accounts via Command Prompt in Windows 10 is a straightforward process that can be accomplished using the net user command. However, it is essential to have administrative privileges and understand the implications of deleting an account.
Prior to deletion, ensure that any necessary data associated with the user account is backed up. Consider using PowerShell for more advanced user management tasks. By mastering these command-line tools, you can effectively manage user accounts in your Windows 10 environment, streamlining administrative tasks and enhancing system security.
With knowledge of these procedures, you’ll be well-equipped to handle various user management scenarios, ensuring your systems remain organized and efficient. Whether you are an IT professional, a system administrator, or simply a power user, these skills will help you maintain a streamlined and effective computing environment.
In this tutorial, you will learn how to use the net user command to create, delete and change user accounts in the Windows command prompt (CDM).
We can perform the following tasks using the net user command:
- View user accounts.
- Add and Remove user accounts.
- Activate and Deactivate user accounts.
- Change the user password.
If you are operating in an Active Directory domain environment, always use the /domain command switch to execute the net user command on the domain controller rather than on the local computer.
Examples
List users on the local computer:
net userList users on the domain controller:
net user /domainThis command displays detailed information about the Administrator account:
net user AdministratorCreate a user named user1 with a password of strongPassword:
net user /add user1 "strongPassword"Delete the user user1 from the computer:
net user /delete user2This command enables the built-in Administrator account on Windows 10/11:
net user Administrator /active:yesThis command sets (changes) the Administrator account password:
net user Administrator "adminPassWord"Execute the following command to disable the Administrator account on Windows 10/11:
net user Administrator /active:noThis command forces the user user1 to change the password at the next logon:
net user user1 /logonpasswordchg:yesCreate a user; the user must change the password at the next logon:
net user /add user1 "strongPassword" /logonpasswordchg:yesCreate a new user; the account expires on January 31st:
net user /add user1 "strongPassword" /expires:01/31/2023Command Options
| username | The name of the user to create, delete, view, or modify. |
| password | Password for the user. |
| * | Use this option to produce a prompt for the password. |
| /add | Use this option when you want to create a new user. |
| /delete | Use this option to remove a user from the Windows system. |
| /active:{yes | no} | Activates or Deactivates a user. The default is yes when creating a new user. |
| /expires:{date | never} | Use this option to set the expiration date (mm/dd/yy) for an account. The default is never. |
| /fullname:»name» | Full name of the user. |
| /passwordchg:{yes | no} | Specifies whether users can change their own password. The default is yes. |
| /passwordreq:{yes | no} | No means the user can log in without a password. The default is YES. |
| /logonpasswordchg:{yes|no} | Specifies whether the user should change the password at the next logon. The default is NO. |
| /homedir:path | The home directory location. |
| /comment:»text» | Use this option to add a description to the user’s account. |
You can view the manual page by typing net help user at the command prompt.
View a User
When you execute the net user command without any options, it displays a list of user accounts on the computer.
net userYou will see an output similar to the following:
Add the /domain command switch if you want to list users on the Active Directory Domain controller.
net user /domainTo see detailed information about a particular user, execute the command net user Username, where the Username is the name of the user you want to view. For example, you can view the Administrator account by running the following command:
net user AdministratorCreate and Delete User Accounts
To create a user account, use the following syntax:
net user /add UserName PasswordFor example, the following command creates a user named user1 with a password of strongPassword:
net user /add user1 "strongPassword"Use an asterisk (*) in place of the password to produce a prompt, as shown in the following example:
net user /add user1 *
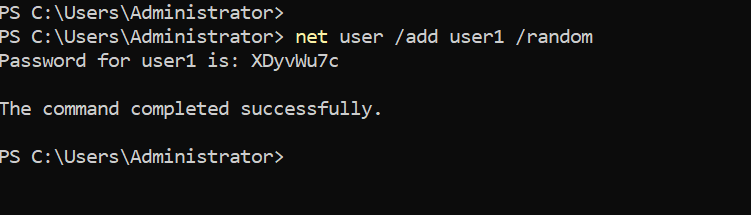
Alternatively, you can also use the /random option to generate a strong random password, as shown in the following example:
net user /add user1 /randomThe randomly generated password will be displayed on the command prompt after you execute the command.
To delete a user, use the following syntax:
net user /delete UserNameThe following command deletes the user user1 from the computer:
net user /delete user2Change Passwords
To change passwords, use the following syntax:
net user UserName New-PasswordUse an asterisk (*) or /random in place of the password to produce a prompt or generate a random password:
net user UserName *
net user user1 /random
Notes
The net user command is most of the time used in Windows Server to manage Active Directory users.
Windows 10/11 uses a new Settings pane to manage users, but the net user command is still useful for some tasks. For example, if you want to activate the built-in Administrator account, it is easy to do that using this command.
While working at the command prompt, run the net help user command to see all available command options.
In the next tutorial, we are going to learn how to manage Windows groups using the net localgroup CMD command.