

Install Clover Bootloader Windows Masprogram Download the latest clover installer from here. run the installer. click continue twice. click change install location and set it to your formatted usb drive. click customize and check the following options: – check “install for uefi booting only”, “install clover in the esp” will automatically select– check following from drivers64uefi. Bootloader for macos, windows and linux in uefi and in legacy mode cloverhackycolor cloverbootloader.
Install Clover To Usb Hdd Clover Uefi Guide Clover has an installer and an iso file. its installer only supports macos, so we just have to use the iso file to install clover on usb from windows and linux. 1. you need to use a. Clover is a bootloader for booting os x, windows and linux on mac or pc with uefi bios firmware. — customizable gui including themes, icons, fonts, background images, animations, and mouse pointers. i am curious of any experience with clover some may have had…. Clover is an efi bootloader which allows you to multi boot windows, mac os x and linux on uefi based computer. this tutorial will show how to manually install clover to the efi system partition and set clover as the priority startup item with easyuefi. Learn how to install clover bootloader on external usb drive using windows for seamless multi os booting! this step by step tutorial guides you from creating.
Install Clover To Usb Hdd Clover Uefi Guide Clover is an efi bootloader which allows you to multi boot windows, mac os x and linux on uefi based computer. this tutorial will show how to manually install clover to the efi system partition and set clover as the priority startup item with easyuefi. Learn how to install clover bootloader on external usb drive using windows for seamless multi os booting! this step by step tutorial guides you from creating. Pre installed ubuntu linux (and it’s flavours), debian or live mode; basic knowledge about bios (firmware) configuration, partition scheme, os installation; make sure that your pc is able to boot clover. for testing purpose; create usb clover with this tool via windows. then boot from it. There are a number of solutions to this problem, but the safest one (and the one i chose), is to install clover to a usb stick, and have the pc use that as a boot menu. with the right driver, clover can then detect your new ssd and boot from it. For those wanting to try windows 10, i thought i would create a short guide on how to create a clover uefi windows 10 installer with rufus and clean install. this guide is tailored for legacy bios machines but should also work in systems with native uefi firmware. 1. access to osx and windows to run rufus and install clover. 2. Step 1 downloading olarila vanilla images or create one vanilla usb installer. 1a) olarila images (windows, mac or linux) here. 1b) how to create usb installer (mac) here. step 2 burning olarila images with balena etcher with windows, macos or linux. 2a) download link here.

Clover Boot Loader On Usb Cateringwes Pre installed ubuntu linux (and it’s flavours), debian or live mode; basic knowledge about bios (firmware) configuration, partition scheme, os installation; make sure that your pc is able to boot clover. for testing purpose; create usb clover with this tool via windows. then boot from it. There are a number of solutions to this problem, but the safest one (and the one i chose), is to install clover to a usb stick, and have the pc use that as a boot menu. with the right driver, clover can then detect your new ssd and boot from it. For those wanting to try windows 10, i thought i would create a short guide on how to create a clover uefi windows 10 installer with rufus and clean install. this guide is tailored for legacy bios machines but should also work in systems with native uefi firmware. 1. access to osx and windows to run rufus and install clover. 2. Step 1 downloading olarila vanilla images or create one vanilla usb installer. 1a) olarila images (windows, mac or linux) here. 1b) how to create usb installer (mac) here. step 2 burning olarila images with balena etcher with windows, macos or linux. 2a) download link here.
Installing macOS on Mac whether Mojave or Catalina requires a few things. The most important one is the macOS installer image. With App Store or enrolling to Apple’s beta program or getting the macOS Catalina DMG file will do the most of the job. With the installer image, sticking to the prompts will end up installed macOS. But if you’re installing macOS on lots of Macs, in this case, you might need to create a bootable USB installer. For this, consider taking help of this instruction in your mind. Here is How to Create macOS Catalina USB Installer on Windows – Hackintosh.
Instead, installing macOS on non-Apple hardware actually and virtually both is somehow easy as you’d install any other operating system. For installing virtually, we’ve prepared everything beforehand which you can use to install macOS Catalina on VMware and install macOS Catalina on VirtualBox. Until here, everything seems fine until you’d like to actually install macOS on your actual Hackintosh PC.
Installing macOS might be somewhat easy but creating a macOS Hackintosh installer is never easy. For installing macOS actually on PC aside from your actual operating system, you’ll need a super-configured, super set-up USB installer. This process is one of the primary and important parts of succeeding for the installation. But it has never been easy to do this since there’s no app for performing this process automatically for you.
Table of Contents
Create macOS Catalina USB Installer
There are several ways around to do this. Since the process will be entirely done on Mac, we’ll use macOS Catalina or macOS Mojave installed on VMware or VirtualBox. They work no different from an actual Mac. If you’ve a Mac, that’s fine, you can use that for this. For your information, this process is entirely done on Catalina installed on VMware to create a complete working macOS Catalina USB installer for installing macOS on a Hackintosh PC.
For those who are curious enough, a Hackintosh is a basically Intel-based machine‚ not by Apple, which can run MacOS. Often, they’re custom-built desktop machines, but laptops with the right specifications work as well. Usually, they are custom built desktop but can be laptop machines that are Intel-based. Since Macs are Intel-based, the Hackintosh machines a little more compatible for installing macOS.
That said, if you’re interested in installing macOS Catalina on your Hackintosh PC, you’re good to create macOS Catalina USB installer on Windows with this. For performing this process, you’ll need some files which are seriously needed. However, we’ve entirely caught you up both with the files and the process. Here’s how to make it actually happen and How to Create macOS Catalina USB Installer on Windows – Hackintosh.
What You’ll Need
There are a number of things you’d need for this. Here’s the list I’ve outlined for you.
- A 12GB+ USB Installer drive that doesn’t mind erasing – Since Catalina is around 6 Gigabytes and we’ll add some more files, we’ll need to have a 12GB or bigger USB flash drive. In this process, everything on the drive will be erased, so make sure you take a solid copy of the files from the drive.
- Access to a system running macOS – Since this process is entirely done on macOS, you may need to access a system running macOS. If you have a Mac, that’s fine. If you don’t have one, we’ve held your hands up. Installing macOS is what’ll do the job for you, whether that’s on VMware or VirtualBox, both are fine.
- A copy of macOS Catalina Installer Image – Getting a copy of macOS Catalina is easy when you have a running macOS installed. From the App Store or Apple’s beta program, you can simply grab a copy of the macOS Catalina which will be used in this process.
- The Clover Bootloader – Since real Macs have a custom firmware that lets them boot macOS, we’ll use the Clover which is a bootloader for this. It also includes kext injection, ACPI renames, kext patches, and lots of other functions.
- Kexts – FakeSMC.kext, Ethernet Kext, NullCPUPowerManagement.kext, Config.plist – A kext is actually kernel extension that is quite similar to drivers on Windows.
These aren’t the whole thing for making things work, but a chunk of patience, tolerance, and enthusiasm is also necessary. Is everything seems ready to you? So what are you waiting for, let’s get started startightly.
Getting Started
Creating a working macOS Catalina USB installer requires accessing to a running macOS. This can be a real Mac or macOS Mojave or Catalina installed on a virtual machine whether VMware or VirtualBox. There’s no difference between them.
If you’ve a Mac, that’s fine, you’re good to skip this. If you don’t own one, you’re nowhere back. We’ve instructed you on installing macOS Catalina on VMware and installing macOS Catalina on VirtualBox both.
Step One: Download macOS Catalina (Preferably from App Store)
Since Catalina is still in beta version, we’ll turn to Apple’s popular beta program. When it’s entirely released, we’ll download from the App Store. This is pretty straightforward.
When you’ve macOS installed on VMware or VirtualBox or you’ve a Mac, start up.
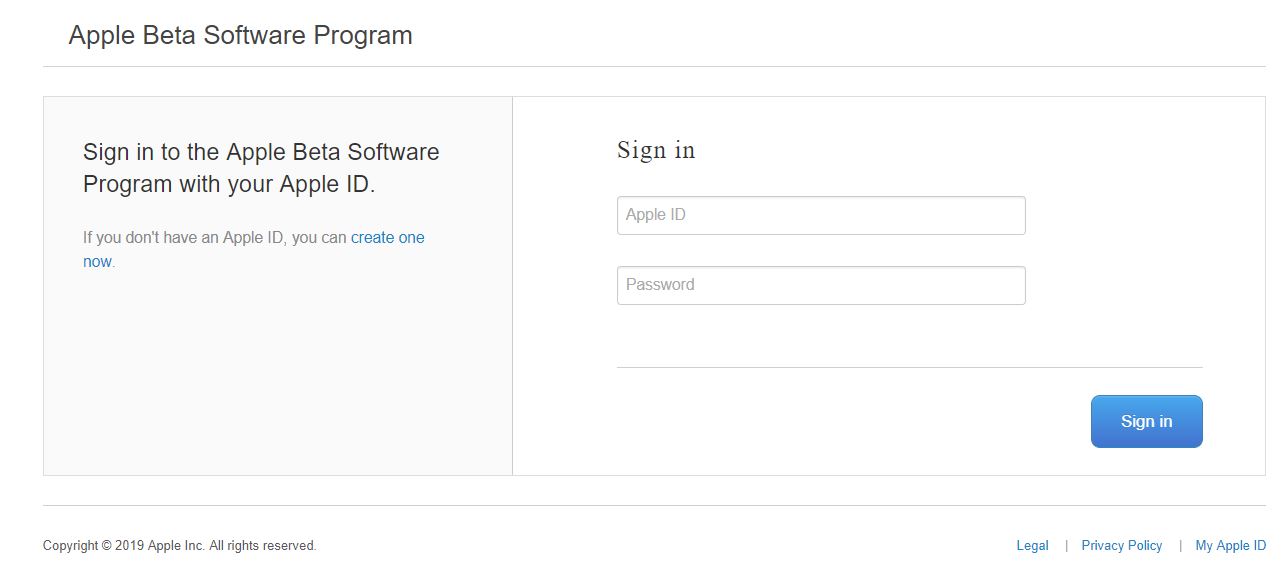
Now navigate to the Apple’s Beta Software Program login page, sign in there.
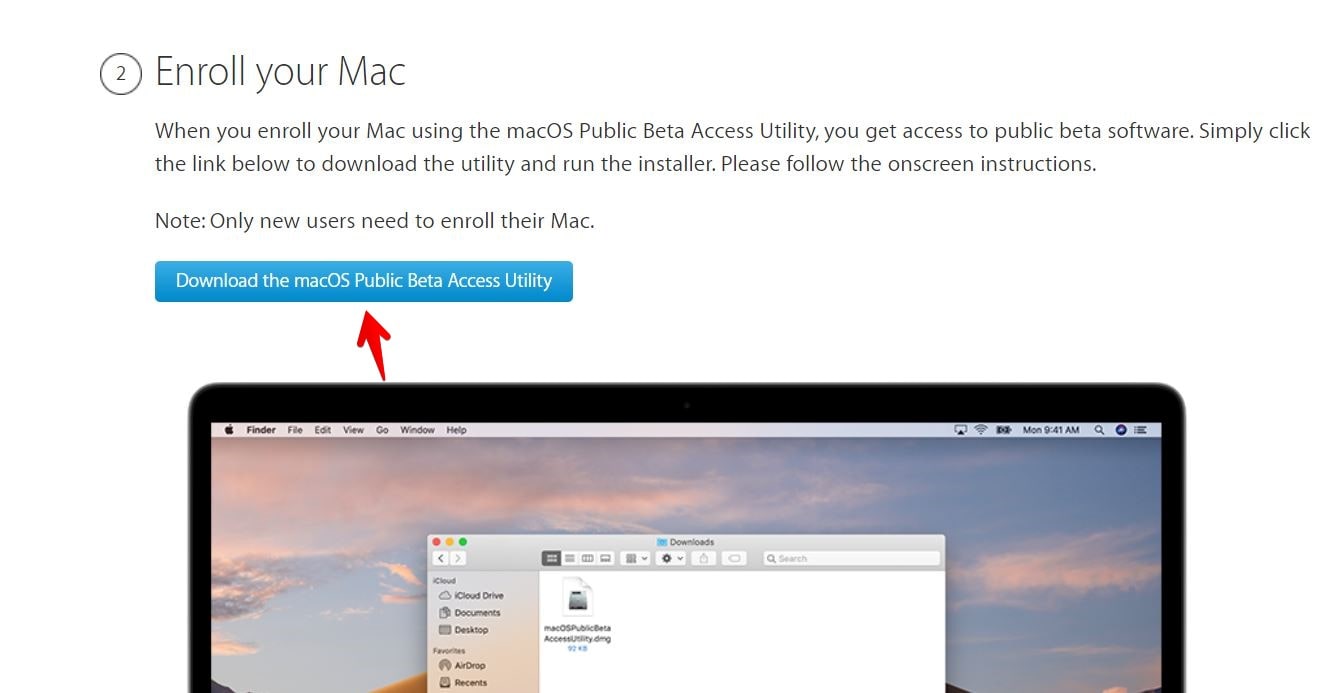
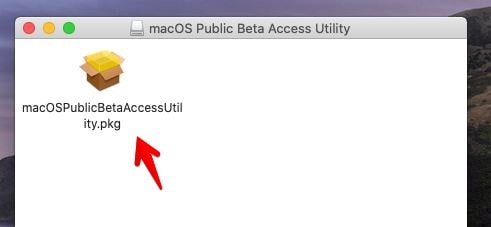
Once you’ve signed in, click enroll your device from the top menu and scroll down click Download the macOS Public Beta Access Utility.
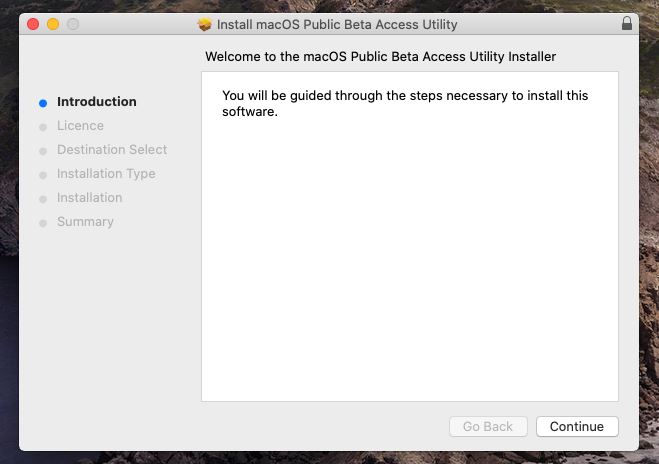
After that, open the macOS access utility package and click on it twice.
Following the prompts will end up macOS downloading from system preferences.
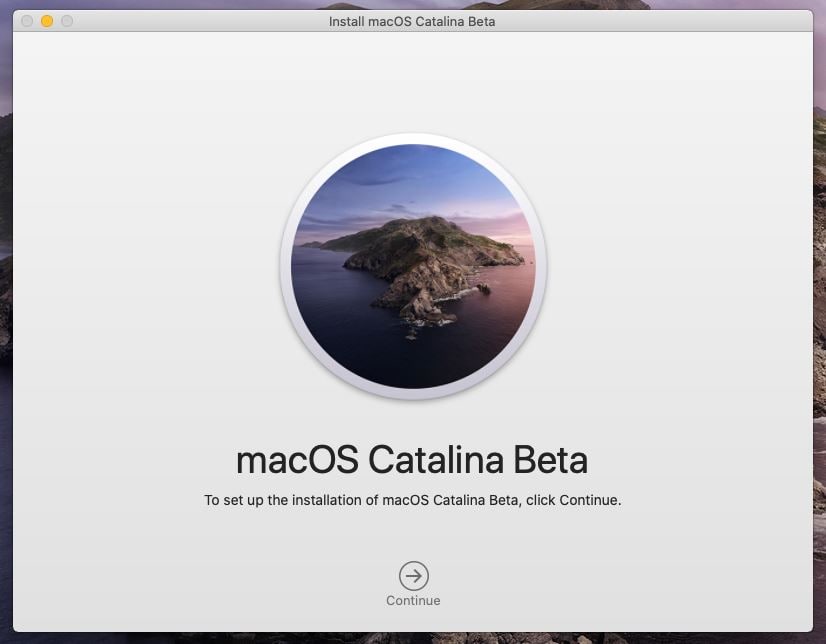
Once it’s done, the macOS Catalina installer window will pop up. Close it.
Step Two: Format USB Installer Drive
One of the important task for this process is formatting the USB correctly. This drive should be configured in order to make this working properly.
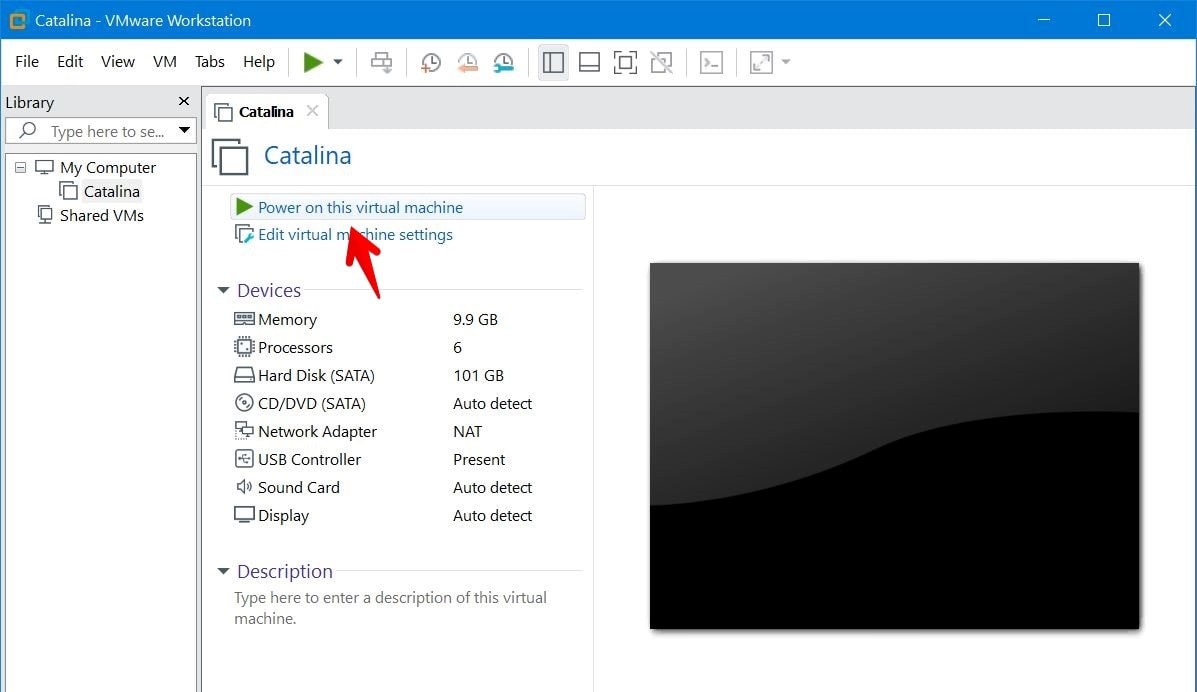
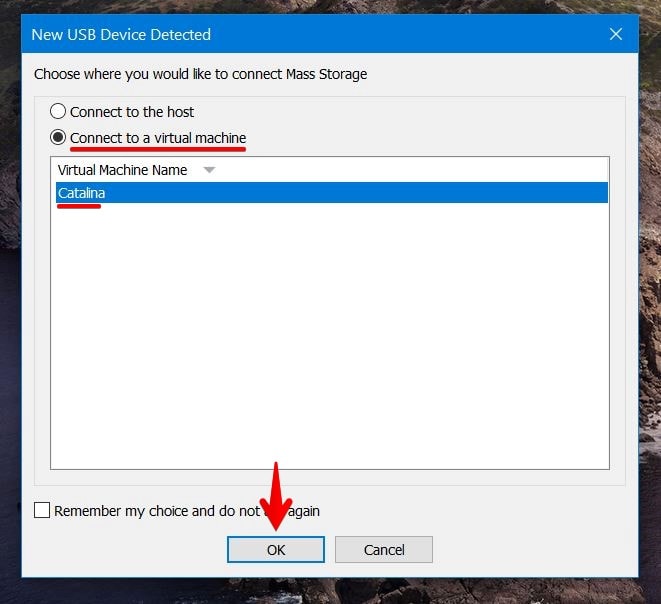
First, insert the USB drive into your computer and select Connect to a virtual machine and click OK. On Mac, there’s nothing you need to do, simply insert.
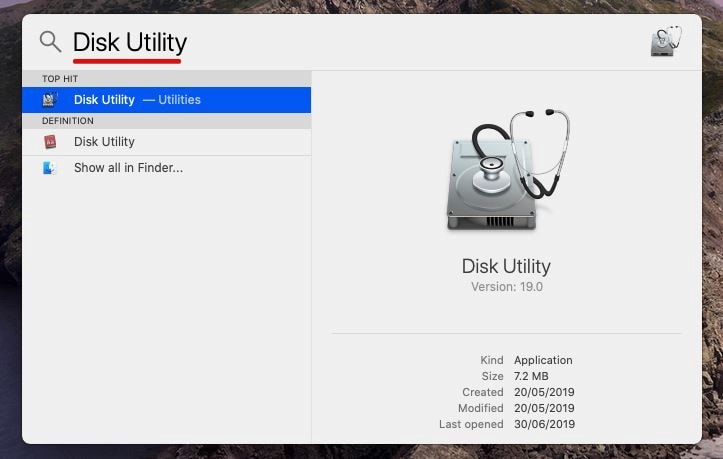
From the top-left corner, click on Spotlight to open it.
There, type Disk utility and hit Enter.
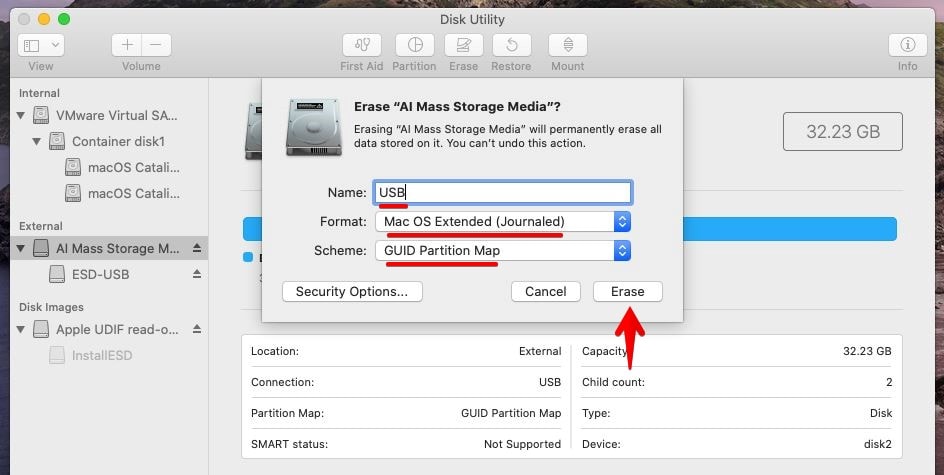
On the Disk Utility window, select the USB thumb drive and click Erase. Then type a name for e.g USB and select Mac OS Extended (Journaled) then click Erase. Make sure all the devices are shown so you can choose the drive correctly. Here’s how it looks like.
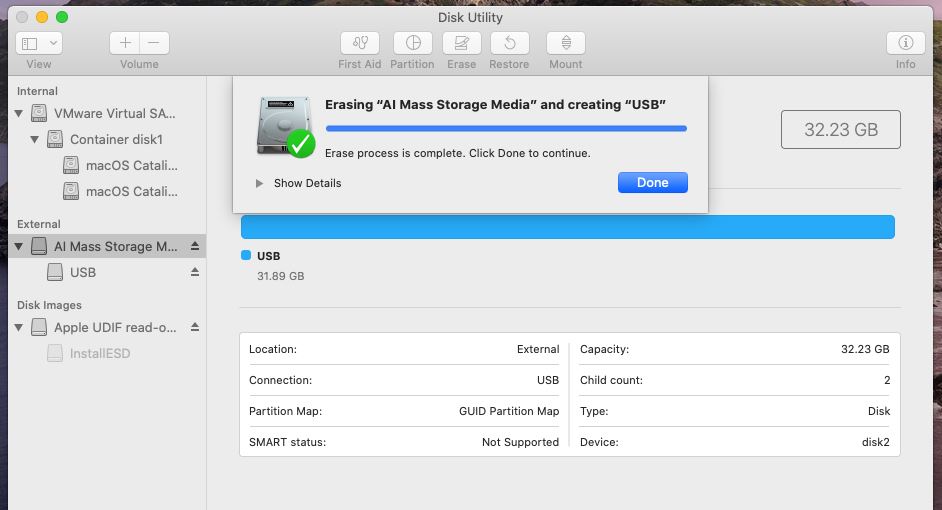
After it’s done, click on Done.
Step Three: Create The Bootable USB Drive
Now it’s time to create the drive bootable with applying some commands from Terminal.
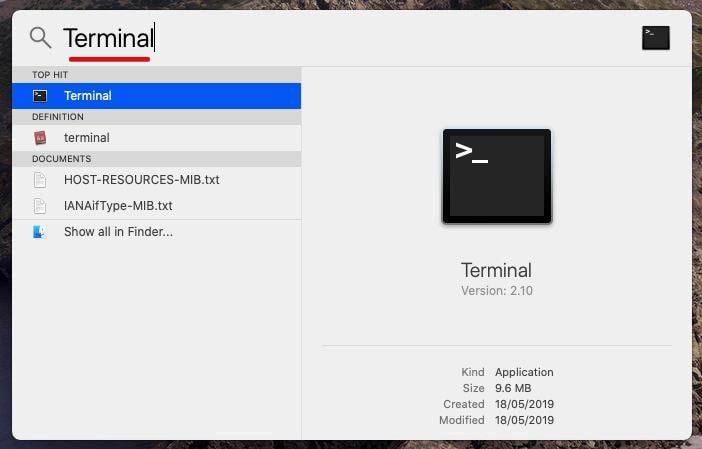
At this point, pull up Spotlight and type Terminal then hit Enter.
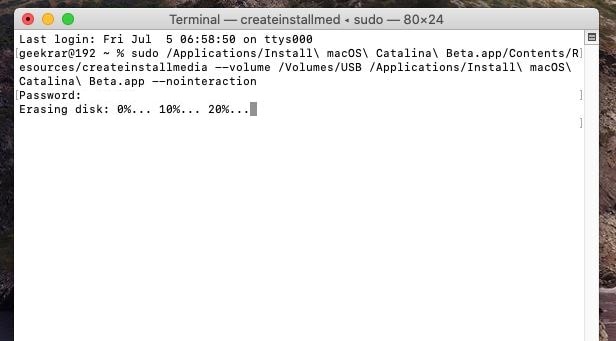
On this window that appears, copy and paste this command and hit Enter. Following that enter your password then hit Enter. This will definitely take some time, be patient.
sudo /Applications/Install\ macOS\ Catalina\ Beta.app/Contents/Resources/createinstallmedia --volume /Volumes/USB Flash Drive/Applications/Install\ macOS\ Catalina\ Beta.app --nointeraction
Note down that if the USB has a different name other than “USB”, you’ll need to change it from the command. For this, simply change the “USB” to whatever your USB name is.
When you’re done, simply close it.
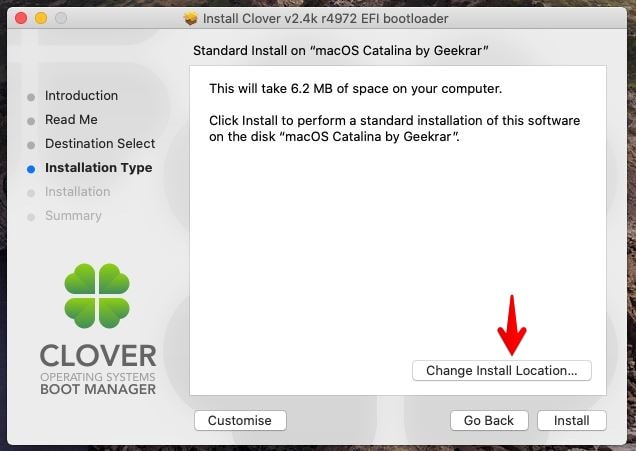
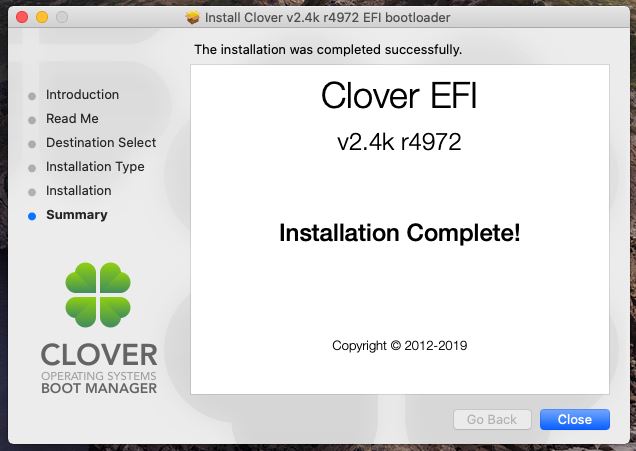
Step Four: Install Clover EFI Bootloader
The bootable USB has now been created but it won’t work for installing macOS on PC. Instead, it will work for installing macOS on Mac. So in order to make this working, we’ll install the Clover Bootloader. This isn’t difficult.
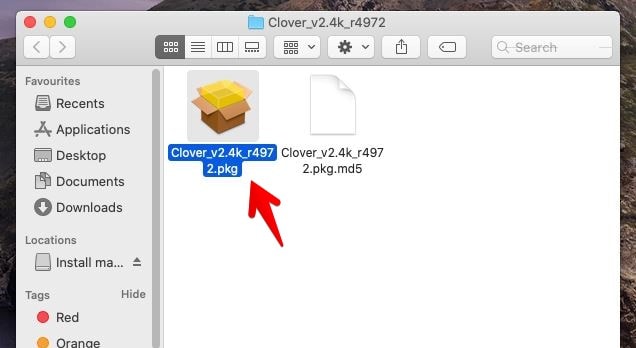
Open Clover package and click on it.
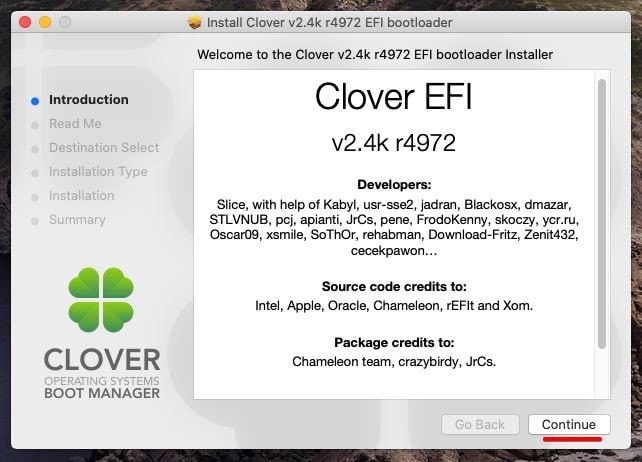
On the Clover EFI Bootloader window, click Continue.
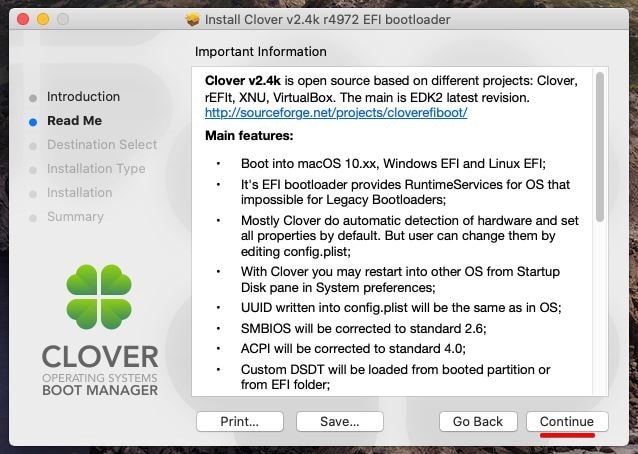
In the next step, simply click Continue.
Now click Change Install Location and click Continue.
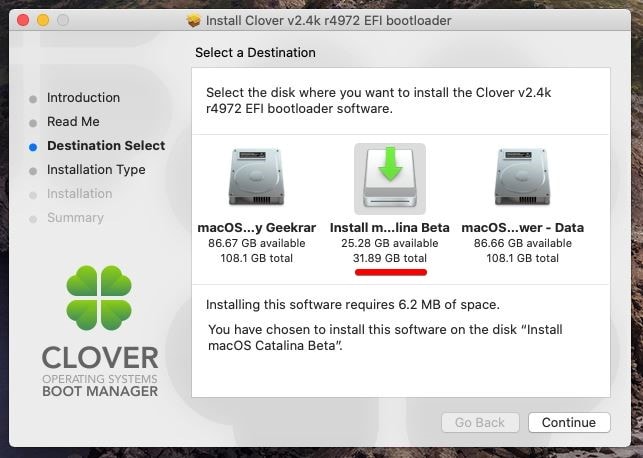
Select the USB Drive which is Install macOS Catalina Beta and click Continue. Since the USB drive was previously changed to Install macOS Catalina Beta, we’ll select this.
Now click on Install.
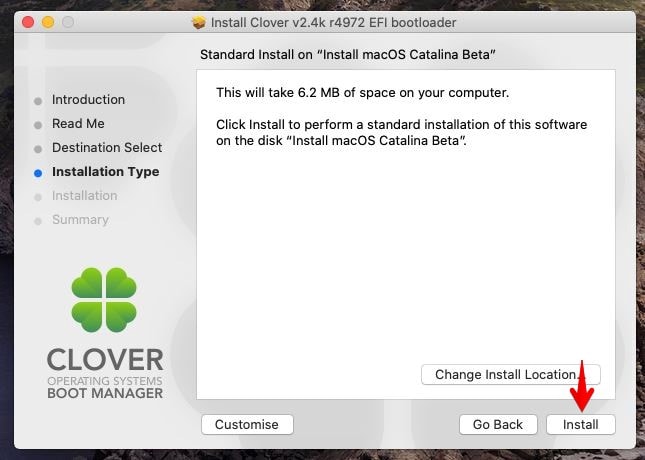
When you’re asked for your password, enter it and let it install. It will take some time, so please wait.
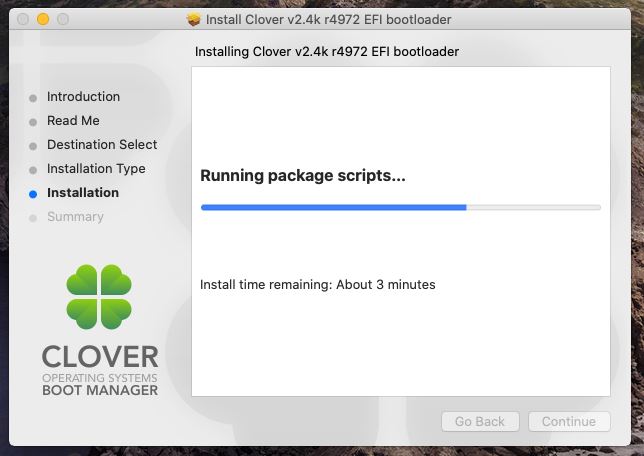
When it has finished, simply click Close.
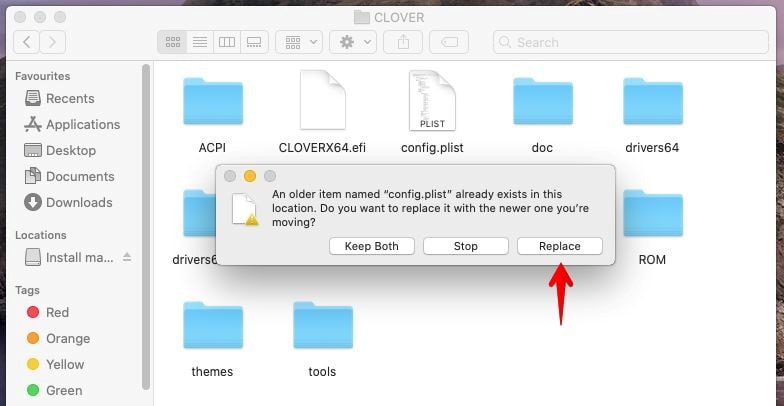
Step Five: Replace Config.plist with the Provided one
This file is important for the installation and we’ve provided the configured one to you so here’s what to do with it.
Navigate to EFI > Clover and drag and drop the file into it. You’ll be asked whether you want to replace, click on Replace.
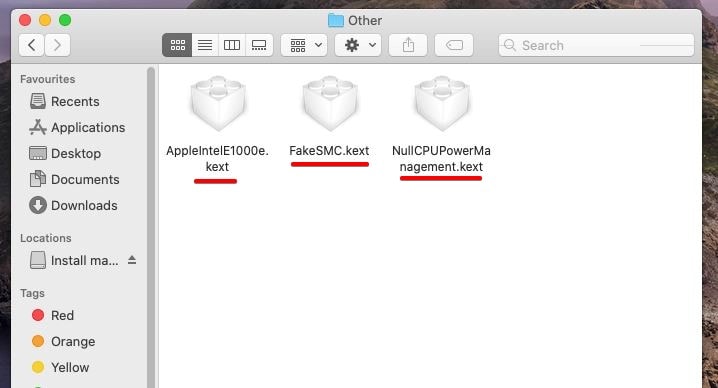
Step Six: Include Kexts
The kexts convince the operating system pretending it is a real Mac, which makes the booting successful. We’ll add some kexts. While you’ve the kexts downloaded before, it’s time to include the kexts to the Bootable drive.
Navigate to EFI/CLOVER/kexts/Other/ and add Fakesmc.kext, your ethernet kext, NullCPUPowerManagement.kext.
All set! We’ve come a far way, but that’s the end to it. If you’ve some questions or concerns regarding it, we’re happy to answer.
CloverEFI-4MU
Introduction
This repo is actually just documentation about How to install Clover EFI Bootloader using manual methods under Linux (eg. Ubuntu). Clover binary used on this repo is similar to Official GitHub here; except additional configs, kexts, etc.
But if you prefer using simpler methods with automated (or guided) steps, I guess you use this clover-linux-installer script by m13253. DWYOR..!!! (Do With Your Own Risk).
What is Clover?
Clover is one of bootloaders developed by Slice, Apianti, BlackOSX, Dmazar, Blusseau, and other devs with great community for booting OS X, Windows and Linux on Mac or PC with UEFI / BIOS firmware.
Some of Clover features are:
- Supports for booting OS X, Windows and Linux (Android x86 as well)
- Running on Legacy BIOS (MBR, GPT) or UEFI firmware (GPT only)
- Customizable GUI including themes, icons, fonts, background images, animations, and mouse pointers.
- … and much more. Here’s for details.
Requirements
However, following this method you have to meet conditions below:
- Desktop PC or Laptop with Legacy or UEFI (GPT partition scheme is recommended)
- Pre-installed Ubuntu Linux (and it’s flavours), Debian or Live Mode
- Basic knowledge about BIOS (Firmware) configuration, partition scheme, OS Installation
- Make sure that your PC is able to boot Clover. For testing purpose; create USB Clover with this Tool via Windows. Then boot from it
- Make a Backup of «Internal EFI Partition» on a safe place.
Before You Begin
-
Clone or Download whole repo: $
git clone https://github.com/badruzeus/CloverEFI-4MU -
My Clover Themes collection: $
git clone https://github.com/badruzeus/MyCloverThemes(Optional). Go to docs for Theming how to -
Follow provided «Video Tutorial» below, or skip to «Manuall Installation» methods on next steps:

-
If you’re not sure; install it to EFI Partition on USB FlashDisk with GPT scheme. Using gParted create 200MB partition, Manage Flags as: boot,esp.

Manual Installation on GUID Partition Table (GPT)
Assummed «Target_Disk» is /dev/sda (Whole Disk) and «Target_Partition» is /dev/sda1 (EFI System Partition).
Check with Terminal: $ sudo blkid or sudo fdisk -l
-
Set /dev/sda1 as Primary Boot Record / PBR (for Legacy and GPT)
- $
cd ~/CloverEFI-4MU/BootSectors - $
sudo dd if="/dev/sda1" bs=512 count=1 >origPBR - $
sudo dd if="/dev/sda" bs=512 count=1 >origMBR - $
cp boot1f32 newPBR - $
cp origMBR newMBR - $
sudo dd if=newPBR of="/dev/sda1" bs=512 count=1 - $
sudo dd if=newMBR of="/dev/sda" bs=512 count=1 conv=nocreat,notrunc - $
sudo dd if=origPBR of=newPBR skip=3 seek=3 bs=1 count=87 conv=notrunc - $
sudo dd if=boot0af of=newMBR bs=440 count=1 conv=notrunc
- $
-
Placing Clover on EFI System Partition (ESP)
(Please note that\EFI\BOOTdir is not always empty, some linux distros maybe placinggrub, kernel, etc.here. If this is your case, just copyBOOTX64.efifile, not replacing a whole dir).a. Option 1 via Command Line
// Mounting EFI System Partition- $
mkdir ~/esp - $
sudo mount -t vfat /dev/sda1 ~/esp
// Copying Clover required files
- $
cd ~/CloverEFI-4MU - $
sudo cp boot ~/esp - $
sudo cp -r EFI/BOOT ~/esp/EFI - $
sudo cp -r EFI/CLOVER ~/esp/EFI
b. Option 2 via File Manager (GUI)
- Mount ESP as Option (1) first
- Terminal: $
sudo [FileManager]// File manager could be nautilus, pcmanfm, thunar, etc. - Manually copy-paste required files as point (a), be careful!
- Terminal: $
sudo umount ~/esp(if all have done).
- $
Bugs & Troubleshooting
-
Press «F1» for Clover Help (Shortcut keys, Functions, etc.)
-
Depends on your UEFI firmware, for adding CLOVER as «New Boot Entry» is usually:
fsX:\efi\clover\cloverx64.efi// (fsX = fs0, fs1, fs2, etc), or just\efi\clover\cloverx64.efi
-
Phoenix or InsydeH2O maybe not including «Boot» Entry Option on it’s firmware (BIOS). On this case, you need manually adding Entry via UEFI Shell. For example adding Clover Entry located on FS0 (could be FS1, FS2 etc. depends on ESP):
map FS*bcfg boot dump
// If02is last Boot Entry, add Clover on03:bcfg boot add 03 FS0:\EFI\CLOVER\CLOVERX64.efi "Clover EFI Bootloader"
// OFC, you could add another entries eg. Windows Boot Manager, Linux Grub2, etc. on 04, 05..If Clover is not set as 1st boot order, you need pressing StartUp key (could be F12, Esc, etc.) and manually select it once computer powered on. Most AMI Aptio BIOS has «Entry Override» option.
-
If you’re unable to «Launch EFI Shell» from BIOS, place «shellx64.efi or SHELLX64.EFI» on your ESP root (not EFI dir).
Some old AMI Aptio firmwares (eg. v2.00) need this. -
Still having trouble accessing Shell via Firmware? Install Clover to Bootable USB FlashDisk using BDUtility.exe under Windows then boot from it. Run UEFI Shell provided by Clover.
Credits
Apple | Canonical | Microsoft | Clover | cvad | fusion71au | InsanelyMac, Olarila and OSXLatitude Forum.
:: Follow me on AppleLife / Facebook / InsanelyMac / MacRumors / Reddit / SourceForge / Youtube ::
Bring me to Life:
Donate

Hello! in this post I’m gonna show you how to make Hackintosh Bootable USB Drive on Windows without Distro. Without distro means we gonna make a Hackintosh Bootable US Drive for the Vanilla Installation method.
This method works on Mac OS X Yosemite, El Capitan, and Mac OS Sierra. As I’ve tried all that OS myself on my low-budget Hackintosh PC.
Please take note that this method won’t work for High Sierra since Apple uses different file structures in the macOS High Sierra app installer. But you absolutely can update to High Sierra with this method with no problem.
You can read posts on how to safely direct upgrade your Hackintosh to High Sierra here Hackintosh Direct Upgrade From macOS Sierra to High Sierra
Can you direct upgrade to macOS Mojave? or create usb bootable using terminal with this method?
Ya! if your graphics card is compatible with Metal display technology. For more info check this post: Want to Install macOS Mojave on Hackintosh Think Again!
Okay! My Hackintosh PC spec is :
- Processor : Intel Core2 Duo e8500 3.17 GHz: https://amzn.to/2YdfnYQ
- Mobo: MSI G31 TM-P21 LGA 775: https://amzn.to/2J5DAtD
- Memory : 4 GB DDR 2: https://amzn.to/2Y9uUcb
- HDD SATA: SAMSUNG HD160JJ 160 GB: https://amzn.to/2Y8KXXB
- VGA: NVIDIA GeForce 8500 GT 512 MB: https://amzn.to/2YduaTw
And below are a short video of my low-budget Hackintosh overview. Skip if you already watch it.
And before you start messing around with your PC. Make sure you know exactly what you are doing. And please do backup all your important data on your drive. And read the guide step by step carefully.
One more thing you need to consider before Hackintoshing your PC is. On some machines, it may have an issue with the ‘Full shutdown.’ So it’s better to plan to dual boot with Windows from the beginning.
For more info about this you can read the article here: How to Dual Boot Windows and Hackintosh With Clover
Okay! LET’S GET STARTED ON IT!
- 7-Zip stable version Download Here
- Boot Disk utility Download Here
- TransMac Download Here
- Paragon Hardisk Manager Free Edition Download Here
- USB Flash Drive 8Gb Get one on Amazon here: https://amzn.to/2uUyzAW (For El Capitan need a 16GB USB Stick)
- Mac OS Installer retail Version of Yosemite, El Capitan or Mac OS Sierra, choose one you desire to make the bootable USB.
To get Mac OS X InstallerApps you can ask help from a friend who has “real Macintosh” to download it from the App Store. Or alternatively, you can download it through torrent.
Make sure you have a torrent client such as Transmission etc for downloading via torrent. Just search on google with the keywords something like e.g Download Mac OS (X) InstallerApps.
[Note!] In this article, I use macOS Sierra for ‘example’
Work with 7-Zip
We start with creating a new folder on the desktop, name it “Mac OS” and work with 7-Zip to open Mac OS installer apps.dmg
Navigate to “Install macOS Sierra.apps > Contents > SharedSupport >Extract “InstallESD.dmg” to “Mac OS” folder that you have created on your desktop.
[Note!] Unless you have the original Installer App. This is important to extract the ‘InstallESD.dmg’ file first if you work with a DMG file. So you don’t have to deal with a ‘payload’ file inside the folder.
See screenshot, click to enlarge!


Now go to the extracted file on “Mac OS Folder” right-click “InstallESD.dmg” to open it with 7-Zip.


Next, extract these files to the folder that you create on your desktop earlier;
Packages folder, AppleDiagnostics.dmg & AppleDiagnostics.chunklist, BaseSystem.dmg & BaseSystem.chunklist. See the screenshot below

Go to the “Mac OS folder” where all files are extracted, and then find “BaseSystem.dmg” right-click to open it with 7-Zip.
And you’ll see a few files, find for ‘4.hfs’ or ‘5.hfs’ file, then extract it to ‘Mac OS Folder’ (See screenshot below)


Okay! now we have all files to work with Boot Disk Utility. Before opening BDU plug in your USB Flash drive. And make sure you have backup any important data inside your USB drive!
Format USB Drive and Install Clover with BDU
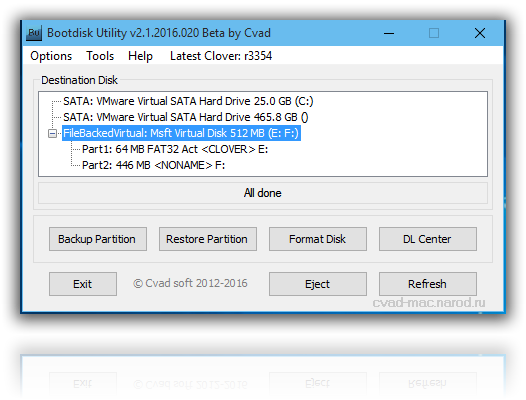
Run Boot Disk Utility As Admin Go to Option & Configuration thick on “Boot Partition Size (MB)” change size to 200.
Select your USB flash disk that appears in BDU click ‘Format Disk.’ It will create two partitions 200 MB for Clover & a 7.8 GB blank “NO NAME”space.
[Note!] Make sure your pc is connected to the internet to let BDU download and install the latest CLOVER boot loader.
See screenshot below

After finishing formatting. Click USB Flash in BDU. It will expand into 2 partitions select “NO NAME” partition and then click Restore Partition.

A new window will appear, select “4.hfs” you have extracted earlier. See screenshot

Select the ‘4.hfs‘ or ‘5.hfs‘ file depending on which macOS you work with. Then click Open to restore it.
When the process completes, we continue to the next step.
Resize USB Partition using Paragon Hardisk Manager
When the restore process completes the size of the <NONAME> partition was becoming smaller. This is because after restoring the ‘4.hsf’ file into it and BDU has formatted the partition into HFS Volume.
So, to make it back to full size we will use Paragon Hardisk Manager to get the job done. Because we still need to copy some files to the partition.
Run Paragon Hardisk Manager and find US Flash Disk in the Drive list.
You will see three partitions on USB Flash Disk ‘Clover-OS X Base System-Unlocated Space’ select OS X Base System resize it to full size.
See screenshot


Working with TransMac
Now it’s time for TransMac to work with. Run TransMac as admin and select USB Flash Disk (mine is Toshiba Trans Memory)
Click on Hfs + volume > System Installation delete Packages slnk file
Then right-click, select ‘Copy Here’ and find ‘Packages folder’ in ‘Mac OS Folder’ on your desktop, and copy it.
See screenshot below?


Those files are pretty big in size. So, it will need some time to proceed, depending on your PC speed.
So, relax and grab a cup of coffee while you wait for the process to complete. ☕
After done copying the ‘Packages‘ folder, back to “Hfs + Volume” right-click “Copy Here”
Copy and paste these four files: AppleDiagnostics, BaseSystem, and also both chunklist files
This time copy and paste those files to the ‘Hfs + Volume’ root folder.
[Important!] On the other version of macOS, it’s named ‘OSX-Base System.’ And do not copy to System > Installation folder like when you copy ‘Packages’ files. Once again I remind you [Important!]
See screenshot


So it should be placed outside along with the ‘macOS Sierra app’ and other files in the HFS+Volume root folder.
When you’re done no we go to the next step.
Adding essential kext and pre edited config.plist to Clover EFI Partition
Now the final step is to make it works. We need to add essential kext and edit the config.plist in Clover EFI.
By the way, you can use pre-edited config.plist and additional kext I have uploaded below.
Download config.plist that I use here: DOWNLOAD
Download kext and driver here: DOWNLOAD
Copy config plist to Usb flash > Clover > EFI > CLOVER replace existing config.plist there.
Next, copy all kext to Clover > EFI > CLOVER > Kext > Other (for OS Sierra) 10.11(for El Capitan) and so on. See screenshot below


For driver32 (optional) put it on the driver32 folder and for driver64 put it on the driver64 folder.
[Note!] Apple PS2 Controller kext will work like a charm! 🙂
Done!
Now you have a bootable US drive and are ready to install Mac OS (X) on your Hackintosh PC.
For post-installation and how to set BIOS etc, you can read here: Hackintosh post installation and bios setup
For creating a bootable USB drive from Real Mac computers or from a working Hackintosh machine, you can read here: How to Make Mac OS Bootable Drive With Disk Utility
For the conclusion and you to Taking Note!
For me, every Hackintosh stuff is only for FUN and educational purposes only. I am not responsible for any damage caused by following this tutorial.
Make sure you know exactly what you’re doing and understand the risk as well. If you really love the Mac OS X system, then you should buy a real Mac by Apple.
However, if you still have a problem please don’t hesitate to hit me in the comment section below. Or share your experience on the Forum website and let’s help each other.
[Special note!] The first idea of creating a macOS bootable USB from Windows using BDU isn’t like this. But there’s another author who also has the same idea but uses different tools. What I mean is the idea of using 7-Zip and Paragon Hard disk Manager, the credit of reference source is goes to OSX Arena. But! the difference is, here I find the way how to make the USB bootable work even on a low-budget PC (core2 duo). And even it will also work to use it on a real Macintosh computer as well to install macOS.
Post last updated: 04/11/2019
BootDev
Создание загрузочных дисков и прочие полезные мелочи
Страницы
2018-11-16
Загрузочная флешка с UEFI Shell
Содержание
Подготовка Флешки
Можно обойтись и без форматирования. Главное чтобы на флешке был раздел отформатированный в файловую систему FAT32. Замечу, что в Windows 10 последних редакций, отсутствует ограничение на создание только одного раздела на USB-флешках.
Для других версий Windows, несколько разделов на флешке можно создать с помощью программы BOOTICE. Подробнее об этом можно почитать по этой ссылке.
Скачиваем UEFI Shell
Скачать Clover можно по тут https://sourceforge.net/projects/cloverefiboot/files/Bootable_ISO/. На странице по ссылке качаем последнюю версию архива.
Загрузочная Флешка с Shell.efi
Открываем флешку, после подготовки. Копируем скачанный файл Shell.efi по пути /EFI/boot. Последовательность данных каталогов нужно создать.
Переименовываем скопированный файл в boot * .efi. Вместо звездочки вписываем архитектуру скачанного файла x64 , ia32 , arm или aa64 . Должно получиться что то подобное boot x64 .efi, boot ia32 .efi, boot arm .efi или boot aa64 .efi.
Можно сделать и универсальный вариант. Разместить Shell.efi файлы всех архитектур, переименовав их в соответствующие имена. В таких условиях флешка будет грузиться на любой из архитектур, файлы которых расположены в папке /EFI/boot.
Проверим флешку в виртуальной машине.
Загрузочная Флешка с Clover
Открываем скачанный ISO-образ с загрузчиком. Для этих целей хорошо подойдет 7-Zip.
Извлекаем содержимое ISO-образа в корень флешки.
Проверяем на виртуальной машине.
Загрузочная Флешка с rEFInd
Открываем скачанный архив с загрузчиком. Для этих целей хорошо подойдет 7-Zip.
Извлекаем содержимое архива в корень флешки.
Проверяем на виртуальной машине.
Для Чего Нужна Флешка с Загрузчиком
Загрузочная флешка с Clover или rEFInd может помочь при различных ситуациях.
Ситуация 1 . когда у вас слетел основной загрузчик на жестком диске, и вы не можете загрузить операционную систему. Загрузчик на флешке автоматически определит все имеющиеся операционные системы, загрузочные устройства, и вы сможете корректно загрузить операционную систему и восстановить основной загрузчик.
Ситуация 2 . У вас был установлен дистрибутив Linux, с загрузчиком GRUB2. Вы решили установить второй операционной системой Windows. После установки загрузчик Windows перезаписал загрузчик GRUB2 и установленный Linux больше не доступен для загрузки. В данной ситуации загрузившись с флешки с загрузчиком, вы сможете загрузить установленный Linux, и уже через него вернуть загрузчик GRUB2 обратно. GRUB2 в свою очередь определит установленный Windows, и позволит грузить обе операционные системы.
Ситуация 3 . На используемой материнской плате отсутствует UEFI Shell. А вам он необходим, для установки специального драйвера в автозагрузку (такое обычно делают на системах с процессорами Xeon для увеличения быстродействия), или добавления новой загрузочной записи.
Вопросы рассмотренные в данном материале: Как создать загрузочную флешку с UEFI Shell? Где скачать UEFI Shell? Как установить Clover на флешку? Как установить rEFInd на флешку? Как можно использовать загрузочную флешку с UEFI Shell?
В заключении приведу пару полезных ссылок. Описание командной оболочки UEFI Shell, смотрим тут. Решение проблемы загрузки ОС с помощью UEFI Shell, описано здесь. Загрузка и установка драйверов в UEFI Shell, рассмотрена тут.
Источник
Installing
Clone this wiki locally
Using the installer
Each Clover revision contains file Clover***.pkg which is macOS executable installer to make all work automatically.

If you want to make this manually then read carefully.
Install for legacy boot
When you power on your computer you see BIOS which want to start some operating system. Old computers (legacy computers) have legacy BIOS which is able to boot some drive HDD, CDROM or USB-HDD. The BIOS read first sector (MBR) from the physical drive into memory and start is as a program written in 16bit codes. The program is less then 512 byte. It named boot0 boot sector. The program boot0 searches the partition table of the drive, finds first partition position (PBR) on the drive and reads there first one or two sectors named boot1. Start the program. The program PBR intended to use on the specific file-system. So use boot1hfs on HFS+ filesystem, use boot1f32 on FAT32 filesystem, boot1ex on exFAT file system and more. After years of investigations we decided to choose one case: drive must be formatted to GPT and have first partition EFI formatted to FAT32. Partition signature will be EF00. We have several variants but recommended one is boot0af It can be installed from macOS by command
sudo fdisk440 -f boot0 -u -y /dev/rdisk0
But the disk should not be system as macOS protect system disk from modifications.
Sector PBR must be updated by commands
Install for UEFI boot
Modern computers have UEFI BIOS which is much larger then legacy BIOS and able to start some EFI-applications from some drives. Usually an UEFI BIOS searches /EFI/BOOT/BOOTX64.EFI. Some BIOSes tuned to search /EFI/Microsoft/Boot/bootmgfw.efi Some BIOSes have own interface to tune what application to start. As we want Clover then we have to mimic to the BIOS-known variant. First one we copy
Second case we make two copies
Clover knows what is bootmgfw-orig.efi and is able to start it if we choose to start Windows from Clover. Moreover Clover is able to write itself as boot option in UEFI BIOS to start the file
and this is recommended configuration because BOOTX64.EFI and bootmgfw.efi will be rewritten at the next Windows update while CLOVER will stay forever. See picture

Second button in low row will perform the writing /EFI/CLOVER/CLOVERX64.EFI into BIOS as first boot option.
To do this manually you may launch Shell.efi (this is the first button in low row at the Clover GUI).
More options about bcfg command you may see by the command
Clover EFI Bootloader
- Slice, with help of Kabyl, usr-sse2, jadran, Blackosx, dmazar, STLVNUB, pcj, apianti, JrCs, pene, FrodoKenny, skoczy, ycr.ru, Oscar09, xsmile, SoThOr, rehabman, Download-Fritz, nms42, Sherlocks, Zenit432, cecekpawon, stinga11, TheRacerMaster, solstice, Micky1979, Needy, joevt, ErmaC, vit9696, ath, savvas, syscl, goodwin_c, clovy, jief_machak, chris1111, vector_sigma, LAbyOne, Florin9doi.
Source code credits to:
Intel, Apple, Oracle, Chameleon, rEFIt and Xom, nanosvg.
Packages credits to :
Chameleon team, crazybirdy, JrCs, chris1111.
Clover is open source based on different projects :
Источник
Хакинтош: разворачиваем macOS Sierra на Intel-PC подробно и понятно
Если вы НЕ МОЖЕТЕ распаковать файлы на флешку, пожалуйста, отойдите от кливиатуры и срочно прочитайте книгу «Компьютер для чайников: подробное пособие как пользоваться ПК».
1. Все файлы залиты на МЕГУ. Кто испытывает с ней проблемы — в комментариях перезалили на торрент.
2. Пожалуйста, не спрашивайте меня про установку Мака на ноутбуки. Прошу вас. Пожалуйста. Это очень геморройный процесс. Поставьте себе убунту и подключите тему Мака. Тот же экспириенс получите
3. Я на хабре редко отвечаю, пишите в вк по всем вопросам.
Данный мануал/гайд/etc написан для тех, кому лень собирать по кускам ту или иную информацию об установке «мака» на PC, все понятно и по полочкам.
Для начала, перед, собственно, установкой самой системы на ПК, нужно определиться, нужна ли она нам или нет, так как сама система очень специфична в плане установки и настройки, если у вас, конечно, не яблочный девайс. Нет смысла объяснять, что разворачивание системы, которая изначально не планировалась для настольных ПК — дело сложное и на это все можно убить от 2-ух до N часов, в зависимости от совместимости железа.
Теперь, разберемся в том, что же такое Хакинтош (Hackintosh): слово «хакинтош» образовалось от слияния двух слов «Macintosh» и «Hack», что по сути означает «взломанный макинтош», хотя ничего общего со «взломом» тут нет.
В данном гайде рассмотрим создание установочной флешки из-под Windows (так как это наиболее популярная система среди «начинающих хакинтошников»), установку системы на чистый диск, расширения ядра под ваше железо и, собственно, установку и настройку загрузчика (именно на этом моменте и многих и возникают проблемы)
Также хочу обратить внимание, что в этой статье работа идет с видеокартами NVidia и UEFI BIOS’ом.
Шаг 1. Оценка и анализ железа
Да, несмотря на то, что Хакинтош так или иначе запускается на почти любых конфигурациях, делает он это всегда по-разному. Поэтому сразу стоит проанализировать наше железо.
Процессоры
Итак, начнем с того, что на машинах на процессорах AMD система работать НЕ БУДЕТ (то предсмертное состояние агонии, в котором она будет прибывать, «работой» назвать очень сложно). Да, по сути, можно поставить кастомное ядро, перепрошить его и так далее, но смысл изобретать велосипед из палок, если так или иначе он все равно сломается. Система встает без проблем на процессоры Intel, начиная с Core i3 (мы говорим конкретно про macOS Sierra 10.12, предыдущие выпуски могут встать также и на процессорах Core 2 Duo и Pentium). В моем случае выпал камень i5 4460 (4 ядра, 4 потока, турбобуст до 3,4 ГГц).
Видеокарты
Далее, определяемся с графикой. Если вы пользуетесь встроенной графикой Intel (в моем случае это HD4600), то скорее всего понадобится отдельный «завод» графики (хотя могут завестись нативно).
Радеоны (AMD) заводятся, но опять же с треском. Например, новые карточки (RX-4**), а также всем известная R9 380 или R9 380x могут просто вывести загрузку в черный экран.
В этом мануале рассматривать завод графики AMD не будем, так как все это сводится к патчам фрэймбуффера и подменам Device ID в загрузчике (что для каждого индивидуально). Подробнее о картах AMD тут: тык (English).
Совсем другое дело обстоит с карточками от NVidia. Заводятся почти все, за исключением некоторых особо-одаренных. Проблемы наблюдаются на 10-ой серии, но, скорее всего, их не скоро будетУже все норм. На картах GTX графика заводится с полпинка, карты выпуска GT тоже не отстают, хотя там и есть некоторые исключения.
Более чем уверен, что вы найдете в списке свою карту.
Сетевой контроллер
Думаю, не нужно разжевывать, как можно определить свою сетевую карту…
Открываем Диспетчер задач → вкладка «производительность» → Ethernet (Windows 10), там большими черными буквами будет сетевуха.
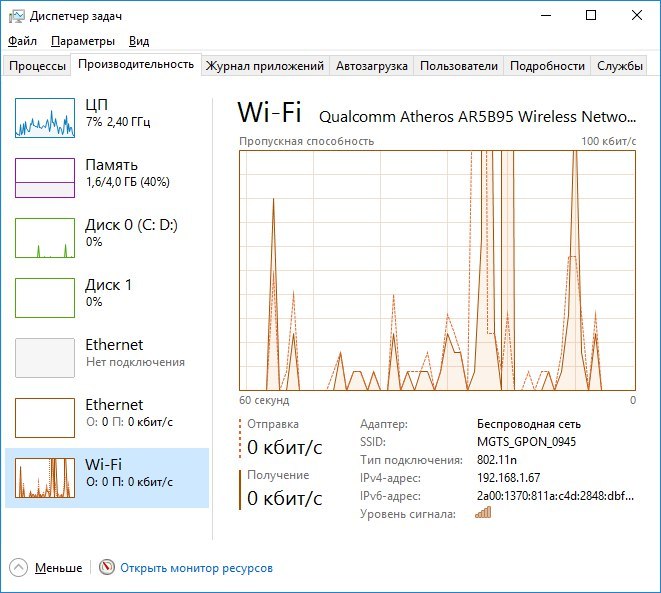
К слову, еще можно в BIOS’e посмотреть
Так или иначе, на этом подробно останавливаться не будем. Сетевую карту в любом случае придется заводить, так что просто предоставлю список поддерживаемых сетевых карт.
Intel Gigabit
5 Series – 82578LM/82578LC/82578DM/82578DC
6 and 7 Series – 82579LM/82579V
8 and 9 Series – I217LM/I217V/I218LM/I218V/I218LM2/I218V2/I218LM3
Realtek
RTL8111, 8168, 8101E, 8102E, 8131E, 8169, 8110SC, 8169SC
RTL8111/8168 B/C/D/E/F/G
RTL8101E/8102E/8102E/8103E/8103E/8103E/8401E/8105E/8402/8106E/8106EUS
RTL8105/8111E/8111F/8136/8168E/8168F
Atheros
AR8121, 8113, 8114, 8131, 8151, 8161, 8171, 8132,8151, 8152, 8162, 8172
AR816x, AR817x поддерживаются
Broadcom
BCM5722, 5752, 5754, 5754M, 5755, 5755M, 5761, 5761e, 57780, 57781, 57785,5784M, 5787, 5787M, 5906, 5906M, 57788, 5784M
Marvell
88E8035, 88E8036, 88E8038, 88E8039, 88E8056, 88E8001
Killer
Память
Ограничений нет. Система запускается на двух гигабайтах. Рекомендовано 4. Автор рекомендует 8.
С железом, собственно, разобрались. Если на этом этапе вы не передумали, идем дальше.
Шаг 2. Делаем загрузочную флешку и развертываем на нее установщик
Итак, вот мы и подошли к практике. Напомню, что делаем мы все это из-под Windows. Сразу говорю, что мы не будем использовать образы с рутрекера, которые так яро советуют люди, у которых все работает хакинтошники «до 18». Для начала нам потребуется утилита BDU (BootDiskUtiliy).
Потребуется флешка >8 ГБ. Любая.
1. Запускаем утилиту
2. Destination disk → выбираем нашу флешку
3. Format disk
Теперь ждем. Флешка отформатируется в Apple HFS и разобьется на два раздела, на один из которых будет установлен загрузчик (CLOVER), а второй останется чистым для того, чтобы туда можно было развернуть установщик.
После выполненных манипуляций получаем примерно следующую картину:
Далее необходимо развернуть установщик на второй раздел. Делаем мы это также через утилиту BDU. Однако, тут стоит вопрос, откуда взять образ. Варианта два: взять готовый, уже распакованный, либо же самолично достать его из Install Mac OS Sierra.app из AppStore. Так как второй способ требует достаточно много времени, да и искать сам этот .app очень долго, воспользуемся первым. Народные умельцы уже приготовили для этой утилиты готовые HFS файлы, извлекли их из .app за нас. Все, что нам нужно, так это скачать его (образ весит почти 5 гигов, так что можно просто поставить на закачку). Собственно, качаем macOS 10.12 Sierra отсюда.
1. Достаем из архива HFS Partition File (HFS+), файл с расширением .hfs.
2. В окне утилиты BDU «Destination disk» выбираем Part 2 нашей разбитой флешки.
3. Открываем «Restore partiton».
4. Ищем и выбираем наш *.hfs-файл. Обратите внимание, что он должен быть не больше PART 2 раздела.
5. Ждем его распаковки.
Все, установщик на флешке распакован и готов к работе.
Теперь нам потребуются некоторые файлы для вашей системы. Все необходимое я собрал в этом архиве. Позже объясню, что и для чего.
Также потребуется еще этот кекст, его тоже скачиваем: тык. Распаковываем папку из архива в корень раздела с Clover’ом, а кекст в папку, которую мы распаковали. Все, готово. Флешка сделана. Идем дальше.
Шаг 3. Установка macOS Sierra на Intel-PC
Проверяем, что флешка вставлена в 2.0 порт. Перезагружаемся, заходим в BIOS. Напомню, что BIOS у нас — UEFI. Отключаем виртуализацию (Intel Virtualization). В приоритет загрузки (BOOT) указываем нашу флешку. Убедитесь, что она будет грузится именно в режиме UEFI. Сохраняем и применяем настройки, перезагружаемся. Попадаем в меню Clover’а.
Clover («Клевер») — загрузчик хакинтоша, а также его установщика.
Нажимаем стрелочку вниз до того момента, пока не попадем на меню Options. Нажимаем Enter. Все, что нам нужно здесь — это вот эта строка:
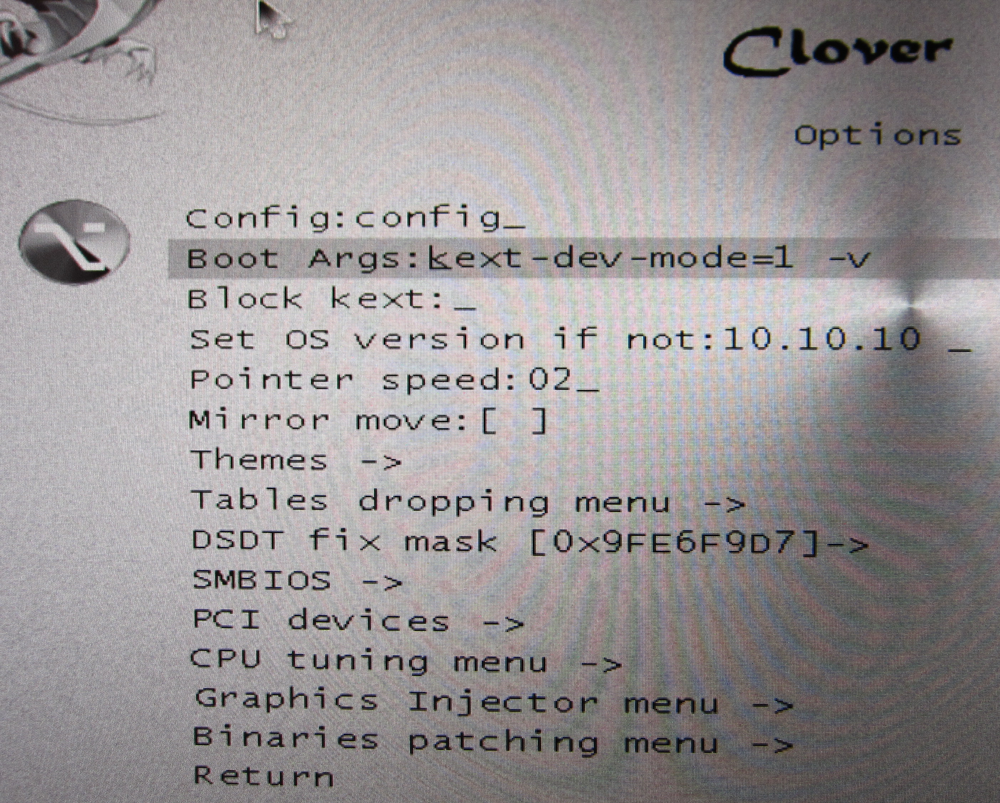
Прописываем в нее следующее:
Объясню, что делает каждый из этих аргументов:
kext-dev-mode=1 — необходимый арг, без которого не запустится хак. Позволяет загружать в систему кексты (Изначально, FakeSMC.kext).
rootless=0 — отключает SIP (System Integrity Protection). Необходимый арг.
-v — «Verbose mode». Вместо красивого яблочка мы увидем «консольную» загрузку, чтобы можно было опознать ошибку, если таковая появится.
npci=0x2000 (или 0x3000, в зависимости от версии PCI-e) — по желанию. Предупреждаем остановку загрузки на этапе сканирования PCI. Можно не прописывать.
nv_disable=1 — по желанию. Чтобы избежать артефактов при загрузке и прочего мусора, отключаем графическую оболочку. Грузимся в нативном режиме графики в православном 144p разрешении. Можно не прописывать.
Применяем аргументы, нажимая Enter. Выбираем Boot Mac OS Sierra from OS X Base System. И вот, пошла родимая загрузка. Сразу разберем некоторые ошибки: still waiting for root device — не успевает подключиться IDE-контроллер.
Missing Bluetooth controller transport — не включилась видеокарта, либо не подрубился FakeSMC.kext. Проверьте, что в папке kexts/other есть FakeSMC.kext. Синезуб тут не при чем.
kext-dev-mode=1 rootless=0 -v npci=0x2000
Или так:
kext-dev-mode=1 rootless=0 -v -x npci=0x2000
Если такие ошибки все же остались, то пробуем грузится так:
В иных случаях помогут только гуглы, хотя эти фиксы должны решать эти проблемы.
Ждем. На некоторых моментах может подвисать. Если зависает больше чем на минуту — ребут. Должно помочь в некоторых случаях.
И вот мы, собственно, в установщике. Выбираем язык и кликаем на стрелочку. Пойдет подгрузка языкового пакета (может подвиснуть на минуту). Теперь открываем Утилиты>Дисковая утилита, нам нужно форматировать диск под macOS. Выбираем нужный диск, нажимаем «Стереть». Для удобства называем новый диск «Macintosh HD». Форматируем, закрываем дисковую утилиту. Далее выбираем диск, на который будем устанавливать систему (в нашем случае, Macintosh HD), устанавливаем.
Установка занимает от 15 до 30 минут, все зависит от скорости записи на диск. После установки система предложит нам настроить интернет подключение — пропускаем, это сделаем позже. Делаем пользователя. Готово, мы в системе. Вернее, в ее обрубке. Пока у нас еще ничего не работает. Если вы перезагрузите машину, то попасть в систему будет невозможно (ввиду отсутствия загрузчика).
Шаг 4. Базовая настройка системы и установка кекстов
Итак, вот мы в системе. Пока она умеет мало, в интернет мы не выйдем, графика не работает, да и вообще все выглядит как-то ну очень плохо. Это нужно исправлять.
Разберемся, что такое кексты.
Kext (Kernel Extension) — расширения ядра, запускающие то или иное несовместимое с оригинальным маком оборудование (Например, откуда в аймаке мы найдем сетевую карту от Realtek или звуковую карту?). Вот они нам сейчас и понадобятся.
Для начала нам потребуется папка PostInstall, которую вы распаковали в раздел CLOVER на загрузочную флешку. Оттуда нам нужна, в первую очередь, утилита Kext Utility, которая позволяет устанавливать кексты в систему. Запускаем ее, вводим пароль от пользователя, ждем, пока увидем надпись «All done».

Устанавливаем кекст на сетевую карту (Папка Network, там по папкам рассортировал под каждую сетевую карту), просто перетаскиваем его в окно программы. Ждем, пока появится надпись «All done». Далее, заходим в раздел CLOVER нашей флешки, далее в kexts, далее в Other. Копируем оттуда FakeSMC.kext в любое место (Лучше в ту же PostInstall), далее тем же путем, что и кекст на сетевую карту, устанавливаем его. Также потребуется кекст на USB 3.0. Он был в архиве Legacy_13.2_EHC1.kext.zip, который вы распаковали в PostInstall. Устанавливаем его.
Готово, мы завели интернет, USB и позволили системе вообще загружаться (FakeSMC.kext имитирует чип System Management Control, который присутствует только на материнских платах Apple. Без этого кекста система просто не стартанет).
Теперь установим загрузчик. Заходим в папку PostInstall → Clover_v2.3k_r3949. Там есть *.pkg файл, открываем его.
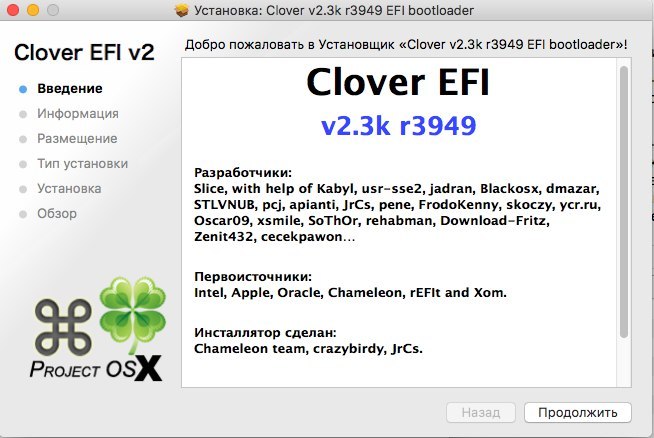
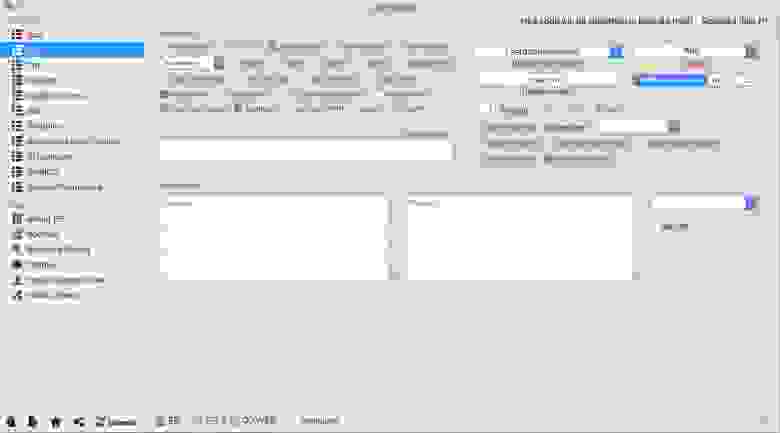
Кликаем продолжить, читаем инфу о загрузчике (вру, тоже нажимайте продолжить). Далее, в левом нижнем углу нажимаем «Настроить».
Для UEFI-загрузки выставляем следующие настройки:
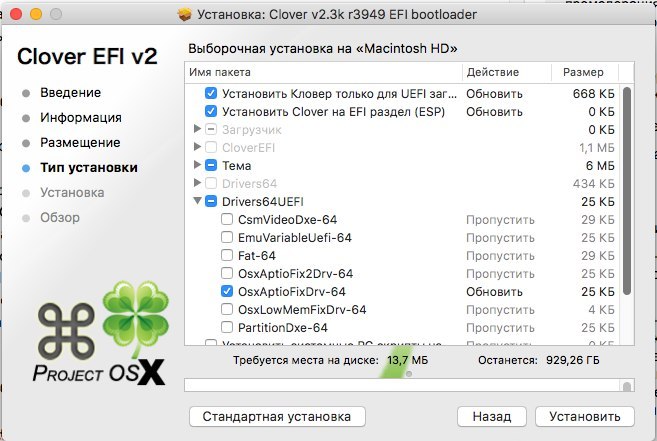
О легаси-загрузке поговорим позже, так как там все немного сложнее и придется патчить DSDT.
Нажимаем «Установить». Пойдем процесс установки загрузчика.
Готово, загрузчик установлен.
Шаг 5. Настройка загрузчика
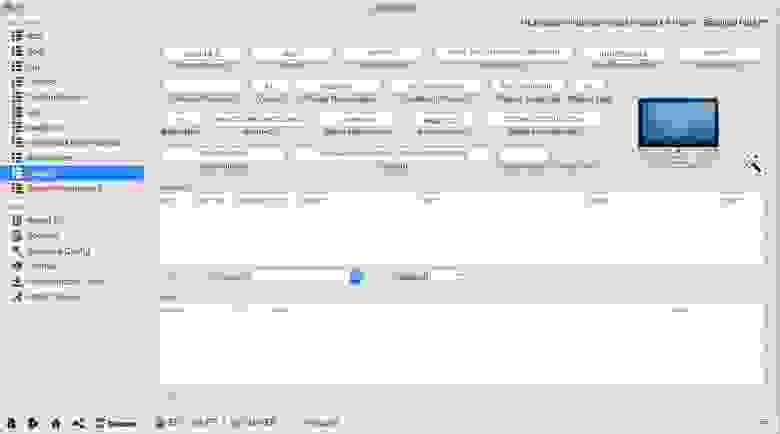
После установки мы получим чистый, ненастроенный загрузчик Clover, который необходимо немного подконфигурировать. Открываем Clover Configurator (в будущем не советую пользоваться данной программой для точечного редактирования конфига загрузчика).
Для начала нам необходимо попасть на EFI раздел с загрузчиком. В левом меню нажимаем Mount EFI. Далее нажимаем Check partition, появится таблица всех разделов. Нужный нам раздел должен находится на том же разделе, что и Apple_HFS , он отображается как EFI EFI. Нажимаем Mount partition. В списке выбираем нужный нам диск (Например, disk0s1). Обратите внимание, что есть баг, когда не видно всех разделов. Покрутите колесиком мышки, так вы сможете листать между разделами и выбрать нужный.
Далее нажимаем Open Partition. Откроет «папка» с нужным разделом. Переходим EFI>CLOVER. Копируем plist.config в папку PostInstall, для удобства. Также на всякий случай копируем его еще куда-нибудь, так как тот, который мы только что скопировали, будем редактировать. А еще один для бэкапа. Копируем, открываем plist.config.
Видим примерно следующее:

ACPI — Фиксы не трогаем, дропаем (DropOEM) нашу видеокарту (DropOEM_DSM работает, когда встречаются два DSDT патча. Поэтому оставляем оригинальный метод автопатча загрузчиком, а наш, если таковой появится, отключаем).
Переходим в секцию BOOT.
Итак, вот тут нам следует покопаться. Аргументы выставляем сами, в зависимости от системы.
-v (verbose) — уже знакомый «текстовый» режим загрузки. Лучше не включать, а прописывать вручную при необходимости.
arch — архитектура. В моем случае x86_64
npci — уже известный нам ключ. Выставляем при необходимости. Рекомендую первую загрузку делать без него, но в Verbose mode.
darkwake — отвечает за режим сна и гибернацию. Имеет 7 режимов. Если сон не заведется изменением hibernatemode в терминале, то рекомендую методом проб и ошибок найти нужный режим дарквэйка.
cpus=1 — запуск с использованием только одного ядра. Не рекомендую выбирать.
nvda_drv=1 — активация вебдрайвера НВидии, который мы поставим чуть позже. Выбираем, если у вас nVidia.
nv_disable=1 — отключение графики невидии и запуск на нативном драйвере мака. Лучше не выбирать, но при необхожимости вручную прописывать.
kext-dev-mode=1 и rootless=0 уже объяснялись ранее.
Переходим в правую подсекцию.
Default Boot Volume — раздел, с которого по-умолчанию будет начинаться выбор диска для загрузки. По-умолчанию LastBootedVolume (последний выбранный раздел).
Legacy — Legacy Boot для старых версий Windows и Linux. Очень сильно зависит от аппаратной части и построения БИОСа, поэтому были разработаны несколько алгоритмов:
LegacyBiosDefault — для тех BIOS UEFI, где есть протокол LegacyBios.
PBRTest, PBR — варианты PBR Boot, тут просто перебором. В моем случае работает PBR.
XMPDetection=YES — важный параметр. Фиксирует количество оперативной памяти, слотов, плашек, частоту и количество каналов.
DefaultLoader — если на разделе несколько загрузчиков, выбираем дефолтный. Не должен быть пустым!
Timeout — время до автоматического бута.
Fast — параметр, пропускающий выбор раздела и сразу переход к загрузке.
-1 (Timeout -1) — отключение автобута.
Секцию CPU пропускаем, загрузчик сам подцепит нужные значения. Devices также лучше пропустить, если вам нечего «фэйкать». Disable Drivers — отключение ненужных драйверов при загрузке. GUI — настройка внешнего вида загрузчика. Думаю, пояснять тут ничего не нужно, особых параметров тут нет. Разрешение экрана, язык и тема меню. Все просто. Graphics — настройка и инжекты графики.
Параметр Inject NVidia не трогать! На запуске будут артефакты. Он предназначен для запуска старых карт линейки GT
Kernel and Kext Patches — патчи и кастомизация ядра. По-умолчанию выбран Apple RTC. Лучше не трогать. SMBIOS — самый сок, кастомизация и подделка «мака».
Для настройки заводской информации нажимаем на иконку волшебной палочки. Далее выбираем iMac (Если ПК) или MacBook (если ноут).
Не добавляйте ничего в Memory и Slots. Это чисто косметические параметры, которые кловер подцепляет на этапе загрузке. Неправильно выставленные параметры могут вызвать конфликты.
WARNING: Видеокарты Nvidia без правок полиси-кекста работают только на мак-моделях iMac13,1 и iMac14,2.
В AppleGraphicsControl.kext/Contents/PlugIns/AppleGraphicsDevicePolicy.kext/Contents/info.plist исправляем Config1 на none вот тут:
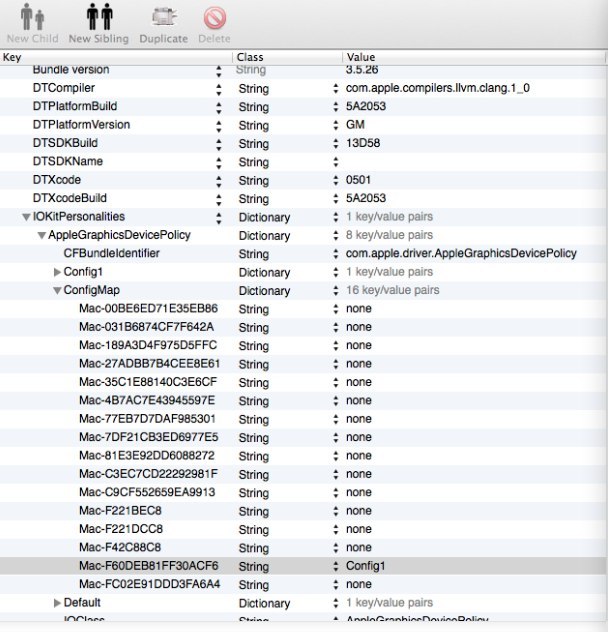
Теперь должно работать.
Готово. Больше не трогаем ничего, базовые настройки мы сделали. Сохраняем наш файл. Теперь копируем его в папку CLOVER раздела EFI, авторизируемся, заменяем. Напомню, что перед этим вы должны были сделать бэкап.
Шаг 6. Установка графического драйвера и первая перезагрузка
Вот мы почти у цели. Теперь осталось только завести видеокарту. В папке PostInstall лежит пакет WebDriver*.pkg. Открываем его, устанавливаем. Далее он предлагает нам перезагрузится. Перезагружаемся.
Теперь удостоверимся, что мы загружаемся не с флешки, а с жесткого диска в режиме UEFI. Выбираем Boot macOS Sierra from Macintosh HD. Запускаемся.
Готово, вот мы и в системе. На картинке я примерно показал, как будет выглядеть ось после всех настроек. Обратите внимание на то, как система поняла ваш «мак», а также на частоту процессора.

Верным признаком работы драйвера нвидии будет ее логотип на панели задач. Я его отключил, к слову, так как он мешается, но получить доступ к панели управления невидией можно через «Системные настройки. ». Интернет можем проверить через Сафари. USB 3.0 банально воткнув флешку в 3.0 порт.
Дополнительно
Касаемо звука дело обстоит иначе. Если у вас внешняя звуковая карта, то просто скачайте драйвера для нее с сайта производителя (аналоговые устройства, типа микшерных пультов, не требуют драйверов и заводятся сразу). Для встроенной звуковой карты используйте один из этих кекстов:
VoodoHDA. Народные умельцы запилили инструкцию по его настройке. Не буду ее копипастить, а просто дам ссылку на архив.
P.S. Автор рекомендует перемещать кекст руками, однако, это все можно сделать через Kext Utility.
Необходимо выполнить следующие условия, чтобы он заработал:
- Наличие ванильного (чистого) кекста AppleHDA.kext в системе.
- Наличие секции HDEF в вашем DSDT (либо фикс кловера FixHDA_8000->True)
- Указать layout в DSDT (либо в config.plist кловера Devices->Audio->Inject->1,2,28. etc. Выбрать из тех, которые прописаны для вашего кодека выше)
- Убрать ВСЕ патчи для звука (если были в вашем config.plist) из раздела KextsToPatch
- Убрать DummyHDA.kext (если пользовались)
- Если пользовались VoodooHDA.kext — удалить. Также удалить AppleHDADisabler.kext и пересобрать кеш.
- Для Intel HDMI 4000/4600 требуется фикс кловера UseIntelHDMI->True
Собственно, это все. После мы получаем готовую к работе macOS Sierra.
Источник