
What is Windows Installer folder? Is it safe to delete files in this folder? This post of MiniTool Partition Wizard will tell you how to safely free up space with the help of the Windows Installer cleanup utility.
About Windows Installer Folder
In this section, several topice related to Windows Installer folder are talked about. After reading the content below, you will have an overall understanding of Windows Installer folder.
What is the Windows Installer folder?
Windows Installer folder is a protected folder with System & Hidden attributes, which can be found under the Windows folder. When you install a program in Windows, its .msi setup package will be copied to the Installer folder.
The Installer directory is a cache location for installer data files of various applications installed on the PC. When you repair, uninstall, or reinstall the program via Apps & Features in Settings or Programs & Features in Control Panel, you are required to use the .msi package from the Windows Installer folder to do these operations.
Once the corresponding setup package (.msi or .msp) file isn’t found, Windows prompts the error “The installation source for this product is not available. Verify that source exists and that you can access it.”
Common issues with the Installer folder
However, you may find that the Installer directory grows and consumes a massive amount of hard disk space. This phenomenon often occurs and it can be seen in many forums or communities. Well, here is a true example.
On my SSD machine, the C:\Windows\Installer folder is massive and takes up about 15% of my total disk space. Is there a way to clean up that folder without killing Windows 8.1/10? Tucking away the installers on the OS partition seems wasteful. -superuser.com
Can you delete all files in this folder?
The answer is negative because the Windows Installer folder contains important files for the accurate run of the system. If you delete these files, you can’t work with your PC. Actually, you should never delete the contents of the C:\Windows\Installer folder randomly.
Windows installer patches sometimes may get orphaned during the process of software uninstallation. When a program is uninstalled, the corresponding .msi package is left behind in the Windows Installer folder. Then these orphaned packages can be deleted.
Besides, many unnecessary files created during normal operations can also be removed. Based on the above fact, you can conduct a Windows Installer folder cleanup Windows 10 with offered methods in this post.
Method 1: Delete Orphaned .MSI Files via PatchCleaner
How to find the orphaned .msi files? PatchCleaner identifies orphaned files in the Windows Installer folder and offers you the option to delete these files or move them to a different location. Follow these steps to use this Windows Installer Clean up tool.
Step 1: Click here to download PatchCleaner。
Step 2: After downloading it, double-click on its setup file and follow the pop-up instructions to install it.
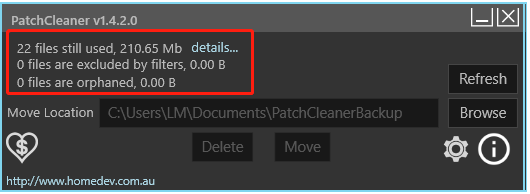
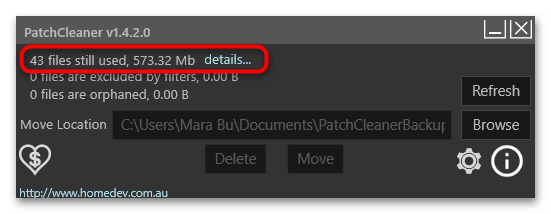
Step 3: When the installation process ends, run it by double-clicking on its icon on the desktop. Then you can see the corresponding sizes of used, excluded, and orphaned files in the Installer folder.
Step 4: You can click details behind each file category to see the detailed information if there are any files. For instance, here is the details of “in use” or valid program entries.
Step 5: If there are any orphaned files on your computer, click details to learn the detailed information. Then you can either delete the orphaned setup package or move it to another folder and then delete it safely after a few days.
How to safely clean up Windows Installer folder? In addition to PatchCleaner, there are some other Windows Installer cleanup programs to do that.
You might also be interested in this: 10 Best Free PC Cleaners to Clean up and Speed up Your Computer
Method 2: Make Use of Windows Settings
Step 1: Open Settings by holding the Windows and I keys at the same time.
Step 2: In the Settings window, click System.
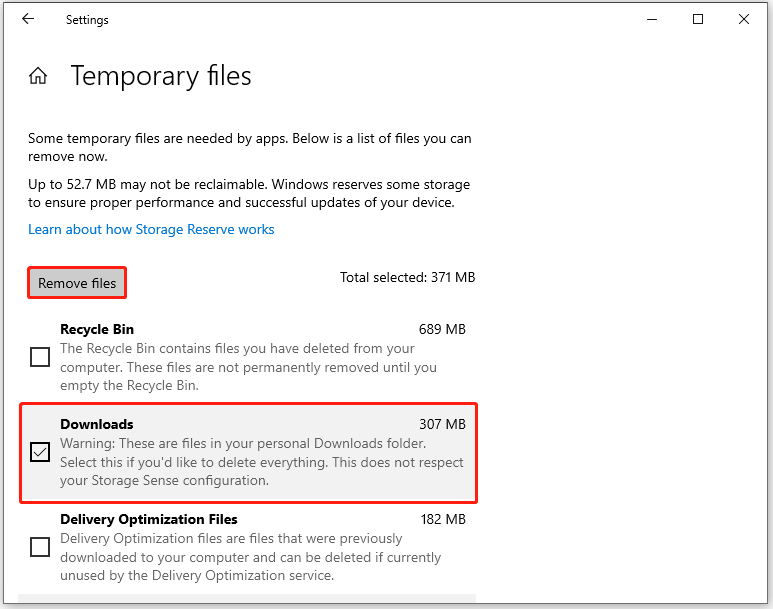
Step 3: Click Storage under the System tab, and then move to the right side of the window and tap Temporary files to continue.
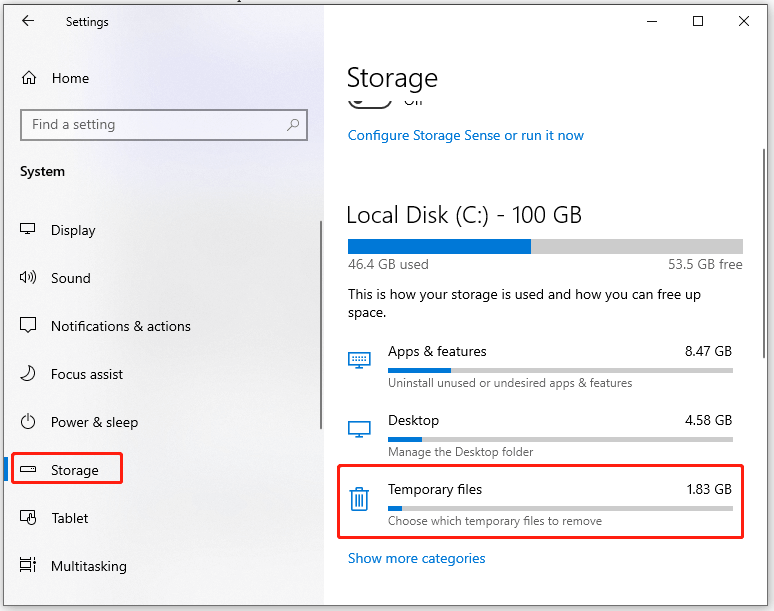
Step 4: Choose file types like Windows Update Cleanup and Downloads from the list, and then click on the Remove files option to execute the operation.
Method 3: Run Disk Cleanup
Disk Cleanup is a built-in utility on Windows devices. It can help you clean up system files safely. It is a free Windows Installer cleanup utility. You can free up space via Disk Cleanup using these steps.
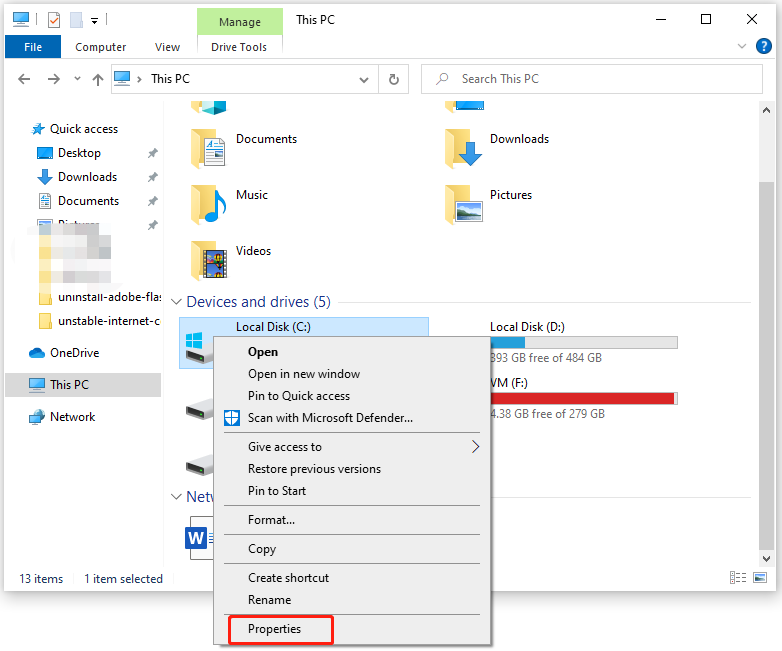
Step 1: Open File Explorer by pressing Windows and E keys.
Step 2: Click on This PC in the left pane, and then find and right-click on the C drive and choose Properties.
Step 3: Tap Disk Cleanup in the Properties window.
Step 4: After you click on Clean up system files, the utility will immediately calculate the disk space that you can free up from the selected drive.
Step 5: Choose files to delete and click OK to carry out the operation.
What is safe to delete in Disk Cleanup? According to your situation, you can delete files including Windows Update cleanup, Windows Upgrade log files, system error memory dump files, system archived Windows error reporting, system queued Windows error reporting, DirectX shader cache, delivery optimization files, device driver packages, system restore points, Recycle Bin, previous Windows installations, and temporary Windows installation files in Disk Cleanup.
You can directly delete unimportant files like Windows Defender, downloaded program files, temporary Internet files, thumbnails, etc.
Further reading:
Though Windows Settings and Disk Cleanup can help you do the Windows Installer folder cleanup job, they probably can’t reach your expectation. What’s more, some errors might appear while you’re using Settings or Disk Cleanup. According to user reports, errors like Settings not working, Settings app not opening, Disk Cleanup won’t open/work, Disk Cleanup stuck on Windows Update Cleanup, etc.
In cases like that, you need a third-party program to find and delete unused files in the Windows Installer folder. MiniTool Partition Wizard is an ideal option. For more information, move to the next section right now!
Related article: How to Clean up Your Computer? Top 8 Methods for You
Find what is taking up your hard drive space with a professional disk space analyzer and then delete unused files or folders. MiniTool Partition Wizard is such a tool. Its Space Analyzer feature enables you to know what is exactly consuming your disk space.
Learn your hard disk usage and delete space-consuming and useless files with this free Windows Installer cleanup utility now!
Step 1: Download and install MiniTool Partition Wizard by clicking the button below and follow the on-screen instructions.
MiniTool Partition Wizard FreeClick to Download100%Clean & Safe
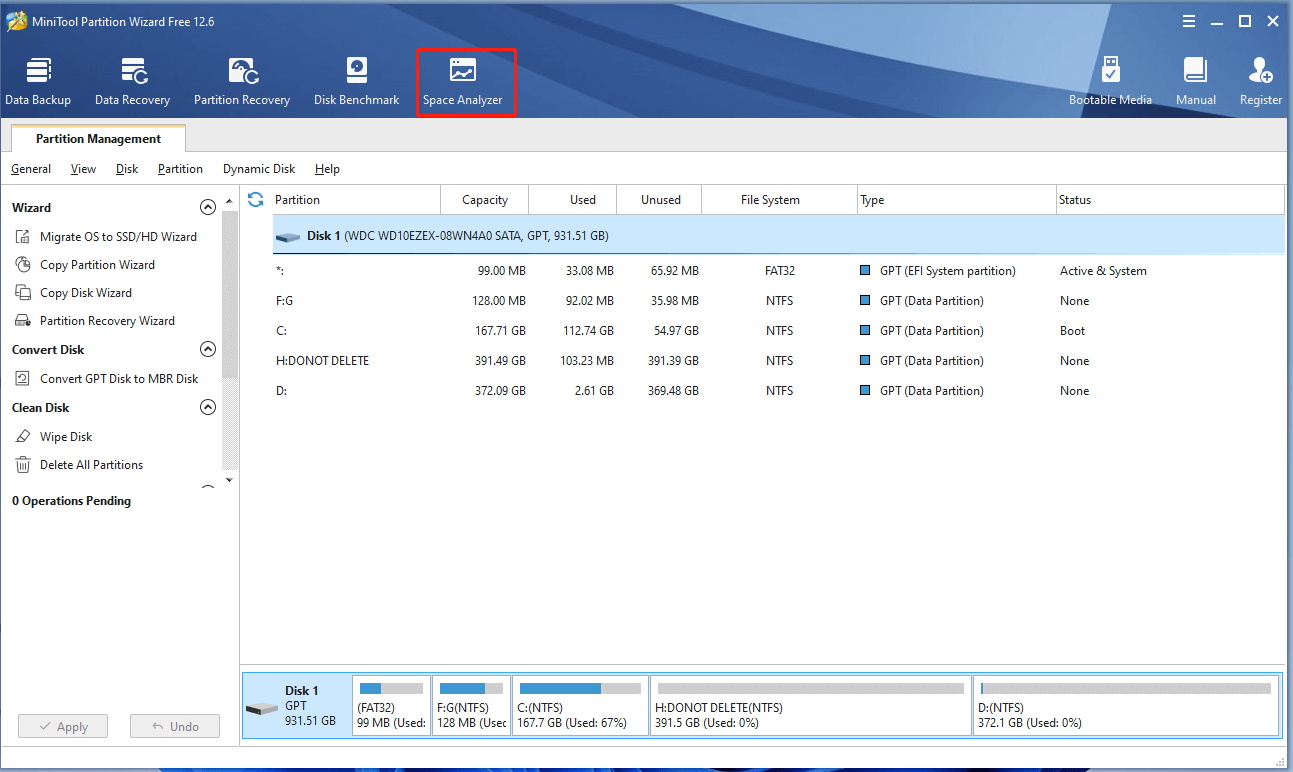
Step 2: Launch this app to enter its main interface.
Step 3: Click on the Space Analyzer feature in the top bar.
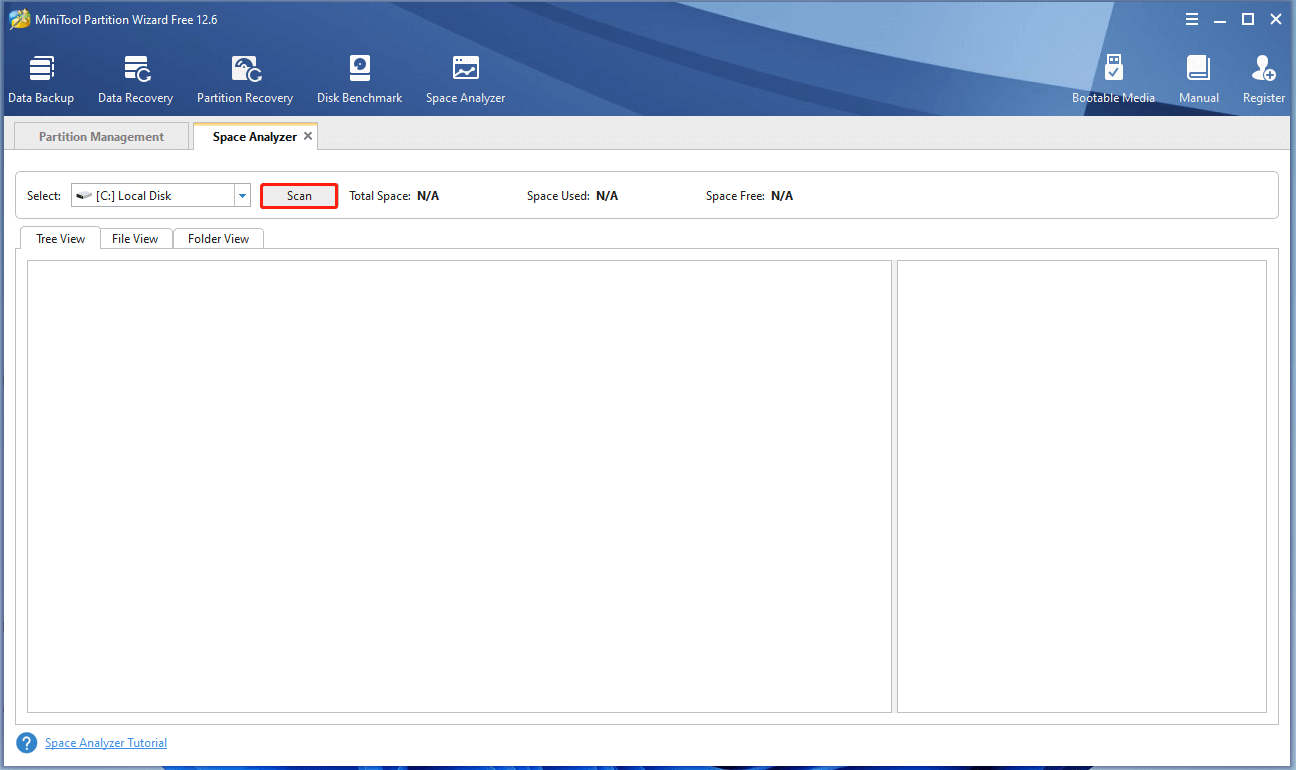
Step 4: In the next window, choose C from the drop-down menu and click Scan. Then the program will automatically scan the selected drive.
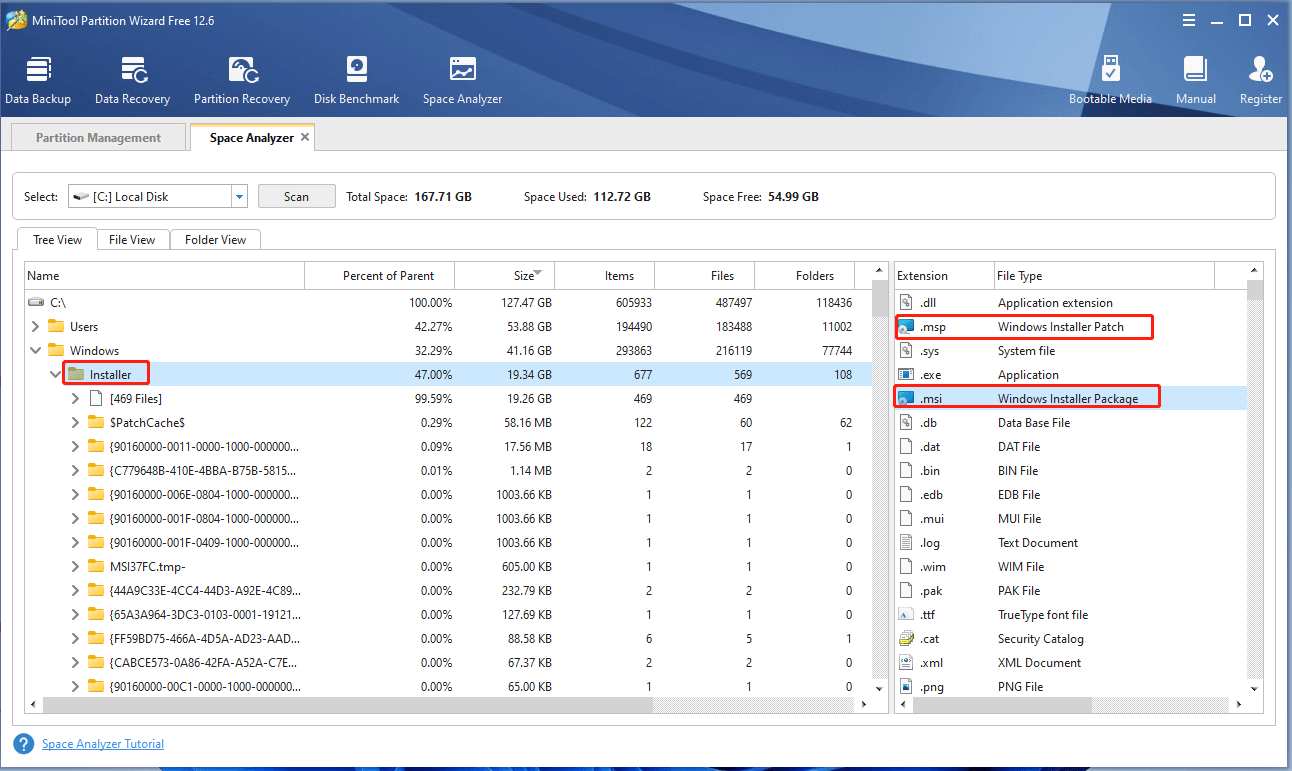
Step 5: After a while, you will receive the result. Expand the Windows folder to find the Installer folder. Likewise, expand the Installer folder to display its content. You can find the target files by using .msi or .msp file filters.
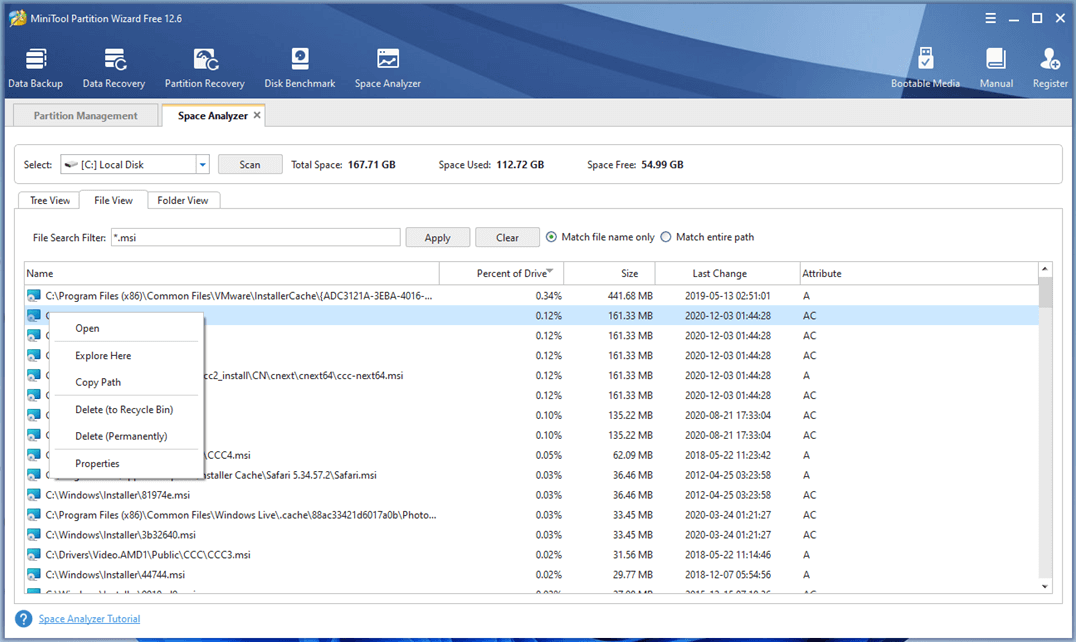
Step 6: Right-click on the unused .msi or .msp files and click Delete (to Recycle Bin) or Delete (Permanently) based on your need.
Method 5: Run Commands in CMD
In addition to the above methods, you can also perform Windows Installer folder clean up by running rmdir or rd command in CMD. Both commands can delete entire directories/folders. Besides, they work in the same way.
Here, we show you how to clean up Windows Installer folder via the rmdir command.
Step 1: Type cmd in the search box and then click Run as administrator under the searched Command Prompt app.
Step 2: In the Command Prompt window, type the command: cd <path of the folder>and hit Enter. Please remember to change the path of the directory and set it to the path of the folder. For instance, if the Windows Installer folder is located on the Desktop, you should type cd desktop and press Enter to run it.
Step 3: Delete the Windows Installer folder by running this command: rdmir Windows Installer. Type the command in the Command Prompt and hit the Enter key to execute it. After the command is executed, the Windows Installer folder will be removed.
Further reading:
To delete a directory via the rmdir command, type rmdir <directory name> and hit Enter. Please note that any directories deleted with the rmdir command can’t be recovered. You should think twice before executing the operation.
Also read: Ultimate Guide to Resolve Can’t Delete Files from SD Card Error
How to perform a Windows Installer folder cleanup Windows 10 smoothly? Here are 5 methods to do that. Pick one based on your preference.Click to Tweet
Bottom Line
You will learn what a Windows Installer folder is and how to safely execute a Windows Installer folder cleanup from this post. You can either clean up Windows Installer folder with a Windows built-in tool or an expertized Windows Installer folder cleanup utility.
Is this post helpful for you? Do you encounter any difficulties while executing the cleanup operation? Well, please share your questions in the following comment area. If you have any doubts about MiniTool Partition Wizard, directly contact us by sending an email to [email protected].
Если вы используете какие-либо программы для анализа содержимого диска, то можете обнаружить, что в Windows 10 скрытая системная папка C:\Windows\Installer занимает много места: иногда сотни мегабайт, а иногда и гигабайты, отсюда и вопрос — что это за папка и что с ней можно, а чего нельзя делать.
В этой инструкции о том, можно ли удалять папку Windows\Installer, файлы в ней, к чему это может привести и есть ли возможность уменьшить занимаемое этой папкой место на жестком диске или SSD. Также может быть интересным: Как очистить место на диске C.
- Можно ли удалить C:\Windows\Installer
- Как очистить папку Windows\Installer в Windows 10
- Видео инструкция
Можно ли удалять файлы из C:\Windows\Installer в Windows 10
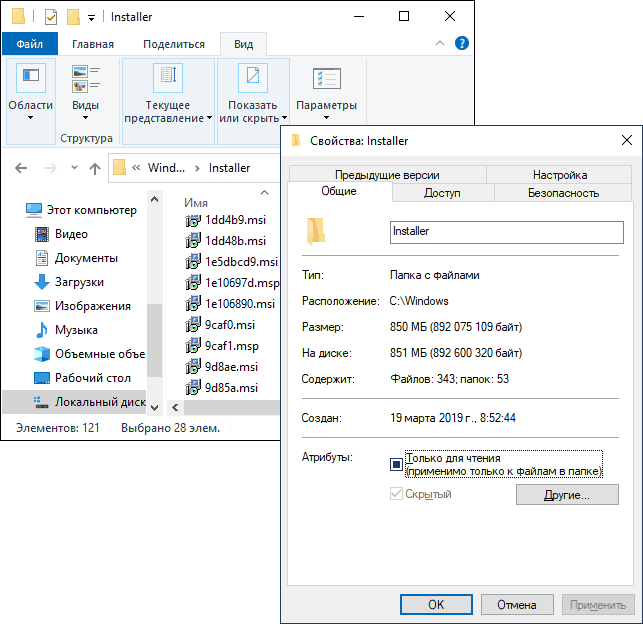
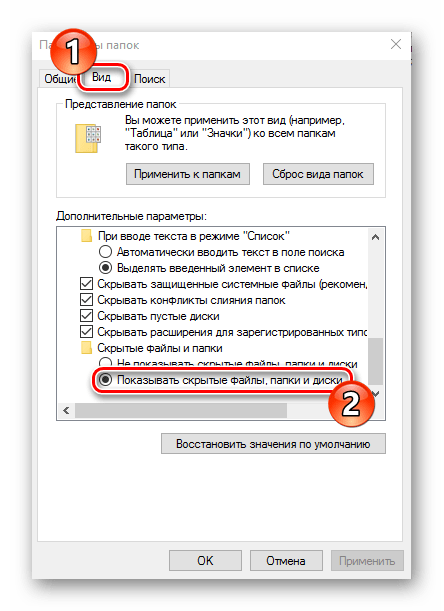
Если вы загляните в папку C:\Windows\Installer (папка скрыта по умолчанию, но в нее легко попасть, введя в адресную строку проводника путь к папке, либо включив показ и скрытых и защищенных системных файлов Windows 10), в ней вы обнаружите набор файлов с расширениями .msi и .msp, а также папки: состоящие из кодов и отдельные с расширением .tmp.
Можно ли это всё удалить? Короткий ответ: нет, не следует. Вы можете безопасно удалить лишь папки .tmp, но они и не занимают много места. Однако, существует возможность в какой-то степени очистить эту папку, о чем в следующем разделе.
А сначала о том, что представляют собой эти файлы в Windows\Installer — это файлы установщиков программ (тех, что установлены на вашем компьютере), использующих для установки службу «Установщик Windows» и они используются когда программа обновляется или когда вы её, наоборот, удаляете через «Панель управления» — «Программы и компоненты». Также они могут использовать для функции «Исправить установку». Соответственно, при их удалении могут возникнуть проблемы при выполнении этих задач.
Как очистить папку Windows\Installer
Иногда случается, что в этой папке присутствуют установщики программ .msi и .msp, более не используемые нигде в системе и такие файлы можно удалить, но для этого нужно определить, какие именно это файлы. Примечание: теоретически далее описанные шаги могут привести к нежелательным последствиям.
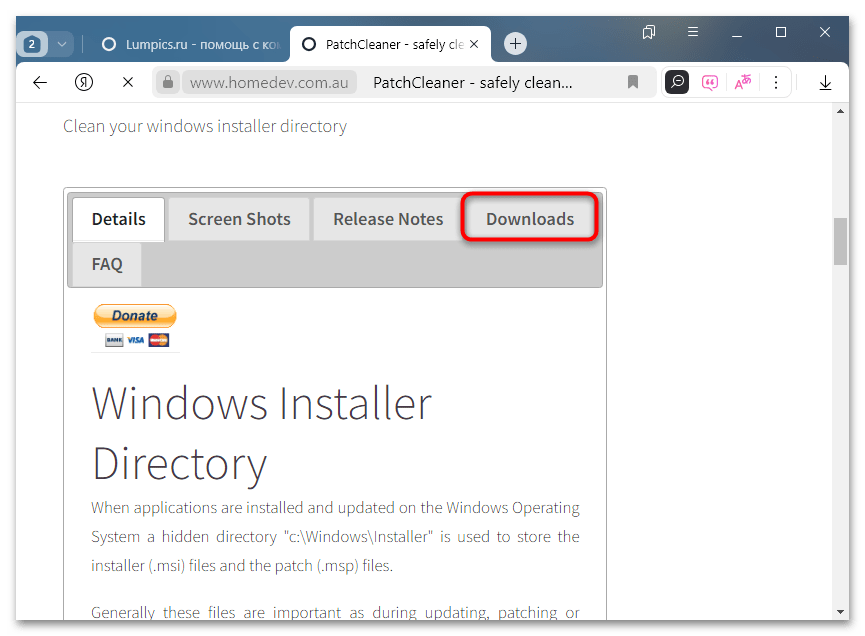
Для этого можно использовать бесплатную утилиту PatchCleaner, официальный сайт разработчика — https://www.homedev.com.au/Free/PatchCleaner (для загрузки используйте вкладку «Downloads» в верхней части описания программы).
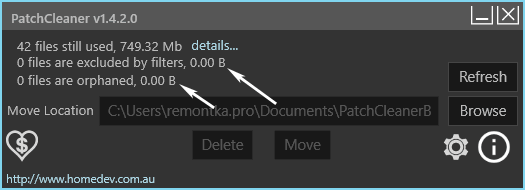
После запуска PatchCleaner, утилита проанализирует содержимое указанной папки и, если среди файлов в C:\Windows\Installer окажутся файлы, которые более не используются (они будут отображены в разделах «Excluded by filters» и «Orphaned». Такие файлы можно сразу удалить (Delete) или переместить в указанную папку «Move» (лучше сначала использовать второй вариант, чтобы убедиться, что всё работает как прежде).
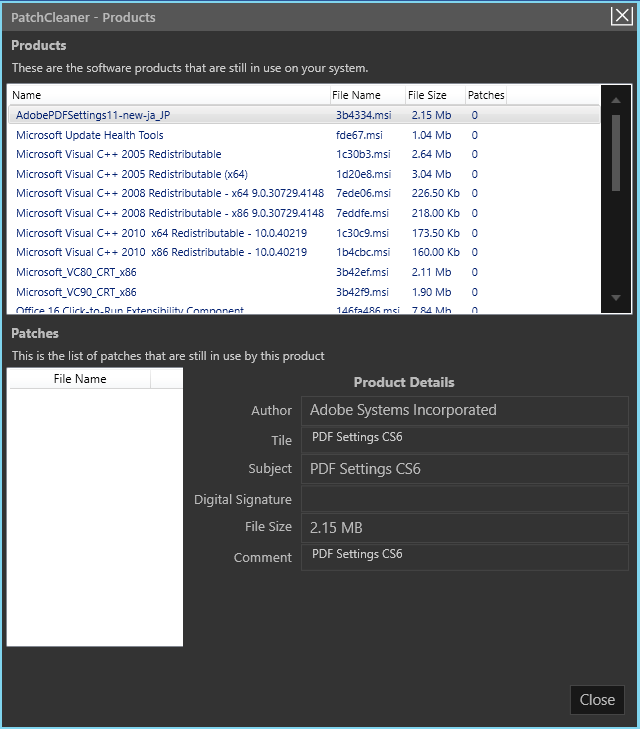
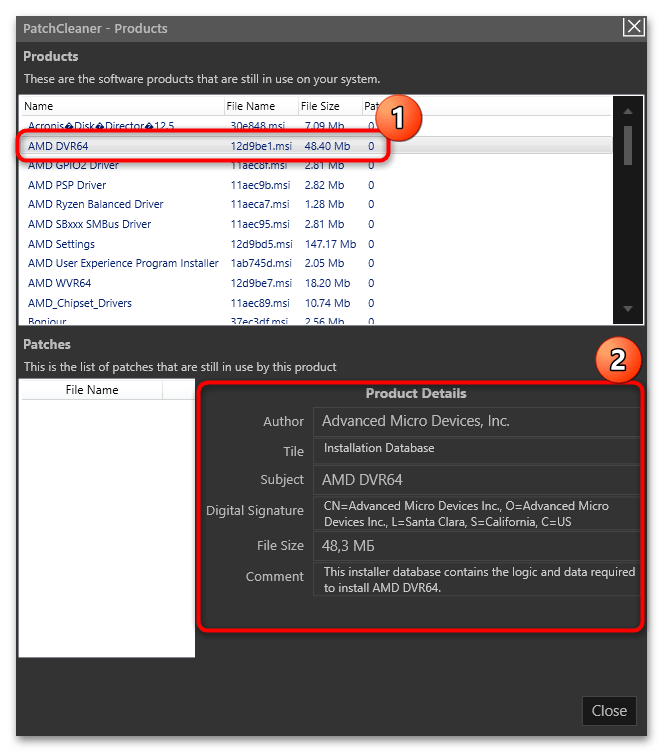
Также, если нажать по «Details» рядом с количеством найденных файлов, в том числе используемых в настоящее время (still used), можно увидеть информацию о том, каким программам соответствуют найденные файлы .msi и .msp, сколько места на диске они занимают и, возможно, принять решение об удалении некоторых из этих программ, если вы ими более не пользуетесь и они не требуются для правильного функционирования другого ПО.

Видео инструкция
Надеюсь, информация была полезной. К слову, о больших папках в Windows 10: вы можете очистить папку DriverStore\FileRepository.
Можно ли удалять папку «Installer»
При продолжительном использовании операционной системы можно заметить, что место на системном диске заканчивается, а очистка кеша и удаление ненужного софта не решают проблему, связанную с нехваткой памяти. У некоторых пользователей каталог под названием «Installer» занимает довольно много пространства, а если его открыть, то можно увидеть различные файлы с расширением MSI, TMP и MSP.
Размер папки «Installer» может разрастись до десятков гигабайт, особенно в тех случаях, когда регулярно скачиваются обновления для операционной системы и разное ПО. Здесь накапливаются инсталляторы и компоненты программ, патчи, апдейты, исправления и данные, которые используются для непосредственной установки и деинсталляции этих программ.
Если при использовании различных анализаторов места отображается информация, что папка «Installer» занимает много места, следует попробовать ее почистить. Конечно, сама папка легко удаляется с помощью стандартных способов, но делать этого мы крайне не рекомендуем, поскольку в результате гарантированно появятся различные проблемы не только с установленными программами, но и самой системой, и последствия могут быть непредсказуемые.
Сразу следует отметить, что каталог «Installer» по умолчанию скрыт, поэтому для просмотра содержимого потребуется включить отображение скрытых элементов. Как это сделать, читайте в нашем отдельном руководстве.
Подробнее: Отображение скрытых папок в Windows 10
Файлы и папки с расширением TMP можно удалять без опасений, поскольку это временные данные, но они занимают мало места, поэтому их очистка не сильно изменит ситуацию.
Тем не менее, помимо важных файлов, необходимых для работы софта и системы, в папке «Installer» располагаются и такие данные, которые уже утратили актуальность. Только делать это нужно не вручную, а лучше воспользоваться специализированными утилитами, которые анализируют операционку и выявляют, какие файлы можно удалить без ущерба работоспособности Windows 10. Об этом мы поговорим в следующем разделе данной статьи.
Очистка папка «Installer»
Сразу следует отметить, что использование встроенной утилиты «Очистка диска» не даст никаких результатов, поскольку инструмент попросту не проверяет папку «Installer», поэтому, как уже говорилось, потребуется прибегнуть к помощи софта от сторонних разработчиков. Одним из наиболее популярных решений является бесплатная утилита PatchCleaner.
В теории даже использование специализированного программного обеспечения может привести к нежелательным результатам, поэтому предварительно лучше создать точку восстановления системы, что поможет откатить ее состояние к тому, что было до проверки и очистки файлов из папки «Installer».
Подробнее: Инструкция по созданию точки восстановления Windows 10
Скачать PatchCleaner с официального сайта
- Нажмите на кнопку выше, чтобы перейти к скачиванию инсталляционного файла утилиты с официального сайта разработчика. Перейдите на вкладку «Downloads».
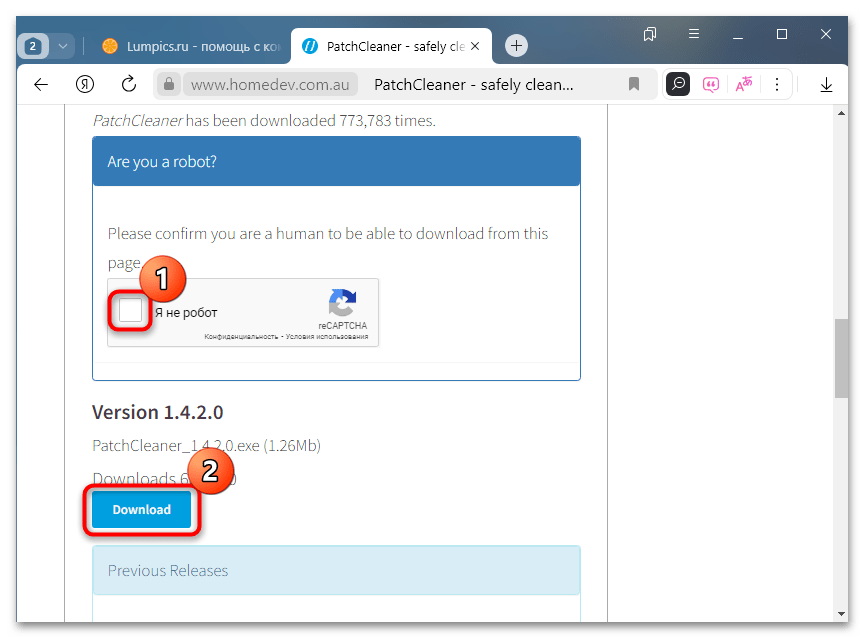
- Подтвердите, что вы не робот, с помощью капчи, затем загрузите последнюю версию софта (на момент написания статьи — это версия 1.4.2.0), кликнув по кнопке «Download».
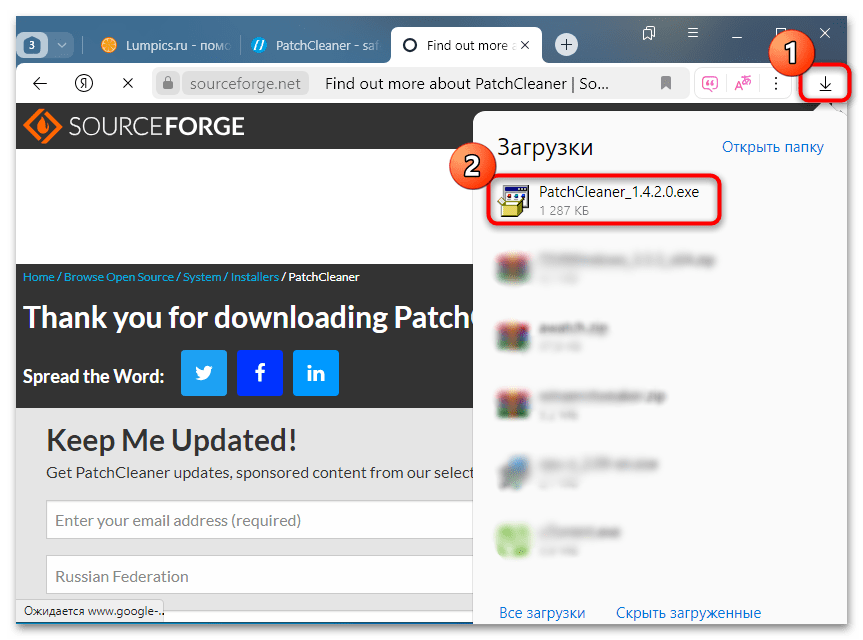
- После завершения скачивания запустите загруженный файл, дважды кликнув по нему.
- Подтвердите начало установки нажатием кнопки «Да».
- Кликните по кнопке «Next» в появившемся приветственном окне.
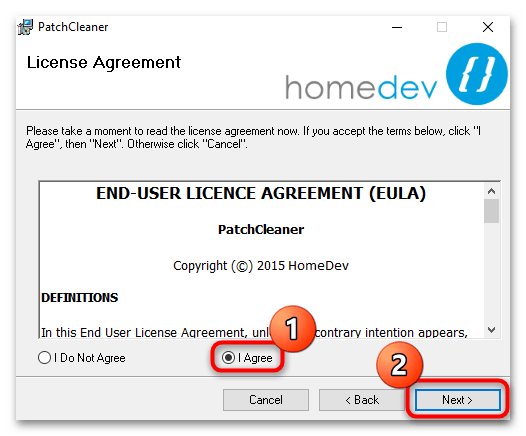
- Отметьте пункт «I Agree», чтобы подтвердить согласие на использование лицензии, и продолжите установку.
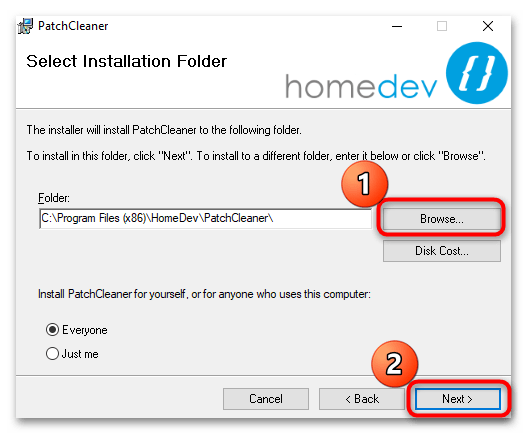
- Если требуется, выберите путь для установки утилиты, нажав на кнопку «Browse» и выбрав адрес через «Проводник».
- Продолжите установку, нажав на «Next», затем по завершении выберите «Close», чтобы выйти из мастера пошаговой установки.
- Запустите установленную утилиту и дождитесь окончания анализа системной папки.
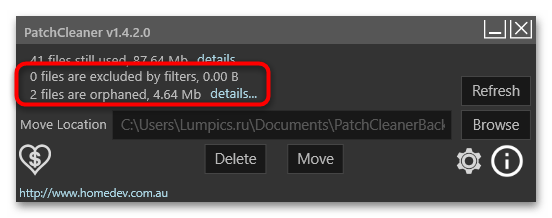
- Те файлы из папки «Installer», которые не используются, отобразятся в строках «excluded by filters» и «orphaned».
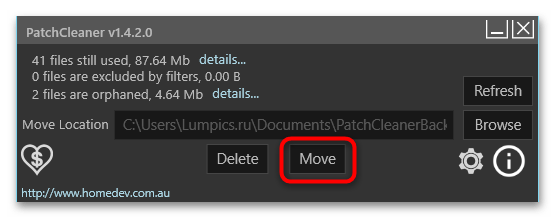
- Эти файлы можно сразу удалить (кнопка «Delete») либо переместить в другое местоположение на диске («Move»). Рекомендуем сначала использовать функцию перемещения — это позволит убедиться, что после отсутствия файлов Виндовс и программы будут работать корректно. Спустя какое-то время (несколько дней или месяц — зависит от частоты использования ПК и установленного софта) их уже можно удалить обычным способом, чтобы освободить место на компьютере.
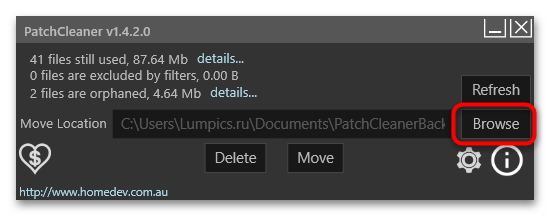
- Чтобы изменить папку для временного перемещения файлов из расположения «Installer», достаточно нажать на кнопку «Browse», затем указать нужный путь в открывшемся окне штатного «Проводника». Это может быть даже другой логический или физический диск.
- Также утилита предоставляет подробную информацию обо всех найденных в папке файлах, в том числе и тех, которые еще используются («still used»). Кликните по кнопке «details», чтобы посмотреть более детальные сведения.
- В новом окне вы увидите, сколько весит тот или иной файл, какой программе соответствует, расширения и другую информацию. Может быть, это поможет решить самостоятельно, какие файлы можно удалить.
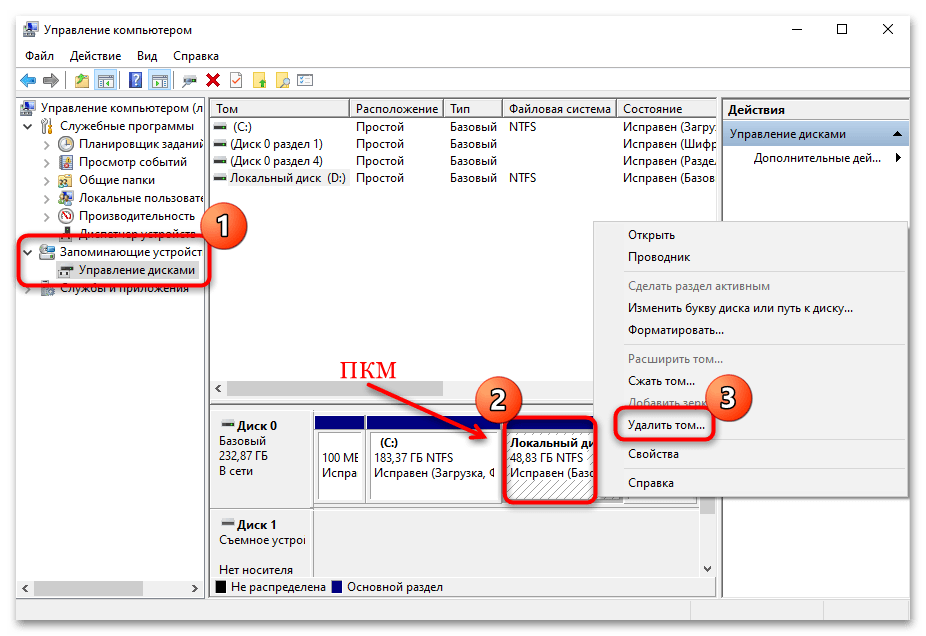
Если данных для удаления нет из-за того, что все файлы важны для функционирования системы и установленного ПО, а место на системном диске заканчивается, можно расширить пространство локального раздела, ведь для стабильной работы Виндовс требуется не менее 15 ГБ пространства. Делается это с помощью предустановленной утилиты или стороннего софта, о чем более развернуто мы писали ранее.
Подробнее: Расширяем системный диск в Windows 10
Наша группа в TelegramПолезные советы и помощь
According to Microsoft, around Windows 10 or 11 is actively running on 1.4 billion devices monthly. The Windows operating system (OS) is one of the most widely used among consumers, in addition to Mac and iOS, Linux and Android.
One problem many users encounter while using a Windows laptop or PC is a lack of sufficient storage space. Over time, it becomes challenging to open up storage space, as you likely store documents, photos, applications, videos and games on your device.
You might not know that installing programs on your Windows operating system (OS) requires certain files to be stored on your hard drive. If you’re low on storage space, you might wonder if you can clean up this folder to free up space and keep the device running properly.
Learn more about the Windows Installer Folder, the files in the folder and how to clean the folder to manage your device’s storage space.
What is the Windows Installer Folder?
Let’s first understand what Windows Installer is before discussing the Windows Installer folder.
Windows Installer is a critical component of Windows OS because it provides a foundation for installing and uninstalling software. When companies manufacture software, they can use the Windows Installer to make installation, maintenance and uninstallation a simple, straightforward process for users. Windows Installer 5.0 is the current version of the software component.
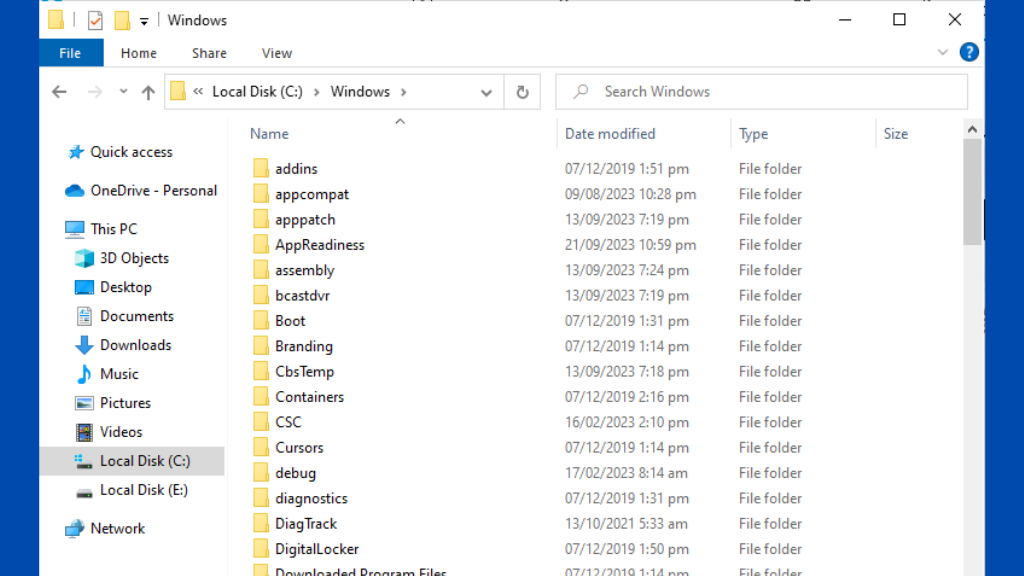
When you download, install and update programs on your Windows computer, some files are stored in a hidden directory. This protected folder is the C:\Windows\Installer, also called the Windows Installer Folder.
Why Clean the Windows Installer Folder?
As time goes on, these files build up, potentially causing problems with your OS. Files stored in the Windows Installer folder are cached copies of setup packages (.msi) and setup patches (.msp). These files belong to programs currently running on your computer.
There might be a time in the future when you need to repair, reinstall or uninstall a program, it’s important to keep .msi and .msp files in the folder. You’ll run into issues if these files are not available. For this reason, it’s important to avoid deleting these files randomly. There are some ways to check your PC specs to determine how much space you have. Suppose you want to run new software. In that case, checking your System Information is a wise idea.
If these files are unavailable, the OS will provide an error message. Although files in the Windows Installer folder can take up massive storage space, it’s only safe to delete orphaned packages.
How to Clean the Windows Installer Folder on Your OS
One method to try before using any of these tools below is to run the Disk Cleanup utility tool on your computer. The Disk Cleanup tool will clean system files that can be deleted. This will reduce the number of steps you need to take to manage the Windows Installer folder.
If you still want to clean the Windows Installer folder, consider using one of the utility tools listed below.
WInstCleaner.ps1
The WInstCleaner.ps1 Powershell Script allows you to manually enter the hidden installer folder and determine which files are orphaned or safe to delete. Additionally, it will show you which files you should not delete, as these are still in use and must stay put for your OS to run correctly.
PatchCleaner
Another tool you can use is PatchCleaner, which was specifically designed to clear out redundant files from the system. While the tool was introduced several years ago, it should still function properly and do what you need.
WICleanup
Lastly, you can try using WICleanup to clean your Windows Installer folder. It scans and deletes orphaned .msi and .msp files. You’ll be able to select files you want to delete manually.
Keep Your Window Installer Folder Updated
With the tools above, you can clean up .msi and .msp files in your Windows Installer folder. If you are worried about deleting critical files, you can always move the folder to a backup hard drive for safekeeping. You can also contact Microsoft Support for further information and receive help from a technical support agent.
Post Views: 6,191
In the digital age, maintaining the performance of your Windows PC is essential. Over time, various files and folders accumulate, potentially affecting your computer’s speed and efficiency. One such folder that often goes unnoticed but can significantly impact your PC’s performance is the Windows Installer Folder. In this article, we’ll explore what the Windows Installer Folder is, why it’s important to clean it up, and how to do so effectively.
what is Windows Installer Folder
In this fast-paced digital world, where efficiency and speed are paramount, a sluggish computer can be a significant hindrance. The Windows Installer Folder, often overlooked, plays a crucial role in your computer’s overall performance. Let’s dive deeper into what this folder is and why you should consider cleaning it up.
Understanding the Windows Installer Folder
The Windows Installer Folder, also known as WinSxS (Windows Side by Side), is a vital component of the Windows operating system. It stores essential files required for installing, updating, and maintaining Windows components and applications. While these files are necessary for system integrity, they can accumulate over time, taking up valuable disk space.
Why Clean Up the Windows Installer Folder?
Cleaning up the Windows Installer Folder is essential for several reasons:
- Freeing Up Disk Space: As the folder grows, it can consume a substantial amount of disk space, potentially leading to low storage issues.
- Improving System Performance: A bloated Windows Installer Folder can slow down your PC, affecting startup times and application responsiveness.
- Enhancing System Stability: Reducing unnecessary files can improve the overall stability and reliability of your Windows system.
Identifying Unnecessary Files
Before you begin the cleanup process, it’s crucial to identify which files can be safely removed. Windows provides tools and commands to assist in this task, ensuring you don’t delete critical system files.
Manual Cleanup Process
Cleaning the Windows Installer Folder manually involves using built-in Windows tools such as Disk Cleanup and the Deployment Imaging Service and Management Tool (DISM). We’ll guide you through the steps to ensure a safe cleanup process.
Automated Cleanup Tools
For those who prefer a more automated approach, various third-party tools are available that can help you clean up the Windows Installer Folder efficiently. We’ll discuss some popular options and their benefits.
Safety Precautions
It’s crucial to take precautions when cleaning the Windows Installer Folder to avoid accidental deletion of critical files. We’ll outline safety measures to ensure a smooth cleanup process.
Monitoring Disk Space
To prevent future accumulation of unnecessary files in the Windows Installer Folder, we’ll provide tips on how to monitor disk space effectively and maintain your PC’s performance.
Conclusion
In conclusion, the Windows Installer Folder is a critical component of your Windows operating system, and regular maintenance is essential. Cleaning up this folder can free up valuable disk space, improve system performance, and enhance system stability. Whether you choose to do it manually or use automated tools, keeping your Windows Installer Folder tidy will contribute to a smoother computing experience.
Is it safe to delete all files in the Windows Installer Folder?
While it’s safe to remove unnecessary files from the Windows Installer Folder, it’s essential to use built-in Windows tools or trusted third-party software to ensure you don’t delete critical system files.
How often should I clean up the Windows Installer Folder?
Cleaning up the Windows Installer Folder is recommended periodically, especially when you notice a decrease in system performance or low disk space warnings.
Can I recover deleted files from the Windows Installer Folder?
Once you delete files from the Windows Installer Folder, they are typically unrecoverable. Therefore, it’s essential to exercise caution when performing cleanup actions.
Are there any risks associated with using third-party cleanup tools?
Using reputable third-party cleanup tools is generally safe, but there is a slight risk of inadvertently deleting necessary files. Always follow instructions and backup critical data before using such tools.
Will cleaning the Windows Installer Folder speed up my PC noticeably?
Cleaning the Windows Installer Folder can lead to improved system performance, but the extent of improvement may vary depending on the initial state of your PC and the amount of clutter in the folder.
Related Articles:
How To Create a Virtual USB Drive in Windows
How to Clean Up Windows Installer Folder for Improved Performance.
How to Change CPU Fan Speed without BIOS: Complete Guide