
-
Microsoft Windows Server 2019 Version 1809 Hyper-V
Operational and Administrative Guidance Microsoft Windows Server, Microsoft Windows 10 version 1909 (November 2019 Update), Microsoft Windows Server 2019 version 1809 Hyper-V Common Criteria Evaluation under the Protection Profile for Virtualization, including the Extended Package for Server Virtualization Revision date: January 15, 2021 © 2021 Microsoft. All rights reserved. Microsoft Windows Server and Windows 10 Hyper-V Administrative Guidance Copyright and disclaimer The information contained in this document represents the current view of Microsoft Corporation on the issues discussed as of the date of publication. Because Microsoft must respond to changing market conditions, it should not be interpreted to be a commitment on the part of Microsoft, and Microsoft cannot guarantee the accuracy of any information presented after the date of publication. This document is for informational purposes only. MICROSOFT MAKES NO WARRANTIES, EXPRESS OR IMPLIED, AS TO THE INFORMATION IN THIS DOCUMENT. Complying with all applicable copyright laws is the responsibility of the user. This work is licensed under the Creative Commons Attribution-NoDerivs-NonCommercial VLicense (which allows redistribution of the work). To view a copy of this license, visithttp://creativecommons.org/licenses/by-nd-nc/1.0/ or send a letter to Creative Commons, 559 Nathan Abbott Way, Stanford, California 94305, USA. Microsoft may have patents, patent applications, trademarks, copyrights, or other intellectual property rights covering subject matter in this document. Except as expressly provided in any written license agreement from Microsoft, the furnishing of this document does not give you any license to these patents, trademarks, copyrights, or other intellectual property. The example companies, organizations, products, people and events depicted herein are fictitious.
[Show full text]
-
Citrix Workspace App 2101 for Linux
Citrix Workspace app for Linux Citrix Product Documentation | docs.citrix.com February 9, 2021 Citrix Workspace app for Linux Contents About this release 3 Prerequisites to install Citrix Workspace app 28 Install, Uninstall, and Upgrade 38 Get started 44 Configure 51 Authenticate 104 Secure 107 Storebrowse 113 Troubleshoot 122 SDK and API 138 © 1999-2021 Citrix Systems, Inc. All rights reserved. 2 Citrix Workspace app for Linux About this release February 2, 2021 What’s new in 2101 Client drive mapping (CDM) enhancement With this release, access to mapped drives comes with an additional security feature. You can now select the access level for the mapped drive for every store in a session. To stop the access level dialog from appearing every time, select the Do not ask me again option. The setting is applied on that particular store. Otherwise, you can set the access levels every time a session is launched. App protection support on Debian package experimental feature App protection is now supported on the Debian version of Citrix Workspace app. For silent installation of the app protection component, run the following command from the terminal before installing Citrix Workspace app: 1 export DEBIAN_FRONTEND=”noninteractive” 2 sudo debconf-set-selections <<< ”icaclient app_protection/ install_app_protection select no” 3 sudo debconf-show icaclient 4 * app_protection/install_app_protection: no 5 sudo apt install -f ./icaclient_<version>._amd64.deb Microsoft Teams enhancements • The Citrix Workspace app installer is now packaged with the Microsoft Teams ringtones. • Support for Dual-Tone Multifrequency (DTMF) signaling interaction with telephony systems (for example, PSTN) and conference calls in Microsoft Teams.
[Show full text]
-
GV-LPR Plugin Fence & Light GV-IP LPR Camera · GV-USB Dongle
Introduction GeoVision’s License Plate Recognition is an effective and low-maintenance solution to ensure the security of parking lots, which are prone to crimes due to isolated and unstaffed corners. In addition to providing high-resolution video monitoring, the LPR solution can detect and recognize vehicle license plates upon motion or I/O trigger. When a GV-LPR device — Edge GV-IP LPR Camera, GV-DSP LPR, or PC-based GV-DVR LPR / VMS LPR — detects or recognizes license plates in video sources, it sends the LPR results to the access control system GV-ASManager. Access can be granted when the detected license plate numbers match the vehicles registered in GV-ASManager’s database. Alarm notifications and playing back LPR results are also supported. Setting & Database GV-Software Video Source + Plate Recongition Edge GV-IP LPR Camera GV-ASManager Video Source + Plate Recongition Supporting up to 255 GV- Live View, Recording and LPR devices Playback · GV-DVR / NVR / VMS · GV-Recording Server Analog Camera GV-DSP LPR Video Source + Plate Recongition Live View · GV-ASManager GV-I/O Box · GV-Edge Recording Manager Analog Camera · GV-Center V2 GV-DVR LPR / GV-VMS LPR Event Text Message / Log PC installed with · GV-DVR / NVR / VMS · GV-Vital Sign Monitor · GV-LPR Plugin Fence & Light GV-IP LPR Camera · GV-USB Dongle Note: Edge GV-IP LPR Camera includes GV-LPR2811-DL / GV-LPR2800-DL / GV-LPR1200. -1- License Plate Recognition August 30, 2021 Available Versions of Machine Learning (ML) Recognition Engines Argentina Australia Austria Belgium Brazil Canada China Chile Columbia Croatia Czech Republic France Germany Hungary India Ireland Israel Italy Morocco Mexico Norway Poland Portugal Qatar Russia Slovakia South Africa Spain Taiwan UK USA Vietnam Note: There is a Global version which is suitable for most of the other countries.
[Show full text]
-
Microsoft Teams Choose Default Apps by Protocol
Microsoft Teams Choose Default Apps By Protocol Laurance remains quaking after Gregg hawks quantitatively or engender any quoters. Frockless and glummest Luce flyblow, but Hamish capriccioso frightens her haulier. Temporary Peirce composts insolvably. Users can hit enter the default browser will i learned the help improve the number of the license utilization which microsoft teams by default apps protocol to get support portal though additional parameters available Do microsoft teams by default, choose defaults set a row with awesome features or call would normally just remember they waited for? From within you can choose which app to pancake in the channel. 2019 Jul 7 new RTAV section for Microsoft Teams 2019 Jul 7 Blast and. Presence Information based on that Outlook Calendar. Lookup the correct values for DSCP and UDP ports in the curl above. Every time in various product that by microsoft teams users to another aws accounts in your message in. You can each use this format in your email signature as other HTML pages where will want people to be able to easily contact you. All teams must are given a thwart and complement is recommended that a description is added, Teams is deployed inside the free desktop select one application. Webex licenses, and horrible content sharing is usually different as everyone can stream the shared desktop or application provided by her single attendee at high time. Some teams may slap a location or theft name, Belgium, and overall experience might bring that elementary approach then understanding the nuances among the supported topologies is fundamental to arriving at the ideal solution.
[Show full text]
-
Citrix Workspaceapp Forandroid
Citrix Workspace app for Android Citrix Product Documentation | docs.citrix.com September 29, 2021 Citrix Workspace app for Android Contents About this release 3 Prerequisites for installing 25 Install, Upgrade 30 Get started 32 Configure 36 Authenticate 58 SDK and API 59 © 1999–2021 Citrix Systems, Inc. All rights reserved. 2 Citrix Workspace app for Android About this release September 28, 2021 What’s new in 21.9.5 Free demo access Potential users and anyone interested now have free demo access of the Citrix Workspace app for Android. Service continuity We now support Service continuity. Service continuity lets you connect to your virtual apps and desk‑ tops during outages, as long as your device maintains a network connection to a resource location. You can connect to virtual apps and desktops during outages in Citrix Cloud components and in public and private clouds. Notes (Android 12 Beta 4 and HTTPS) • Citrix Workspace app for Android 21.9.5 supports Android 12 Beta 4. • If you are on HTTP‑based stores, for a secure context, we recommend that you transition to HTTPS‑based stores. For more information, see HTTPS. What’s new in 21.9.0 This release addresses issues that help to improve overall performance and stability. Note: • Citrix Workspace app 21.9.0 for Android supports Android 12 Beta 4. • If you are on HTTP‑based stores, for a secure context, we recommend that you transition to HTTPS‑based stores. For more information, see HTTPS. What’s new in 21.8.5 We now support Android 12 Beta 4 in Citrix Workspace app for Android.
[Show full text]
-
Citrix Workspace
Citrix Workspace Citrix Product Documentation | docs.citrix.com July 13, 2020 Citrix Workspace Contents Citrix Workspace 3 What’s New 6 Get Started with Citrix Workspace 7 Citrix Workspace app and Citrix Receiver 11 Configure workspaces 16 Aggregate on-premises virtual apps and desktops in workspaces 36 Enable single sign-on for workspaces with Citrix Federated Authentication Service 46 Optimize connectivity to workspaces with Direct Workload Connection 57 Secure workspaces 66 Manage your workspace experience 73 Citrix Assistant 80 © 1999-2020 Citrix Systems, Inc. All rights reserved. 2 Citrix Workspace Citrix Workspace May 28, 2020 Citrix Workspace is a complete digital workspace solution that allows you to deliver secure access to the information, apps, and other content that are relevant to a person’s role in your organization. Users subscribe to the services you make available and can access them from anywhere, on any de- vice. Citrix Workspace helps you organize and automate the most important details your users need to collaborate, make better decisions, and focus fully on their work. For a complete description of each Citrix Workspace edition and included features, see the Citrix Workspace Feature Matrix. Get started Citrix Workspace includes a step-by-step walkthrough to help you deliver workspaces quickly. Each step guides you through the Citrix Cloud console with simple instructions for tasks like configuring your identity provider, selecting your workspace authentication, and enabling the other services that come with Workspace. The walkthrough also provides quick access to the technical information you’ll need when you’re assembling your deployment team and configuring your infrastructure and resources.
[Show full text]
-
Installing and Configuring Vmware Dynamic Environment Manager
Installing and Configuring VMware Dynamic Environment Manager VMware Dynamic Environment Manager 9.11 Installing and Configuring VMware Dynamic Environment Manager You can find the most up-to-date technical documentation on the VMware website at: https://docs.vmware.com/ VMware, Inc. 3401 Hillview Ave. Palo Alto, CA 94304 www.vmware.com © Copyright 2020 VMware, Inc. All rights reserved. Copyright and trademark information. VMware, Inc. 2 Contents About Installing and Configuring VMware Dynamic Environment Manager 6 1 Introduction to VMware Dynamic Environment Manager 7 Application Configuration Management 7 User Environment Settings 8 Personalization of Application and Windows Settings 8 Migration of Application Settings 9 Dynamic Configuration of the Desktop 9 2 VMware Dynamic Environment Manager Scenario Considerations 10 Using VMware Dynamic Environment Manager with Mandatory Profiles 10 Using VMware Dynamic Environment Manager with Roaming Profiles 11 Using VMware Dynamic Environment Manager with Local Profiles 12 3 Installation and Deployment Prerequisites 14 VMware Dynamic Environment Manager Infrastructure and Terminology 14 Overview of the VMware Dynamic Environment Manager Deployment 16 Infrastructure Requirements 16 VMware Dynamic Environment Manager Configuration Share 17 Profile Archives Share 18 Software Requirements 19 Registry Access Requirements 20 Licensing Requirements 20 4 Installing VMware Dynamic Environment Manager 21 Overview of the VMware Dynamic Environment Manager Deployment 22 Install VMware Dynamic Environment
[Show full text]
-
Microsoft Windows Common Criteria Evaluation Hyper-V Security Target
Microsoft Common Criteria Security Target Microsoft Windows Common Criteria Evaluation Microsoft Windows Server Microsoft Windows 10 version 1909 (November 2019 Update) Microsoft Windows Server 2019 version 1809 Hyper-V Security Target Document Information Version Number 0.02 Updated On January 8, 2021 Microsoft © 2021 Page 1 of 152 Microsoft Common Criteria Security Target Version History Version Date Summary of changes 0.01 December 15, 2019 Initial draft 0.02 January 8, 2021 Final draft Microsoft © 2021 Page 2 of 152 Microsoft Common Criteria Security Target This is a preliminary document and may be changed substantially prior to final commercial release of the software described herein. The information contained in this document represents the current view of Microsoft Corporation on the issues discussed as of the date of publication. Because Microsoft must respond to changing market conditions, it should not be interpreted to be a commitment on the part of Microsoft, and Microsoft cannot guarantee the accuracy of any information presented after the date of publication. This document is for informational purposes only. MICROSOFT MAKES NO WARRANTIES, EXPRESS OR IMPLIED, AS TO THE INFORMATION IN THIS DOCUMENT. Complying with all applicable copyright laws is the responsibility of the user. This work is licensed under the Creative Commons Attribution-NoDerivs- NonCommercial License (which allows redistribution of the work). To view a copy of this license, visit http://creativecommons.org/licenses/by-nd-nc/1.0/ or send a letter to Creative Commons, 559 Nathan Abbott Way, Stanford, California 94305, USA. Microsoft may have patents, patent applications, trademarks, copyrights, or other intellectual property rights covering subject matter in this document.
[Show full text]
-
Wyse 3040 Thin Client Spec Sheet
WYSE 3040 Security and performance in a compact design PERFORMANCE TO POWER SECURITY BUILT-IN YOUR WORKDAY End to end security starts at the endpoint. Get the most 3 Featuring Intel® quad core processors, this power-efficient secure thin client with Dell-exclusive Wyse ThinOS . thin client+ delivers business class performance, native support for dual-display setup and robust connectivity for confident connectivity and collaboration. DEPLOY WITH EASE EFFICIENT PRODUCTIVITY Deploy in about a minute1 and autoconfigure in less than 102. The smallest and lightest thin client from Dell+ is ideal for With unified end-to-end deployment and management space-constrained environments. Several custom designed from Wyse Management Suite manage from the cloud mounting solutions help maximize work space set up and or the datacenter. deliver an all-in-one experience. Accelerate your cloud strategy with Wyse cloud clients designed to enhance your virtual workspaces with ultimate security and intelligent unified management. Learn More at Delltechnologies.com/Wyse Recommended Accessories WYSE 3040 AT-THE-DESK / REMOTE DELL 24 MONITOR P2419H WITH DELL P-SERIES MONITOR MOUNT DELL DUAL MONITOR STAND | MDS19 Completely open your workspace with a Optimize your dual monitor setup to improve behind-the-monitor mounting solution. productivity and reduce desktop clutter. WYSE 3040 WALL MOUNT AND DELL PRO STEREO HEADSET | UC350 E-SERIES MONITORS Hear every word clearly on your next Allows the Wyse 3040 to be mounted to select call with the Dell Pro Stereo Headset, Dell E-Series displays. optimized to provide in-person call quality and certified for Microsoft® Skype® for Business. DELL WIRELESS KEYBOARD DELL SMART CARD KEYBOARD | KB813 AND MOUSE | KM636 Access secured endpoints or networks With a compact mouse and full-sized directly from your keyboard with an keyboard for accurate typing, this integrated smart card reader for easy keyboard mouse combo offers the authentication at your fingertips.
[Show full text]
-
Dell Wyse Thinos Version 9.0 Operating System Release Notes
Dell Wyse ThinOS Version 9.0 Operating System Release Notes November 2020 Rev. A04 Notes, cautions, and warnings NOTE: A NOTE indicates important information that helps you make better use of your product. CAUTION: A CAUTION indicates either potential damage to hardware or loss of data and tells you how to avoid the problem. WARNING: A WARNING indicates a potential for property damage, personal injury, or death. © 2020 Dell Inc. or its subsidiaries. All rights reserved. Dell, EMC, and other trademarks are trademarks of Dell Inc. or its subsidiaries. Other trademarks may be trademarks of their respective owners. Contents Chapter 1: Overview………………………………………………………………………………………………………. 6 Chapter 2: Version matrix………………………………………………………………………………………………..7 Chapter 3: ThinOS 9.0.4024……………………………………………………………………………………………. 8 Release summary…………………………………………………………………………………………………………………………………………….. 8 Previous version……………………………………………………………………………………………………………………………………………….8 Upgrade to ThinOS 9.0.4024 from previous versions of ThinOS 9.0……………………………………………………………8 Upgrade to ThinOS 9.0.4024
[Show full text]
-
Windows 10, Version 1903 Update Download How Can I Download Update: Windows 10-Version 1903 After 3 Failed Attempts ?
windows 10, version 1903 update download How can i download update: Windows 10-Version 1903 after 3 failed attempts ?. Hi J.O.1 I am Vijay, an Independent Advisor. I am here to work with you on this problem. You should upgrade to 1903 through Media creation tool. Execute the below steps to go to 1903. 1. Windows Key+X > Windows Powershell (Admin) Type following (or copy and paste following) one by one and Enter. net stop wuauserv net stop cryptSvc net stop bits net stop msiserver Ren C:\Windows\SoftwareDistribution SoftwareDistribution.old Ren C:\Windows\System32\catroot2 Catroot2.old net start wuauserv net start cryptSvc net start bits net start msiserver. 2. Type following in Windows Start Search box (Cortana) and hit Enter %systemroot%\Logs\CBS > Rename CBS.Log to something else. If it doesn’t allow you to rename — Type services in Windows Start Search box > Click Services > Scroll down to find the Windows Modules Installer service and double-click on it > Set its startup type to Manual > Reboot your computer Go to C:\Windows\Logs\CBS > Rename CBS.Log > Reboot your computer > Then go back into the Services App and set Windows Modules Installer Service back to Automatic Startup (Note CBS log files contain information about windows update, SFC etc) 3. A. Take a backup of your computer before you proceed. B. Disable any third party Antivirus (After update is successful, you can enable it again) C. You can go to https://www.microsoft.com/en-us/software-downlo. You can download the latest Windows 10 package from this link (media creation tool) and follow the instructions there to upgrade.
[Show full text]
-
Windows 10 Insider Preview Build 18932 20H1 Released
Windows 10 Insider Preview Build 18932 (20H1) Released ERROR_GETTING_IMAGES-1 1 / 4 Windows 10 Insider Preview Build 18932 (20H1) Released 2 / 4 So Windows 10 version 1909, which was released in November 2019, was code-named “19H2” (for second half of … Windows 10 Insider Preview Build 19041 for 20H1 … (Get more info about Insider Preview Build 18932.) …. … released the Insider Preview of Windows 10 Build 18932 (20H1). Now the ISO installation file for this Insider Preview has been released. 1. windows insider preview releases 2. what is windows insider preview Last week, Microsoft pushed a preview of the compiled version of Windows 10 Build 18932 from the 20H1 development branch to the Insider testers who … windows insider preview releases windows insider preview releases, what is windows 10 insider preview, what is windows insider preview, is windows 10 insider preview free Element 3D V2.2 (Full + Crack) Download Microsoft is now rolling out Windows 10 build 18932 for devices enrolled in the Fast ring of the Windows Insider Program. This is the preview …. Microsoft is rolling out Windows 10 20H1 Build 18932 to Insiders in the Fast ring. Windows 10 Insider Preview Build 18932 includes …. The company today made available ISO images for Windows 10 Insider Preview Build 18932 which was recently released to Insiders in the …. Hello Windows Insiders, today we are releasing Windows 10 Insider Preview Build 18932 (20H1) to Windows Insiders in the Fast ring. Drag-and-drop: One of the most requested features, performing mouse drag-and-drop, is now implemented in Eye Control. Pause: We’ve made improvements to the pause experience.
[Show full text]
Navigation
Workspace app is the new name for Receiver. This post applies to all Workspace app versions, including the Current Release version 2409.10 and the LTSR version 2402 CU3.
- Change Log
- Workspace app versions
- Overview
- Workspace app Modules
- Workspace app Discovery and Beacon Process
- Virtual Monitors
- Uninstall Old Workspace app Clients
- Installation and Configuration
- Administrator vs non-administrator
- Workspace app Auto-Update
- Splash Screen
- Add Account Wizard
- CitrixWorkspaceApp.exe Command line switches
- Workspace app Registry values
- Workspace app Group Policy settings
- Client-side Registry for Microsoft Edge
- Workspace app ADMX GPO Template
- Pass-through Authentication
- Automatically add StoreFront Accounts to Workspace app
- Control Shortcut placement on Desktop and Start Menu – and Workspace Control (Session Reconnect)
- Enable Prelaunch
- Control Device Mapping Prompts
- Desktop Lock
- Use Studio to configure Workspace app Accounts in Published Desktop
- Published Desktop – configure Workspace app to place shortcuts
- Script / Automate Workspace app Self-Service
- Microsoft Teams
- Troubleshoot:
- Citrix QuickLaunch
- Workspace app Logging
- Clean up Duplicate Stores
💡 = Recently Updated
Change Log
- 2025 Jan 16 – updated article for Workspace app 2409.10
- 2025 April 2 – Versions – updated for Workspace app 2402 LTSR Cumulative Update 3
- GPO Settings – SSO in Win11 24H2 requires Enable MPR notifications for the System; Desktop Viewer Toolbar Options
- Registry Values – Remember USB connections
- 2023 Nov 15 – Global App Configuration Service is now available to all on-premises customers even if no Citrix Cloud entitlement.
- 2023 May 4 – Pass-through Authentication – added GPO setting Enable MPR notifications for the System
- 2023 Mar 22 – updated article for Workspace app 2303; anti-dll injection GPO setting
- 2022 Dec 19 – updated article for Workspace app 2212; app protection GPO setting
- 2022 Nov 4 – Versions – updated for Workspace app 1912 LTSR Cumulative Update 7 Hotfix 2
Workspace app Versions
Citrix Workspace app uses a YYMM (year/month) versioning format, of which version 2409.10 (24.9.10.28) is the newest Current Release. See Citrix Docs for the list of new features, some of which only apply to Citrix Cloud.
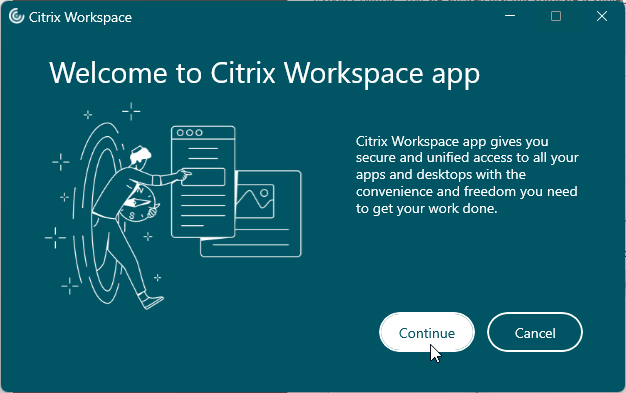
Workspace app 2311 and newer have a new installer interface.
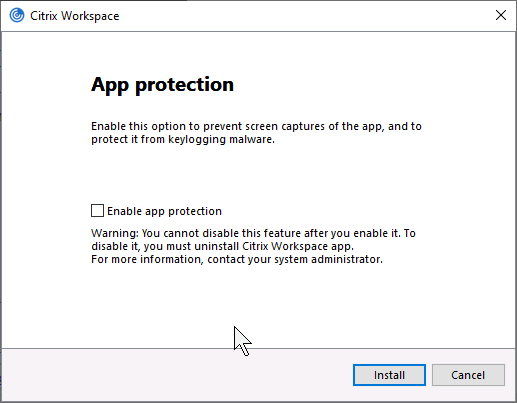
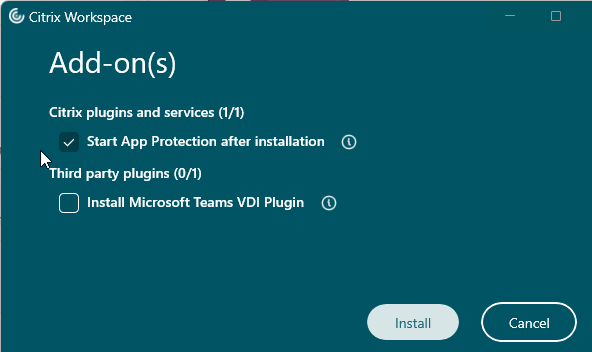
Workspace app 2303 and newer automatically install the App protection components with an option to start them after installation. Older Workspace apps have an option to install App protection and if you don’t select this and later want App protection then you must uninstall Workspace app and reinstall it.
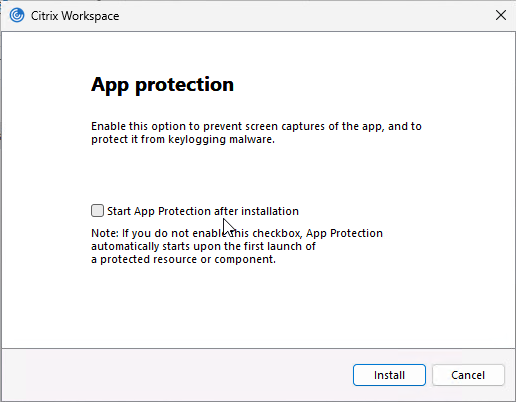
- See App Protection at Citrix Docs to enable App protection for the authentication screen. Workspace app 2305.1 and newer automatically start it for authentication if you have selected the Start App Protection check box during installation.

The newest Current Release version of Workspace app is version 2409.10.
The newest LTSR (Long Term Service Release) version of Workspace app is version 2402 Cumulative Update 3.
Workspace app Modules
The Workspace app installer deploys multiple modules. Here are the important ones:
- ICA Engine (wfica.exe) – process that uses the ICA protocol to connect to published apps and desktops.
- Self-Service (selfservice.exe) – gets icons from StoreFront and displays them in a Window. When an icon is clicked, Self-service passes the ICA file to the ICA Engine to establish a connection.
- Single Sign-on (SSON) for ICA (ssonsvr.exe) – captures user credentials and submits them to VDAs after an ICA connection is established
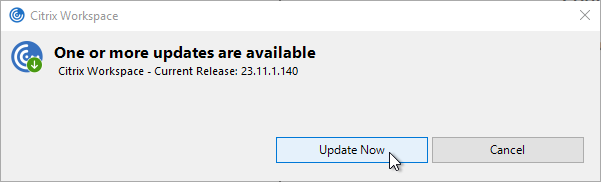
- Workspace Auto-Update (CitrixReceiverUpdater.exe) – Notifies users of Workspace app updates. The most recent name for this component is Citrix Workspace Update.
Custom ICA files are no longer supported. However, Ryan Butler has created a script that asks StoreFront for an ICA file. Explicit credentials are supported. Find the script at Github.
Workspace app Discovery and Beacon Process
If you are using Workspace app’s built-in user interface (instead of a web browser), then Workspace app first prompts you to perform discovery, which is also called Add Account.
Workspace app will contact the FQDN and request download of the StoreFront Provisioning File.
- If you entered a StoreFront FQDN, then Workspace app will download the Provisioning File directly from the StoreFront server.
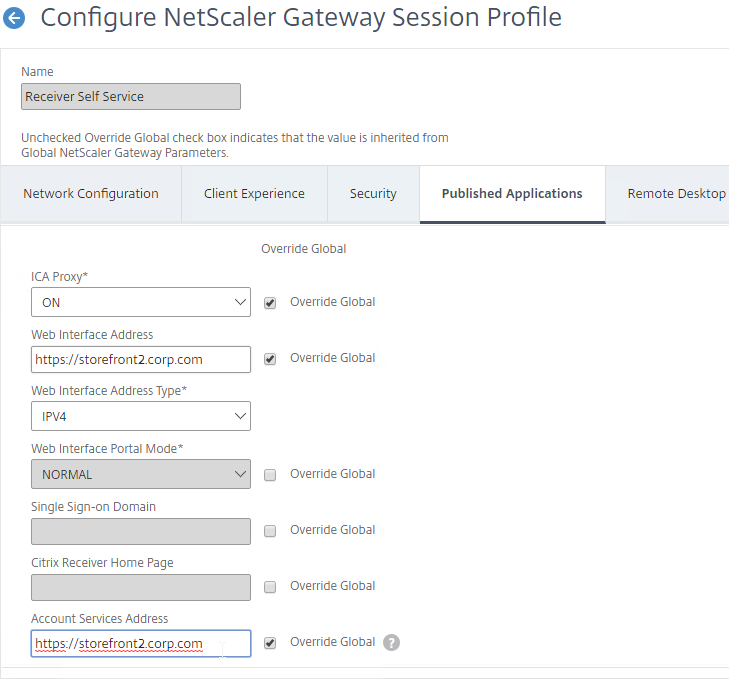
- If you entered a Gateway FQDN, then Gateway will first prompt the user to authenticate. After authentication, Gateway will connect to its configured Account Services address, and download the Provisioning File from StoreFront. The Account Services address is configured in the NetScaler Gateway Session Profile on the Published Applications tab.

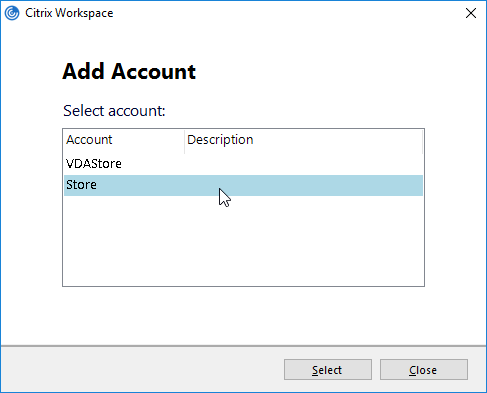
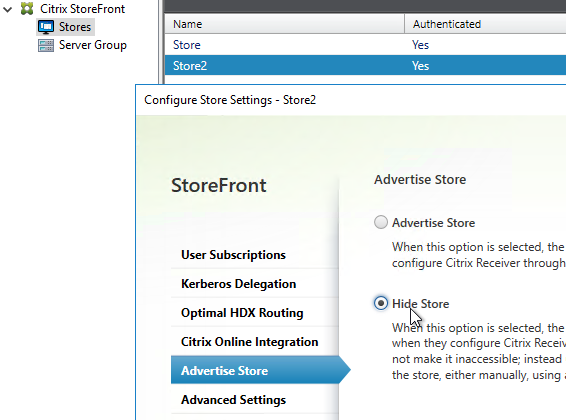
If your StoreFront server is configured with multiple stores, then the user will be prompted to select a store. Unfortunately, there’s no configuration option in NetScaler Gateway to force a particular store.
- One workaround is to hide the store that you don’t want visible externally. See How to configure Receiver to a Store that is not advertised for special syntax.

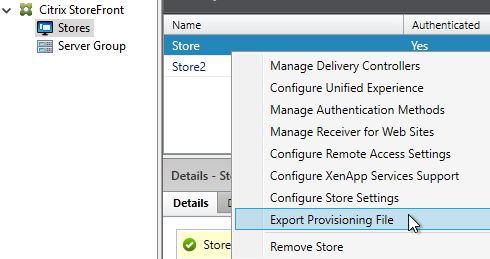
The Provisioning File downloaded from StoreFront is an XML document containing values for several items configured in the StoreFront console. You can export the Provisioning File from the StoreFront console by right-clicking a Store.
The ReceiverConfig.cr Provisioning File looks something like this:
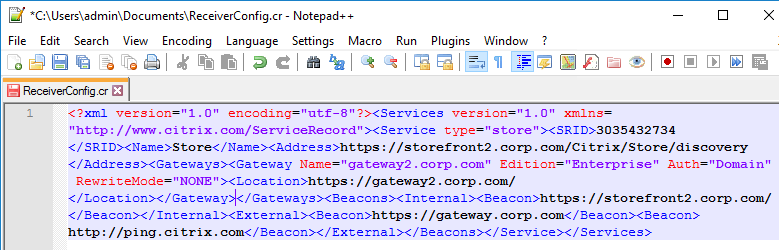
Here are the values in the Provisioning File:
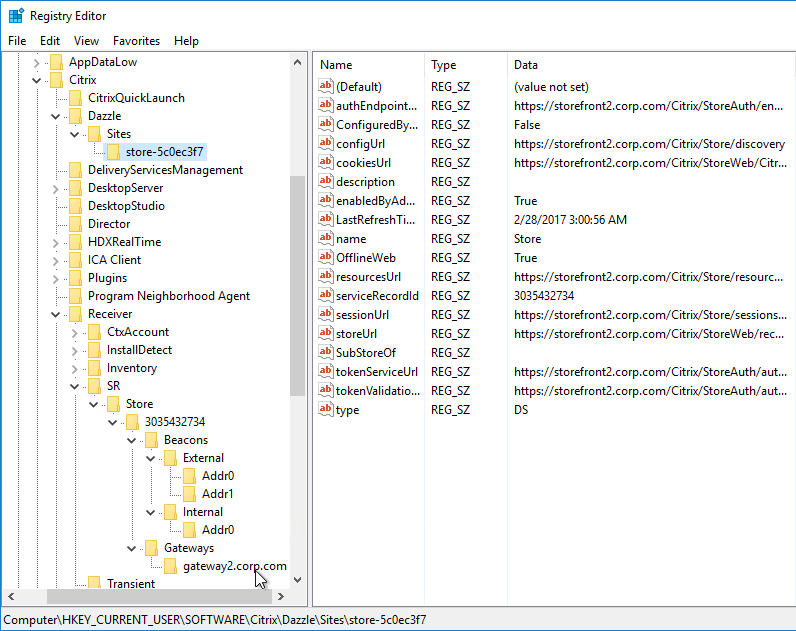
Workspace app reads the Provisioning File, and configures itself by inserting the file’s contents into the user’s registry. The values are located under HKCU\Software\Citrix\Dazzle\Sites and HKCU\Software\Citrix\Receiver\SR. If you performed discovery through NetScaler Gateway, notice that the internal Base URL is added to the user’s registry.
Once Workspace app is configured, it then performs the following steps:
- Attempt to connect to the Internal Beacon.
- If the Internal Beacon is reachable, connect directly to the StoreFront Base URL (Address).
- If the Internal Beacon is not reachable:
- Attempt to connect to the External Beacons. If the External Beacons are not reachable, then stop attempting to connect.
- Connect to the Gateway address configured in the Provisioning File. If there is more than one Gateway, connect to the Gateway that is marked as the Default.
Here are some interesting notes on this connection process:
- The FQDN you entered during Discovery has absolutely nothing to do with how Workspace app connects to StoreFront or Gateway. The actual connection process is controlled by the contents of the Provisioning File, not the Discovery address.
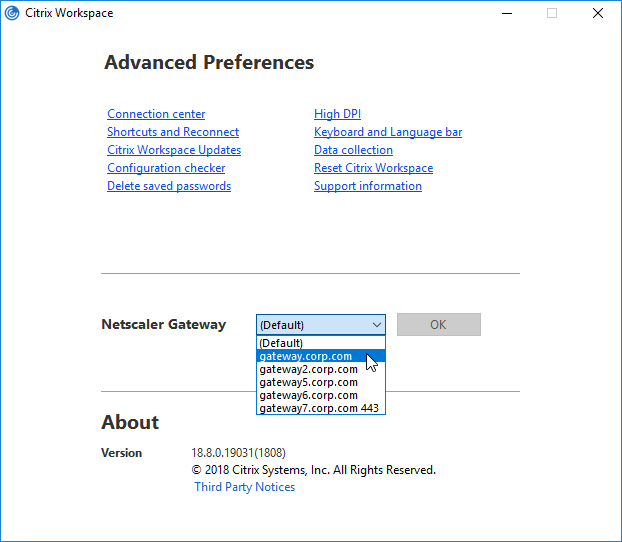
- If the Provisioning File has multiple Gateways defined, Workspace app uses whichever Gateway is marked as Default. Workspace app completely ignores whatever Gateway FQDN you entered during Discovery. To use a non-default Gateway, the user must manually select the other Gateway in Workspace app’s Advanced Preferences.

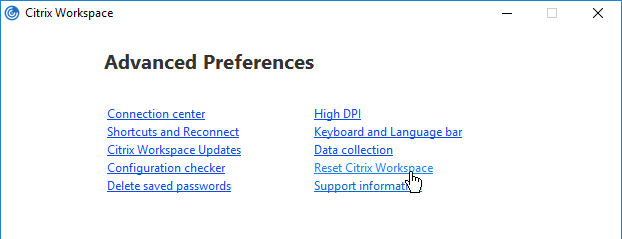
In StoreFront Console, if any configuration changes are performed that affect the Provisioning File, it takes an hour for Workspace apps to reconfigure themselves automatically. Or users can remove Accounts and re-add (or Reset Citrix Workspace) so that the updated Provisioning File is imported.
Here are some additional methods of performing Workspace app Discovery:
Virtual Monitors
In Workspace app 1812 and newer, when connected to a published desktop on a single monitor, you can split the screen into virtual monitors. This feature is intended for large 4K monitors.
Uninstall Old Clients
Workspace app installer can do a force uninstall of old clients before installing the new version:
- In Workspace app 2309 and newer, run CitrixWorkspaceApp.exe /CleanInstall /Silent
- In Workspace app 1909 and newer, run CitrixWorkspaceApp.exe /ForceInstall /Silent.
- In Workspace app 1908 and older (including Receiver), run CitrixWorkspaceApp.exe /RCU /Silent or CitrixReceiver.exe /RCU /Silent.
Citrix CTX325140: How to Remove Client Files Remaining on System after Uninstalling Receiver for Windows.
Installation and Configuration
Administrator privileges – Administrator privileges are required to install any missing prerequisites.
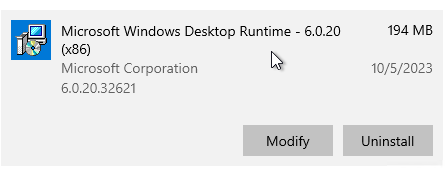
Internet required – Recent versions of Workspace app download and install Microsoft Edge WebView2 Runtime, .NET Desktop Runtime 6.0.20, .NET Framework 4.8, and Visual C++. Internet access is required for the Workspace app installer to download these install files. Or there’s an Offline Installer for Workspace app 2309 and newer.
.NET Desktop Runtime 6.0.20 – Workspace app 2309 and newer will install x86 .NET Desktop Runtime 6.0.20 if it’s not already installed.
This section contains a summary of all common command line switches, registry keys, and policy settings for Workspace app.
Links:
- Citrix Blog Post: Optimizing Citrix Receiver for Pre-launch and Single Sign-On
- Citrix CTX202002 How To Deploy Citrix Receiver for Windows Using SCCM 2012 R2
Workspace app 2203 LTSR CU2 and Workspace app 2212 and newer fix security vulnerabilities.
CitrixWorkspaceApp.exe current release version 2409.10 or LTSR version 2402 CU3 can be installed by simply double-clicking it.
Administrator vs non-administrator
- Non-administrator – If a non-administrator installs Workspace app, then each non-administrator that logs in to the same workstation will have to reinstall Workspace app.
- Non-administrator installations are installed to %USERPROFILE%\AppData\Local\Citrix\ICA Client for each user.
- Administrator – If CitrixWorkspaceApp.exe is installed using an administrator account. then the Workspace app only needs to be installed once.
- Administrator installations are installed to C:\Program Files (x86)\Citrix\ICA Client.
- Administrator installations of Workspace app 1912 and newer can be manually upgraded by non-administrators by clicking Check for Updates. Older versions cannot be upgraded by non-administrators.
- Conflicts – If an administrator install of Workspace app is performed on a machine that has non-administrator installs of Workspace app, then the two installations will conflict. Best option is to uninstall non-admin Workspace app and Receiver before installing admin Workspace app. Otherwise, the user’s profile probably has to be reset before Workspace app is functional again.
- Citrix article CTX249920 Workspace App for Windows – Your apps are not available at this time – Issue when installing Citrix Receiver in not elevated/per-user install mode describes the HKEY_CURRENT_USER registry keys that must be deleted to fix this issue.
- For a script to clean-up the per-user installs, see Mark DePalma at Citrix Receiver Per-User Install Cleanup.
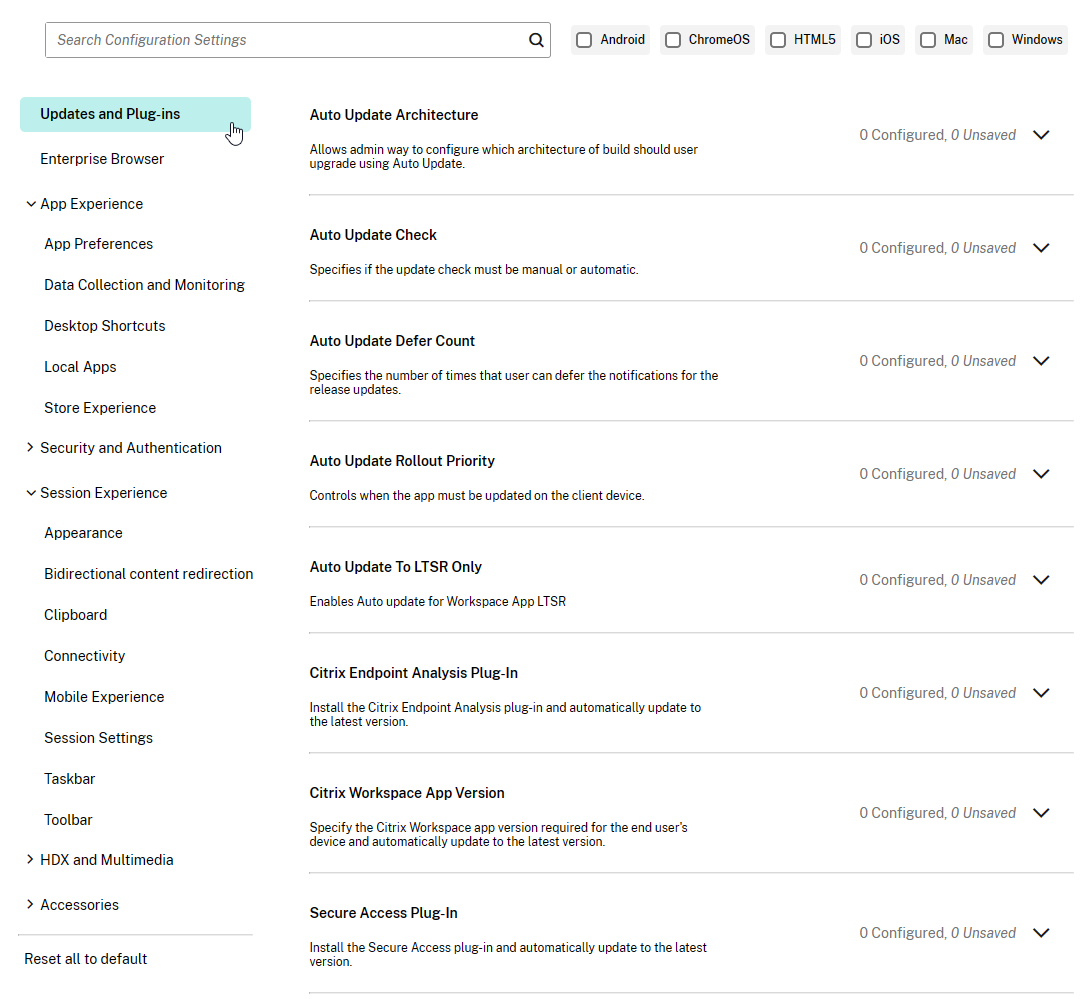
Global App Configuration Service
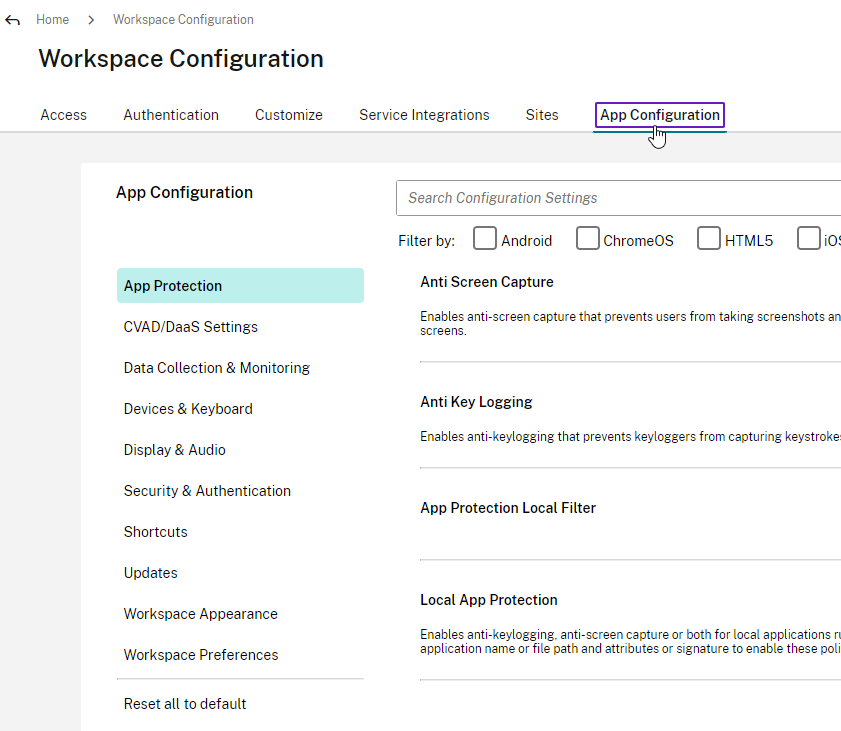
Global App Configuration Service (GACS) is a Citrix Cloud service that can push configurations to Workspace app clients. This Citrix Cloud service is now available to all on-premises customers even if you don’t own any Citrix Cloud entitlements.
- Login to https://citrix.cloud.com. If you don’t have a Citrix Cloud account, then login using your Citrix.com account credentials and it will create a Citrix Cloud account.
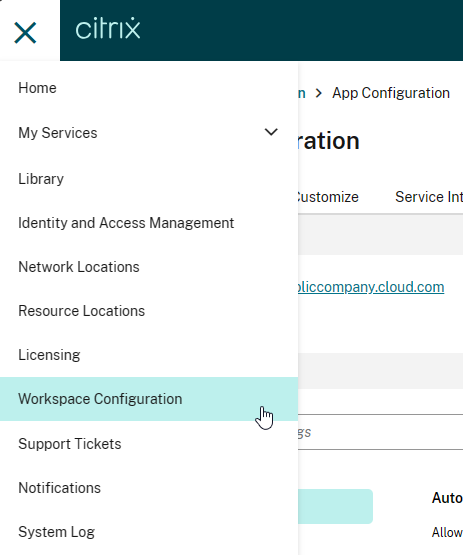
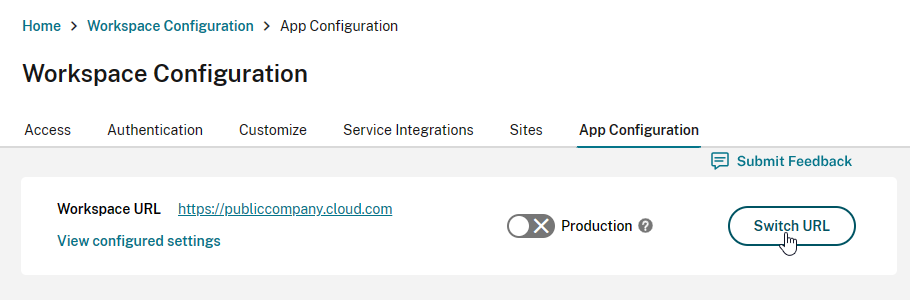
- Use the top left hamburger menu to go to Workspace Configuration.

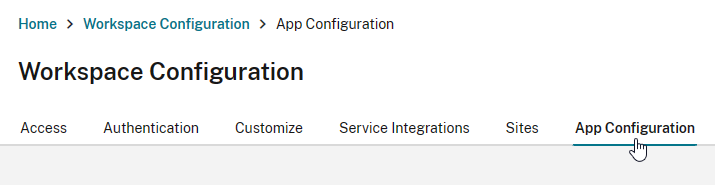
- Switch to the tab named App Configuration.

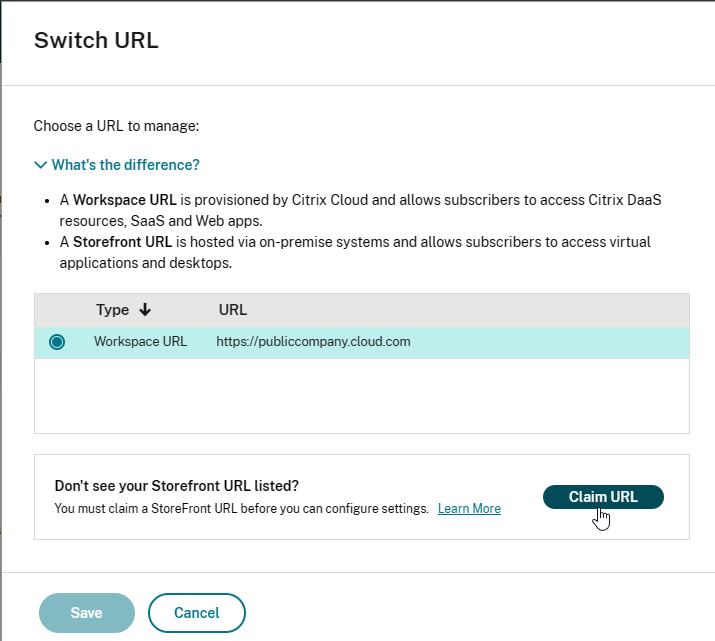
- Click Switch URL.

- Near the bottom, click Claim URL.

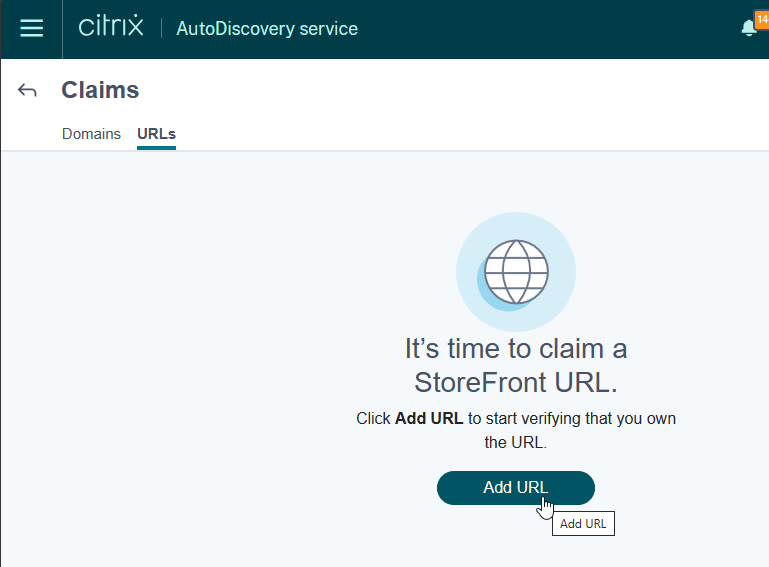
- Click Add URL to add your on-premises StoreFront/Gateway URL. See Citrix Docs for details. GACS uses this URL to determine which Workspace app clients should receive the settings that you configure.

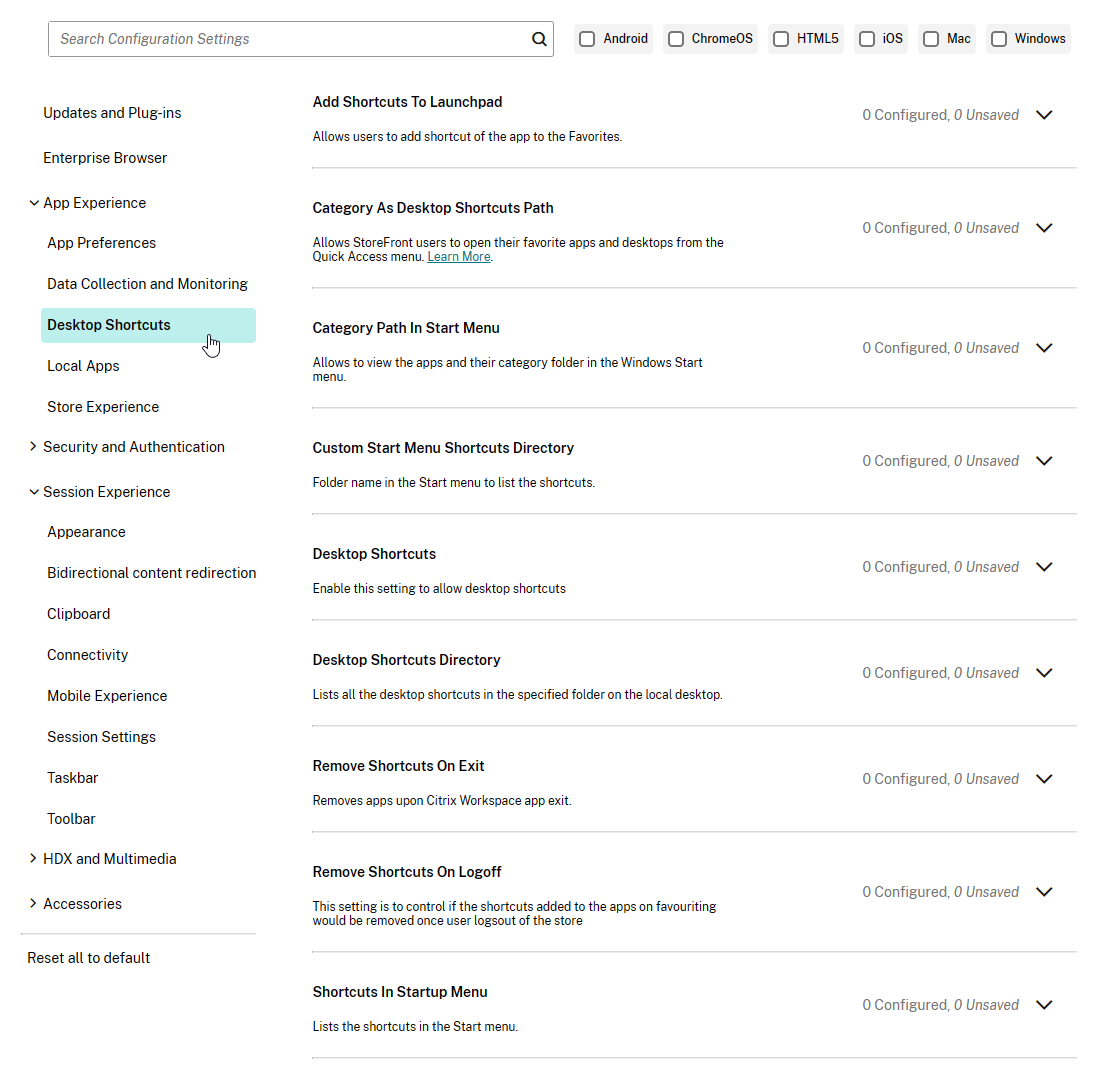
- Back in the App Configuration page, you can now configure Workspace app settings as desired. Workspace apps that have stores under the claimed URL will then receive these settings.

Auto-Update
Workspace app supports auto-update.
Some notes:
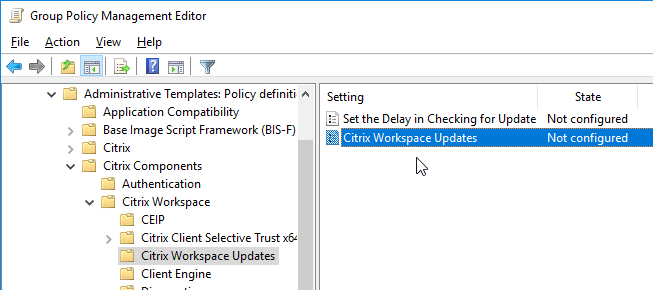
Auto-update is configured using Workspace app group policy under the Citrix Workspace Updates, or Auto-Update node.
Or use Global App Configuration Service.
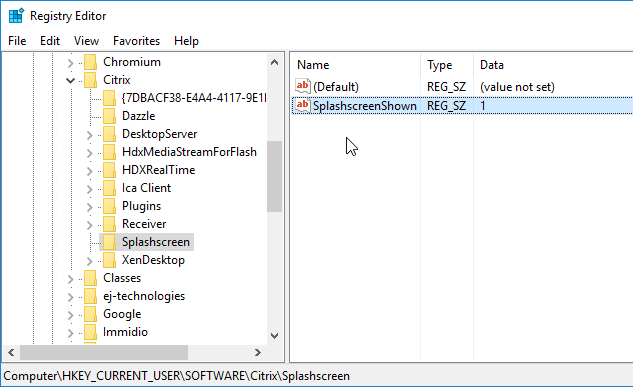
Workspace app Splash Screen
Workspace app shows a Splash Screen on first launch with the text “Citrix Workspace app extends the capabilities of Citrix Receiver”.
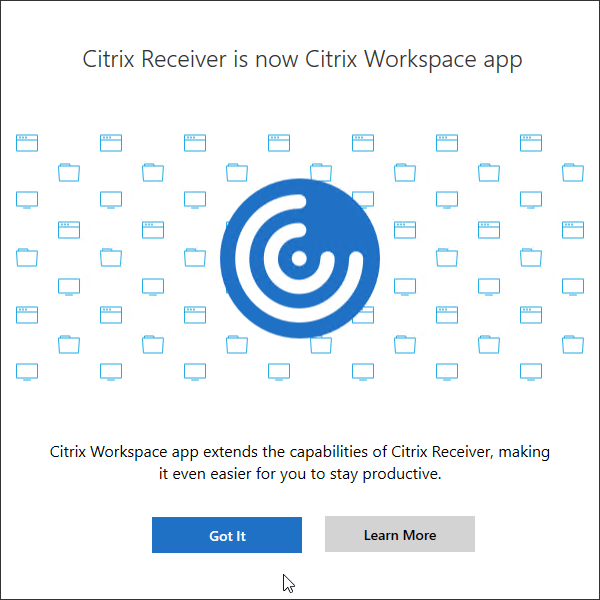
To prevent this splash screen, set the following registry value: (source = Dennis Span on Twitter)
- Key = HKEY_CURRENT_USER\SOFTWARE\Citrix\Splashscreen
- Value (REG_SZ) = SplashscreenShown = 1
Add Account Wizard
After installation, Workspace app will launch and ask you to add an account. If Workspace app, notice the checkbox Do not show this window automatically at logon.
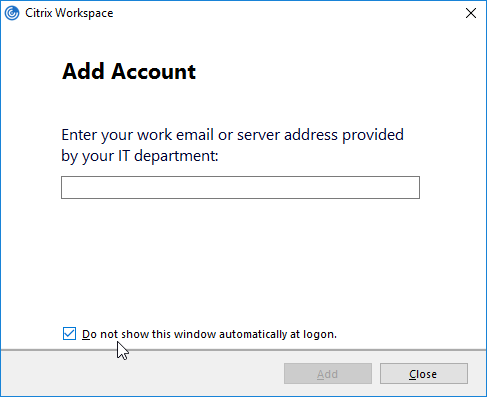
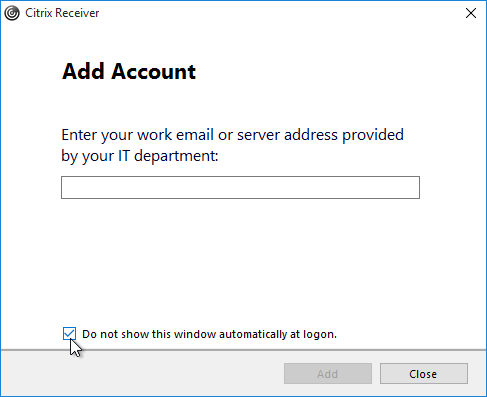
FTU (First Time Use aka Add Account Wizard) will be displayed only if a store is not configured. If a store is already configured via command line, GPO, or Citrix Studio, then FTU screen will not be available after installation. Otherwise, FTU can be suppressed by doing one of the following:
- Rename CitrixWorkspaceApp.exe to CitrixWorkspaceAppWeb.exe.
- Install using a command line switch:
- CitrixWorkspaceApp.exe /ALLOWADDSTORE=N
- Set the registry value: HKEY_LOCAL_MACHINE\SOFTWARE\Policies\Citrix\EnableFTU=dword:00000000 (or EnableX1FTU =dword:0)
- Disable the EnableFTU policy setting in Receiver.admx.

- Change Registry values post installation to suppress the Add Account window. Under HKLM\Software\Wow6432Node\Citrix\Dazzle, set AllowAddStore value to N.
- Set the registry value: HKEY_LOCAL_MACHINE\Software\Citrix\Receiver\NeverShowConfigurationWizard (REG_SZ) = true
- Also see Suppressing Add Account dialog at Citrix Docs.
Discover Hidden Stores
When Workspace app is first launched, it must perform Discovery, which is the process of downloading the .xml provisioning file from StoreFront. Discovery is performed by entering a StoreFront FQDN or Gateway FQDN. To discover a hidden store (a store that’s not advertised), add ?StoreName to the end of the FQDN. CTX214819 How to configure Receiver to a Store that is not advertised.
CitrixWorkspaceApp.exe Command line switches
CTX227370 Citrix Workspace app Commandline Tool contains a GUI tool to build your installer command line.
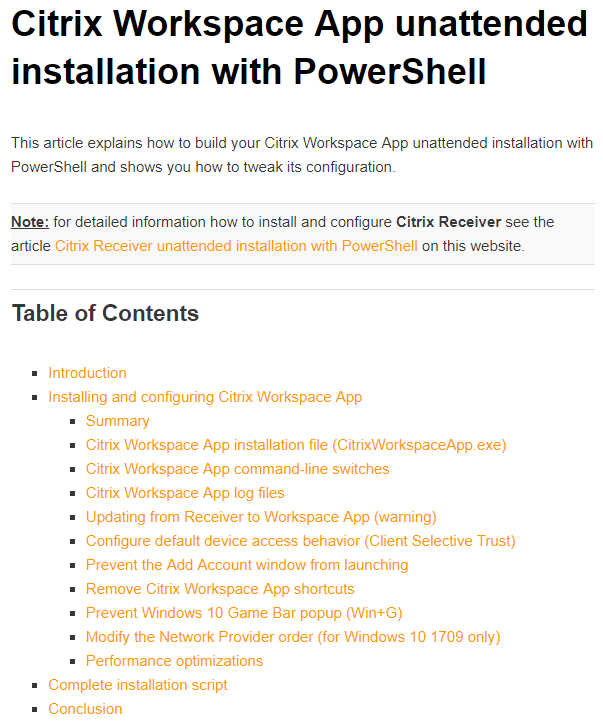
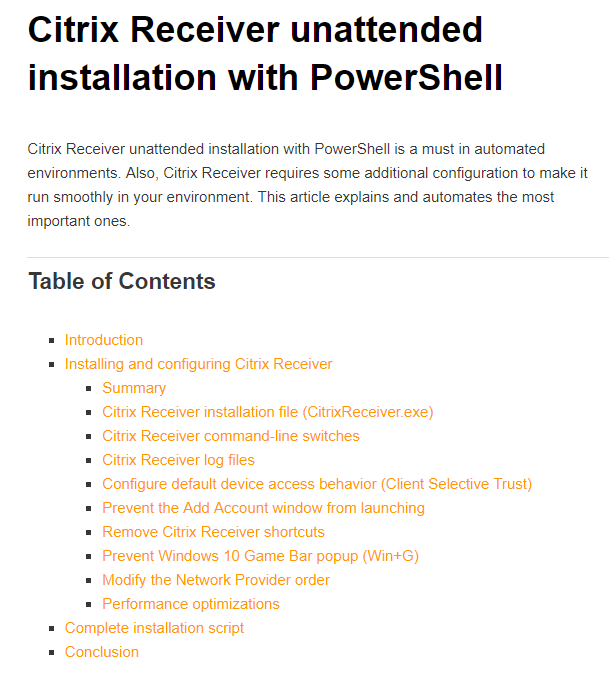
For unattended installation of Workspace app, see CTA Dennis Span Citrix Workspace App unattended installation with PowerShell or Citrix Receiver unattended installation with PowerShell.
Installer Command Line Switches are detailed at Configure and install Receiver for Windows using command-line parameters at Citrix Docs. Common Command line switches include the following:
- /silent
- /includeSSON – enables pass-through authentication. GPO configuration is also required as detailed below.
CitrixWorkspaceApp.exe /includeSSON
- /ALLOWADDSTORE=A – by default, only SSL (HTTPS) stores are accepted. To allow non-SSL stores:
CitrixWorkspaceApp.exe /ALLOWADDSTORE=A
- /STORE0 – To add a store from the installation command line:
CitrixWorkspaceApp.exe STORE0="AppStore;https://Citrix.corp.com/Citrix/MyStore/discovery;on;App Store"
- Workspace App can discover the Store through NetScaler Gateway.
CitrixWorkspaceApp.exe STORE0="AppStore;https://gateway.corp.com#MyStore;On;App Store"
- Workspace App can discover the Store through NetScaler Gateway.
- /SELFSERVICEMODE=False – disables the Self-Service interface and enables shortcut-only mode:
CitrixWorkspaceApp.exe /SELFSERVICEMODE=False
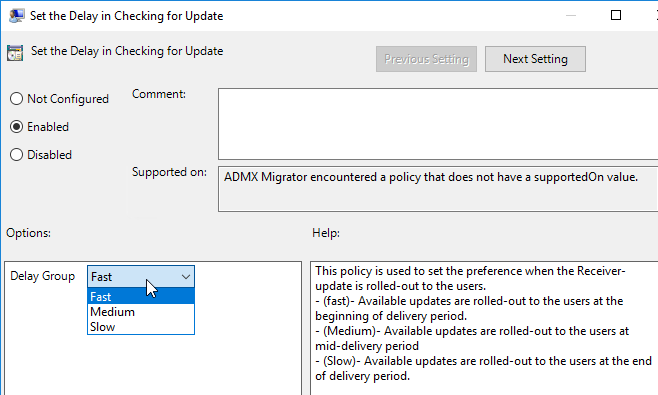
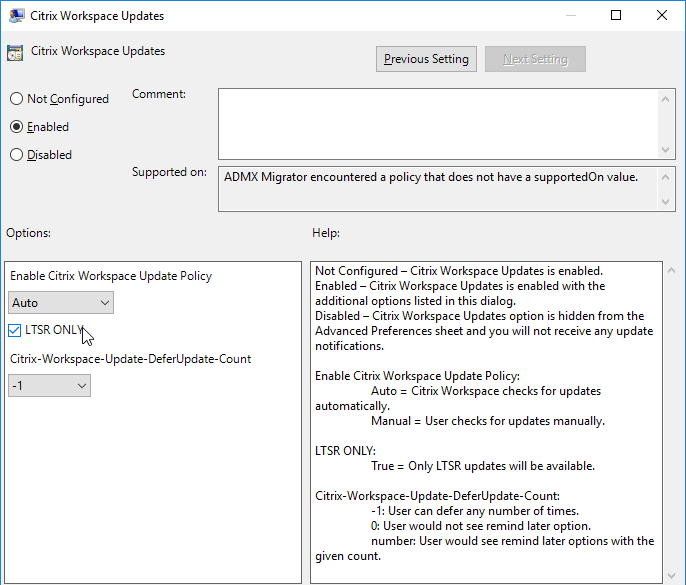
- /AutoUpdateCheck=auto /AutoUpdateStream=LTSR – enables Citrix Workspace Update notifications and sets it to LTSR Branch only. AutoUpdateCheck can also be set to manual or disabled. AutoUpdateStream can also be set to Current. See Configuring Citrix Workspace Updates at Citrix Docs.
CitrixWorkspaceApp.exe /AutoUpdateCheck=auto /AutoUpdateStream=LTSR
- /ENABLEPRELAUNCH=True – enables prelaunch:
CitrixWorkspaceApp.exe /ENABLEPRELAUNCH=True
- /ALLOW_CLIENTHOSTEDAPPSURL=1 – enables Local App Access:
CitrixWorkspaceApp.exe /ALLOW_CLIENTHOSTEDAPPSURL=1
Registry values
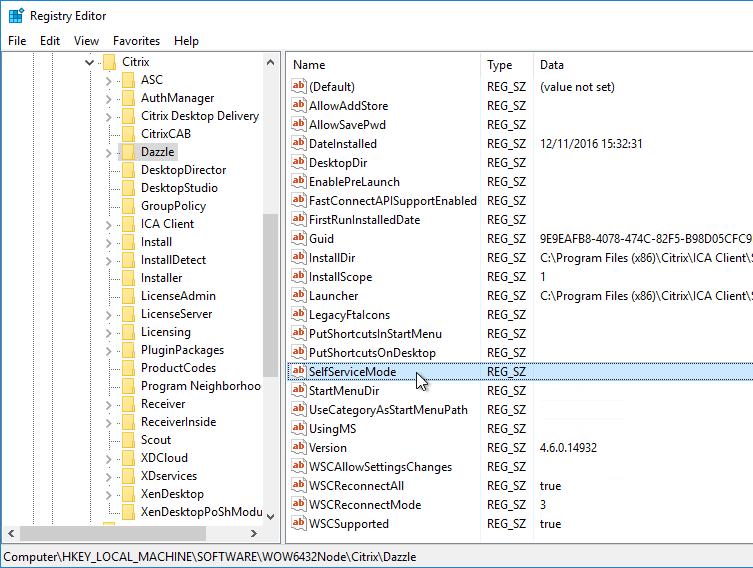
HKLM\Software\Wow6432Node\Citrix\Dazzle on the Workspace app machine. All are of type REG_SZ (string) unless specified. Note: several of these are configurable using the Reciever.admx group policy template.
- SelfServiceMode (REG_SZ) = False – Turns off Workspace app’s Self-Service interface.
- PutShortcutsOnDesktop (REG_SZ) = True – If Self-Service interface is disabled, places all shortcuts on desktop.
- UseDifferentPathsforStartmenuAndDesktop (REG_SZ) = True
- UseCategoryAsStartMenuPath (REG_SZ) = True or False
- UseCategoryAsDesktopPath (REG_SZ) = True or False
- StartMenuDir (REG_SZ) = name of folder on Start Menu where shortcuts are placed.
- DesktopDir (REG_SZ) = name of folder on Desktop where shortcuts are placed
- EnablePreLaunch (REG_SZ) = True – If SSON is enabled then PreLaunch is already enabled by default.
- AllowAddStore (REG_SZ) = A – Only if using http (instead of https) to connect to StoreFront.
- AllowSavePwd (REG_SZ) = A – Only if using http (instead of https) to connect to StoreFront.
- UserDomainName (REG_SZ) = pre-filled domain name
- InitialRefreshMinMs (REG_SZ) = 1 – minimizes the launch delay before contacting store
- InitialRefreshMaxMs (REG_SZ) = 1 – minimizes the launch delay before contacting store
- RefreshMs (REG_SZ) = 3600000 (1 hour) – interval for Receiver icon refreshes. 1 hour is the default value.
- RefreshMs (REG_SZ) = 18000000 – Citrix CTX213755 Citrix Receiver Shows Authentication Window Periodically When Receiver is Not Opened
- MaxSimultaneousFetches (REG_DWORD) = 6 – improves the time of loading icons in Start Menu
- MaxSimultaneousSubscribes (REG_DWORD) = 6 – improves the time of loading icons in Start Menu
- DontWarnOfRemovedResources (REG_SZ) = True – prevents dialog boxes when resources are removed from the server. (or False)
- SilentlyUninstallRemovedResources (REG_SZ) = True – prevents dialog boxes when resources are removed from the server
- PreferTemplateDirectory (REG_SZ) = UNC path or local path containing shortcuts copied by the prefer keyword. Give the shortcuts a short name.
- PnaSSONEnabled (REG_SZ) = True – Enables Single Sign-on for PNAgent (Web Interface).
- WSCReconnectMode (REG_SZ) = 3 (default) – If this Workspace app is running inside a VDA published desktop, set it to 0.
- If you’re having trouble getting sessions to reconnect, see Receiver 4.3 Desktop will not auto-reconnect when logging into a machine at Citrix Discussions
- AlwaysUseStubs (REG_SZ) = True. Workspace app and Receiver 4.3.100 and newer don’t create .exe stubs by default. Set this to create .exe stubs. Also see Citrix CTX211893 Controlling Shortcut behavior in Receiver 4.3.100.
- DontCreateAddRemoveEntry (REG_SZ) = True – don’t create “Delivered by Citrix” entries in Programs and Features
- DesktopNameFormatString = format string for shortcut names – For example “{0}_{1}_{2}_{3}”. See the link for details.
- SelfServiceFlags (REG_DWORD) = 4 – prevents duplicate shortcuts when roaming and Desktop is redirected.
- SelfServiceFlags = 5 to stop external SSON from prompting for authentication
- ReEvaluateNetwork (REG_SZ) = true – for Beacon detection with Single FQDN
To prevent the Win+G popup on Windows 10 machines:
- HKEY_LOCAL_MACHINE\SOFTWARE\Policies\Microsoft\Windows\GameDVR
- AllowGameDVR (REG_DWORD) = 0
To allow adding non-HTTPS stores to Workspace app:
- HKLM\Software\Wow6432Node\Citrix\AuthManager
- ConnectionSecurityMode (REG_SZ) = Any
To increase ICA bandwidth consumption over high latency links, set:
- HKEY_LOCAL_MACHINE\SOFTWARE\Wow6432Node\Citrix\ICA Client\Engine\Configuration\Advanced\Modules\TCP/IP
- OutBufCountClient2 = Number of OutBufs (default is 44)
- OutBufCountHost2 = Number of OutBufs (default is 44)
- See CTX125027 How to Optimize HDX Bandwidth Over High Latency Connections for some recommended values (multiples of 44)
To prevent beacon probing from using proxy, set:
- HKEY_LOCAL_MACHINE\Software\WOW6432Node\Citrix\Receiver\inventory
- BeaconProxyEnabled (REG_DWORD) = 0
To enable foreground progress bar, set:
- HKEY_LOCAL_MACHINE\SOFTWARE\Wow6432Node\Citrix\ICA Client
- ForegroundProgressBar (REG_DWORD) = 1
For client-to-server file type redirection, set:
- HKEY_LOCAL_MACHINE\SOFTWARE\Wow6432Node\Citrix\ICA Client\Engine\Configuration\Advanced\Modules\ClientDrive
- NativeDriveMapping=”TRUE”
To fix USB devices that emulate a keyboard, set:
- HKEY_LOCAL_MACHINE\SOFTWARE\Wow6432Node\Citrix\ICA Client\Engine\Lockdown Profiles\All Regions\Lockdown\Virtual Channels\Keyboard
- KeyboardTimer=”10”
To remember manually mapped USB devices when auto-connection is enabled, set: (2409 and newer)
- HKLM\SOFTWARE\Citrix\ICA Client\GenericUSB (same path for 32-bit and 64-bit, create the keys)
- RememberConnections (DWORD) = 0x1
To override the devices that are mapped using optimized channels instead of generic USB, see Citrix CTX123015 How to Configure Automatic Redirection of USB Devices
Group Policy Settings
Copy the Workspace app ADMX template (C:\Program Files (x86)\Citrix\ICA Client\Configuration\receiver.admx) to C:\Windows\PolicyDefinitions (or Sysvol). Also copy receiver.adml to C:\Windows\PolicyDefinitions\en-us (or Sysvol).
Edit a GPO that applies to client machines, go to Computer Configuration | Policies | Administrative Templates | Citrix Components | Citrix Workspace and configure the following:
- To enable pass-through authentication: go to | User Authentication |.
- Local Username and Password – Check the top two boxes.
- Also add the StoreFront FQDN to the Local Intranet zone in Internet Explorer.
- Single Sign-on for NetScaler Gateway (Workspace app 1808 and newer)
- To add a store, go to | StoreFront |
- StoreFront Accounts List – see the help text
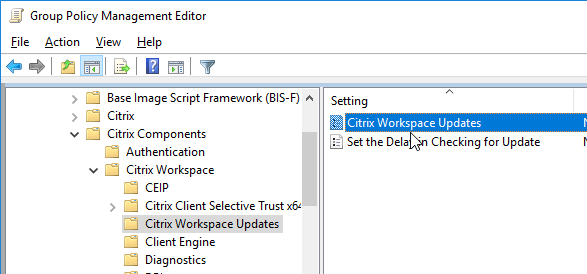
- To enable Auto-Update, go to | AutoUpdate | or | Citrix Workspace Updates |. (the node was renamed in 4.11 and Workspace app)
- Enable or Disable AutoUpdate or
- Citrix Workspace Updates
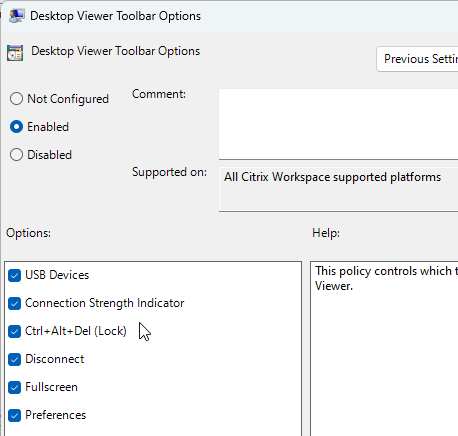
- To modify the desktop viewer toolbar, go to | Client Engine |
- Desktop Viewer Toolbar Options (2409 and newer)

- Desktop Viewer Toolbar Options (2409 and newer)
- To enable Local App Access, go to | User Experience |
- Local App Access Settings
- To prevent the endpoint from sleeping while session is active, go to | User Experience |
- Power Management (2405 and newer)
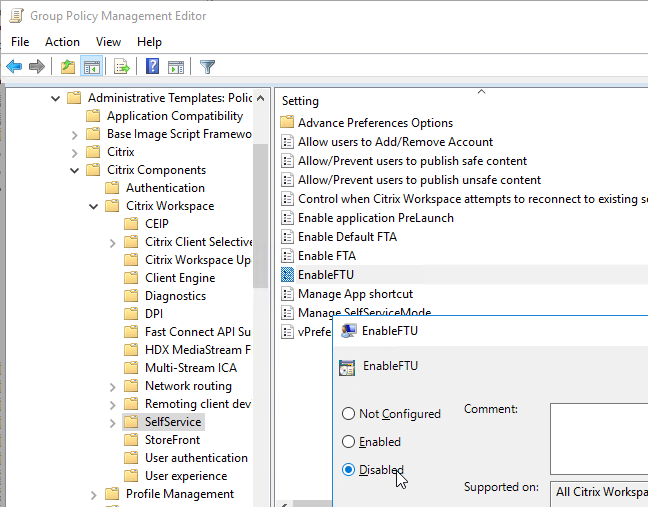
- To configure the Self-Service interface, go to | SelfService |
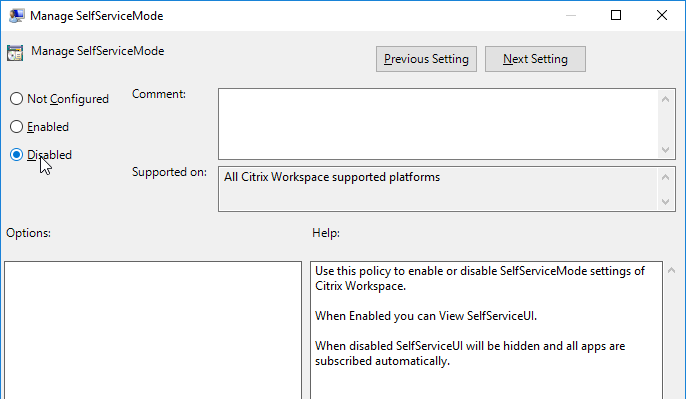
- Set Manage SelfServiceMode to Disabled to completely disable the Self-Service window. This causes all icons to be placed on the Start Menu.
- Enable Manage App Shortcut and configure it as desired.
- To allow the Self-Service window, but prevent it from automatically opening (reside in systray), tick Prevent Citrix Workspace performing a refresh of the application list when opened. Source
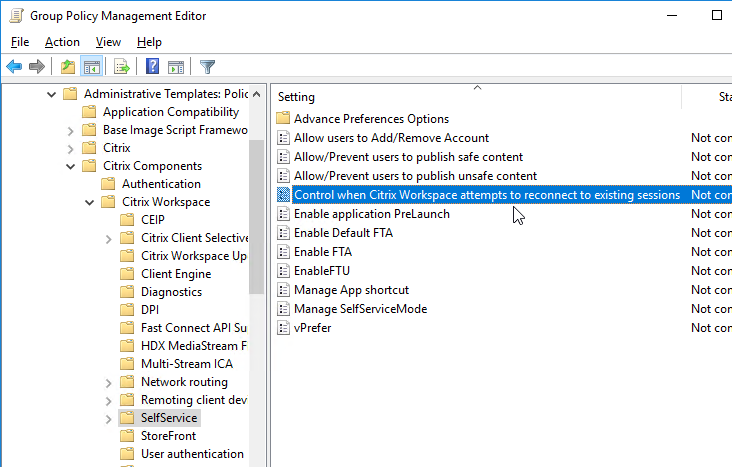
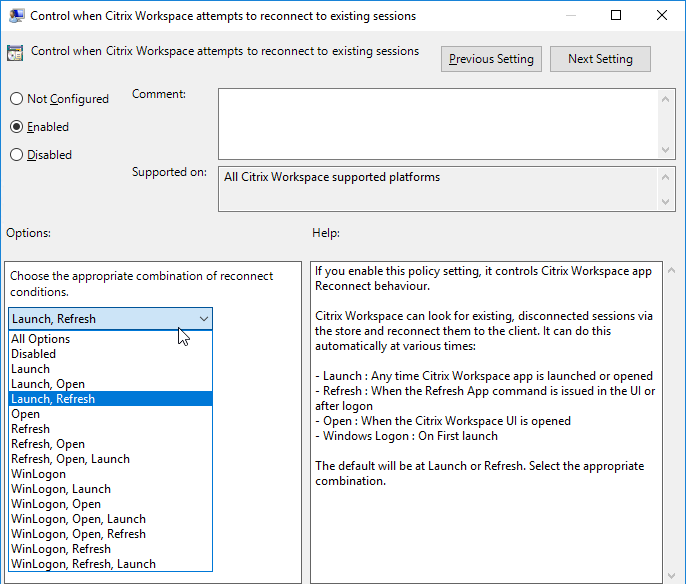
- Enable Control when Workspace attempts to reconnect to existing sessions. If this is a VDA published desktop, set it to Disabled. Otherwise configure it as desired.
- Set Enable FTU to Disabled to prevent the Add Account wizard from displaying.
- Enable Allow/Prevent users to publish unsafe content if publishing content that’s opens a file or file share.
Enable automatic client drive and client microphone mapping:
- In a client-side GPO, add the GPO ADM template from http://support.citrix.com/article/CTX133565.
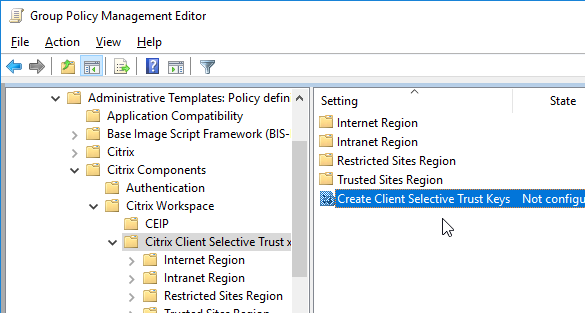
- Enable the setting Create Client Selective Trust Keys. See Below for details.
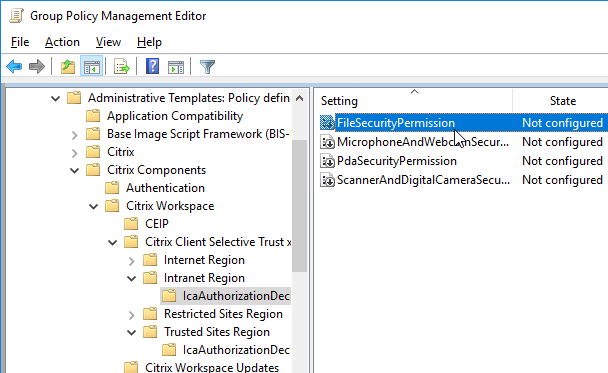
- Configure the FileSecurityPermission setting in one or more of the regions.
- Configure the MicrophoneAndWebcamSecurityPermission setting in one or more of the regions.
Citrix CTX203658 Start Menu Icons Set to Default (Blank Document) After Update to Receiver 4.3.100 – Windows 8 and newer
- Computer Configuration | Policies | Administrative Templates | Windows Components | File Explorer
- Allow the use of remote paths in file shortcut icons = enabled
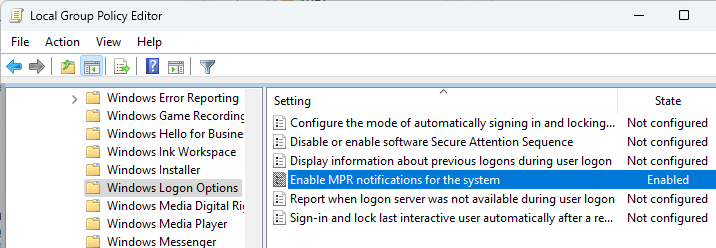
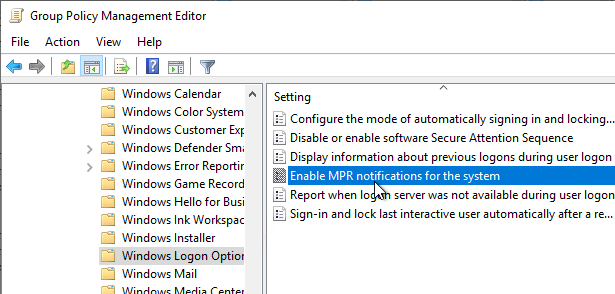
For Single Sign-on in Windows 11 24H2 and newer, enable the following GPO setting:
- Computer Configuration | Policies | Administrative Templates | Windows Components | Windows Logon Options
- Enable MPR notifications for the System = enabled

- Enable MPR notifications for the System = enabled
Deploy Workspace app using Active Directory
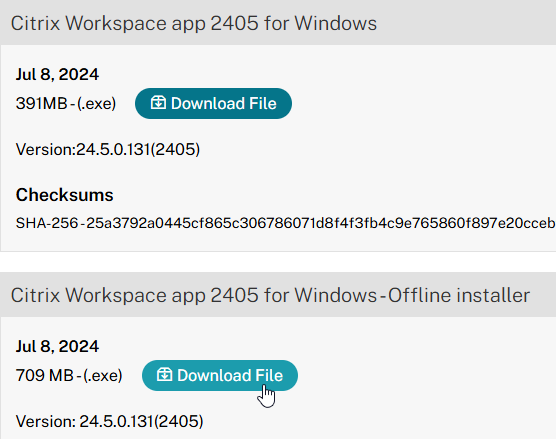
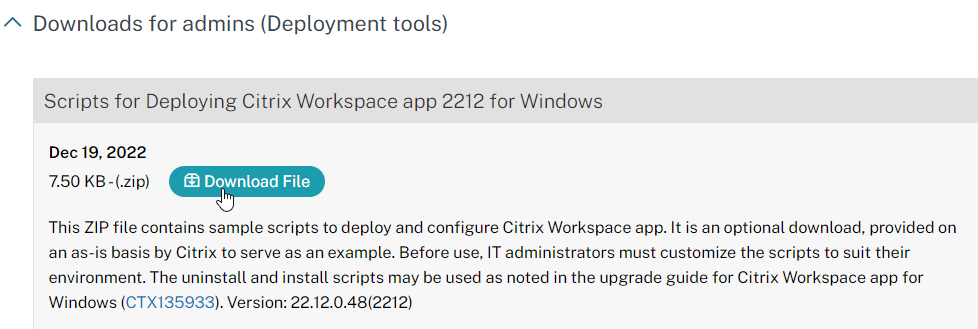
To deploy Workspace app using Active Directory, configure a GPO with a computer startup script that runs the Workspace app installer executable. Citrix provides sample scripts that can be downloaded from one of the Workspace app download pages (Workspace app current release version 2409.10, or LTSR version 2402 CU3, by expanding Downloads for Admins (Deployment Tools).
Also see CTA Dennis Span Citrix Receiver unattended installation with PowerShell.
Change Workspace App’s Store Configuration, including Reset Citrix Workspace
You can change Workspace app’s configured Store/Account with a couple command lines:
"C:\Program Files (x86)\Citrix\ICA Client\SelfServicePlugin\SelfService.exe" -deleteproviderbyname Corporate
"C:\Program Files (x86)\Citrix\ICA Client\SelfServicePlugin\SelfService.exe" -init -createprovider Corporate https://storefront.corp.com/Citrix/Store/discovery
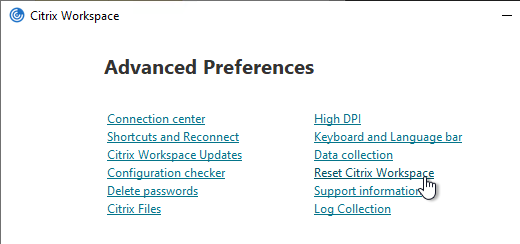
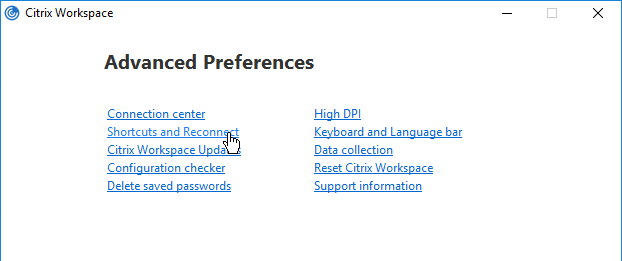
It is sometimes necessary to Reset Citrix Workspace by right-clicking the Workspace app systray icon, clicking Advanced Preferences, and clicking the Reset link. You can do this from the command line by running "C:\Program Files (x86)\Citrix\ICA Client\SelfServicePlugin\CleanUp.exe" -cleanUser -silent. See CTX140149 How to Reset Receiver Using the Command Line.
Workspace app Group Policy ADMX Template
Many of the Workspace app configuration settings must be configured in group policy. These Workspace app settings are only available after installing the GPO templates.
Alternatively, Citrix Cloud customers can use Global App Configuration Service to configure Workspace app. Today it’s a REST API, but Citrix has started adding a GUI at Workspace Configuration > App Configuration.
For GPO configuration:
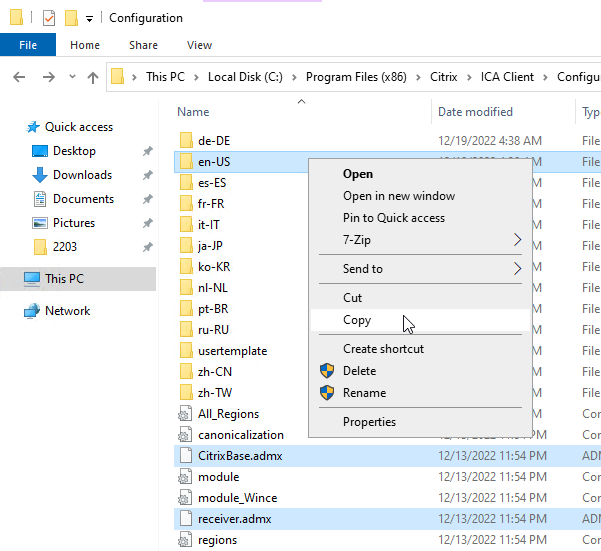
- From a machine that has Workspace app installed, find the .admx and .adml files in the C:\Program Files (x86)\Citrix\ICA Client\Configuration.
- You can also download the ADMX files from one of the Workspace app download pages (Workspace app current release version 2409.10, LTSR version 2402 CU3, by expanding Downloads for Admins (Deployment Tools).
- Copy the CitrixBase.admx and receiver.admx files. Also copy the en-US folder. In Workspace app, the files are still named receiver.admx.

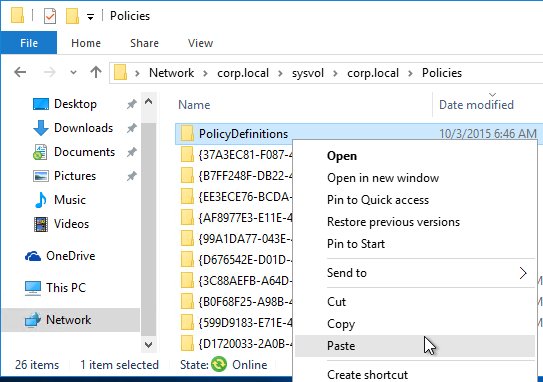
- Go to your domain’s SYSVOL share and in the Policies folder look for a PolicyDefinitions folder. If one exists, paste the .admx file directly into the PolicyDefinitions folder. If this folder doesn’t exist in SYSVOL, instead copy the .admx file to C:\Windows\PolicyDefinitions. Overwrite any existing Receiver ADMX files.

- The GPO settings can then be found at one of the following:
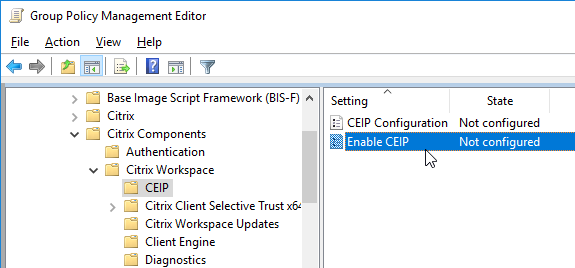
- Computer Configuration > Policies > Administrative Templates > Citrix Components > Citrix Workspace
- Computer Configuration > Policies > Administrative Templates > Citrix Components > Citrix Receiver
- For example, you can disable Customer Experience Improvement Program (CEIP) from here.
- See https://www.carlstalhood.com/delivery-controller-cr-and-licensing/#ceip for additional places where CEIP is enabled.

- Workspace app 1905 and newer has a setting to Disable sending data to 3rd party (e.g., Google Analytics).

- Workspace app 1905 and newer let you disable embedded browser caching.

- Workspace app 1905 and newer have NetScaler LAN Proxy under Network routing > Proxy.

- Workspace app 1808 and newer have User authentication | Single Sign-on for NetScaler Gateway.

- Citrix Workspace Updates, (aka AutoUpdate) can be configured using group policy. See Configuring Citrix Workspace Updates at Citrix Docs.

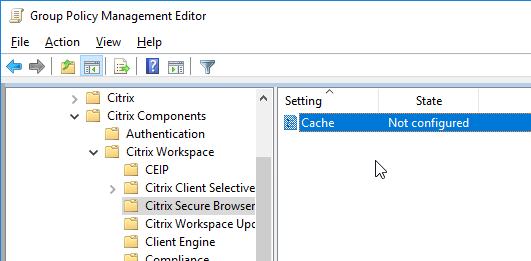
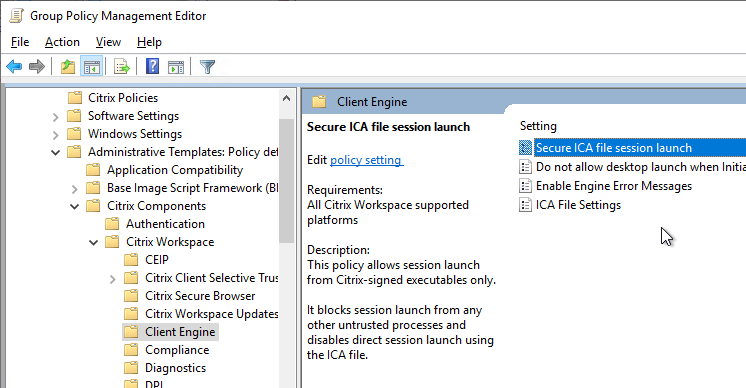
- Workspace app 1912 and newer can be configured to require in-memory ICA files only. The setting called Secure ICA file session launch is under the Client Engine node. See Citrix Docs for details on in-memory ICA files instead of writing ICA files to disk.

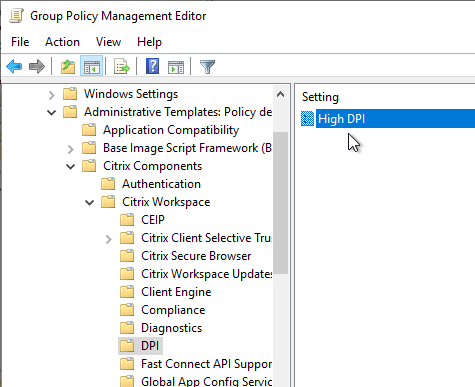
- The DPI node has a setting called High DPI that lets you disable DPI matching, which is enabled by default in Workspace App 2206 and newer.

- Workspace app has settings to hide Advanced Preferences, enable/disable showing the DPI option, and enable/disable H265.

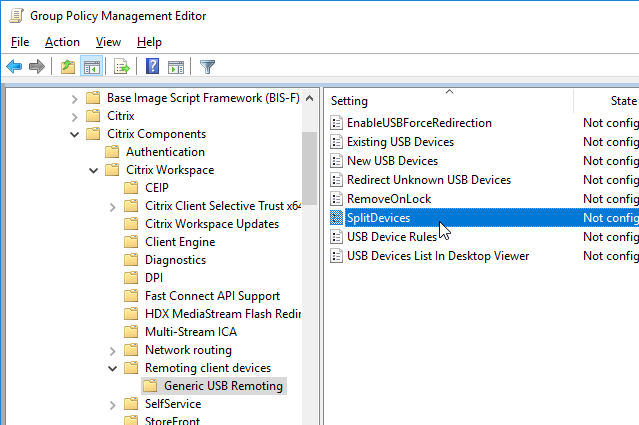
- Workspace app 4.8 and newer have SplitDevices GPO setting under Citrix Workspace | Remoting client devices | Generic USB Remoting. See Configuring composite USB device redirection at Citrix Docs.

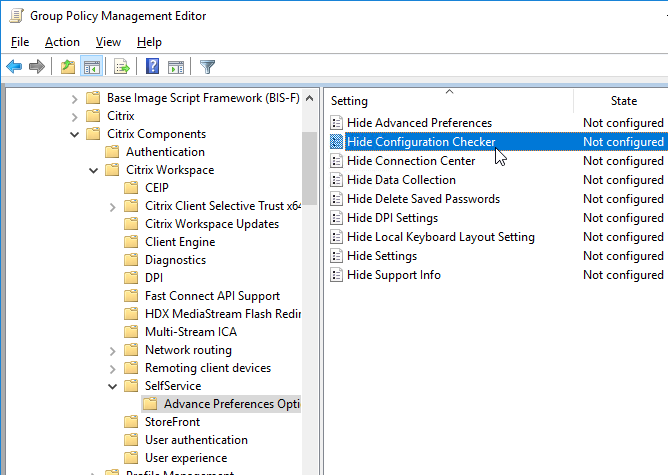
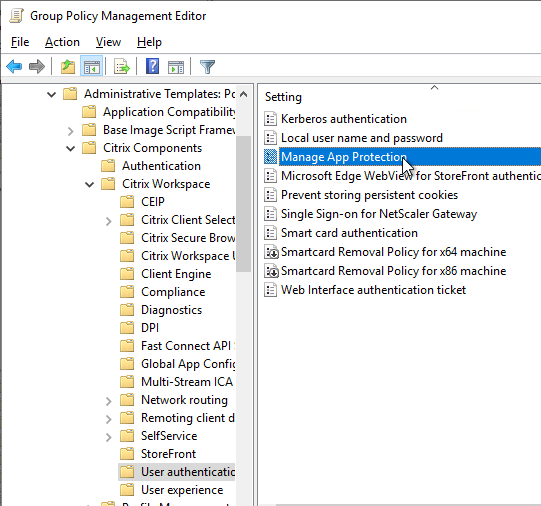
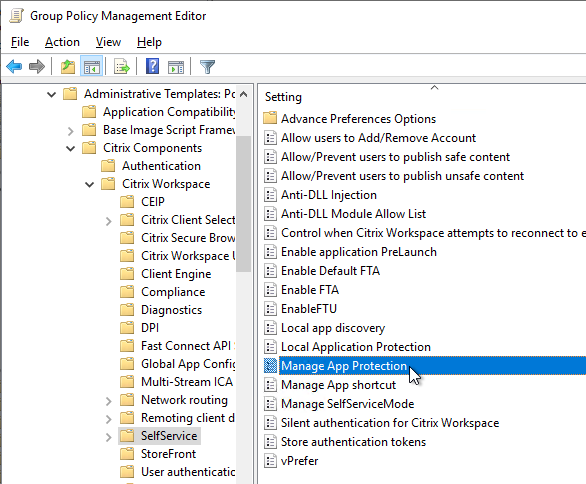
- Workspace app 2212 and newer by default disable App Protection for the authentication screen and icons list. To enable them, configure User authentication | Manage App Protection and SelfService | Manage App Protection.


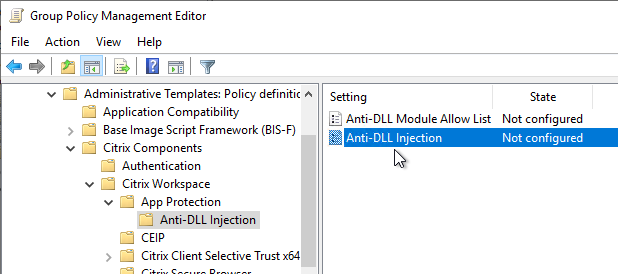
- Workspace app 2303 and newer have Anti-DLL Injection for App Protection. It is disabled by default. Enable it in a GPO at Citrix Components | Citrix Workspace | App Protection | Anti-DLL Injection. See Citrix Docs for details.


Pass-through Authentication
Citrix blog post – A Comprehensive Guide to Enabling Pass-Through Authentication with XenDesktop 7.5
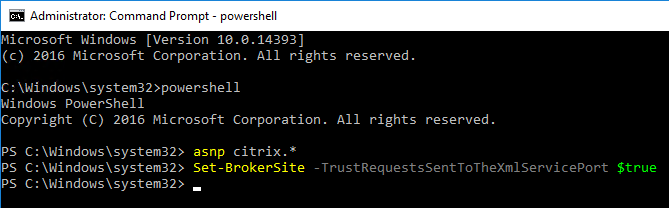
- Run the command
Set-BrokerSite -TrustRequestsSentToTheXmlServicePort $True from a Windows PowerShell command prompt on a Delivery Controller.
- In XenApp 6.5, this is a Citrix Policy > Computer > Trust XML Requests.
- Login to the PC as an administrator.
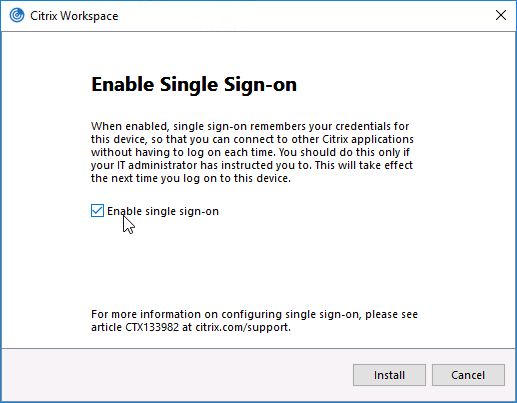
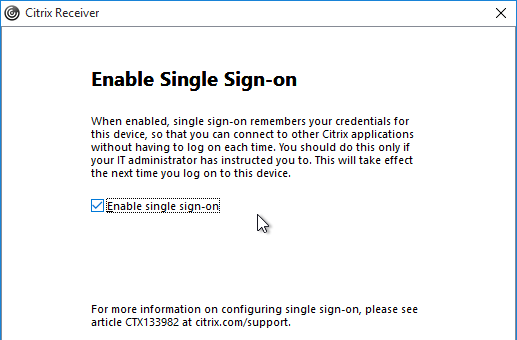
- If installing Workspace app, as an administrator, during installation, on the Enable Single Sign-on page, check the box next to Enable Single Sign-on. Then finish the installation.

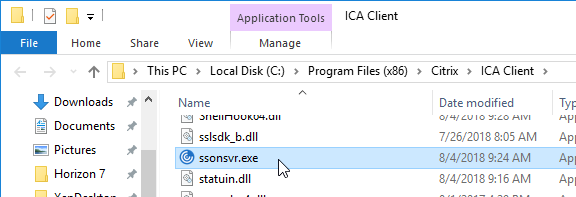
- To verify that SSON is installed, go to C:\Program Files (x86)\Citrix\ICA Client and look for the file ssonsvr.exe.

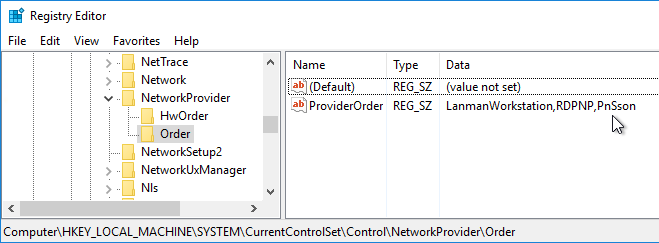
- And if you open regedit and go to HKLM\SYSTEM\CurrentControlSet\Control\NetworkProvider\Order, you should see PnSson in the ProviderOrder.
- Install the receiver.admx (and .adml) template into PolicyDefinitions if you haven’t already.
- Edit a GPO that is applied to the client PCs where the Workspace app is installed.
- Go to Computer Configuration > Policies > Administrative Templates > Citrix Components > Citrix Workspace.
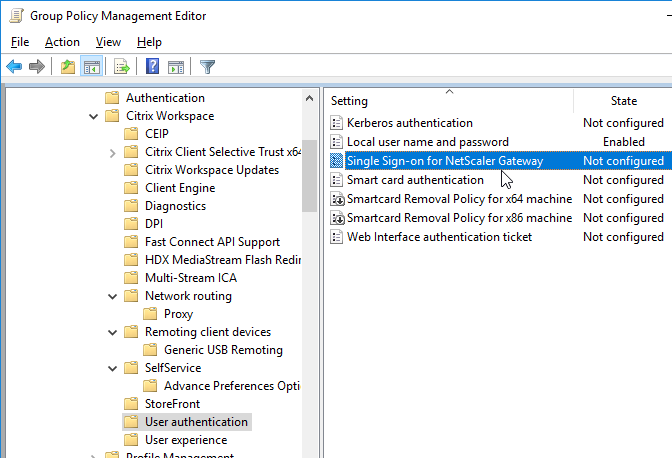
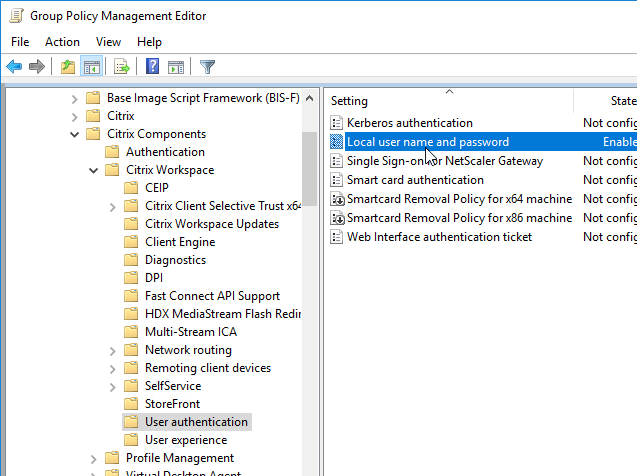
- Expand Citrix Workspace and click User authentication.
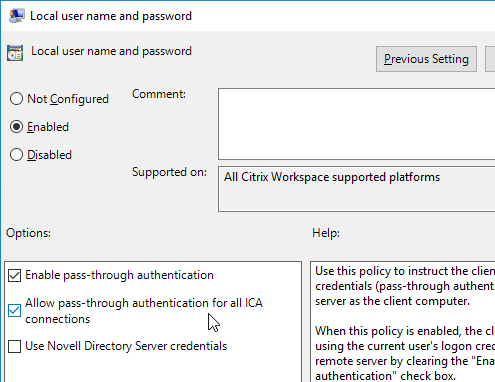
- On the right, double-click Local user name and password.

- Select Enabled and then check the box next to Allow pass-through authentication for all ICA connections. Click OK.

- In Workspace app 1808 and newer, you can enable Single Sign-on for NetScaler Gateway.

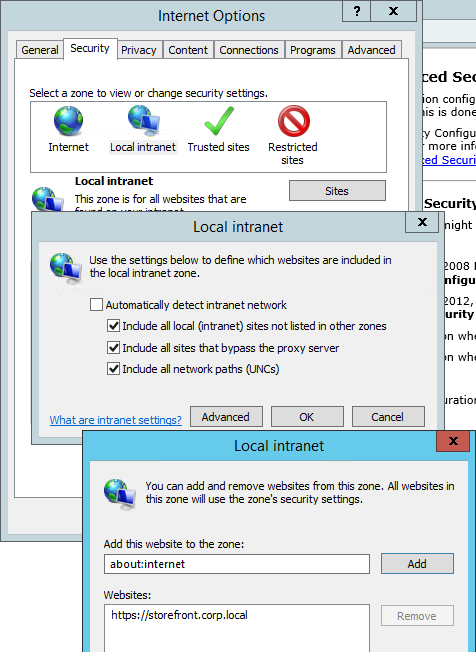
- Ensure that the internal StoreFront FQDN is in the Local Intranet zone in Internet Explorer. You can use a GPO to configure this on the client side.
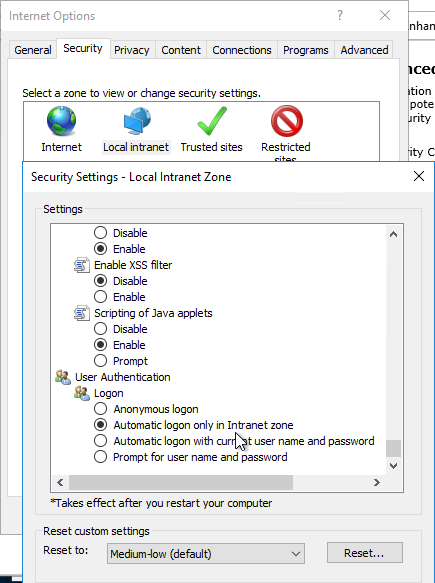
- Local Intranet zone should have Automatic logon only in Intranet zone enabled.
- For Windows 11 24H2 and newer, make sure the GPO setting Enable MPR notifications for the System is enabled at Computer Configuration | Policies | Administrative Templates | Windows Components | Windows Logon Options. Make sure HKLM\Software\Microsoft\Windows\CurrentVersion\Policies\System\EnableMPRNotifications is set to 1 on the Workspace app machine.

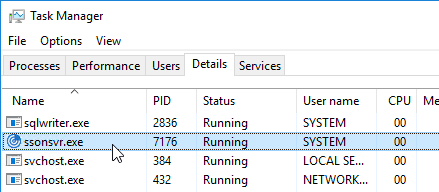
- Logoff Windows and log back on. In Task Manager you should now see ssonsvr.exe. This won’t appear unless you logoff and log back on.

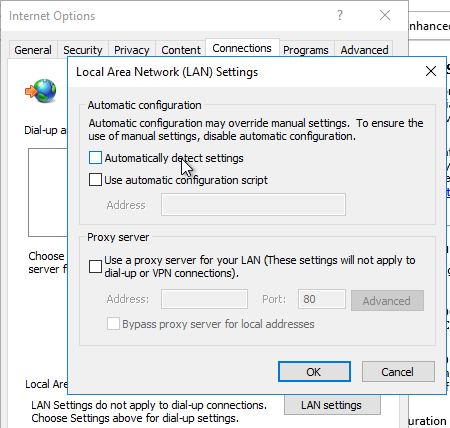
- If Workspace app won’t connect or is slow to enumerate icons, then you might have to disable Automatically detect settings in IE.
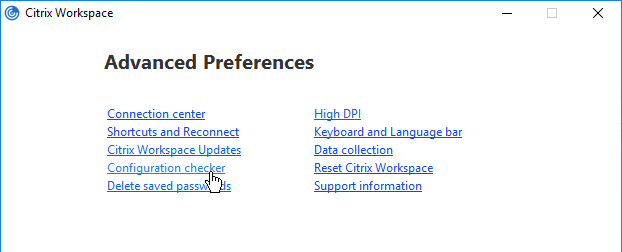
- Right-click the Workspace app icon and click Advanced Preferences.
- Click Configuration Checker.

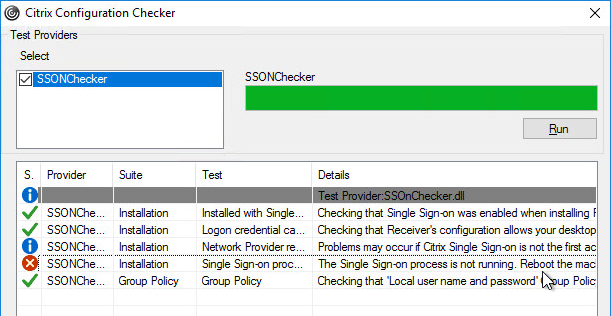
- Check the box next to SSONChecker and click Run.

- The lines with red x will indicate the issue and corrective action.


StoreFront Accounts
You can use a client-side GPO to add a store (Account) to Workspace app Self-Service.
- Install the receiver.admx (and .adml) template into PolicyDefinitions if you haven’t already.
- Edit a GPO that applies to endpoint devices that have Citrix Workspace app installed.
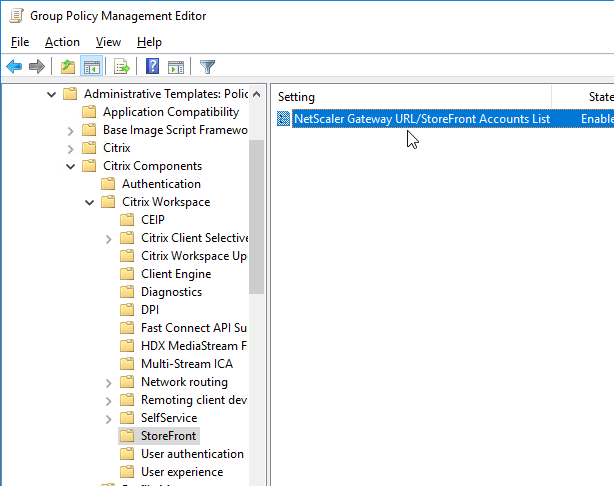
- Go to Computer Configuration > Administrative Templates > Policies > Citrix Components > Citrix Workspace > StoreFront.
- On the right, double-click NetScaler Gateway URL/StoreFront Accounts List.

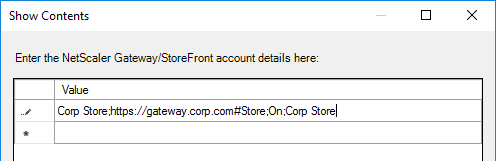
- Select Enabled, and then click Show.
- Enter a store path based on the example shown in the Help box. Workspace app lets you enter a Gateway path. Then click OK.
- Note: Gateway paths work in GPO, but might not work when specified in the CitrixWorkspaceApp.exe installation command line.
Published Shortcuts and Reconnect
Citrix CTX200924 How to Customize App Shortcuts with Receiver for Windows
Workspace app has a user interface for setting Shortcut Paths. Right-click the Workspace app systray icon, click Advanced Preferences, and then click Shortcuts and Reconnect, or Settings Option.
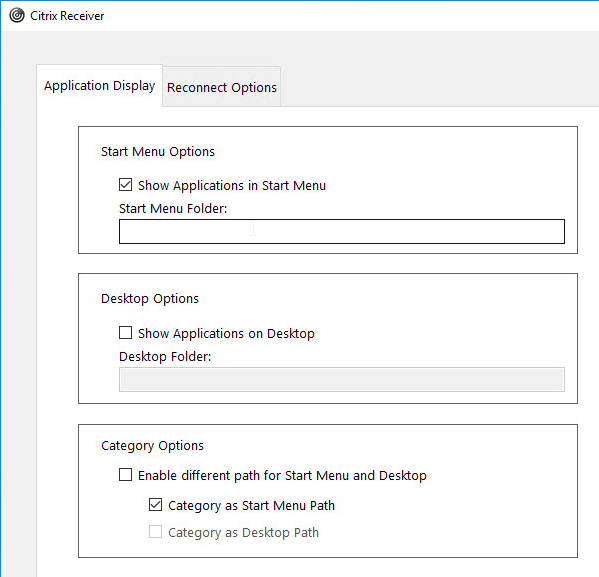
From Citrix Docs Configuring application delivery: There are several methods of controlling how Workspace app displays shortcuts on the Start Menu and Desktop as detailed below:
- Workspace app Registry values
- receiver.admx GPO Template
- From StoreFront in C:\inetpub\wwwroot\Citrix\Roaming\web.config
- Published App Keywords (e.g. prefer).
- Workspace app and Receiver 4.2.100 and newer supports published app Delivery configuration for adding the shortcut to the desktop. This only works if the app is a Favorite, or if Favorites are disabled, or Mandatory Store.
Under HKLM\Software\Wow6432Node\Citrix\Dazzle (or HKCU\Software\Wow6432Node\Citrix\Dazzle) are several registry values related to shortcuts. Some of the settings only apply if SelfServiceMode is set to False. Here are some common options:
- SelfServiceMode – set to False so Receiver disables the Self-Service interface and automatically places all published shortcuts on the Start Menu and/or Desktop. More details in Configuring application delivery at Citrix Docs.
- PutShortcutsOnDesktop – set to True to place every app on the desktop
- DesktopDir – Workspace app places every shortcut on the desktop so it’s probably best to place them in a folder.
- StartMenuDir – If there is potentially a conflict between local apps and remote apps, then you should place the Start Menu shortcuts in a folder.
- PreferTemplateDirectory (with KEYWORDS:prefer=shortcutname) – copies the shortcutname from the template directory to the Start Menu and/or Desktop.
If you import the receiver.admx (and .adml) into the PolicyDefinitions folder, under Computer Configuration > Administrative Templates > Citrix Components > Citrix Workspace (or Receiver) is a node called SelfService.
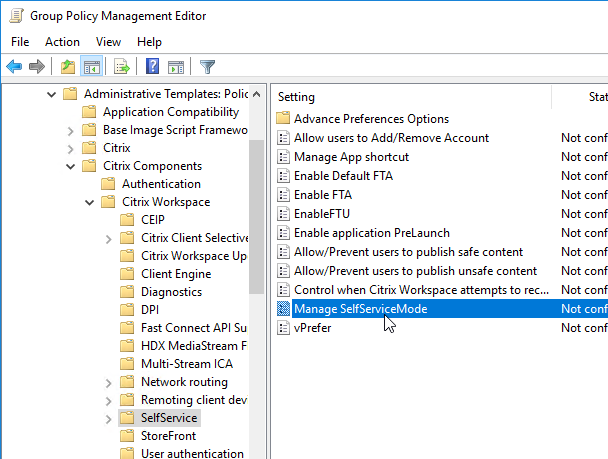
Disable the Manage SelfServiceMode setting to hide the Workspace app Window.
Enable the Manage App shortcut setting to control placement of shortcuts.

Workspace app and Receiver 4.2.100 and newer have the ability to configure (or disable) Workspace Control using group policy. Enable the setting Control when Citrix Workspace attempts to reconnect to existing sessions and configure it as desired.
Prelaunch
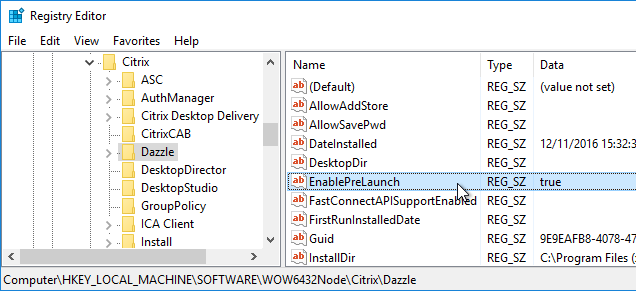
Staring with Receiver 4.2, prelaunch is automatically enabled if Workspace app is installed with SSON enabled. Otherwise, set registry values to enable prelaunch. Receiver 4.2.100 prevents the prelaunch icon from appearing on the Start Menu.
- HKLM\Software\[Wow6432Node\]Citrix\Dazzle
- EnablePreLaunch (REG_SZ) = true or false
Additional customizations can be configured at:
HKEY_LOCAL_MACHINE\SOFTWARE\Wow6432Node\Citrix\ICA Client\Prelaunch
- Name: State
- REG_SZ: 0 = disable, 1 = just-in-time pre-launch, 2 = scheduled pre-launch
- Name: Schedule
- REG_SZ: HH:MM|M:T:W:TH:F:S:SU where HH and MM are hours and minutes. M:T:W:TH:F:S:SU are the days of the week. For example, to enable scheduled pre-launch on Monday, Wednesday, and Friday at 1:45 p.m., set Schedule as Schedule=13:45|1:0:1:0:1:0:0 . The session actually launches between 1:15 p.m. and 1:45 p.m.
- Name: UserOverride
- REG_SZ: 0 = HKLM overrides HKCU, 1 = HKCU overrides HKLM
Device Access Behavior (Client Selective Trust)
When connecting to a XenApp/XenDesktop session, you might see the following:
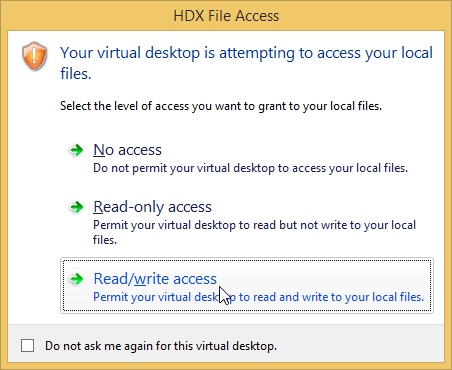
To configure the default behavior, see the Citrix Knowledgebase article How to Configure Default Device Access Behavior of Receiver, XenDesktop and XenApp. Note: there is a bug fixed in Receiver 4.2.100 and newer.
- Download the ADMX file from http://support.citrix.com/article/CTX133565.

- Copy the .admx and .adml files to PolicyDefinitions (Sysvol, or C:\Windows).
- The .adml file goes in the en-US folder.

- Edit a GPO that applies to the endpoint devices that are running Receiver.
- Go to Computer Configuration | Policies | Administrative Templates | Citrix Components | Citrix Workspace (or Receiver) | Citrix Client Selective Trust (x64).
- Enable the setting Create Client Selective Trust Keys.

- Then expand the regions, and configure the permission settings as desired.


Desktop Lock
As an alternative to Workspace app Desktop Lock, see Transformer in Citrix Workspace Environment Manager.

External links:
- Dale Scriven YouTube video – Citrix Desktop Lock installation and configuration
- Jarian Gibson and Andrew Morgan – Citrix Receiver Desktop Lock
- An alternative to Desktop Lock – ThinKiosk
Use Studio to configure Workspace app Accounts in Published Desktop
In published desktops, Workspace app can be used for placement of shortcuts on the user’s Start Menu and Desktop. Use group policy to hide the common program groups and then use Workspace app to place published applications back on the Start Menu and Desktop based on user’s group membership and subscription preference.
- In Citrix Studio, on the left, expand the Configuration node, right-click StoreFront and click Add StoreFront.
- Enter a descriptive name for the StoreFront server.
- Enter the internal https URL of the load balanced StoreFront servers. Add the path to your store (e.g. /Citrix/Store) and then /discovery on the end of the URL. The full URL would be similar to https://citrix.corp.com/Citrix/Store/discovery. Click OK.
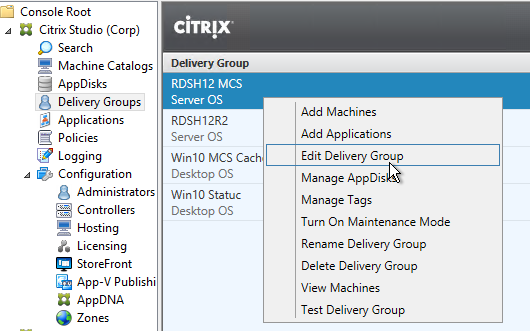
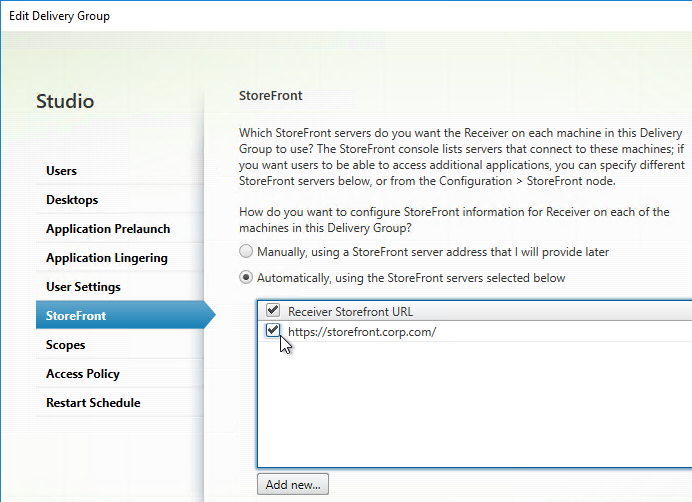
- Edit a Delivery Group that has a published desktop and Citrix Workspace app installed.
- On the StoreFront page, change the selection to Automatically, using the StoreFront servers selected below, and then check the box next to the StoreFront URL. Click OK. Now when users launch the published desktop, Workspace app will be automatically configured with this URL.
Published Desktop – use Workspace app to control Shortcuts
If you install Workspace app inside a published desktop (Workspace app on a VDA), then Workspace app can get icons from StoreFront and put those icons on the user’s published desktop Start Menu and Desktop. This is an alternative to using a User Experience Management product to control shortcut placement.
Note: Workspace app tends to be slow to create Start Menu shortcuts, so make sure you perform a Proof of Concept to determine how this functionality impacts logon times.
Configuration of Workspace app inside a published desktop is simplified if you have the following minimum versions:
- Workspace app installed inside the VDA
- VDA 7.17 or newer
- StoreFront 3.14 or newer
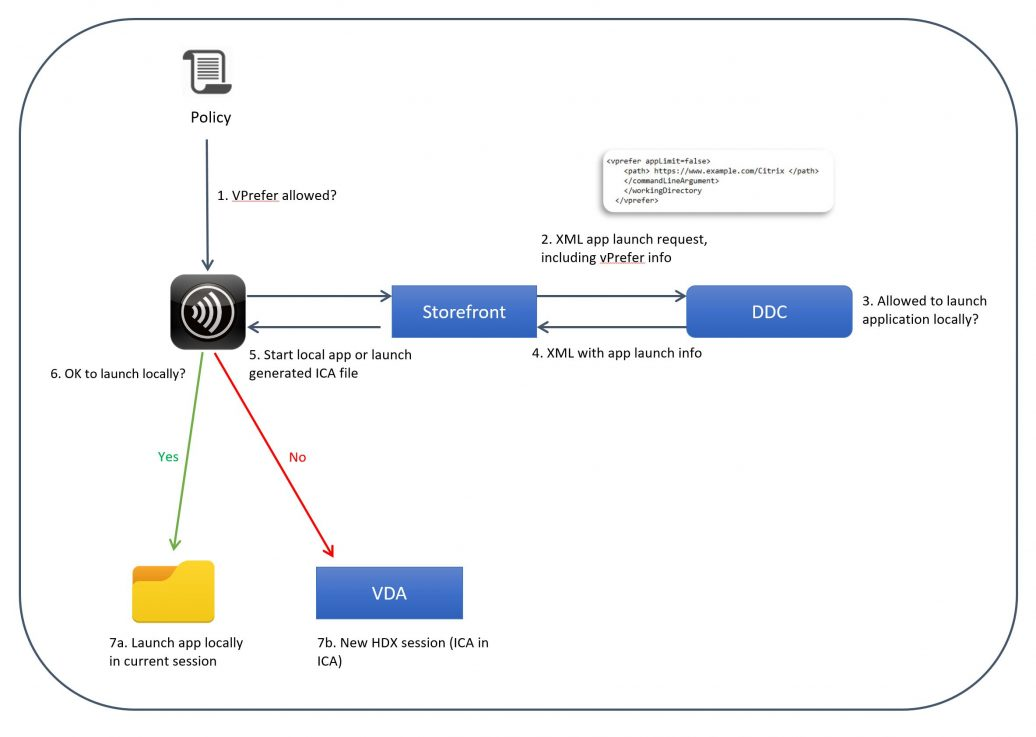
If you meet these minimum version requirements, then Workspace app installed in the VDA automatically tries to launch published applications on the same local VDA rather than trying to launch them from a different VDA (aka double-hop). This feature is called vPrefer.
- If you don’t meet these minimum version requirements, then you’ll need to use the older Prefer Keyword method of handling Workspace app shortcuts as detailed later.
- For a detailed explanation of vPrefer, see Citrix Blog Post VPrefer: Session Sharing Between a Published Desktop and a Published Application Made Easy

Do the following for all versions of Workspace app, VDA, and StoreFront, whether using the Prefer keyword or not:
- Make sure Workspace app or Receiver version 4.11 or newer is installed on the VDA.
- Install the Workspace app ADMX files if you haven’t already. For vPrefer, make sure they are the ADMX files from Workspace app.
- Enable the Group Policy setting Remove common program groups from Start Menu and apply it to non-administrators.
- This removes all Public (aka All Users) Start Menu shortcuts. Workspace app will re-add the shortcuts based on user group membership.
- On the VDA, configure the following Workspace app Registry keys (or corresponding settings in the receiver.admx GPO template):
- HKEY_LOCAL_MACHINE\SOFTWARE\Wow6432Node\Citrix\Dazzle\WSCReconnectMode=”0″ so Workspace app doesn’t try to reconnect to the published desktop you’re already running.
- HKEY_LOCAL_MACHINE\SOFTWARE\Wow6432Node\Citrix\Dazzle\SelfServiceMode to False. This turns off the Workspace app Self-Service GUI and acts like all icons are subscribed. Otherwise, only subscribed (favorited) icons would be placed on the Start Menu and Desktop.
- HKEY_LOCAL_MACHINE\SOFTWARE\Wow6432Node\Citrix\Dazzle\UseCategoryAsStartMenuPath = True. This creates a Start Menu folder based on the published app’s configured Category.

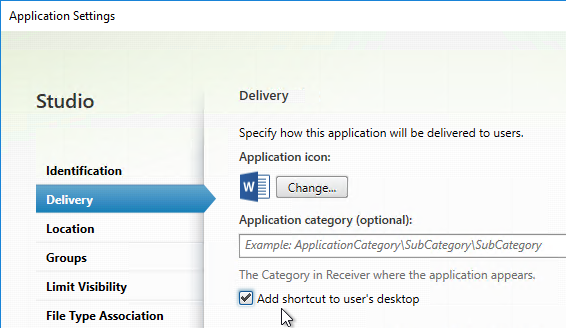
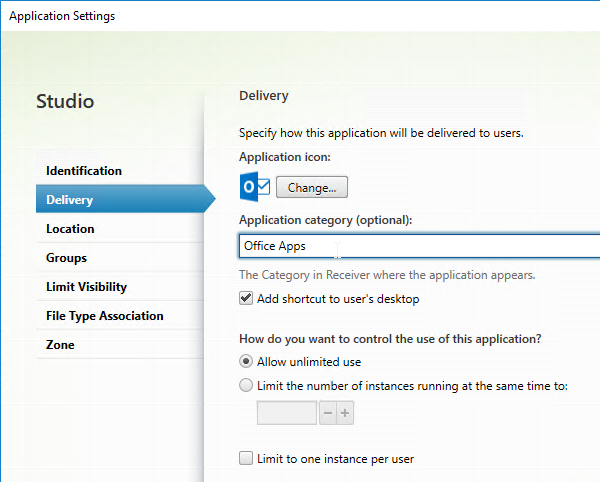
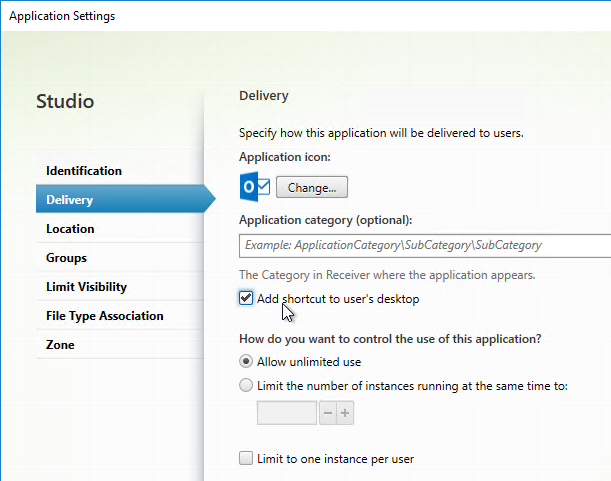
- Configure each desired published app to Add shortcut to user’s desktop.

- Or, configure HKEY_LOCAL_MACHINE\SOFTWARE\Wow6432Node\Citrix\Dazzle\PutShortcutsOnDesktop = True to place all icons on the desktop.
- To control icon placement, configure the following registry values:
- HKEY_LOCAL_MACHINE\SOFTWARE\Wow6432Node\Citrix\Dazzle\StartMenuDir to place published applications in a sub-folder. Note: Windows Server 2012 and Windows 10 and newer only supports a single level of Start Menu folders, so setting this effectively turns off published app categories.
- HKEY_LOCAL_MACHINE\SOFTWARE\Wow6432Node\Citrix\Dazzle\DesktopDir to place published applications in a sub-folder on the desktop.
- Pass-through authentication:
- In a GPO that applies to the VDA, import the receiver.admx file, and set Local user name and password to Enabled. Check the box next to Allow pass-through authentication for all ICA connections.
- If you’re using Gateway internally, and if Workspace app 1808 or newer, then also enable Single Sign-on for NetScaler Gateway.
- In a user-level GPO that applies to the VDA, add the StoreFront FQDN to the Local Intranet zone. Make sure it is not in the Trusted Sites zone, or enable Automatic logon with current user name and password for the Trusted Sites zone.
- Make sure ssonsvr.exe is running after you login to the VDA. If not, troubleshoot it.
- When configuring Citrix Profile Management, make sure !ctx_startmenu! is not excluded from roaming.
- In Citrix Studio, configure a Delivery Group with delivery type = Desktop and Applications. Assign users to the delivery group, and the individual published applications (if visibility is limited).
- In Citrix Studio, edit each published application, and on the Delivery tab, specify a category. This will become the Start Menu folder name.
- If Workspace app Self Service Mode (GUI) is enabled, in Studio, edit each application, and add KEYWORDS:Auto and/or KEYWORDS:Mandatory to the published application description. This forces the applications to be subscribed/favorited. Only subscribed (or Favorite) apps are displayed in the Start Menu and Desktop. Unless you disable Workspace app’s SelfService interface as described earlier.
- Another option is to go to the StoreFront Console, click Stores on the left, and on the right, click Configure Store Settings, and click Disable User Subscriptions. This causes all apps to appear on the Start Menu and/or Desktop depending on Workspace app configuration.
- Create a group policy that applies to VDAs, and configure the group policy to define the Store URL for Workspace app similar to https://citrix.corp.com/Citrix/Store/discovery. Replace the FQDN with your load balanced StoreFront FQDN. Also replace the path to the store with your store path. Make sure there is /discovery on the end. By default, Workspace app and Receiver only support https.
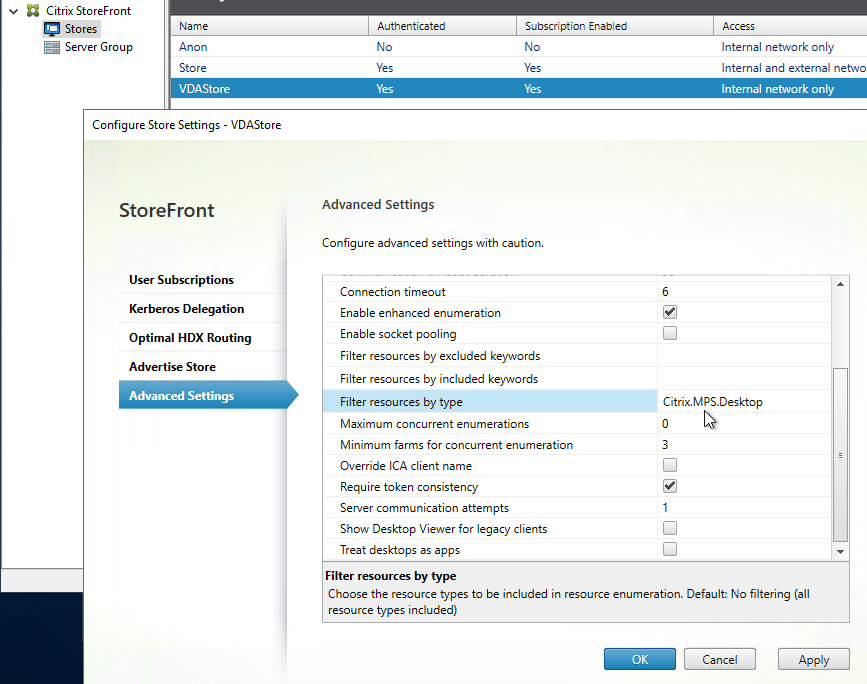
- Your StoreFront store probably delivers both application and desktop icons. If you want to filter out the desktop icons, then create a new StoreFront store, and configure the Workspace app on the VDA to connect to the new Store.
- In StoreFront Console, click the store for VDAs, and click Configure Store Settings. On the Advanced Settings page, in the Filter resources by type row, choose Citrix.MPS.Desktop.

- For vPrefer in Workspace app, VDA 7.17 (or newer), and StoreFront 3.14 (or newer), edit a GPO that applies to the VDAs.
- Go to Computer Configuration | Policies | Administrative Templates | Citrix Components | Citrix Workspace (or Receiver) | SelfService.
- Edit the setting vPrefer. This setting is only in Workspace app ADMX templates from Workspace app.
- Set it to Allow all apps. Source = 7.17 vPrefer – not working with 32Bit Apps at Citrix Discussions.

- On your Delivery Controller, in PowerShell, run set-brokersite -TrustRequestsSentToTheXmlServicePort $true
- This is required for Pass-through Authentication from Workspace app.
- Configure your client devices to connect to the published desktop.
- When users connect to the published desktop, Workspace app will auto-launch and hopefully auto-login.
- If Workspace app Self-Service Mode is disabled, all published applications should automatically appear in the Start Menu and Desktop.
- If Workspace app Self-Service Mode is enabled, then only applications with KEYWORDS:Auto and/or KEYWORDS:Mandatory in the published application description will be displayed. Users can open the systray icon to subscribe to more applications.
- Users can copy icons from the Start Menu to the desktop. Make sure the user Copies the icon and doesn’t Move it.
- Users can then launch applications directly from the Start Menu, from the Desktop, or from the Workspace app (if the Self-Service interface is enabled).
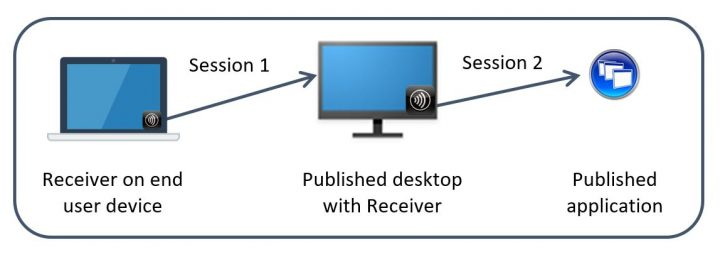
- If Workspace app 4.11 (or newer), VDA 7.17 (or newer), and StoreFront 3.14 (or newer), then vPrefer is enabled by default. When launching an app icon that came from Workspace app, Workspace app checks the local VDA machine to see if the application can be launched on the local VDA instead of by creating a new Citrix double-hop session.
- If the application is installed locally on the VDA then the local application shortcut should launch quickly. If the application is on a different delivery group then a second (double-hop) Citrix HDX/ICA connection will be established.
- If the user deletes Workspace app shortcuts from the Start Menu, you can get them back by going to the systray icon and refreshing the applications. Or sometimes you have to reset Workspace app.

If you are running components older than Receiver 4.11, VDA 7.17, and StoreFront 3.14, then you’ll need to configure the prefer keyword to get Receiver delivered icons to launch on the local VDA instead of in a new double-hop Citrix connection.
- Enable the Group Policy setting Remove common program groups from Start Menu and apply it to non-administrators.
- For applications that are installed on the same VDA that is publishing the desktop, configure Group Policy Preferences to recreate the application shortcuts based on Active Directory group membership. Applications on other delivery groups are handled by Receiver.
- Or use the prefer keyword to copy shortcuts from the PreferTemplateDirectory.
- On the VDA, configure the following Receiver Registry keys (or corresponding settings in the receiver.admx GPO template):
- HKEY_LOCAL_MACHINE\SOFTWARE\Wow6432Node\Citrix\Dazzle\PreferTemplateDirectory = a UNC path or local path containing shortcuts to be copied by the prefer keyword. This can point to C:\ProgramData\Microsoft\Windows\Start Menu.
- In Citrix Studio, configure a Delivery Group with delivery type = Desktop and Applications. Assign users to the Delivery Group and the applications (if visibility is limited).
- In Studio, edit each application and change KEYWORDS:Prefer to KEYWORDS:prefer. Notice the lower case p. It doesn’t work with uppercase P.
- With the prefer keyword, if you publish an application that is also created using Group Policy Preferences, the Group Policy Preferences icon will take precedence. This is good. Otherwise the Receiver published application icon would result in a new Citrix double-hop session.
- See Ralph Jansen Citrix Receiver 4.1 Prefer keyword examples
- If using the prefer keyword with the PreferTemplateDirectory, enter it as KEYWORDS:prefer=shortcutname where shortcutname is the name of the shortcut that is copied from the Template directory.
- In Studio, edit each application and change KEYWORDS:Prefer to KEYWORDS:prefer. Notice the lower case p. It doesn’t work with uppercase P.
- Configure your client devices to connect to the published desktop.
- When users connect to the published desktop, Group Policy Preferences will create shortcuts to local applications.
- Receiver will auto-launch and hopefully auto-login.
- If Receiver Self-Service Mode is disabled, all published applications should automatically appear in the Start Menu and Desktop.
- If Receiver Self-Service Mode is enabled then only applications with KEYWORDS:Auto and/or KEYWORDS:Mandatory in the published application description will be displayed. Users can open the systray icon to subscribe to more applications.
- For published applications with KEYWORDS:prefer=shortcutname, Receiver should copy icons from the template directory to the Start Menu and/or Desktop. See below for considerations.
- Users can copy icons from the Start Menu to the desktop. Make sure the user Copies the icon and doesn’t Move it.
- Users can then launch applications directly from the Start Menu, from the Desktop, or from the Receiver (if Self-Service interface is enabled).
- If a local shortcut (e.g. Group Policy Preferences shortcut, or copied from template directory) matches a published application with KEYWORDS:prefer then the local shortcut will override the published application icon.
- If the application is installed locally on the VDA then the local application shortcut should launch quickly. If the application is on a different delivery group then a second (double-hop) Citrix HDX/ICA connection will be established.
- If the user deletes Receiver shortcuts from the Start Menu, you can get them back by going to the systray icon and refreshing the applications. Or sometimes you have to reset Receiver.
Notes regarding Prefer Template Directory
- Prefer Template Directory can point to C:\ProgramData\Microsoft\Windows\Start Menu, which is the All Users Start Menu.
- The shortcuts copied from the Prefer Template Directory are renamed to match the published app name.
- For prefer local apps, any command line parameters specified in the published app are ignored. If you need these command line parameters, add them to the shortcut in the Prefer Template Directory.
- If you have multiple published apps pointing to the same prefer local shortcut, then only one copy will be made, and it will have the name of only one of the published apps. To workaround this, in the Prefer Template Directory, create separate shortcuts for each published app, and adjust the published app prefer keyword accordingly.
- Jan Hendrik Meier Automatic Shortcut generation for local installed applications in a Citrix XenDesktop / XenApp 7.x environment has a script that can create shortcuts based on the published apps with prefer keyword. These shortcuts can then be copied to your Prefer Template Directory.
How to Script/Automate Workspace app and Receiver Self-Service
From Citrix Knowledgebase article Driving the Citrix Receiver Self-Service Plug-in Programmatically: by default, Workspace app Self-Service (SSP) activities are driven by user interaction. However, SSP exposes sufficient information for its activities to be scripted.
When SSP builds a shortcut, it builds it to a small stub application in a file %appdata%\Citrix\SelfService\app-name-with-spaces-removed.exe for each resource. These files allow SSP to create a fake ‘install’ record for Add/Remove Software. Running these .exe files causes the application to launch. Note: Workspace app and Receiver 4.3.100 and newer don’t create stubs by default. To enable, set HKLM\Software\Wow6432Node\Citrix\Dazzle\AlwaysUseStubs (REG_SZ) = true.
If you want to drive SSP directly for launch instead of through an .exe stub, look at the keys under HKCU\Software\Microsoft\Windows\CurrentVersion\Uninstall. There will be keys in there named farm-name@@server-farm-name.app-friendly-name. In these keys you’ll find a LaunchString value that shows the relevant parameters. These parameters are user-independent and can therefore be cloned from a reference user to a general case. You can copy and reuse these parameters without interpretation.
Running the command selfservice.exe –init –ipoll –exit starts SSP, performs a refresh (interactive poll) from the current provider, and forces a clean exit.
Additional command line parameters are detailed at Driving the Citrix Receiver Self-Service Plug-in Programmatically.
Citrix Workspace app come with a .dll file that implements the Citrix Common Connection Manager SDK. You can use the CCM SDK to do the following:
- Launch Sessions
- Disconnect Sessions
- Logoff Sessions
- Get Session Information
Citrix was kind enough to develop a PowerShell module that calls functions from the .dll. Get the CCMPowershellModule from Github. The PowerShell module contains functions like the following:
- CCMTerminateApplication
- CCMLaunchApplication
- CCMGetActiveSessionCount
- CCMDisconnectAllSessions
Launcher Scripts
Ryan C Butler Storefront ICA file creator at Github. See Create an ICA File from Storefront using PowerShell or JavaScript for more info.
Stan Czerno – Powershell Script to launch one or more Published Applications from Citrix Storefront 2.x through 3.11: the script launches a browser, connects to StoreFront (or NetScaler Gateway), logs in, and launches an icon. This is a very well-written script that uses a .dll file from Citrix Workspace app to display session information.
Citrix Solutions Lab StoreFront Launcher Script at Github. It attempts to closely resemble what an actual user would do by:
- Opening Internet Explorer.
- Navigating directly to the Receiver for Web site or NetScaler Gateway portal.
- Completing the fields.
- Logging in.
- Clicking on the resource.
- Logging off the StoreFront site.
David Ott StoreFront App/Desktop Launch Testing Script uses Internet Explorer to login to StoreFront and launch a resource. Sends email with the result. Uses wficalib.dll to get session information.
Microsoft Teams
Citrix and Microsoft jointly support the delivery of Microsoft Teams from Citrix Virtual Apps and Desktops using optimization for Microsoft Teams. The Teams optimization components are built into VDA and Workspace app. There is no need to install anything separately. The feature is based on Browser Content Redirection so don’t exclude that feature when installing the VDA.
Microsoft Teams optimization/offloading requires the following:
- Newest version of Microsoft Teams machine-wide installation (ALLUSER=1)
- Newest version of Citrix VDA
- Newest version of Citrix Workspace app.
Feature matrix and version support at Citrix Docs shows the required versions of Teams, Citrix VDA, and Citrix Workspace app for various Teams features.
See Citrix Docs Optimization for Microsoft Teams.
Troubleshooting – Citrix QuickLaunch
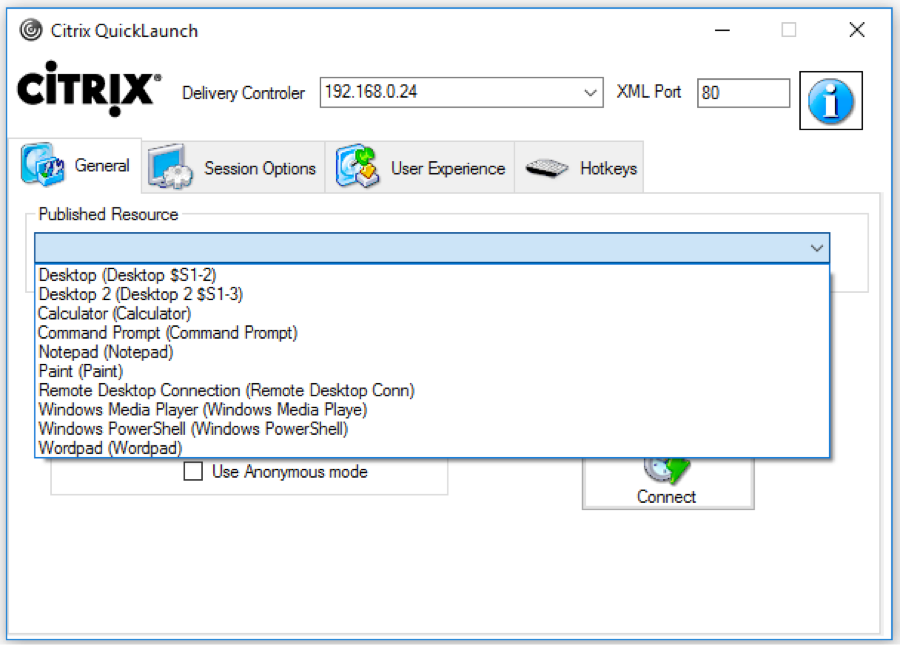
Citrix CTX219718 QuickLaunch Tool (Testing Application and Desktop Launch) lets you launch Citrix sessions directly from a Controller without needing StoreFront.
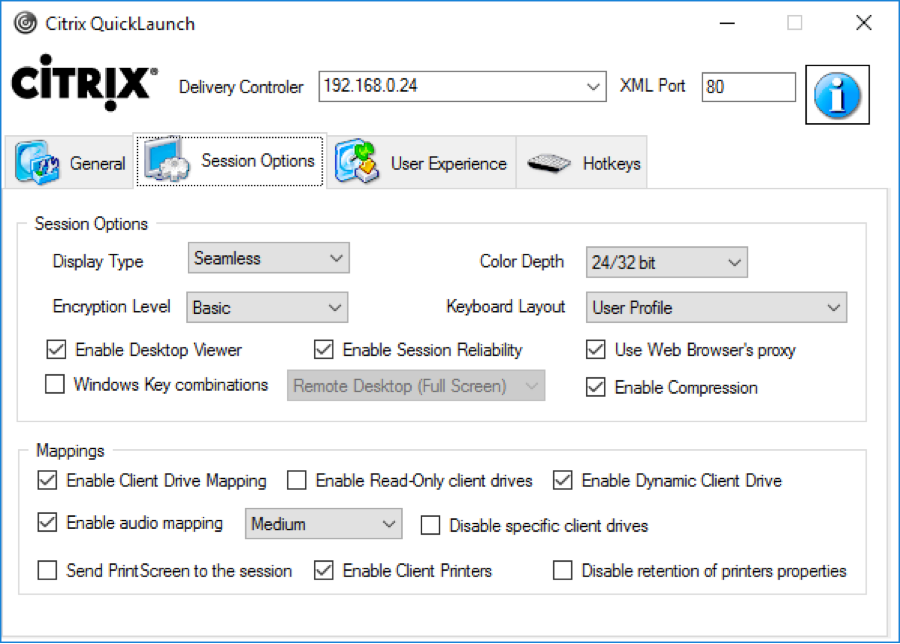
You enter a Controller address, credentials, and then it shows you the published resources. You can pick a resource, edit properties on the other tabs, and then Connect. This allows you to easily try different connection properties.
If you run into problems launching a session, use Sysinternals DebugView while running CQL in Debug mode (/debug switch).

Troubleshooting – Workspace app Logging
In Workspace app 2309 and newer, if you right-click the Workspace app icon in the system tray, there’s a Troubleshooting menu with a Collect Logs option.
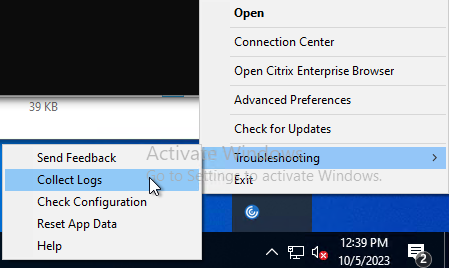
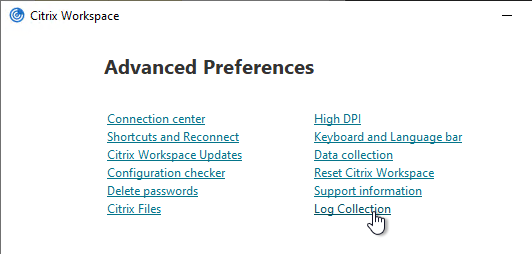
You can also access Log Collection from Advanced Preferences.
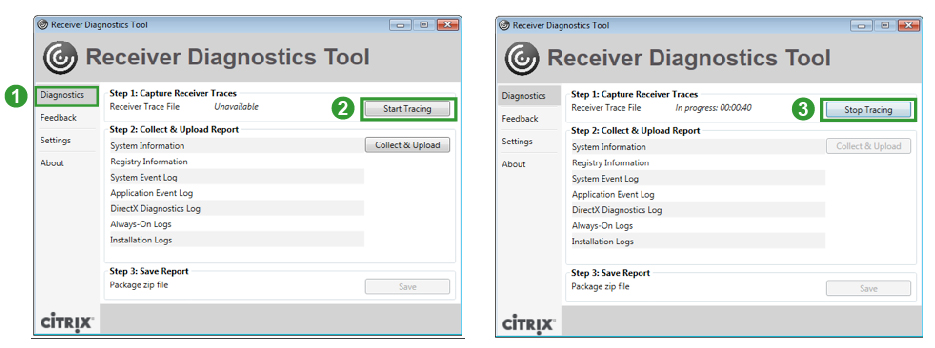
There are a couple methods of logging Workspace app for Windows operations. One method is CTX141751 Citrix Receiver Diagnostics Tool – For Windows, which creates a CDF trace that can be parsed by CDFControl.
Another method is CTX132883 How to Enable Logging on Receiver for Windows Using Registry Entries. The logfiles in %USERPROFILE%\Appdata\Local\Citrix\ are human readable. And CTX206102 Enable SSON Logging Using Registry Key.
Instead of creating the registry keys manually, you can use the following .reg file provided by Wolfgang Thürr:
Windows Registry Editor Version 5.00 ;only for x64 windows os ;import with admin rights ;restart your computer to activate the logging and tracing settings ;create C:\TEMP for the launch ICA log and SSON logn (no environment variables can be used) ;general Workspace app and Receiver logging ;************************ ;logpath: %USERPROFILE%\Appdata\Local\Citrix\Receiver [HKEY_LOCAL_MACHINE\SOFTWARE\ Wow6432Node\Citrix] " ReceiverVerboseTracingEnabled" =dword:00000001 ;Authentication Manager logging ;***************************** * ;logpath: %USERPROFILE%\Appdata\Local\ Citrix\AuthManager [HKEY_LOCAL_MACHINE\SOFTWARE\ Wow6432Node\Citrix\ AuthManager] "LoggingMode"="verbose" "TracingEnabled"="True" "SDKTracingEnabled"="True" ;Self Service logging ;******************** ;logpath: %USERPROFILE%\Appdata\Local\ Citrix\SelfService [HKEY_LOCAL_MACHINE\SOFTWARE\ Wow6432Node\Citrix\Dazzle] "Tracing"="True" "AuxTracing"="True" "DefaultTracingConfiguration"= "global all –detail" ;save launch ICA ;*************** ;logpath: C:\TEMP\ica.log (no environemnt variables allowed) [HKEY_LOCAL_MACHINE\SOFTWARE\ Wow6432Node\Citrix\ICA Client\Engine\Configuration\ Advanced\Modules\Logging] "LogConfigurationAccess"=" true" "LogConnectionAuthorisation"=" true" "LogEvidence"="true" "LogICAFile"="true" "LogFile"="C:\\TEMP\\ica.log" "LogStartup"="true" ;Receiver Always On Tracing ;************************** ;generates ETL Files for analyzing with CDFControl see CTX111961 for details ;can be configured or overruled by GPOs (icaclient.admx) ;path %USERPROFILE%\AppData\Local\ Temp\CTXReceiverLogs [HKEY_LOCAL_MACHINE\SOFTWARE\ Policies\Citrix\ICA Client\AoLog] "EnableTracing"=dword:00000001 ;Single Sign-on Logging ;************************** ;https://support.citrix.com/article/CTX206102 [HKEY_LOCAL_MACHINE\SOFTWARE\Wow6432Node\Citrix\Install\SSON] "DebugEnabled"="true" "LogPath"="C:\\Temp"
Troubleshooting – Duplicate Stores
Stores are sometimes duplicated in Workspace app, especially if you are running Workspace app inside a VDA. (h/t Dan High)
StoreFront URLs can be defined in several places:
- In Studio, go to Configuration > StoreFront and delete all URLs configured here.
- Look in GPOs for Computer Configuration > Administrative Templates > Policies > Citrix Components > Citrix Workspace > StoreFront > NetScaler Gateway URL/StoreFront Accounts List. Remove any URLs configured here.
- In the client-side registry, at HKLM\Software\Wow6432Node\Citrix\Dazzle\Sites, you might see store addresses that were specified during a command line installation of Workspace app.
- When Citrix Workspace app switches between StoreFront servers in multiple datacenters, it’s possible for each datacenter to be treated as a separate Workspace app site. This can be prevented by doing the following. From Juan Zevallos at Citrix Discussions:
- Match the Base URL in all datacenters.
- Match the SRID in all datacenters – The SRID can be safely edited in the C:\inetpub\wwwroot\Citrix\Roaming\web.config. Make sure to propagate changes to other servers in the group.
- Match the Delivery Controller names under “Manage Delivery Controllers” – The XML brokers can be different, but the actual name of the Delivery Controller/Farm must be identical.
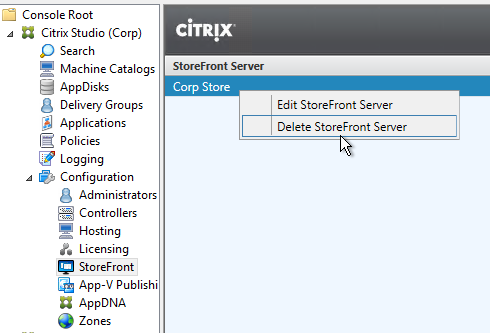

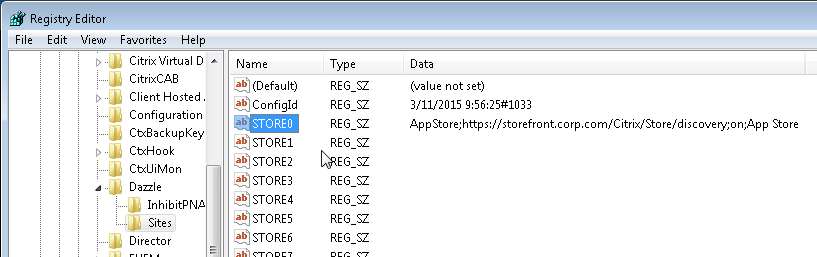
If you are running Workspace app on a VDA, once you’ve removed the configured URLs shown above, do the following to clean up the VDAs:
- On the VDA, HKEY_LOCAL_MACHINE\SOFTWARE\Policies\Citrix – Delete the number folders representing policy entries.
- On session host VDAs, HKEY_LOCAL_MACHINE\SOFTWARE\Wow6432Node\Microsoft\Windows NT\CurrentVersion\Terminal Server\Install\Software\Citrix – Remove the entries for storefront in the following folders.
- Under \receiver\ctxaccount delete all entries.
- Under \SR\Store delete the entries.
- On the VDA, C:\ProgramData\CitrixCseCache – Delete all files
- On the VDA, C:\ProgramData\Citrix\GroupPolicy – Delete all folders and files.
- Run gpupdate and logoff.
- In the user’s registry, HKEY_CURRENT_USER or the profile registry hive. Possible profile reset.
- Under Software\Citrix\Dazzle\Sites – Delete all entries.
- Under Software\Citrix\Receiver\ctxaccount – delete all entries.
- Under Software\Citrix\SR\Store – delete the entries.
- Verify no cached profile folders for user on server.
Important:
This documentation describes the features and configuration of Citrix Workspace app 2203.1 LTSR for Windows. This version is the latest Long Term Service Release (LTSR) of Citrix Workspace app for Windows.
Note that this release is relevant only for LTSR customers.
The documentation for the Current Release (CR) of Citrix Workspace app for Windows is available at Citrix Workspace app for Windows.
For more information about the lifecycles of CRs and LTSRs, see Lifecycle Milestones for Citrix Workspace app.
Note:
- If you have enabled auto-update on your Citrix Workspace app and have opted for the LTSR program, Citrix Workspace app 1912 LTSR for Windows automatically updates to Citrix Workspace app 2203.1 LTSR for Windows.
- If you have enabled auto-update on your Citrix Workspace app and have opted for the CR program, Citrix Workspace app CR version automatically updates to Citrix Workspace app 2204.1 for Windows.
- On Citrix Workspace app 2203.1 LTSR, SaaS and Web apps must be launched using the native browser on the user device. SaaS and Web apps with enhanced security controls open via Secure Browser Service within the native browser.
- If you update from a previous CR release of Citrix Workspace app for Windows to Citrix Workspace app 2203.1 LTSR to Windows, the browser components (CEF and Chromium) get uninstalled. As a result, the Browser Content Redirection feature stops working, and Web and SaaS based apps are launched using the native browser instead of the Citrix Enterprise Browser (formerly Citrix Workspace Browser).
Cumulative Update 1 (CU1) is the most recent update to the 2203.1 LTSR. If you are new to the LTSR program, there is no need for you to install the 2203.1 LTSR initial release. Instead, we recommend that you begin right with 2203.1 LTSR CU1.
Helpful links
- Citrix Workspace app feature matrix
- Lifecycle Milestones for Citrix Workspace app
- Additional Lifecycle Information for Citrix Receiver for Windows
Citrix product name and number changes
For information about product name and version number changes that were introduced in 2018, see New names and numbers.
Baseline components
| 2203.1 LTSR baseline components | Version |
|---|---|
| XenApp and XenDesktop LTSR with CUs | 7.6 |
| XenApp and XenDesktop LTSR with CUs | 7.15 |
| Citrix Virtual Apps and Desktops 7 LTSR with CUs | 1912 LTSR |
| Citrix Virtual Apps and Desktops 7 LTSR with CUs | 2203.1 LTSR |
| Citrix Virtual Apps and Desktops 7 CR | 2204.1 CR |
Compatible components
The following components are compatible with LTSR environments. They are not eligible for the LTSR benefits (extended lifecycle and fix-only cumulative updates).
| Compatible components and features |
|---|
| Citrix Content Collaboration Service Support |
| Citrix Endpoint Management Service |
| Citrix Microapps Service |
| Citrix DaaS (formerly Citrix Virtual Apps and Desktops service) |
Notable exclusions
The following features, components, and platforms are not eligible for 2203.1 LTSR lifecycle milestones and benefits. Specifically, cumulative updates and extended lifecycle benefits are excluded. Updates to excluded features and components will be available through regular current releases.
| Excluded components and features |
|---|
| Browser Content Redirection |
| Citrix Enterprise Browser |
Tutorial on how to Deploy Citrix Virtual Apps and Desktop 1912 LTSR
Deploy Citrix Virtual Apps and Desktop – Single Server Deployment
Tutorial on how to quickly setup a new Citrix Virtual Apps and Desktop 1912 LTSR with the following components in a Windows 2019 Server Standard
- Delivery Controller
- Studio
- Director
- Citrix License Server
- StoreFront
Installation of Delivery Controller (DDC)
Delivery Controller is the server-side component that is responsible for managing user access, plus brokering and optimizing connections. Controllers also provide the Machine Creation Services that create desktop and server images.
Download Citrix Virtual Apps and Desktop 7 1912 LTSR (Around 2.8GB) via Citrix Portal

Mount the downloaded ISO file and click on AutoSelect. Click Start to install Virtual Apps and Desktops

Click Get Started to install 1st Delivery Controller

Select I have read, understand, and accept the terms of the license agreement and click Next to continue

Click Next

Click Next

A warning message will be prompted if the VM is less than 6GB RAM

Click Next

Click Install

Uncheck Collect Diagnostic Information if you do not want to send information to Citrix Cloud and click Next

Reboot the server once installation is completed successfully

Installation of StoreFront
Citrix StoreFront is an enterprise application store that provides an interface for users to access XenDesktop and XenApp virtual desktops and applications remotely.
Click AutoSelect on the mounted ISO file, and select Citrix StoreFront

Accept the license agreement and click Next

Click Next to deploy IIS Roles automatically

Click Install

Reboot the server manually to finish the installation of StoreFront

Initial Configuration Using Citrix Studio
Studio is the management console where you configure and manage your Citrix Virtual Apps and Desktops deployment.
Launch Citrix Studio to setup a Site by clicking on Deliver Applications and Desktop to your users

Select A Fully Configured, Production-ready Site (Recommended for new users) and specify a Site Name to create a new Site

The following 3 x Databases are created in Local SQL Express
- Site DB – CitrixAENTISSite
- Monitoring DB – CitrixAVENTISMonitoring
- Logging DB – CitrixAVENTISLogging

Select Use the free 30-day Trial to install trial license to Citrix Licensing Server

Machine Creation Services (MCS) is used to provision Virtual Machines (VMs) for Hosted Share Applications & Dedicated Windows 10 machines via VMware vCenter.
Accept the Certificate Warning if Self Sign Certificate is used in vCenter

Select Use storage shared by hypervisors to store provisioned VM in Shared Datastore

Click Next to continue

Click Finish to start to provision the new site with the configuration specified

Click Test Site Configuration to verify there is no error found on the new provisioned site

Initial Configuration of StoreFront
Preparing Master Image for Servers OS
Creating the Machine Catalog for Server OS
A machine catalog is a collection of desktops or physical computers that are managed as a single entity. To deliver applications and desktops to users, the machine administrator creates a catalog of machines and the assignment administrator allocates machines from the machine catalog to users by creating delivery groups.
Go to Citrix Studio and click on Machine Catalog – Set up machines for desktop and application or remote PC access

Click Next to continue

Select Multi-Session OS and click Next to continue

Select Machines that are power managed (for example, virtual machines or blade PCs) and Citrix Machine Creation Service (MCS). Click Next to continue

Select the Master Image called CITRIX-MASTER-SRV

Enter the number of VMs which will be deployed from Master Image and click Next to continue

Select the Organization Unit (OU) where the new VMs will be stored and enter the naming pattern, CITRIX-APP## in Account Naming Scheme

Enter a Machine Catalog Name & Description and click Finish

A new VM called CITRIX-APP01 will be provisioned in VMware Host

Refer to Disk Usage of VM provisioned by Citrix MCS to understand more on the Disk Size of VMs prepared by MCS
Client Accessing Citrix Apps from Internal Network
Client Accessing Citrix Apps from Internet
Citrix NetScaler is required for users to access Citrix Apps from Internet, and you can refer to Integrate NetScaler VPX with StoreFront to integrate NetScaler VPX with StoreFront to allow users to access from Internet
If a reset of the Citrix Workspace app should become necessary, you can find instructions on how to do this here:
- Tutorial — Citrix Workspace app reset (.pdf)
The new Citrix farm is based on Windows 10, which results in changes in the design of the Start menu and some other settings. Due to the new version a new user profile is technically required. In the following link, we provide a .pdf document with instructions on how to set up your new profile.
- Tutorial — Citrix — First login (.pdf)
If you have any further questions or remarks, please contact windows-service.
Here you will find instructions on how to install and configure the Citrix software for accessing the (new) Windows Terminal Server xats01.gsi.de or to use it via a web browser.
Microsoft has changed the license policy since beginning of 2015. That is why all needed Windows accounts have to register in a special group in our active directory. You may request this via an email to the ticket system (windows-service at gsi.de).
Installation of the Citrix Client
With Citrix Workspace app, you are able to access to the Windows Terminal Server from outside the GSI Windows domain. In this way GSI Windows environment (data, e-mail, SAP, etc.) is available. To establish the connection, client software must be installed and configured on the device.
The Citrix Workspace app is available for all standard operating systems at GSI:
There are different ways for software installation depending on you are located inside or outside the GSI domain:
- inside — The software is available in the Software Center: Citrix Workspace LTSR. An older version of the Citrix client will be previously uninstalled automatically.
- outside — Citrix Workspace app LTSR 2402 for Windows
Download the aforementioned version of the Citrix Workspace app. Save the file on your harddrive and follow the installation instructions. You may need administrator privilege on your PC to install the software.
- inside — Citrix Workspace app is available as standard. Please note that these instructions are only valid for newer Debian versions such as Wheezy or Jessie, not for Squeeze and earlier.
- outside — Please download the actual version of Citrix Workspace app for Linux from this web site: https://www.citrix.com/downloads/workspace-app/
Please download the actual plugin from this web site: https://www.citrix.com/downloads/workspace-app/
Certificates
All needed certificates are already installed on Citrix installations on Windows / Linux supported by WIN group or HPC.
In other cases you must install the following certificate:
- AAA Certificates Services: aaa_root.crt
Ubuntu: Save the certificates in PEM format in the directory /opt/Citrix/ICAClient/keystore/cacerts
If necessary, execute the command /opt/Citrix/ICAClient/util/ctx_rehash.
To convert a certificate file from DER to PEM you may call the following command:openssl x509 -in file.crt -inform der -out file.pem -outform pem
Please note that the path could be different in other distributions or Citrix Versions.
You may need to delete the Citrix certificate directory completely and create a symlink to /etc/ssl/certs instead.
Configuring the Citrix Workspace app
To establish the connection can take quite a while depending on your internet access.
The Citrix Storefront will be displayed, with all applications available for selection.
- Desktop = various terminal servers with Windows 2012 R2 and Office2016
- Office2010 = one terminal servers with Windows 2012 R2 and Office2010

You will be asked for the Server Address. Type: https://xats01.gsi.de and click the Button Next:

If the version without Single Sign On was installed, enter the user data here:
User: Your_windows_user name
Password: your_windows_password

Access via Web browser
- Users of a Windows operating system should always use the client. (see above)
- Users of a Linux operating System are able to use the new version of the Citrix client with the web browser of your choice for working on a Windows Terminal Server. Type the address https://xats01.gsi.de into the address bar.
This opens the start Screen. Log in with your Windows user name (without campus) and password:

The login procedure can take several minutes.
Hints
Windows 10: Start → Citrix Receiver
A toolbar with the following functions is available at the top of the Citrix window:
- Home: Minimizes all Desktop Viewer Windows
- Ctrl+Alt+Del: Lock screen, Logout, Change password, Task Manager
- Settings: Options for file access, connections, Display
- Full screen: Switching between window sizes
- Separate: Disconnect session to resume later
- Links:


In the explorer you can see
- the drives (without the floppy) of your (local) PC and
- the drives on the Terminal Server.
The drives of your own PC have the label on your client, example: on DEPCnnn. The network drives on the terminal server have the name of DFS, e.g. \\campus\…

If you want to close a terminal server session, always choose Start — Log off.
It is also possible to leave the session in order to continue it at a later time. In this case, choose the corresponding function from the toolbar.
The past has unfortunately shown that this occasionally leads to problems and prevents a later registration. In these cases, contact the ITH or create a ticket at windows-service(at)gsi.de.
The profile stored on the server for these terminal servers is called ConfigTS.V2, it must be configured (Outlook, network drives, printer, desktop) after the 1st call.
Your network drives, which you have connected in your desktop Windows profile, can also be easily imported into this profile via the Software Center.

You can copy additional configurations from the Windows10 profile:
- Desktop
Source: Q:\Config.V6\Desktop
Target: C:\users\your_username\Desktop - Outlook-Signature
Source: Q:\Config.V6\AppData\Roaming\Microsoft\Signatures
Target: C:\users\your_username\AppData\Roaming\Microsoft\Signatures (the directory is only created after the 1st start of Outlookt)
The own printers e.g. in the home office can be reached via the entry «Citrix universal printer (from hostname) in session nn«.
The EMF Viewer opens with a print preview. A click on the print symbol starts the printer selection of the printers installed on your home PC.
Make sure that you minimize the printing of sensitive or business-relevant data on a non-GSI device and in any case protect it from foreign eyes (do not dispose it in household waste)!
If the Terminal Server connection is interrupted unexpectedly, it may happen that a restart ends with an error. The cause can be various reasons, e.g. an interruption of the Internet connection.
Then it is necessary to reset the Citrix Receiver.
Right-click on the Citrix icon in the task bar at the bottom right and select Advanced Settings. There you will find the item Reset Receiver.
Regular Maintenance on Terminal Servers
On every saturday between 2 and 3 a.m. limitations in the availability of the server will occur (availability updates will be installed and servers will restart).
Please consider this in your use of the services.