
By Timothy Tibbetts |
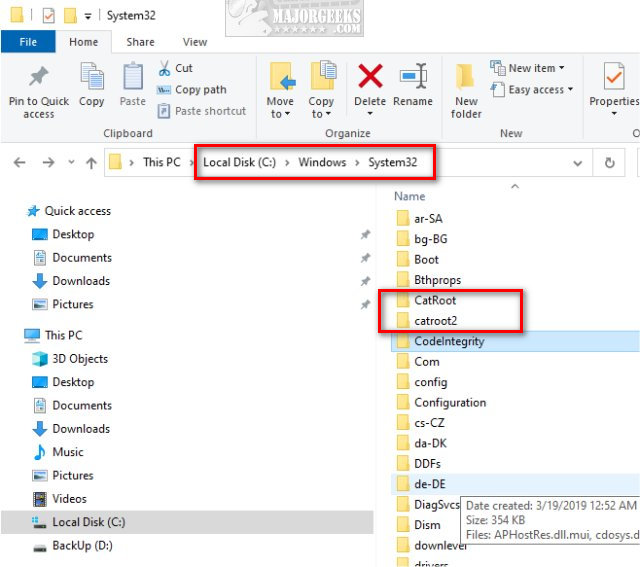
CatRoot and catroot2 are two folders found in C:\Windows\System32. In this tutorial, we explain what these two folders are and how to delete (one of) them if needed.
Catroot and Catroot2 are Windows system folders required for Windows Updates. The folders contain numerous files and folders, including signatures of the Windows Update package.
Deleting the contents of the Catroot2 folder has been known to fix Windows Update errors or problems.
Deleting the Catroot and Catroot2 is for Advanced Users Only. If you remove the Catroot folder, your computer won’t boot. If you delete Catroot2, the folder is automatically created when you reboot. We spent hours testing this and found that removing the Catroot folder consistently rendered our computer unbootable.
Video tutorial:
To delete the folders, open File Explorer and go to C:\Windows\System32.
Catroot2:
Double-click on the catroot2 folder.
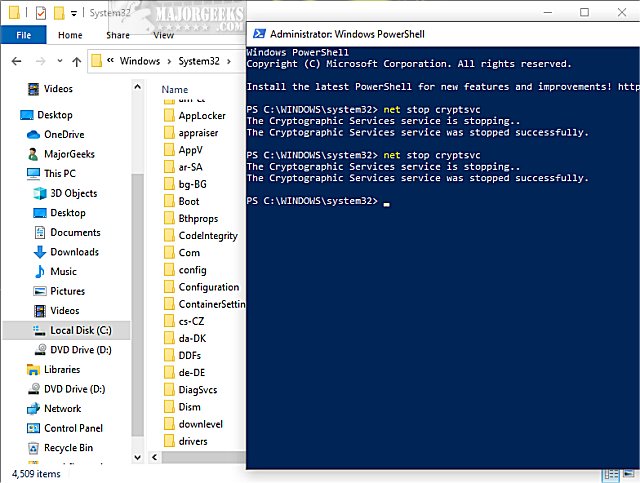
Open PowerShell as Admin.
Press Ctrl + A to highlight all files and folders and press Delete.
When you see the Folder in use error switch back to Powershell and type in net stop cryptsvc
Switch back to File Explorer and continue deleting by pressing Try Again.
You will need to press Continue multiple times.
CatRoot (Not Recommended):
Stop! Deleting the CatRoot folder will cause your computer to not boot. The folder is intentionally difficult to delete. This information is for advanced users and informational purposes.
If you were to delete the CatRoot folder, you’d follow the same steps for the catroot1 folder.
Similar:
comments powered by Disqus
Catroot2 and SoftwareDistribution are two important cache folders on Windows 11/10 PC. Whenever you update your device, some information is saved inside these folders. When their database increase in size, they may start causing different error codes on your PC and even prevent updates from happening automatically. In this blog post, we have discussed how to find and purge this Catroot2 folder on Windows PC.
See Also: How to Clear the SoftwareDistribution Folder on Windows 11
How to Purge the contents inside the Catroot2 folder
If you are struggling with an update error code, clearing the contents inside the Catroot2 folder might help. Here’s how to purge this folder on Windows PC –
Note: Before you begin clearing the contents inside this folder, make sure to disable the update services first.
- Press Windows + R to launch the Run dialog box.
- Type “
services.msc” on it and hit OK. - When the Services window opens up, scroll down to the Background Intelligent Transfer service.
- Right-click on this service, and choose the Stop option from the context menu.
- In a similar way, disable the services – Windows Update and Cryptographic services as well.
- Once disabled, open File Explorer by pressing Win + E and reach out to the below path –
C:\Windows\System32
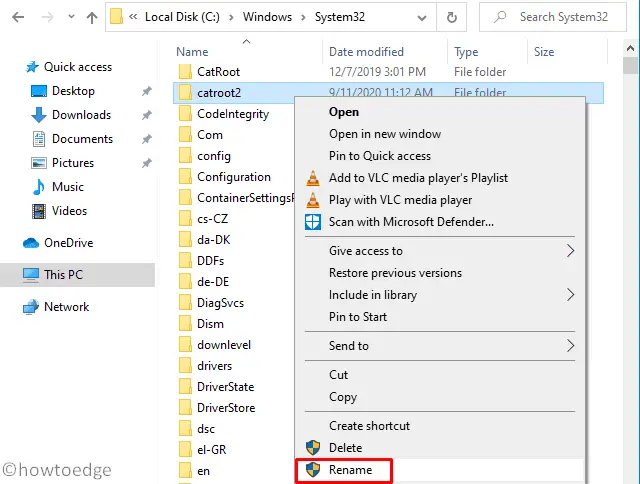
- Locate and double-click on Catroot2 to open this folder.
- Use Ctrl + A to select all items, right-click on any one item, and choose to delete them.
Note: Though you may delete this folder, we suggest renaming this folder to something catroot2.old. This way, all the files inside this folder are with you and you may use them in case something went wrong on your computer.
- Once deleted or renamed, you may restart all those services that you have stopped before.
Restart your Windows PC and check if the persisting update error resolves afterward. When you reach out to the Catroot folder’s location, you will find new files and folders lying there.
Note: If you had renamed this folder, you will find two different folders starting with catroot2. Out of them, one is the folder bearing “.old” extension while the latter is recently created by Windows.
2] Deleting the Catroot2 Folder using CMD or PowerShell
Since the Catroot2 folder contains some important data related to previous updates on your Windows PC, we suggest not deleting this folder or purging its contents. Instead, you may rename this folder to something like catroot2.old. This way, you not only contain the catroot2 folder from deleting but also severs the deletion purpose.
Follow the below instructions on how to perform this task on Windows 11 –
- Press Windows + X to launch the Power Menu.
- Select Terminal (Admin) and when the UAC window prompts, hit Yes.
- This will default open Windows PowerShell having admin privileges.
Note: Alternatively, you may also use Ctrl + Shift + 2 to invoke Command Prompt on the terminal.
- Copy/paste the following codes on the elevated console to stop all major update services.
net stop bits
net stop wuauserv
net stop appidsvc
net stop cryptsvc

- After you stopped the update services from running on your system, run the following code to delete the catroot2 folder from your system.
rmdir %systemroot%\system32\catroot2 /S /Q
Note: If you want, you may even choose to rename this folder to something – “catroot.old” as well. Do note to run this code instead of running the above command –
rename C:\Windows\System32\catroot2 Catroot2.old
- Restart all those services that you stopped earlier by executing the below series of commands –
net start wuauserv
net start bits
net start appidsvc
net start cryptsvc

- After you have run all these codes successfully, close Command Prompt/PowerShell, and restart your PC.
Sign back into your device again and you will find this Catroot2 folder lying inside the C:\Windows\System32 folder.
The catroot2 folder in Windows operating systems is not harmful; it is a legitimate process that affects your computer’s ability to receive Windows updates. There is a reason to want to delete it, however; files within the catroot2 folder can become corrupt, preventing you from installing Windows updates. Renaming, moving or deleting the catroot2 folder will cause Windows to create a fresh copy of it from protected memory, which will usually fix any installation problems caused by corrupted files.
Step 1
Click the «Start» menu, and select «Run.» Type «cmd» (without quotation marks), and click «OK» to open the command line interface.
Step 2
Type «net stop cryptsvc» (without quotations), and press «Enter» to temporarily disable the cryptographic service. Wait until the command line interface says «the cryptographic service was stopped successfully» before continuing.
Step 3
Type «ren %systemroot%\System32\Catroot2 oldcatroot2» (without quotations), and press enter; this will rename the unwanted catroot2 folder to «oldcatroot2», allowing Windows to create a fresh copy of it.
Step 4
Type «net start cryptsvc» (without quotations) to reactivate the cryptographic service. Wait until the command line interface says «the cryptographic service was started successfully» before closing the interface.
Tips & Warnings
- If you’re renaming catroot2 in order to fix a problem with Windows updates (the most common reason for doing this), you may need to delete certain temporary files to complete the repair. To do this, click the «Start» menu and select «(My) Computer», and then open the local disk folder (usually the C drive). Open the «Windows» folder and then open the «System32» folder. Open the «Catroot» folder and then open the «F750E6C3-38EE-11D1-85E5-00C04FC295EE» folder. Delete any files that begin with «tmp». Your computer may not recreate the catroot2 folder immediately; expect to see it replaced after either rebooting or attempting to install Windows updates. Keep the renamed «oldcatroot2» folder until the new one is created; afterwards you may delete it.
- Do not rename, move, or delete the catroot folder; it contains files necessary to recreate the catroot2 folder and keep the computer operating properly.
Windows updates occasionally encounter issues, causing frustration. Renaming or deleting the Catroot2 and SoftwareDistribution folders can often resolve these problems. The Catroot2 folder stores digital signatures crucial for updates, while SoftwareDistribution contains temporary files needed for installation.
Removing these folders prompts Windows to recreate them during the next update attempt, potentially resolving conflicts or corruption. However, proceed cautiously, as improper deletion may disrupt update functionality.
Renaming or deleting the Catroot2 and SoftwareDistribution folders can resolve Windows update issues by forcing Windows to recreate these folders with fresh files.
Catroot2 folder stores cryptographic hashes and digital signatures. Renaming or deleting it prompts Windows to generate new, uncorrupted catalog files.
SoftwareDistribution folder contains temporary update files and components. Renaming or deleting it clears the cache, removes potentially corrupted files, and resets update components.
Table of Contents
- Renaming Catroot2 and SoftwareDistribution Folders
- Deleting Catroot2 and SoftwareDistribution Folders
- Restart Windows Update Service
- Running the Windows Update Troubleshooter
- Open Command Prompt as administrator.
- Stop related services with commands:
net stop wuauserv
net stop cryptSvc
net stop bits
net stop msiserver
- Rename folders with commands:
ren C:\Windows\SoftwareDistribution SoftwareDistribution.bak
ren C:\Windows\System32\catroot2 Catroot2.bak
- Restart services with commands:
net start wuauserv
net start cryptSvc
net start bits
net start msiserver
Deleting Catroot2 and SoftwareDistribution Folders
- Open Command Prompt as administrator.
- Stop related services with commands:
net stop wuauserv
net stop cryptSvc
net stop bits
net stop msiserver
- Navigate to folders and delete contents:
C:\Windows\SoftwareDistribution
C:\Windows\System32\catroot2
- Restart services with commands:
net start wuauserv
net start cryptSvc
net start bits
net start msiserver
If issues persist, try additional fixes.
If renaming or deleting Catroot2 and SoftwareDistribution folders do not resolve Windows Update issues, try these additional fixes:
Restart Windows Update Service
- Open Services.msc
- Locate Windows Update service
- Right-click and restart the service

Running the Windows Update Troubleshooter
- Open Settings > System > Troubleshoot
- Select “Other troubleshooters”
- Click “Run” next to Windows Update
- Follow on-screen instructions

Restarting the service refreshes components, while the troubleshooter detects and fixes update-related problems automatically.