
The Windows Command Prompt (CMD) is a powerful tool that allows users to interact with their operating system through text-based commands. Whether you’re a beginner exploring CMD for the first time, an expert troubleshooting advanced issues, or just looking for utility-focused tasks, this guide has you covered.
In this guide, we will provide you with some of the most useful commands for the following:
- CMD Commands for Beginners
- CMD Commands for Experts
- CMD Commands for Utility
- CMD Commands for Troubleshooting
- CMD Commands for Students
- CMD Commands for Programmers
CMD Commands for Beginners
These commands are essential for users who are new to CMD and provide basic functionalities to help them navigate and perform simple tasks.
1. View Directory ‘dir‘
- Function: Displays the contents of the current directory.
- How to use: Type
dirand press Enter. Usedir /sto include subdirectories. - Use case: Quickly view files and folders in your current location.
Syntax: dir
2. Change Directories ‘cd’
- Function: Lets you navigate between folders.
- How to use: Type
cd [folder_name]to move into a directory. Usecd ..to go up one level. - Use case: Navigate to specific directories to manage files or execute commands
Syntax: cd [folder name]
3. Create a New Directory ‘mkdir’ or ‘md’
- Function: Allows you to create a new directory
- How to use: Type mkdir [file_name]— Here the new directory name is GFG
- Use case: When you need a new directory for any separate work, you may create a new directory
Syntax: mkdir [GFG]
4. Rename a File ‘ren’
- Function: Helps in renaming any file or directory.
- How to use: Type
renorrename [old_name] [new_name]and press Enter. - Use case: Discover new method of renaming file or any directory.
Syntax: ren xyz.txt newxyz.txt
5. Delete a File ‘del’
- Function: Lets you to remove one or more files
- How to use: Type del [file_name]— This will erase the provided file name
- Use case: This function allows you to erase any file if you’re unable to fetch
Syntax: del[file_name]
6. Close ‘exit’
- Function: Closes the Command Prompt window.
- How to use: Type
exitand press Enter. - Use case: Ends your session with CMD.
Syntax: exit
7. Clear Screen ‘cls’
- Function: Clears all text from the CMD window.
- How to use: Type
clsand press Enter. - Use case: Removes clutter after multiple commands
Syntax: cls
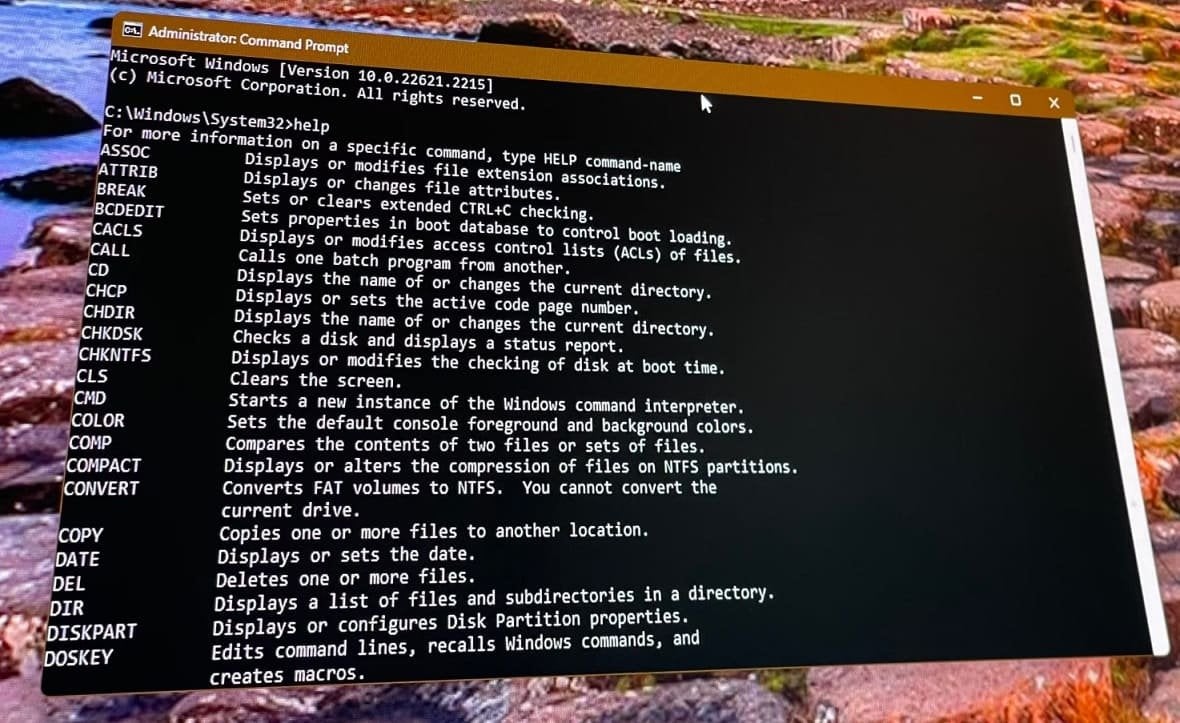
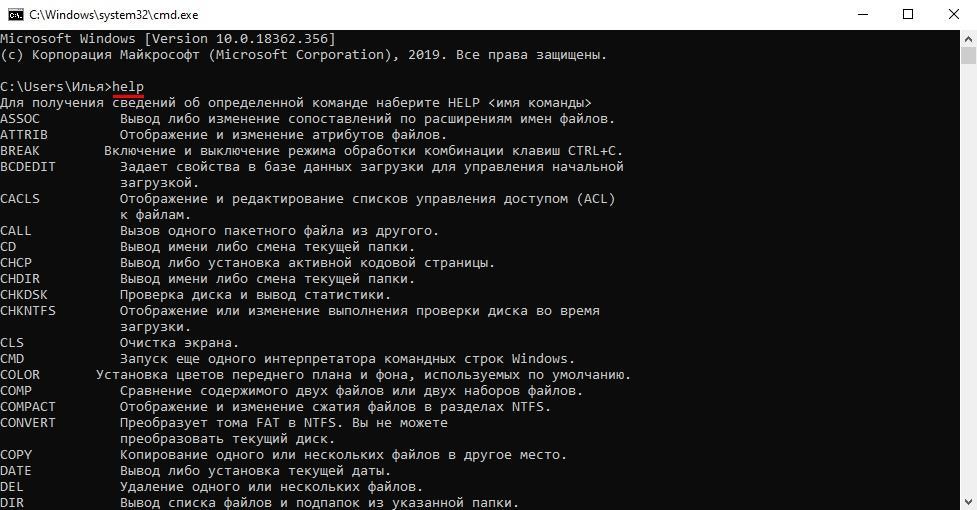
8. View Available Command ‘help’
- Function: Lists all available commands and their descriptions.
- How to use: Type
helpand press Enter. - Use case: Discover new commands and learn their functions.
Syntax: help
9. Display or Set the System time ‘time’
- Function: Lets you set the system time or display the current time.
- How to use: Type
time [new_time] and press Enter. - Use case: Allows the user to set their system’s time without additional navigation
Syntax: time [new_time]
10. Copy Files ‘copy’
- Function: Lists all available commands and their descriptions.
- How to use: Type
copy [source1] [destination2] and press Enter. - Use case: Discover new commands and learn their functions.
Syntax: copy file.txt Backup\
| Command | Description | Syntax | Example |
|---|---|---|---|
dir |
View the contents of a directory | dir |
dir C:\Users\Documents |
cd |
Change the current working directory | cd [directory_name] |
cd Downloads |
mkdir |
Create a new directory | mkdir [directory_name] |
mkdir NewProject |
ren |
Rename a file | ren [old_name] [new_name] |
ren draft.txt final.txt |
del |
Delete a file | del [file_name] |
del unwanted.txt |
exit |
Close the Command Prompt | exit |
exit |
cls |
Clear the Command Prompt screen | cls |
cls |
help |
View available CMD commands and their descriptions | help |
help |
time |
Display or set the system time | time |
time 14:30:00 |
copy |
Copy files from one location to another | copy [source] [destination] |
copy report.docx D:\Backup\ |
CMD Commands for Experts
These commands are more advanced and suitable for users comfortable with troubleshooting and system management tasks.
1. System File Checker ‘sfc’
- Function: Scans and repairs corrupted system files.
- How to use: Type
sfc /scannowin CMD (run as administrator). - Use case: Fix system errors related to missing or corrupted files.
Syntax: sfc /scannow
2. Disk Error ‘chkdsk’
- Function: Scans the hard drive for bad sectors and file system errors.
- How to use: Type
chkdsk [drive letter]: /f(e.g.,chkdsk C: /f) in CMD. - Use case: Identify and fix disk issues.
Syntax: chkdsk C: /f
3. View Running Processor ‘tasklist’
- Function: Displays all running processes and their details.
- How to use: Type
tasklistto list processes. Usetasklist /fi "imagename eq [process name]"to filter. - Use case: Identify resource-heavy or unresponsive processes.
Syntax: tasklist /fi "imagename eq [process name]
4. Restart ‘shutdown’
- Function: Allows you to shut down or restart the computer via CMD.
- How to use:
- Shutdown:
shutdown /s /f /t [seconds]. - Restart:
shutdown /r /f /t [seconds].
- Shutdown:
- Use case: Automate shutdown or restart tasks
Syntax:
Shutdown: shutdown /s /f /t [seconds].
Restart: shutdown /r /f /t [seconds].
5. Network Statistics ‘netstat’
- Function: Displays active connections and listening ports.
- How to use: Type
netstatto view all active connections. - Use case: Diagnose network-related issues or monitor network activity.
Syntax: netstat
6. Kill a Running Process ‘taskkill’
- Function: Lets you terminate a process using its process ID (PID)
- How to use: Type
taskkill /[PID] /F to terminate - Use case: Can be helpful for terminating any dedicated PID.
Example (PID: 1124)
Syntax: taskkill /PID 11234 /F
7. View Saved Passwords ‘netsh wlan show profiles’
- Function: Retrieve the password of a saved Wi-Fi network.
- How to use: Type netsh wlan show profile name=»WiFi-Name» key=clear
- Use case: Discover new commands and learn their functions.
Example: netsh wlan show profile name="MyHomeWiFi" key=clear
| Command | Description | Syntax | Example |
|---|---|---|---|
sfc |
System File Checker — Scans and repairs system files | sfc /scannow |
sfc /scannow |
chkdsk |
Check Disk — Scans and fixes disk errors | chkdsk [drive]: /f /r |
chkdsk C: /f /r |
tasklist |
View running processes | tasklist |
tasklist |
shutdown |
Shutdown or restart the system | shutdown /r /t [seconds] |
shutdown /r /t 10 (Restart in 10 seconds) |
netstat |
View network statistics and active connections | netstat -a |
netstat -an (Show all connections numerically) |
taskkill |
Kill a running process using its process ID (PID) | taskkill /PID [PID] /F |
taskkill /PID 4567 /F (Kill process with ID 4567) |
netsh wlan show profiles |
View saved Wi-Fi network names | netsh wlan show profiles |
netsh wlan show profiles |
CMD Commands for Utility
These commands are focused on specific tasks and utilities to enhance productivity and system performance.
1. Network Configuration ‘ipconfig’
- Function: Displays IP address, subnet mask, and gateway information.
- How to use:
- Basic: Type
ipconfig. - Detailed: Type
ipconfig /all.
- Basic: Type
- Use case: Troubleshoot internet connectivity issues.
Syntax: ipconfig
2. Network Connectivity ‘ping’
- Function: Sends packets to test communication with another device or website.
- How to use: Type
ping[destination] - Use case: Check if a device or website is reachable.
Syntax: ping geeksforgeeks.org
3. System Information ‘systeminfo’
- Function: Displays detailed information about your computer.
- How to use: Type
systeminfo. - Use case: Quickly access system specifications for troubleshooting or reporting.
Syntax: systeminfo
4. Trace Route ‘tracert’
- Function: Shows the path packets take to reach a specific destination.
- How to use: Type
tracert[destination] - Use case: Identify network bottlenecks or connectivity issues.
Syntax: tracert geeksforgeeks.org
5. Manage Drives ‘diskpart’
- Function: Opens a command-line utility for managing disk partitions.
- How to use: Type
diskpartto enter the disk management interface. - Use case: Create, delete, or modify partitions on your drives.
Syntax: diskpart
6. Delete a Directory ‘rmdir’
- Function: Removes directory from the origin
- How to use: Type rmdir [directory_name] and press Enter.
- Use case: Discover new commands and learn their functions.
Example: GFG — Directory name
Syntax: rmdir GFG
7. View ‘rmdir’
- Function: Removes directory from the origin
- How to use: Type rmdir [directory_name] and press Enter.
- Use case: Discover new commands and learn their functions.
Example: GFG - Directory name
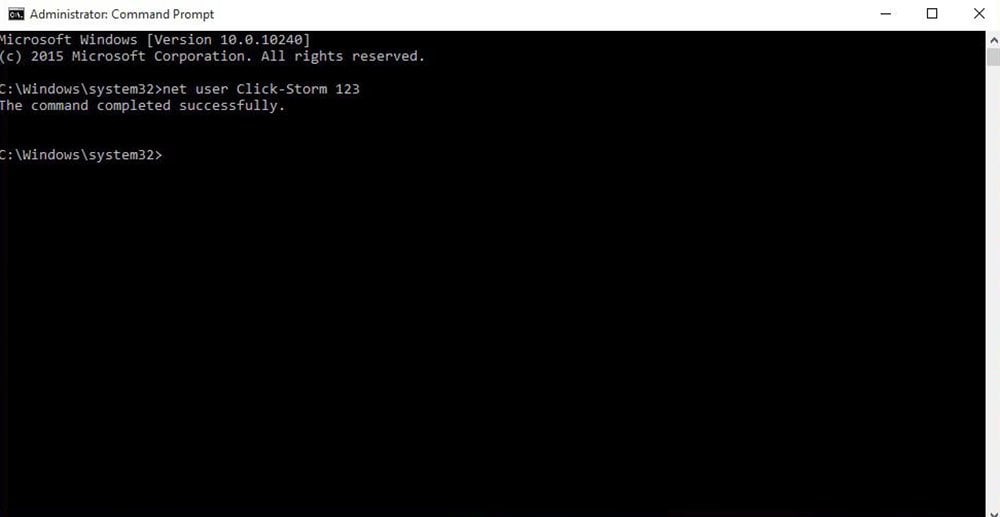
8. Manage User Account ‘net user’
- Function: To list all the user accounts
- How to use: Type net user and press Enter.
- Use case: Discover new commands and learn their functions.
Syntax: net user username password /add
9. View Startup Programs ‘wmic startup get caption,command’
- Function: To check what programs launch on startup.
- How to use: Type wmic startup get caption,command, and press Enter.
- Use case: Discover new commands and learn their functions.
Syntax: wmic startup get caption,command
| Command | Description | Syntax | Example |
|---|---|---|---|
ipconfig |
View network configuration, including IP address, subnet mask, and gateway | ipconfig |
ipconfig /all (Displays detailed network info) |
ping |
Test network connectivity by sending packets to a host | ping [host or IP] |
ping google.com (Check connection to Google) |
systeminfo |
Display detailed system information, including OS version, installed memory, and processor | systeminfo |
systeminfo |
tracert |
Trace the route packets take to a network destination | tracert [hostname or IP] |
tracert google.com (View network path to Google) |
diskpart |
Manage disk partitions, including creating, formatting, and deleting partitions | diskpart |
diskpart → list disk → select disk 1 → create partition primary |
rmdir |
Delete a directory (folder) | rmdir [directory_name] |
rmdir /s /q OldFolder (Delete a folder and its contents without confirmation) |
dir |
View contents of a directory | dir |
dir C:\Users\Documents (List files in a specific directory) |
net user |
Manage user accounts, including adding, modifying, or deleting users | net user |
net user John password123 /add (Create a new user account) |
wmic startup get caption,command |
View startup programs and their commands | wmic startup get caption,command |
wmic startup get caption,command |
CMD Commands for Troubleshooting
1. File Comparison ‘fc’
- Function: Compares two files and highlights differences.
- How to use: Type
fc [file1] [file2]to compare files. - Use case: Detect changes or errors in files
Syntax: fc 1 2
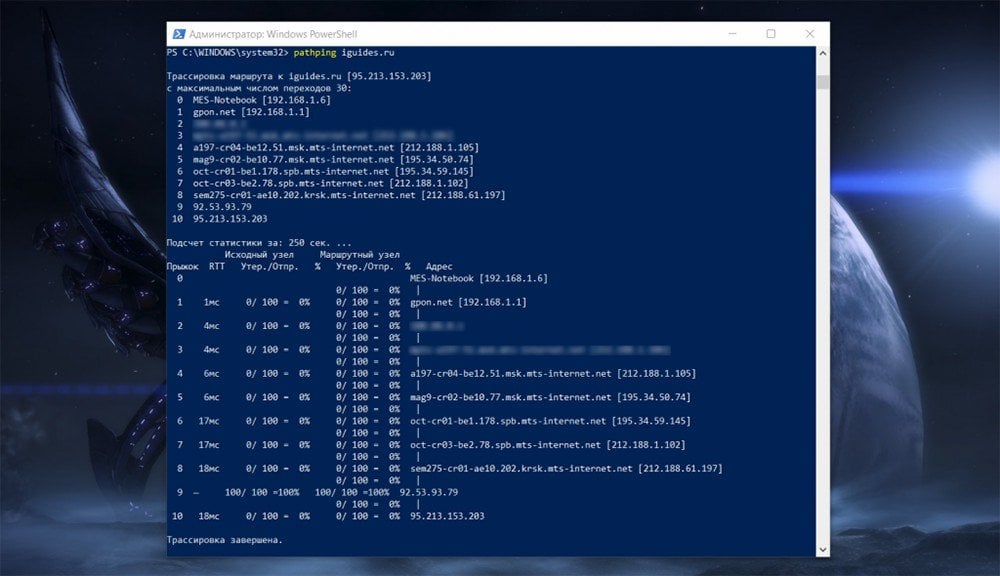
2. Advanced Network Diagnostics ‘pathping’
- Function: Combines
pingandtracertfunctionalities to provide detailed network path diagnostics. - How to use: Type
pathping[destination] - Use case: Troubleshoot complex network issues.
Syntax: pathping geeksforgeeks.org
3. Registry Editor ‘regedit’
- Function: Launches the Windows Registry Editor.
- How to use: Type
regeditto open the registry. - Use case: Modify registry keys for advanced configuration or troubleshooting.
Syntax: regedit
4. View MAC ‘getmac’
- Function: Displays the MAC address of your network adapter.
- How to use: Type
getmacto view the MAC address. - Use case: Identify your device’s hardware address for network configurations
Syntax: getmac
5. Power Configuration ‘powercfg’
- Function: Displays and manages power settings.
- How to use: Type
powercfg/[option] - Use case: Optimize power usage and troubleshoot battery issues.
Syntax: powercfg /energy for a detailed power usage report
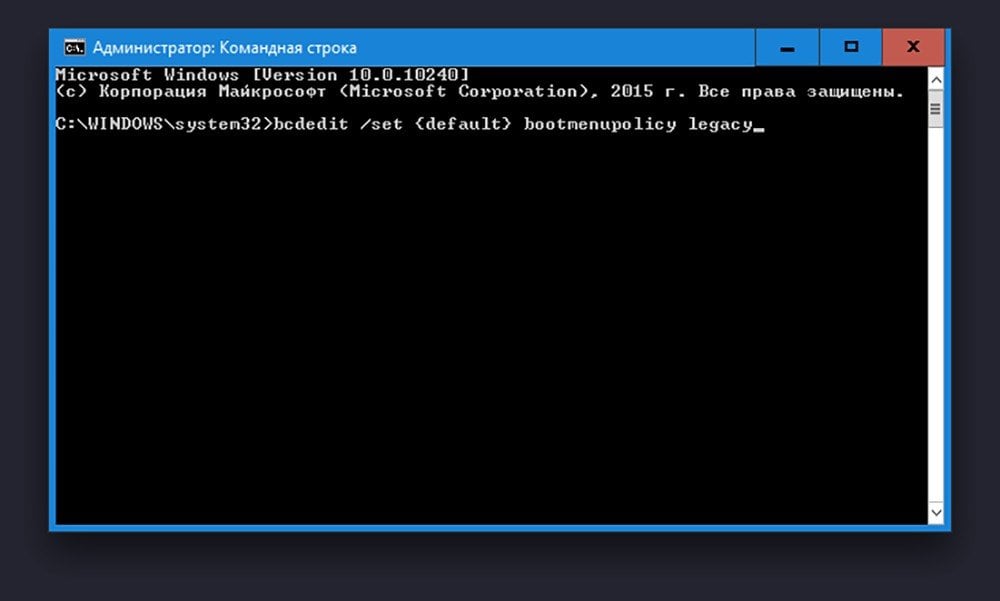
6. Enable Boot Manager ‘bcdedit’
- Function: Used to modify boot configuration settings
- How to use: Type
bcdedit/ set current - Use case: Discover new commands and learn their functions.
Syntax: bcdedit /set {current} bootmenupolicy standard
7. Format a Drive ‘format’
- Function: To erase any specific drive.
- How to use: Type format [drive]: /FS:NTFS and press Enter.
- Use case: Discover new commands and learn their functions.
Syntax: format D: /FS:NTFS
| Command | Description | Syntax | Example |
|---|---|---|---|
fc |
Compare two files and highlight differences | fc [file1] [file2] |
fc file1.txt file2.txt (Compare two text files) |
pathping |
Perform advanced network diagnostics with packet loss details | pathping [destination] |
pathping google.com (Analyze network route to Google) |
regedit |
Open the Windows Registry Editor (GUI) | regedit |
regedit (Opens the registry editor – use with caution!) |
getmac |
Display the MAC (Media Access Control) address of your network adapters | getmac |
getmac /v /fo list (View MAC addresses in detailed format) |
powercfg |
Manage and analyze power configurations | powercfg /[option] |
powercfg /batteryreport (Generate a battery usage report) |
bcdedit |
Enable, disable, or modify Windows Boot Configuration | bcdedit /set {current} [option] |
bcdedit /set {current} bootmenupolicy standard (Enable boot menu in Windows 10/11) |
format |
Format a drive (erase all data) | format [drive]: /FS:[filesystem] |
format D: /FS:NTFS (Format drive D: with NTFS file system) |
CMD Commands for Students
Students can use these commands to manage files, perform simple calculations, and even help with tasks like coding and studying.
1. Calculator ‘calc’
- Function: Opens the Windows Calculator application.
- How to use: Type
calcand press Enter. - Use case: Quickly open the calculator for
Syntax: calc
CMD Commands for Programmers
Programmers often use CMD to automate tasks, compile code, and test network functionality. These commands can be especially useful for developers working in command-line environments.
1. Compile Java Code ‘javac’
- Function: Compiles Java source files into bytecode.
- How to use: Type
javac [file name].javato compile Java code. - Use case: Compile and test Java programs directly from the command line.
Syntax: javac
2. Version Control ‘git’
- Function: Interacts with Git repositories from the command line.
- How to use: Type
git [command] - Use case: Manage version control, clone repositories, or push commits from the command line.
Syntax: git clone [repository URL]
3. Execute Python Script ‘python’
- Function: Runs Python scripts in the command prompt.
- How to use: Type
python [script.py]to execute a Python program. - Use case: Test and run Python code directly in the command line.
Syntax: python [script.py]
4. Run Node.js Scripts ‘node’
- Function: Executes Node.js scripts.
- How to use: Type
node [script.js]to run a JavaScript file using Node.js. - Use case: Run backend scripts and test JavaScript programs in the command line.
Syntax: node [script.js]
5. Node Package Manager ‘npm’
- Function: Installs and manages JavaScript packages.
- How to use: Type
npm install [package]to install a package. - Use case: Manage dependencies and libraries in Node.js applications.
Syntax: npm install [package]
| Command | Description | Syntax | Example |
|---|---|---|---|
javac |
Compile Java source code into bytecode (.class files) | javac [filename].java |
javac HelloWorld.java (Compile a Java file) |
git |
Version control system for tracking changes in files | git [command] |
git clone https://github.com/user/repo.git (Clone a repository) |
python |
Execute a Python script or enter interactive mode | python [script.py] |
python script.py (Run a Python script) |
node |
Execute JavaScript code using Node.js | node [script.js] |
node app.js (Run a Node.js script) |
npm |
Manage Node.js packages and dependencies | npm [command] |
npm install express (Install the Express.js package) |
Bonus: CMD Tricks and Tips
To make CMD usage even more efficient, here are some bonus tips:
1. Save CMD Output to a File
Use the > operator to save the output of a command to a text file.
2. Open CMD in a Specific Directory
Instead of navigating manually, you can directly open CMD in a folder by typing cmd in the File Explorer’s address bar.
3. Use && for Multiple Commands
You can run multiple commands sequentially:
ipconfig && ping google.com
Conclusion
Mastering the most useful CMD commands in Windows can empower you to perform tasks more efficiently, troubleshoot problems, and gain deeper control over your system. By familiarizing yourself with these essential CMD commands, you’ll be better equipped to handle a variety of situations, from simple file management to advanced system configurations. Whether you’re a beginner or an experienced user, these commands are invaluable tools to have at your disposal.
В наших статьях про работу Windows 10 и других версий часто можно встретить упоминание командной строки. Все дело в том, что это удобный системный инструмент, который позволяет настраивать ОС под себя и управлять разными ее частями с помощью простых текстовых команд. Например, мгновенно запускать разные приложения или проводить проверку и сканирование файлов.
Для командной строки существует огромное количество различных кодов, которые мы можете использовать для того, чтобы упростить себе работу с системой и использовать ее функции по максимуму. Ниже разберемся, как открывается командная строка и какие команды можно в нее вводить.
Виды командной строки
Утилита для выполнения команд в Windows разделена на два интерфейса: непосредственно командную строку и оболочку PowerShell. Каждая из них — это консоль, которая напрямую соединяет вас с компонентами ОС или конкретными приложениями на вашем ПК.
Первой появилась командная строка. Ее встроили в систему для того, чтобы оптимизировать стандартные задачи, например, работу с учетными записями на ПК или создание резервных копий по ночам. Вы можете запускать и куда более сложные сценарии. Скрипты командной строки помогают вам облегчить и ускорить работу.

командная строка виндовс 10
PowerShell же создан как расширенная версия прошлой утилиты и использует собственные скрипты — командлеты. Они представляют собой язык сценариев, который можно расширять. По сути, вы можете использовать ту утилиту, которая удобнее вам, но помните, что командная строка не может использовать командлеты для PowerShell.
командная строка виндовс 10
Открываем командную строку
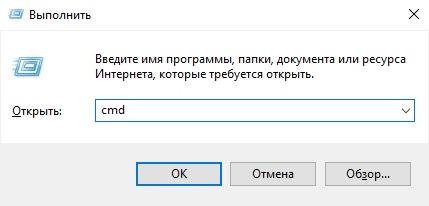
Проще всего запустить командную строку через системную утилиту «Выполнить». Ее можно вызвать с помощью комбинации клавиш Windows + R. В открывшемся окне введите cmd и подтвердите выполнение запроса.

командная строка виндовс 10
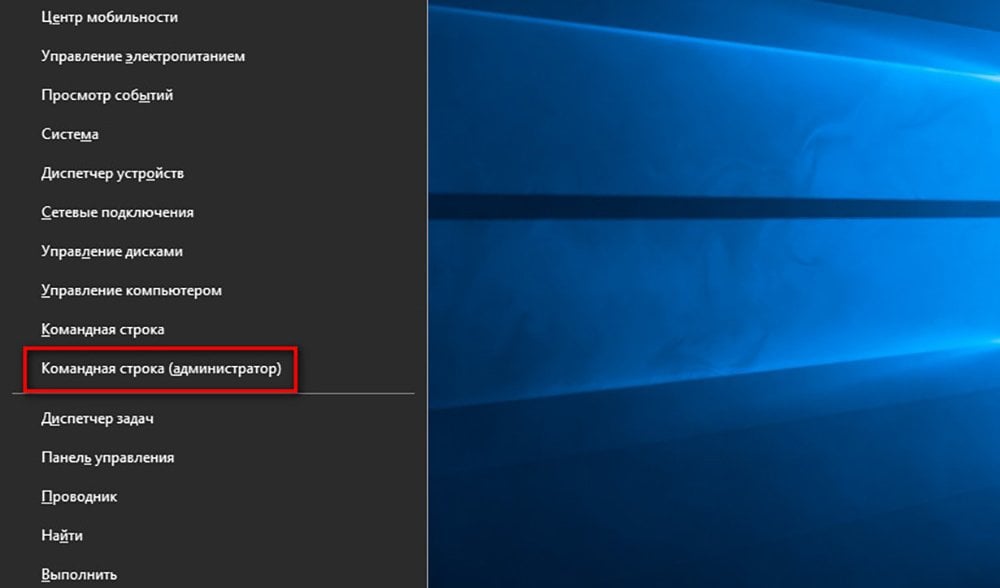
Еще один вариант — запуск через меню «Пуск». Нажмите правой кнопкой мыши по иконке меню и выберите «Командная строка» или «Windows PowerShell». Также вы таким образом можете запустить командную строку от имени администратора и получить максимальный ее функционал. Но помните, что этот способ сработает только если у вас не стоит модификации на меню «Пуск». В ином случае у вас откроется другое всплывающее окно.
командная строка виндовс 10
Какой бы способ вы не выбрали — итог будет одинаковым. В результате откроется окно командной строки, в которое вы сразу же можете вводить нужные вам команды для системы и прочих файлов.
Список команд
Как мы уже отметили ранее, в командной строке есть очень много различных команд, но большинство из них настолько специфичны, что нужны только в редких случаях. В статье мы постарались собрать только основные команды, которые могут помочь вам быстро открывать системные утилиты и работать с папками на вашем ПК.
командная строка виндовс 10
Помните об осторожности при работе с системными файлами и инструментами, и не забывайте делать бэкапы файлов, если вам нужно что-то серьезно изменить.
Программы и утилиты
Эти команды позволят вам моментально запускать программы и открывать разные системные утилиты. С их помощью вы можете быстро перемещаться по разным компонентам системы, без необходимости делать несколько шагов в меню пуск. А еще это позволяет запускать важные утилиты, для доступа к которым нужно лезть вглубь ПК.
- appwiz.cpl — программы и компоненты;
- certmgr.msc — меню управление системными сертификатами
- control — панель управления;
- control printers — меню управления подключенными устройствами и принтерами;
- control userpasswords2 — учетные записи на ПК;
- compmgmt.msc — управление параметрами ПК;
- devmgmt.msc — диспетчер устройств;
- dfrgui — меню оптимизации дискового пространства;
- diskmgmt.msc — управление дисками и пространством;
- dxdiag — средство диагностики DirectX.
командная строка виндовс 10
- hdwwiz.cpl — диспетчер устройств (другая команда);
- firewall.cpl — брандмауэр Защитника Windows;
- gpedit.msc — редактор локальной групповой политики;
- lusrmgr.msc — локальные пользователи и группы на вашем ПК;
- mblctr — центр мобильности;
- mmc — консоль управления системными оснастками;
- msconfig — системная конфигурация;
- odbcad32 — панель администрирования источника данных ODBC;
- perfmon.msc — системный монитор (можно смотреть изменения в производительности ПК и системы);
- presentationsettings — режим презентации;
- powershell — PowerShell (расширенная версия командной строки);
- powershell_ise — интегрированная среда сценариев для PowerShell;
- regedit — редактор реестра.
командная строка виндовс 10
- resmon — монитор ресурсов;
- rsop.msc — результирующая политика Windows;
- shrpubw — мастер создания общих ресурсов;
- secpol.msc — локальная политика безопасности;
- services.msc — средство управления службами операционной системы;
- taskmgr — диспетчер задач;
- taskschd.msc — планировщик заданий.
Приложения
Команд для работы с приложениями довольно мало. Они направлены в основном на уже открытые программы, которые выполняют определенные процессы на ПК.
- schtasks – отложенный запуск приложения через планировщик задач;
- shutdown – выключить или перезагрузить ПК;
- tasklist – список выполняемых задач на ПК;
- taskkill – остановить выполнение задачи и закрыть процесс (нужен PID, его вы можете узнать из прошлой команды);
- reg – редактор реестра;
- runas – запустить задачу от имени другого пользователя.
командная строка виндовс 10
Управление системой
С этим пунктом нужно обращаться осторожнее, ведь команды в нем связаны непосредственно с работой вашей системы. Конечно, если вы просто запустите утилиты с помощью этих запросов, и ничего не будете менять, все будет нормально. Но если вам нужно что-то изменить в системе — будьте крайне осторожны.
- computerdefaults — параметры программ по умолчанию;
- control admintools — папка со средствами администрирования;
- date — управление датой на ПК;
- displayswitch — управление подключенными экранами;
- dpiscaling — параметры дисплея;
- eventvwr.msc — журнал событий;
- fsmgmt.msc — средство работы с общими папками;
- fsquirt — работа с файлами по Bluetooth;
- intl.cpl — региональные настройки;
- joy.cpl — внешние игровые устройства;
- logoff — выход из системы.
командная строка виндовс 10
- lpksetup — управлениее языками интерфейса;
- mobsync — центр синхронизации Windows;
- msdt — средство диагностики службы поддержки Microsoft;
- msra — удаленный помощник Windows;
- msinfo32 — сведения о системе;
- mstsc — удаленный рабочий стол;
- napclcfg.msc — конфигурация операционной системы;
- netplwiz — управление учетными записями пользователей;
- optionalfeatures — управление стандартными компонентами операционной системы;
- shutdown — завершение работы компьютера;
- sigverif — средство проверки подлинности файлов;
- sndvol — запуск микшера громкости;
- slui — активация лицензии Windows;
- sysdm.cpl — свойства системы;
- systempropertiesperformance — параметры быстродействия;
- systempropertiesdataexecutionprevention — запуск службы DEP параметров быстродействия.
командная строка виндовс 10
- timedate.cpl — дата и время ПК;
- tpm.msc — управление доверенным платформенным модулем TPM на локальном компьютере;
- useraccountcontrolsettings — параметры управления учетными записями пользователей;
- utilman — специальные возможности;
- ver — сведения о текущей версии Windows;
- wf.msc — режим повышенной безопасности брандмауэра;
- winver —общие сведения о Windows;
- WMIwscui.cpl — центр поддержки Windows;
- wscript — параметры сервера сценария;
- wusa — автономный установщик обновлений Windows.
Сеть и интернет
С помощью этих команды вы можете проверить работоспособность вашего интернета и изменить настройки. Также вам будет доступна информация о сетевых устройствах и интерфейсах.
- control netconnections — просмотр и настройка сетевых подключений;
- inetcpl.cpl — свойства интернета;
- NAPncpa.cpl — аналог первой команды;
- telephon.cpl — настройка модемного подключения к интернету;
- ipconfig – информация о сетевых интерфейсах;
- ping – отправляет ICMP-запросы на целевой хост, проверяет его доступность.
командная строка виндовс 10
- tracert – путь пакетов в сети;
- nslookup – поиск IP-адреса по имени ресурса;
- route – таблицы сетевых маршрутов;
- arp – таблицу с IP-адресами, преобразованными в физические адреса;
- netsh – программа управления сетевыми настройками;
- getmac – MAC-адрес сетевого адаптера;
- tftp – запускает TFTP-клиент в консоли.
Периферия
Команды для управления оборудованием, подключенным к вашему ПК тоже есть. Их немного и они вызывают в основном окна настройки разных устройств, от мышки для принтера и графического планшета.
- main.cpl — панель настройки мыши;
- mmsys.cpl — панель настройки звука;
- printui — пользовательский интерфейс принтера;
- printbrmui — средство переноса принтера, с возможностью экспорта и импорта программ и драйверов;
- printmanagement.msc — управление параметрами печати.
командная строка виндовс 10
- sysedit — редактирование системных файлов с расширениями .ini и .sys;
- tabcal — средство калибровки дигитайзера;
- tabletpc.cpl — свойства планшета и пера;
- verifier — диспетчер проверки драйверов;
- wfs — факсы и сканирование;
- wmimgmt.msc — элемента управления WMI стандартной консоли.
Файлы и диски
Здесь мы рассмотрим команды для работы с дисками, папками и хранящимися в них файлами. Некоторые из них будут работать только если вы уже вызвали какую-то утилиту или запустили программу. А если вы запутаетесь, то всегда можно воспользоваться командой help, чтобы получить справку по командной строке.
- assoc — связь между расширениями имени и типа пакетного файла;
- attrib — редактирование атрибутов файла или папки;
- bcdboot — создание/восстановление системного раздела;
- cd — смена диска или просмотр выбранного;
- chdir — просмотр папки или переход к другой;
- chkdisk — проверка дисков и внешних накопителей;
- cleanmgr — очистка диска.
командная строка виндовс 10
- convert — смена файловой системы тома;
- copy — копирование файлов (с выбором конечного каталога);
- del — удаление выделенных файлов;
- dir — просмотр файлов и папок по выбранному пути;
- diskcopm — сравнить содержимое двух дисков;
- dickcopy — скопировать содержимое одного диска на любой другой;
- diskpart — утилита для работы с дисками (открывается в отдельном окне командной строки);
- erase — удаление одного или нескольких файлов;
- fc — сравнение файлов и поиск различий;
- format — форматирование дисков Windows;
- label — изменение меток тома для дисков;
- md — новая папка;
- mdsched — проверка оперативной памяти;
- move — перемещение файлов по указанному пути.
командная строка виндовс 10
- ntmsmgr.msc — средство работы с внешними накопителями;
- recdisc — создание диска восстановления операционной системы (только оптические накопители);
- recover — восстановление данных;
- rekeywiz — шифрующая файловая система (EFS);
- RSoPrstrui — восстановление системы;
- sdclt — резервное копирование и восстановление;
- sfc /scannow — проверка целостности системных файлов;
- tree — графическое отображение структуры каталогов;
- verify — анализ правильности записи файлов на диск;
- vol — метка и серийный номер тома диска.
Настройка командной строки
Командную строку также можно кастомизировать под себя. Изменить ее цвет, установить приветствие, очистить содержимое, если кода стало слишком много. Словом, всячески управлять ей.
- cls — очистить экран командной строки;
- color — изменить цвет фона (нужен идентификатор цвета);
- exit — закрыть утилиту;
- help — полный список команд;
- prompt — изменяет слева название.
командная строка виндовс 10
В статье мы собрали самые полезные команды для командной строки. Пользуйтесь ими при необходимости, но не забывайте об осторожности. Все действия с системными файлами и утилитами вы выполняете на свой страх и риск.
Заглавное изображение: wall.alphacoders.com
The Windows Command Prompt tool, and many of its commands, might seem boring or even relatively useless at first glance, but as anyone who has ever used the Command Prompt very often can tell you, there’s much to love!
These tricks will get you excited about many of the mundane-sounding Command Prompt commands like telnet, tree, or robocopy—okay, robocopy sounds pretty cool.
Some of these Command Prompt tricks are special features or fun uses for the Command Prompt itself, while others are just neat or relatively unknown things you can do with certain CMD commands.
Use Ctrl+C to Abort a Command
Just about any command can be stopped in its tracks with the abort command: Ctrl+C.
If you haven’t actually executed a command, you can just backspace and erase what you’ve typed, but if you’ve already executed it, then you can do a Ctrl+C to stop it.
It isn’t a magic wand, and it can’t undo things that aren’t undoable, like a partially complete format command.
However, for things like the dir command that seem to go on forever or questions you’re asked at the prompt that you don’t know the answer to, the abort command is an excellent Command Prompt trick to know.
View a Command’s Results One Page (or Line) at a Time
Ever run a command, like the dir command, that produces so much information on the screen that it’s almost useless?
One way to manage this info dump is to execute the command in a special way so whatever information is generated is shown to you one page, or one line, at a time.
Just type the command, and then follow it with the pipe character and then the more command.
For example, executing the below command will generate the thousands of lines of results that you expect from the dir command, but the more command will pause each page of results with — More — at the bottom of the page, indicating that the command is not done running.
dir /s | more
Just press the spacebar to advance by page, or press Enter to advance one line at a time.
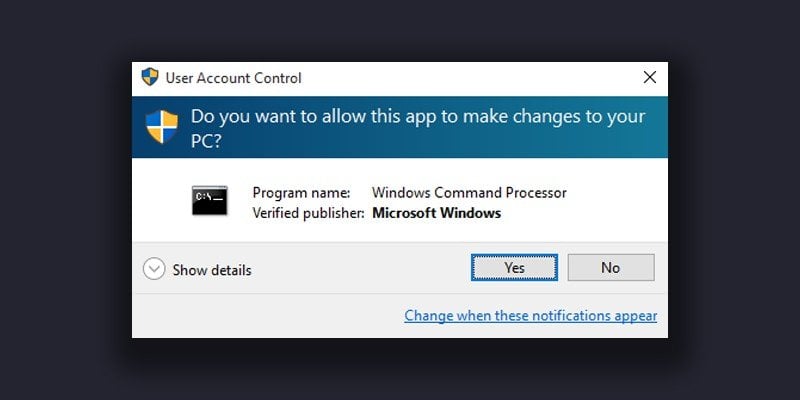
Run Command Prompt as an Administrator Automatically
Many commands require that you open an elevated Command Prompt in Windows—in other words, execute them from a Command Prompt that’s run as an administrator.
You can always right-click any Command Prompt shortcut and choose Run as administrator, but creating a shortcut to do the same thing can be a huge time saver if you’re a frequent Command Prompt power user.
To complete this trick, just create a Command Prompt shortcut on the desktop, enter the shortcut’s properties and then select the Run as administrator box, located in the Advanced button on the Shortcut tab.
If you use Command Prompt via Terminal (you do by default if you’re on Windows 11), setting up admin access is even easier: Open Terminal’s settings to the Defaults page, and enable Run this profile as Administrator.
Become a Command Prompt Power User With Function Keys
The fact that the function keys actually do something in the Command Prompt is maybe one of the best kept secrets about the tool:
- F1: Pastes the last executed command (character by character)
- F2: Pastes the last executed command (up to the entered character)
- F3: Pastes the last executed command
- F4: Deletes current prompt text up to the entered character
- F5: Pastes recently executed commands (does not cycle)
- F6: Pastes ^Z to the prompt
- F7: Displays a selectable list of previously executed commands
- F8: Pastes recently executed commands (cycles)
- F9: Asks for the number of the command from the F7 list to paste
Change the Prompt Text
Did you know the prompt itself is completely customizable thanks to the prompt command? It is, and when we say customizable, we mean really customizable.
Instead of C:\>, you can set the prompt to any text you want, have it include the time, the current drive, the Windows version number (like in this example image), you name it.
One useful example is prompt $m$p$g, which will show the full path of a mapped drive, alongside the drive letter.
You can always execute prompt alone, without options, to return it to its sometimes boring default.
Get Help for Any Command
The help command does not provide help for every Command Prompt command.
However, any command can be suffixed with the /? option, usually called the help switch in Command Prompt, to display detailed information about the command’s syntax and often times even some examples.
The help switch may not be the coolest Command Prompt trick you’ve ever heard of, but it’s hard to disagree that it’s one of the more useful.
Neither the help command nor the help switch offers much in the way of explaining how to interpret the syntax.
How to Read Command Syntax
Save a Command’s Output to a File
An incredibly useful Command Prompt trick is the use of redirection operators, specifically the > and >> operators.
These little characters let you redirect the output of a command to a text file, giving you a saved version of whatever data the command produced in the Command Prompt window.
For example, let’s say you’re about to post a computer problem to an online forum, and you want to provide really accurate information about your computer. An easy way to do that would be to use the systeminfo command with a redirection operator.
For example, you might execute the below command to save the information provided by the systeminfo command to that file. You could then attach the file to your forum post.
systeminfo > c:\mycomputerinfo.txt
Terminal users have it even easier. Just right-click the Command Prompt tab and choose Export Text.
How to Redirect Command Output to a File
View a Drive’s Entire Directory Structure
One of the neatest little commands is the tree command. With tree, you can create a kind of map of the directories on any of your computer’s drives.
Execute tree from any directory to see the folder structure under that directory.
With so much information created with this command, it’s probably a good idea to export the results to a file so you can actually look through it.
Customize the Command Prompt Title Bar Text
Tired of that «Command Prompt» title bar text? No problem, just use the title command to change it to say whatever you like.
For example, let’s say your name is Maria Smith, and you want to express your ownership of the Command Prompt. Execute this and the title bar will change immediately:
title Property of Maria Smith
The change won’t stick, so the next time you open Command Prompt, the title bar will be back to normal.
The title command is usually used to help give a custom appearance in script files and batch files—not that titling it with your name isn’t a good idea!
Copy Text From the Command Prompt
Copying lots of text from the Command Prompt isn’t as easy as copying from other programs, which is part of the reason why saving a command’s output to a file, which you learned about a few tricks back, is so handy.
However, what if you do just want to copy a short section of text to the clipboard? It’s not too hard, but it’s not very intuitive either:
- Right-click anywhere in the Command Prompt window and choose Mark.
- Highlight with your left mouse button whatever you’d like to copy.
- Press Enter or right-click once.
That’s the menu-based method, but surprisingly, you can also use the regular Ctrl+C shortcut, too.
If you chose Mark but then decided you don’t want to copy anything, right-click again to cancel the Mark action, or press the Esc key.
Now you can paste that information anywhere, just like you paste other text.
If QuickEdit Mode is turned on (or you’re in Terminal), right-clicking won’t show a menu. This is actually another tip in this list! See step 20 for the details.
Open the Command Prompt From Any Location
If you’ve ever worked in the Command Prompt for very long, you know that it can be really frustrating executing the cd/chdir command over and over again to get to the right directory.
In Windows, open the folder you’d like to start working from. When you’re there, hold down Shift while you right-click anywhere in the folder.
After the menu pops up, you’ll notice an entry that’s not usually there: Open in Terminal (Windows 11) or Open command window here. Select that, and you’ll start a new instance of the command line, ready and waiting at the right location.
If you’re a Command Prompt power user, you’ll immediately recognize the value in this little trick.
Drag and Drop For Easy Path Name Entry
Most Command Prompt commands require you to specify full paths to files or folders, but typing out a long path can be frustrating, especially when you miss a character and have to start over.
For example, in Windows 11 and 10, this is the path to the Accessories group in the Start Menu:
C:\ProgramData\Microsoft\Windows\Start Menu\Programs\Accessories
Who wants to type that all in manually? We don’t.
Just open the folder in Explorer. Once there, drag the folder or file to the Command Prompt window and let go. Like magic, the full path is inserted, saving you a considerable amount of typing depending on the length and complexity of the path name.
This technique doesn’t work in an elevated Command Prompt.
Shut Down or Restart Another Computer
System administrators in a business environment do this all the time for lots of reasons, but you can also shut down or restart another computer on your network, all from your computer’s Command Prompt.
The easiest way to shut down a computer remotely is to execute shutdown /i from the Command Prompt to open the Remote Shutdown Dialog, shown above.
Just enter the name of the remote computer (which you can get by running the hostname command on the other PC), choose what you want to do (restart or shutdown), select some other options, and then select OK.
So whether you’re brushing up on your command skills or just scaring a family member, this Command Prompt trick is a fun one.
You can also shut down or restart another computer strictly from the Command Prompt with the shutdown command, without using the Remote Shutdown Dialog.
Use Robocopy as a Backup Solution
Thanks to the robocopy command, you don’t need to use Window’s backup software or install a free backup software tool.
Just execute the following, obviously replacing the source and destination folders with whatever you’d like to back up and where it should go.
robocopy c:\users\ellen\documents f:\mybackup\documents /copyall /e /r:0 /dcopy:t /mir
The robocopy command with these options functions identically to an incremental backup software tool, keeping both locations in sync.
You don’t have this command if you’re using Windows XP or earlier. However, you do have the xcopy command, which can be used to do something very similar:
xcopy c:\users\ellen\documents f:\mybackup\documents /c /d /e /h /i /k /q /r /s /x /y
No matter which command you choose to use, just create a batch file containing the command and schedule it to run in Task Scheduler, and you’ll have your own custom-made backup solution.
View Your Computer’s Important Network Information
Maybe just for your own information, but certainly when you’re troubleshooting a network or internet problem, you’ll probably at some point need to know details about your computer’s network connection.
Everything you’d want to know about your network connection is available somewhere in the Control Panel in Windows, but it’s much easier to find, and much better organized, in the results from the ipconfig command.
Execute this command in Command Prompt:
ipconfig /all
What displays on-screen next is everything important about your network connection: your IP address, hostname, DHCP server, DNS information, and much, much more.
Microsoft
Map a Local Folder Just Like a Network Drive
The net use command is used to assign shared drives on a network to your own computer as a drive letter, but did you know there’s another command that can be used to do the same thing to any folder on any of your local hard drives?
There is, and it’s called the subst command. Just execute the command followed by the path of the folder you wish to appear as a drive.
For example, let’s say you want your C:\Windows\Fonts folder to appear as the Q: drive. Just execute this command and you’re set:
subst q: c:\windows\fonts
This Command Prompt trick makes accessing a particular location from the Command Prompt much easier and the folder will appear as a drive next to all your real hard drives.
An easy way to delete the «network drive» example here is with the subst /d q: command. Just replace q: with your own drive letter.
Access Previously Used Commands With the Arrow Keys
Marcus Urbenz / Unsplash
Another great Command Prompt trick uses the keyboard arrow keys to cycle through previously executed commands.
The up and down arrow keys cycle through the commands you’ve entered, and the right arrow automatically enters, character by character, the last command you executed.
This might not sound that interesting, but there are several situations where the arrow keys become huge time savers.
Consider this example: You’ve typed out 75 characters of a command and then try to execute it, only to find that you forgot to add an option at the very end. No problem, just press the up arrow and the entire command is automatically entered in the Command Prompt window, ready for you to edit to make it work.
Automatically Complete Commands With Tab Completion
Tab completion is another Command Prompt trick that can save you lots of time, especially if your command has a file or folder name in it that you’re not completely sure of.
To use tab completion, enter the command and then the portion of the path that you do know, if at all. Then press the Tab key over and over to cycle through all the available possibilities.
For example, let’s say you want to change directories to some folder in the Windows directory, but you’re not sure what it’s named. Type cd c:\windows\ and then press Tab until you see the folder you’re looking for.
The results cycle in order, or you can use Shift+Tab to step through the results in reverse.
You know how your smartphone’s texting app automatically guesses what it is you want to type next? Tab completion in Command Prompt is sort of like that—only better.
Find a Website’s IP Address
Want to find the IP address of any website? Use the nslookup command or the ping command, but the former is probably faster.
First, let’s use the nslookup command to find the IP address of lifewire.com.
Just execute nslookup lifewire.com and view the result. Don’t confuse any private IP addresses that also show up in the nslookup results alongside the public IP address of lifewire.com, which is what IP address we’re after.
Now let’s try using the ping command to find it.
Execute ping lifewire.com and then look at the IP address between the brackets in the first line shown. Don’t worry if the ping command «times out» during execution; all we needed here was the IP address.
You can use the same procedure with any website or any hostname on your local network.
What the NSLOOKUP Tool Can Tell You About Internet Domains
Copy and Paste Easier With QuickEdit Mode
A number of these Command Prompt tricks have dealt with making copying and pasting easier. So, how about an even easier way to copy from the Command Prompt (and a secret way to easily paste)?
Just right-click on the Command Prompt title bar and select Properties. On the Options tab, in the Edit Options section, check the QuickEdit Mode box and then select OK.
Enabling QuickEdit Mode is like having Mark enabled all the time, so selecting text to copy is really easy.
As a bonus, this also enables a simple way to paste into the Command Prompt: just right click once and whatever you have in the clipboard is pasted in the Command Prompt window. Normally, pasting involves right-clicking and selecting Paste, so this is still a bit different than you’re used to.
Using Command Prompt through Terminal? Just select text like you would anywhere else, and press Enter or right-click to copy it. No need to turn on QuickEdit Mode.
Watch Star Wars Episode IV
Yes, you read that correctly, you can watch an ASCII version of the full Star Wars Episode IV movie right in the Command Prompt window!
Just open Command Prompt and execute this:
telnet towel.blinkenlights.nl
The movie will start immediately. Check out the tip below if this doesn’t work.
True, this isn’t a terribly productive use of the Command Prompt, nor is it really a trick of the Command Prompt or any command, but it sure is fun! We can’t imagine the work that went into this homage to the sci-fi masterpiece.
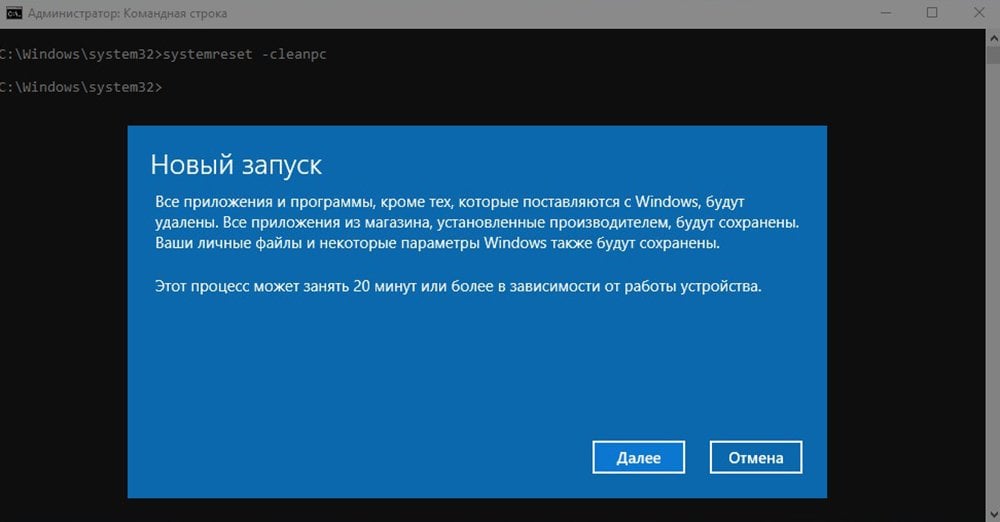
Windows 10 предусматривает гибкую настройку и управление системой с помощью командной строки. Она позволяет пользователю посредством команд воспользоваться той или иной функцией. Например, существует команда SFC /scannow, позволяющая производить сканирование и мгновенное исправление системных файлов. Подобных функций десятки, но не все о них знают. Однако некоторые из них бывают очень даже полезными при постоянном использовании ПК.
Сегодня мы поговорим подробнее об основных командах для командной строки в Windows 10.
Открываем командную строку
Для пользователей Windows 10 в командной строке предоставлено огромное количество команд, однако не все из них используются даже опытными юзерами. Поэтому мы рассмотрим с вами только основные команды, которые могут пригодиться в разных случаях. Но для начала я покажу вам, каким способом можно запустить командную строку и как ею пользоваться.
Самый простой способ запуска командной строки – это ввод специальной команды в окне «Выполнить». Для этого воспользуемся следующей инструкцией:
- Используем комбинацию клавиш «Win+R», где Win – это клавиша, расположенная в нижней левой части клавиатуры с логотипом Windows. Далее вводим команду cmd и нажимаем на клавишу «Enter».

Запускаем командную строку
- В отобразившемся окне перед нами открывается командная строка, которая уже готова к получению команд от пользователя.

Командная строка включает в себя простой интерфейс и мощный функционал
Также вы можете запустить командную строку и через меню «Пуск». Для этого достаточно кликнуть правой кнопкой мыши по пуску и выбрать «Командная строка» либо «Windows PowerShell». Тут же можно открыть программу от имени администратора.
Давайте теперь попробуем воспользоваться командной строкой на примере очень простой команды: control. Она позволяет запускать панель управления на компьютере.
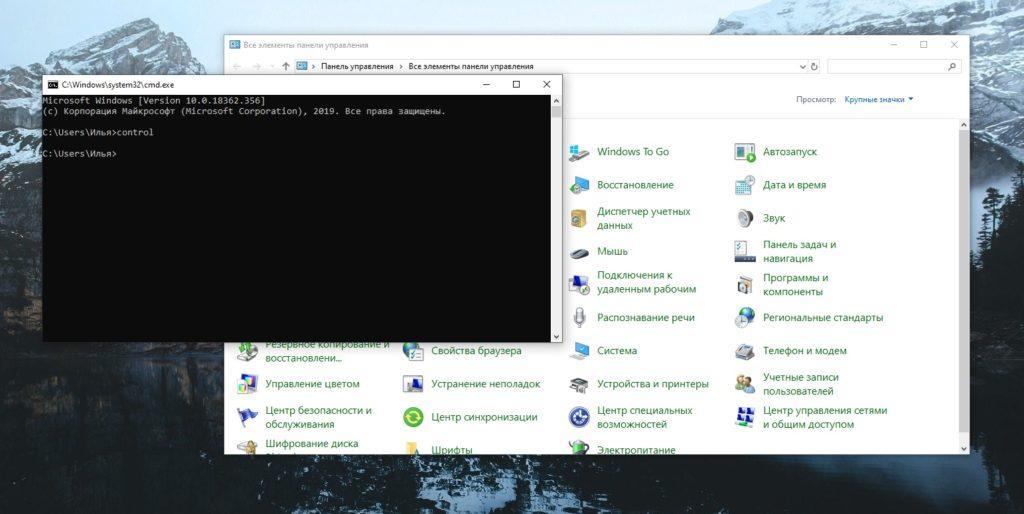
Чтобы использовать команду, необходимо ввести нужное слово или набор слов и символов, а затем нажать на кнопку «Enter»
С вводом команд разобрались, теперь можно приступить к просмотру основных команд. Начнем мы с тех, которые предназначены для быстрого запуска стандартных программ.
Запуск основных программ и утилит системы
Нижеуказанный список не всем будет полезен, но там есть команды, без которых пользователю не обойтись. Например, обратите внимание на такие команды как dxdiag и regedit. С помощью них запускаются важные утилиты, которые просто так вы не сможете найти в операционной системе.
- appwiz.cpl – утилита «Программы и компоненты»
- certmgr.msc – окно для управления сертификатами системы
- control – «Панель управления»
- control printers – окно для управления устройствами и принтерами
- control userpasswords2 – «Учетные записи пользователя»
- compmgmt.msc – «Управление компьютером»
- devmgmt.msc – «Диспетчер устройств»
- dfrgui – «Оптимизация дисков»
- diskmgmt.msc – «Управление дисками»
- dxdiag – запуск средства диагностики DirectX
- hdwwiz.cpl – еще одна команда для вызова окна «Диспетчер устройств»
- firewall.cpl – Брандмауэр Защитника Windows
- gpedit.msc – «Редактор локальной групповой политики»
- lusrmgr.msc – «Локальные пользователи и группы»
- mblctr – «Центр мобильности»
- mmc – консоль управления системными оснастками
- msconfig – «Конфигурация системы»
- odbcad32 – панель администрирования источника данных ODBC
- perfmon.msc – «Системный монитор», предоставляющий возможность просмотра изменений в производительности компьютера и системы
- presentationsettings – «Параметры режима презентации»
- powershell – PowerShell (та же командная строка, но с большим функционалом)
- powershell_ise – «Интегрированная среда сценариев» оболочки PowerShell
- regedit – «Редактор реестра»
- resmon – «Монитор ресурсов»
- rsop.msc – «Результирующая политика»
- shrpubw – «Мастер создания общих ресурсов»
- secpol.msc – «Локальная политика безопасности»
- services.msc – средство управления службами операционной системы
- taskmgr – «Диспетчер задач»
- taskschd.msc – «Планировщик заданий»
Управление и настройка операционной системы
В данном разделе будет рассказано о командах, с помощью которых можно выполнять различные действия в операционной системе.
- сomputerdefaults – определение параметров программ по умолчанию
- control admintools – открытие папки со средствами администрирования
- date – отображение и изменение текущей даты в командной строке
- displayswitch – изменение подключенных экранов
- dpiscaling – параметры дисплея
- eventvwr.msc – просмотр журнала событий
- fsmgmt.msc – средство работы с общими папками
- fsquirt – отправка и прием файлов по Bluetooth
- intl.cpl – региональные настройки
- joy.cpl – настройка внешних игровых устройств
- logoff – выход из системы
- lpksetup – установка и удаление языков интерфейса
- mobsync – запуск окна «Центр синхронизации»
- msdt – официальное средство диагностики службы поддержки Microsoft
- msra – вызов утилиты «Удаленный помощник Windows»
- msinfo32 – просмотр сведений об операционной системе
- mstsc – подключение к удаленному Рабочему столу
- napclcfg.msc – настройка конфигурации операционной системы
- netplwiz – панель управления «Учетными записями пользователей»
- optionalfeatures – включение и отключение стандартных компонентов операционной системы
- shutdown – завершение работы компьютера
- sigverif – средство проверки подлинности файлов
- sndvol – запуск микшера громкости
- slui – средство активации лицензии ОС Windows
- sysdm.cpl – вызов окна «Свойства системы»
- systempropertiesperformance – «Параметры быстродействия»
- systempropertiesdataexecutionprevention – запуск службы DEP, компонента «Параметров быстродействия» ОС
- timedate.cpl – изменение даты и времени
- tpm.msc – «Управление доверенным платформенным модулем TPM на локальном компьютере»
- useraccountcontrolsettings – «Параметры управления учетными записями пользователей»
- utilman – управление «Специальными возможностями» в разделе «Параметров» операционной системы
- ver – показывает сведения о текущей версии ОС Windows.
- wf.msc – активация режима повышенной безопасности в стандартном Брандмауэре ОС Windows
- winver – просмотр общих сведений об операционной системе и ее версии
- WMIwscui.cpl – переход к Центру поддержки операционной системы
- wscript – «Параметры сервера сценария» ОС Windows
- wusa – «Автономный установщик обновлений Windows»
Настройки периферийных устройств
Есть также и немного команд, предназначенных для вызова стандартных программ и элементов управления оборудования, подключенного к компьютеру или ноутбуку.
- main.cpl – настройка мыши
- mmsys.cpl – панель настройки звука
- printui – «Пользовательский интерфейс принтера»
- printbrmui – средство переноса принтера, предоставляющее возможность экспорта и импорта программных компонентов и драйверов оборудования
- printmanagement.msc – «Управление печатью»
- sysedit – редактирование системных файлов с расширениями INI и SYS (Boot.ini, Config.sys, Win.ini и др.)
- tabcal – средство калибровки дигитайзера
- tabletpc.cpl – просмотр и настройка свойств планшета и пера
- verifier – «Диспетчер проверки драйверов»
- wfs – «Факсы и сканирование»
- wmimgmt.msc – вызов «Элемента управления WMI» стандартной консоли
Работа с файлами и подключенными накопителями
Нижеуказанные команды предназначены для работы с файлами, папками, дисковыми устройствами и накопителями. Некоторые из них работают только внутри предварительно вызванных консольных утилит. Для получения более подробных сведений по ним вы всегда можете обратиться к справке, воспользовавшись командой help.
Вводим help и нажимаем на клавишу «Enter»
- assoc — выводит и позволяет изменять связь между расширениями имени и типов того или иного пакетного файла
- attrib – редактирование атрибутов предварительно обозначенного файла или папки
- bcdboot – создание и/или восстановление системного раздела
- cd – просмотр наименования текущей папки или переход в другую
- chdir – просмотр папки или переход к другой
- chkdsk – проверка жестких и твердотельных дисков, а также подключенных к ПК внешних накопителей
- cleanmgr – инструмент «Очистка диска»
- convert – преобразование файловой системы тома
- copy – копирование файлов (с указанием конечного каталога)
- del – удаление выбранных файлов
- dir – просмотр файлов и папок по указанному пути
- diskcopm – позволит сравнить содержимое двух гибких дисков
- dickcopy – полностью скопирует содержимое одного гибкого диска на любой другой (пакетное копирование)
- diskpart – консольная утилита для работы с дисками (открывается в отдельном окне «Командной строки», для просмотра поддерживаемых команд обратитесь к справке – help)
erase – удаление одного или нескольких файлов - fc – сравнение файлов и поиск различий
- format – форматирование локальных дисков Windows
- label – удаление, изменение, а также создание меток тома для дисков
- md – создание новой папки
- mdsched – проверка оперативной памяти
- move – перемещение файлов по заданному пути
- ntmsmgr.msc – средство работы с внешними накопителями
- recdisc – создание диска восстановления операционной системы (работает только с оптическими накопителями)
- recover – восстановление данных
- rekeywiz – инструмент для шифрования данных («Шифрующая файловая система (EFS)»)
- RSoPrstrui – Настройка средства «Восстановление системы»
- sdclt – «Резервное копирование и восстановление»
- sfc /scannow – проверка целостности системных файлов с возможностью их восстановления
- tree – графическое отображение структуры каталогов диска или папки
- verify – анализ правильности записи файлов на диск
- vol – отображает собственную метку и серийный номер тома для диска
Работа внутри командной строки
Если вы захотите изменить цвет, почистить содержимое командной строки или воспользоваться внутренними настройками, то вы также можете использовать команды. Например, если вписать команду color и выбрать специальное кодовое слово, то изменится весь фон и цвет текста командной строки.
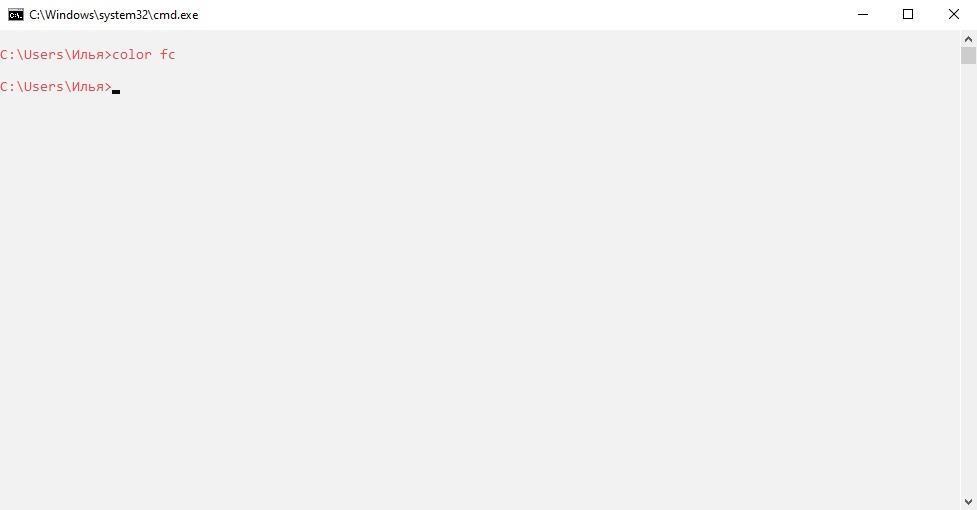
Команда color fc придает утилите бледно-розовый оттенок
- cls – очистка содержимого экрана командной строки
- color – изменение фона и цвета
- exit – выход из командной строки
- help – отображение полного списка команд командной строки
- prompt – изменяет слева от вводимого текста название на любое другое
Теперь вместо <C:\Users\Илья> будет отображаться слово «hello»

Сеть и интернет
Немного команд для настройки сети и интернета:
- control netconnections – просмотр и настройка доступных «Сетевых подключений»
- inetcpl.cpl – переход к свойствам интернета
- NAPncpa.cpl – аналог первой команды, предоставляющий возможность настройки сетевых подключений
- telephon.cpl – настройка модемного подключения к интернету
Заключение
Подытожив, хочется сказать, что не нужно запоминать какую-либо команду дословно. Ознакомления с ними более чем достаточно. Ну а если вам понадобится воспользоваться какой-либо функцией на компьютере с Windows 10, то вспомните про командную строку и посмотрите вышеперечисленные команды – уверен, вы найдете то, что нужно. Если же вы хотите более обширно изучить командную строку, то рекомендую почитать профессиональную литературу, которую легко найти в Интернете.
Post Views: 43 767
Windows’ celebrated CLI (Command-Line Interpreter) is a treasure trove of hidden features, tools, and settings.
Command Prompt lets you tap into every area of your Operating System, from creating new folders to formatting internal and external storage.
To help you navigate cmd.exe like a pro, we’ve prepared a compressive list of cool CMD commands to make you feel like a hacker.
Getting Started with Command Prompt
Unsure about using cmd.exe? Not a problem; just follow this step-by-step guide to get started.
First of all, you’ll need to fire up the Command Prompt Window by hitting Windows Key + R and typing in cmd in the Run window. Hit Enter and CMD will momentarily pop up on your screen.
There’s more than one way to prompt command.
For the second method, hit the Windows key to bring up the Start Menu. After that, type in cmd or command prompt in the search bar and left-click on the icon.
To sum up…
Method 1: Windows key + R -> type cmd -> press Enter
Method 2: Windows key -> type cmd or command prompt -> left-click on the CMD icon.
Now that Command Prompt is up and running, it’s time to have some fun. We’re going to start with a couple of basic commands and then move on to the more advanced stuff.
Basic Windows CMD Commands
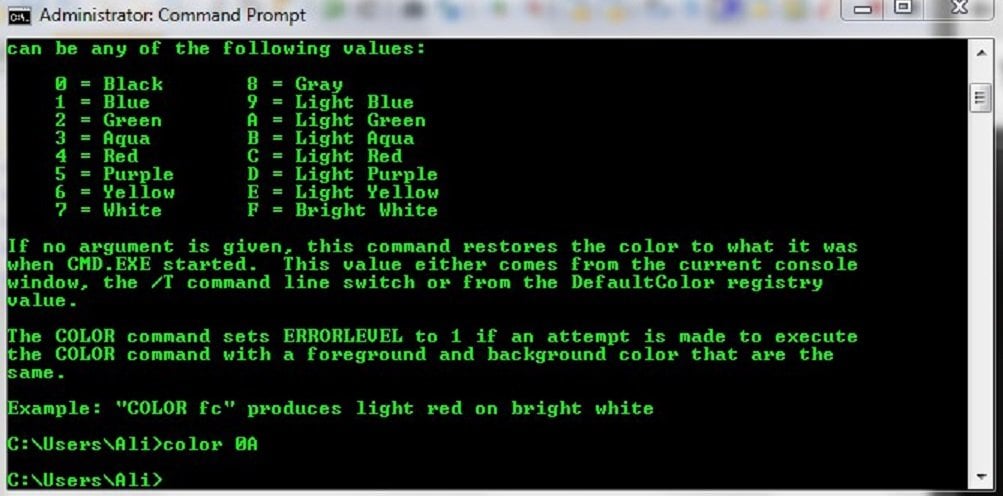
Ver– displays operating system version on the screen (e.g., Microsoft Windows [Version 10.0.19045.2486])Date– displays the current date on the screen. Can also be used to change the date.Shutdown– shuts down your machine.Taskkill– allows you to terminate a process or a running app. To use this, type intaskkillfollowed by ‘/f’, ‘/im’, and the name of the process or app you want to terminate (e.g. winword.exe). So, if we want to kill all instances of MS Word, we would need to type intaskkill /f /im winword.exe. Hit Enter to confirm.Color– changes the color of the foreground and background. For instance, typing in ‘color fc’ will make the background bright white and the foreground (i.e., writing) light red.Getmac– displays your machine’s MAC address.Ipconfig– displays your IP address.Ping– sends data packets to a specific IP address or network (e.g.,ping google.com). Very useful in troubleshooting Internet connectivity issues.Pathping– maps the connection to a specific IP address. Can also be used to troubleshoot connectivity issues.Nslookup– displays the DNS record or IP address of a specific domain (e.g.,nslookup facebook.com).Chkdks– performs a routine check on a specified disk and corrects errors.Gpupdate– updates group policies. Usually used in conjunction with the force (/f) argument.Mkdir– creates a new directory.Tasklist– displays a list of all live processes and applications.Timeout– very useful when working with batch files. This command allows you to delay execution for a specified number of seconds. When appended the -1 value, process execution will be delayed indefinitely. The computer will wait for a keystroke to continue.Type– this command allows you to view text files (.txt) in your cmd window.Vol– displays disk volume information such as serial numbers or labels.Systeminfo– displays useful sys info such as Host Name, OS version, processor, BIOS version, time zone, applied hotfixes, and more.Netstat– displays info about active TCP connections.Help– outputs a list of commonly used commands.
Advanced Windows CMD Commands
And now it’s time to lose the kid gloves and talk about some more advanced (and cool) CMD commands.
Telnet– allows you to establish a remote, Telnet-type connection.Before attempting to ‘dial’, ensure that both machines support Telnet communication and that the client software is installed.To initiate this type of remote session, you must specify the IP address of the server or the main computer followed by 13531 (e.g. telnet 60.227.102.16 13531). The number at the far end of the command represents the communication port used by the Sage 50 Connection Manager.If the setup’s done right, your CMD cursor should become blank. Otherwise, it will return the message “telnet is not recognized as an internal or external command, operable program, or batch file”. This error message appears when Telnet’s not enabled on the machine.To switch it on, click on the Start button and head to Control Panel. Under Programs and Features, select Turn Windows Features on or off.Scroll down until you see Telnet Client and Telnet Server. Enable both features and click the Ok button to confirm. Restart your machine. Open a new CMD window and retry the connection.Klist– this command allows you to visualize cached Kerberos tickets and retrieve useful information such as encryption type, server, start time, renew time, session key type, cached flags, and more.FC– changes made to files may not always be obvious.To see if a file has been modified, use the File Compare (FC) command in CMD. You can perform two kinds of file comparisons: ASCII or binary.For instance, you may want to use an ASCII-type comparison when working with a text file. On the other hand, for media (e.g. pictures, clips, etc.) a binary comparison would be the proper approach.Powercfg– this is a great diagnostic tool for laptop users.Ever wondered why your battery’s running out so fast, leaving you high and dry, possibly in the middle of an (important) e-meeting? Well, you can quickly find out by running this Power Configuration utility in CMD. Powercfg usually works best with the ‘-energy’ argument.So, after running the combo ‘powercfg -energy’, your machine will begin a 60-second power test. It will generate a power efficiency diagnostic report. If any errors are found, they will be highlighted in the second section of the report, along with recommendations.Cacls– this nifty command allows you to display or modify ACLs (i.e. Access Control Lists) of various files.Some of its more popular uses include granting specific access rights to users (i.e. Read, Write, Change, or Full Control), revoking permissions, denying specific users, or replacing the user’s access rights. Here’s a quick example of how to use the Cacls command.
Step 1. Create a text document on your desktop area. Name it ‘test.txt’
Step 2. Open CMD.
Step 3. Navigate to the Desktop directory by typing in ‘cd desktop’
Step 4. Type in ‘cacls test.txt’. This will display users and permissions.
Step 5. In this example, we will update (replace) the default rights of user BUILTIN\Administrators from F (i.e. Full Control) to R (i.e. Read only) using the /P argument.
Step 6. Type in ‘cacls test.txt /P BUILTIN\Administrators: R
Step 7. Type ‘Y’ and press Enter to confirm changes.
6. ARP – display or commit changes to the ARP cache.
To view the contents of the cache, type in ARP -a and press ENTER. If you want to make changes to the ARP cache such as adding a static entry use ARP-a, followed by the Internet address (i.e. IP) and the physical address (i.e. MAC).
For instance, if we have a new host and want to associate its IP to its physical address, we will need to type in the following line: ARP-a [IP_address] [Physical_Adress].
7. Chgport – use this command to display or remap COM ports.
8. Cipher – check the encryption status of your files or folders (i.e., NTFS partitions only).
9. Cmdkey – displays and allows you to make modifications to all host-stored passwords and usernames.
10 Dispdiag – allows you to diagnose display-related issues. Can create log dump files when used together with the [-d] argument.
11. Driverquery – displays a list of all the drivers installed on the machine.
12. Fondue – install optional MS Windows updates from CMD.
13. Hwrcomp – this command allows you to install or update existing handwriting recognition dictionaries.
14. Makecab – used to compress files and folders.
15. Mrinfo – displays router interface info.
16. Pentnt – this command allows to user to detect so-called floating-point division errors in Pentium processors.
17. Reagentc – use this command to configure the Windows Recovery Environment.
18. Recover – retrieve data from a bad disk.
19. Repair-bde – useful in decrypting/repairing a damaged drive that’s been encrypted with BitLocker.
20. Runas – execute an application with another user’s credentials.
21. Chgusr – modify the install mode for your terminal server.
22. Cmstp – used to install or uninstall a service profile for the Connection Manager.
23. Ctty – modify the default input or output devices.
24. Forfiles – Selects and executes a command on a file or set of files.
25. Format – Prepares a disk for use with Windows, by formatting it.
26. Fsutil – Performs tasks related to file allocation table (FAT) and NTFS file system, such as managing reparse points or sparse files.
27. Ftp – Transfers files to and from a remote network site using the File Transfer Protocol.
28. Getmac – Displays the Media Access Control (MAC) address for network adapters.
29. Goto – Directs the Command Prompt to a labeled line in a batch program.
30. Gpresult – Displays Group Policy information for a machine or user.
31. Gpupdate – Refreshes local and Active Directory-based Group Policy settings, including security settings.
32. Graftabl – Enables the ability to display an extended character set in graphics mode.
33. Hostname – Displays the host name portion of the full computer name of the computer.
34. Icacls – Displays or modifies discretionary access control lists (DACLs) on specified files.
35. If – Performs conditional processing in batch programs.
36. Ipconfig – Displays all current TCP/IP network configuration values and refreshes Dynamic Host Configuration Protocol (DHCP) and Domain Name System (DNS) settings.
37. Iscsicli – Starts the Microsoft iSCSI Initiator, used to manage iSCSI.
38. Klist – Displays or deletes Kerberos tickets.
39. Ktmutil – Starts Kernel Transaction Manager Utility.
40. Label – Creates, changes, or deletes the volume label of a disk.
41. Lodctr – Updates registry values related to performance counters.
42. Logman – Manages and schedules performance counter and event trace log collections on local and remote systems.
Did you get the cool CMD commands you wanted?
I’m always open to getting feedback. If you enjoyed the article or feel we’re missing anything, let me know by reaching out to us on social media. It’s a relatively short list of CMD commands but enough to show you what’s possible.
Don’t forget to stay safe.
If you liked this article, follow us on LinkedIn, Twitter, Facebook, YouTube, and Instagram for more cybersecurity news and topics.
Newsletter
If you liked this post, you will enjoy our newsletter.
Get cybersecurity updates you’ll actually want to read directly in
your inbox.
Senior PR & Communications Officer
Experienced blogger with a strong focus on technology, currently advancing towards a career in IT Security Analysis. I possess a keen interest in exploring and understanding the intricacies of malware, Advanced Persistent Threats (APTs), and various cybersecurity challenges. My dedication to continuous learning fuels my passion for delving into the complexities of the cyber world.