
Updated on Apr 28, 2025
HP is a popular information technology company that produces extraordinary laptops in different models and specifications. Moreover, HP laptops are generally considered extensive and much more reliable. On the other hand, depending on your system usage and requirements, your system may slow down with time.
Hence, you would see your HP laptop running slowly, affecting your device’s performance. In this article, EaseUS will find 8 different ways to resolve this issue in an ideal scenario. The solutions are explained in easy and simple steps.
| ⏱️Reading Time | 3-7 minutes |
| 🧑💻Task | Fix HP laptop running slow |
| 🗂️Reasons | Insufficient RAM and hard drive space、hardware failure、PC problems |
| ✍️Solutions |
|
Indeed, facing issues of HP laptops running slow can be extremely problematic. HP laptop running slow also includes HP slow startup and other errors. But you don’t need to worry because here you’ll find the top 8 solutions to fix this issue:
Fix 1. Extend Partition
Extending the partition on your HP laptop allows you to allocate more disk space to a specific partition on your hard drive. Ultimately, with sufficient disk space, the operating system will work optimally, which increases overall system speed. In this scenario, you can use EaseUS Partition Master, which helps create or extend partitions within Windows XP/Vista and Windows 11/10/8.1/8/7.
Interestingly, the partitions are duplicated or cloned without issues of data loss. So you don’t need to worry about your important information. It’s also possible to merge, format, or wipe partitions.
To know how you can easily and efficiently extend partition by using EaseUS Partition Master, these steps will assist you a lot:
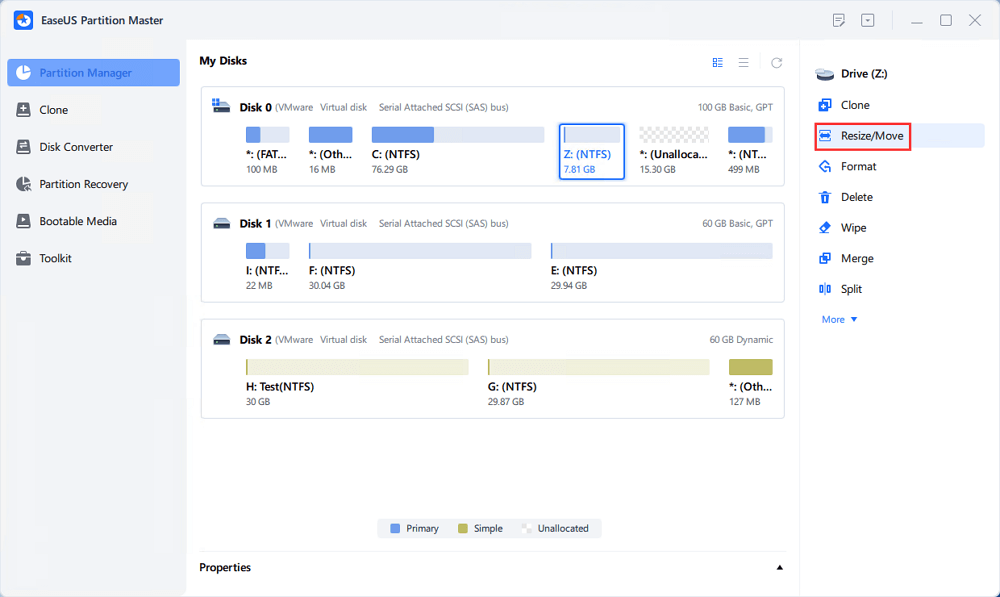
Step 1. Locate the Target Partition.
Go to Partition Manager, locate the target partition and select «Resize/Move».
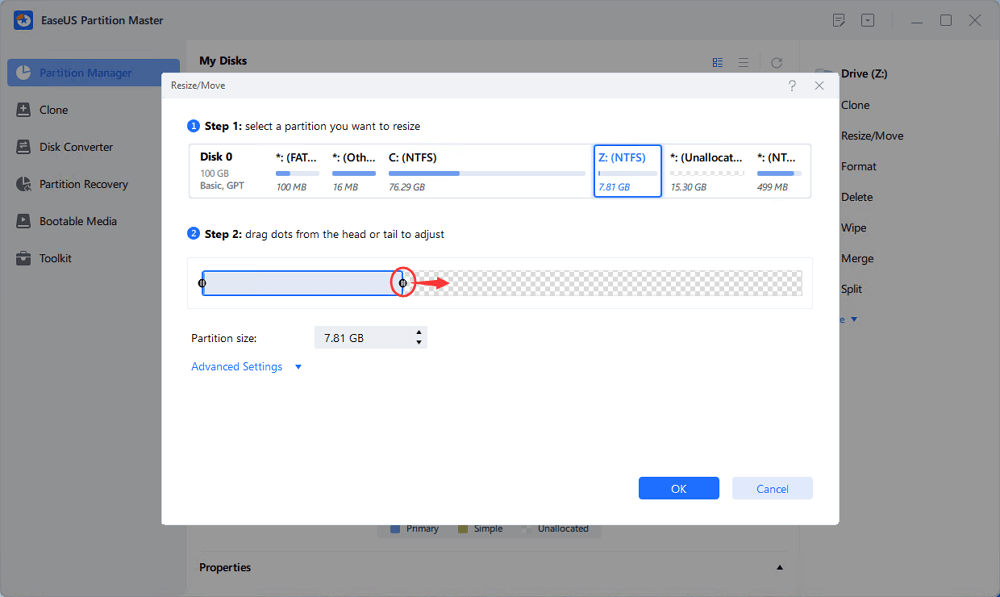
Step 2. Extend the Target Partition.
Drag the partition panel rightward or leftward to add the unallocated space into your current partition, or you can click click «fill in all unallocated» to allocate all space to the target partition. Then, click «OK» to confirm.
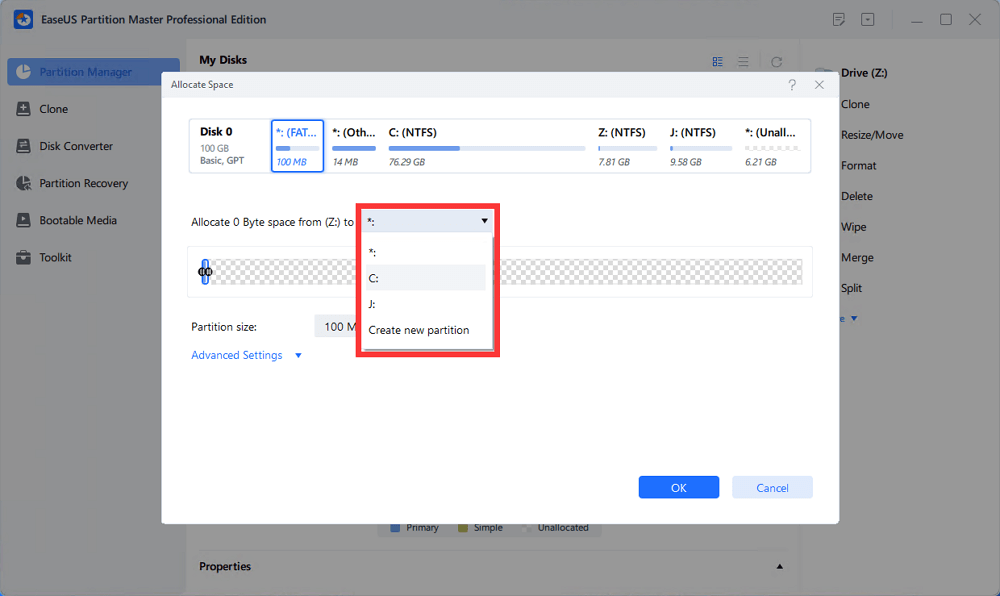
Extra Option: Get Space from Another Drive
If there is not enough unallocated space on your disk, right-click on a big partition with enough free space, select «Allocate space».
Then select the target partition that you want to extend at the allocate space to column.
Step 3. Execute Operations to Extend Partition.
Drag the dots of the target partition into the unallocated space and click «OK».
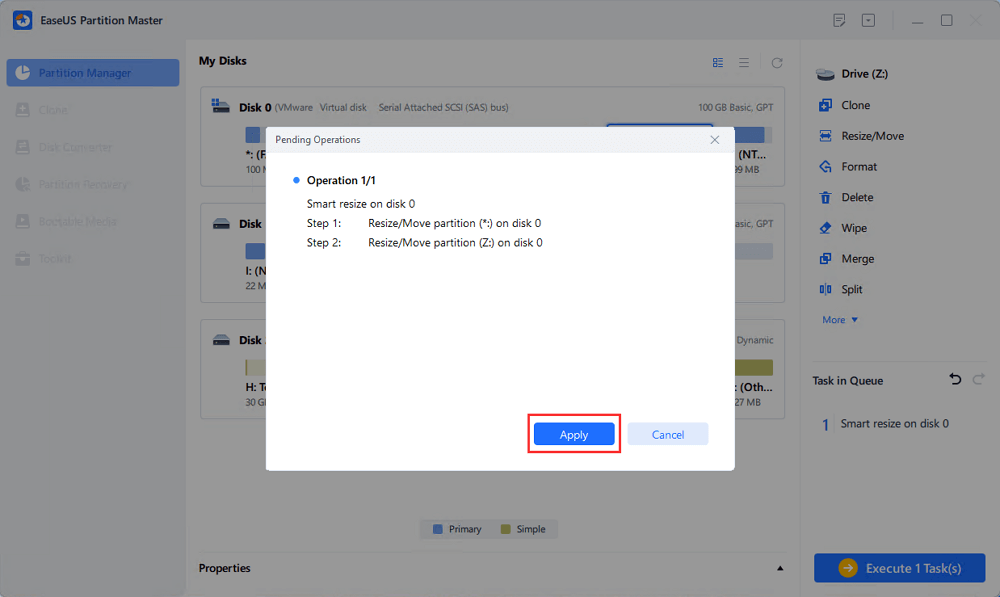
Then Click the «Execute Task» button and click «Apply» to keep all the changes.
EaseUS Partition Master is a powerful partitioning tool. It can also help you perform more operations, such as shrinking C drive, extending, merging partitions, and so on.
Read Also:
Fix 2. Clean Up Disk Space
Your hard disk may be filled with junk data that consumes important disk space and requires urgent disk cleanup. You can use a space analyzer to check how muck disk space Windows take. If the space is insufficient, clean it up. For this purpose, using EaseUS CleanGenius is the perfect solution. After all, this platform offers a faster disk cleanup by removing all junk files or bloatware and ultimately improving the system’s speed.
Advanced PC cleaning tools exist that analyze and clean useless data, corrupt registries, and more. This way, you will have your valuable storage back where you can store other important data. Meanwhile, your system speed will also improve.
If you’re looking to clean up your disk space via EaseUS CleanGenius software, follow these simple steps to move forward:
Step 1. Download and install EaseUS Partition Master Suite.
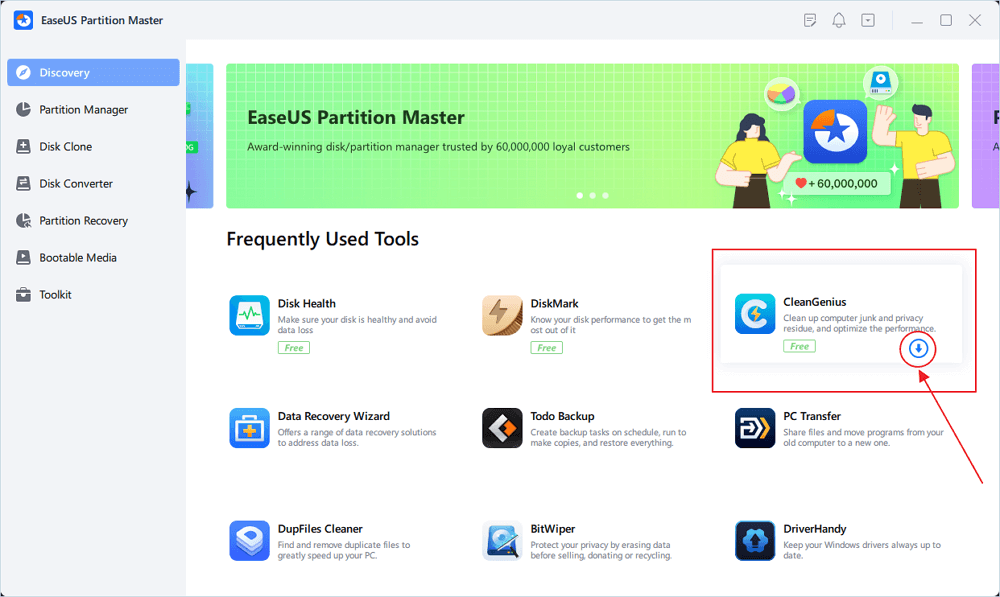
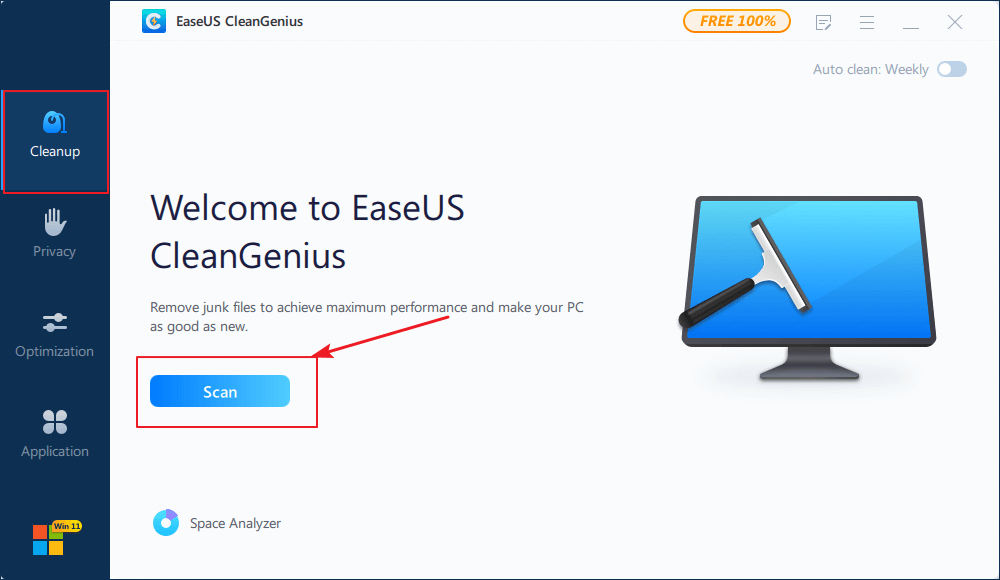
Step 2. Click PC Cleaner and install EaseUS CleanGinus. Then, click «Cleanup» and click «Scan» to start cleaning up the system and make your PC as good as new.
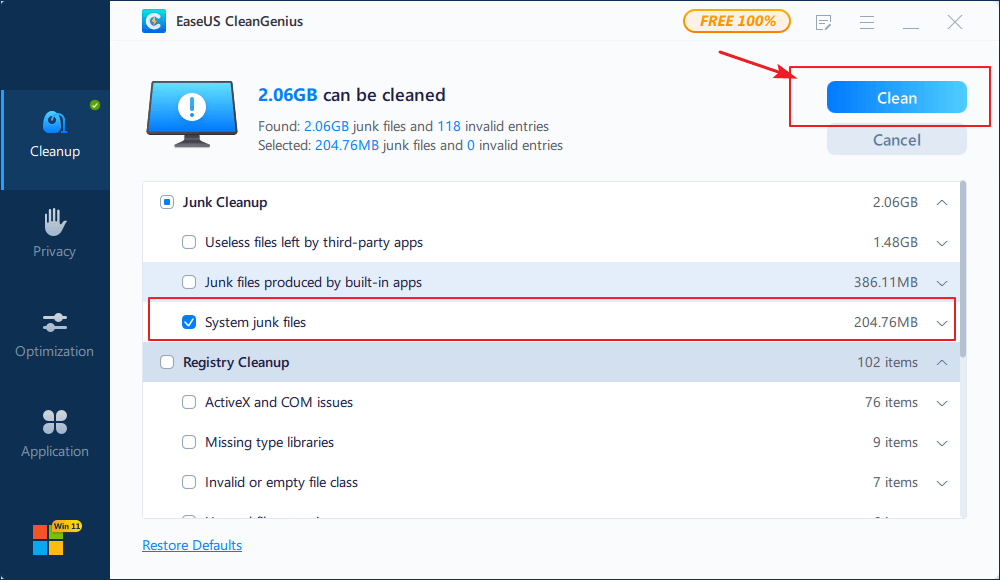
Step 3. The software will scanning all over your computer to find idle data files that take a huge amount of disk space, you can select useless large files, system junk files and Windows invalid entries and click «Clean» to start system cleanup process.
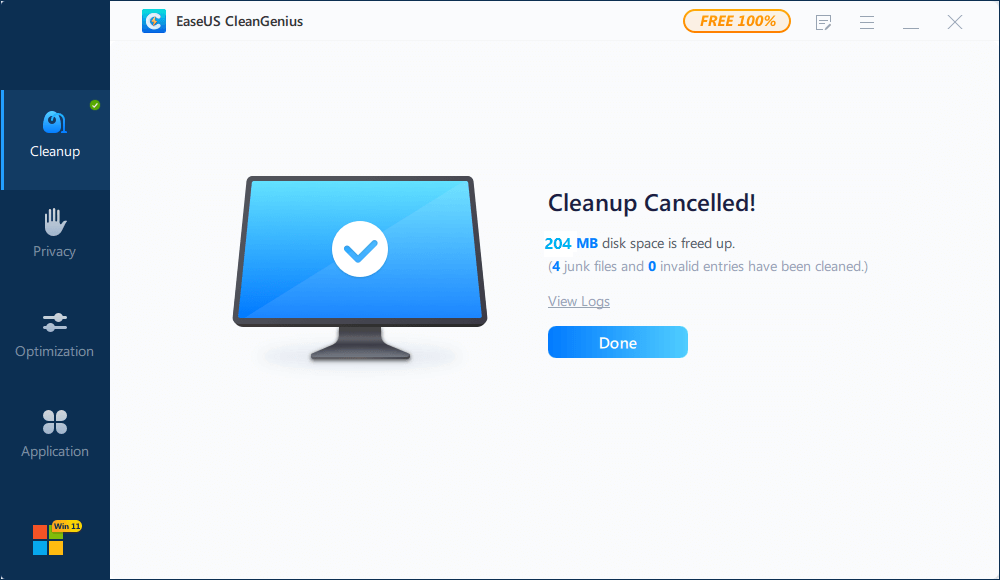
Step 4. When the scan is complete, click «Done» to finish cleaning system junk files.
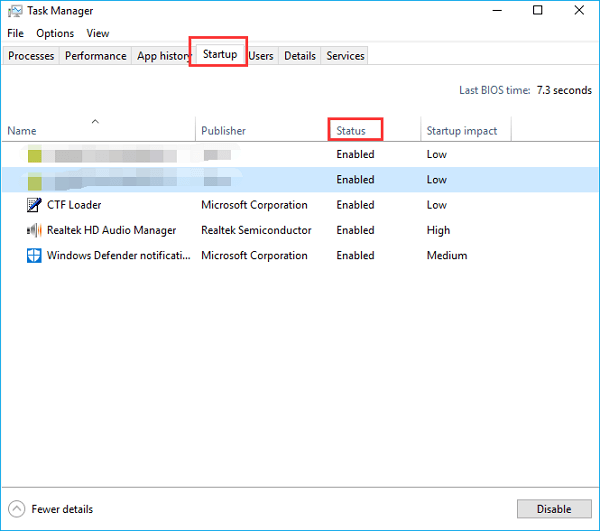
Fix 3. Disable Startup Items
Startup items are one of the reasons for your HP laptop to get slow. Startup items automatically open when you run your laptop, which minimizes the system’s speed and efficiency. To deactivate the startup items, follow these straightforward instructions:
Step 1: Search and open your computer’s Task Manager system application. This navigates you into the Task Manager panel.
Step 2: Move into the «Startup» tab to see different applications with their «Status.» Select the applications having «Enabled» status and proceed to click the «Disable» button from the bottom right.
Fix 4. Check for Windows Updates
Windows updates are essential to clear underlying bugs and issues. Also, your computer needs updated Windows to be compatible with other new programs. But the system will be hard to operate if your Windows isn’t updated. Thus, it’s important to check for Windows updates, and here you’ll find ways to update your computer:
Step 1: Press «Win + S» from your keyboard to launch the Windows search dialog. Search the «Settings» application and select the «Update & Security» option.
Step 2: Proceed to click «Windows Update» from the left-side panel and check for available updates on the right side. If updates are available, there will be visible to you.
Fix 5. Check for Malware
Malware or viruses can reduce the optimal functionality of your computer. It’s by crashing your PC due to spyware running in the computer’s background. This way, the CPU, GPU, and RAM will face disruption due to malicious activity. Hence, it’s important to check for malware, and you’ll find here easy instructions for this task:
Step 1: From the Windows search bar, search and open «Settings» and continue to click the «Update & Security» option from the menu.
Step 2: Select «Windows Security» from the left-side panel and proceed to the «Virus and Threat Protect» option. Press the «Quick Scan» button to scan your computer for viruses and threat protection.
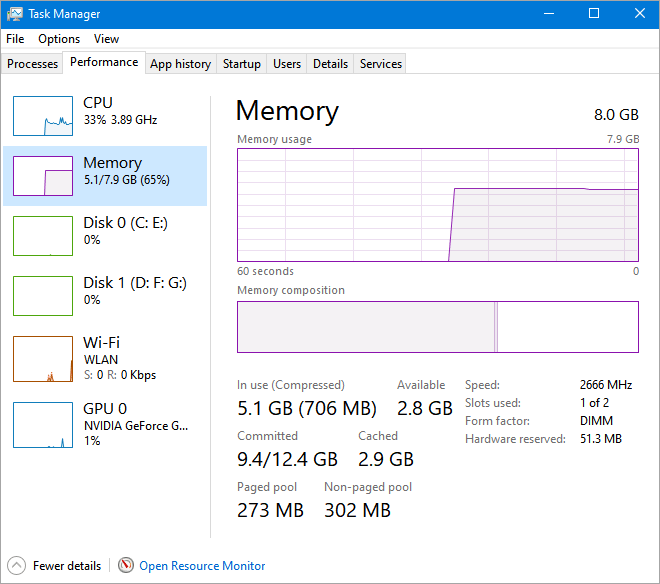
Fix 6. Upgrade Memory
Increasing the amount of RAM is crucial because all the processes of your HP laptop depend upon it. If you have low RAM, the laptop will start running slowly, making your daily tasks difficult. RAM consumption is increasing with new advanced and innovative features coming into different software.
To catch up with this software, you have to increase your RAM. You can change your RAM from 128GB to 6TB according to your system specifications. Increasing the RAM have numerous benefits, such as smooth video editing, multi-tasking, and blazing-fast browsing.
Fix 7. Upgrade HP Hard Disk to SSD
A hard disk is generally a slower storage device than an SSD. You can effectively increase your system speed by replacing your hard disk with an SSD. For this purpose, you can clone your data from HDD to an SSD by using EaseUS Partition Master. Using this tool, you can seamlessly copy data within HDD/SSD.
Indeed, the cloning actions are performed without data loss. Meanwhile, the platform is easy to use with simple tool navigation and can be used on Windows 7, 8, 10, and 11.
To clone data from your hard disk to an SSD through EaseUS Partition Master, follow these straightforward step-by-step instructions:
Step 1. Select the source disk.
- Click the «Clone» from the left menu. Select the «Clone OS Disk» or «Clone Data Disk» and click «Next».
- Choose the source disk and click «Next».
Step 2. Select the target disk.
- Choose the wanted HDD/SSD as your destination and click «Next» to continue.
- Read Warning message and confirm «Yes» button.
Step 3. View the disk layout and edit the target disk partition size.
Then click «Continue» when the program warns it will wipe out all data on the target disk. (If you have valuable data on the target disk, back up it in advance.)
You can select «Autofit the disk», «Clone as the source» or «Edit disk layout» to customize your disk layout. (Select the last one if you want to leave more space for C drive.)
Step 4. Click «Start» to start the disk cloning process.
EaseUS Partition Master offers more help on upgrading your hard disk. If you need it, click on the link below to check it out.
Fix 8. Reboot Computer
If all the above fixes don’t work, the last and most trusted option is to reboot/restart your computer. This may resolve underlying issues that are the reason for your computer to work slowly.
To reboot your computer, click the «Start» button indicated as the Windows icon from the bottom toolbar. Continue to select the «Power» button from the available options and then press «Restart.»
Why Is HP Laptop So Slow
It’s common to see your HP laptop running slow with time. Of course, this automatically reduces your system’s performance. But why did this issue happen at first? Let’s discuss some popular reasons here:
- Low Hard Disk Space: The operating system relies on virtual memory when the RAM is fully utilized. However, with low disk space, it becomes difficult to allocate memory, which reduces system speed.
- Insufficient RAM: RAM is an essential part of a computer system. When different applications run simultaneously, OS provides specific RAM to each program. If RAM is insufficient, system speed will reduce.
- Hardware Failure: Hard drive is where the computer’s data is stored. Upon a hard drive failure due to hardware component issues, the system may slow down and face disruptions.
- Computer Overheating: Overheating can significantly decline the speed and performance of your HP laptop. This occurs when your computer’s CPU and GPU experience excessive workload, which causes heating issues.
- Virus: Computer viruses are among the popular reasons your system can slow down. This is because malware can disrupt your system’s components through malicious processes.
- Improper Use: You may forget to delete applications and software on your device after using them for your respective task. These applications may consume free space on your device, which decreases system speed.
We’ve analyzed why HP laptop is running slow and provided many additional fixes. With these solutions, you can also solve the Windows 10 slow after clone issue. If you found this article helpful, please share it with more people who need it.
Bonus Tips to Speed Up HP Laptop
No one wants to use a laptop that works slowly while adding interruptions to daily tasks. Thus, it’s essential to increase the speed of your HP laptop. Find here some of the bonus tips that can help you speed up your HP laptop:
- Wisely Use Laptop: Make sure to delete all the software and applications that you’re not using. Thus, freeing up the useful storage occupied by useless applications.
- Heat Dissipation: Use your HP laptop to dissipate the system heat accurately. This will cool down the system’s GPU and CPU, automatically increasing speed and performance.
- Upgrade RAM: If your laptop has limited RAM, upgrading it can significantly improve performance, especially when running memory-intensive tasks or multiple programs simultaneously.
- Update Drivers: Outdated, corrupted, or incompatible HP drivers can cause performance issues. You can access the HP customer support website and download the latest drivers for your HP laptop.
- Solving Flash Ad Troubleshooting: Paying attention to Flash Ad troubleshooting can help increase system speed, as it reduces resource consumption, prevent malware, and minimize crashes.
Conclusion
Overall, it’s common to see your HP laptop running slow. This is possible because of your increased usage, which minimizes available storage. Low system specifications, malware, startup applications, and other issues can also reduce system speed. In this article, you discussed 8 different ways to increase the speed and performance of your HP laptop. EaseUS Partition Master is the best solution provider in shared fixes because of its reliability.
See Also:
FAQs About HP Laptop Running Slow
This article provided you with valuable instructions on how to overcome issues of HP laptops running slow. If you still need more information, these FAQs may solve your queries:
1. Why my brand-new HP laptop is so slow on Windows 11?
Your HP laptop can be slow for many reasons, including nearly filled disk, startup applications, malware presence, no Windows update, not using SSD, and more.
2. Why is the HP laptop slow after the factory reset?
It’s maybe because your laptop may not have dedicated drivers installed. Also, insufficient system resources and bloatware can reduce the system’s speed.
3. How to make my laptop run faster?
You need to turn off startup items to make your laptop run faster. For this purpose, you can follow the straightforward instructions given below::
Step 1: Launch your computer’s Task Manager system application and navigate into the «Startup» tab to see different applications.
Step 2: Select the applications with the status «Enabled.» Continue to click «Disable» from the bottom right of the screen.
Computer is slow
Is your computer or laptop performance starting to slow down? Our Performance Tune Check is an easy way to enhance the performance of your computer or laptop and ensure that your device performs optimally over time by:
- Optimizing your PC and speeding up your laptop
- Deleting junk files
- Controlling when applications run
- Adjusting how your computer uses memory resources
- Reducing heat inside your computer
You can also use our automated solutions and self-guided troubleshooting to diagnose and fix a slow computer.
Performance Tune Check
Performance Tune Check scans and optimizes your computer to prevent system slowdowns and improve performance.
Requires HP Support Assistant version 8.5 or later
This product cannot be identified by serial number alone.
Please provide a product number as well.
Please enter a valid serial number.
Please enter a valid serial number, product number or product name
Please enter a valid product number
Example: HU65BM18V, LaserJet …
Example: CN123A
Identify your computer
Enter your model name or serial number to find software and manuals specific to your device.
This product cannot be identified by serial number alone.
Please provide a product number as well.
Search our support articles
Search by issue to find step-by-step guidance for diagnosing and solving most computer issues.
Self-guided troubleshooting for a slow computer
Note:
A Microsoft troubleshooter solution is a .diagcab file, which may contain a single fix or multiple fixes for a single or a series of issues. Once downloaded, click to launch the troubleshooter. Applicable only for Windows 7 and later versions.
- Click the Download button and install the latest HP PC Hardware Diagnostics.
Download
- After Installation, select Start from your PC, and then under All Apps, select HP Help and Support, then HP PC Hardware Diagnostics Windows.
- The app opens to the main menu. Click System Tests.
- Click the Run Once button and follow the instructions on the screen
- If the hardware test passes, your hardware is functioning properly. If there is a hardware failure, you will see a “Fail” notice with an error code.
- Use the HP Failure ID decoder to learn more about the error code and find help or repair options based on your warranty.
Learn more about HP PC Hardware Diagnostics.
Diag survey container
Все способы:
- Проверка аппаратной совместимости
- Этап 1: Очистка автозагрузки
- Этап 2: Отключение фоновых процессов
- Этап 3: Отключение следящих трекеров
- Этап 4: Настройка службы Superfetch
- Этап 5: Отключение SmartScreen
- Этап 6: Проверка и устранение вирусных угроз
- Этап 7: Удаление проблемных обновлений
- Этап 8: Проверка аппаратных комплектующих
- Вопросы и ответы: 2
Проверка аппаратной совместимости
Прежде чем переходить к описаниям методов ускорения работы «десятки», следует проверить, отвечает ли лэптоп хотя бы минимальным системным требованиям. Для этого воспользуемся одним из приложений определения комплектующих, например, бесплатным решением под названием Speccy.
Скачать последнюю версию Speccy
Загрузите и установите программу, затем запустите. В окне перейдите на вкладку «Общая информация» и обратите внимание на пункты «Центральный процессор» и «Оперативная память».

Убедитесь, что по этим пунктам ноутбук соответствует требованиям Виндовс 10, описанным в статье далее.
Подробнее: Системные требования для установки Windows 10
Если хотя бы по одной из позиций лэптоп «проседает», методы программной оптимизации не принесут желаемого эффекта, и единственным надёжным решением будет обновление комплектующих или замена устройства, если возможности апгрейда в нём не предусмотрены. Если же он полностью подходит под требования, воспользуйтесь описанными далее методами.
Этап 1: Очистка автозагрузки
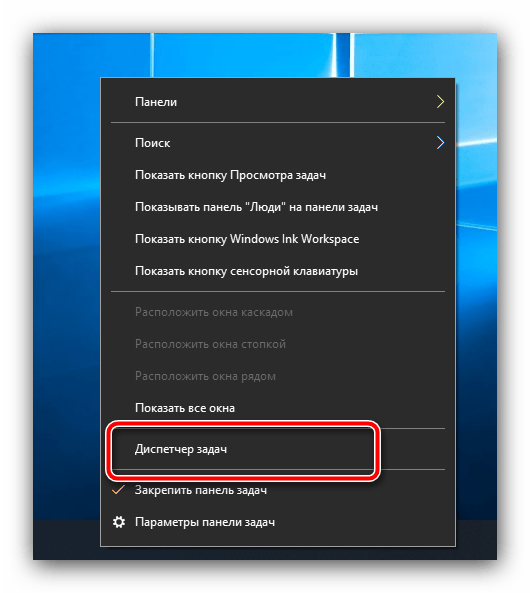
Если ноутбук очень тормозит в процессе старта системы и некоторое время после загрузки «Рабочего стола», причиной проблемы является большое количество программ в автозагрузке: запуск каждой из них отнимает аппаратные мощности, и при объёмном списке (свыше 20 позиций) этот процесс способен затормозить даже мощные устройства. Поэтому первым шагом на пути к оптимизации работы будет проверка состояния автозагрузки и её очистка.
- Для решения рассматриваемой задачи в большинстве ситуаций достаточно системных средств. Управление автозапуском в «десятке» реализовано с помощью вкладки в «Диспетчере задач»: вызовите эту оснастку любым подходящим методом, например, щелчком правой кнопки мыши по панели задач и нажатием на соответствующий пункт.
Подробнее: Как открыть «Диспетчер задач» в Windows 10
- Далее перейдите на вкладку «Автозагрузка».
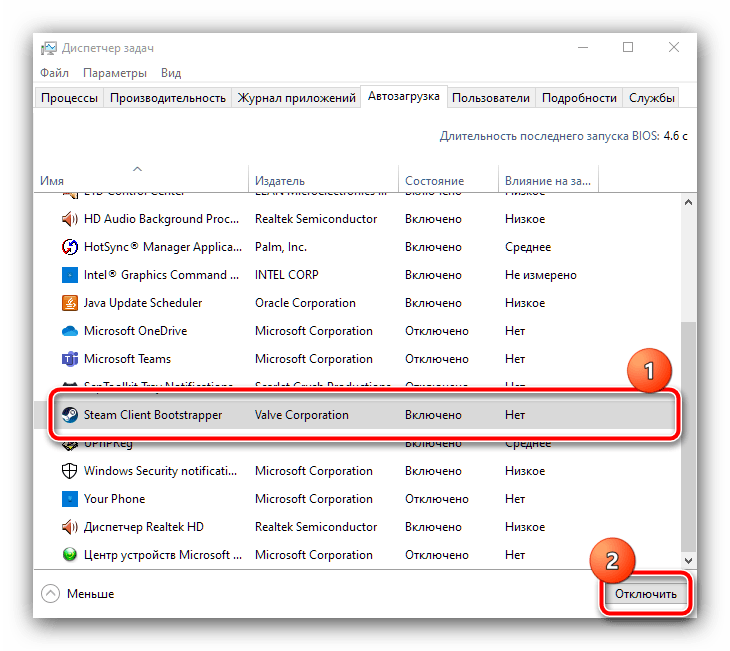
- Внимательно осмотрите список программ и выберите те, загрузка которых вам не нужна – например, это может быть клиентское приложение Steam, средство пользования сетями BitTorrent, мессенджер и подобное – затем выделите одну из позиций и нажмите на кнопку «Отключить» внизу окна.
- В столбце «Состояние» у этой программы должен отображаться статус «Отключено»: это означает, что теперь софт не будет запускаться вместе с ОС.
- По методу из шага 4 отключите все ненужные приложения, после чего закройте оснастку и перезагрузите компьютер для проверки.


Как показывает практика, эти действия позволяют значительно ускорить запуск «десятки» – особенно это заметно на компьютерах с жесткими дисками, а не SSD.
Этап 2: Отключение фоновых процессов
Вторым источником тормозов «десятки» на ноутбуке является большое количество программ, которые работают в фоновом режиме. Особенно это ощутимо на устройствах с 6 Гб ОЗУ и меньше, но и 8 Гб тоже не является спасением. Для устранения этой проблемы нужно выполнить следующие действия:
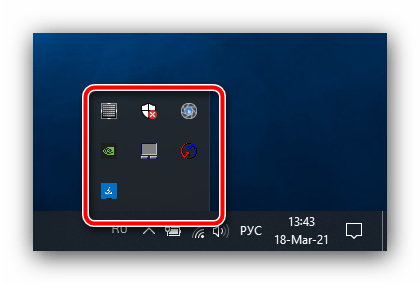
- Первым делом откройте системный трей (область в правом нижнем углу экрана, рядом с часами) и обратите внимание на элементы, которые там находятся. В идеале там должны присутствовать только панели управления видеокартой/видеокартами и средства беспроводного подключения, тогда как все остальные приложения следует закрыть.
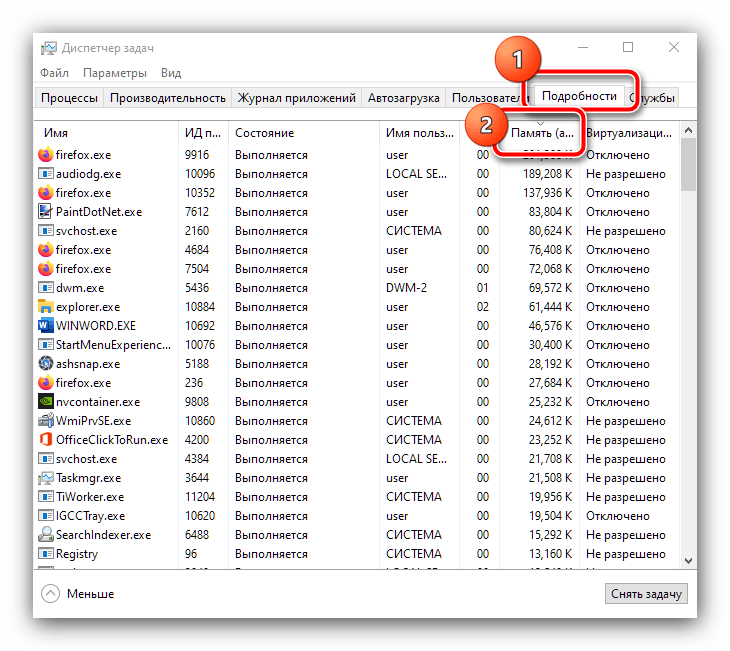
- Теперь снова откройте «Диспетчер задач» и перейдите на вкладку «Подробности» – здесь вы можете найти все работающие в данный момент фоновые процессы. Для определения самого прожорливого щёлкните один раз ЛКМ по столбцу «Память» и они будут отсортированы по занимаемому объёму.
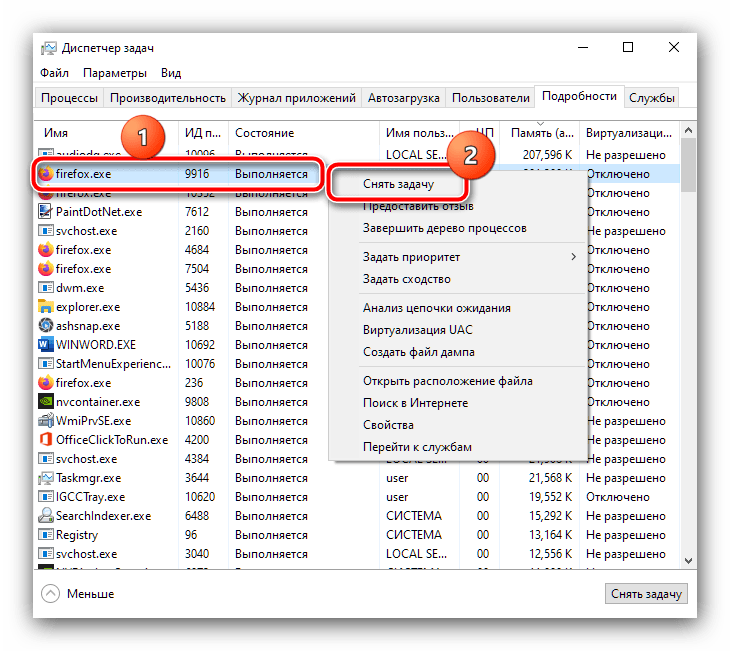
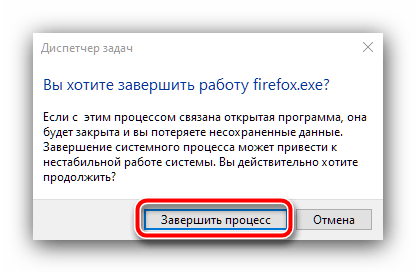
- Если на первых строчках вы видите сторонний софт, который вам в данный момент не нужен, кликните по нему ПКМ и выберите пункт «Снять задачу».

В окне подтверждения нажмите «Завершить процесс».
- Проделайте эту операцию для всех на ваш взгляд ненужных или подозрительных приложений – скорость работы ноутбука должна повыситься.
Если после закрытия процесса он запускается снова, возможно, вы имеете дело с вирусом – в такой ситуации переходите к этапу 6.
Этап 3: Отключение следящих трекеров
Windows 10 печально известна своей настырностью в плане получения данных пользователя: компания Microsoft в рекламных либо диагностических целях собирает серьёзные объёмы информации, на что, разумеется, тратятся аппаратные мощности устройства. Оставляя в стороне этический аспект этой проблемы, остановимся на практической: постоянная активность трекеров может ощутимо влиять на производительность, поэтому отключить следящий софт стоит хотя бы ради этого. На нашем сайте уже есть подробная инструкция по выключению подобных служб – перейдите по ссылке далее и выполните описанные в ней действия.
Подробнее: Как отключить слежку в Windows 10

Этап 4: Настройка службы Superfetch
В «десятке» компания Майкрософт несколько изменила принцип работы с файлами подкачки, за которую отвечает служба Superfetch. Изначальная цель заключается в повышении плавности ОС и программ на устройствах с минимальными количеством оперативной памяти ценой постоянного обращение к жёсткому диску, и в большинстве ситуаций эта служба хорошо справляется со своими обязанностями. Однако в ряде случаев активный файл подкачки, напротив, может замедлять систему, и разумеется, в таком случае Superfetch нужно отключать. По ссылкам далее вы найдёте соответствующие инструкции.
Подробнее:

Этап 5: Отключение SmartScreen
По заявлениям разработчиков, в Виндовс 10 они уделили много внимания безопасности, добавив к встроенному антивирусу средство мониторинга под названием SmartScreen. Разумеется, оно постоянно работает в фоновом режиме и в некоторых случаях может потреблять большое количество мощностей RAM и CPU. Если вы уверены в том, что соблюдаете цифровую гигиену (не посещаете сомнительные ресурсы в интернете, не запускаете подозрительные файлы и т. д.) то СмартСкрин можно отключить. Один из наших авторов уже рассмотрел варианты этой процедуры в деталях и, чтобы не повторяться, просто приведём ссылку на соответствующее руководство.
Подробнее: Как отключить SmartScreen в Windows 10

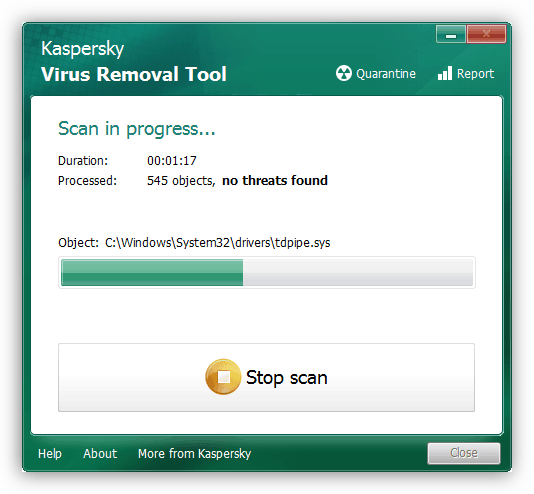
Этап 6: Проверка и устранение вирусных угроз
Создатели вирусов в очередной раз переживают золотой век: в последние годы очень популярными стали программы для скрытого майнинга криптовалют (так называемые майнеры), которые потребляют значительное количество ресурсов компьютера, отчего и могут наблюдаться тормоза в работе ноутбука. Ранние версии подобного софта было нетрудно вычислить – чаще всего через упомянутый ранее «Диспетчер задач» – но сейчас зловреды научились хорошо маскироваться, в том числе и под системные компоненты. Один из наших авторов написал статью с детальным алгоритмом действий при подозрениях на заражение, поэтому следует ею воспользоваться, если при использовании лэптопа наблюдаются замедления и/или разнообразные аномалии.
Подробнее: Борьба с компьютерными вирусами
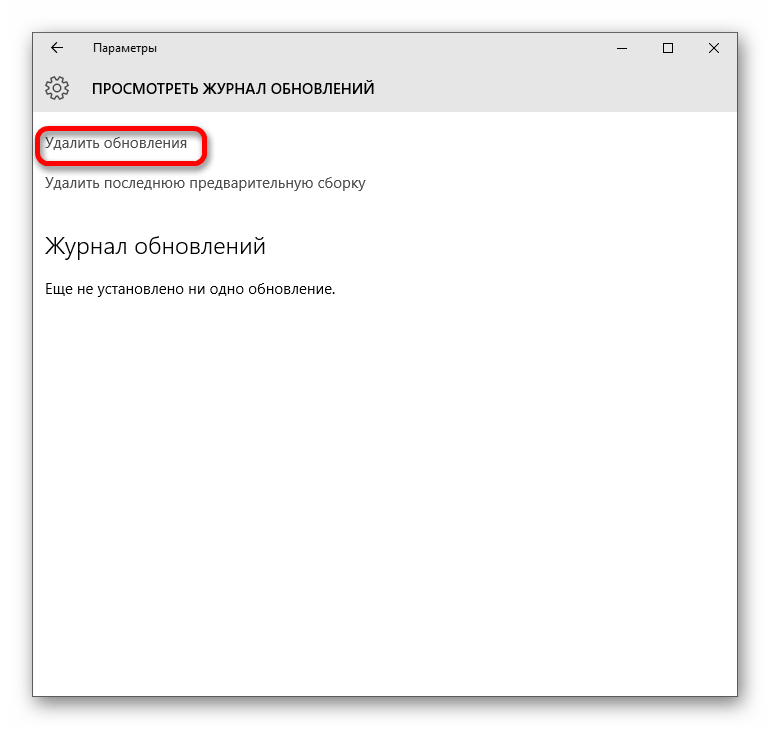
Этап 7: Удаление проблемных обновлений
Нередко тормоза появляются как будто ни с того, ни с сего: вчера ноутбук работал исправно, а сегодня уже медленно. Но если посмотреть в журнал, можно увидеть, что как раз при выключении ОС установила очередное обновление. Увы, но от ошибок никто не застрахован, и порой некоторые апдейты выходят с багами. Обычно они исправляются достаточно оперативно, и нужно только некоторое время подождать, но если времени нет, выходом из ситуации будет удаление проблемного компонента.
Подробнее: Как удалять обновления в Windows 10
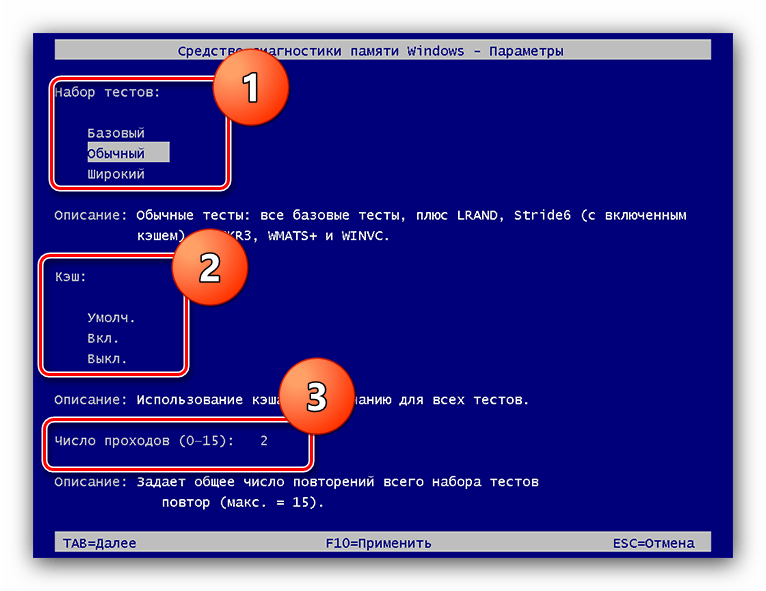
Этап 8: Проверка аппаратных комплектующих
Довольно частой причиной, по которой может тормозить компьютер, является плохое состояние важнейших его составляющих, а именно модулей оперативной памяти и/или основного накопителя, HDD и SSD. Если вы прошли все предыдущие этапы, но подвижек в избавлении от тормозов не наблюдается, попробуйте проверить оперативку и носители памяти: возможно, они вот-вот выйдут из строя и требуют срочной замены.
Подробнее: Проверка состояния RAM / HDD / SSD в Windows 10
На производительность компьютера могут влиять и его рабочие температуры. Большинство ноутбуков (за исключением только, пожалуй, игровых) оснащены не слишком горячими процессорами и видеоядрами, поэтому высокие значения тепловыделения для них нехарактерны. Однако если в той же Speccy вы видите, что значения нагрева высокие, свыше 70 градусов Цельсия, это говорит о проблеме. К счастью, в большинстве случаев будет достаточно просто почистить устройство от пыли: самостоятельно, если у вас имеются соответствующие навыки, либо доверить эту процедуру специалисту из сервисного центра.
Наша группа в TelegramПолезные советы и помощь
0 / 0 / 0
Регистрация: 11.01.2019
Сообщений: 10
11.01.2019, 20:48. Показов 35553. Ответов 21
Ноут: HP Probook 450 G5, i5 8250U, 8 гб ОЗУ, графа гибридная
Я и не совсем овощ, и проблемы всегда решал сам, но эта ситуация ввела меня в тупик.
Ноут брал без винды летом 2018, поставил винду, все дрова поставил, все заработало, все летало, периодически ставил обновы. Зимой начали вылетать болты внутри в обалсти харда, и как то раз решил сам вскрыть и вкрутить их, выключил комп и аккуратно все сделал, не пришлось даже вытаскивать девайсы из слотов. После этого я включил комп и система начала жутко тормозить, окна и программы открывались заметно долго, игры тормозили, фпс сильно упал (даже в кс 1.6 фпс был 30-40 тогда как до этого были все 100), звук начал тормозить и трещать, фильмы начали фризить при проигрывании, при печатании клава сходила с ума — на рабочем столе нажимал на клавишу A, открывался меню пуск, либо выбиралось все что есть на раб. столе (как в случае ctrl+a) и печатались не те буквы что я нажимал, хотя автозамену insert я не включал . В этот момент обновы не ставились, в процессах НИЧЕГО лишнего и емкого не было, НИЧЕГО не нагружалось, по загрузке все было стабильно (цп на 2-3%, озу — 28-30%, хард 0%, графа и сеть также). Проверил систему через dr. web, нашла прога кое какие файлы, но их удаление ничего не улучшило. Все проверялки давали положительный результат. Подумал, хана винде, снес ее и установил новую 10-ку со всеми последними обновлениями, НО, винда новая, ничего еще не установлено, а система также тормозит и фризит, да и с клавой такие же симптомы. Мой настольный ПК с 5-летней 10-кой и 8-летней начинкой работает и реагирует в разы быстрее.
Так в чем проблема? И сталкивался ли кто-нибудь с такого рода проблемой?
ПЫ: Все что писал гугл и все что писали тут, ничего не помогло, поэтому, просьба, не кидать ссылки на готовые решения в этом форуме. , я все просмотрел.
0