
Apache Spark has become a popular framework for processing large-scale data and performing distributed computing tasks. With its powerful processing capabilities, PySpark, the Python API for Apache Spark, has gained significant traction among data engineers and data scientists.
However, like any software, PySpark is not immune to errors and issues that can hinder its smooth execution. One such error that users may encounter is the dreaded «RuntimeError: Java gateway process exited before sending its port number.»

In this article, we will explore the causes of this error and provide a comprehensive guide to troubleshoot and resolve it. We will delve into the inner workings of PySpark, understand the role of the Java gateway process, and discuss various factors that could contribute to this error. By following the troubleshooting steps and best practices outlined here, you’ll be equipped to overcome this obstacle and ensure the successful execution of your PySpark applications.
Understanding «RuntimeError: Java gateway process exited before sending its port number»
It is essential to grasp the fundamental components of PySpark to comprehend the «RuntimeError: Java gateway process exited before sending its port number» error. PySpark relies on a Java gateway process to establish communication between Python and the Spark cluster. This gateway process acts as a bridge, enabling the Python code to interact with the Java-based Spark runtime environment.
The error occurs when the Java gateway process unexpectedly terminates before it can provide the assigned port number to Python. As a result, the communication channel between Python and the Spark cluster is disrupted, leading to the runtime error.
There can be several underlying causes for this error. It could be due to misconfigurations in the Spark environment, problems with the Java installation, network or firewall issues impeding communication, insufficient system resources, or compatibility conflicts between PySpark, Java, and Spark versions. Identifying the specific cause is crucial to finding an appropriate solution.
Troubleshooting Steps for «RuntimeError: Java gateway process exited before sending its port number»
Resolving the «RuntimeError: Java gateway process exited before sending its port number» error requires a systematic approach to diagnose and address the root cause. Here are the essential troubleshooting steps to follow:
Verify Spark configuration settings
Check the Spark master URL, Spark home directory, and Java version compatibility. Ensure that these settings are correctly configured in your environment. Adjust them if necessary based on your specific Spark setup.
To verify Spark configuration settings, you need to check the configuration files and ensure that the values are correctly set according to your requirements. Here’s a step-by-step guide on how to verify Spark configuration settings:
- Locate the Spark Configuration Directory:
- The Spark configuration files are typically located in the conf directory within your Spark installation.
-
Common locations include $SPARK_HOME/conf or /etc/spark/conf.
-
Identify the Configuration Files:
-
The two main configuration files are spark-defaults.conf and spark-env.sh.
-
spark-defaults.conf contains key-value pairs for Spark properties.
-
spark-env.sh allows you to set environment variables for Spark.
-
Open spark-defaults.conf:
-
Use a text editor to open spark-defaults.conf located in the Spark configuration directory.
-
Review the key-value pairs to verify if they match your desired configuration.
-
Common properties include Spark master URL, executor memory, driver memory, and executor cores.
-
Modify spark-defaults.conf if Needed:
-
If any properties need to be modified, make the necessary changes in the file.
-
Ensure that the format is key=value, with each property on a new line.
-
Open spark-env.sh:
-
Use a text editor to open spark-env.sh located in the Spark configuration directory.
-
Review the environment variables defined in the file.
-
Verify Environment Variables:
-
Check if any environment variables are set and confirm their values.
-
Common environment variables include SPARK_HOME, JAVA_HOME, and HADOOP_CONF_DIR.
-
Modify spark-env.sh if Needed:
-
If any environment variables need to be modified or added, make the necessary changes in the file.
-
Ensure that the format is export VARIABLE_NAME=value, with each variable on a new line.
-
Save and Close the Configuration Files:
-
After making any modifications, save the changes and close the configuration files.
-
Restart Spark:
-
If Spark is already running, you may need to restart it for the new configuration settings to take effect.
-
Restart the Spark cluster or Spark services, depending on your setup.
-
Verify the Configuration:
-
Run your PySpark application or execute the spark-submit command with your application.
-
Monitor the application logs or output to ensure that the desired configuration settings are applied.
Validate Java installation
Confirm that Java is properly installed on your system and that the Java executable is included in the system’s PATH environment variable. Reinstall Java if needed, ensuring that the installation is complete and error-free.
To validate the Java installation on your system, you can follow these steps:
- Check Java Version:
- Open a command prompt or terminal window.
- Type the following command and press Enter:
java -version
Enter fullscreen mode
Exit fullscreen mode
- The command will display the installed Java version information, including the version number and additional details.
- Verify Java Installation Path:
- Locate the Java installation directory on your system.
- The default installation path on Windows is typically «C:\Program Files\Java» or «C:\Program Files (x86)\Java».
-
On Linux or macOS, it is usually located in «/usr/lib/jvm» or «/Library/Java/JavaVirtualMachines».
-
Ensure JAVA_HOME Environment Variable is Set:
-
Check if the JAVA_HOME environment variable is set on your system.
-
Open a command prompt or terminal window.
-
Type the following command and press Enter:
On Windows:
echo %JAVA_HOME%
Enter fullscreen mode
Exit fullscreen mode
On Linux or macOS:
echo $JAVA_HOME
Enter fullscreen mode
Exit fullscreen mode
If the variable is set, it should display the path to the Java installation directory.
- Test Java Compiler (javac):
- Open a command prompt or terminal window.
- Type the following command and press Enter:
javac -version
Enter fullscreen mode
Exit fullscreen mode
- This command checks the availability of the Java compiler (javac) and displays its version information.
- Run a Java Program:
- Create a simple Java program (e.g., a Hello World program) using a text editor.
- Save the program with a .java extension (e.g., MyProgram.java).
- Open a command prompt or terminal window.
- Navigate to the directory where you saved the Java program.
- Compile the program by running the following command:
javac MyProgram.java
Enter fullscreen mode
Exit fullscreen mode
- If the program compiles without any errors, it indicates that Java is installed and functioning correctly.
- Run the compiled program by executing the following command:
java MyProgram
Enter fullscreen mode
Exit fullscreen mode
- If the program runs and displays the expected output, it confirms that Java is installed and running properly.
By following these steps, you can validate the Java installation on your system. Verifying the Java installation ensures that the necessary Java runtime environment is available for running Java-based applications, including PySpark, which relies on Java.
Check firewall and network settings
Review your firewall settings to ensure that they are not blocking the communication between your Python code and the Spark cluster. Additionally, investigate any network connectivity issues that might impede the Java gateway process. Adjust firewall rules and network settings accordingly.
To check firewall and network settings, follow these steps:
- Firewall Configuration:
- Identify the firewall software or service running on your system. This can be the built-in firewall on your operating system or a third-party firewall.
- Open the firewall configuration interface.
-
Review the rules and settings related to network traffic and application access.
-
Allow Spark Ports:
-
Check if the firewall is blocking the ports used by Spark for communication. By default, Spark uses port 7077 for the Spark master and a range of dynamic ports for worker nodes.
-
Add firewall rules to allow incoming and outgoing connections on these ports.
-
If you are using a specific Spark configuration with custom ports, ensure that the firewall rules are adjusted accordingly.
-
Network Configuration:
-
Ensure that your network configuration allows communication between the Spark driver (where your PySpark code runs) and the Spark cluster.
-
If you are running Spark in a distributed environment, such as on multiple machines or in a cloud setup, make sure that network connectivity is established between these nodes.
-
Check the network settings, such as IP addresses, subnets, and DNS configurations, to ensure proper connectivity.
-
Ping Test:
-
Use the ping command to test network connectivity between different machines or nodes.
-
Open a command prompt or terminal window on one machine and run the following command:
ping <IP address or hostname>
Enter fullscreen mode
Exit fullscreen mode
- Replace with the IP address or hostname of the machine or node you want to test connectivity with.
- If the ping is successful and you receive responses, it indicates that the network connection is established.
- Network Security Groups (for Cloud Environments):
- If you are running Spark in a cloud environment, such as AWS or Azure, check the network security groups or firewall rules specific to that cloud provider.
-
Review the inbound and outbound rules to ensure that the necessary ports for Spark communication are allowed.
-
Proxy Settings:
-
If you are working behind a proxy server, ensure that the proxy settings are configured correctly in your system or application.
-
Check the proxy configurations in your browser settings, system network settings, or application-specific settings.
By reviewing and adjusting the firewall and network settings as necessary, you can ensure that Spark communication is not blocked and that the necessary network connectivity is established. These steps help prevent any potential issues that might hinder the communication between the Spark driver and the Spark cluster, allowing your PySpark applications to run smoothly.
Address resource limitations
If you are running Spark on a resource-limited environment, such as a machine with limited memory, it could lead to the Java gateway process termination. Allocate more memory to the Spark configuration or reduce the workload to alleviate resource constraints.
To determine if you have resource limitations that could impact your PySpark application’s performance or result in errors like the «RuntimeError: Java gateway process exited before sending its port number,» you can assess the following resources:
- Memory (RAM):
- Check the available memory on your system where PySpark is running.
- On Windows, you can open the Task Manager and navigate to the Performance tab to view memory usage.
- On Linux or macOS, you can use the free -h command in the terminal to check available memory.
-
If the available memory is consistently low or near its limit, it indicates a potential memory limitation.
-
CPU (Processor):
-
Evaluate the CPU utilization during the execution of your PySpark application.
-
In Windows, you can use the Task Manager’s Performance tab to monitor CPU usage.
-
On Linux or macOS, you can utilize tools like top or htop in the terminal to observe CPU utilization.
-
If the CPU usage is consistently high or reaches 100% during execution, it suggests a possible CPU limitation.
-
Disk Space:
-
Assess the available disk space on the drive where Spark and PySpark application data are stored.
-
Check the drive’s properties or use the df -h command on Linux or macOS to view disk space.
-
Ensure that you have enough free space to accommodate the data processed by your PySpark application.
-
Network Bandwidth:
-
Evaluate the network bandwidth available for data transfer between your PySpark application and any external data sources or clusters.
-
If you’re working with large datasets or transferring data over a network, limited bandwidth could impact performance.
-
Cluster or Environment Limitations:
-
If you are working with a distributed Spark cluster or cloud-based environment, there may be limitations imposed by the cluster configuration or your chosen service plan.
-
Review the documentation or consult your system administrator or cloud service provider to understand any limitations or quotas.
If you observe resource limitations in any of these areas, such as low memory, high CPU usage, insufficient disk space, or limited network bandwidth, it is likely that these limitations could affect your PySpark application’s performance or cause errors. In such cases, you may need to adjust your Spark configuration, optimize your code, allocate more resources, or consider scaling up your environment to overcome these limitations and ensure smooth execution of your PySpark applications.
Verify compatibility
Ensure that PySpark, Java, and Spark versions are compatible with each other. Incompatible versions can result in unexpected errors, including the «Java gateway process exited» error. Consult the documentation and release notes of each component to verify their compatibility and consider updating or downgrading versions if necessary.
Additional Troubleshooting Techniques
If the above steps do not resolve the issue, here are some additional troubleshooting techniques to consider:
-
Review error logs and stack traces: Examine the error logs and stack traces to obtain more specific information about the error. This can help identify any specific libraries, dependencies, or code snippets that might be causing the problem.
-
Use logging and debugging tools: Employ logging and debugging tools to gain insights into the execution flow and pinpoint the exact location or conditions that trigger the error. This can aid in isolating the root cause and narrowing down the scope of investigation.
-
Seek help from forums and communities: Reach out to relevant forums, communities, or support channels dedicated to PySpark, Java, or Spark. Share your error details, configurations, and any relevant code snippets to seek assistance from experts who have encountered similar issues.
-
Consider reinstalling or upgrading: If all else fails, consider reinstalling or upgrading PySpark, Java, or Spark components. This step should be taken with caution, ensuring that the necessary backups and compatibility checks are performed to avoid any potential data loss or compatibility conflicts.
Best Practices and Recommendations
To prevent and address the «RuntimeError: Java gateway process exited before sending its port number» error effectively, here are some best practices and recommendations:
-
Maintain up-to-date software versions: Regularly update PySpark, Java, and Spark to their latest stable versions. This helps incorporate bug fixes, performance improvements, and compatibility enhancements that can reduce the likelihood of encountering such errors.
-
Follow proper installation and configuration procedures: Adhere to the official installation and configuration guidelines provided by PySpark, Java, and Spark documentation. This ensures that the setup is accurate, reducing the possibility of misconfigurations or missing dependencies.
-
Monitor system resources: Keep a close eye on system resources such as memory, CPU utilization, and disk space. Monitoring and allocating sufficient resources to the Spark environment can prevent issues related to resource limitations.
-
Establish a robust testing environment: Set up a dedicated testing environment where you can perform thorough testing of your PySpark applications. This helps identify and address errors early in the development process, reducing the impact on production systems.
-
Stay updated with documentation and community resources: Stay informed about the latest updates, troubleshooting techniques, and solutions shared through official documentation, community forums, and online resources. Active participation and engagement with the community can provide valuable insights and guidance when encountering issues.
Learning Python with a Python online compiler
Learning a new programming language might be intimidating if you’re just starting out. Lightly IDE, however, makes learning Python simple and convenient for everybody. Lightly IDE was made so that even complete novices may get started writing code.
Lightly IDE’s intuitive design is one of its many strong points. If you’ve never written any code before, don’t worry; the interface is straightforward. You may quickly get started with Python programming with our Python online compiler with only a few clicks.
The best part of Lightly IDE is that it is cloud-based, so your code and projects are always accessible from any device with an internet connection. You can keep studying and coding regardless of where you are at any given moment.
Lightly IDE is a great place to start if you’re interested in learning Python. Learn and collaborate with other learners and developers on your projects and receive comments on your code now.
Read more: Solving PySpark RuntimeError: Java gateway process exited
Все способы:
- Способ 1: Исправление проблем с совместимостью
- Способ 2: Включение компонентов Windows
- Способ 3: Добавление SA:MP в исключения брандмауэра
- Способ 4: Переустановка DirectX
- Вопросы и ответы: 11
Для игры в GTA: San Andreas по сети необходимо скачать клиент под названием SA:MP. Сейчас этот метод гейминга все еще пользуется большой популярностью, поэтому многие юзеры сталкиваются с задачей инсталляции приложения на компьютер под управлением Windows 10. Не всегда после установки получается запустить клиент для подключения к серверу, что может быть связано с разными проблемами. Именно об их решении и пойдет речь далее.
Способ 1: Исправление проблем с совместимостью
Самая частая неполадка, из-за которой клиент мультиплеерной версии GTA не хочет запускаться или подключаться к серверу, — неправильно установленные параметры совместимости со старыми сборками Windows, ранее заданные вручную пользователем или автоматически. Давайте разберемся, как сбросить их и задать рекомендованные значения.
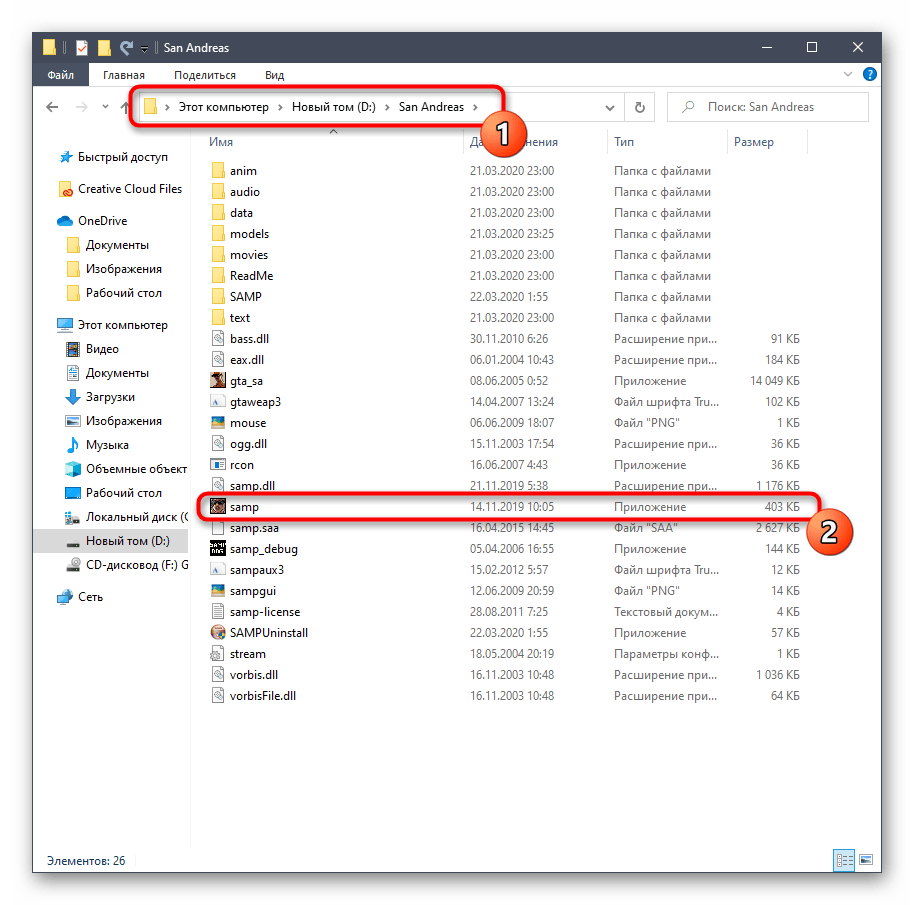
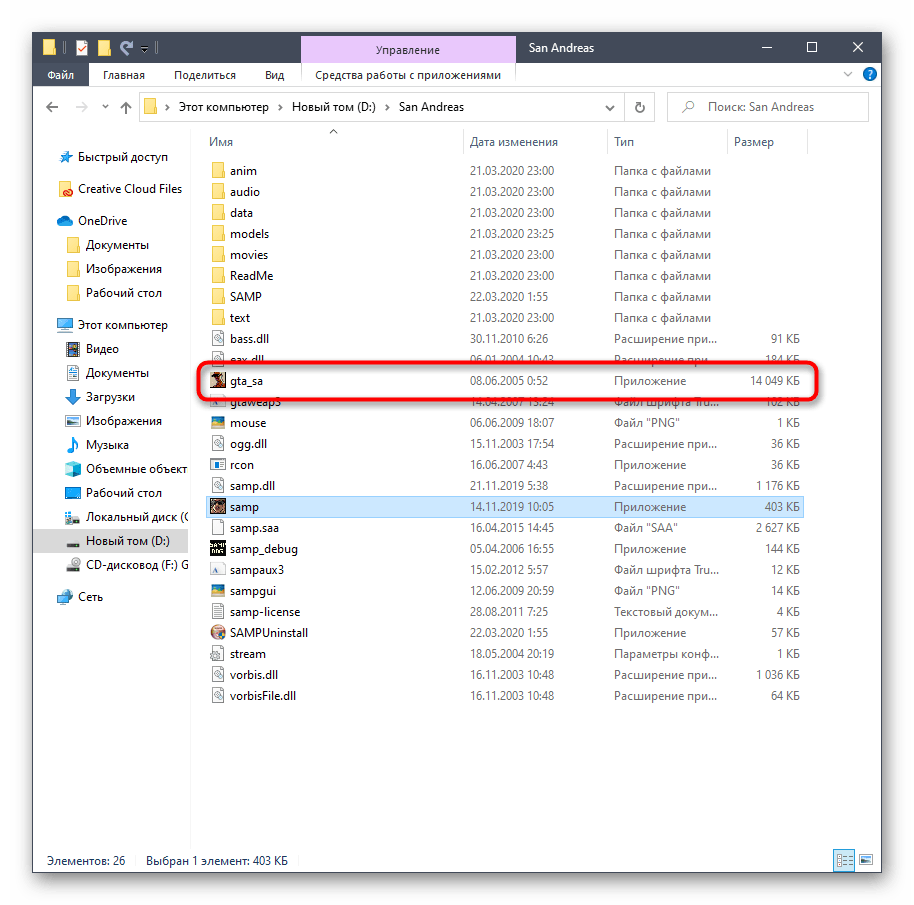
- Перейдите по пути игры и отыщите там исполняемый файл «Samp». Кликните по нему правой кнопкой мыши, чтобы отобразить контекстное меню.
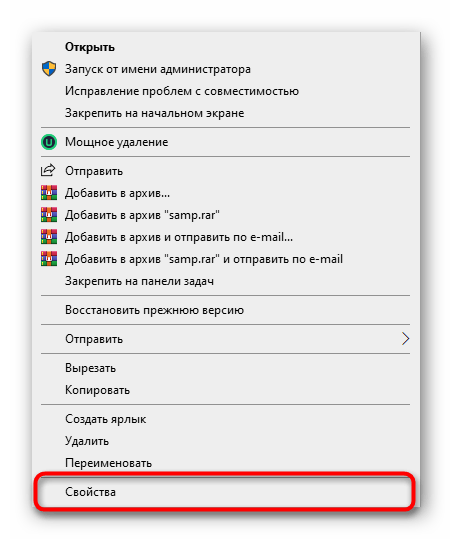
- В появившемся списке вас интересует пункт «Свойства».
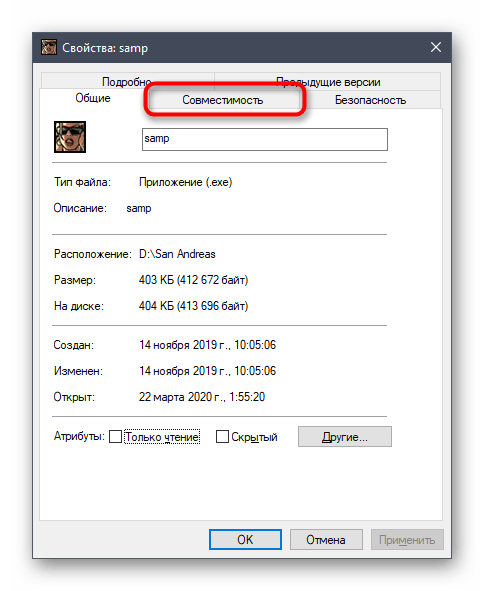
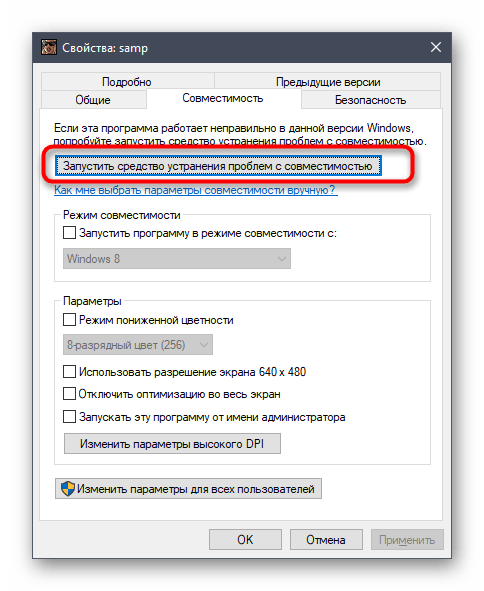
- После открытия нового окна переместитесь на вкладку «Совместимость».
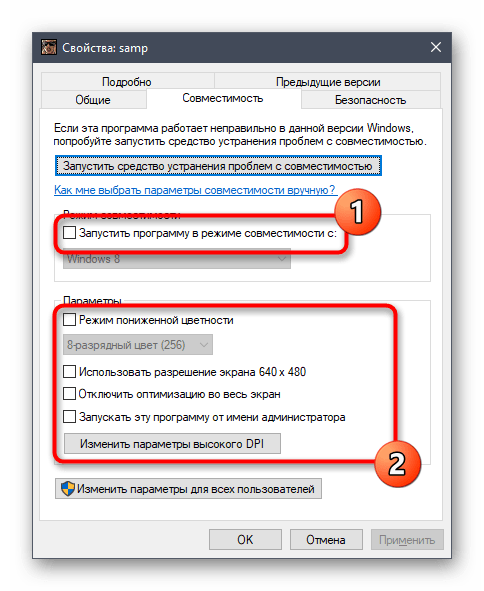
- Здесь снимите галочки со всех пунктов, связанных с режимом совместимости и дополнительными параметрами.
- Затем щелкните по кнопке «Запустить средство устранения проблем с совместимостью».
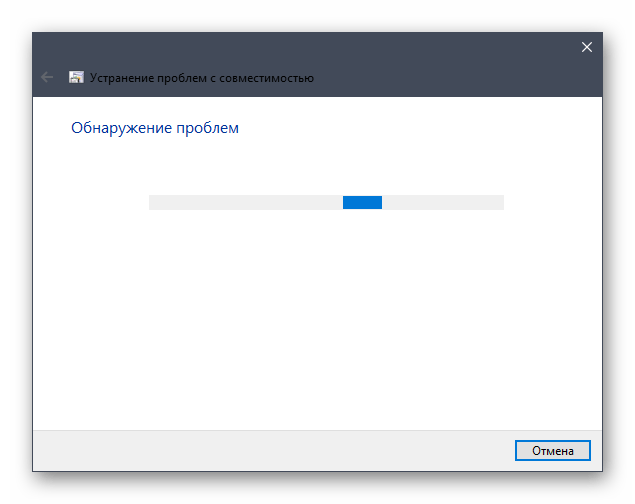
- Дождитесь окончания обнаружения неполадок. Эта операция займет буквально несколько секунд.
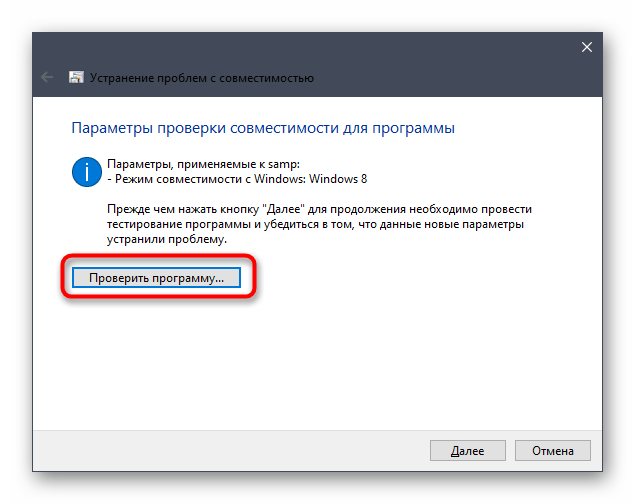
- После появления «Выберите режим диагностики» укажите «Использовать рекомендованные параметры».
- Теперь, когда новая конфигурация будет применена, нажмите по «Проверить программу» и попытайтесь подключиться к серверу.
- Если неполадка все еще наблюдается, произведите те же самые шаги, но уже с объектом «Gta_sa».

Компьютер перезагружать не нужно, ведь все изменения будут применены сразу же. Просто закройте окно настройки совместимости и попробуйте подключиться к одному из рабочих серверов, чтобы проверить функционирование клиента.
Способ 2: Включение компонентов Windows
В Windows 10 имеется несколько встроенных компонентов, которые часто используются старыми программами для запуска и корректной работы. GTA: San Andreas тоже относится к списку таких приложений, ведь была выпущена довольно давно. По умолчанию компоненты, необходимые для запуска, должны быть включены, однако из-за сбоев или действий пользователя параметры могут сбиться. Мы советуем просто проверить настройки и включить их, если это потребуется.
- Откройте «Пуск» и через поиск отыщите приложение «Панель управления».
- Там вас интересует раздел «Программы и компоненты».
- Через левое меню переместитесь к «Включение или отключение компонентов Windows».
- Дождитесь загрузки всех компонентов в появившемся окне.
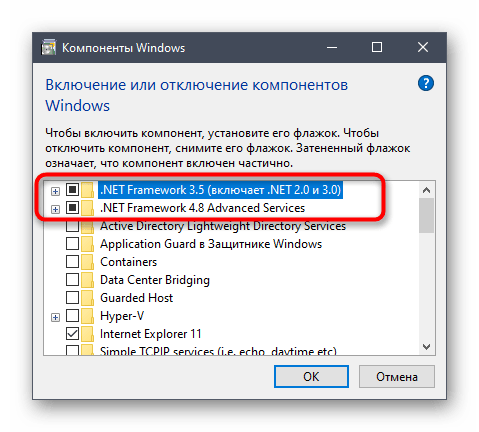
- Активируйте первые пункты, связанные с .NET Framework.
- Затем опуститесь вниз по списку, где поставьте галочку возле «Компоненты прежних версий».


Отправьте компьютер на перезагрузку, чтобы применить все изменения. Только после этого переходите к проверке действенности выполненных манипуляций, попытавшись подключиться к любому серверу через SA:MP.
Способ 3: Добавление SA:MP в исключения брандмауэра
Рассматриваемый сегодня клиент позволяет подключаться к сетевым серверам, а это значит, что все процессы происходят через интернет. В операционной системе имеется межсетевой экран, который может заблокировать весь подозрительный входящий и исходящий трафик. SA:MP это тоже может коснуться, что в итоге приведет к трудностям с подключением к серверу. Мы советуем добавить приложение в исключения, чтобы брандмауэр просто игнорировал его.
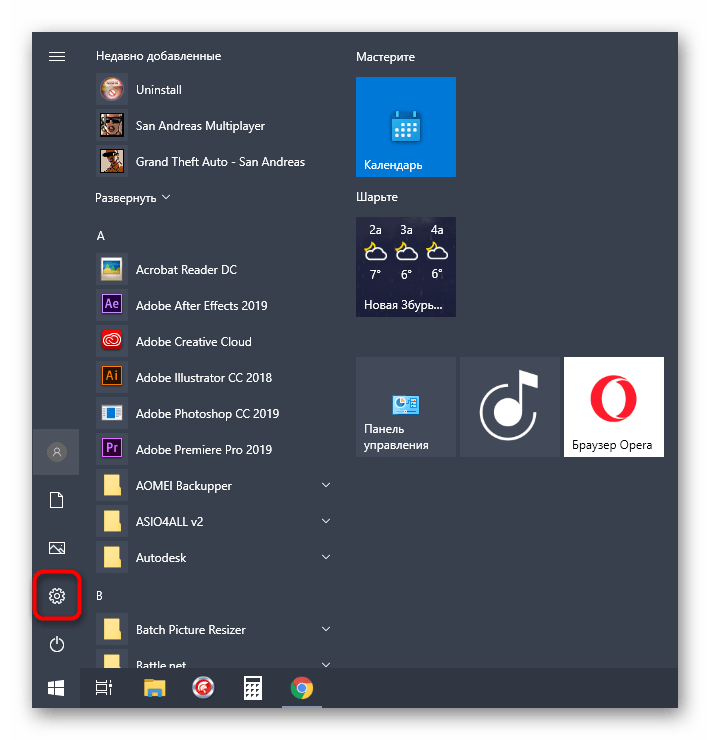
- Откройте «Пуск» и перейдите в «Параметры».
- Здесь выберите плитку «Сеть и Интернет».
- Кликните по нижней надписи «Брандмауэр Windows».
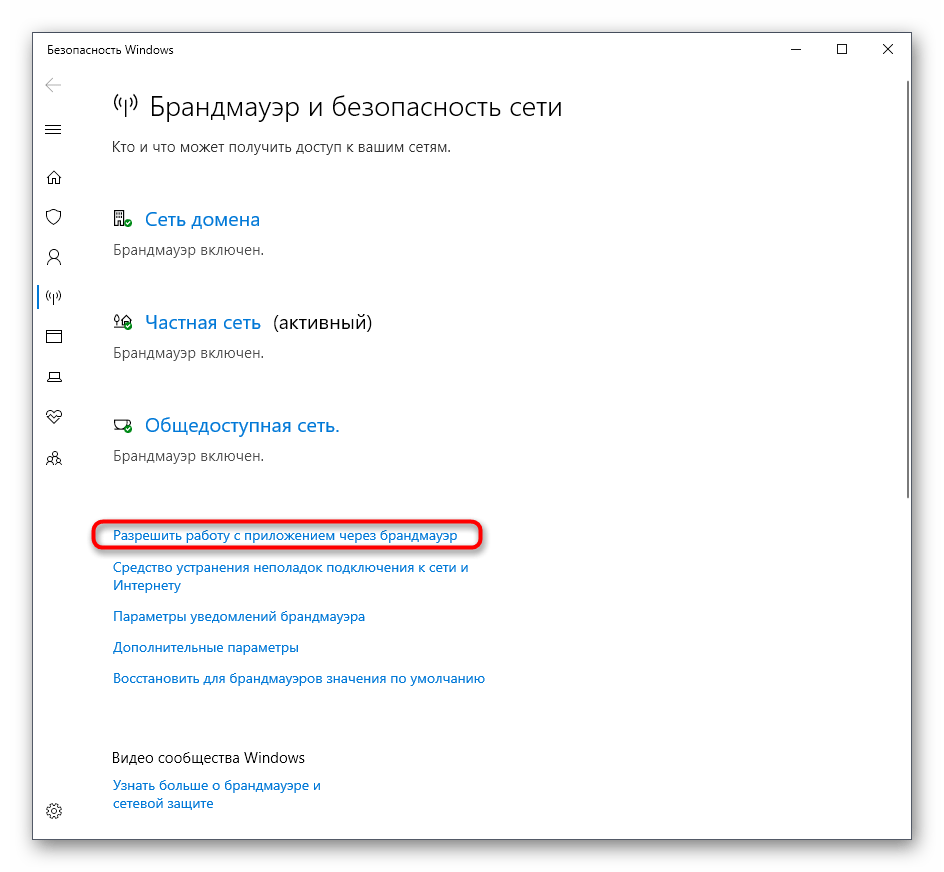
- В появившемся меню вам нужна надпись «Разрешить работу с приложением через брандмауэр».
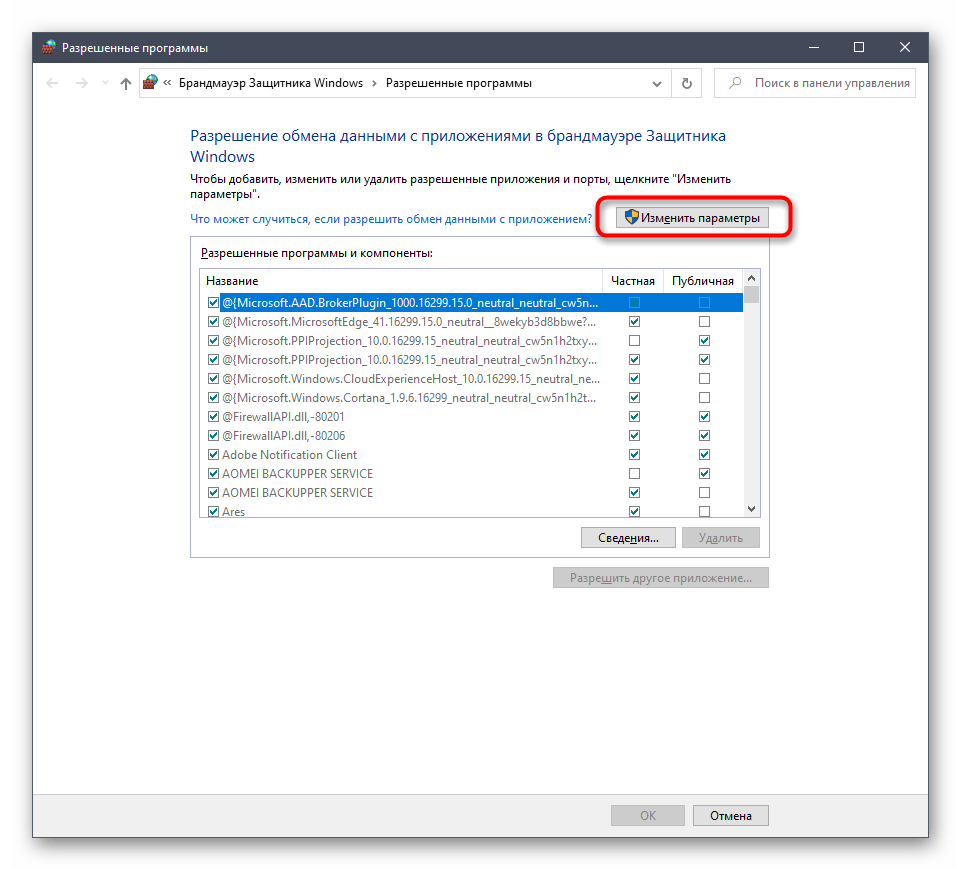
- В окне «Разрешенные программы» нажмите по кнопке «Изменить параметры».
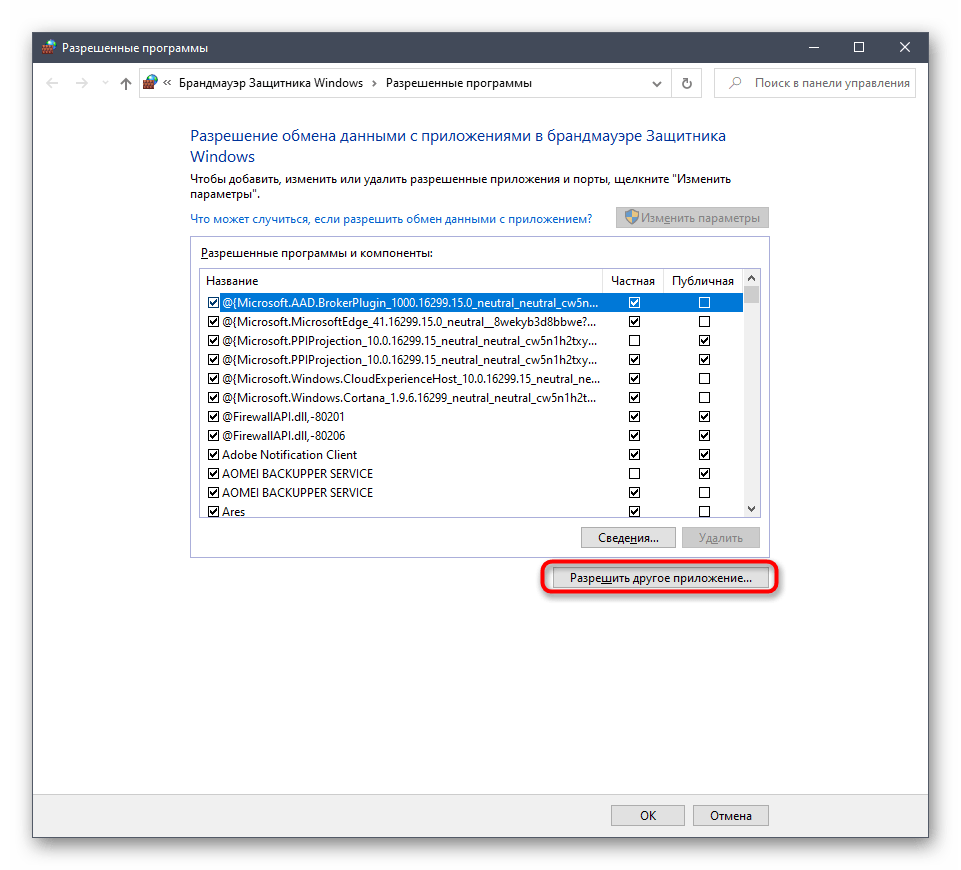
- Теперь перейдите в «Разрешить другое приложение».
- Нажмите на «Обзор», чтобы задать путь к исполняемому файлу SA:MP.
- В стандартном окне Проводника отыщите и выделите приложение.
- Щелкните по «Добавить».
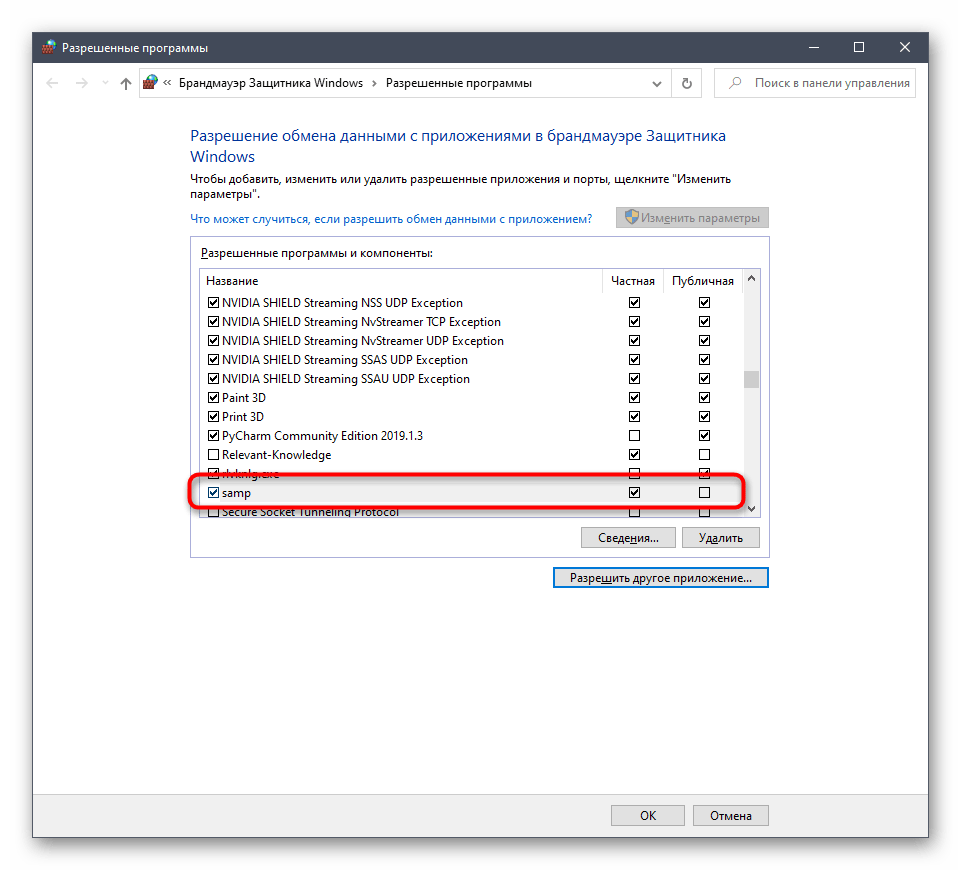
- Убедитесь, что теперь SA:MP имеется в списке разрешенных программ и доступен как для частной, так и публичной сети.


Теперь стандартный межсетевой экран Windows не будет оказывать никакого влияния на SA:MP, поэтому можно смело запускать клиент и проверять работоспособность серверов.
Способ 4: Переустановка DirectX
Мы сделали этот вариант заключительным, поскольку он является радикальным и не всегда оказывается эффективным. Его суть заключается в переустановке DirectX в Виндовс 10 со включением недостающих компонентов. Такие действия помогают в тех случаях, когда из-за каких-то сбоев файлы компонента были повреждены или утеряны. Более детальные инструкции по этой теме ищите в другом руководстве на нашем сайте, нажав по следующей ссылке.
Подробнее: Переустановка и добавление недостающих компонентов DirectX в Windows 10
Только что вы ознакомились с пятью разными вариантами решения проблемы с работоспособностью SA:MP в GTA: San Andreas. В случае, когда ни один из них не оказался эффективным, попробуйте загрузить другую сборку самой игры, если не используете лицензию.
Наша группа в TelegramПолезные советы и помощь
Rockstar Games Launcher представляет собой востребованный софт, который нужен для запуска «Grand Theft Auto» и ряда других приложений. Однако отдельные геймеры говорят, что у них не запускается Rockstar Games Launcher. Это довольно неприятная проблема, которая мешает использовать любимые игры. Чтобы справиться с ней, можно применять разные способы – проверить сервер, отключить антивирус, загрузить софт от имени администратора.
Содержание
- Причины сбоев
- Способы решения
- Проверка удаленных серверов
- Запуск от имени администратора
- Переустановка ПО
- Обновление программы
- Отключение антивирусного ПО
Причины сбоев
Проблема с запуском Rockstar Launcher может быть связана с разными факторами. К ним относят следующее:
- Проблемы сочетаемости Windows и программы запуска. В таком случае рекомендуется включить средство запуска в режиме совместимости, пользуясь правами администратора.
- Устаревшая графика или несоответствующие драйверы графического процессора. Причиной может быть их выход из строя. Для устранения проблемы требуется установить обновление графического драйвера.
- Неполадки при подключении к интернету. Чтобы решить эту проблему, требуется очистить кэш
- Блокирование запуска программы антивирусным софтом или защитным брандмауэром. Также эти ресурсы могут остановить ее применение по назначению. В таком случае можно выключить антивирусный софт или брандмауэр и посмотреть, удастся ли решить эту проблему.
- Конфликты программы или постороннее вмешательство. В таком случае требуется выполнить перезапуск системы в состоянии чистой загрузки и оценить работу софта.
- Повреждение или неправильная установка программ Launcher или Social Club. Для решения этой проблемы требуется переустановить софт.

Способы решения
Чтобы справиться с проблемой запуска Launcher, можно воспользоваться разными способами.
Проверка удаленных серверов
Иногда причиной проблем при запуске лаунчера становятся технические неполадки или плановые работы на серверах разработчика. Потому, прежде всего, необходимо оценить их активность.
Если перейти по ссылке, требуется обратить внимание на цвет статуса. Он должен быть подсвеченным. Если статус выглядит неактивным, не стоит переживать, что зайти в Social Club не получается. В таком случае требуется подождать исправления технических неполадок. Время от времени стоит оценивать статус. Это даст возможность поймать момент, когда работоспособность будет восстановлена.

Запуск от имени администратора
Если лаунчер не запускается на персональном компьютере с операционной системой Windows, причина может заключаться в совместимости. В таком случае рекомендуется загрузить софт в режиме совместимости, используя права администратора. Для этого стоит выполнить такие действия:
- Перейти к ярлыку Rockstar Games Launcher и сделать клик правой кнопкой мышки.
- В контекстном меню выбрать функцию «Свойства».

- Зайти на вкладку «Совместимость» и поставить галочку на строчке «Запускать эту программу в режиме совместимости для». Тут требуется выбрать другую версию операционной системы Виндовс, чтобы запустить лаунчер. Тут можно экспериментировать с разными вариантами ОС для запуска инструмента в режиме совместимости.
- Зайти в раздел «Настройки» и найти пункт «Запустить эту программу от имени администратора». Около него нужно поставить галочку.

- Нажать кнопку «Применить» и выбрать «Ок» для сохранения изменений.
После этого можно попытаться загрузить Games Launcher и оценить правильность работы софта. Если это не помогает, проблема, скорее всего, заключается в других причинах. В таком случае можно попытаться воспользоваться другим способом.
Переустановка ПО
Если ни одно из решений не помогает, вполне вероятно, что проблема заключается в неправильной установке лаунчера и приложения Social Club. Для этого требуется вначале удалить программы с персонального компьютера, после чего поставить их обратно.
Чтобы удалить софт, рекомендуется выполнить следующее:
- Открыть «Настройки». Это можно сделать, нажав комбинацию клавиш «Win + I».

- Перейти на вкладку «Приложения».

- Выбрать раздел «Приложения и функции».
- Найти программы Rockstar Games Launcher и Social Club в перечне инсталлированного софта. После чего их требуется поочередно удалить.
- Сделать резервную копию каталога Rockstar Games и удалить их.

После выполнения перечисленных действий выполнить загрузку установщика Rockstar Games. Это рекомендуется делать с официального портала. После чего нужно установить программу на свой компьютер. Стоит отметить, что программа Rockstar Games Social Club установится в системе автоматическим способом. После этого рекомендуется загрузить программу запуска. После чего она, скорее всего, начнет нормально работать.
Обновление программы
Важно помнить об инсталляции обновлений софта. Это актуально в том случае, если лаунчер использовался давно и новые версии не устанавливались. Чтобы обновить приложение, его рекомендуется полностью закрыть. После чего необходимо повторно зайти в систему. При наличии в доступе новых версий они загрузятся автоматическим способом.
Если Social Club не запускается даже после обновления, требуется выполнить следующее:
- Нажать сочетание клавиш «WIN + I». Это даст возможность зайти в параметры операционной системы.
- Зайти в раздел «Обновление и безопасность».

- Нажать на кнопку проверки обновлений, которые доступны.

При наличии новой версии, которую можно скачать, рекомендуется выполнять действия в соответствии с инструкцией на экране. При этом требуется немного подождать перезапуска системы.
После чего нужно вернуться к попыткам входа в программу.
Отключение антивирусного ПО
Если перечисленные методы не дают результатов, требуется отключить антивирусную программу и попытаться снова зайти в лаунчер. Иногда софт, который используется для защиты, приводит к появлению проблем и ошибок.
Почти все антивирусы дополнены опцией помещения подозрительных файлов или программ на карантин. Нередко это провоцирует сбои в работе игровых приложений и другого софта. При этом пользователи, которые обладают правами администратора, могут добавить файл или приложение в исключение. Эту возможность можно рассмотреть на примере антивируса Avast. Для исправления ошибки рекомендуется выполнить следующие действия:
- Открыть окно программы через рабочий стол. Также это можно сделать через панель фоновых программ.
- В левом меню найти раздел «Защита».

- В открытом окне выбрать пункт «Хранилище вирусов». Затем появится перечень файлов и программ, которые помещены в карантин.
- Отыскать лаунчер, выделить его и выбрать пункт «Удалить».

Выполнение перечисленных действий поможет исправить ошибку. При использовании другой антивирусной программы удастся найти руководство в Ютубе или в поисковике.
Выключить брандмауэр еще легче. Для этого рекомендуется совершить следующие действия:
- Зайти в «Мой компьютер» и нажать на стрелку сверху. Это поможет запустить панель управления. Также ее допустимо открыть другим способом.
- Зайти на вкладку «Система и безопасность».

- Выбрать «Брандмауэр защитника Windows».

- Нажать на кнопку «Включение и отключение защитника Windows». Она располагается в левой части меню.

- Зайти в окно «Настройка параметров для каждого типа сети».
- Выбрать пункт «Отключить брандмауэр». Это требуется сделать для всех параметров.

Rockstar Games Launcher представляет собой полезный софт, который используется для запуска различных игровых приложений. Однако иногда эта программа не работает. Чтобы исправить ошибку, можно воспользоваться разными способами – запустить софт от имени администратора, отключить антивирус и брандмауэр, обновить или перезапустить программное обеспечение.
Для тех кто дочитал до конца ЭКСКЛЮЗИВНЫЙ контент в Telegram
Только для подписчиков канала мы публикуем закрытые материалы!
Нашли опечатку? Выделите текст и нажмите Ctrl + Enter
Поделись с друзьями:
Твитнуть
Поделиться
Поделиться
Отправить
Класснуть
Вотсапнуть
Запинить
Problem: While running PySpark application through spark-submit, Spyder or even from PySpark shell I am getting Pyspark: Exception: Java gateway process exited before sending the driver its port number.
In order to run PySpark (Spark with Python) you would need to have Java installed on your Mac, Linux or Windows, without Java installation & not having JAVA_HOME environment variable set with Java installation path or not having PYSPARK_SUBMIT_ARGS, you would get Exception: Java gateway process exited before sending the driver its port number.
Set PYSPARK_SUBMIT_ARGS
Set PYSPARK_SUBMIT_ARGS with master, this resolves Exception: Java gateway process exited before sending the driver its port number.
export PYSPARK_SUBMIT_ARGS="--master local[3] pyspark-shell"
vi ~/.bashrc , add the above line and reload the bashrc file using source ~/.bashrc
Incase if issue still doesn’t resolve, check your Java installation and JAVA_HOME environment variable.
Install Open JDK
Why you need Java to run PySpark?
Spark basically written in Scala and later on due to its industry adaptation it’s API PySpark released for Python using Py4J. Py4J is a Java library that is integrated within PySpark and allows python to dynamically interface with JVM objects, hence to run PySpark you also need Java to be installed along with Python, and Apache Spark.
Use below commands to install OpenJDK or Oracle JDK on Linux Ubuntu.
# To Install Open JDK
sudo add-apt-repository ppa:openjdk-r/ppa
sudo apt-get update
sudo apt-get install openjdk-11-jdk

# To Install Oracke JDK varsion 8
sudo add-apt-repository ppa:webupd8team/java
sudo apt-get update
sudo apt-get install oracle-java8-installer
Set JAVA_HOME Environment Variable
Now export JAVA_HOME with the java installation directory.
export JAVA_HOME=/usr/lib/jvm/java-11-openjdk-amd64
vi ~/.bashrc , add the above line and reload the bashrc file using source ~/.bashrc
Happy Learning
Related Articles
- PySpark “ImportError: No module named py4j.java_gateway” Error
- How to Import PySpark in Python Script
- PySpark install on Windows
- PySpark NOT isin() or IS NOT IN Operator
- PySpark alias() Column & DataFrame Examples
- Fonctions filter where en PySpark | Conditions Multiples
Solution 1:[1]
Type this in you bash terminal, and it will be fixed:
export PYSPARK_SUBMIT_ARGS="--master local[2] pyspark-shell"
All this does is export pyspark-shell to the shell environment variable PYSPARK_SUBMIT_ARGS.
Solution 2:[2]
Solution 3:[3]
How did you install spark?? Clearly, you are having trouble starting a java process, which is what that error means.
You may want to install Spark again using the instructions to the letter, wherever you found them. However, you could also use conda, (anaconda or miniconda), in which case installing pyspark will also get a current java for you
conda install pyspark
Solution 4:[4]
I have faced same issue then I installed jdk 8 not into program files but in a new separate folder called Java and issue got resolved.